A good way to clean your dirty old rubber & even some black plastic parts is to grab a can of your favorite foaming tire cleaner and soak them down with it and let it sit until all the foam has evaporated and them wipe away the excess. Easy !
Avoid painting during times of high humidity unless you have a fully dehumidified climate controlled spray booth in your shop . Seriously don’t even do rattle can paint. I had to repaint this dadgum little bracket 3 times to get it right without any runs or with out the gloss black paint becoming chalky. Of course the third time I painted it was the next day after the humidity had dropped back down. If it’s really humid just wait until another day to paint.
Restoration Tech Tips #3 No matter what your favorite rust remover is, none of them work well when it is really cold. If you’re planning to soak some parts in something like Evapo-Rust during the winter months you really should put it in a warm place to get good results.
Confession time, on of my favorite things about the whole antique & vintage motorcycle restoration business is hunting down good deals on new old stock parts. It’s astounding what you can find for these old motorcycles sometimes. The joy of finding these 30, 40, or even 50 plus year old gems is often dulled by the fact that when you get them, they look old. Now this may be fine if you’re replacing parts on an original machine with a bit of patina as they will blend right in. But if you are doing a full restoration this just wont do. Let me give you a couple of examples using some parts that I have recently purchased for my current personal project a 1972 Honda SL100 K2. These will illustrate why I recommend vapor blasting NOS parts. When I removed the fork top bridge from the bike, one of the fork tube clamps had broken completely off. A brand new one was sourced on Ebay for a reasonable price, and this is how it looked when I took it out of the box.
NOS top bridge before vapor blasting.
It’s just a little dull & oxidized, plus it has a little bit of magic marker writing on it. Even though it’s obviously 100% new & unused it still looks old, so I put it through the vapor blaster. 15 minutes later it looked like this (below)
NOS top bridge after vapor blasting.
Vapor blasting NOS parts does not give them a polished finish. What it does is restore the aluminum so that it looks like it was freshly cast. Because this process has a light peening effect it closes the pores on the aluminum so that it stays cleaner longer. No clear coat is needed just occasional cleaning.
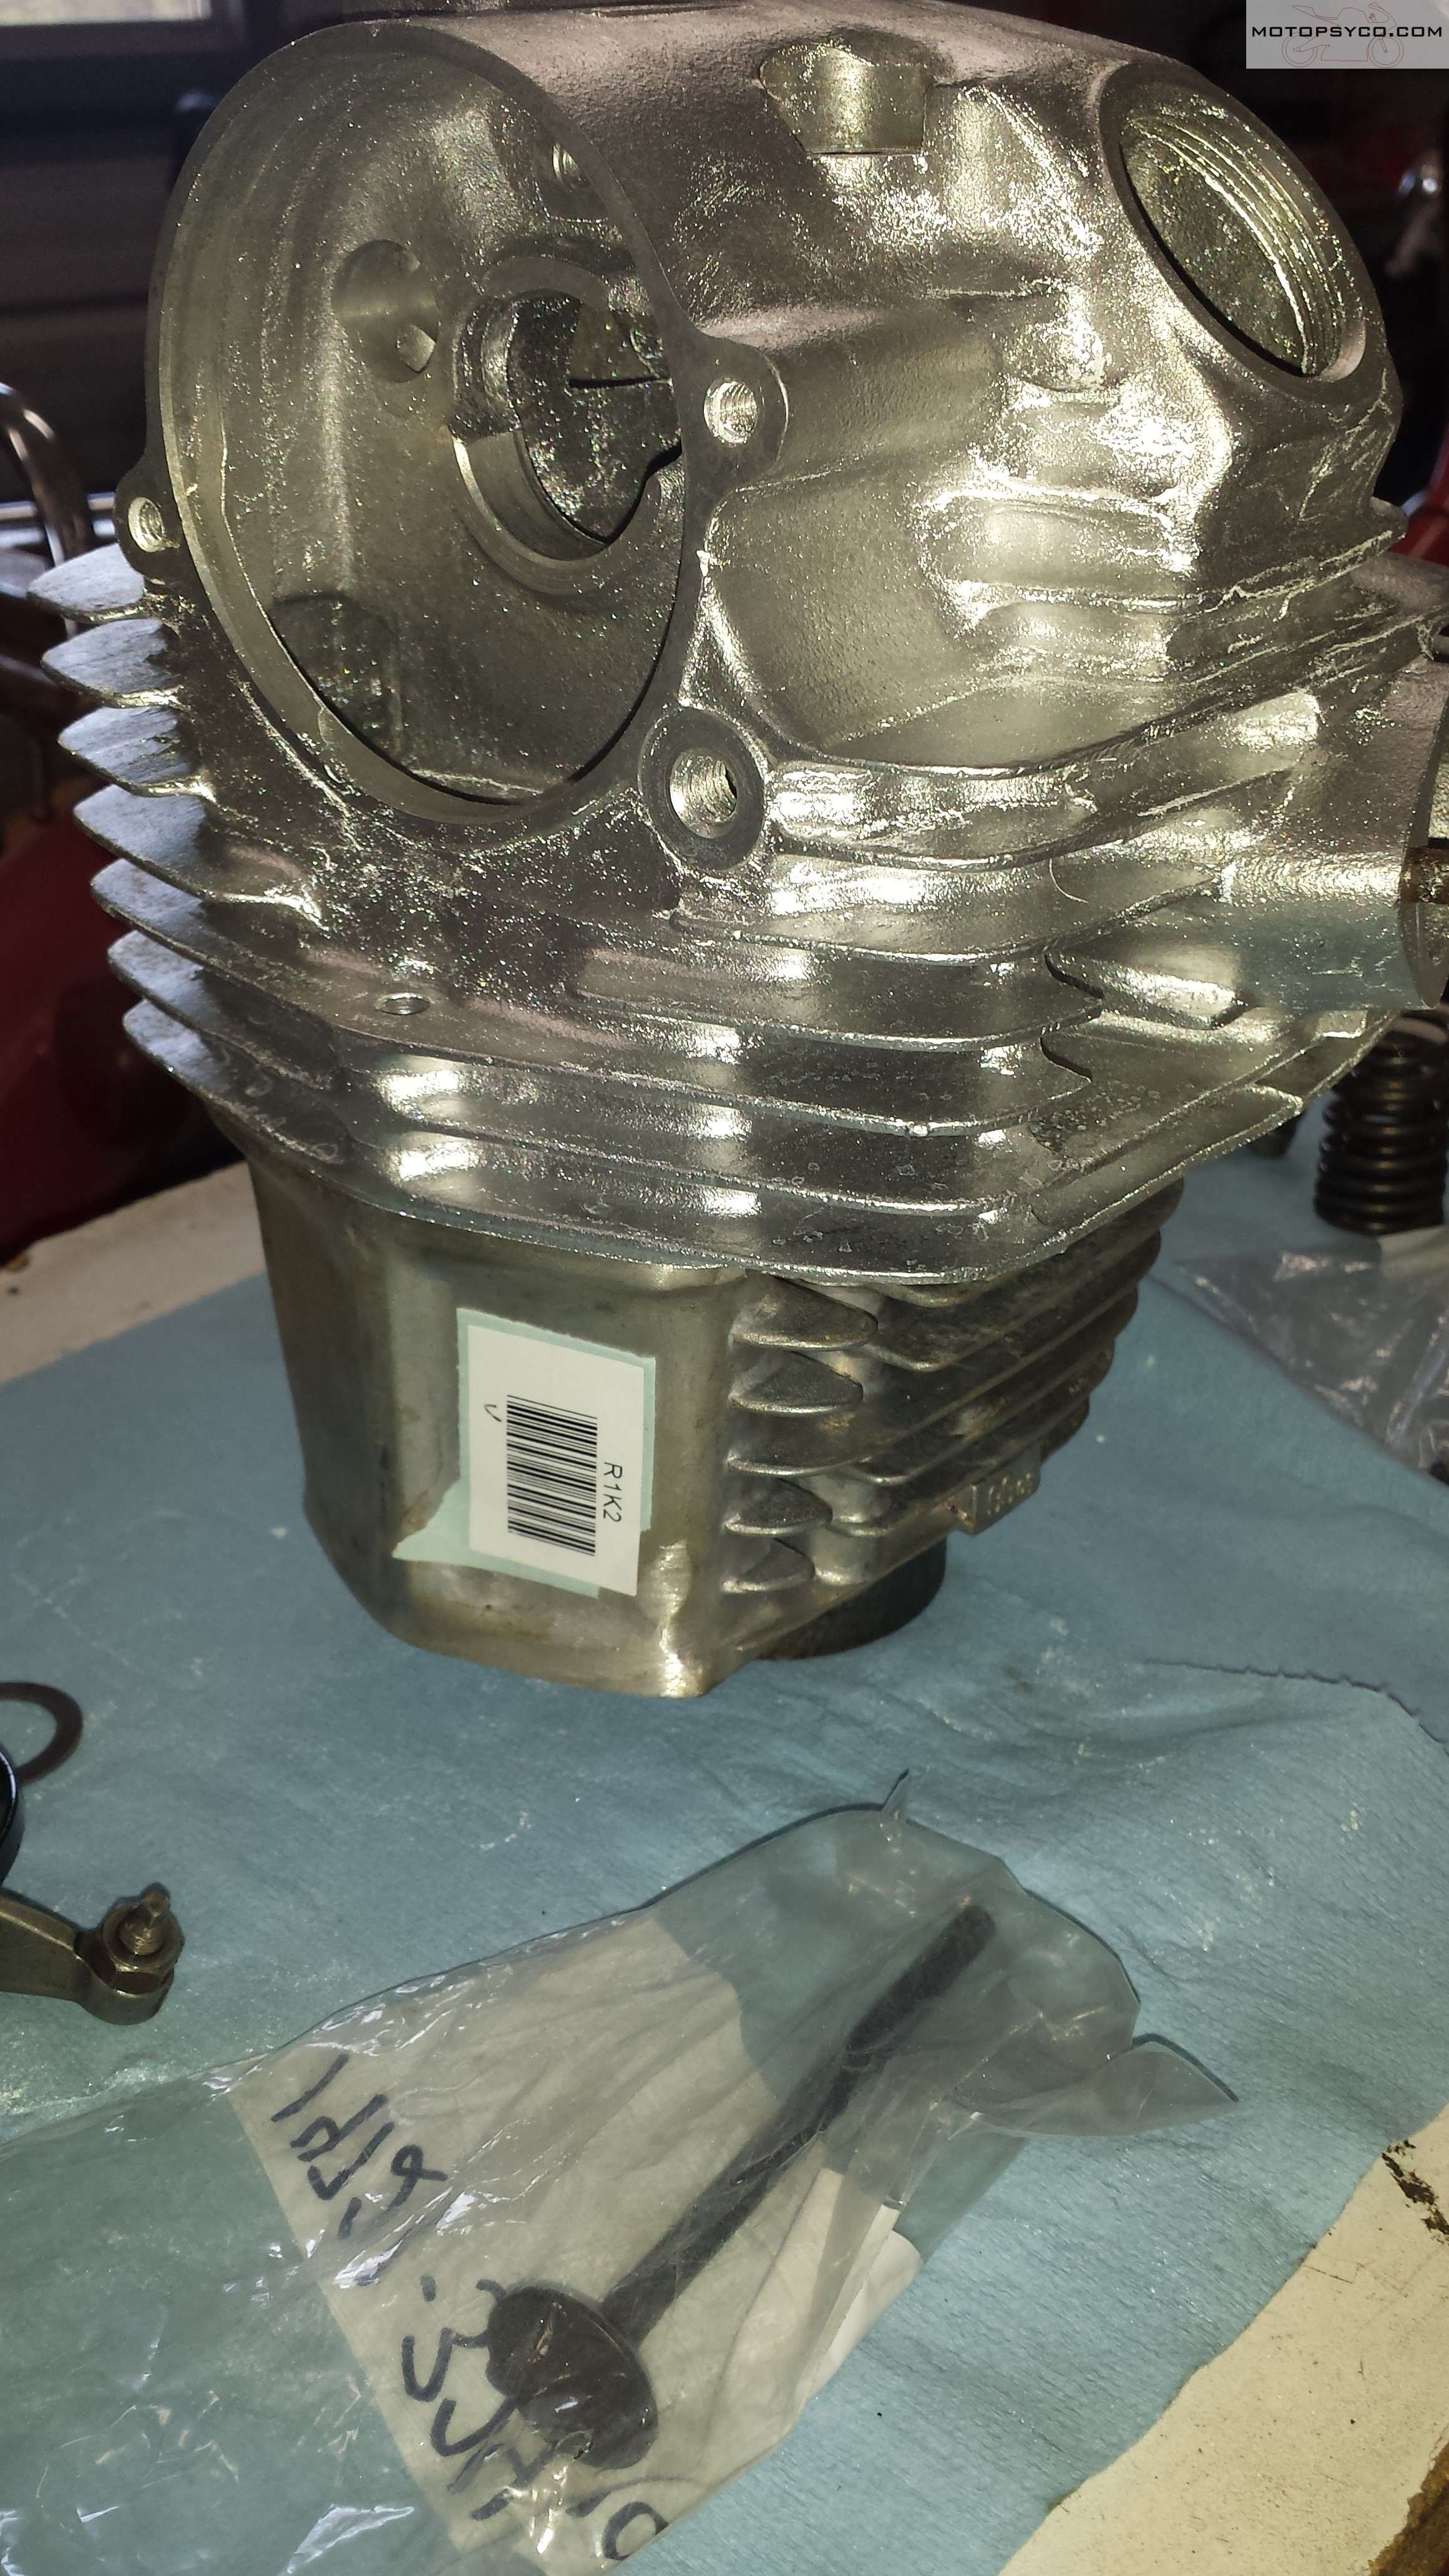
Here’s another example, a freshly vapor blasted cylinder head sitting on top of a brand new old stock cylinder. The new cylinder looks positively dull & dirty compared to the head, so after I finished all my clean up honing, ring gap checking etc. I ran the cylinder through my vapor blaster to clean up the appearance of it.
NOS SL100 cylinder before vapor blasting.
If you look at the assembled engine below you can see how much better the cylinder looks and how well it matches the rest of the bare aluminum parts on this engine.
Complete SL100 engine after vapor blasting.
Seriously if you’re performing a restoration on a motorcycle and you are not happy with the appearance of your new old stock aluminum parts find a shop near you that does vapor blasting.
If you have not heard the buzz about lithium batteries for motorcycles then you have probably been hiding under a rock somewhere. There are many different brands available, and although prices have dropped some you may have noticed that they command a premium price. The question for most people is lithium motorcycle battery worth it? Most of the time yes, but sometimes the answer is no.
Of course there are a number of advantages and some disadvantages of lithium batteries in general. The single biggest advantage they have for the motorcycle restorer or customizer is that they contain no acid. There’s nothing worse than to have your battery burp a little acid out through the overflow tube and dribble it all over you freshly restored paint & chrome. Even if you carefully route the vent tube the acid still seems to corrode the battery box, frame etc.
Figure 1 Battery acid damage to a Gold Wing
For the collector & show bike enthusiast who does not ride their motorcycles very often, a lithium battery has a very slow self-discharge rate. Especially on older motorcycles that have zero current draw when the key is switched off a fully charged lithium ion battery will usually maintain enough current to start the motorcycle for up to a year. Please note that it is recommended by all manufacturers that you disconnect and remove the battery for storage. If your motorcycle has any current drawing accessories such as a clock or an alarm system the battery must be checked & charged on a regular basis if you plan to leave it connected to your motorcycle.
In racing or other high performance applications lithium ion batteries have the advantage of weighing much less any other currently available battery configuration with equivalent specifications. I cannot recommend them for total loss ignition systems on race machines unless you are willing to be extremely diligent about checking and recharging them, and you accept the fact that this is basically a non-warrantied experimental use in the eyes of the manufacturers. If your racer has a charging system that meets the minimum charging requirements of your battery then you should not continue to handicap yourself by running a heavy lead acid battery.
Customizers love these batteries because they can be installed in any position even upside down. There are a few different from factors, most appear similar to a standard battery, but there are a few oddly shaped batteries available. Li-ion batteries are much smaller & lighter making them much easier to hide in café racer bum stops or under seat trays.
Figure 2 Conventional and Shorai Lithium Gold Wing batteries for comparison
Warranties are usually better on these batteries running on average 3 years from most suppliers if they are installed in a factory recommended vehicle with a good functional charging system.
This leads to the biggest caveat of them all. Your motorcycle or other powersports vehicle must have a charging system capable of maintaining a steady charging rate of 13.6-14.4 volts during operation. If you have an older motorcycle that has a marginal charging system that is not capable of maintaining this charging rate and you want to run this type of battery some charging system upgrades will be needed. If yours is a fully functional mint condition classic motorcycle with all original parts, I personally would not change it just to run a li-ion battery. For one that is a frequent driver, or just needs a new charging system, look at some of the aftermarket upgrades available, it might be worth your while upgrade your charging system even if you don’t choose a Li-ion battery.
With proper precautions (see the manufacturer’s instructions) these batteries can handle some water spray or a very brief dunking, if you frequently run long deep water crossings on your dirt bike or take your atv and drive it around in the water with nothing but the snorkel sticking up above the water then these batteries are not for you.
Another factor to consider for some is that if something goes wrong & your battery goes dead away from home it can’t be jump started. Once discharged below a certain point these batteries have to be charged back up with the manufacture’s recommended charger, or you risk damaging the battery. So if you’re the life of the party & plan to use the stereo system in your Gold Wing to provide music for the whole campground until late at night & then get your buddy to give you jump start the following morning so you can get home then you shouldn’t even consider a lithium battery.
Since this was published in the Vintage Japanese Motorcycle magazine I must note that if you need a six volt battery, at this time the only manufacturer offering a six volt lithium motorcycle battery is Shorai.
Cold weather operation is a little different & takes some getting used to. When the temperature drops below freezing a li-ion has very different operational characteristics. They actually require a bit of a warming up period to deliver full voltage. For my own personal driver, a 1980 Honda CB650, when the temperatures are at or below freezing I will switch the key on and make sure the headlight is on high beam for about 30 seconds before hitting the starter button. If the engine turns too slowly to start I let go of the button and wait a few more seconds at which point the battery is fully warmed up and will spin the starter normally. It’s just a little thing & I realize most people are not masochist enough to ride a motorcycle in the freezing cold if they have a car, but it is a difference in the behavior of lithium & lead acid batteries that you should be aware of.
To me the advantages of the lithium motorcycle battery outweigh the disadvantages and I hope that this gives you enough information to help you make an informed decision about whether or not you want to purchase one.
This article originally appeared in the Vintage Japanese Motorcycle Magazine in 2015. To learn how to join the club and receive this fine publication 6 times a year visit http://www.vjmc.org
Disclaimer; Motopsyco is an authorized Shorai battery dealer and will be more than happy to help you with selection of your new battery, so if you can’t figure out which one you need from this battery finder link, feel free to contact me by email at motopsyco@motopsyco.com.
There are two things that are commonly found when working on old motorcycles, one is cadmium plated parts that are faded, rusted or discolored somehow, and the other is broken or cracked mounting tabs on plastic parts such as air boxes or side covers. Today we’ll learn how to do a reasonably good job of creating cheap fake cad plating with spray paint. Then we will tackle a minor repair of some ABS plastic parts. Most of the black plastic parts on motorcycles are ABS and on some such as early sport bikes such as EX250 or 500 Ninjas the bodywork is also.
Cheap Fake Cad Plating
Let’s start with this steering lock that goes on my 1982 Honda C70. In the picture it doesn’t look too terrible, but this was after washing it in the parts washer with a Scotchbrite pad to get rid of some light rust.
Once it was dry I taped off the key slot and sprayed on a couple of coats of adhesion promoter.
After giving the adhesion promoter about 8-10 minutes to dry I gave the part a couple of coats of metallic “chrome” paint. This paint doesn’t really look like chrome but it really is a very bright silver.
After allowing the chrome paint to dry thoroughly, take a can of the metallic “gold” spray paint and from 18-20 inches away lightly fog the gold paint over the chrome. Just do one or two light coats. the idea is to lightly tint the part with gold but not to completely cover up the chrome.
It’s really best to do this in a well lit place so that you can see when there’s enough gold on the part and stop spraying it.
Here you can see my cheap fake cad plating next to one of the well sheltered original cadmium plated brackets from this same motorcycle. Naturally if you plan on having a 100 point national show winning motorcycle, real cad plating is the only way to go, but for your average rider or local bike night hero this is a nice inexpensive way to get a clean authentic look to parts that should look cad plated.
ABS Plastic Repair
A major source of aggravation are cracks in plastic parts and or mounting tabs broken off of them. But since since a lot of these plastic parts are made of the same ABS material as sewer & drain pipe there really is quite a simple solution. Glue them back together with common ABS cement that you can find at any local hardware store. The air box on this little C70 that I’m working on had been reinstalled at some point in the past without the metal spacers that are normally used to secure such parts to the metal frame without damaging it. The result was that one mounting tab was split & the other one was broken completely off.
To repair the cracked side was simple enough, it jut needed cleaning up and having plenty of glue applied. For the other side that was completely broken out I put a standoff with a washer in the hole & gave it a good coat of cement, permanently attaching it to the air box. You can also buy ABS plastic sheet & use that to fabricate repair patches, replacement tabs & even custom parts that can be glued together using ABS pipe cement. Once you are done & the glue is dry it can be filed, sanded or even painted over just like any normal plastic.
Hopefully these two tips about cheap fake cad plating & abs plastic repair will help someone out, until next time.
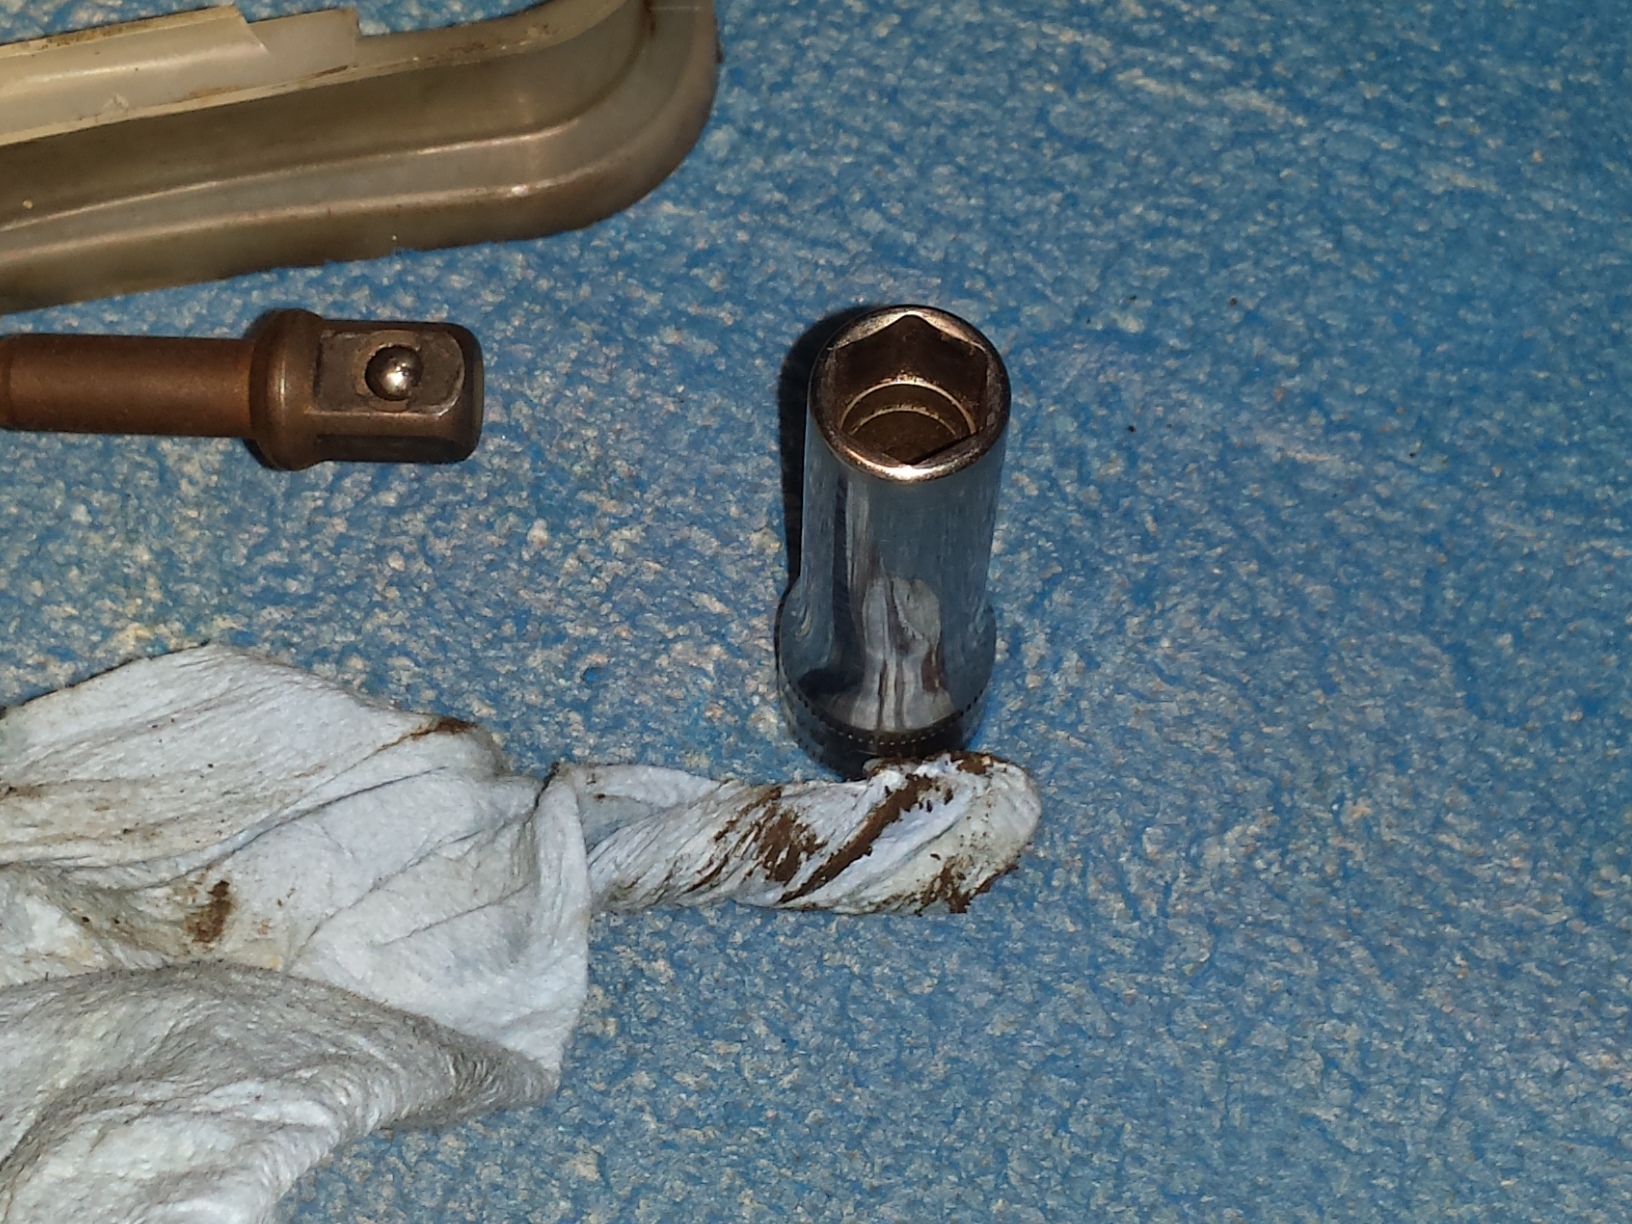
Here’s a quick random tech tip for you. Although this one is mainly aimed at restorers & customizers it will be of benefit to anyone who values a neat and clean appearance on their project vehicle. When it is time to reassemble your motorcycle make sure that you clean the grease out of your sockets and box end wrenches. When appearances count you really don’t want the old grease & dirt that is inside of your tools dirtying up your clean shiny fasteners. Sure on chrome plated or stainless nuts & bolts it’s more of an inconvenience having to go back and clean them but with zinc plated, cad plated or even painted hardware the dirty old crap stuck in the recesses of your tools can stain the surfaces beyond cleaning. Not to mention that grit from dirt or metal shavings can sometimes be suspended in the old grease and scratch even stainless fasteners when you tighten them down.
So even if all you do is just twist up a rag & stuff it through the wrench, it will make a big difference. I think in the future whenever I finish a big greasy dirty project on an engine or an off-road vehicle, I’ll try to remember to run all of the tools used through the parts washer & clean them inside & out.
How I got reminded of this…
My last big project was the resurrection of an old ATV for use as a hunting & farming vehicle. It was filthy nasty & greasy even after being washed thoroughly. When I was done all of the tools were wiped off and returned to the tool box without a second thought. Then I used them to disassemble my crusty little C70 Passport, but today when I started putting it all back together with everything cleaned & painted the grease & dirt marred a couple of the bolts so I began wiping the wrenches out after that.
Today I’d also like to apologize to my regular readers for my reduced post output over the last few months since my shoulder injury. Things are getting better now and there is a ton of material saved up, so look for a lot more good stuff to come, including some classic four wheeler tutorials, product reviews, and the return of the Website of the Month category to active status. Still with so much going on there’s no way that I can fit every cool random event into this blog so why don’t you join me on Facebook, follow along on Instagram or on Twitter.
I have a confession to make; at one time the very thought of putting a perfectly good running motorcycle on a truck or trailer was horrifying to me. But as I’ve gotten older my once hard core has become a soft chewy center. Crash damage, arthritis, and a growing disdain for any kind of suffering will do that to you. The missus & I will still do a bit of long riding from time to time, and I still scratch my head when I see a full dresser riding solo on the back of a tow vehicle. If said Goldwing or ‘Glide is surrounded on the trailer by some fine vintage machinery, choppers or hardcore sportbikes I can understand. Having discovered the joy of vintage motorcycle shows & swap meets it’s not unusual for me to take multiple motorcycles plus miscellaneous trade items, making a tow vehicle necessary. If I’m only taking one motorcycle or scooter capable of making the trip, to the show with no plans to buy or sell anything I usually just ride the darn thing because without riding what’s the point of owning a motorcycle?
One of my trailer queens.
Now let me make an apology to all of you old geezers that I used to pick on about your trailer queens. I am well on my way to becoming one of you and own a couple of motorcycles that I would never even attempt to travel on.
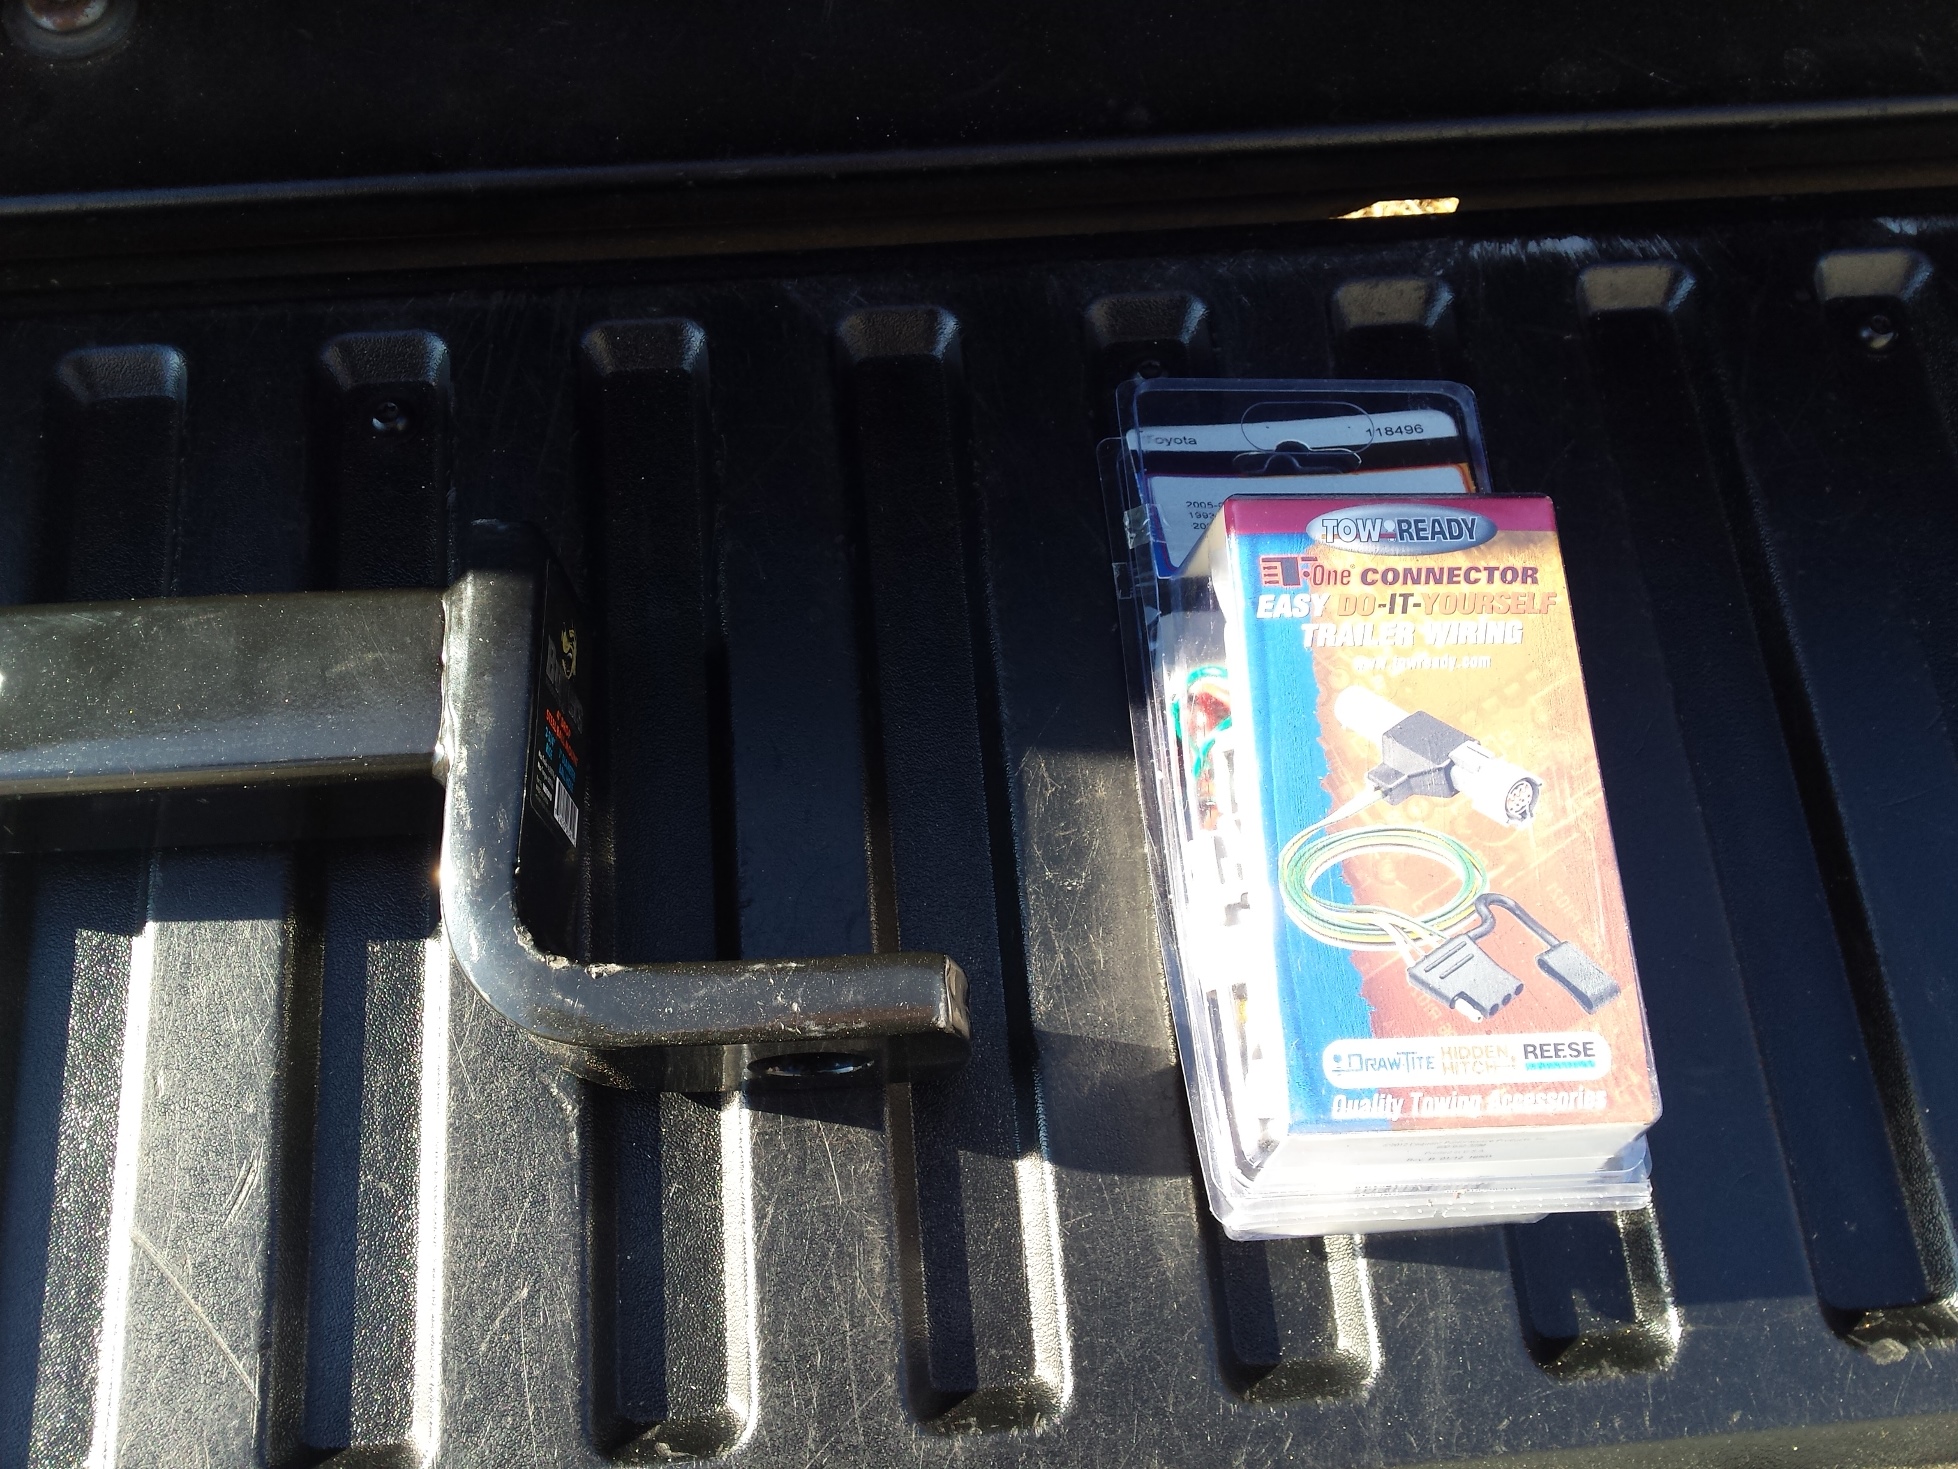
Westin trailer hitch
Let’s get on to the meat of this how to, my previous tow vehicle was a Chevy van that served me okay for a while but last year I sold it and acquired a nice low mileage 2010 Toyota Tacoma that was the plain Jane work truck of my dreams that I thought did not exist anymore. So I ordered up a Westin Receiver Hitch
hitch to fit it, along with a Reese T-connector kit for the trailer lights. Now let’s see how it was installed.
Open up the package, and read the instructions. Then count all of the hardware supplied to make sure it matches what you are supposed to have. Next gather up all of the tools you need to match the bolts in the kit & on your truck, van, or SUV. While what is shown here is specific to my truck & hitch the vast majority of installations will be very similar to this. Buy your trailer hitch from a reputable manufacturer and read the instructions.
Don’t forget, read the instructions first!
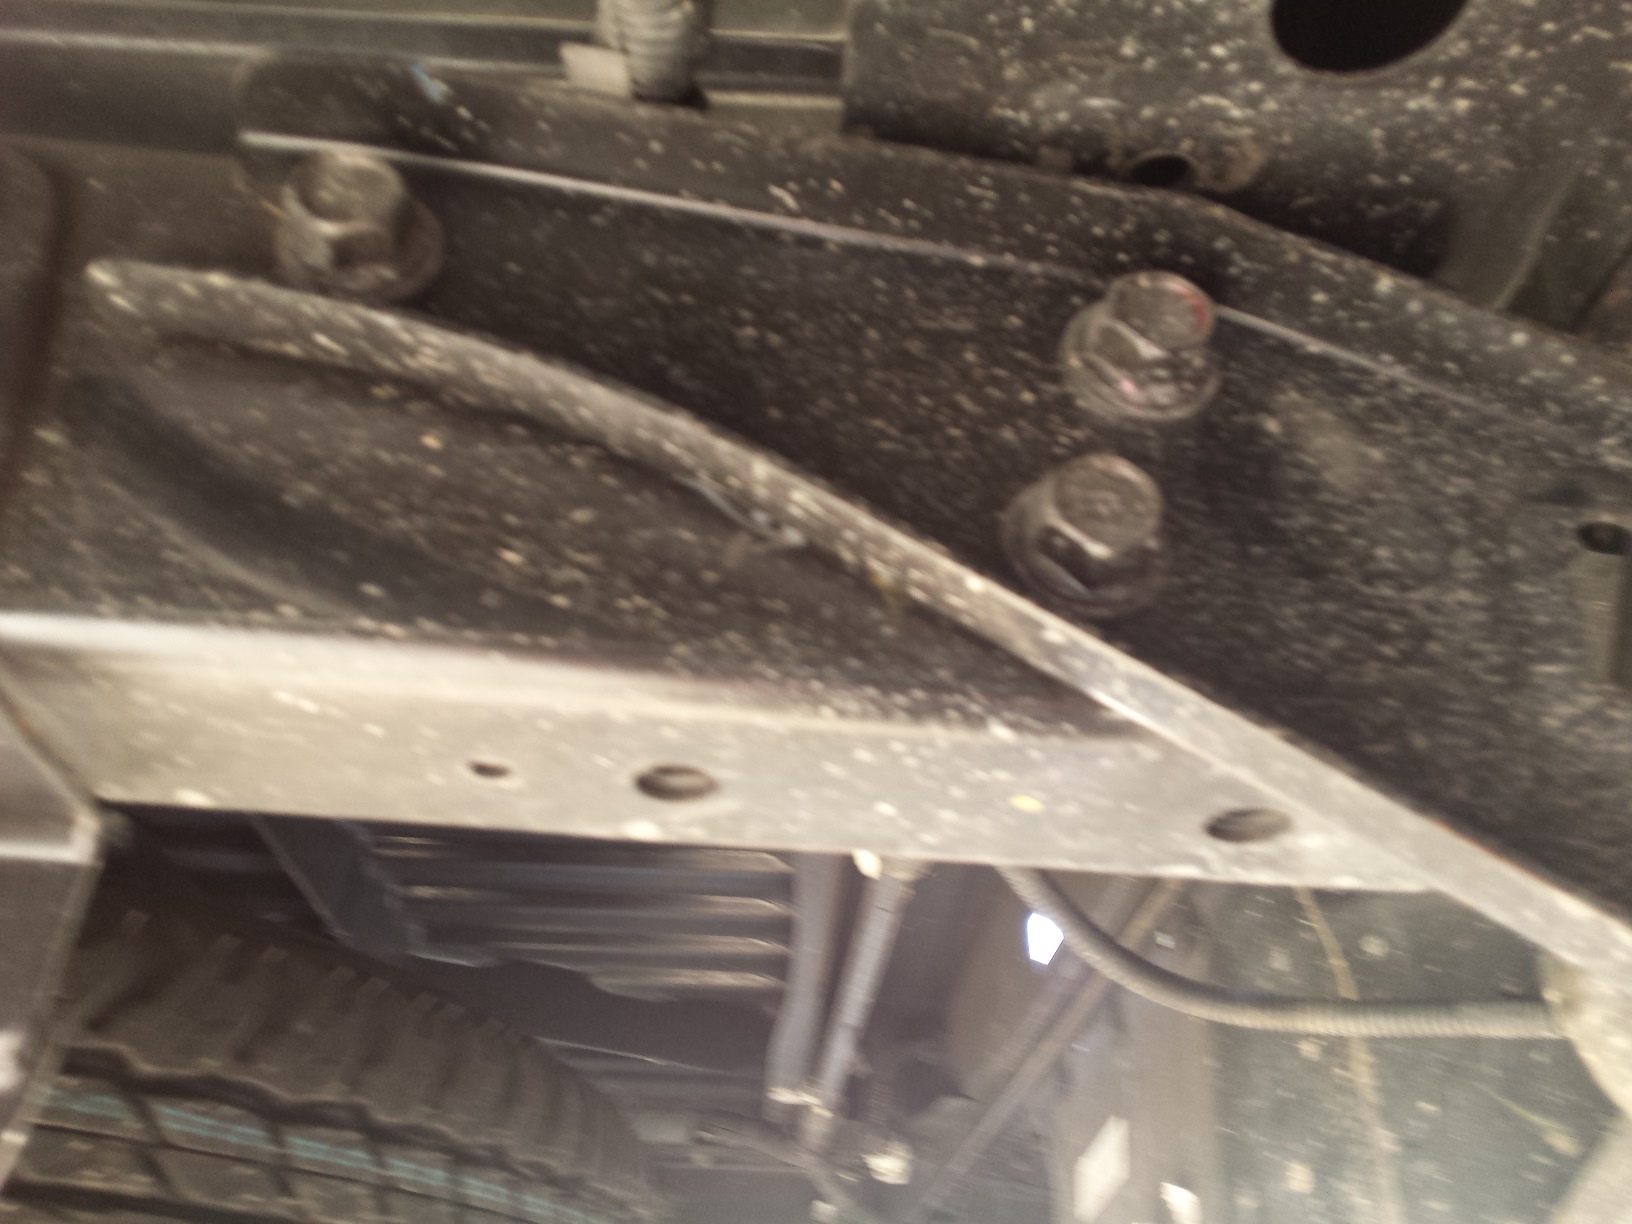
Like most of them this Westin hitch receiver uses the bumper brackets to attach it to the truck. The instructions called for me to remove 2 of them on each side and leave one attached loosely. Work carefully and don’t allow your bumper to drop down suddenly as this could cause damage to your vehicle and or injury to you.
Please make sure you take reasonable safety precautions when you are doing this. You will be handling large heavy awkward items over your head in a cramped space. It’s possible to install a hitch alone but it’s better if you have help. At the very least you need someone nearby in case it falls and beans you in the head.
My truck also had the above tapped holes in the frame that were put there for the location of a trailer hitch, make sure that if your vehicle has additional holes like this that your hitch will use, that the holes are clean and the threads are good before putting the hitch in place.
Since I was working alone a floor jack was called into action to support the receiver as it was lifted into place. For most of us a good floor jack is a necessity to install one of these alone.
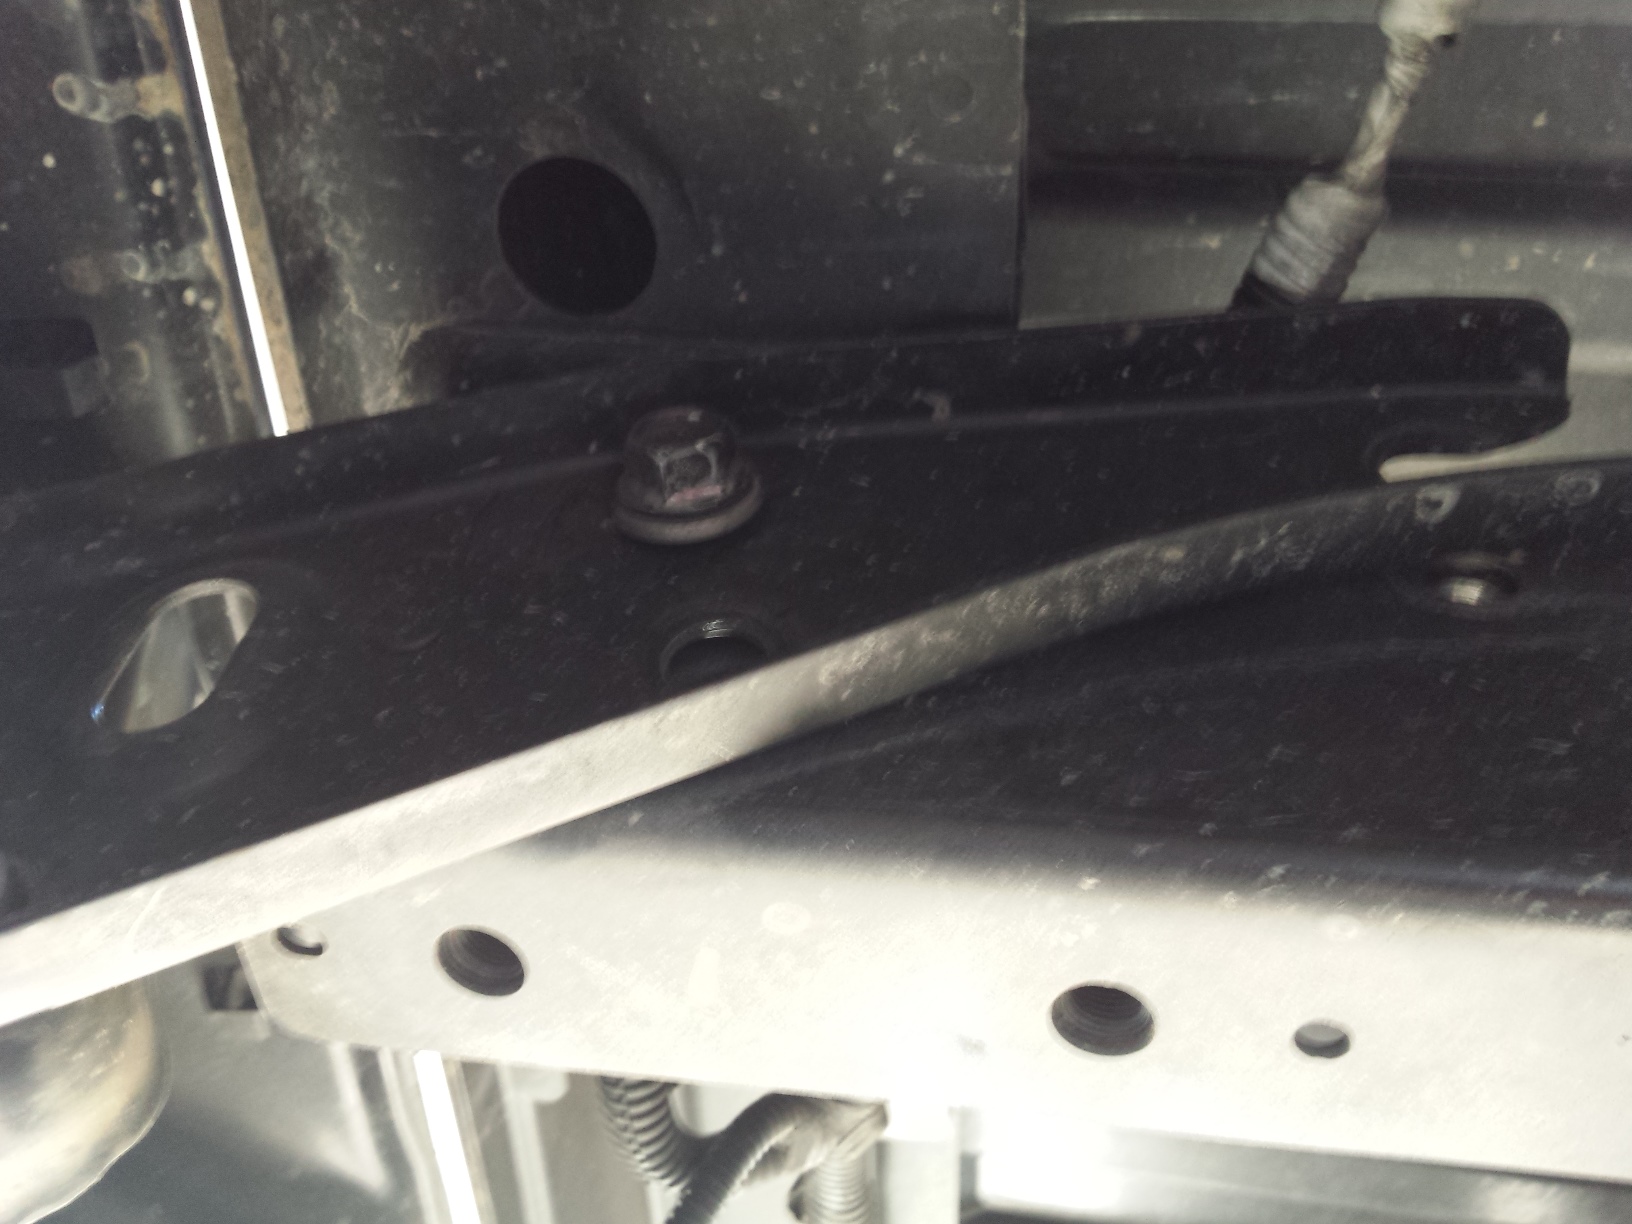
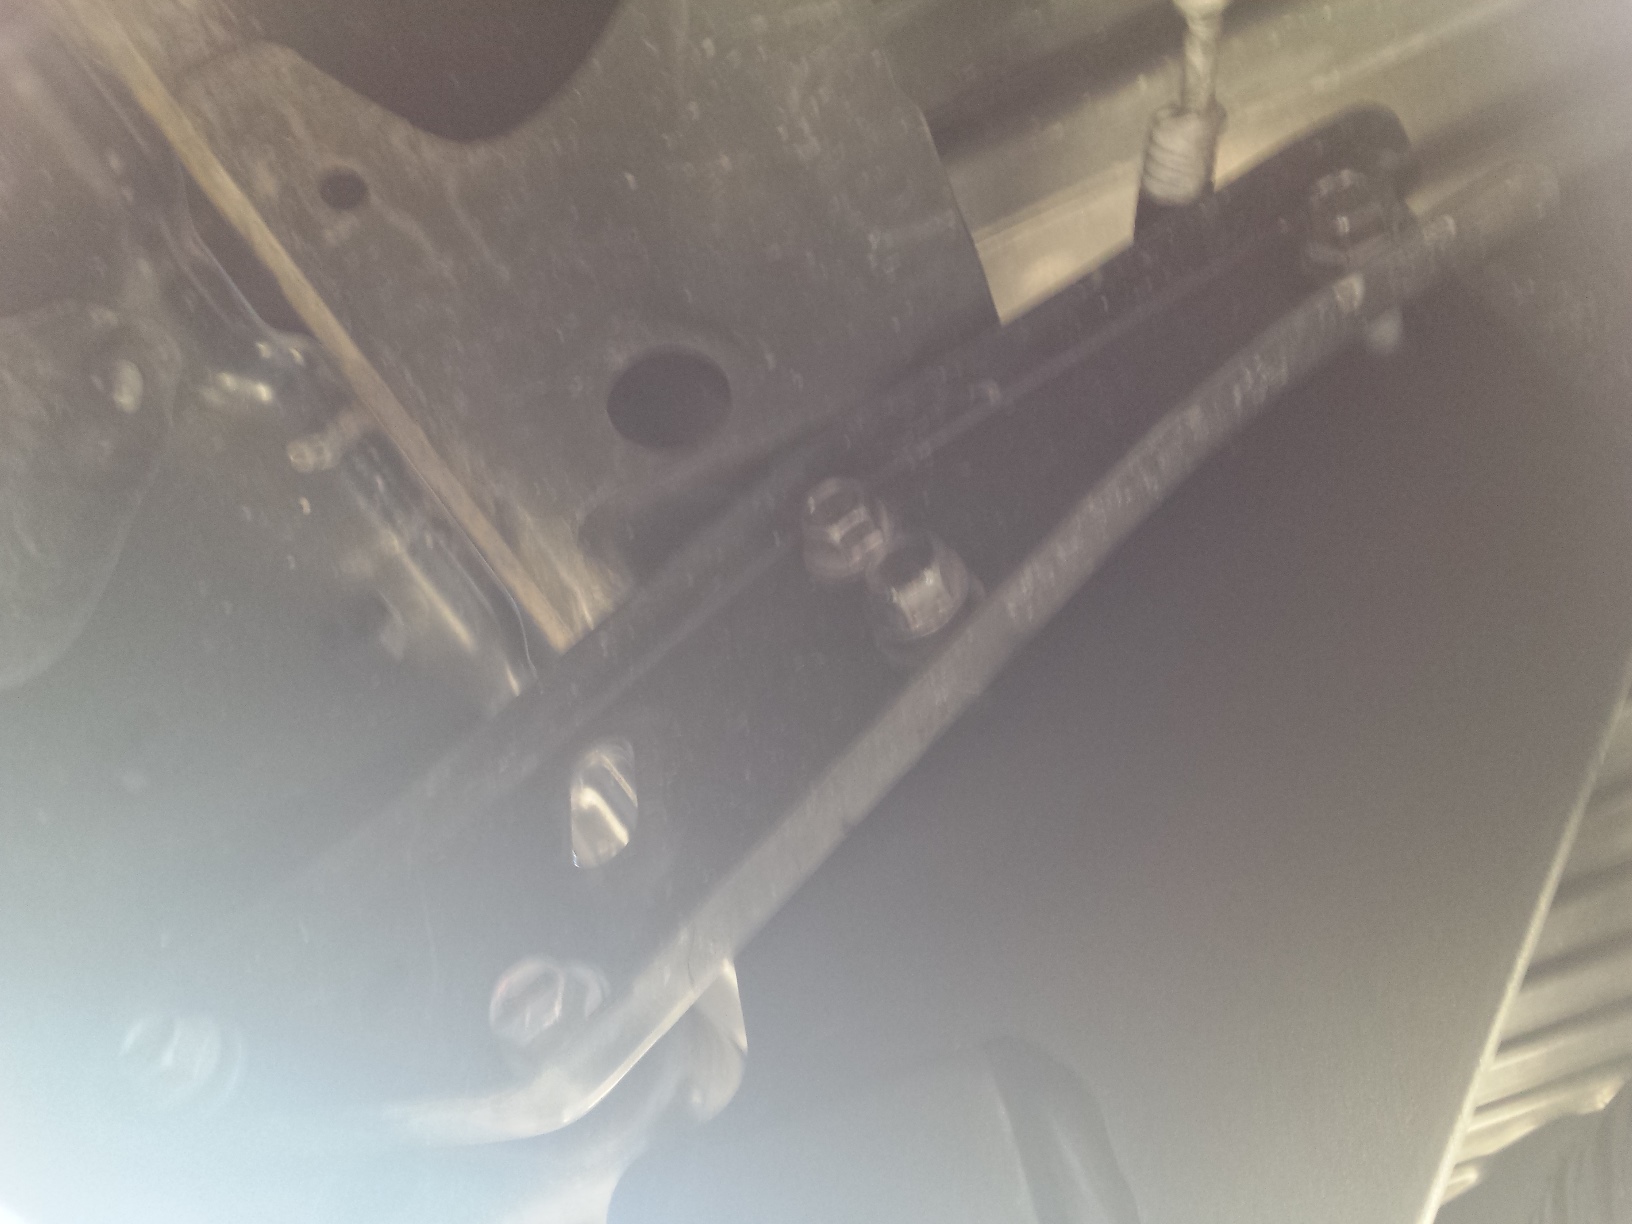
Line up the bolt holes and start all of the bolts. Do not tighten any of them until you have them all started securely. Once you have every bolt started in its own hole, then you may need to install some shims if supplied and realign your bumper so that it looks right.
use shims as instructed
After the shims are in place and the bolts are all snug, check your bumper alignment again and adjust if needed.
Now it’s time for the final tightening of the bolts, grab your trusty torque wrench and tighten all of the bolts to the specified torque for your application.
Now it’s time to move on to the wiring connections, Old timers will remember the bad old days when hooking up a trailer lighting harness meant cutting and splicing wires. Then came the Scotchlock connectors that made the job quicker but weakened any wire they were attached to and made it more likely that the wire would fail a few years down the road. Now everything is plug and play for most vehicles.
The instructions called for me to remove the right rear tail light so I did.
Then plug the Reese T-connector wiring harness in between the trucks harness and the tail light.
The only part of the installation that required any drilling was to mount the control box. Be sure to paint the metal inside the hole and let it dry mounting the box with screws & lock nuts. Please note on some applications these boxes can be mounted directly to the receiver hitch without any modifications. One other thing to note, many modern trucks have composite plastic beds that do not conduct electricity well, so make sure that you attach the ground wire to a metal component that is attached to the chassis. Using outdoor rated UV resistant cable ties secure the wiring neatly allowing just enough slack at the end to work with all of your trailers but without dragging the ground.
Now slide in your hitch and hook up your trailer & test everything. I have been using this Westin Receiver Hitch
for a year now dragging trailers all over the eastern United State and have absolutely no complaints about it. It was easy to install to. Even if you still don’t feel up to doing it yourself at least now you know what it takes to install a trailer hitch. See you on the road!
Peace Y’all
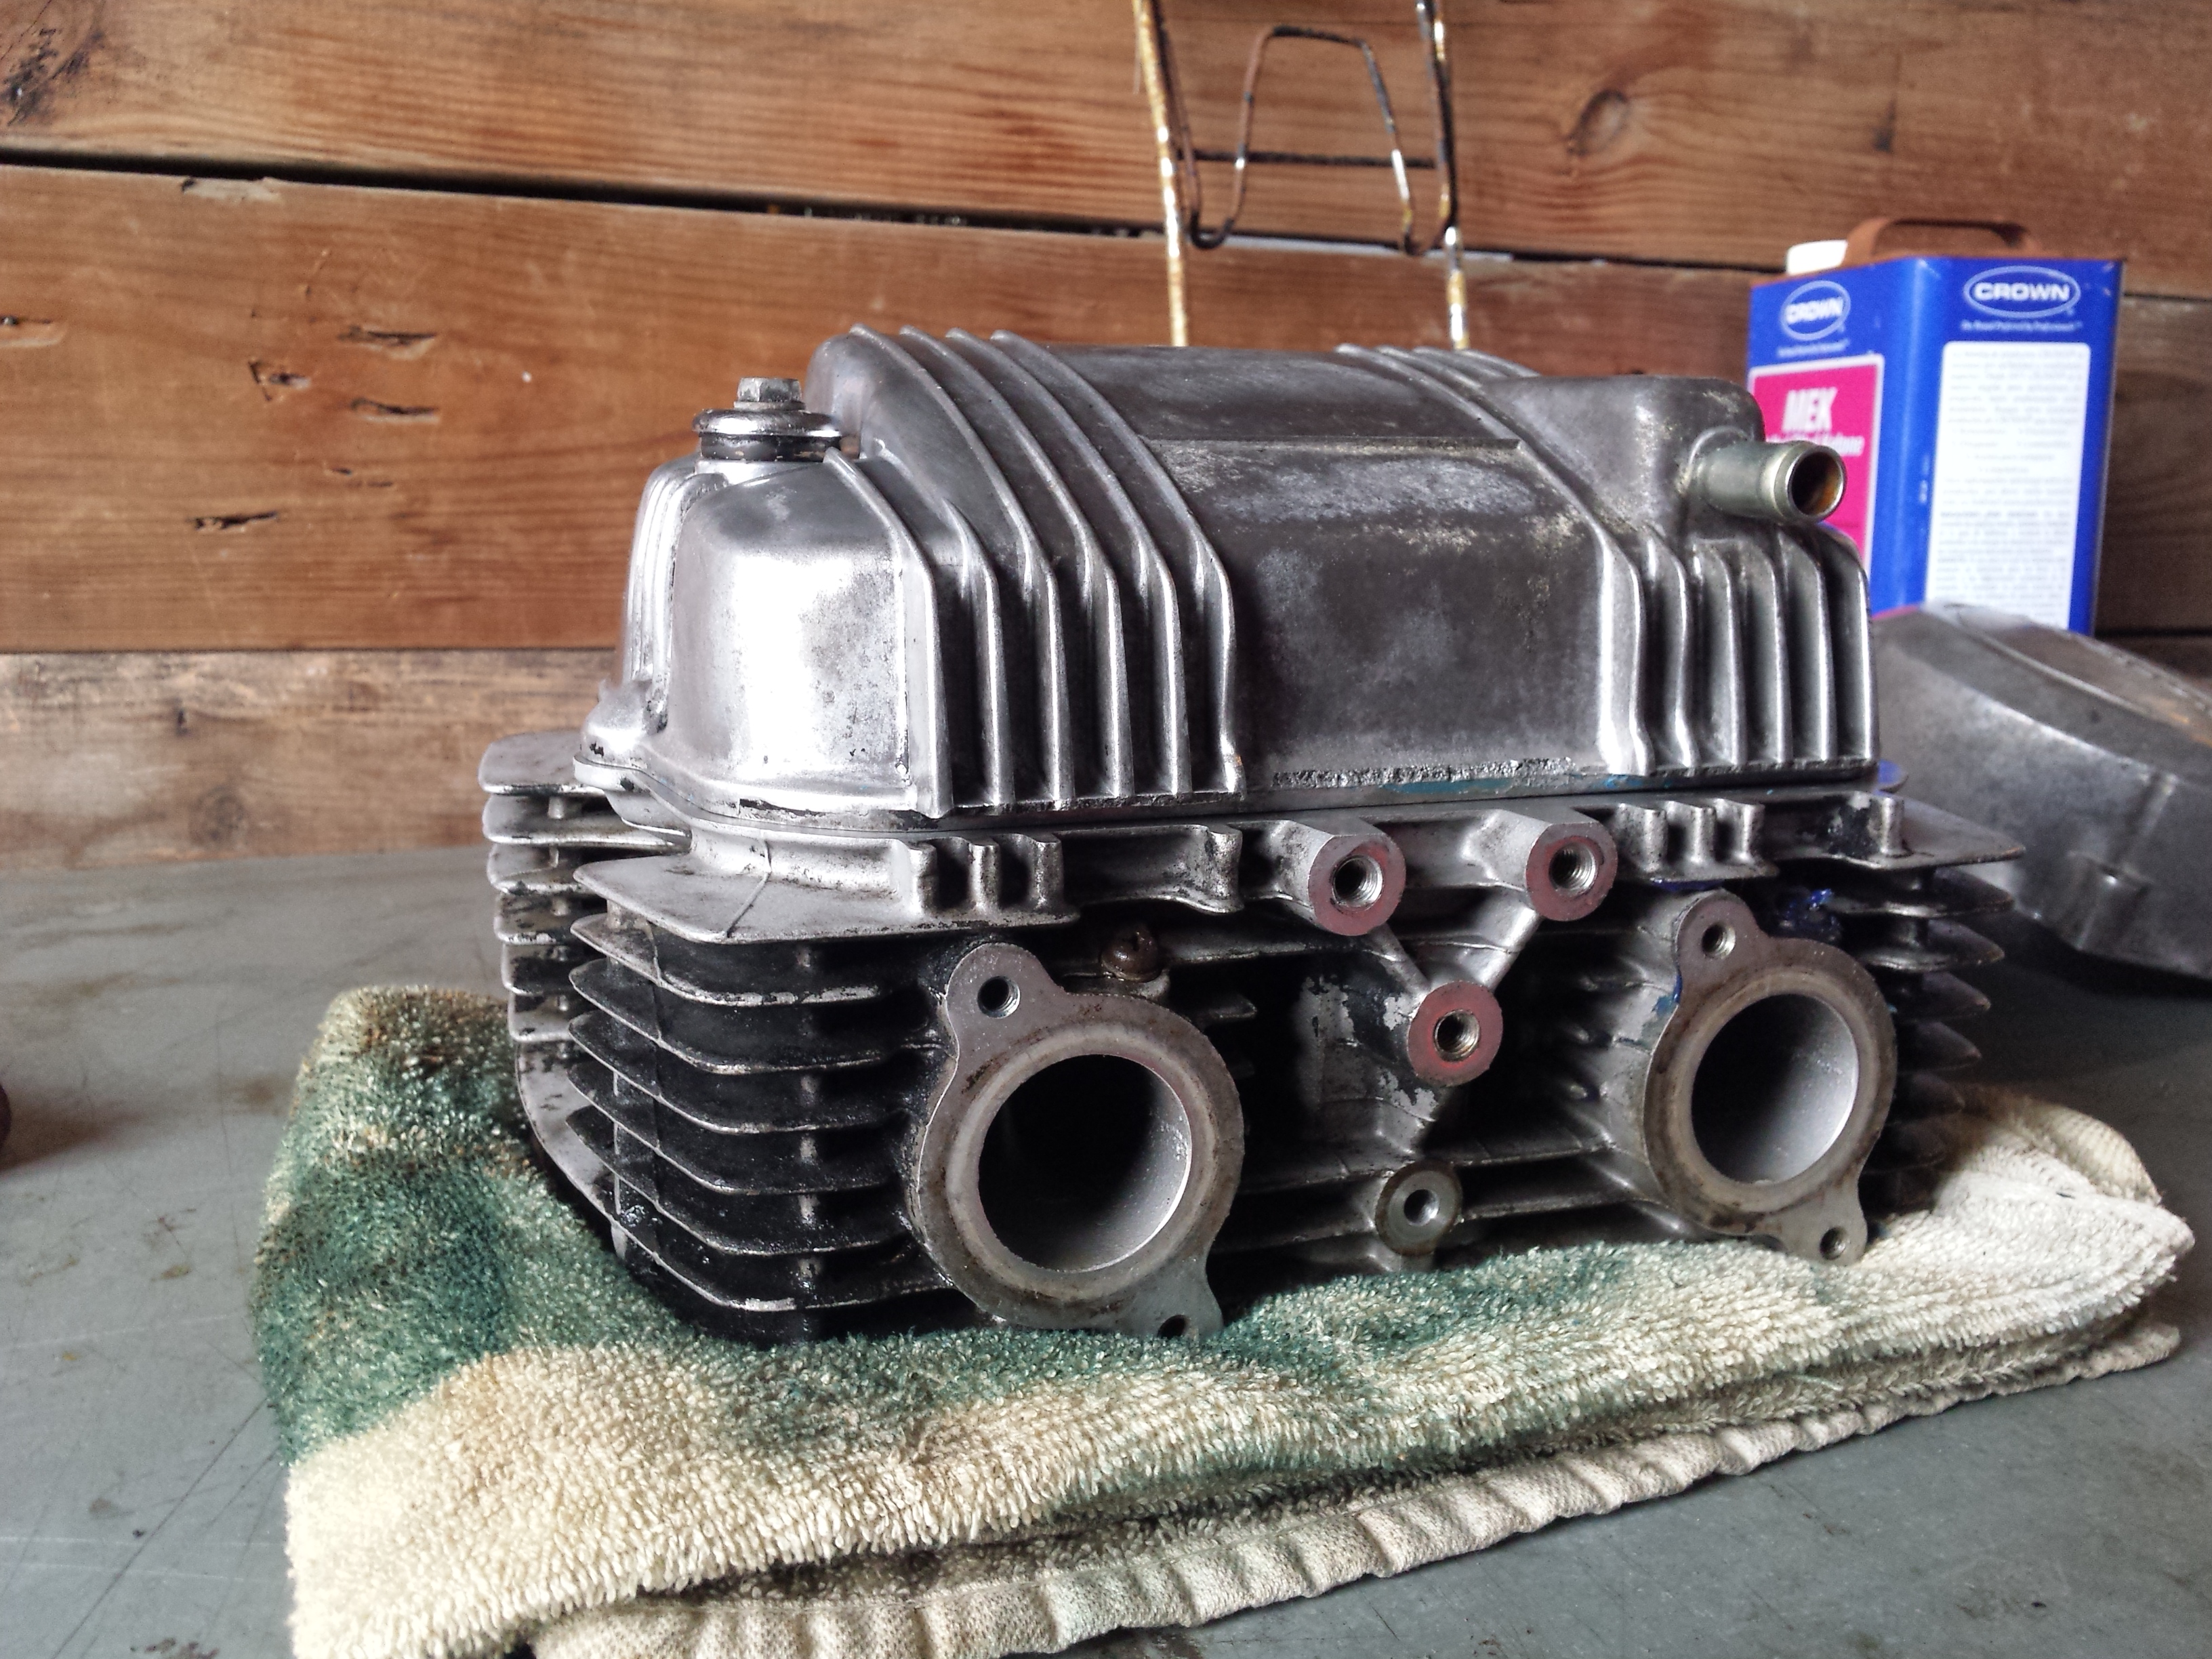
D.I.Y. motorcycle head service is possible for the home mechanic at times, under the right circumstances. Of course if you are one of those fortunate individuals who happens to have a fully equipped machine shop and know how to use it you can do anything. But for the ordinary person restoring an older motorcycle or atv that wants to save a buck or two it is still possible to do an acceptable job provided certain conditions are met.
My patient for this job will be the CM400 that I used for the valve adjustment tutorial a couple of weeks ago. After adjusting the valves and putting oil in the cylinders it still had about a 45-50 psi difference in compression from the left to right sides so I pulled it apart for a top end overhaul. It turns out that the right cylinder had oil rings that were stuck from sitting and that the gaps were aligned on the other two rings.
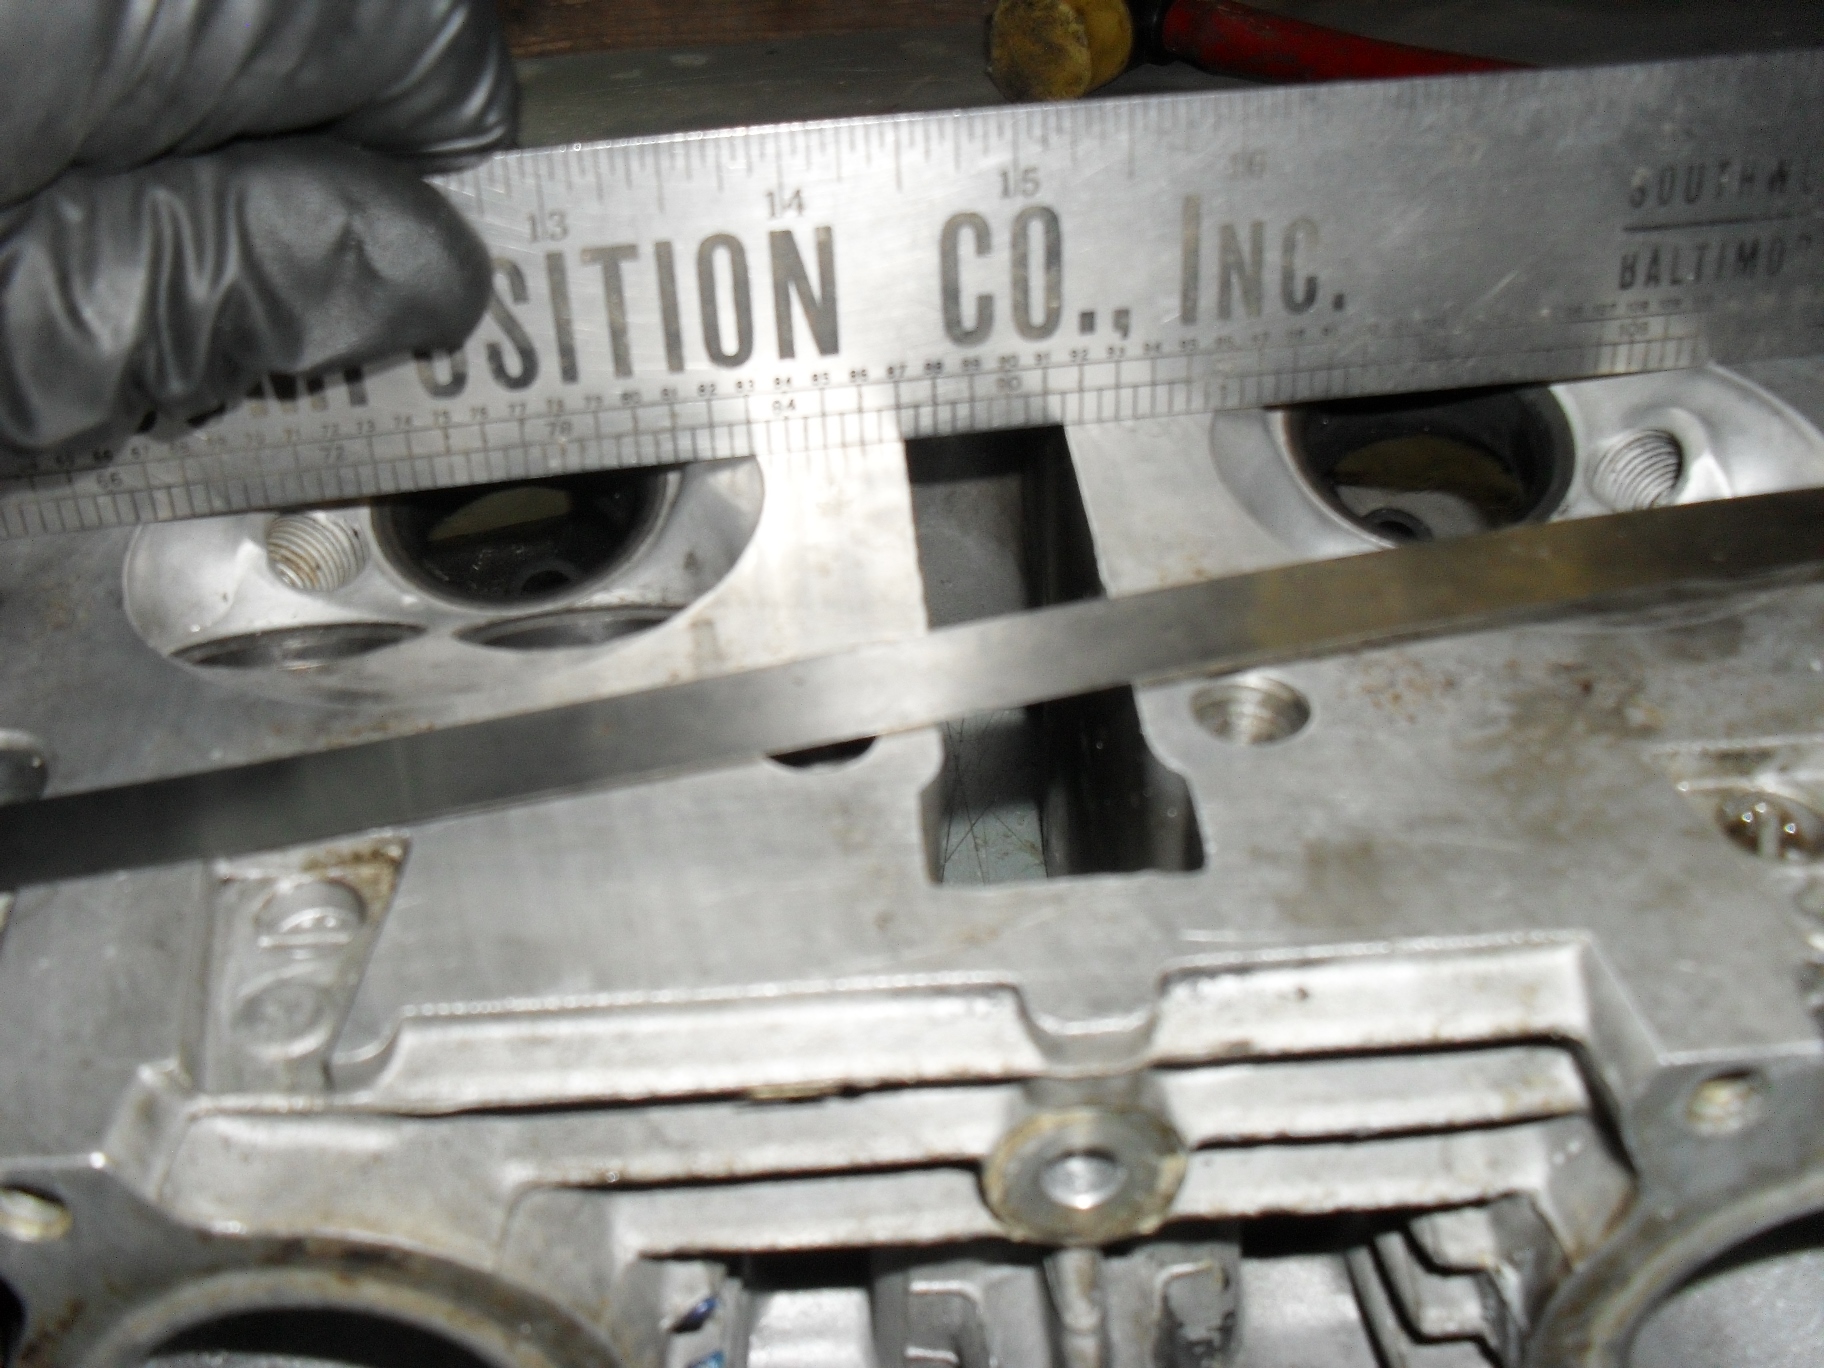
Before disassembling it, I cleaned the head fairly well and removed the carbon from the combustion chambers. This makes handling the parts much nicer and inspection much easier. No matter what method you use to remove the carbon do not allow any type of abrasive or wire brush or scraper to contact the flat sealing surface of the head. Yes I know you may have to use some type of scraper to remove the gasket residue from the head but be very careful not to scratch or gouge it in any way. I actually used soda blasting to clean this head but made sure not to hit the mating surfaces with it.
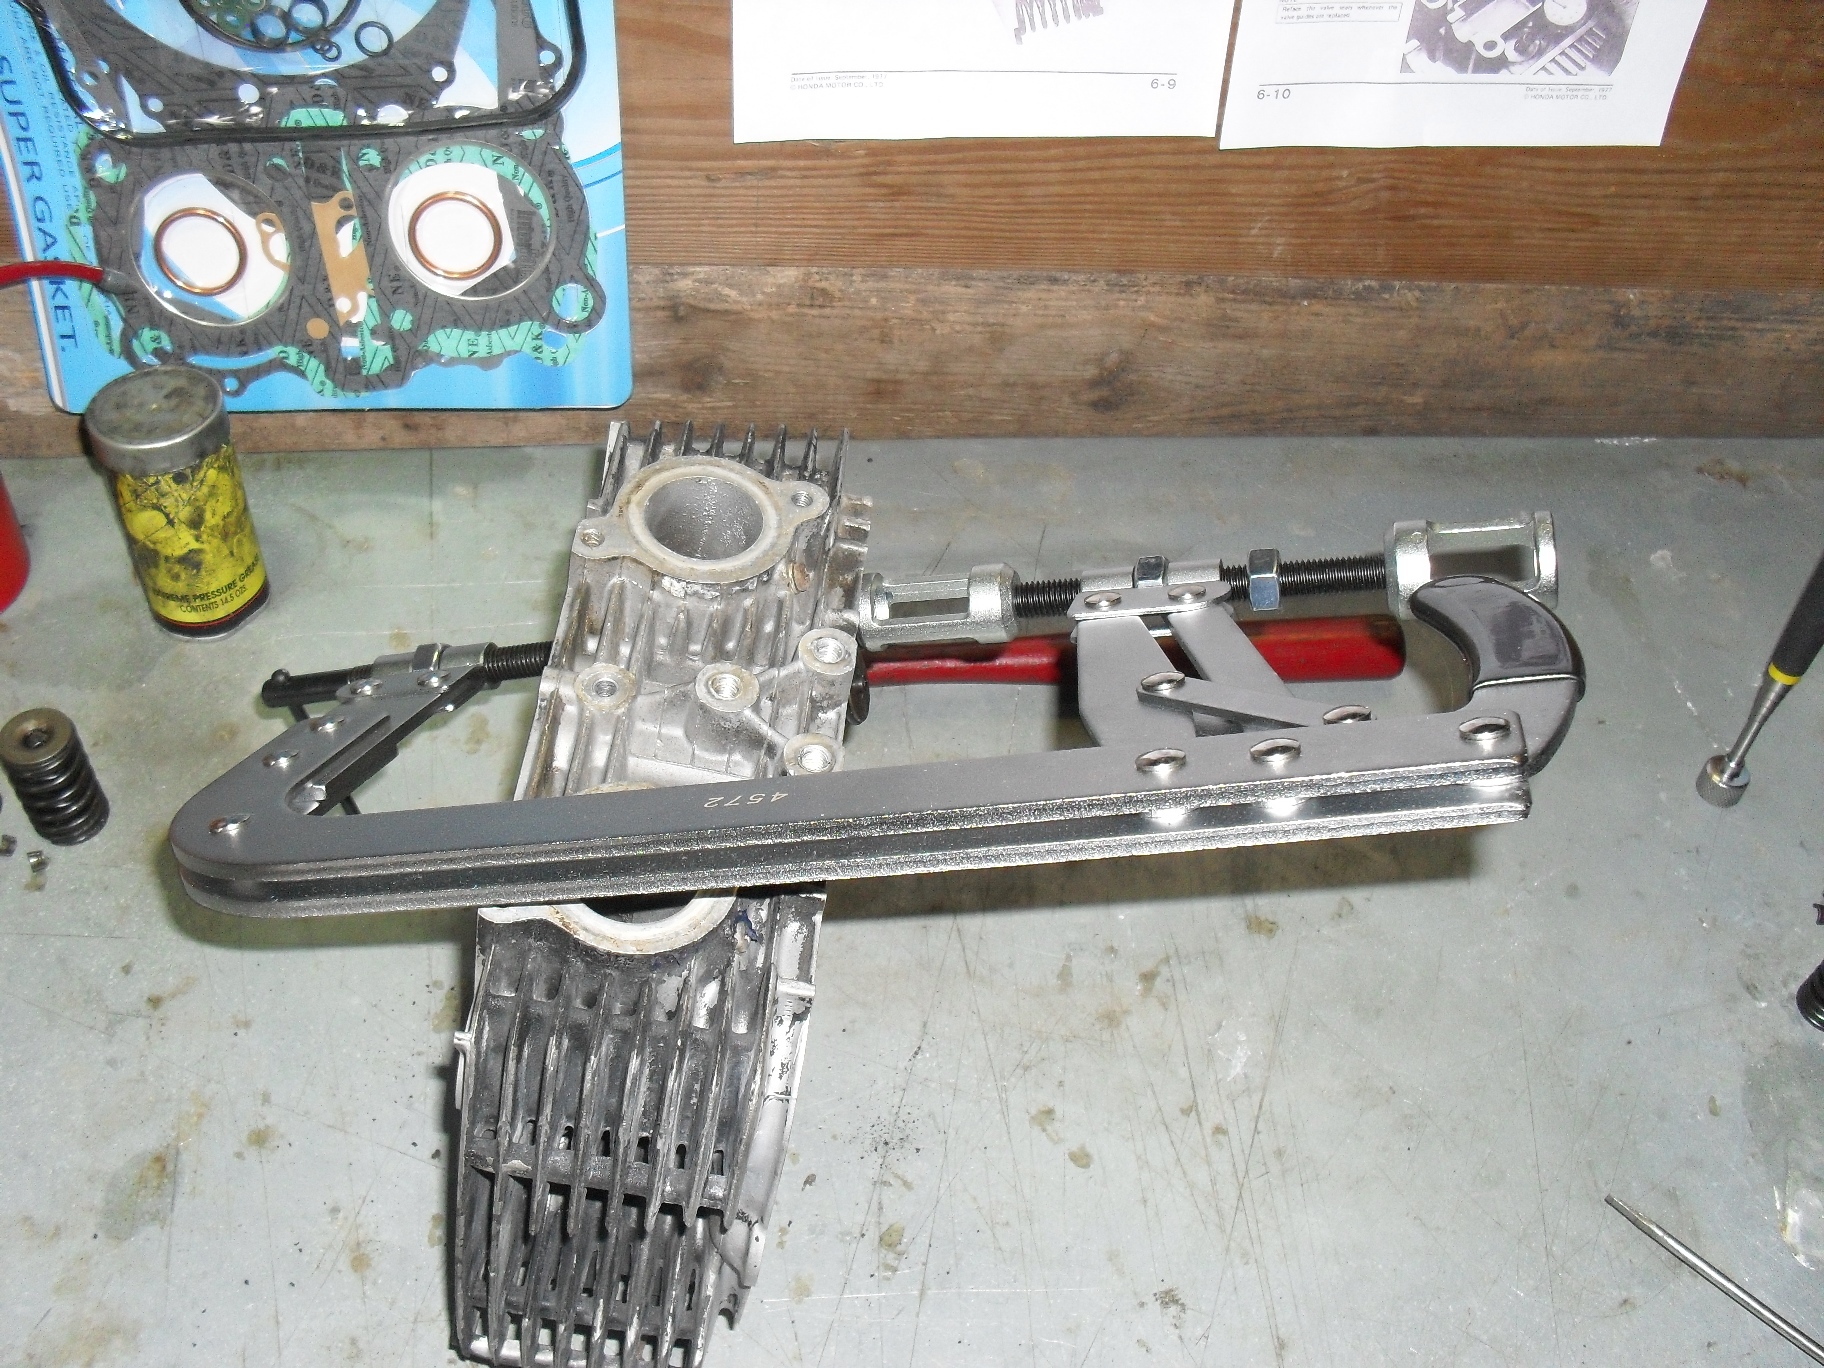
Now I must make a couple of quick disclaimers here. First there are some defects that if discovered during the inspection process that will mean you need to take your head to a machine shop to be repaired anyway. Second, unless you own a set ball micrometers to check them with, you will basically be guessing that the valve guides are okay based on the condition of the valve stems. Chances are that if like me, you are working on something old but with relatively low mileage they are okay BUT it is not guaranteed and excessively worn valve guides can cause oil consumption & smoking even with new seals. Third, this is not the high performance option, if you are building a hotrod and looking to squeeze every last drop of performance out of it you can then I suggest you contact a reputable high performance machine shop for a good 5 angle valve job and new valve guides. This is to get your old heap running as good as possible for the least amount of dough you can spend. The fourth and last disclaimer is to always put safety first in the shop. You will be dealing with strong springs under compression. There is a chance that a tool could slip releasing a spring to go flying out at high speed and hit you or to pinch your fingers between the spring & the tool. Only use a good quality valve spring compressor
in good condition, make sure you read the instructions that come with it, & wear some eye protection too.
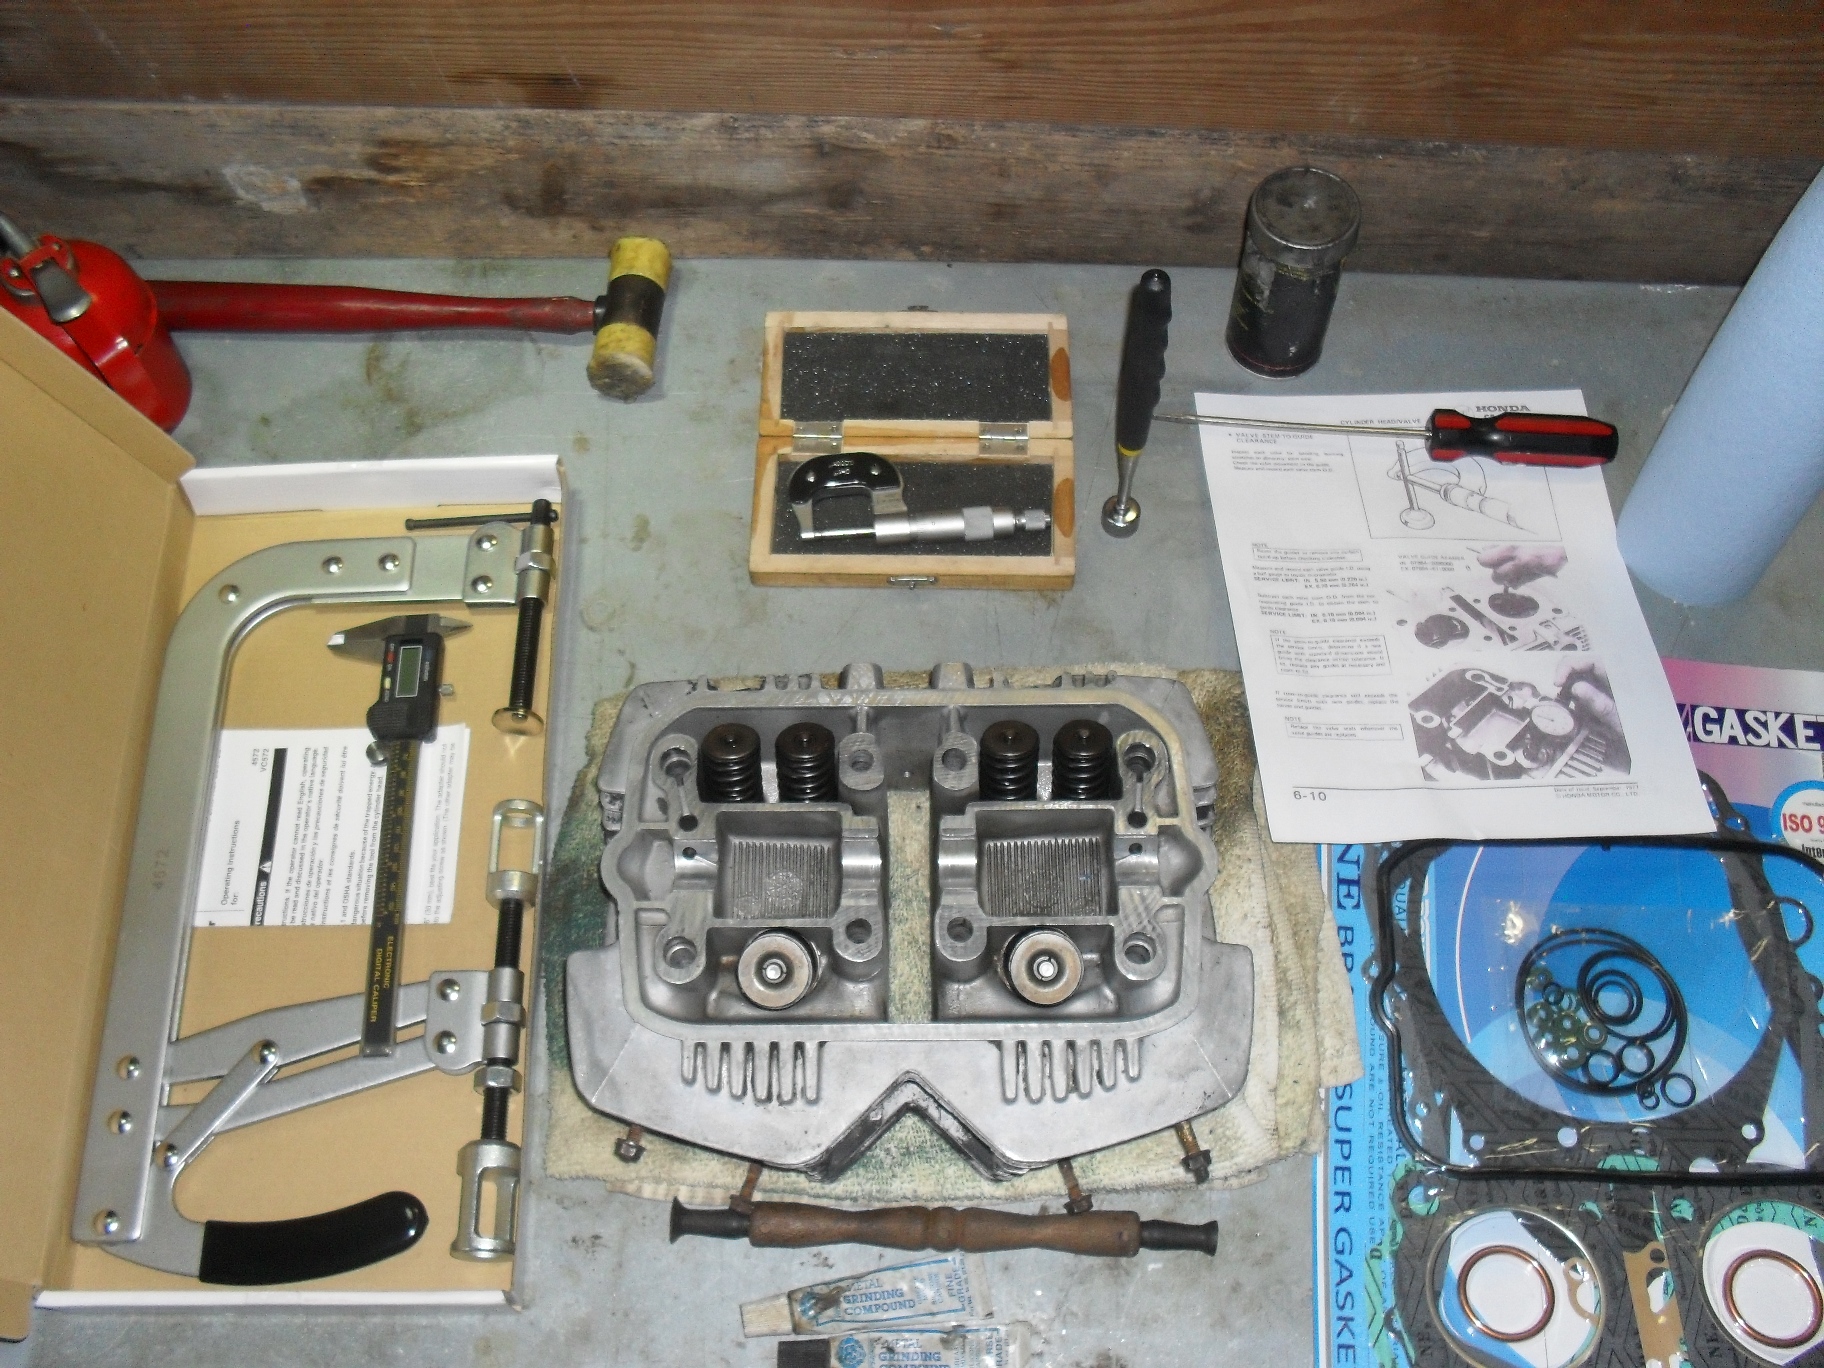
Even so there are some specialty tools you will need to get if you do not have them. In the picture above at the bottom center the thing with the two suction cups on it is a valve lapper with 2 tubes of grinding compound one coarse & one fine. Moving clockwise around the head are the valve spring compressor, a caliper dial or digital whatever you have, a light rubber or plastic hammer just in case something needs a tiny bit of extra persuasion, a micrometer (if you don’t know how to read a micrometer you can either learn how or just buy a digital one.) Next item to the right is a pick up magnet and a flat screwdriver, a few pertinent pages photocopied from the service manual and a new gasket set with valve seals. If you want to learn to use a micrometer watch the 2 videos below.
Set your valve spring compressor into place over the first valve you wish to remove and turn the compression screw inward until the spring is compress enough that the valve keepers either fall out or you can reach in with a magnetized screwdriver and pull them out.
It is very important that you keep your valves, springs, & other parts together so that they can be reinstalled in the same opening from which you removed them. This is especially critical for the valves as they wear into their valve guides and seats as the engine is operating. If any of the valves do not come out, or if removal is difficult you may have a bent or seized valve, put everything back together and find a good machinist. The cure for a damaged valve requires replacing the valve & seat as a unit. The valve guide drivers and reamers required for this job are really a bit much to purchase & learn to use for just one head.
Once you get all the valves out give the head a good visual inspection looking for anything that looks galled, burnt, or cracked
Be sure you check inside the ports to especially around the valve guides. Next check the valve seats which are the hardened steel inserts around the outside of the large holes in the combustion chamber. If any of valve seats 0r guides are burnt, badly scored or pitted , have cracks in them or easily visible excess wear then you need to put it back together & take it to a competent machinist
If all looks good make sure the head is not warped beyond acceptable limits. for this you’ll need a good straight edge and a feeler gauge in whatever size your service manual specifies
Place the straightedge firmly across the head in several locations and try to insert the feeler gauge between it and the heads gasket mating surface. If it goes between the two anywhere then a machinist will need to shave the head to level it back out.
Now it’s time to grab the micrometer and check the diameter of every valve stem in several places up & around each one. If any of them are worn beyond the service limit, chances are the valve guides are shot too and this is no longer a normal do it yourself job. Double check them for straightness at this time also,
After that get a caliper and measure the extended length of all of your valve springs. Replace any that do not fall into the specified range for your motorcycle.
Once the inspection process is complete and you are satisfied that all of your parts are in good condition & can be reused go ahead & clean the valves & guides thoroughly. Most of the time you can just scrub the intake valves clean in the parts washer, but the exhaust valves usually have a hardened scale stuck to them so I use a brass wire brush to clean them with. For the valve guides I use a gun cleaning brush, but any small round brush with plastic or brass bristles that fits through them will do. I try to avoid using brushes with steel or stainless steel bristles on parts like these because I only want to remove the grease, carbon, and scale without affecting the base metal.
Pick out whichever valve you want to start with and put a small amount of valve grinding compound around the head of the valve on the surface that contacts the valve seat in the head, and place that valve back into the hole that it was originally removed from. Grab the valve lapping tool & stick one of the suction cups on it to the valve like this and then rotate it back & forth to clean the mating surface. The most efficient way to do this is to hold the lapping stick between your palms and pretend you are trying to start a fire with it. Stop occasionally to check on your progress and replenish the lapping compound if needed. I use a coarse compound to start with & then switch to fine grit, but it is possible to make do with just the fine grit if that is what you have.
Stop and inspect rather frequently, you are not trying the grind the entire surface of the valve & seat flat. What you want is a uniform,well polished shiny ring all the way around the valve & seat at the point where the two meet. Once you have that, to keep polishing is just putting unnecessary wear on your engine parts. It should only take you a few minutes per valve to accomplish this, so keep going until you have all of the valves done.
With all of the valves lapped you now need to wash them and the head again and completely remove all of the valve grinding compound so that it doesn’t make its way into your freshly overhauled engine and grind up parts that don’t need it. Then open up your gasket set and find the valve seals. I have the seals for this engine laid out above.
The two larger one are for the exhaust valves and the four smaller ones are for the intake valves.
Once you have all of the seals into place it is time to start reinstalling the valves remembering to put each valve back into the hole that you removed it from to start with. First push the valve back into the hole.
It should go in smoothly, make sure that it doesn’t push the new seal off of the valve guide. Put the matching valve spring(s) and retainer back into place over the valve stem.
You will have to carefully hold the retainer while you put the valve spring compressor into place to compress the valve spring(s).
Compress the springs until you can see the grooves for the valve keepers well enough to reinstall the keepers.
Put a thick coat of grease on each retainer to stick it to the valve stem when you put it into place.
If at all possible use a pair of tweezers or needle nose pliers to put the keepers on the valve stem. If you find that you must use your fingers to get them both into place be extremely careful and make sure that the compressor is securely clamped and not going to suddenly pop loose and crush your fingers while you are positioning the keepers. You have been warned.
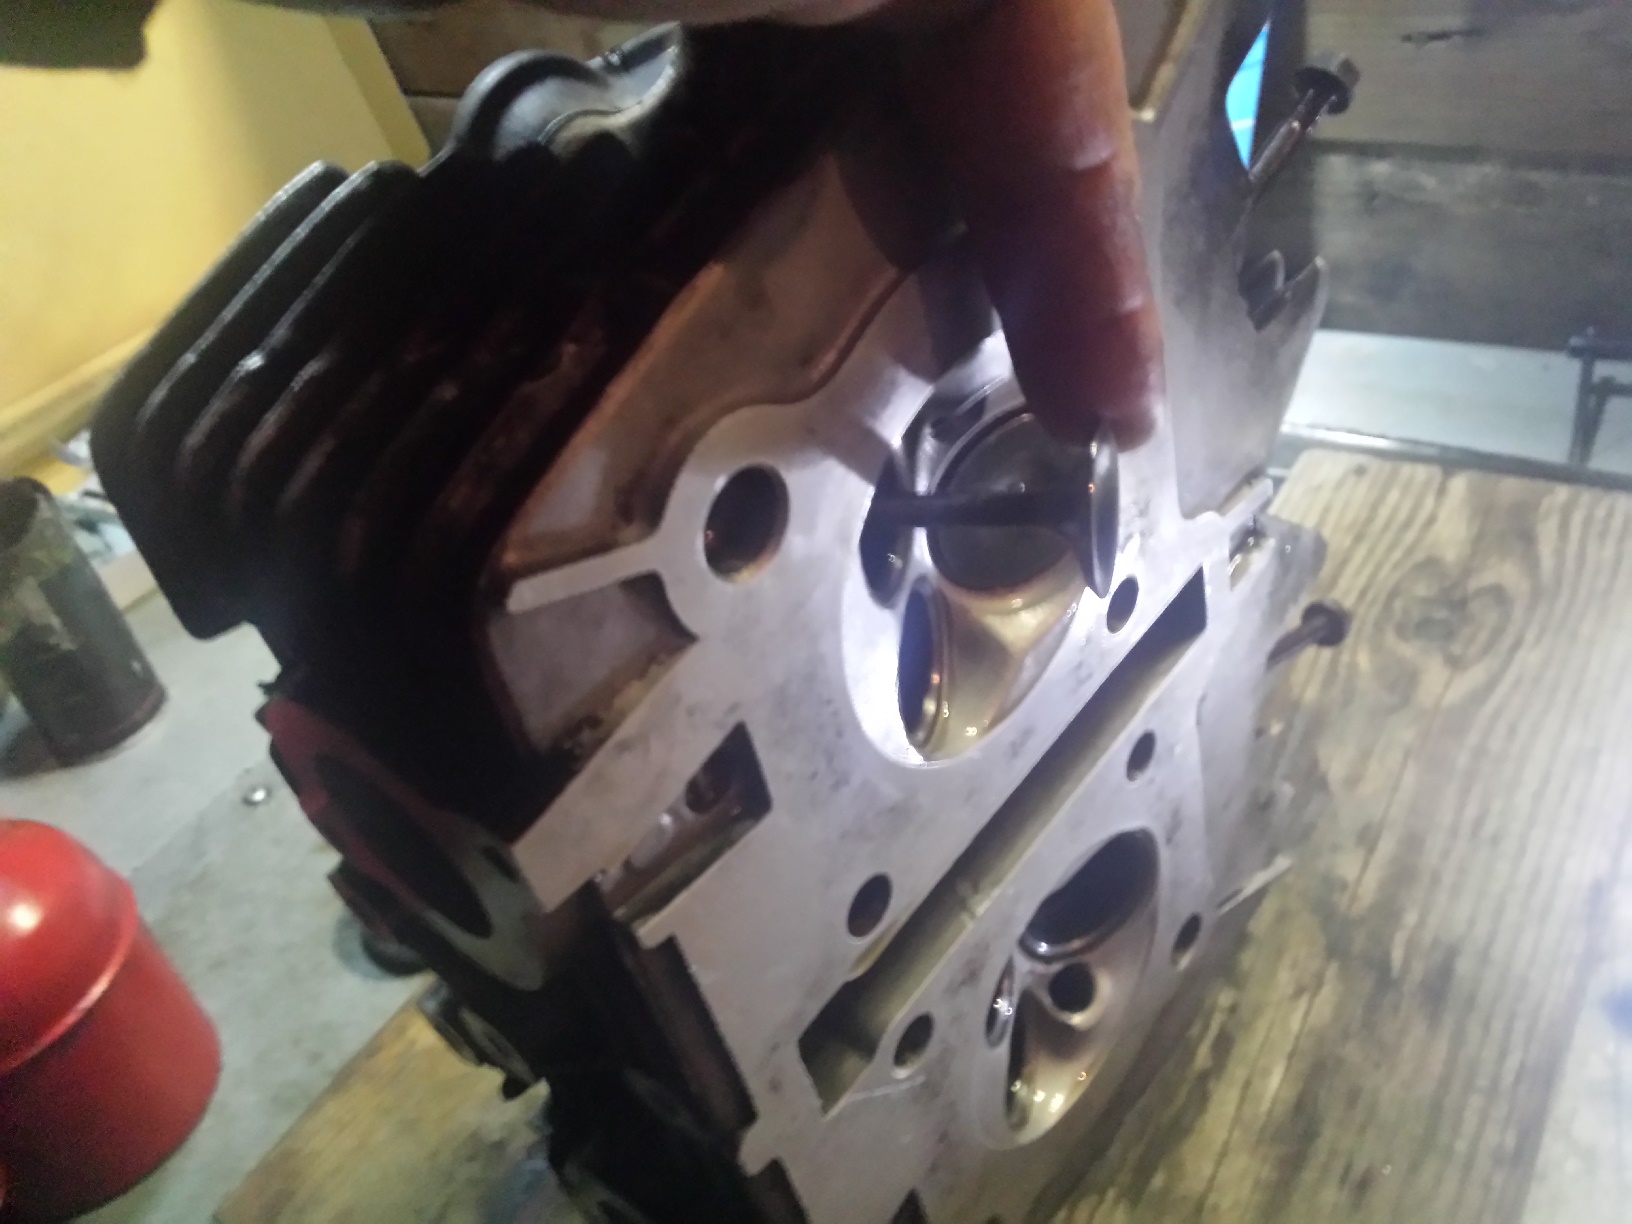
When you have the keepers in place on the valve stem then slowly unscrew the clamping screw and if necessary keep the springs and retainer straight as you release the pressure. Remember if your compressor has a release handle on it like mine does, do not use it to clamp & release the valve springs. Always use the clamp screw. The release handle is there to allow you to move it from one valve to another without having to fully unscrew the clamp every time. When you have fully released the pressure & moved the clamp your vale should look like the picture below with both keepers trapped securely between the retainer & the valve holding the whole lot securely together.
Repeat these steps until all of your valves are securely reinstalled in the head.
I have tried to be as honest as possible with you about the possible pitfalls and risks of D.I.Y. motorcycle head service, but if you are willing to take your time, check everything carefully, and work in a meticulous fashion there’s no reason that you cannot give it a shot. Just be willing to take the risk of trying on your next restoration or overhaul and you’ll find yourself having that much more satisfaction with your handiwork once the engine is up and running.
Of course since I want this one to look as good as it works I covered up all of the mating surfaces & plugged all the ports before spraying my favorite ceramic filled engine paint on it. If you need tools and supplies just visit my webstore’s tool sections and search for what you need. If you can’t find something there let me know & I will point you in the right direction even if it means sending you to someone else.
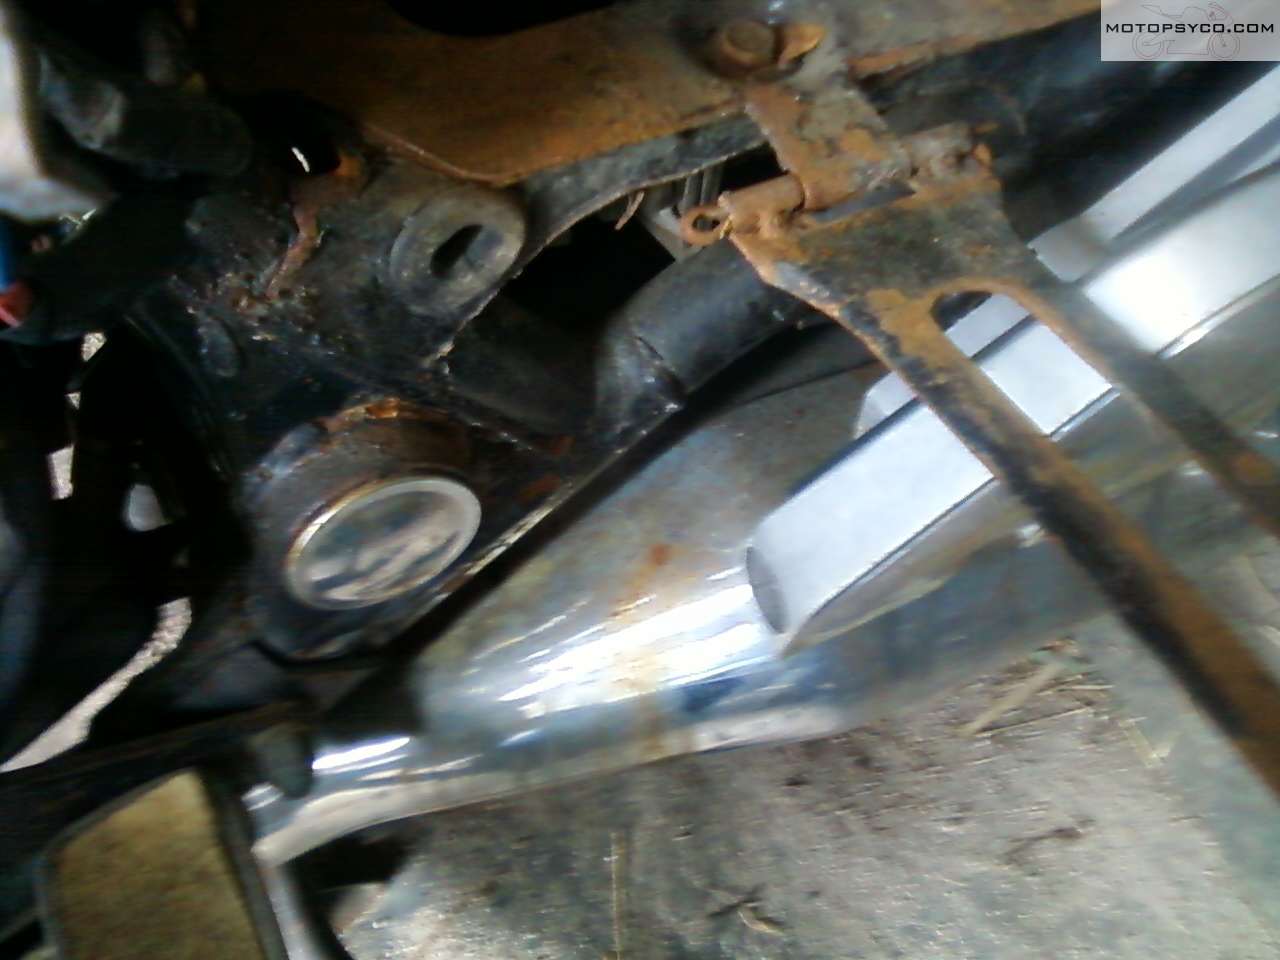
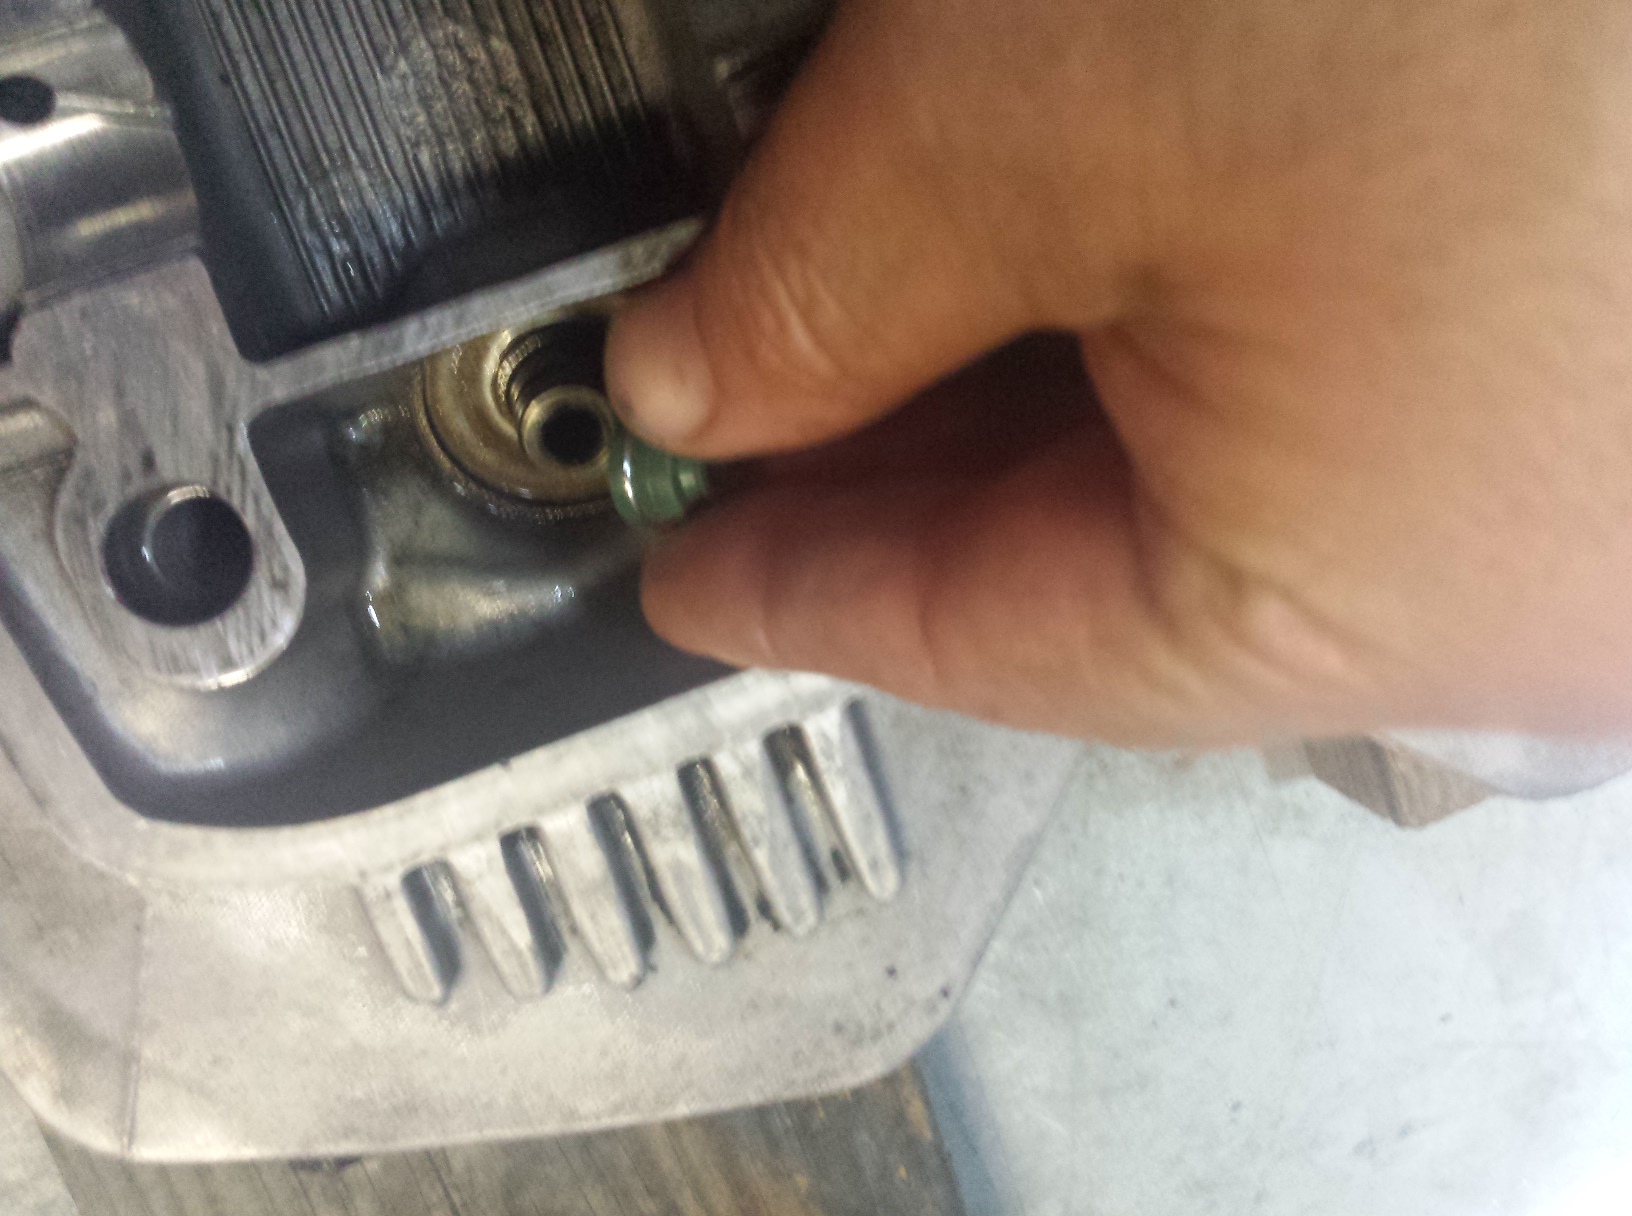
I noticed someone has been searching this site for information on this topic. If you have just done or had work done on your Honda Recon 250 ATV or it has been sitting long enough for mud daubers to nest in it, and it runs well other than the fact that it stalls going uphill then you need to check the upper vent hose on the side of the carburetor that runs up to the steering head area. If this hose gets pinched shut or plugged up it will cause this to happen because the trapped air prevents the float bowl from refilling when the atv is on too steep of an incline to vent through the bottom of the carb. Just find the rubber hose that leads from the left side of the carb as shown below. The other end should be up near the steering head and completely open to the atmosphere. Make sure that it is not routed in such a way that the fuel tank pinches it shut when the tank is re-installed.
If you are trying to sort out why your Honda Recon stalls going uphill or any other problem you may be having with it I highly recommend a good service manual. If you are doing your own work it will save your ass a lot of trouble.
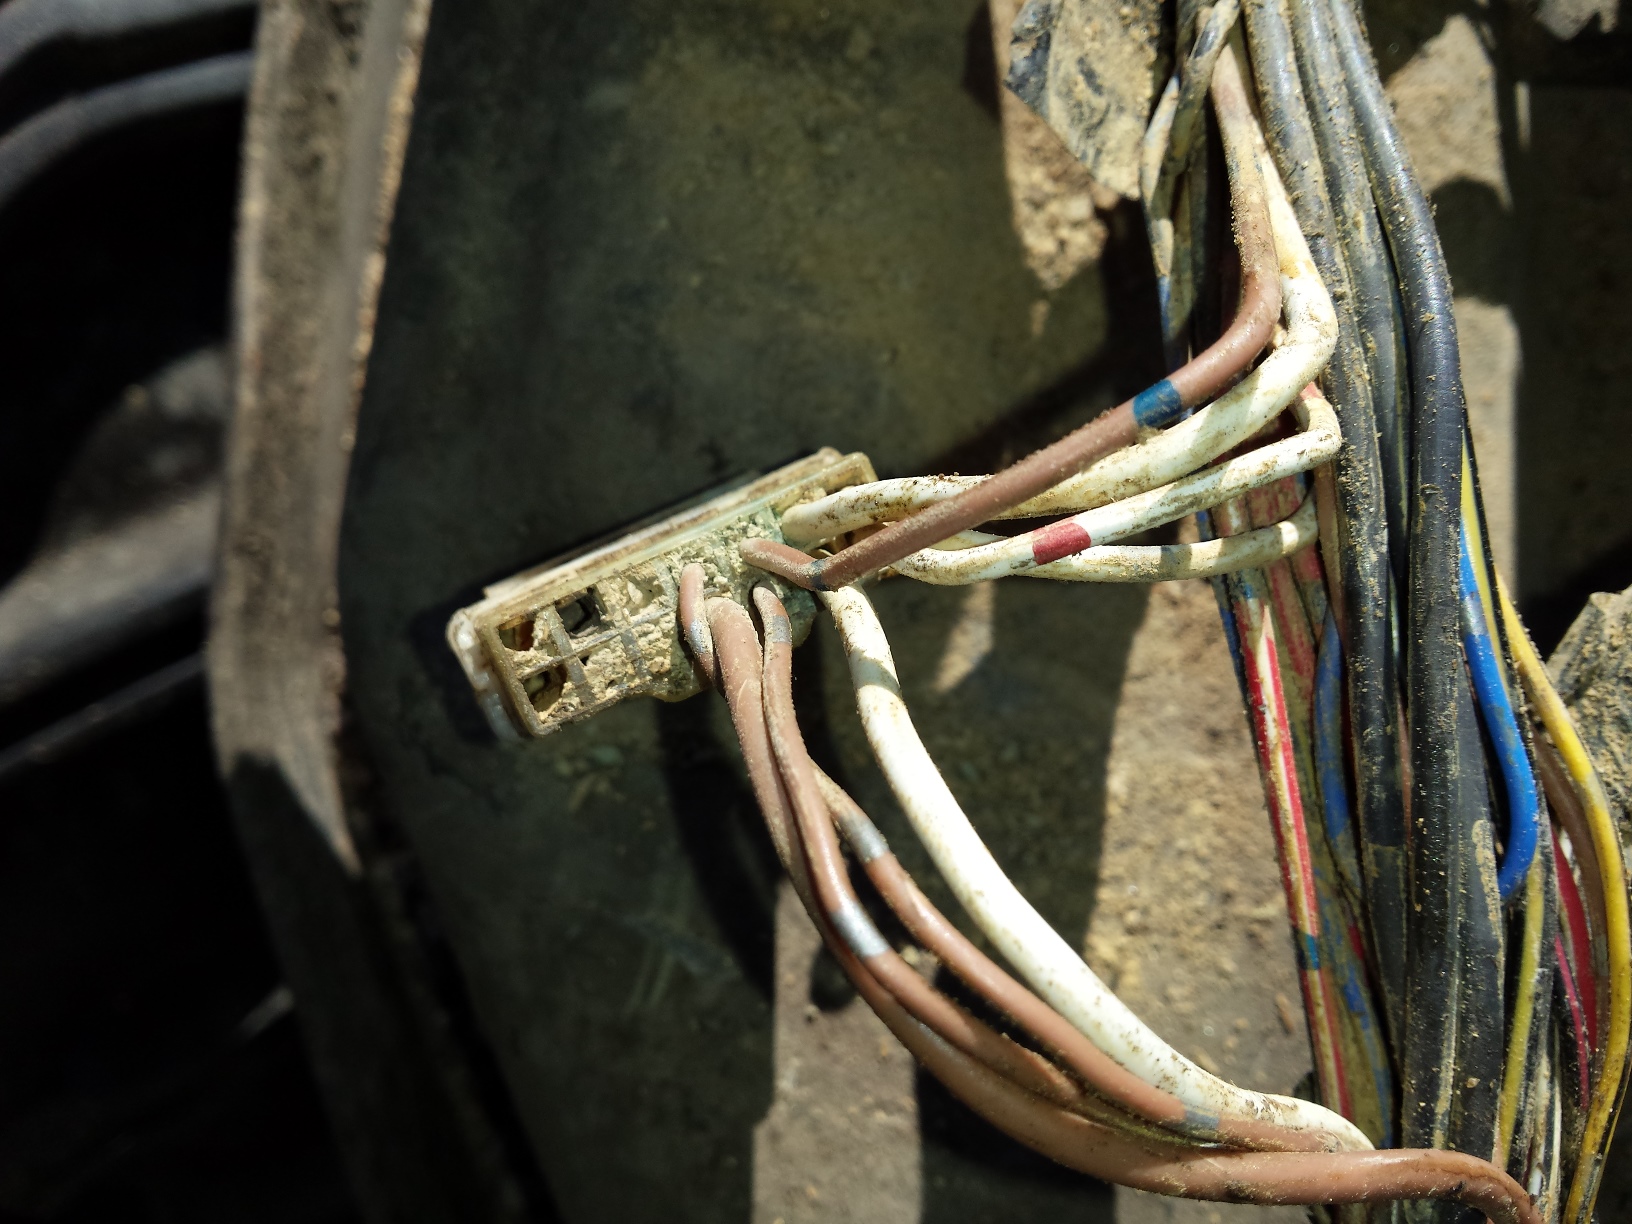
This is a unique problem that affects 2005 & 2006 Kawasaki Brute Force ATVs, you would think that by now all of these would have been fixed already but every now and then one still shows up. Anytime you have any electrical problem with one of these four wheelers this is the first thing you should check. Battery not charging, 4wd switch not working, lights flashing, or any other electrical fault of any kind you should remove the rear fender unit and check the wiring harness for a rectangular bulge like this. There are two of them one at the rear over the gas tank & and one almost in the middle. Usually it is the one in the rear that causes the most problems. This is the front one in this picture. The next picture is of the rear connector, notice that it is packed with mud despite the fact that it was sealed up inside of a tightly wrapped electrical harness. This causes either broken connections or direct shorts depending on how your luck is at the time. A couple of the wires just fell out of this one. Although I have heard of these connectors failing on machines that were not abused, in all honesty if you just keep your late model atv & it’s computer controlled engine out of any water deeper than the top of the differentials you are unlikely to have any problems. I am not going to give you a step by step tutorial on this repair, but will give you links to a couple of excellent ones that already exist on the great tool know as the internet. The first one is at the Mud In My Blood forum and you can get to it by clicking here. One thing that is incorrect in this one is that the author thought that the factory had fixed it starting in ’06. I can assure you they did not as the pictures above came from an ’06 model that I fixed yesterday. Another great one is found at youtube if you would prefer to watch a video, just click on this link right here. What ever you do be sure that you seal your final connections up tightly before re-wrapping the wiring harness and taping it back up. Go play in the mud again just remember it costs cubic dollars in repairs to keep using your land vehicle as a boat or a submarine! Unless you get an Argo 😉
If you liked this post or found it helpful.
Could I please ask a favor of you? Chase is giving away 20 $100,000 grants to small businesses this fall. In order to be considered for this award I have to collect 250 votes for Motopsyco by June 19th 2015. Please click on the picture below and vote for Motopsyco to be eligible for this grant program.
People keep doing a repeated search for, “four turns out from the seating of fuel screw of keihin 4 stroke carburetor do get more mileage in motorbikes.” The answer to this is no. The mixture screw should be correctly called the idle mixture screw, as it only controls the air/fuel ratio at idle. This screw should only be adjusted as needed to correct the idling of your engine & the very beginning of the transition off of the idle stop. And even then all other factors affecting your engine, such as spark & air should be checked & corrected first. Normally the only reason you would turn the mixture screw out that far, would be on a high performance engine that has been re-jetted for maximum power. Of course an engine like that gets the minimum fuel mileage.
On a stock engine if you turn the mixture screws out 4 turns you will develop drivability problems, and there will be an increased risk of engine failure due to overheating caused by an excessively lean mixture at idle. The other problem is that with the screws that loose is that you run the risk of them vibrating out and leaving you stranded. Plus your gas mileage will probably go down due to the way you have to twist the throttle to compensate for the drivability problems.
Since this is a popular topic amongst those who commute by motorcycle, sometime soon I will do a post on how to maximize fuel economy. Except for basic maintenance none of it will involve any work on the carburetor.