More About Vintage Motorcycle Drum Brakes

In my recent post Twin Leading Shoe Drum Brakes, I went over the basics of servicing a set of front brakes from an 81 Honda CM400E, & while I feel that it was a decent article from a how to standpoint, it was pointed out to me that someone who was completely new to the world of vintage motorcycle or do it yourself mechanics might not fully understand that I was trying to convey so I thought that it would be a good idea to go over the basics of the different type of vintage motorcycle drum brakes. For the purpose of this we will examine internal expanding shoe brakes, there are some ancient motorcycles & some minibikes that use a completely different drum brake style with an external brake band around the outside of the drum and I’m not going into that here unless you give me evidence of overwhelming popular need for explanations of external band brakes. Below you will find a few illustrations along with some brief explanations of mechanically actuated single leading shoe & twin leading shoe vintage motorcycle brakes. Just for grins I’ll show you an exploded illustration of a four leading shoe drum brake at the end of this post.

First let’s examine the single leading shoe drum brake. This is the type that you are most likely to encounter on motorcycles and atvs that utilize drum brakes at one end or the other. In fact there are still some lower end bikes that still use this system today. It is simple & it works.

<single leading shoe brake motopsyco.com>

When the brake arm is moved the brake cam pivots pressing the shoes into the drum generating friction to stop the wheel from turning. You may have noticed that I have the shoes marked leading and trailing and here is why. with the drum rotating in a clockwise direction the bottom shoe is pushed away from the brake cam by the rotating drum thus forcing it against the brake pivot post and the drum with greater force. The front or leading edge of the brake shoe is the first part of the shoe that the rotating drum passes over as it turns whereas the trailing edge is the last edge of the friction pad in the path of drum rotation. The top shoe in this illustration is labeled the trailing shoe because the trailing edge of the shoe is forced up into the drum first. Because it is not being pushed into a fixed pivot point by the rotation of the drum, the force generated tends to push it back towards the brake cam instead of  pushing it more tightly into the drum. This means that the trailing shoe generates less stopping force than the leading shoe. There are a few advantages to this design with simplicity & reliability being at the top of the list. Another huge advantage to this design is that when you reverse the direction of wheel rotation, the trailing shoe becomes the leading shoe & the leading shoe becomes the trailing shoe. Why is this an advantage you may ask? Simple you get equal braking force whether you are going forward or reverse. While this is not that big a deal on a motorcycle it’s very important on vehicles such as atvs, tractors etc. that have reverse gears and travel backwards under power.

Up next let me throw up an illustration that I created of a simple twin leading shoe brake.

<TLS brakes illustrated motopsyco.com>

You will notice that there are still two brake shoes inside the drum but now there are two brake cams, two pivot posts, & two brake actuating arms joined together with a linkage. When the brake arms are moved it raising the leading edge of both shoes into the brake drum. Remember the advantages that the leading brake shoe has in stopping force that I told you about earlier? Now both brakes shoes are leading shoes giving you the maximum amount of friction possible from a drum brake design. This is the advantage to this design, increased stopping power. The disadvantages are that it is slightly more complicated and that it requires careful adjustment of the brake arm linkage to ensure that both shoes contact the drum at the same time. If the shoes do not open at an equal rate then only one of them will touch the drum under use giving you even less stopping power than a single leading shoe brake system. Also if you reverse the rotation of the wheel the twin leading shoes become twin trailing shoes, giving a reduced stopping power in reverse. On a motorcycle this doesn’t really matter though.

In the blog post about twin leading shoe drum brake I stated that they were the ultimate development in vintage motorcycle drum brakes, well that is almost true. There is a system that is capable of generating even more stopping force than that, the four leading shoe drum brake that was used in some exotic racing machinery. I shall not go into a huge amount of detail here except to say it is basically a pair of twin leading shoe systems mounted back to back on a common hub. I cribbed the image below from TheVincent.com.

<4 leading shoe motorcycle brakes>

If you are fortunate enough to own such a fine machine as an antique, Vincent, Brough, or MV Augusta racebike that uses 4 leading shoe brakes and you (or your staff mechanic) are not able to get it sorted properly, then load it into the enclosed trailer that you keep attached to your Land Rover, or Cayenne and have your butler deliver it to me along with a sackful of large unmarked bills and I will be glad to set it up for you, including a small amount of testing at a local track to make sure they are operating correctly.


A Motorcycle Blog Celebration!

Hi there,
My name is Floyd Finch III and I am the owner of this little motorcycle blog. Motorcycling has been one of two passions that I have consistently kept in my life since my childhood.

<The Motopsyco>

I believe every biker should have a little bit of outlaw in them.

At sometime early this morning in the hours just after midnight on March 23rd 2015 this little blog of mine passed the 100,000 all-time page view mark. While this may not seem all that significant compared to some of the mega-bloggers out there it makes me very happy. Hearing from readers in the comment sections or by email is a joy as well and hopefully I have helped a couple of people out.


Since founding this blog in February of 2011, my goal has been to help as many of my fellow motorcycling do it yourselfer home mechanics as I can, and to share the experiences that I have with those not fortunate enough to get out & do even the few shows & events that I take in.


Of course let’s not forget the occasional product reviews as well, I really am honest in my opinions of the products reviewed here whether for good or bad. This will continue to be my policy in the years to come.

This little motorcycle blog is beginning to exceed anything I dreamed of when I first started it. Although it was started as a hobby a good informative blog does incur some serious expenses so you may notice a few ads around the site. You know you’re going to shop online sooner or later and if you click on an ad here to start it would be a great boost for the blog without costing you a dime that you weren’t going to spend already!

Every year since 2011 the readership of this blog has shown serious solid growth, starting in 2011 I had 1982 page views, 2012 brought in 12,173 views, a huge jump in 2013 pushed readership up to 31,706 for the year, in 2014 there were 43,227 page views on this blog. My goal for this year is to push that number up to over 50,000 for the year with more to come in the years afterward.
So this is my most sincere & hearty thanks to all of the readers, and to those of you who have made products available for review. At this time I would like to encourage everyone who would like to keep up with all that is happening around here and to always have notification of my latest tutorials, tips & reviews please scroll down and sign up for my email list at the very bottom of the page below.
If you have a question that you would like to ask me directly or a product that you would like to have reviewed or if you are interested in advertising on this site please shoot me a line to: motopsyco@motopsyco.com
Thank you,
Floyd Finch III aka Motopsyco

<the man the myth the legend motopsyco>

Twin Leading Shoe Motorcycle Brakes Explained

Since I first posted this a couple of days ago it was pointed out to me that this article was not quite as beginner friendly as my normal do it yourself articles about explaining WHY you do some things. So if you don’t know the difference between a single leading shoe brake & a twin leading shoe brake or even how to identify which one you have or just to learn how they work please go to More About Vintage Motorcycle Drum Brakes and then come back to this page.

Twin leading shoe drum brakes are the ultimate development of motorcycle drum brakes. By using two lever arms and two cams to raise the leading edge of the brake shoes into the rotating drum they were able to generate a greater stopping force than a standard drum brake which pushes the leading edge of one brake shoe & the trailing edge of the other shoe into the drum. It was discovered early on that the shoe with the leading edge being forced into the drum generated much more friction than the trailing shoe. So until the development of powerful reliable disc brakes in the 1970s the twin leading shoe motorcycle brakes were pretty much the ultimate performance set up. Even after their performance was eclipsed by hydraulic disc brakes they were still considered adequate for small & medium sized machines right up into the early 1980s. Today there are still a few low end bikes fitted with drum brakes on the rear, but they are of the standard type, as even the low buck machines rely on powerful front discs for most of their stopping power. As far as I know today twin leading shoe motorcycle brakes are only found on antique, vintage, and custom bikes.

As always don’t forget that you can enlarge any picture on this blog by clicking on it.

<vin<cm400 twin leading shoe brakes>

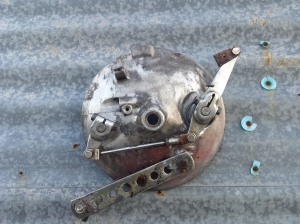
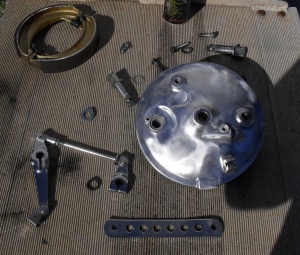
What we are going to look at today is an example of what may be the last of the of the factory installed twin leading shoe motorcycle brakes. The nasty cruddy looking part you see above is from an 81 Honda CM400E. The “E” stood for economy. The CB & CM variants of this bike got disc brakes on the front. By 1981 these were considered obsolete and were used on this model as a bit of parts bin engineering to meet a price point. This particular front wheel & brake backing plate had been painted at least 3 times in different colors What you see in the picture above is after using some aircraft peeler & some light soda blasting to clean it off a bit. Then I disassembled it and and dropped all of the chrome bits in the Metal Rescue tub and put the rest of it in the parts washer before wire brushing the backing plate. Please note, if you are doing a restoration you do not want to wire brush aluminum parts like this but this one is going on a rough edged custom and the brushed finish will be perfect for it.

<vintage Honda twin leading shoe brakes>

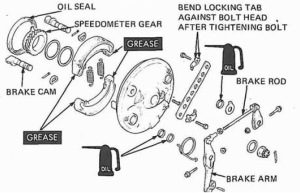
This is an exploded view giving you a look at the typical parts of a front hub using this style of brake.

<old motorcycle twin leading shoe brakes>

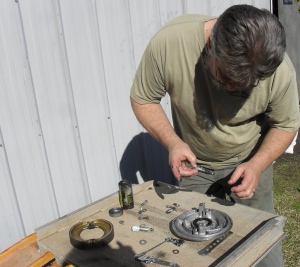
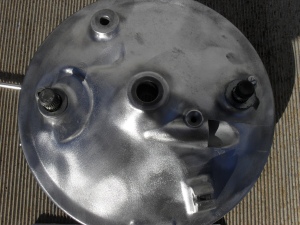
On this one I will not be reinstalling the speedometer gear as my plans call for a custom electronic speedometer. The first thing to do is apply a light coating of high quality grease to the shafts of the brake cams and push them into the backing plates.

<old twin leading shoe brakes>

Second part is to put the clean, lightly oiled felt seals into place as illustrated below. While I am sure there is probably a specified oil for this I’ve always just used whatever was handy in my oil can and have never had any trouble. That being said I am not responsible for any trouble you may have if you do not research and use the factory recommended oil.

<vintage Honda twin leading shoe brakes>

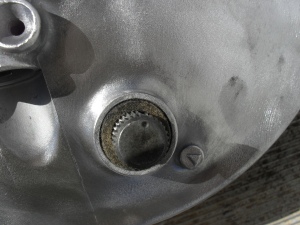
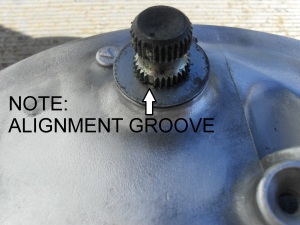
Third step here is to slide the washer with the wear indicator tab  back down onto the brake cam over the felt on the side that you removed it from which should have a pointer cast into it like in the picture below. This little part has splines and has an alignment groove so that it will only fit one way. It it doesn’t just just slide back on you have it turned the wrong way and need to move it around the until the wide spline lines up with the wide groove.

<vintage Honda twin leading shoe brakes>

A plain thin washer slides down to cover the felt on the other side of the axle hole.

<vintage Honda twin leading shoe brakes>

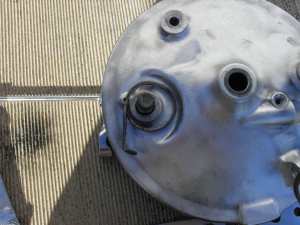
The external return spring is dropped into place next.

<vintage Honda twin leading shoe brakes>

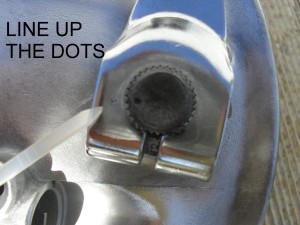
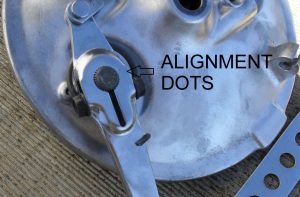
On of the really nice thing about most old Japanese bikes are the presence of dots on the brake cams & arms to help you line them up correctly the first time.

<vintage Honda twin leading shoe brakes>

Put the arms on one at the time aligning the dots. I normally have brake rod loosely installed between the two arms before assembly just because I think it is easier than connecting the two brake arms afterward. If it is easier for you to do it the other way then that is fine too.

<vintage Honda twin leading shoe brakes>

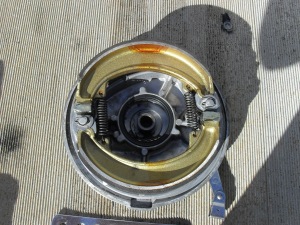
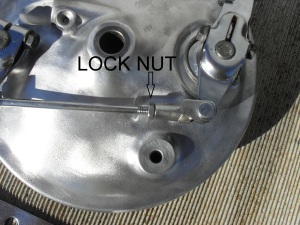
Do not tighten the lock nut on the brake arm yet! Install the brake shoes first!

<vintage Honda twin leading shoe brakes>

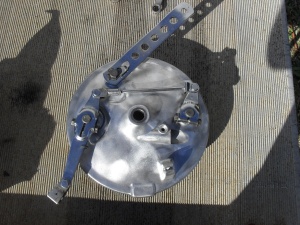
Adjust the brake rod as necessary to get both shoes to move at as close to the exact same time as possible. If you are a real demanding performance nut build yourself a jig and use a couple of dial indicators to ensure that the pads  are moving together exactly. For the vast majority of us eye-balling it will work fine and any teeny little mismatch that occurs will be wiped out within a couple of stops

<vintage Honda twin leading shoe brakes>

Now you can tighten down that lock nut. Here’s a little video to show you how the cams move the shoes when the brakes are actuated.

Now its time to get to work on the rest of the front wheel so that it can be installed on the front of Project wAmmo!

<vintage Honda twin leading shoe brakes>

Peace Y’all