Tha Misfit! A Psyco Road Test & Motorcycle Review!

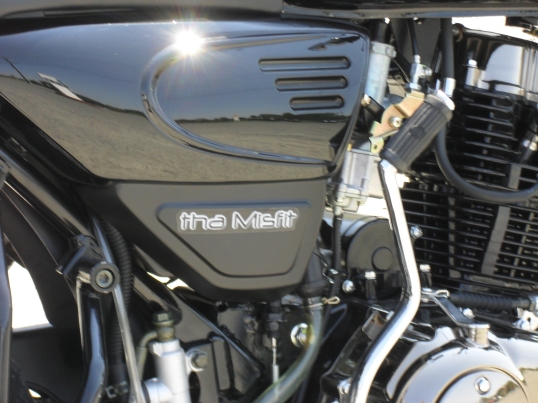
Cleveland Cyclewerks Misfit sidecover

Tha Misfit!

I first read about Tha Misfit a few months ago in my favorite print motorcycle magazine, and immediately found it to be intriguing. It has a very old school standard/cafe racer look, and is a super lightweight with a single cylinder 250cc engine. At the time I just filed it away in the back of my mind as being something cool to look at should I ever happen to come across a real one, then I promptly forgot about it.
Later as I trolled the internet looking for good things to point out to you, I ran across the Cleveland Cyclewerks website, and decided to post it as a website of the month just because I liked the website and the company’s edgy attitude. Of course I had to see where the nearest dealer was and it turned out to be Carolina Fun Machines on East Independence Blvd. in Matthews N.C. a mere hour and a half away. So I emailed the owners and Mr. Tim Juntgen & I corresponded briefly setting up a demo ride for this past Saturday.
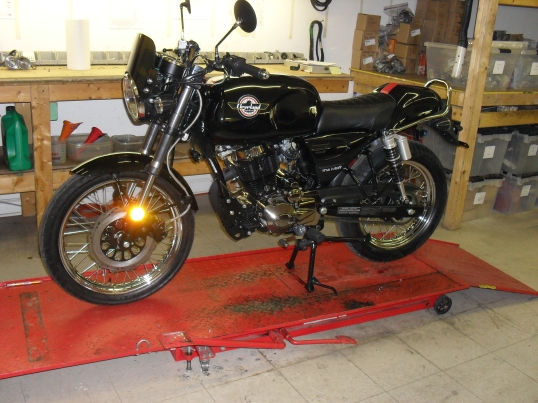
When I arrived at the place they were busy but Tim took the time to show me around the place and there in the clean well lit service area was a freshly serviced Misfit sitting on a lift ready to go out for a ride.

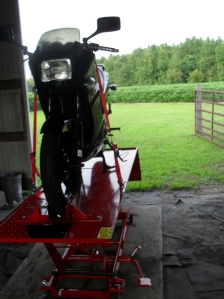
Cleveland Cyclewerks Misfit on Harbor Freight motorcycle lift

All serviced up and ready to ride!

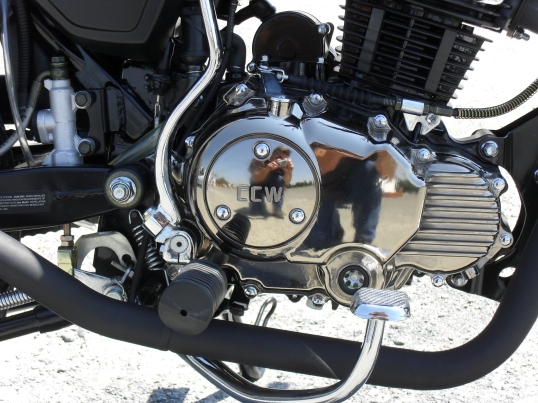
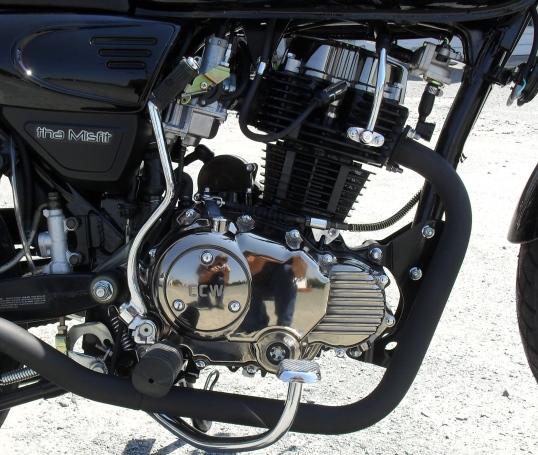
The first thing that struck me was the stunning appearance of the little machine, the fit and finish was much better than I expected especially on the Lifan engine. I have repaired a few machines (mostly atv’s) with these engines, and while the engine was never the problem the appearance of them was unfinished and cheap looking. This engine looked as good as it ran. In fact the outer covers have some of the best looking black chrome I have ever seen.

cleveland cyclewerks black chrome engine cover

Cleveland Cyclewerks black chrome engine cover

Mr. Juntgen brought it around front and went over it with me and my wife snapped some pictures of the two misfits together.

Floyd Finch motopsyco.com Cleveland Cyclewerks Misfit

the 2 coolest Misfits you’ll ever meet!

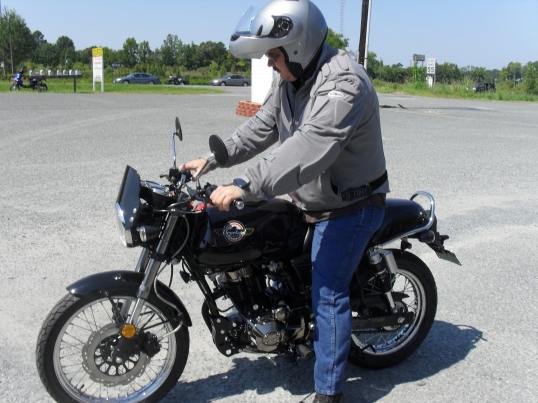
For you to get a better frame of reference as to the size of this motorcycle I am 5’10” tall with a 29″ inseam and weigh 230 pounds. With my legs fully extended I was just able to straddle the bike while having both feet flat on the ground. One thing that was immediately comforting was that the suspension sagged, but no more than any other “normal” production motorcycle when I climbed aboard. That was definitely a sign of good things to come.

cleveland cyclewerks misfit starter button

Starting Tha Misfit

Now my own Ninja 250 is a really lightweight motorcycle, but it feels much heavier than this bike. When I say lightweight I don’t mean like a current 250 street bike from the big four. Think early 70’s XL175 for comparison purposes and you will be right on the money. Since the engine is basically a modernized XL clone it just adds to the great vintage illusion. It also has two of the handiest vintage features that seem to have disappeared from most motorcycles today, a fuel gauge and a centerstand!

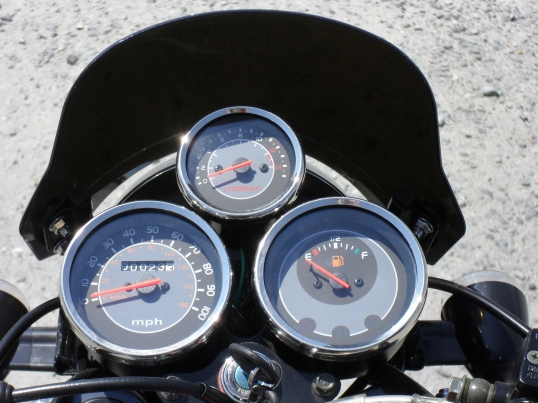
motopsyco.com Cleveland Cyclewerks Misfit gauges

Tha Misfit’s instruments

As you can see from the picture above the speedo is on the left with the fuel gauge and indicator lights on the right, and the tachometer in the small pod at the top center. As a traditionalist I might prefer a the tach to be in the big pod on the right and the fuel gauge to be in the small pod, but from a functional point of view all is great, because in this style of bike, at this price I am pleasantly surprised to see a tachometer at all.

Cleveland Cyclewerks Misfit starting out.

and we’re off!

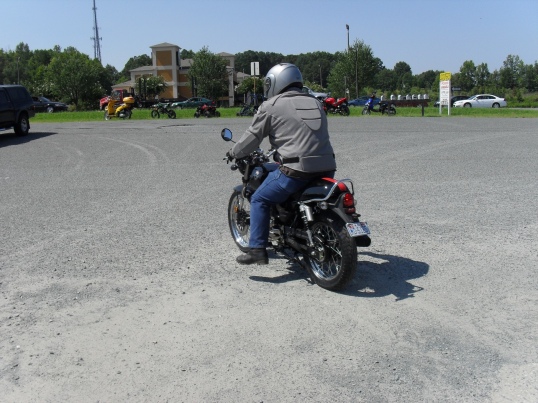
After starting the engine I took off for a few quick laps of the parking to get acquainted with the brakes and handling before heading out onto Hwy 74. Immediately I was impressed by the neutral handling which was a lot more stable than I thought it would be on such a light motorcycle. The front brake lever does have quite a bit of travel and requires you to grab it with all of your fingers for a hard stop. If you are a beginner, or just one of these unfortunate souls whom has heard that you shouldn’t use the front brake because it will throw you over the handlebars or make the front wheel slide then you need to A. buy a Misfit and learn to ride a motorcycle the right way and B. get some smarter friends. If you are a crotch rocket jockey and are used to being able to pull the rear wheel three feet off of the ground with one finger on the brakes, it aint gonna happen on this bike, sorry. You just put four fingers around the lever and pull it back for safe easy to modulate stopping power. The rear disk actually works very well and was easy to handle as well.

Cleveland Cyclewerks Fuel Tank Emblem

Cleveland Cyclewerks Gas Tank Emblem

I pulled out onto U.S. Hwy 74, a nice busy six lane between Monroe & Charlotte on a busy Saturday afternoon with nearly bumper to bumper traffic. Now this bike is no speed demon, but it is fast enough to stay abreast of the 65 mph traffic I encountered. When I crossed the overpass over I-485 the upside down fork and piggyback reservoir shocks just soaked up the bumps in a most impressive manner. In fact the suspension did a great job of handling all of the bumps that I encountered with none of the bouncing that I expected from such a light motorcycle. Swinging off of 74 to ride some of the twisty backroads this little bike came into its own. The handling is terrific and totally natural, just point it where you want to go and ride. You won’t necessarily be going that fast but you sure will feel good at the speed you are going. Just remember to keep the little engine on the boil, it does not require manic rpm to make forward progress like a 250 sportbike but it does let you know when it’s not spinning fast enough. 55 mph was never this much fun on anything else, especially around 35 mph curves. 😉 This bike is a throwback to a time when motorcycling was simpler and a throbbing single cylinder engine and a twisty road were all you needed for a good time.

Cleveland Cyclewerks 250 Lifan Engine

a classic looking single cylinder motorcycle engine.

The light flickable handling, flexible powerplant and great economy of operation also make this a great machine for dodging through traffic on your daily commute to your job. Plus you can pretend you are heading out to the Ace Café while dodging potholes, and cellphone addicted car drivers, because this bike has the right look and feel to let you indulge your inner Walter Mitty. After all even commuting by motorcycle is still way more fun than driving a car.
There are a few little nits to pick. The front brake lever could stand to have a little less travel, and the turn signal, neutral and high beam indicators are nearly impossible to see in bright sunlight. My right leg was resting on the kickstarter while riding, this did not really bother me but it might bother some people.

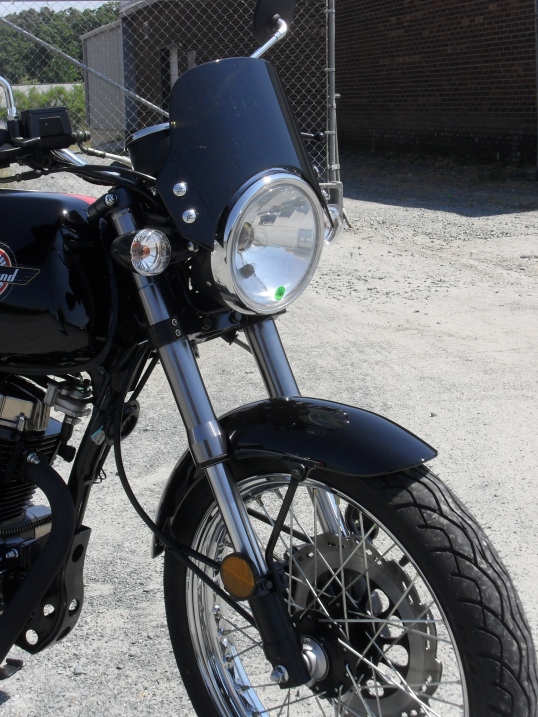
Cleveland Cyclewerks Forks and Flyscreen

Upside down forks & a flyscreen, how can you possibly beat that at this price?

Speaking of the kickstarter since I am an old guy with an artificial knee I just had to see how hard the bike was to start with it. At least when it is warm, with a little throttle it fired right up on the first kick. I bet this engine would respond well to the same modifications used to perk up old XR/XL Hondas. You still wouldn’t have a ton up special but with the right work I bet you could actually make it snarl a little bit.

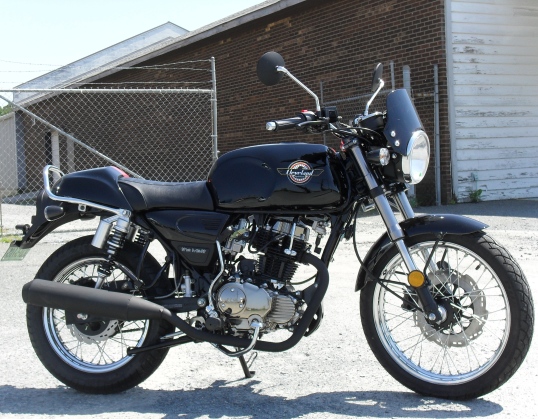
Cleveland Cyclewerks Misfit left side

Cleveland Cyclewerks Misfit left side

In summary what we have here is a really cool looking little bike that is not too small. It is very light and handles well. The build quality is just as good or better than anything else new in it’s price range. And it would be a fantastic commuter for anyone looking to save some dough while still looking Rebel Without a Cause cool doing it. It’s not perfect but it is a barrel of fun. If you are a rank beginner, an older re-entry rider, or just looking to get a great value for your dollar, go for it. You’ll be glad you did.

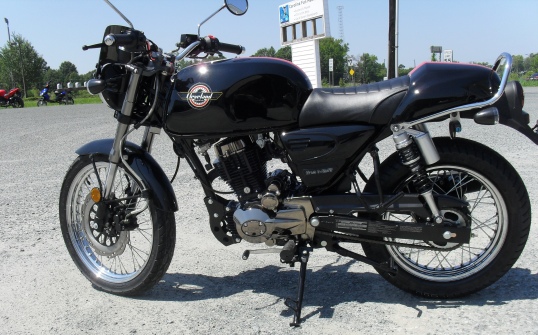
Cleveland Cyclewerks Misfit right side

Cleveland Cyclewerks Misfit right side

Peace Y’all
Floyd
Review of the Harbor Freight Motorcycle Lift Table

I’ve been wanting one of these for a long time. For years I used a wooden table or a chain hoist to lift motorcycles up for repairs when I just could not bear to get down on the floor to work on them. As I’ve gotten older the combination of a weaker back and a fatter wallet has made this purchase a lot easier to justify. So when the September issue of my favorite motorcycle magazine arrived on my Kindle with a coupon to purchase this lift for $299 I bought a print copy ASAP & clipped the coupon.

Ironically enough it took me 2 weeks to purchase this from either of the 2 nearby Harbor Freight stores. Unfortunately this led to my first real negative experience with a company that I have enjoyed doing business with for years. Last Saturday I went to my closest store in Florence S.C. and they were out of stock, so I called the store in Dillon an hour drive from here and they were also out, but told me they were expecting a shipment on Thursday. Yesterday, I was in Florence and they were still out, so I called the Dillon store and gave them the item number and was informed they had some in stock. So I gassed up my van and rolled up the interstate to that store, imagine my shock when I handed the clerk my coupon and was told that they were out of stock. When I mentioned that I had just called and had been informed that they were in stock. Then she went back to the computer and “found” one for me. Probably just a human error but if you are using a coupon to buy one I would verify stock in your nearest store before driving very far to pick one up. Don’t mention the coupon until you get there.

The shipping guys helped me load it in my van with the forklift. This worked out for me okay but if I had to do it again I would have taken a trailer for easier loading and unloading. If you have a long bed pickup truck that’s the best thing to use.

lift in crate in my Astro van

lift in crate in my Astro van

Since the completed crate was far too large and heavy for my beautiful assistant and I to remove from the van I simply opened where it was and slid the contents out into the door of my barn.

motorcycle lift crate open

motorcycle lift crate open

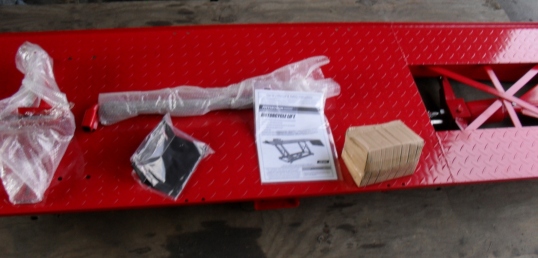
I am not going to do a step by step walk through of the assembly because in all honesty the instructions that come with it are perfectly adequate to help you get it together. I will touch on a couple of things that I think you should know about. First I got all of the parts laid out and read the instructions from beginning to end.

Harbor Freight Motorcycle Lift Table w/ parts & instructions

Harbor Freight Motorcycle Lift Table w/ parts & instructions

Harbor Freight Motorcycle Lift Table oil fill plug

Harbor Freight Motorcycle Lift Table oil fill plug

One of the things that you are instructed to do is to check the level of oil in the lift cylinder. The fill plug is in the location shown in the picture below.

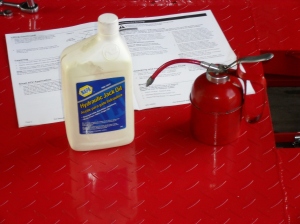
Be sure to use a decent grade of jack oil. If you do not have some at home go ahead and pick some up at Harbor Freight while you are there. The best way to fill a jack cylinder like this is with a squirt can. Mine turned out to need a pint of oil to fill it.

oil I used for my Harbor Freight Motorcycle Lift Table

oil I used for my Harbor Freight Motorcycle Lift Table

The instructions seem to want you to install all of the parts and accessories before you check the oil and raise the lift. I personally installed the wheels, then filled up the jack and raised the table all the way up to install the wheel vise, tie downs, & the ramp. You should do whatever seems safest to you.

Installing accessories on my Harbor Freight Motorcycle Lift Table

Installing accessories on my Harbor Freight Motorcycle Lift Table

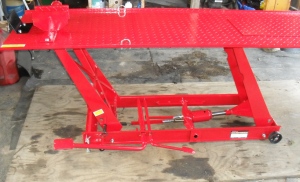
Here it is altogether.

my fully assembled Harbor Freight Motorcycle Lift Table

my fully assembled Harbor Freight Motorcycle Lift Table

  After double checking the assembly of the table I lowered it back down and drove the Minimum Ninja up on it so that it could receive some long overdue TLC.

Look Y'all it's the Minimum Ninja!

Look Y’all it’s the Minimum Ninja!

Yesterday after strapping the bike down I raised the table to its maximum height and left the motorcycle sitting on it with the safety bar properly installed. When I went back this afternoon it was still all the way up. A lot of people criticize the design of the wheel vise but I think that it is okay. Unlike the larger vises I am certain that one can perform most fork and front wheel service without removing it. When I was a dealership mechanic most of the time the wheel vises from our heavy duty air lifts spent most of their time lying under the workbenches because they got in the way. Plus my bike still has a centerstand 🙂

Kawasaki Ninja 250 on my Harbor Freight Motorcycle Lift Table

Kawasaki Ninja 250 on my Harbor Freight Motorcycle Lift Table

Don’t forget to recycle the crate! It actually has a couple of large pieces of usable plywood, I know that you can always find a use for a good piece of wood around the house or shop.

Recycle this crate you know you want to.

Recycle this crate you know you want to.

This will be a long term review. Over time I will publish new updates or simply update this post as I get some miles and years put on this thing.

As for the Minimum Ninja, it will receive its own pages here covering the updates and repairs as I make them.

Peace Y’all

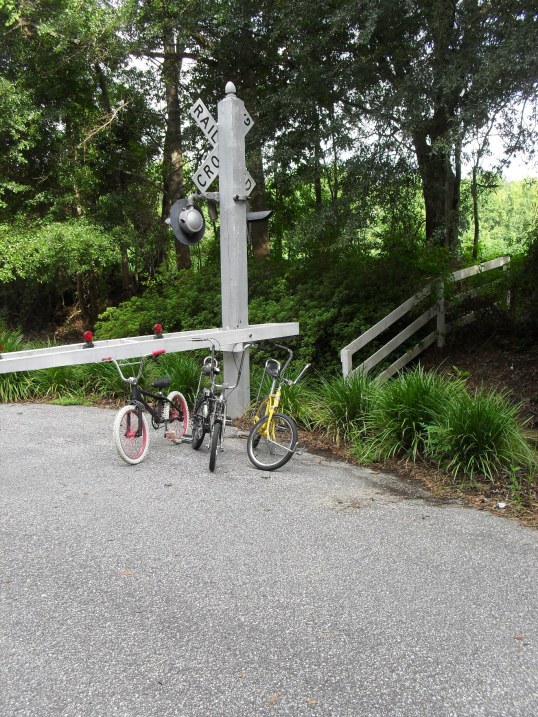
Riding Kiddie Bikes on the Rail Trail in Florence S.C.

At the Ebenezer Road end of the trail.

At the Ebenezer Road end of the trail.

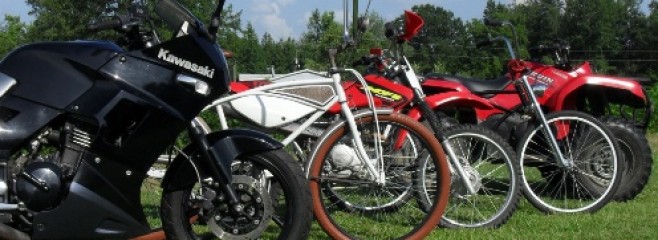
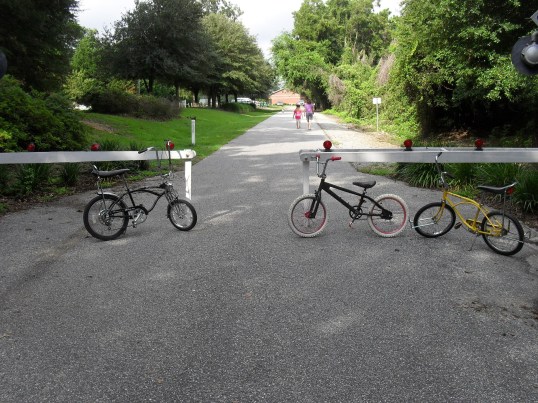
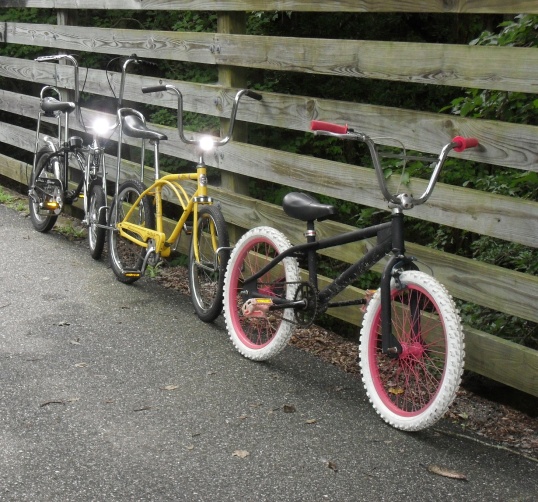
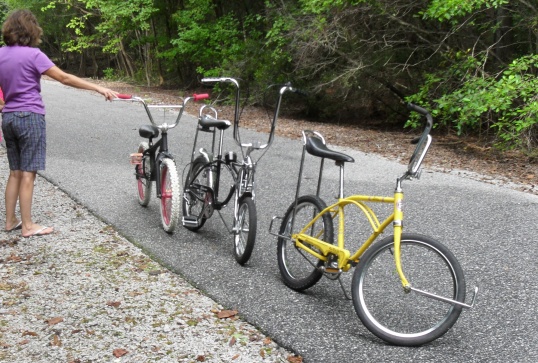
A few weeks ago our granddaughter expressed an interest in learning to ride a bicycle without training wheels. Since the kiddie bike she had already was way to small for her, I took an old Mongoose BMX frame set I had hanging on the wall in my shop, swapped the rear wheel out for one with a coaster brake, and then threw it together with plenty of fresh grease, flat black & pink paint to create the girly ratrod in these pics. The mint original Black Friday Krate shown is one I purchased in Charlotte earlier this year. My wife is riding the yellow Ross Polo Bike Jr. that has its original paint & chrome, but has some typical period custom pieces added such as the banana seat and the bumpers. The only thing I’ve replaced on it are the rear tire & chain.

We promised her that once she learned to ride well we would take her with us one Saturday morning, so with my beloved wife’s patient coaching she practiced until she could start, ride, & stop by herself without falling down. Of course since she was riding a 20″ bike we decided that we should too.

Left to right, Black Friday Krate, Mongoose Sniper, & Ross Polo Bike Jr.

Left to right, Black Friday Krate, Mongoose Sniper, & Ross Polo Bike Jr.

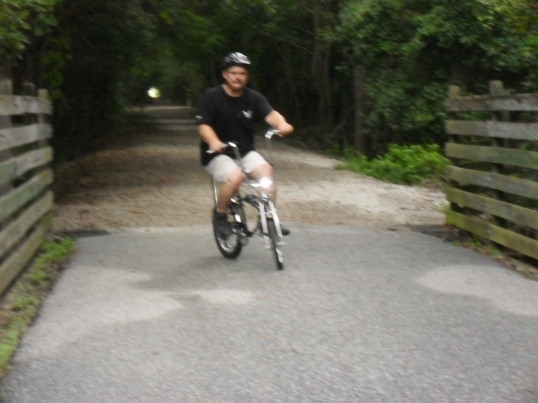
It was fun, of course it turns out that a 20 is almost to big for the kid, just the perfect size for my wife, and ridiculous looking with my big old butt sitting on it, especially the Krate with it’s little tiny front tire.

Here we have a large man on a small bicycle! Having loads of fun too.

Here we have a large man on a small bicycle! Having loads of fun too.

When putting around on these little cruisers, you can forget proper leg extension, cadence, etc. Just relax and enjoy the ride. We put in at the trailhead at the Bicycle World bike shop on Palmetto St. in Florence ( a big thanks for allowing people to park there btw ), crossed the bridge over Jefferies Creek, and turned left to ride the smooth pavement section of the trail up to Ebenezer Road, where we turned around and came back to the end of the pavement that you see above before heading back to the van to take her home in time for her Karate lesson. There is just the slightest downhill grade from Ebenezer back to the creek so I took advantage of it to try out a speed run on the Krate. At about 18m.p.h. on the speedo in third gear the front end starts to bounce a bit, push it on up to around an indicated 22 and a speed wobble sets in too. ( maybe because I weigh more than 200 pounds, not necessarily a fault of the bike ) Plus even with dual calipers the rear brake only is meant for posing not for riding like a bat out of hell. It was still FUN though!

for some reason this strange little woman keeps following me around & taking my picture, she must be a stalker ;)

for some reason this strange little woman keeps following me around & taking my picture, she must be a stalker 😉

Here are some pics of the bikes leaning up against the bridge.

Jefferies Creek Bridge, Florence, S.C. bicycle trail

Jefferies Creek Bridge, Florence, S.C. bicycle trail

Some wangster had been down on the trail tagging a little bit, normally I don’t mind graffiti art in the right (read urban/industrial) setting but out in the middle of the woods? Give me a break. Besides if all I could paint was ugly shit like we saw that day I’d be ashamed to pick up a spray can.

Vintage Kustom Ross, Mint Schwinn BFK, & Custom Mongoose rat bmx

Vintage Kustom Ross, Mint Schwinn BFK, & Custom Mongoose rat bmx

To cap off a terrific morning after dropping the little one off safely at home we headed over to Creek Ratz, and sat on the deck and had a nice romantic lunch served up by a pleasant young lady while we watched the wildlife in the pond behind us.

Peace Y’all

Heron on lakeshore behind Creek Ratz

Heron on lakeshore behind Creek Ratz

Cleveland Cyclewerks My August Website of the Month

I just love this picture and the text it contains….

250 cc cafe racer

one cool 250cc cafe racer

Normally I don’t get too excited about new American motorcycle start ups, after all we’ve been down that road before with Indian, Excelsior Henderson, etc. Sure Victory made it but they have the power of the colossal Polaris corporation behind them. Plus they specialize in exactly the kind of motorcycle that the above photo from Cleveland Cyclewerks is talking about.

My current motorcycle of choice is a 250 Ninja that my wife purchased for me as a Christmas gift a few years ago when I was ready to start back riding after a gnarly bone crushing crash. I was sure that it if I kept riding that it would be gone soon in favor of a larger & more powerful machine. Guess what? It has turned out to be a fantastic ride that I may keep forever. Plus it has opened my eyes to just how much sense motorbikes in this class make. Yet they are still capable of providing one with all of the thrills and chills found in a larger motorcycle.

Please keep in mind that I have never ridden any of their products, am not a paid endorser, nor do I have anything to gain from this. But I like their style and bravado, and I am a fan of small and quick handling motorcycles. The bikes that make sense is what their ad copy says, and in these times, this class of machine makes a lot of sense.

Of course if the fine people at Cleveland Cyclewerks feel so inclined as to set a lonely blogger up with a chance for an extended test drive, I’ll be glad to give them an honest review from the viewpoint of a rider, commuter, and small bike enthusiast.

Go check out Cleveland Cyclewerks and see if you like their style as much as I do!

Dirtbike Carb 101 Part 3 Lets Put It Back Together!

If you are just joining this class and would like to read lesson 1 it can be found here.

Here is an exploded view of the carburetor with all of the key parts labeled. Everything has been cleaned or replaced and is now ready to be re-assembled!

motorcycle carb exploded view
The red lines indicate which hole the various parts go in.

The first thing you want to do when you pull the carburetor body out of the parts washer is to take a compressed air gun or a can of spray carb cleaner and blow out all of the  holes and passages in carburetor body. In general if you spray cleaner into any port on the body it should come out somewhere else. This is to get all of the passages completely clear. Do wear some eye protection while you are doing this.

motorcycle dirtbike mixture screw, main jet & idle jet
mixture screw, main jet & idle jet

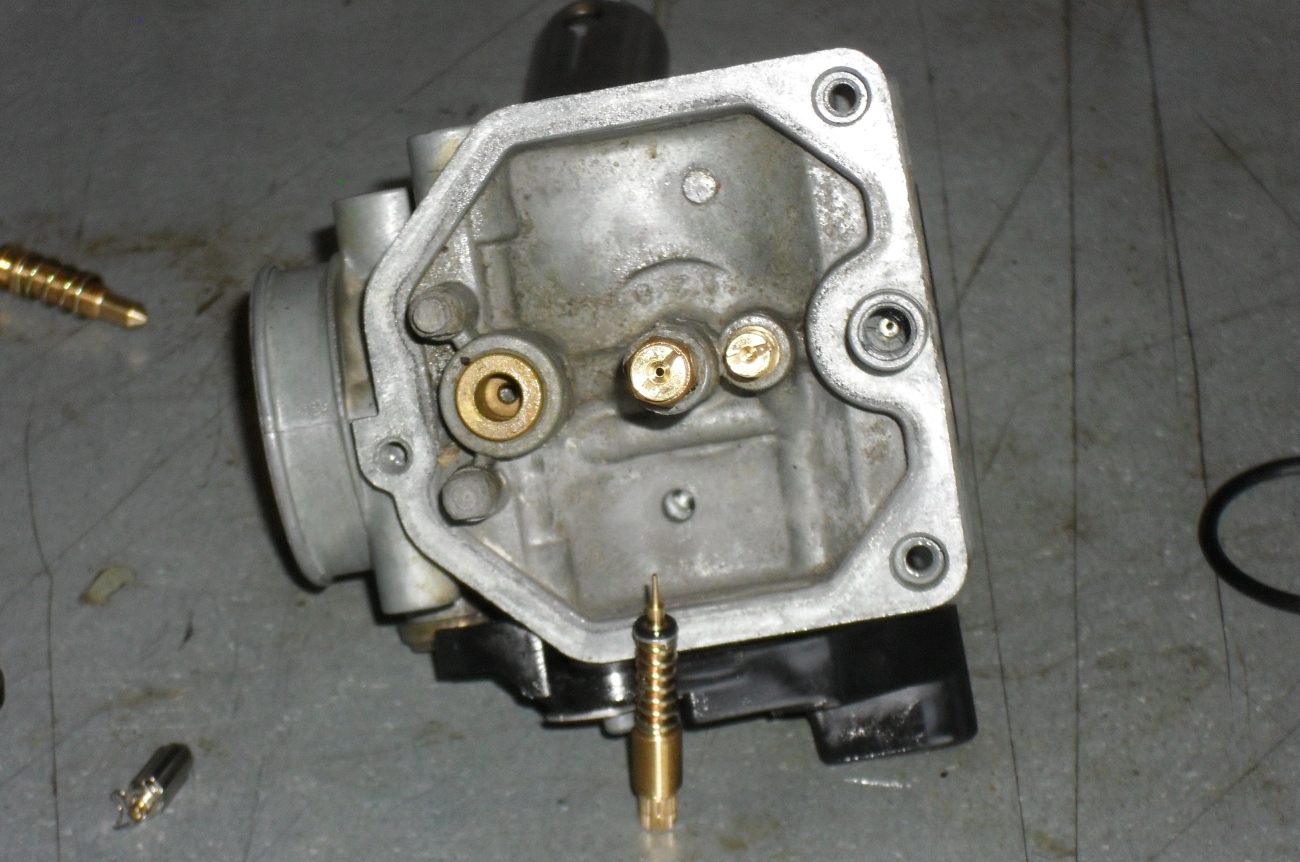
In this picture I have already re-installed the needle jet, main jet holder & jet, and the idle or slow jet as some like to call it. The mixture adjustment screw is leaning up against the carb so you can see how the spring, washer, and o-ring fit over it in that order. This screw goes into the large hole on the right side of this picture. To install it pick up the carb with one hand, and hold it upright, with your other hand take the assembled mixture screw components and place them up into the hole and turn the screw until it has engaged the threads and will stay in. Return it to the workbench and turn the screw all the way in until it just touches the bottom. Do not tighten it! Do you remember how many turns you have to back it out to reach it’s original position that it was in before you removed it? I told you to write it down in lesson 2. If not check your service manual for the initial starting position, and be prepared to tweak it a little til you get a smooth transition from idle to accelerating.

Now it is time to re-install the float. There is usually a small wire retainer over the float valve that slides over a matching tab between the floats. Holding it together place the float valve into the brass ringed hole shown on the left side of the picture above. Then you should be able to slide the retainer pin in from one side to hold it into place, like this.

Honda xr 100 carb floats installed
carburetor floats installed


Don’t forget to put the little plastic shroud back on in the same way it came off.

Normally I wish vile and unspeakable torture on people whom make the mistake of using any type of gasket sealers on any type of fuel system assembly, but there is always an exception to every rule. In this case the fit of the float bowl o-ring into its groove on the float bowl was just not good enough to hold it into place so I applied a very thin film of  a gasoline resistant, Permatex product. A small amount of Permatex 1 or similar product. Use just barely enough to hold the gasket in place. After all you don’t want it squeezing out and stopping up your nice clean carburetor do you?

dirt bike carb float bowl gasket
carburetor float bowl gasket

Of course if the gasket will stay in place by itself long enough to get the float bowl screwed back into place I never put any kind of adhesive on it. but sometimes life just doesn’t work that way.

Once you have the float bowl back on it’s time to reassemble the slide. If you are replacing the needle  aka the metering rod, be sure you put the tiny little e clip on it in the same groove that the original one was in on the old needle. Push the needle in through the hole in the center and instal the retainer as shown.

metering rod & slide
retainer clip and needle nose pliers


This picture shows the retainer installed in the slide, exact positioning is not important just be sure you don’t block the slot on the side that the throttle cable goes through.

motorcycle metering rod retainer installed
motorcycle jet needle (metering rod) retainer installed


Now go bolt the carburetor back to the engine (remove the plug from the intake first if you used one), hook up the air cleaner hoses, new gas filter etc. This is the time to be sure the air filter is clean also.

Now back to the slide it only fits into the carb one way so if it does not smoothly slide all the way to the bottom something is wrong. This shot shows how the slide has a notch for the idle speed adjustment screw.

Honda xr 100 carb slide and spring
xr100 carburetor slide and spring

Now reverse the steps from lesson one to reinstall the slide to the end of the throttle cable under the top of the carburetor and then slide it into place and tighten the cap down by hand. Guess what? It is time to re-connect the gas tank and fill it with fresh fuel. I consider installing a new fuel filter mandatory and so should you.

motorcycle fuel filter
motorcycle fuel filter on Honda XR


Once you have the engine up and running you may need to set the idle speed using the idle speed screw as indicated here.

dirtbike idle speed adjustment
XR100 idle speed adjustment screw

Let the engine warm up thoroughly for a few minutes before making any final adjustments to either the idle speed screw or the pilot mixture screw. If you need to adjust anything make changes in very small increments.

Now go have some fun!

Dirtbike Carburetor 101 Part Two!

Welcome back everyone,

At the end of the last class we ended with the carb sitting on the bench and the intake port in the head plugged to keep out dirt & small critters. Now let’s pull off the vent hoses and turn it upside down on the bench like this.

Take note of the pilot mixture adjustment screw that I have labeled here for you. I will be giving you a tip about it later in the lesson so be ready to refer back to this picture if you need to. Please remember these are not in the same place on all carburetors. I have seen them on the top and on the side depending upon the make and model. Some late model machines have them hidden under aluminum caps to keep you from tampering with them, but if you have a real problem you can remove the caps to repair it. Just be sure to replace them especially if you have to pass emissions inspections in your state. As usual I recommend you consult your handy dandy service manual for your motorcycle just to be on the safe side, because some carbs have more than one aluminum plug and you don’t want to remove the wrong one. Trust me I know….

Of course this bike has none of those annoying issues so let’s go ahead and take the screws out of the float bowl and look inside.

EWWW!

Now I am a fairly environmentally conscious guy, I grow organic veggies, the shop that I work in is powered by solar electricity, drive reasonably efficient vehicles etc. but you will never convince me in a million years that today’s gasoline is good for the environment. Once the lead was removed there really was not that much left to improve. There is no way  fuel that will rapidly break down into this toxic and corrosive sludge as fast as the fuel made in this day and time, can possibly be good for the environment. Just think of what it is doing to your vehicles as they sit in the driveway right now.

Let me get out of rant mode and get on with the lesson; here’s a shot of it with the float removed. You should be able to push the pin out to one side with a small punch and lift the float and float needle (float valve) out of the bottom of the carb.

So when someone tells you the float is sticking this is what they are talking about. Sticking floats are usually caused by either a piece of trash getting under the point of the float valve, or if the motor has been sitting by gasoline evaporating, and gluing it into place with a coat of gunk like you see here.

In this next shot I have removed the jets and the mixture adjustment screw. Even if you have a service manual handy, before removing the mixture screw, turn it all the way in slowly and count how many turns it takes to go all the way in. Write the number down somewhere, and then remove the screw along with the spring the washer and the o-ring that are in the hole under it.

You’ll probably have to dig for the o-ring using a piece of wire or a small pick like I did above.

At this point all of the metal parts are ready for a good long soak in the parts washer or carburetor cleaner until tomorrow. In fact the longer the better. Gather up some supplies.

If you have an air compressor and a parts washer you may not need the spray carb cleaner. If you don’t have a compressor it is mandatory even with a parts washer or a dip bucket of carburetor cleaner. For this bike I did pick up a carburetor overhaul kit. If your o-rings are all still in good shape and you can get all of your jets spotless you may not need it, but it is often difficult to clean the idle jet good enough to work again even with all of the right tools. If it’s my own bike, and I am broke that week, I might chance it, cause hey it’s part of the price I pay for this hobby. If it is your bike, you are getting new parts, because if it does not work, then I would be working on it for free and that would just piss me off. You would probably be upset at me too.

Here’s a teaser shot of everything laid out on the bench after cleaning, be sure to come back for the next lesson!

exploded view!

Click here to continue this lesson!