Royal Enfield Interceptor 650 1300 Mile Review

Royal Enfield Interceptor 650
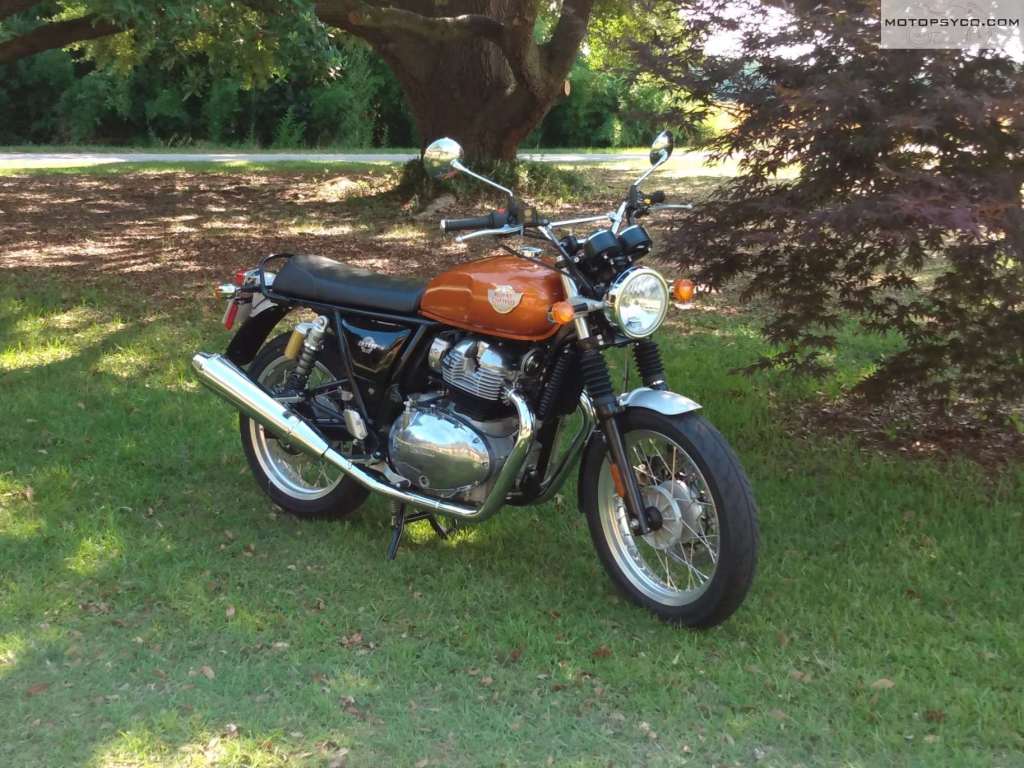
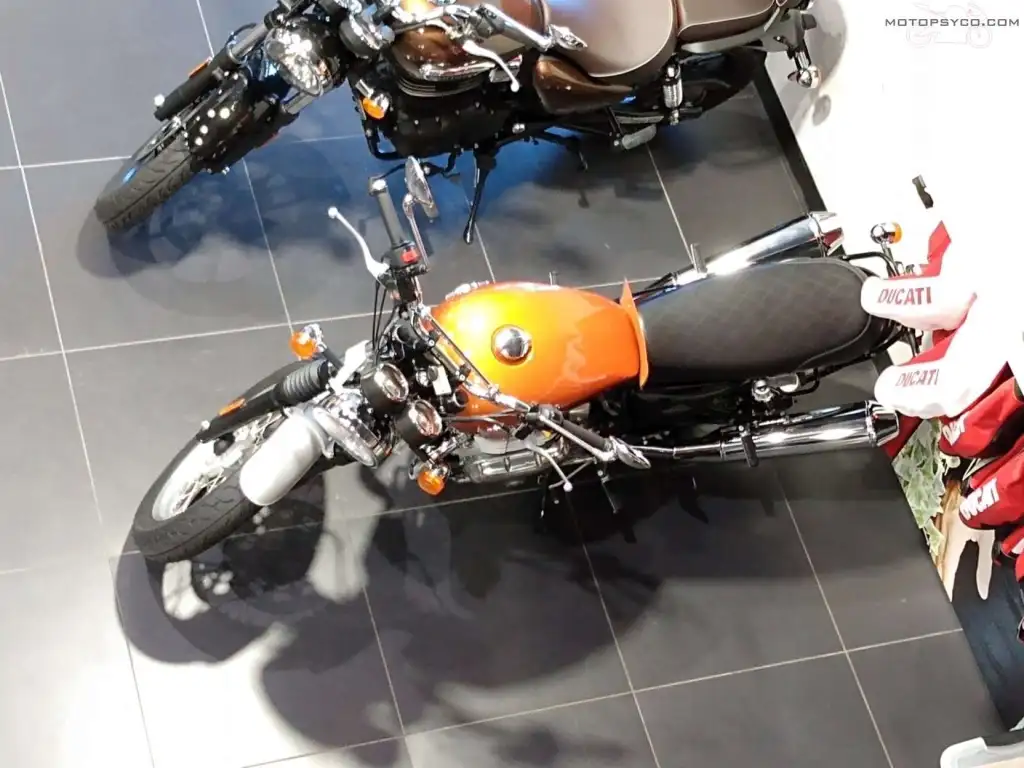
Royal Enfield Interceptor 650 in Orange Crush Livery

Let me go ahead and explain why this Review is being done at 1300 miles after I took ownership of the bike and not sooner. The owner’s manual gives a recommended break in period of 1200 miles, since I am a very particular person who believes in doing things correctly I stuck to that. Let me go ahead and say that my Royal Enfield Interceptor 650 has been utterly reliable with no electrical or mechanical malfunction whatsoever. I purchased this motorcycle this summer with my own funds and have complete freedom to praise or disparage it as I see fit. Here’s the best phrase to describe the Royal Enfield Interceptor 650, “It’s a perfectly adequate motorcycle.” This is not meant to be disparaging, for a motorcycle commuter like myself it is high praise indeed.

Royal Enfield Interceptor 650 tank
very nice paint

The only color that I wanted was the Orange Crush version so I began to search dealer’s websites and called around looking for the machine I desired. Here in the American southeast within 3-400 miles of my home all of the Orange Crush painted Royal Enfield Interceptor 650 s were sold out and no one could tell me how long it would take to get one. Motorcycles of Charlotte had the best combination of inventory and prices on hand so I decided to go and purchase whatever they had in stock and simply paint it orange when I got it home. Yes I am a good enough painter to do so and it would have had a better than factory appearance. When I told Cameron the salesperson that I was working with, what my plans were, he suggested that if I was willing to wait a month that they could get me the color that I wanted. So I put down a deposit and almost exactly a month later went back to pick up my new motorcycle. I’m thankful for Cameron & the rest of the crew at Motorcycles of Charlotte for a great new bike sales experience.

my new Royal Enfield Interceptor 650
The first time I ever laid eyes on her.

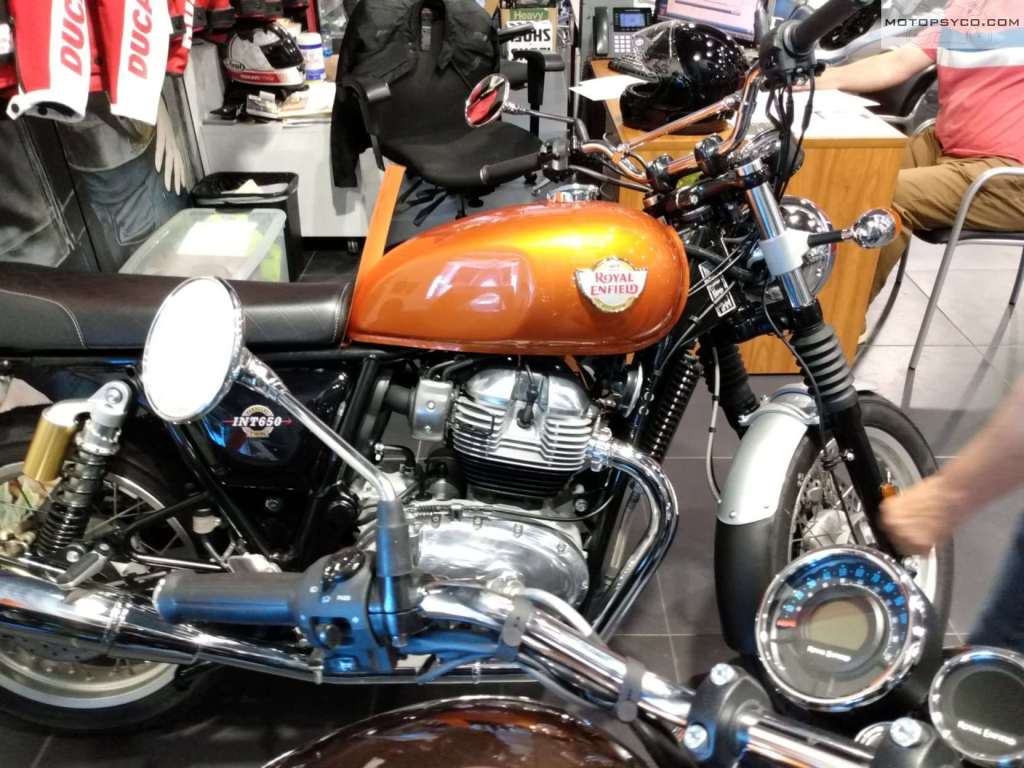
Let’s start by going over the good and bad points of the Royal Enfield Interceptor 650 with what is absolutely the best thing about it, the appearance. They got it right, this motorcycle has the classic British motorcycle look. The proportions and styling are spot on. The paint is very good, much better than the old 500 Classic Bullet that I reviewed several years ago. One reason I wanted this color combo was to get the silver wheels (all other colors come with black wheels) which I prefer. The shapes of the bodywork, engine and tank work together to recall the old Interceptor 700 from the golden age of the Britbike. In fact when I was on my way home with it on the carrier behind my truck a gentleman whose dad had owned several old Royal Enfields flagged me down so that he could take some pictures of it. He thought it was a restoration and was surprised to find out it was brand new. If you don’t want to talk to strangers about your motorcycle this is not a bike for you. The phrase perfectly adequate motorcycle does not apply to the looks of the Royal Enfield Interceptor 650. It is a rolling work of art straight out of the past, and arguably the best looking of all of the new “retro motorcycles” produced today.

Royal Enfield Interceptor 650
A great looking motorcycle!

Reading through the online forums and groups you’ll occasionally see posts about electrical problems most of which seem to be traceable to the dielectric grease on the prongs of the relays that operate the circuits of the motorcycle and are usually solved by cleaning them off. I’ve yet to experience any such problems with mine. It’s been totally reliable thus far. After I put my deposit down I went home and ordered a case of oil filters for it from a reputable vendor and some good 10w50 synthetic motorcycle oil to have on hand for when they were needed. The factory recommends getting the first service done at 300 miles. This seems a bit soon by modern standards but this is a real vintage style motorcycle with real locknut and screw valve adjusters, so I guess the factory is being extra cautious.

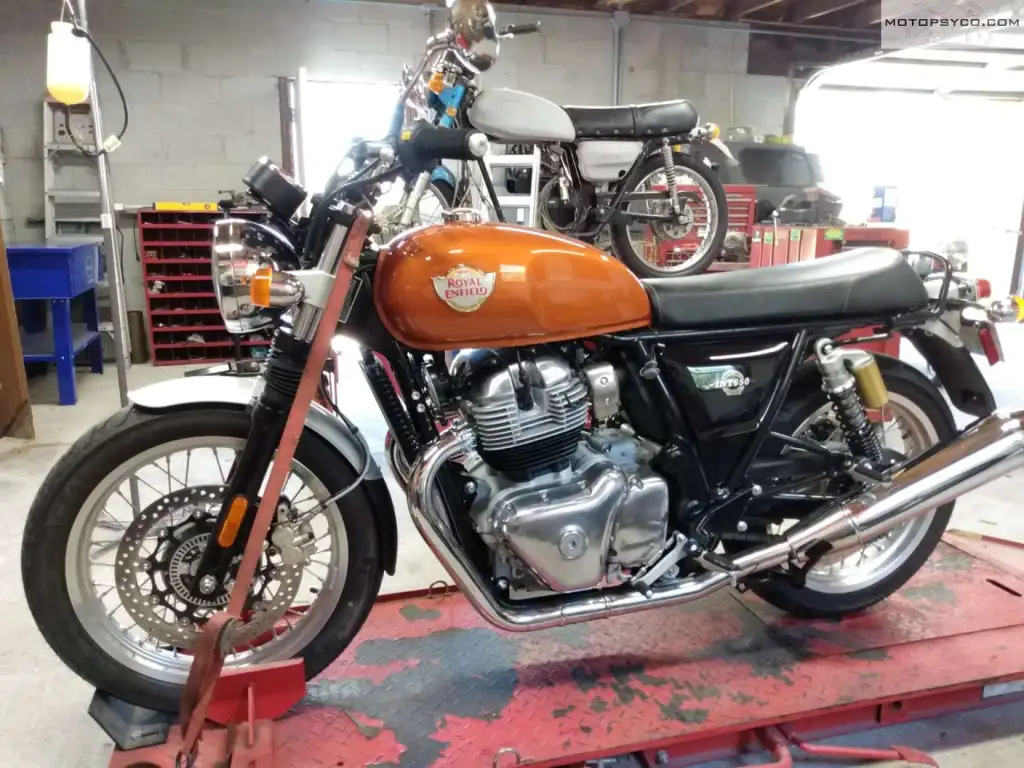
first service Royal Enfield Interceptor 650
Time for the first service!

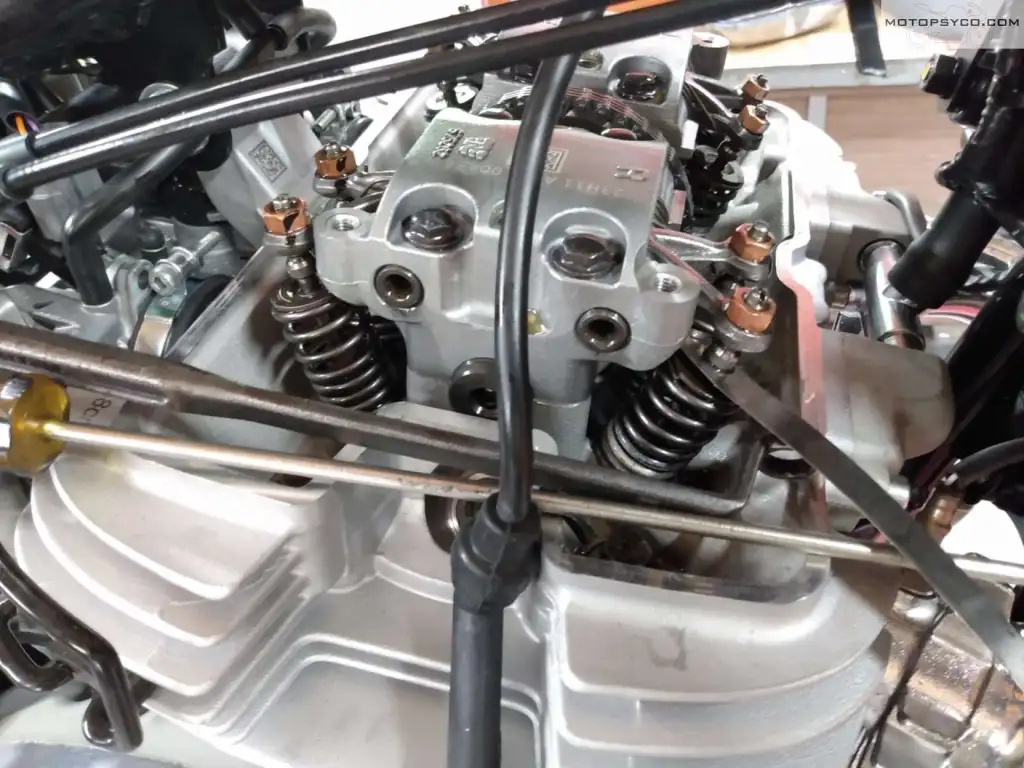
So at exactly 300.6 miles I pulled mine up on the table and gave it a full service. I live an hour and a half away from the nearest dealer so I do my own work unless it’s a warranty repair. This bike has one of the easiest valve adjustments I’ve ever performed. 2 of the exhaust tappets were a tiny bit loose so I set those to spec. I’m not going through the service here but it is easy-peasy to perform. In addition to getting a service manual, go to YouTube and look for Royal Enfield Interceptor 650 service videos by Stuart Fillingham and you’ll learn all you need to know.

Royal Enfield Interceptor 650 valve adjustment
It’s very simple to check and adjust the valves.

Handling and suspension are good. It is built to a price point and that shows some but the handling is good enough that you really can ride it as is without any modifications if you desire. If you’re planning on strafing apexes you’ll definitely want to replace the original tires. I haven’t done too much twisty riding here in the flatlands but on the few curvy roads we have, I’ve found it to be more than adequate. The springs are a little soft and the front end dives under hard braking but it has the good handling characteristics that the old British motorcycles were so famous for, thanks to a frame designed by Harris Performance in England. I may upgrade the suspension to get rid of some of the softness later but for now I am actually enjoying the relatively plush soft ride. Let’s face it if you expect sport bike handling go get a sport bike but for the rest of us this is perfectly adequate as is. The same goes for the braking system, it’s basic but the ABS works and it’s matched to the bikes power & intended mission.

1st test ride Royal Enfield Interceptor 650

Comfort is a very subjective thing on a motorcycle and what works for me may not work for you. Parts to upgrade and modify these motorcycles are available all over the internet for very reasonable prices so bear that in mind if you try one and find it uncomfortable. The seat is adequately comfortable for me & I can ride reasonable distances with no problems. I’ve not taken it on any really long trip yet but don’t foresee me having any problems. Some owners have hated the seat and changed it immediately, the factory accessory upgrade is very reasonably priced. The foot peg location is another thing a lot of people complain about. The driver’s foot pegs really are located right where you naturally try to drop your feet to the pavement when you stop. A lot of people buy foot peg relocation kits to move them and I can see doing this if you’re taller or shorter than me. With my 29 inch inseam the pegs are in a great position for me when I’m actually riding, when I stop I’ve just developed the habit of putting my feet down behind the pegs. Riding comfort trumps comfort while stopped.

Royal Enfield Interceptor 650 motopsyco

The only thing that was a real problem for me was the level of vibration felt through the handlebars. My day job is computer aided drafting and design, so I have arthritis and general repetitive motion deterioration of my hands and wrists. I installed a set of Grip Puppies over the stock grips and that helped a good bit, but I wound up replacing the handlebars and doing some other mods that I’ll tell you about later that took care of my only real complaint.

Please note the pictures used in this post are of the 100% factory stock bike on the day I brought it home and do not include any of the changes I’ve made since then. I’ll show you what I’ve done to it later.

The charming vintage experience generated by riding this motorcycle is greatly aided by the traditional air & oil cooled parallel twin engine. It does have a 270 degree firing order instead of a traditional 180 or 360 degree firing order. This is supposed to reduce vibration and give a better sounding syncopated exhaust note. The Bosch fuel injection system works flawlessly and there is no warm up period when cold or stumbling like you would have with a set of carburetors. What’s so vintage about that you ask? Well nothing really but it does have authentic vintage power levels, most reported dyno tests put it at 40-42 at the rear wheel. In 1965 this would have been a bad motor scooter, but here in 2022 that’s not much. Yes dear reader she’ll do the ton but don’t ask for much else. Performance is perfectly adequate for getting back and forth to work or cruising around looking really damn good on the weekend but if you want to go really fast you need to get a different motorcycle. There are no ride modes or traction control, you don’t really need them on this machine.
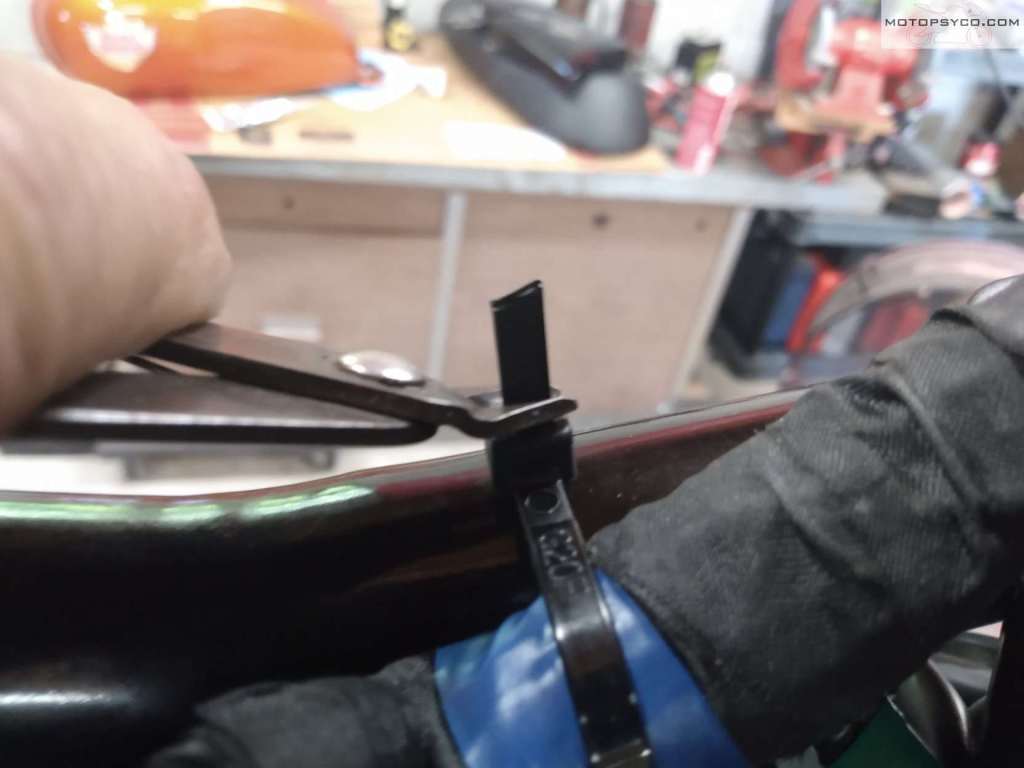
flush cutting cable ties
Improperly cut cable ties are a pet peeve of mine. Would someone in India please buy some flush wire cutters?

Even with the stock exhaust the engine sound is pleasant with a cool little burble on the overrun while shifting or slowing down. There’s adequate torque so that you don’t have to keep rowing through the six speed gearbox unless you want to. When you run the engine up to the redline the power comes on stronger as you pass 5000 rpm but be careful if you hit the rev limiter at 7500 rpm it cut’s the engine back hard. The abruptness of the rev limiter means that if you really want to get max acceleration out of this motorcycle you need to make sure you shift by 7200 rpm. If you need maximum acceleration very often the Royal Enfield Interceptor 650 might not be the bike for you.

Speaking of that 6 speed gearbox let me sing its praises. Made in India quality has come a long way since the days of the old iron barreled 500 Bullets. I’ve owned bikes from every continent and my love of Japanese motorcycles is well documented but this Royal Enfield Interceptor 650 has the slickest shifting transmission of any motorcycle I’ve ever ridden in my entire life.

No speed demon, not a big loud heavy cruiser, or a giant touring bike, this motorcycle is truly a newly minted vintage style motorcycle with just the right amount of modern electronics in the form of ABS and fuel injection to get rid of the vintage shortcomings but without excessive modern electronic gimmicks that often seem to be added to bikes (and cars) just because they can. The speedometer & tachometer are good old analog gauges, only the digital odometer and fuel gauge give away the fact that this is a new motorcycle.

2nd floo Motorcycles of Charlotte.
Orange Crush top view

Small, uncomplicated and good looking, (a lot like my wife) unless something really bad happens I think this one is a keeper. My all-inclusive out the door cost that I paid for this machine in June of 2022 was just a smidge over $7500. This includes sales tax & registration but not local property taxes. Again I cannot recommend Motorcycles of Charlotte highly enough.

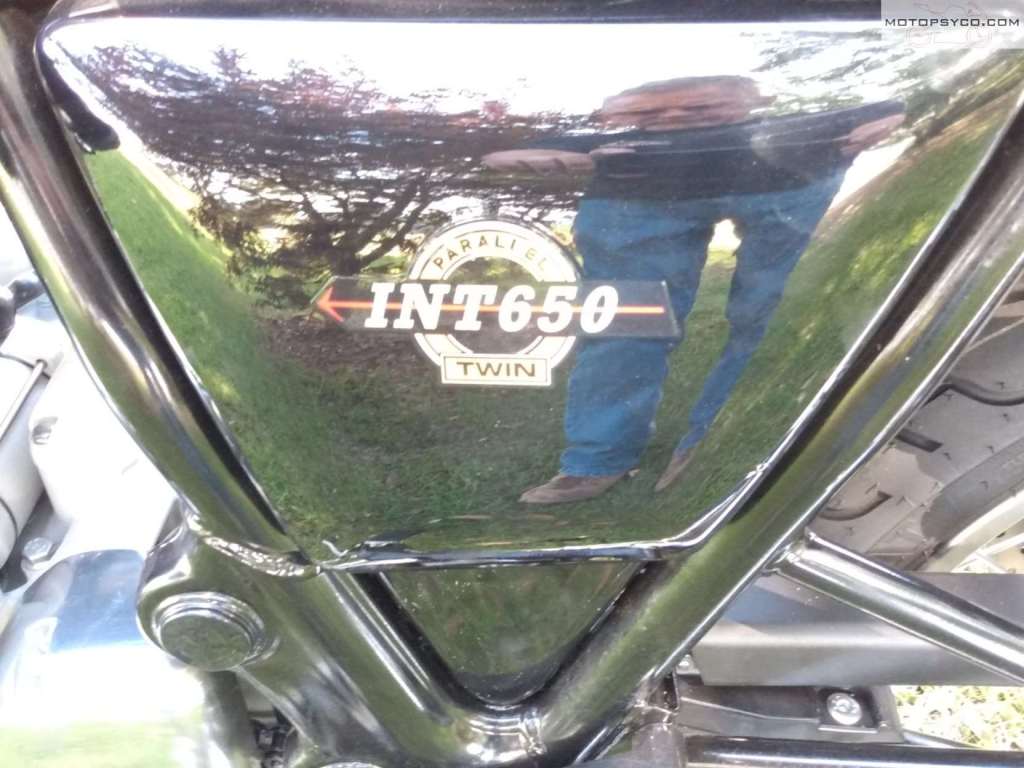
You may have noticed that I keep calling this bike the Interceptor 650. The official North American model designation is the INT650, the Interceptor name as applied to motorcycles is legally owned by Honda who used it for their legendary line of V4 sport bikes. So fellow Americans when you go shopping for one of these look for the INT650, you can change the stickers later to look more like the original Royal Enfield Interceptor of the 1960s.
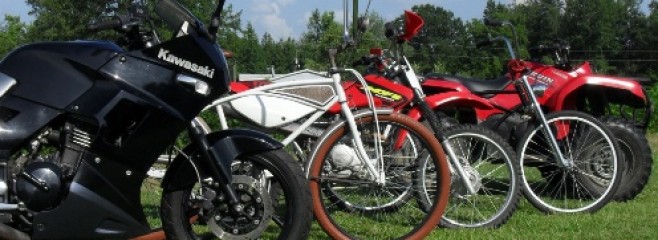
Royal Enfield Int650

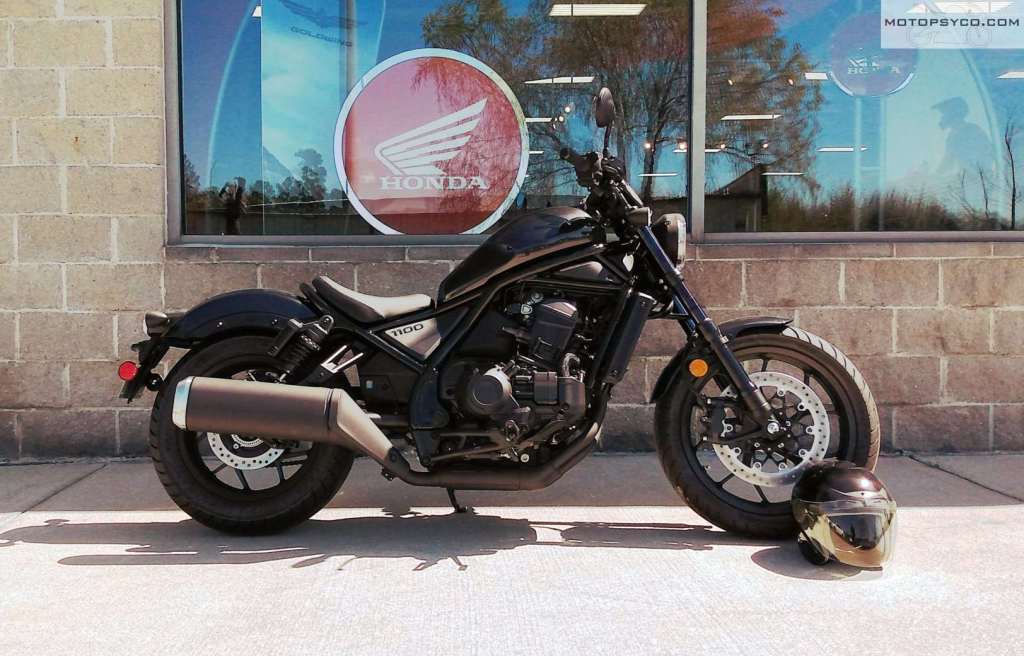
Riding the Honda Rebel 1100 DCT!

Honda Rebel 1100 cover

Honda Rebel 1100

It was a cool Friday morning, I was giving our 2001 Honda Helix a major tune up and oil change and needed to pick up a new spark plug plus order a few other parts so I ran over to my local dealer Generation 3 Powersports in Florence S.C. and that’s when I first saw the new Honda Rebel 1100 in real space.

Late last year Honda announced that they were going to be selling an 1100cc Rebel cruiser and I’ve started watching it with interest and immediately decided that if I got the chance to I was going to ride one. It turns out that my friends over at G3 had one in stock, better yet it was the DCT model. So I took a seat on it and the senior owner Don came over and held it up for me to put my feet up on the pegs and see how I fit on it. For me the fit was very good, with my 29” inseam my knees were right at a 90 degree angle and nestled up to the tank in a good location. When I mentioned that I have been wanting to ride one he informed me that he had this one set up for demo rides and I immediately jumped at the chance to take it out.

Honda Rebel 1100 DCT test ride

I’ve ridden several of the old Hondamatic motorcycles of the late 70’s and early 80’s and enjoyed them a lot, of course on that day, when I went to the dealer, I was getting parts for my 250cc scooter that has a CVT transmission so unlike a lot of people I have no problem with the thought of riding a motorcycle with an automatic transmission. Honda’s dual clutch transmission has been out for a while now and has proven to be a reliable system that works well in the NCT700, Goldwing and Africa Twin motorcycles. Unlike a CVT which uses a belt sliding between variable pulleys to infinitely adjust speed the DCT is an actual gearbox with the shifting controlled by an ECU that actually learns your riding style and adapts to it.
Honda Rebel 1100 dark

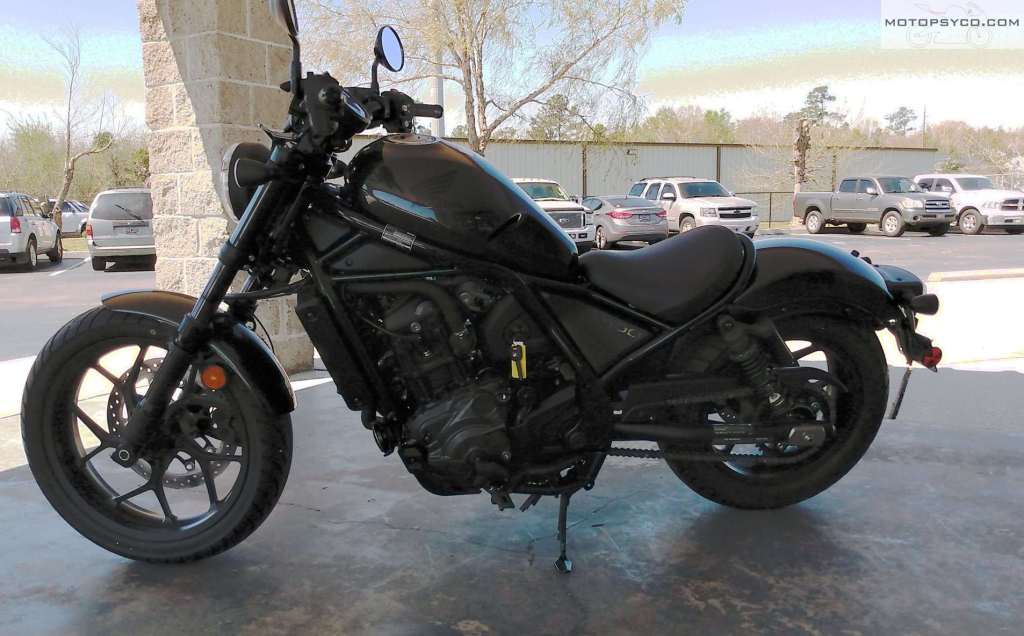
Let’s talk about the motorcycle and the riding experience for a bit. For a cruiser the styling of the current Rebels is unconventional, Honda chose to plot their own path with parallel twin engines and modern industrial styling. The 1100cc parallel twin engine is much better than any v-twin powerplant in terms of power per cc and smoothness. Plus it’s different, some might not like it but I prefer my Japanese cruisers to be distinctly Japanese and all of the newer Rebels fit the bill. The blacked out styling is distinctively different from the typical shiny cruiser style, but is definitely modern and contemporary.

Like every modern fuel injected motorcycle the engine fires right up and settles into a nice muted idle. The rhythm of the exhaust note is not a lumpy idle like a v-twin but a steady staccato beat. It’s a little quiet but not too quiet. The engine revs quickly and eagerly in a way no old school v-twin like my Shadow ACE 1100 can match. There are selectable ride modes but for my test I just left it in standard, my goal was to experience the motorcycle not the electronics. I do like the factory cruise control a feature normally found only on 900 pound luxury touring motorcycles. With a total weight of 505 U.S. pounds fully fueled for the DCT model, (slightly less for the manual transmission version), the Rebel 1100 is a pleasantly light weight motorcycle to have such features.

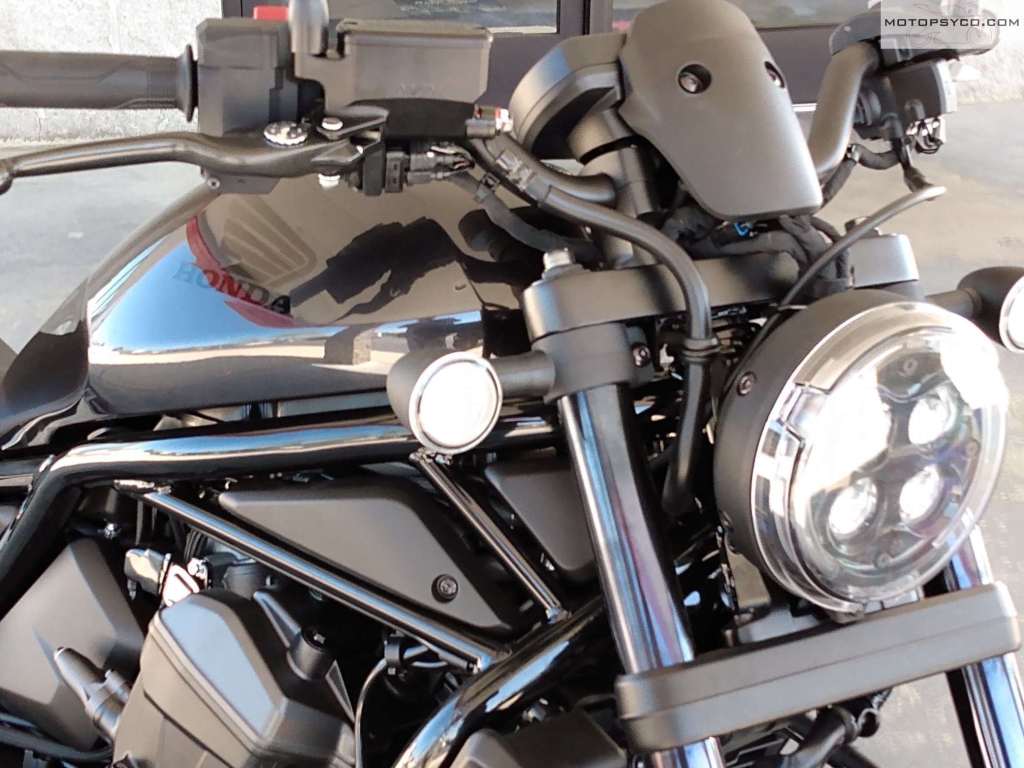
Honda Rebel 1100 headlight

Lifting it up off the kickstand the first impression is that Rebel 1100 feels much lighter than 500 pounds. The handlebars are just like the old superbike bars we all used to put on our bikes back in the eighties, you lean forward just a little bit to reach them, which is a super comfy position for me. I thumbed the button to put it in drive and made a couple of laps of the parking lot to see how the initial acceleration and braking felt before heading out on the road. It’s a bit of a weird sensation sitting on a motorcycle and not having a clutch handle. You can manually shift using push buttons on the left handlebar but I deliberately did not do that. The buttons are there if you want to play with them but much like the paddle shifters in my wife’s car I suspect most people will play with them a time or two and then never touch them again.

Honda Rebel 1100 foot controls

Styling foot controls

Pulling out onto the road and cruising felt great, kind of like riding an old CB400F but with a lower seat and triple the horsepower. Some test riders may not have liked it but under acceleration the DCT always picked the right shift points for me. While I didn’t do any performance testing once I got clear of town I did whack the throttle hard for a quick run from 35 to 70 mph and the gearbox responded exactly like it should have. The front end felt light and it accelerated hard. Now I understand why it has electronic wheelie control, the Rebel 1100 engine is that good. Many have criticized the fact that it lost a few horses compared to the Africa Twin that this engine was derived from, but in the real world you’ll never notice the difference.

I didn’t get to any real twisty roads just a few city street corners and a couple of nice two lane sweepers but that was enough to tell me that the Rebel 1100 handled much better than any other cruiser that I’ve ridden including the 2017 Guzzi V9 that I recently sold. A really good rider on a Rebel will spank an average rider on a sport-bike with no problem. I love my vintage motorcycles but I have to admit these modern machines are truly marvelous and I may have to give buying another new one some serious thought.

You might think that a bike with such a low seat height of 27 and ½ inches would be a rough ride but in this case you would be wrong. The Rebel 1100 and I rode through a few intersections with some seriously rippled pavement and horrible patchwork and the ride felt just fine. One of the things that has turned me off of new bikes is that the new ones I have purchased always seemed to need either a replacement seat and/or shocks to be comfortable. This one has nice suspension including Showa rear shocks with piggyback reservoirs that work very well just as they are.

Braking is good, the ABS system works unobtrusively and provides great stopping ability. Which will be reassuring for those times when the DCT system doesn’t downshift when you think it should, on up-shifts I always felt that the DCT shifted at the right time and held the right gear for the right length of time to match what I was trying to do. Once or twice the downshift didn’t occur when I wanted it to but after we got used to each other, things smoothed out. You should be aware of this little quirk but do not let it stop you from buying a Honda with a dual clutch transmission if you want one, once you get used to it, everything becomes seamless.

Badass Honda Rebel 1100

When you think of a Honda Rebel you probably think of the cute little 250 beginner bikes that were a staple of riding schools everywhere for decades. These were finally superseded by the current generation of 300 and 500 Rebels that the Rebel 1100 is descended from. Yet the Rebel 1100 is not really a beginners bike. With it’s light weight and low seat height it could be, but the power and handling it has are more than enough to keep an experienced rider happy. This is the maximum Rebel for the rider whose skill has outgrown the smaller Rebels but not their inseam. It’s a serious motorcycle for serious riders who just happen to have outgrown the smaller Rebels or who want a cruiser style ride but not another big, heavy and slow chrome plated v-twin motorcycle.

If I bought a Rebel 1100, which is a distinct possibility, it would get the touring accessories and passenger accommodations before it left the dealer. The first thing I’d do is take it out for a nice 2-300 mile ride just to get used to it. The next thing I’d do would be to strap it to my work table, take a few measurements and then fire up the Solidworks CAD software and design some cool one of a kind custom parts for it.

The Honda Rebel 1100 is one of those rare motorcycles that I can unconditionally recommend to everyone who is comfortable sitting on it, at my 5’-10” height, it is a great fit for me, rides well, handles great, has plenty of power and best of all is available with Honda’s dual clutch transmission if you want it.

Whether you opt for the 6 speed manual or the DCT automatic the Honda Rebel 1100 is a great real world motorcycle for real motorcyclists.

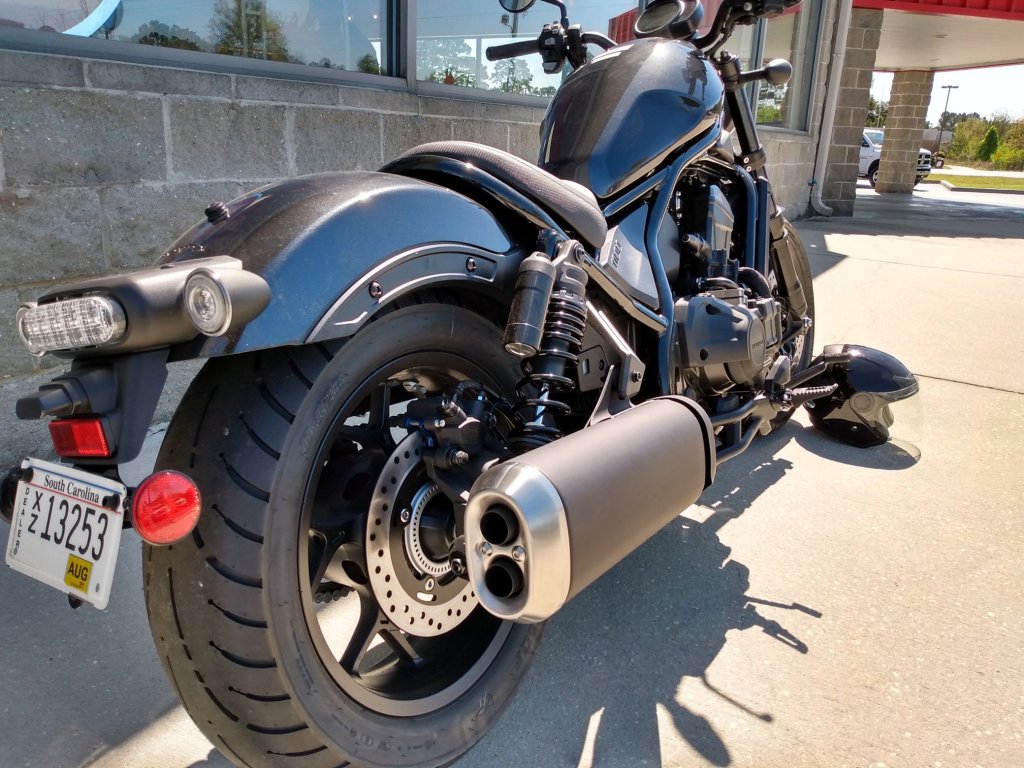
Honda Rebel 1100 rear

Moto Guzzi V9 Roamer

The three thousand mile good, bad & ugly review

Moto Guzzi V9 Roamer

Just got home from the very first ride!

In March of 2019 I took delivery of my Moto Guzzi V9 Roamer a leftover 2017 model in the color dubbed “Giallo Solare” (solar yellow) for years now I’ve wanted a Guzzi but have never bought one. Truth be told I really wanted an old Eldorado, Ambassador or even one of the old 850T models, but for some reasons the stars never aligned correctly for that to happen.

It started with a Honda CTX1300

That is correct, my path to owning a Moto Guzzi V9 Roamer began with me drooling over a used Honda CTX1300. To be honest with you there are times when I wish I had the Honda but this is not due to quality or reliability issues. For some reason my wife who is usually an agreeable soul put her foot down and insisted that I was not going to spend that much money on a used motorcycle, especially one she had never heard me mention before. Her words were, “if you’re going to do this why don’t you get something you’ve always wanted.”

Triumph Street Twin vs Moto Guzzi V9 Roamer

These were the two bikes that I was considering and in all honesty the choice really came down which one was the most unusual. Both the Triumph Street Twin and the Guzzi V9 were well regarded by most reviewers. The engine sizes are similar, both are considered retro standards and both of them are “tuned for torque.” I’ve always regarded the tuned for torque statement as bullshit marketing doublespeak for we cut the horsepower and we hope you don’t notice, but now that I’ve ridden the Guzzi  I really like it. Peak torque comes in way down low in the rpm range and it literally pulls like a freight train up to the redline. It’s really not fast like the screaming Japanese fours that I was used to, but it feels a lot more powerful than it is. Why would I pick the Roamer over the V9 Bobber? Because I like the bright colors and chrome look. It screams 1970’s whereas the Bobber with its fat tires on both ends and matte paint say modern day hipster. Nothing wrong with that if you like it but I’m an eccentric old fart and this is an eccentric gentleman’s motorcycle. Lots of people think it’s a restoration and are shocked to find out that it is nearly new.

Pitfalls of purchasing online from out of state

There were no dealers in my home state of South Carolina at the time when I purchased this one on Ebay, from a dealer in Wisconsin. Shipping was handled by Haulbikes.com and rates were reasonable. One thing I will mention is that shipping companies like this cannot come down to the cul de sac in your neighborhood you’ll need to make arrangements to meet them somewhere with a large enough parking lot to get the tractor trailer parked off the road so that your bike can be unloaded safely.

What turned out to be the biggest problem is the fact that I decided, instead of paying cash for it, that I’d let the dealer do financing for me. Unfortunately their home state of Wisconsin requires the dealerships to send all titles directly to the bank. Unfortunately the bank turned out to be incredibly incompetent and would not help me to get the bike registered for the road in S.C. Finally after 2 months of not being able to register my new bike I went ahead & paid off the loan, even then it took a complaint to the BBB to finally get my title sent to me. If you decide to go online to purchase a vehicle I suggest paying cash up front, or if you really need financing that you obtain it in your home state to avoid registration problems.

Let us praise the good (looks &handling)

Among  Guzzista the looks of the V9 series are polarizing with the vast majority preferring the sportier looks of the V7 lineup. The general public on the other hand thinks this bike is gorgeous, especially the non-riding people or even those who have ridden motorcycle but have never heard of Moto Guzzi. The styling is what I would call cruising standard. The shape of the tank sort of resembles the old 850 T3 of the 70s but is smaller in proportion to the rest of the motorcycle than the T3 tank is. The quality of the fit and finish of the visible parts is stunning. The yellow paint has a heavy orange tint to it that appears golden in dim light.

The size and weight of this bike are perfect to me with a wet weight of approximately 440 lbs (200 kg) the Moto Guzzi V9 Roamer is very easy to handle at low speeds in parking lots and garages. Despite its relatively light weight for a midsize modern motorcycle the Roamer is very resistant to the effects of crosswinds and rainstorms. My experience with new bikes is extremely limited but compared to all the old stuff I’ve ridden the V9 is very confidence inspiring when the rain starts. It is a very mild mannered motorcycle this combined with traction control and Brembo anti-lock brakes provide you with a stable planted feel when the road gets a little wet.

Dream and Guzzi

The Guzzi with my 64 Honda Dream

All the Ricky racer boys who write for the magazines were not enamored with the handling and I understand, if I were riding around on all the latest crotch rockets I would probably feel the same way. I was using a modified 1980 Honda CB650 as my main daily rider and the handling and braking of the Roamer are much better than any vintage bike or cruiser that I’ve ever ridden. That being said the little Japanese 650cc 4 banger will smoke the 850cc V-twin easily in both acceleration and top speed, it’s not even close. Speed is not what this bike is about though, it’s about having a vintage motorcycle experience without the vintage motorcycle headaches. A lot of people on the various Guzzi forums recommended dropping the triple clamps down on the forks by 20mm to quicken up the steering so I tried it at it did seem to help once I put some decent shocks on the rear & lifted the rear back up. One very impressive specification of the Moto Guzzi V9 Roamer is that in the owner’s manual, maximum carrying load is listed at 925.94 lbs (420 kg) for rider passenger & luggage. This was partially responsible for me choosing this motorcycle and for my delusion that I could at least modify it into a usable middleweight touring machine. Don’t laugh my wife & I routinely ride 2-300 miles a day on our Honda Helix CN250 scooter, so surely it should be possible on an 850cc motorcycle right?

Let’s get down to the bad

The handling was really good to me even with the 100% stock suspension as long as you were on smooth pavement that is. The front end seemed okay with decent travel & rebound but the rear suspension was incredibly harsh. I finally set the preload at the lowest setting possible but all this did was to lower the rear of the bike enough to negate the benefits of lowering the front end for quicker steering. It would still beat the living shit out of you even over mild bumps. I do not know about the latest models but if you buy an earlier model like I did you should go ahead & budget for a new set of shocks immediately. I purchased a set of Ikon shock absorbers and I am very happy with them. This smoothed out the ride over bumps and actually improved the handling and allowed me to set the preload back to its maximum setting, raising the rear of the bike back up to where I like it. Before I changed the shocks my wife actually refused to ride on the Roamer at all due to the intense pain she felt even over seemingly small bumps and potholes.

Moto Guzzi V9 Roamer Ikon

Ikon shocks work really well.

If you need dealer support for basic maintenance this might not be the bike for you unless you happen to live near a dealer. I’d have to drive 3 or 4 hours to reach a dealer, but I can do all of my own oil changes, valve adjustments and repairs myself. Other than needing some software & a set of cables to connect your laptop to diagnose the fuel injection this is an extremely easy motorcycle to work on. The fuel injection isn’t that complicated either just join the Wild Goose Chase forum and search for Guzzidiag software, it’s simple enough an old fart like me can use it. If worst comes to worst custom builder Craig Rodsmith has proven that you can make it run with carburetors.

I wish the fuel tank were a little bigger but that’s a minor niggle, the low fuel light comes on when you’ve used 2.5 gallons out of the 4 gallon tank. This is roughly 150 miles and you’ll probably be ready for a break by then.

The effin ugly

Moto Guzzi V9 Roamer

The original factory seats on these motorcycles are instruments of torture. It’s almost like when they were finalizing the design someone plopped a cheap old plastic 1980s skateboard deck on top of the frame and said that looks cool, we’ll just add 6mm worth of padding and cover it with Naugahyde and we have us a seat. It really does look cool but it’s an awful place to sit for more than 10 minutes and it’s way too short for two up riding even if your passenger is a tiny 108 lb. wisp of a person like mine is. My pre-purchase research had warned me about the seat before I bought the bike but I was still caught off guard by how bad it was in real life. I’m now running the Moto Guzzi two piece, two up comfort seat which is much more comfortable. Too bad that is not really good enough, even the accessory seat is only a 150 mile seat at best as our last 300 mile in one day trip proved to us. If I keep this bike much longer I’ll try a Corbin seat. Corbin doesn’t really list a seat for the Roamer but they do have one for the V9 Bobber and the factory seats are interchangeable so I don’t see why an aftermarket seat for one wouldn’t work on the other.

I love / hate this motorcycle

It looks good, it sounds good too, and even with the stock pipes I could sit in the garage and listen to it idle for hours. The small gas tank that so many complain about, allows the engine to take its place as the rightful star of the show. A guy at a gas station once commented, “it looks like its all motor!”  I agree it does have a very muscular look and sound for a 55 hp v-twin. Now that I’ve got the suspension sorted out to my liking nothing beats riding around on the back roads with it. The engine really is the greatest thing about this motorcycle. The six speed gear box is very smooth also and well matched to the engine. If you’re putting around in town between 30-45 mph just put it in fourth and leave it there, bombing around out in the country between 45 and 60 fifth gear is the one to be in. I won’t even put it in sixth gear at less than 60 mph. You don’t gain anything but a little more vibration on the handlebars, fuel mileage stays the same and you’re not in the meat of the engines torque curve if you need sudden acceleration for some reason. Torque is massive and acceleration is much better than the spec sheets would indicate.

Unfortunately I bought the wrong motorcycle. As far as I can tell this will never be a comfortable 2 -300 miles a day motorcycle without some major modifications. We just ride the Helix if our destination is more than an hour away. I guess I should have bought a touring bike but I really hate big heavy motorcycles and would give up riding if that was all that was available. Plus I know from experience that you can do very long rides on smaller motorcycles.

Moto Guzzi V9 Roamer

A fantastic commuter!

So what do I do with it now? With the previously mentioned seat & shock mods the Moto Guzzi V9 Roamer is a top notch commuter bike. You want a bike night attention getter that handles decently on the back roads, a bar hopper or just something to ride around locally? This is the bike for you and I’m enjoying it in all of these roles except for bar hopping because I don’t go to bars.

ready to tour?

Going out for a long ride on the Moto Guzzi V9 Roamer

Back in March of 2020 Mrs. Psyco & I took the Roamer on a 300 mile one day trip. The first half wasn’t too bad but even though we had a break for a couple of hours the ride home took its toll on us. Around the 225 mile mark my lower extremities were numb and I knew that neither one of us would be able to move when we got home. At this point I decided that this pile of shit was going on Ebay the minute I got home but then it saved our life.

We were buzzing down S.C.  Highway 34 between Newberry and Camden S.C.  at 6o mph or so, following behind a big black bro-dozer Chevy pickup, when suddenly the driver made a sudden right turn into a driveway and then without warning threw it into reverse and backed out in front of me without looking. There was no time to stop before hitting the huge four door mall terrain vehicle that had suddenly blocked both lanes of the 2 lane road we were on. Fortunately there was no oncoming traffic, road signs or mail boxes in the area so I twisted the throttle some more, banked hard to the left and was able to safely pass the rear bumper of this truck on the shoulder on the opposite side of the road from where I started. Thankfully no nasty surprises were lurking in the grass on the shoulder & I was able to slow down and safely merge back onto the road. When we stopped to steady our nerves my wife swore that she could feel the trailer hitch brush her pants leg as we went by. Thanks be to God that we didn’t get hurt that day. That was also when I decided to keep the Guzzi a little while longer. If we had been on any other bike in my collection, especially the scooter we would have been hamburger stuck to the side of that bro-dozer.

muddyMoto Guzzi

Filthy motorcycle at the end of a long day.

Even so it was about 2 weeks before I got back on it or even washed it (we ran through a few miles of red clay mud in the rain). It took a while after that for the sensitivity to the vibration through the seat to go away but eventually it did.

Where do we go from here?

Once the nation and my finances recover from the coronavirus pandemic and the stupid senseless outbreak of violence that is occurring, I’ll throw a few more dollars at it and try to make it more comfortable so that I can do with it what I bought it for which is to be able to ride 3-6 hours a day. If that fails I’ll get some loud pipes, an upgraded fuel injection map and customize the hell out of it. If it can’t be a road bike I’ll turn it into a show bike.

Would I sell it? Maybe but cash is not really what I want, barter is more of my style there are 2 very specific trades that I’d make for it and both would need to be straight up barter with no cash changing hands;

UPDATE 2022 I wound up selling this motorcycle & used the cash to buy something else.

1: a 1995-1996 Jaguar XJS 2+2 convertible in good driving condition. 4.0 6 cylinder engine.  Color is unimportant and needing some cosmetic work is okay as long as all electrical and top components are functional and I can drive it home from wherever you are.

2: I’d definitely be willing to trade for a nice looking ready to ride Honda CTX1300 preferably with a passenger backrest or top trunk installed.

Hope you all have a great day!

Auxiliary Fuel Tank by Pit Posse

While I was in the process of moving I managed to break the end off of my old auxiliary fuel tank that had served me well for over 20 years. When I went looking for a replacement most of the top name brands were rather expensive starting at $45.99 and going up. At the other extreme were a bunch of smaller unknown brand ones from China or India with decent prices but some long shipping times & unknown quality. As a compromise I settled on this one sold by Pit Posse for 39.99  It came with a decent length of hose & a good quality brass shutoff valve. Let’s be honest here, all of these plastic auxiliary tanks cost more than what they are really worth but comparatively speaking this one is a good deal coming from a U.S. based company. The actual product is still made in China though. I’ve been using this one since June 8th 2018 and am very happy with it.

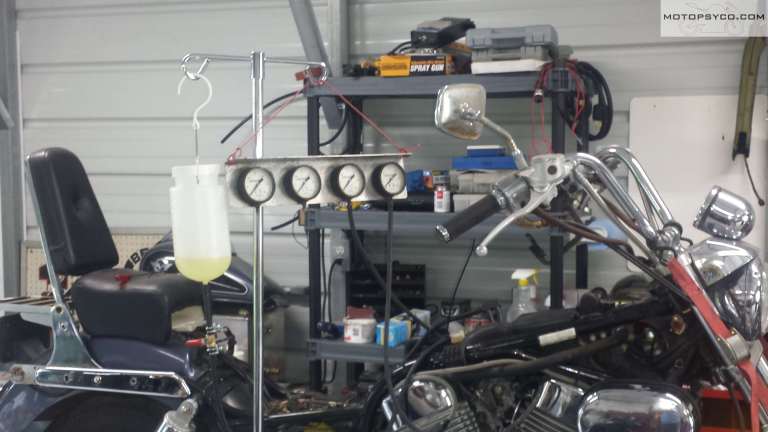
Auxiliary fuel tank & carburetor synchronization guages on an I.V. Pole
My setup for adjusting carburetors.

You might notice that in the picture above that I have my vacuum gauges and auxiliary fuel tank hanging from an I.V. pole.  If you’re serious about doing carb work on motorcycles & four wheelers you need to get yourself an I.V. pole. It turns out that you can get one pretty dang cheap too, click here to see them starting as low as $23 with free shipping. Well worth every penny.

My sychronizer gauges actually come from Honda and were purchased from the inventory of a shop that went out of business. If you don’t have a set and are thinking of buying some do yourself a favor and get a set vacuum gauges, not the mercury sticks. Of course if you have the money you could go for a Carbtune Pro setup. If my gauges ever quit that’s the one I plan to get.

That’s all for today just thought I’d post a quickie product review and share a couple of tips that you might find useful. Until next time,

Peace Y’all

G MAX MODULAR HELMET

G MAX MODULAR HELMET

It really was getting to be time to replace my beloved old HJC CL Max modular helmet as it was 7 years old anyway, but it was so comfortable and quiet plus I’m so cheap that it was hard to let go of it.

Yes I know you should replace your helmet every 5 years or so but I went a little beyond that with the HJC simply because it seemed to be holding up so well. So what made me purchase my new G MAX Modular helmet? To be perfectly honest it had nothing to do with motorcycling and everything to do with alcohol, hunting, kayaking and general fun with friends out here in the middle of nowhere. Confused? So was I at first, so let me tell you a little tale before diving into this review.

It all started with me coming back from a ride and setting my helmet on either the trailer or the back of the truck and going to eat supper & drink a bottle of Guinness. Thanks to the generosity of good friends I have temporary use of a little bitty two story shack down by the Little Pee Dee River while I’m awaiting the purchase of my new home to be completed. It’s such a terrible life here as there’s nothing to do other than hunting, fishing, shooting, bothering my wife for affection and sitting on the back porch drinking beer while taking in all of the natural beauty of the river which is less than 30 feet from where I’m sitting as I write this. It’s pure misery and I’m really suffering, can’t you tell? Oh yeah, back to the story.

<g max modular helmet>

Last weekend after we came back from supper we were sitting on the screened in back porch watching the fish jump in the water when an old friend came paddling up in his kayak, he had dropped another guy off to do some deer hunting and he was floating down the river doing a bit of fishing. So I invited him up to have a brew and sit for a spell. While we were sitting there the man that he had dropped off to hunt called him on the phone and was ready to be picked up, as the sun had fully set by this time. Since it’s both too dark to navigate the river by flashlight, and the current is so swift here it would take a while to get back upstream anyway, I gave him a ride back to where the other guy is waiting at the hunting club. So I take off like the damn fool redneck that I am rolling through the woods and the two lane oiled gravel roads on the outskirts of Little Rock, S.C. Instead of dropping him off at his truck I bounced my way down the two track trail to pick up the hunter, and then carried both of them back to the truck before hauling ass back to the house. I’m a little fuzzy as to what point the fact that my old helmet had been sitting on the floor of the trailer earlier in the evening hit me. After a brief search in the hopes that it had fallen off in the yard we went to bed. The next morning the old HJC was sitting on the porch, battered beyond usability but still in one piece. The guys had found it and brought it to me and left it on the porch. Apparently it had bounced off of the truck and landed in the middle of the road, scratch one very nice mid- priced modular motorcycle helmet..

So within a day or two we made the pilgrimage to Florence S.C. to visit my old friends at Generation 3 Powersports to pick up a new lid for me to wear on my 40 mile commute to work. Unfortunately no HJC modulars were available from stock, so I actually tried on the G Max and in the 2X size it fit perfectly well but quite frankly I was somewhat reluctant to trust my very valuable head to a lower priced modular helmet so I also tried on a couple of normal full face helmets trying to find something comfortable, but kept coming back to the silver gray G Max Modular helmet so I bought it. After purchasing it the sales person pointed out the built in tail light and showed me how to replace the batteries in it. Up until this point I hadn’t even realized it had a tail light on it, as my helmet shopping is done based strictly on protection and fit. Paint schemes and gimmicks are secondary characteristics to safety and comfort.

So how is it? Not bad, the plan was to take it back and order a “brand name” modular helmet if I didn’t like it, but after a couple hundred miles the G Max modular helmet has been found eminently acceptable. It’s not love at first ride like my old lid was but it ain’t bad either. Since I have a very square jawed face it was almost too snug on my lower jaw, but the more I wear it the less noticeable it becomes.

g max modular helmet

One of the nifty gimmicks is a small net in the chin area presumably to keep bugs & debris from entering the helmet from the bottom side. The problem with it is that the attachment points of the net to the front of the face shield are not 100% secure and the edges of the net will roll over and poke me in the chin if I’m not careful closing the helmet.

Another gimmick that’s actually very good on this helmet is the slide down sun shield. It works very well and is a boon to a person like myself who wears prescription glasses and can’t wear traditional sunglasses when riding. Plus when the sun goes down you just push it back up into the helmet and ride on, no stopping to change glasses or face shields.

g max modular helmet sun shade

Now let’s talk about this built in tail light. It’s powered by a couple of AAA batteries buried in the back of the helmet under a cover easily removed with a screwdriver. To activate it press the button in the center of the light before you put the lid on your head. Press the button once for a steady light, twice and it will flash slowly, a third press of the button gives you a rapidly pulsing light. Press a forth time to turn it off again. As an extra cost option you can get a kit that will give you a wireless attachment to your motorcycle’s brake light, this is definitely worth considering if you have a bike with a small hard to see tail light. This gimmick will definitely help reduce your risk of being rear ended, my main concern with any helmet is crash protection and the G-Max seems as good as any other helmet in this regard, I hope to never crash test it.

G Max modular helmet light

The air vents on the G Max modular helmet are fantastic, the air flow and noise level are really good for a sub $200 helmet. One of my main concerns that most likely is not a problem for anyone else is making sure that my helmet is compatible with my hearing aids. The ear cup area is open and roomy and the wind noise is well dampened so I can leave my ears on while I ride.

Let me conclude by saying that although the G Max modular helmet is not perfect, it is very good especially for a $169 modular helmet and if it fits you correctly and you need a good commuter helmet on a budget, I highly recommend it. Plus the tail light is a great additional safety feature.

Rock or Bust ACDC World Tour Review

Two weeks ago I went to see the Rock or Bust ACDC World Tour live in Greensboro, N.C. Like a lot of other long time fans I must confess to some initial trepidation about the new lead singer, but quickly decided that I had 2 choices; one was to go see ACDC with Axl Rose as the lead singer or to possibly never get to ACDC live at all. I spent a little extra and got me and Mrs. Psyco some decent seats on the club level and sat back and watched one hell of a fine rock and roll show.

<Rock or Bust ACDC World Tour stage>

Confession time, I really liked Guns and Roses almost as much as ACDC but when the sad news of Brian Johnson’s hearing problems surfaced it was kind of a blow and I figured that this was the end of ACDC, but they soon announced that Axl was to be his replacement and it made me a little skeptical. The early videos coming out of Europe weren’t too promising, Axl was sitting in a wheelchair due to a broken leg, and was still carrying some of the extra weight he had put on during his time away from the spotlight, plus he was still learning the band and it’s style.

Axl Rose on the big screen

Fast forward to the start of the U.S. tour and an entirely different man stepped out on the stage with the mic in his hand. The flab is gone and he was dancing around on stage and kicking it up in those ostrich skin boots like he never left the stage. All those girls who loved him so much back when he was the prettiest face in his music videos, when they see him now a lot of them will feel the same way again. My old lady has told me and all her friends at least a dozen times how good he looked. Now I realize most of you could care less about that part and think his singing sucks compared to Brian’s and I used to be one of you. Some of the songs sound different, on some of them he is able to pull off an almost exact duplicate of the original sound. Axl tends to perform the older Bon Scott tunes very well but his voice is not as gravelly and naturally capable of higher notes than Johnson’s so those songs tend to sound a little different but still very damn good. There are two song in particular that I feel he does better than any other vocalist the band has had. Axl belts out “Giving the Dog a Bone” just like it was written for him and my personal favorite by him is “Whole Lotta Rosie.” If you disagree, I don’t really care we can debate all day long whether or not Axl Rose is good for ACDC, one thing is certain, ACDC has been very good for Axl Rose.

Angus Young guitar solo

Now let’s talk about the front man Angus Young, after losing his brother Malcom, from the band due to health issues, Angus is the last of the original cast still in the show. And make no mistake about it he is the star. ACDC has had 4 lead singers, 3 drummers etc. but without Angus this band cannot exist. He is the front man, the audience knows this. Watching his long guitar solo, I realized that he feeds off the adoration of the audience, that it sustains him. But it’s not a one way relationship, you can tell that it is his mission to entertain you. Some have written (especially after he hired Axl) that he is only keeping this band going for the money, and while it is very lucrative, I can tell you right now, that he loves having the audience hanging on his every note, and that’s the real reason he puts on that schoolboy outfit, drags his old bones out on that stage and performs like a man possessed.

Of course Stevie Young and Cliff Williams put forth very dynamic performances in the background stepping forward occasionally for vocal duties but playing competently & professionally. Both are very impressive musicians and it would be great to see them getting into the spotlight a bit more because they really do their part to make the music special.

ACDC has had 3 different drummers but my favorite will always be Chris Slade. In addition to his time with the worlds best hard rock band, he has played an amazing variety of rock and pop music throughout his career playing with a number of amazingly diverse acts such as Tom Jones, Uriah Heep, Asia, etc. Chris is a true master of his craft and you can tell it listening to and watching him play.

Look regardless of how you think you may feel about the bands current line up if you love rock & roll there’s still no better band than ACDC, so cast your doubts aside and if you are still able to obtain tickets get your ass to the next Rock or Bust ACDC World Tour show, you wont regret it.

Rock or Bust ACDC World Tour

In Rock We Trust, It’s Rock Or Bust!


Install a Trailer Hitch

Almost Anyone Can Install a Trailer Hitch

I have a confession to make; at one time the very thought of putting a perfectly good running motorcycle on a truck or trailer was horrifying to me. But as I’ve gotten older my once hard core has become a soft chewy center. Crash damage, arthritis, and a growing disdain for any kind of suffering will do that to you. The missus & I will still do a bit of long riding from time to time, and I still scratch my head when I see a full dresser riding solo on the back of a tow vehicle. If said Goldwing or ‘Glide is surrounded on the trailer by some fine vintage machinery, choppers or hardcore sportbikes I can understand. Having discovered the joy of vintage motorcycle shows & swap meets it’s not unusual for me to take multiple motorcycles plus miscellaneous trade items, making a tow vehicle necessary. If I’m only taking one motorcycle or scooter capable of making the trip, to the show with no plans to buy or sell anything I usually just ride the darn thing because without riding what’s the point of owning a motorcycle?

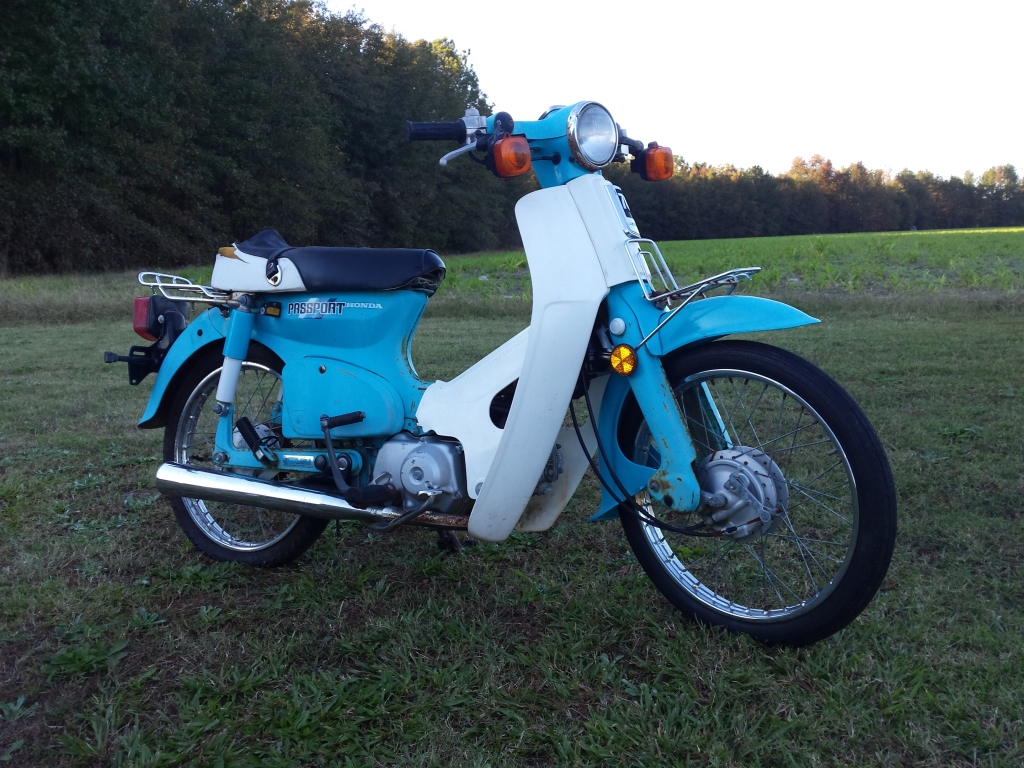
<1982 C70 Passport>

One of my trailer queens.

Now let me make an apology to all of you old geezers that I used to pick on about your trailer queens. I am well on my way to becoming one of you and own a couple of motorcycles that I would never even attempt to travel on.

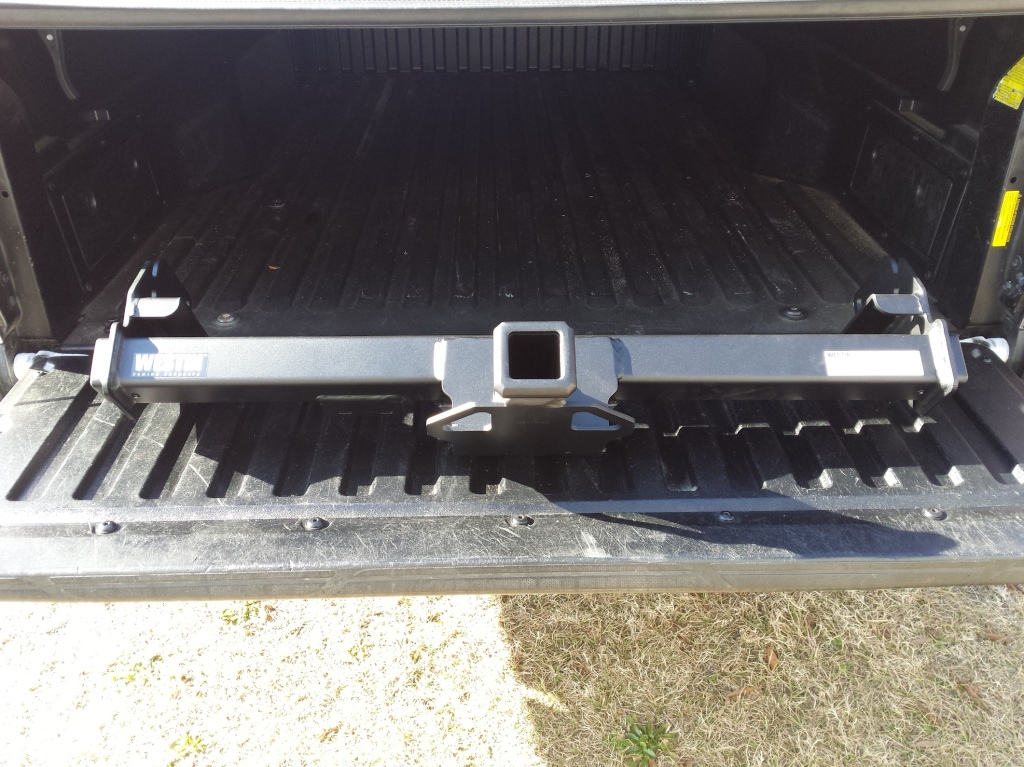
<Westin Trailer Hitch>

Westin trailer hitch

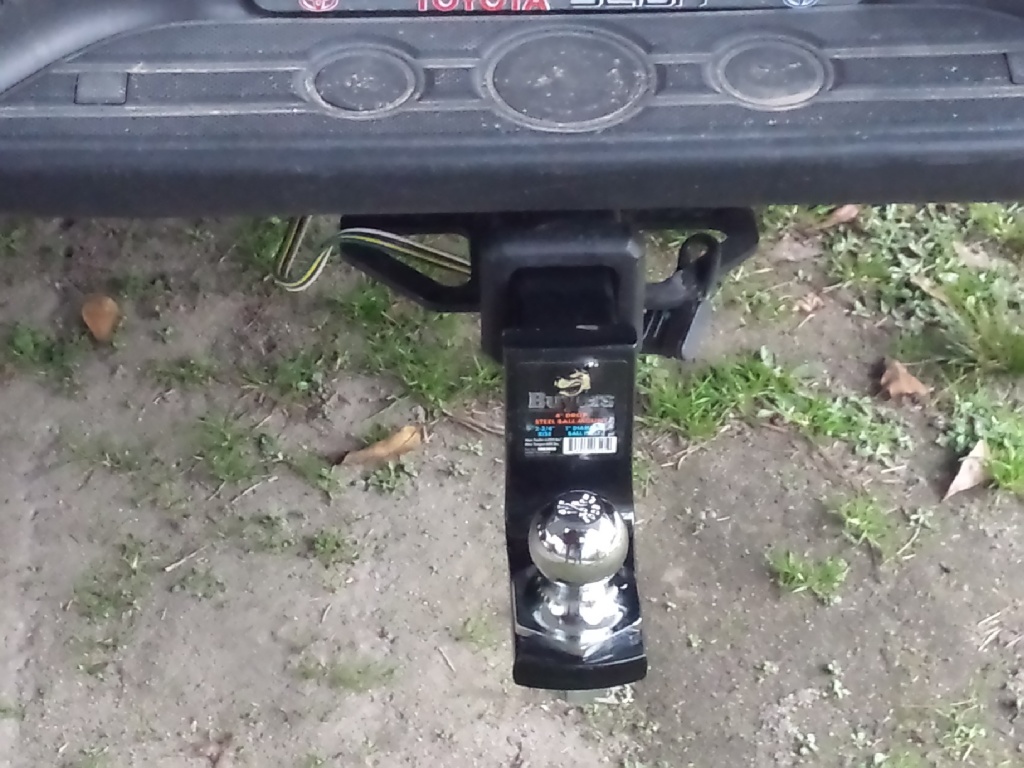
Let’s get on to the meat of this how to, my previous tow vehicle was a Chevy van that served me okay for a while but last year I sold it and acquired a nice low mileage 2010 Toyota Tacoma that was the plain Jane work truck of my dreams that I thought did not exist anymore. So I ordered up a Westin Receiver Hitch
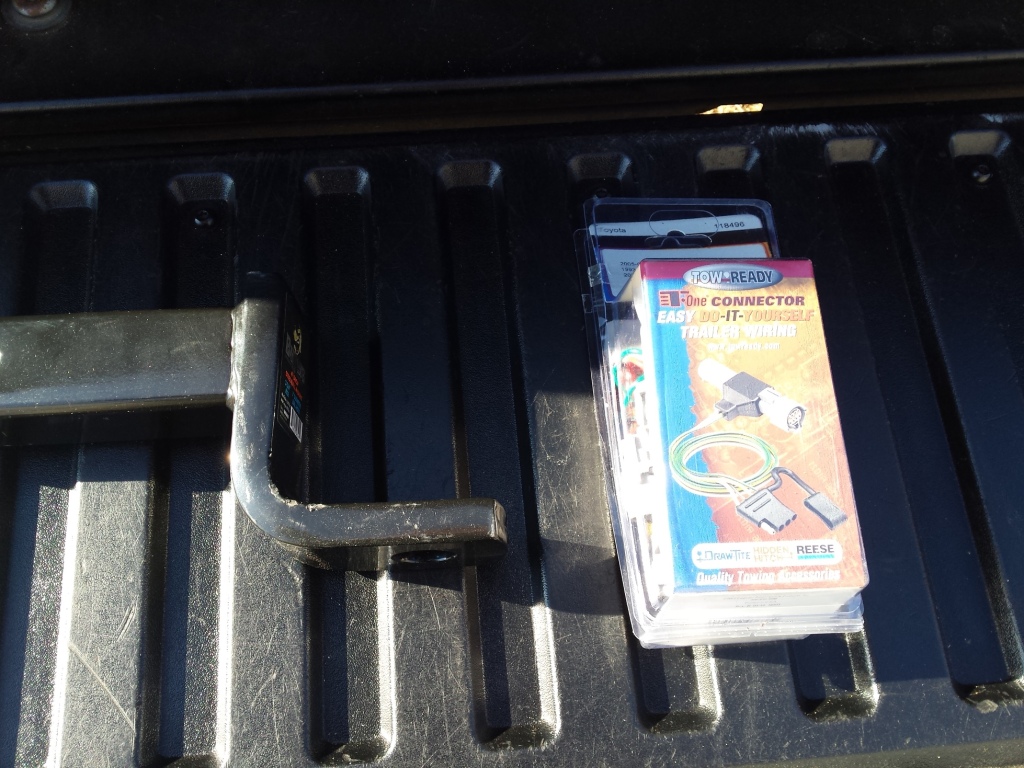
hitch to fit it, along with a Reese T-connector kit for the trailer lights. Now let’s see how it was installed.

<Reese Trailer Hitch Connector>
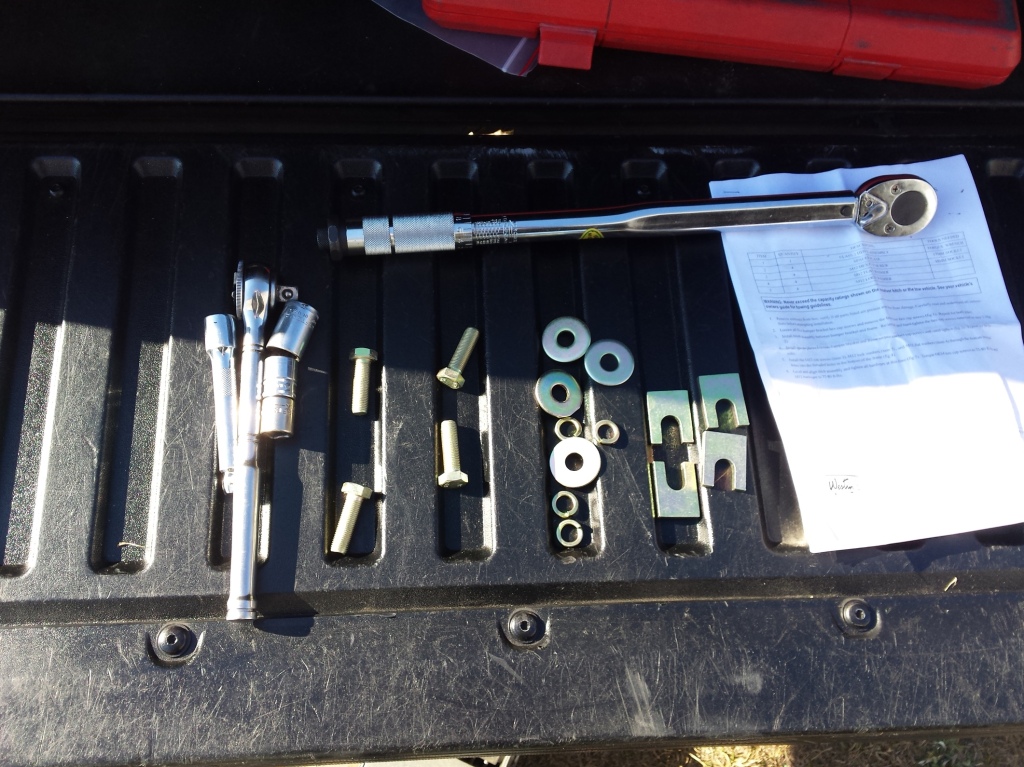
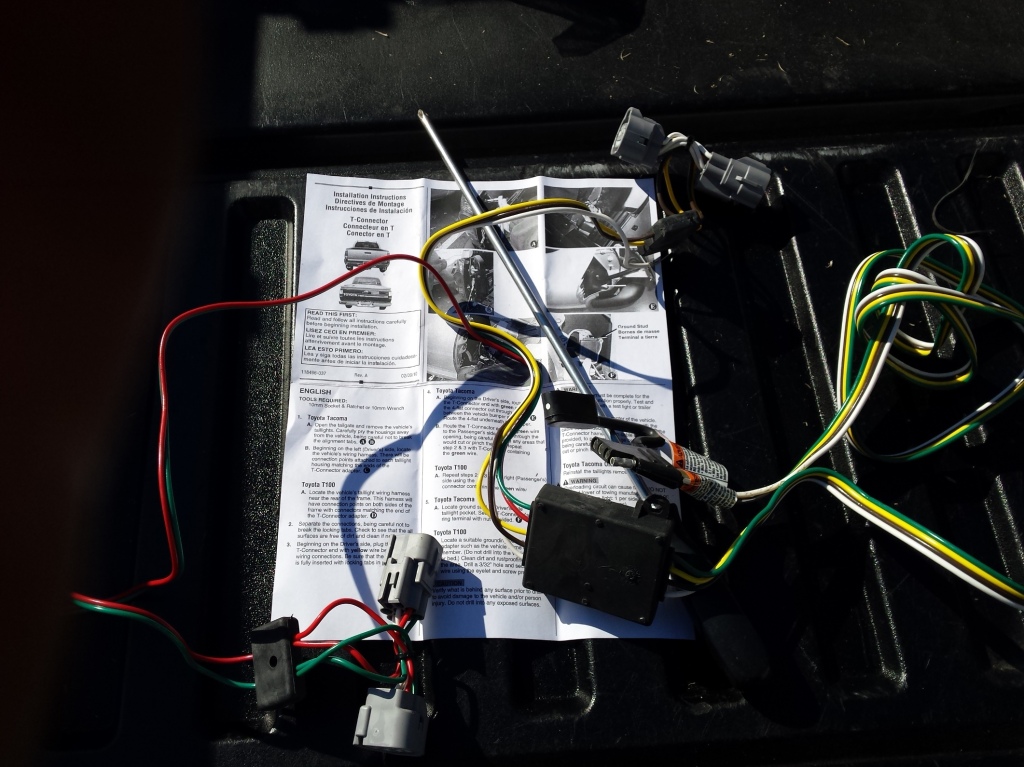
Open up the package, and read the instructions. Then count all of the hardware supplied to make sure it matches what you are supposed to have. Next gather up all of the tools you need to match the bolts in the kit & on your truck, van, or SUV. While what is shown here is specific to my truck & hitch the vast majority of installations will be very similar to this. Buy your trailer hitch from a reputable manufacturer and read the instructions.

<hitch receiver hardware>

Don’t forget, read the instructions first!

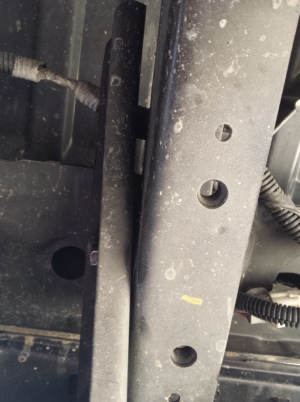
Like most of them this Westin hitch receiver uses the bumper brackets to attach it to the truck. The instructions called for me to remove 2 of them on each side and leave one attached loosely. Work carefully and don’t allow your bumper to drop down suddenly as this could cause damage to your vehicle and or injury to you.

<bumper bolts>


<bumper bolts loosened>

Please make sure you take reasonable safety precautions when you are doing this. You will be handling large heavy awkward items over your head in a cramped space. It’s possible to install a hitch alone but it’s better if you have help. At the very least you need someone nearby in case it falls and beans you in the head.

<install a trailer hitch>
My truck also had the above tapped holes in the frame that were put there for the location of a trailer hitch, make sure that if your vehicle has additional holes like this that your hitch will use, that the holes are clean and the threads are good before putting the hitch in place.

<a good floor jack>
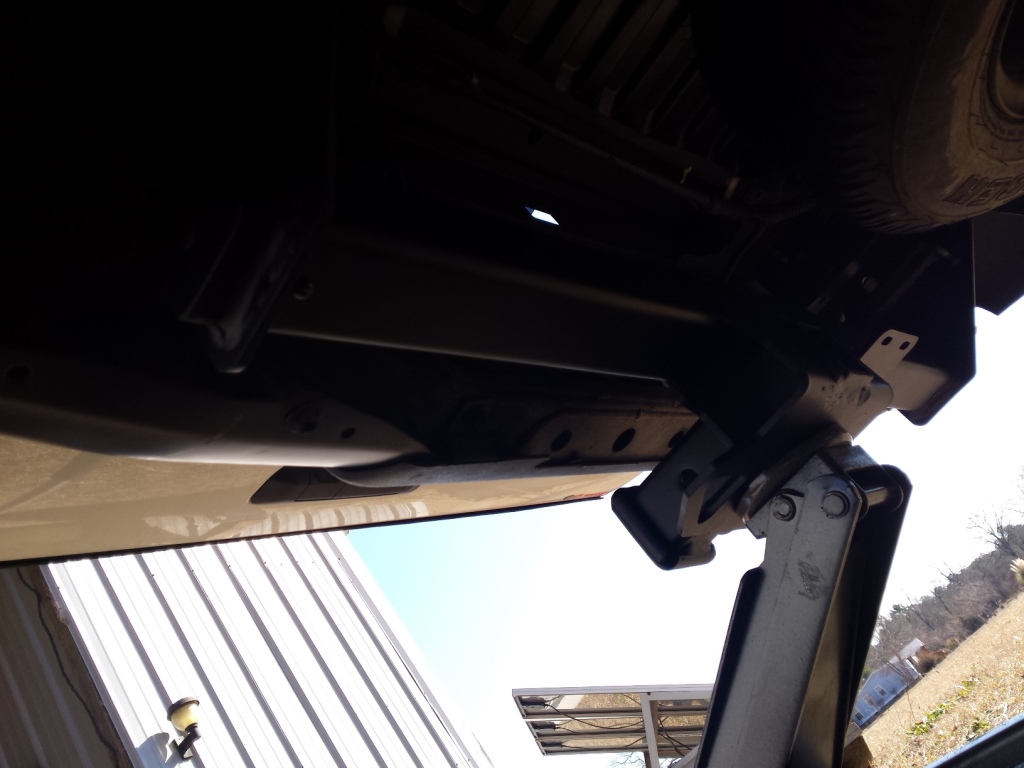
Since I was working alone a floor jack was called into action to support the receiver as it was lifted into place. For most of us a good floor jack is a necessity to install one of these alone.

install a trailer hitch
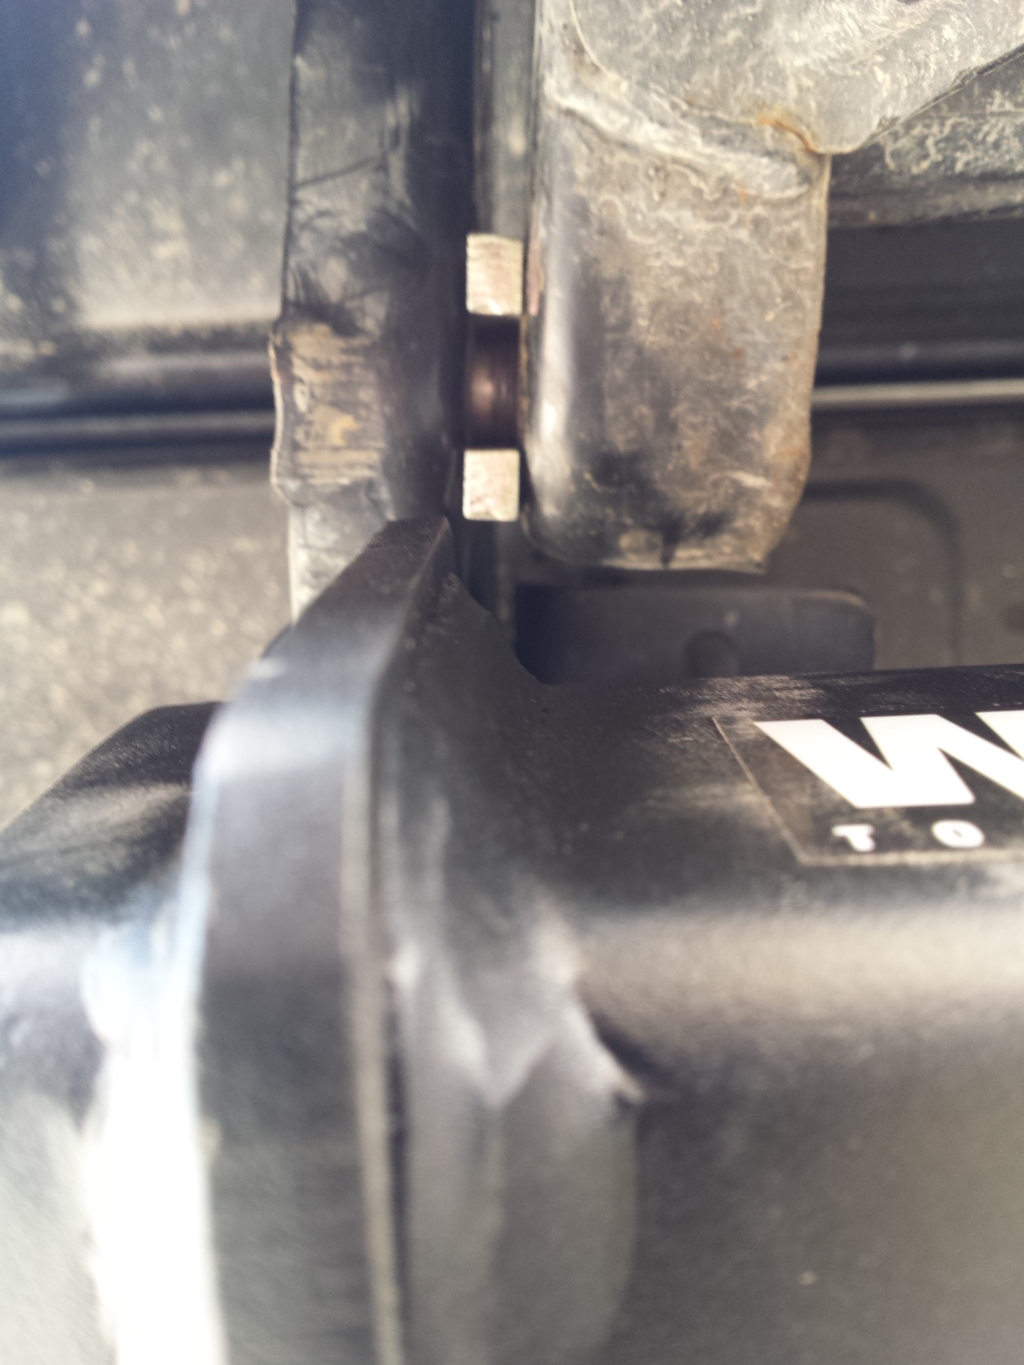
Line up the bolt holes and start all of the bolts. Do not tighten any of them until you have them all started securely. Once you have every bolt started in its own hole, then you may need to install some shims if supplied and realign your bumper so that it looks right.

use shims as needed

use shims as instructed

After the shims are in place and the bolts are all snug, check your bumper alignment again and adjust if needed.

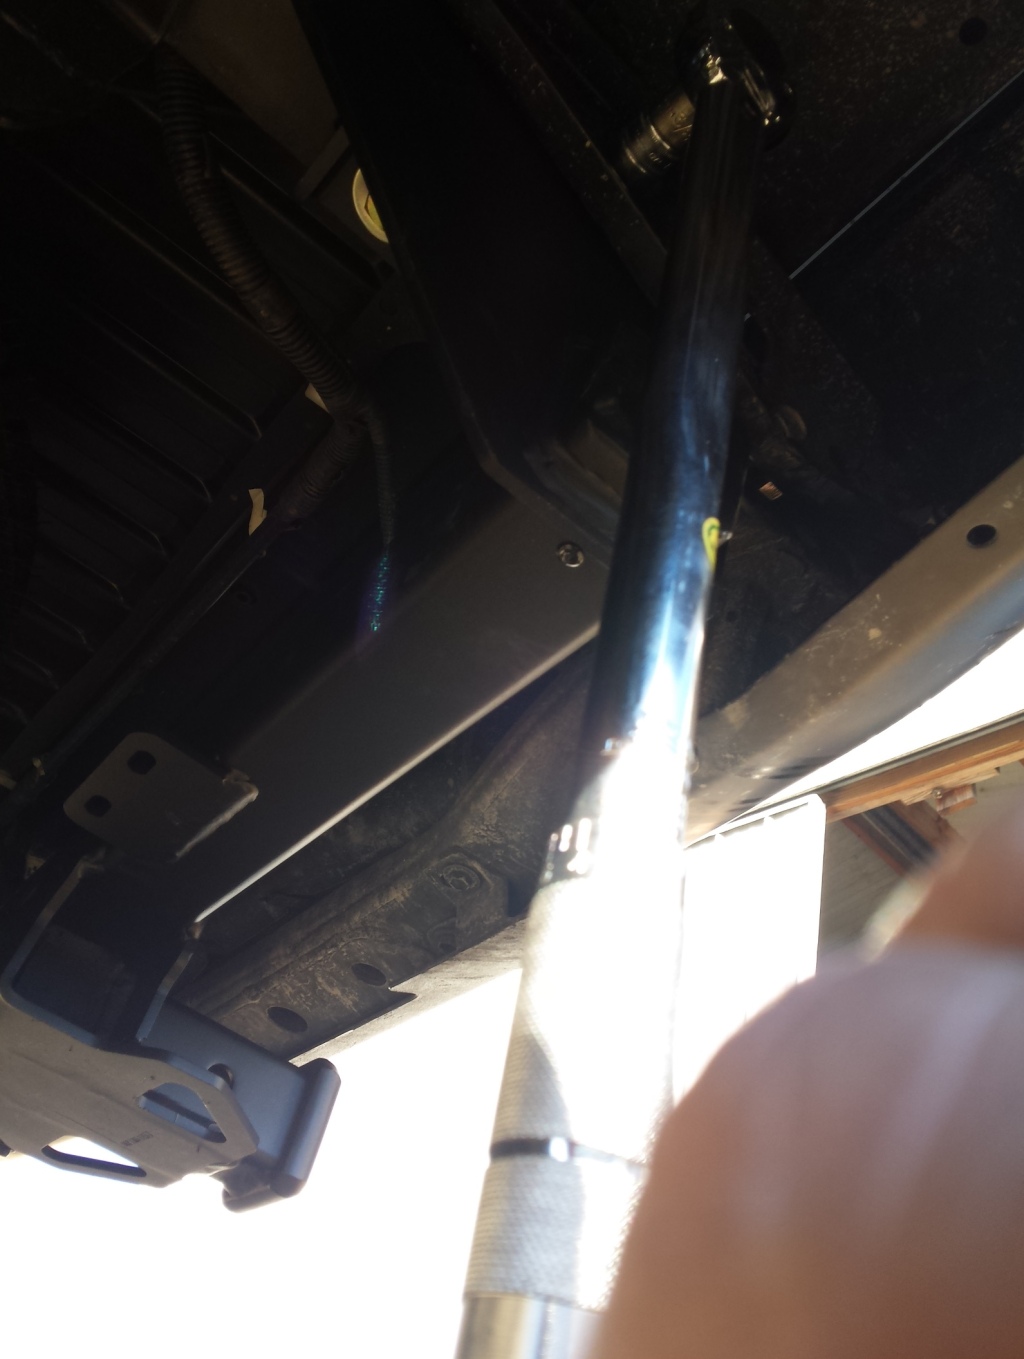
torque wrench install a trailer hitch
Now it’s time for the final tightening of the bolts, grab your trusty torque wrench and tighten all of the bolts to the specified torque for your application.

<reese t connector toyota tacoma>
Now it’s time to move on to the wiring connections, Old timers will remember the bad old days when hooking up a trailer lighting harness meant cutting and splicing wires. Then came the Scotchlock connectors that made the job quicker but weakened any wire they were attached to and made it more likely that the wire would fail a few years down the road. Now everything is plug and play for most vehicles.

<reese t connector toyota tacoma>
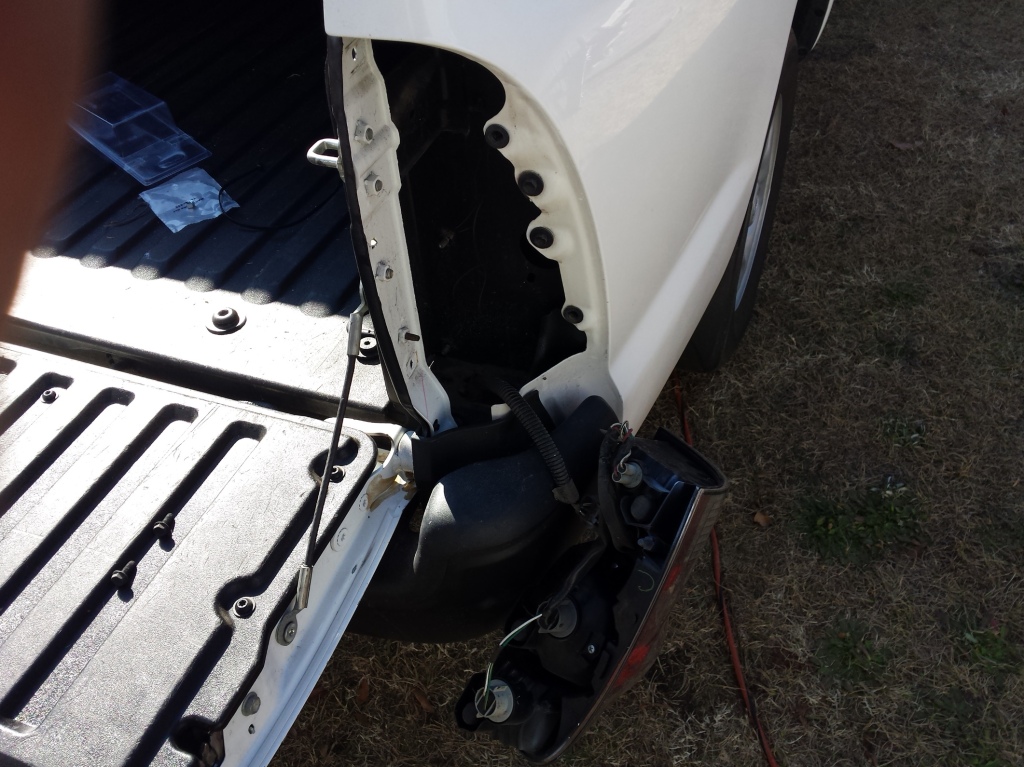
The instructions called for me to remove the right rear tail light so I did.

tee connector install a trailer hitch
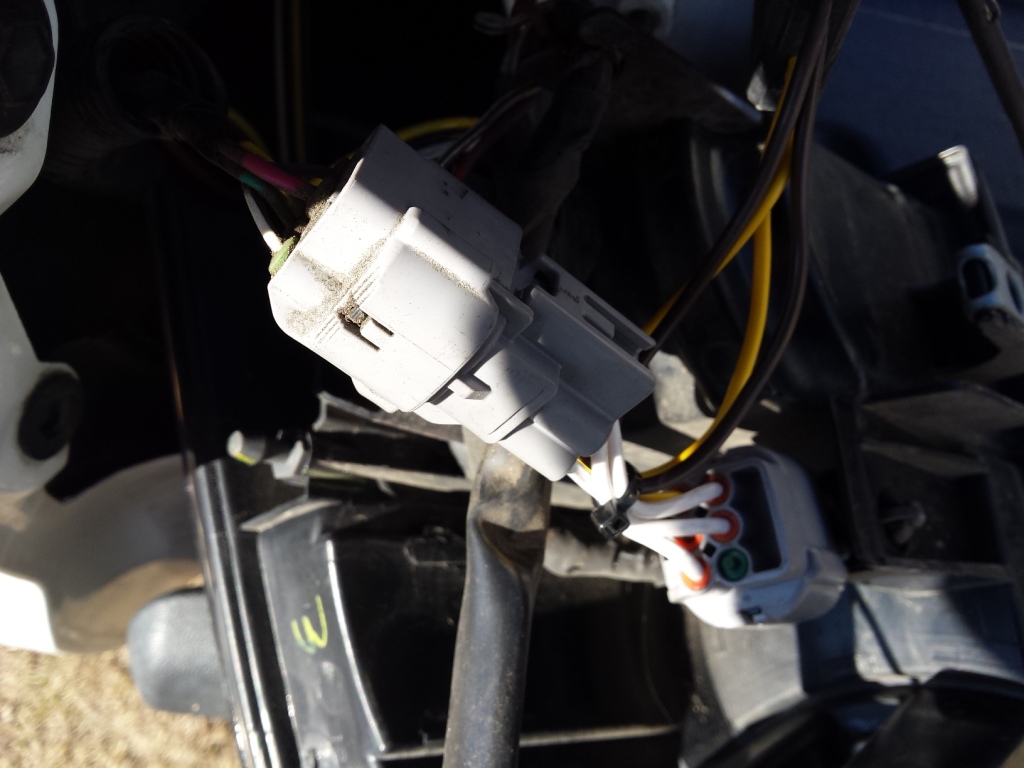
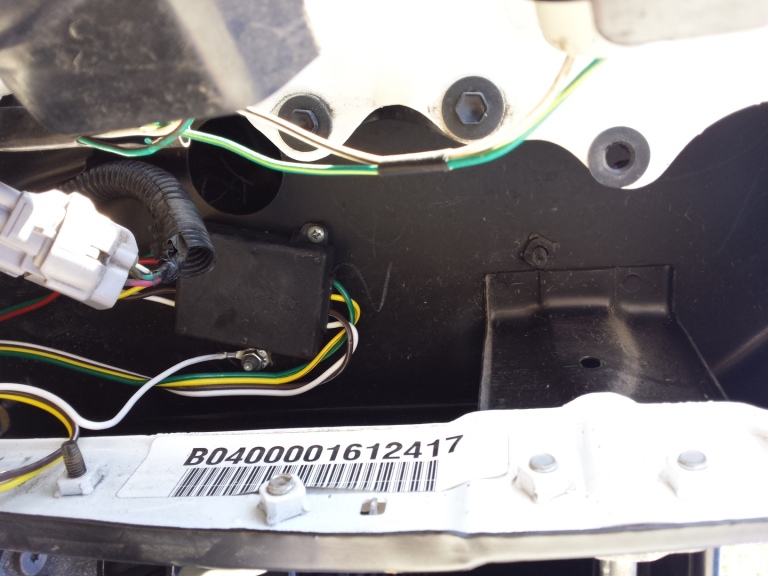
Then plug the Reese T-connector wiring harness in between the trucks harness and the tail light.

trailer lighting control box
The only part of the installation that required any drilling was to mount the control box. Be sure to paint the metal inside the hole and let it dry mounting the box with screws & lock nuts. Please note on some applications these boxes can be mounted directly to the receiver hitch without any modifications. One other thing to note, many modern trucks have composite plastic beds that do not conduct electricity well, so make sure that you attach the ground wire to a metal component that is attached to the chassis. Using outdoor rated UV resistant cable ties secure the wiring neatly allowing just enough slack at the end to work with all of your trailers but without dragging the ground.

Toyota Install a trailer hitch Westin
Now slide in your hitch and hook up your trailer & test everything. I have been using this Westin Receiver Hitch
for a year now dragging trailers all over the eastern United State and have absolutely no complaints about it. It was easy to install to. Even if you still don’t feel up to doing it yourself at least now you know what it takes to install a trailer hitch. See you on the road!
Peace Y’all

Install a Vista-Cruise Throttle Lock

For the last 3 or 4 months a shoulder injury has severely curtailed my riding and blogging. In addition to this I’ve had problems with numbness & tingling in my hands seemingly forever but simply wrote it off as the cost of working on a computer all day every day for a living. Using a Cramp Buster on the throttle helped, but once I hurt my shoulder it just wasn’t enough anymore.
Although sitting at a desk drawing pictures and filling out spreadsheets on a computer all day often leaves my hands & fingers sore whether I ride or not, some of the things about my main daily driver motorcycle greatly exacerbate the problem. To start with as part of the whole vintage/rat/survivor look it still had the original 35 year old factory rubber grips on it. While they really looked the part, these grips were rock hard and slick, to the point that I might as well have been gripping the steel handlebar directly. The bar itself was robbed from a 71 Honda CL450 and is one of the most rigid & indestructible off road handlebars ever made, this combined with the fact that it is clamped directly to the top of the triple tree with no insulation of any kind, sent the high frequency vibration of the engine straight up into my arms. In all honesty it was nothing that I couldn’t live with until becoming afflicted with bursitis in my right shoulder. Faced with the reality of not being able to ride more than a few minutes at the time, I decide that it was time to do something about it.

<vista-cruise motorcycle cruise control>

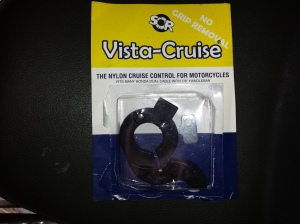
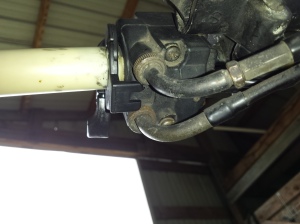
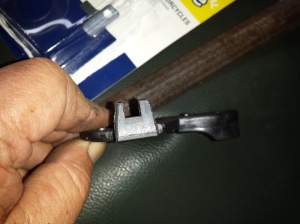
So I decided to replace the grips and install a Vista-Cruise Throttle Lock. This universal motorcycle “cruise control” is a product that I have used before on 2 other motorcycles not for pain relief but mainly for long distance riding and for riding no handed and other fun stupid stuff. This like most universal products may or may not work with your particular motorcycle, and it’s highly unlikely that it will fit any motorcycle without some modification. These throttle locks were designed around a typical late ’60s through mid ’80s universal Japanese motorcycle with dual throttle cables. Even then the instructions warn that some cutting or filing may be necessary to make it work. As you see in the picture below it would not fit up against the switch housing as delivered.

<vista-cruise motorcycle throttle lock>

So I had to file it to fit.

<universal motorcycle throttle lock>

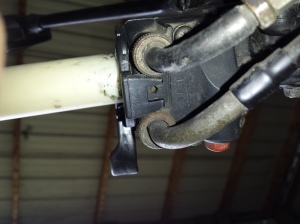
Remove the least amount of material possible, & check the fit often. This is how I had to modify it to fit my 1980 Honda CB650, your bike may require something totally different. If you’re not comfortable with cutting & modifying a brand new part to make it work then you probably should not install a Vista-Cruise throttle lock. I recommend that you use a Brakeaway custom fit cruise control instead.

<universal motorcycle cruise control>

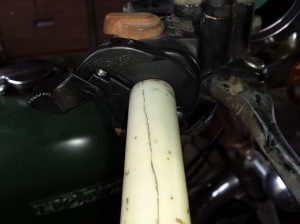
It is not really necessary to remove the grip to install the throttle lock but since I was replacing the grips anyway it is much easier. If you are not changing the grips you can just pry it back from the switch housing a little bit and fit it around the throttle tube as directed in the Vista-Cuise instructions.

<motorcycle throttle lock>

Once you have it fitted properly here’s the adjustment key that is supplied. Use it or a flat screwdriver to adjust the tension screw so that it holds the throttle in place when locked but allows it to return to idle as soon as you flip the switch up to unlock it.

<motorcycle cruise control>

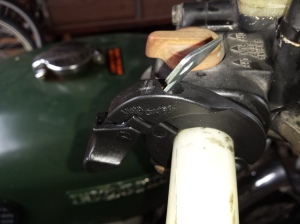
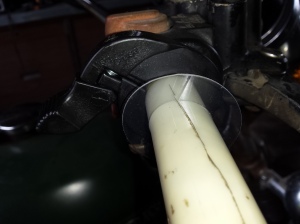
Don’t forget the clear washer shown below that goes between the grip and the throttle lock to prevent the grip flange from hanging up on the side of the Vista-Cruise.

<vista-cruise installation>

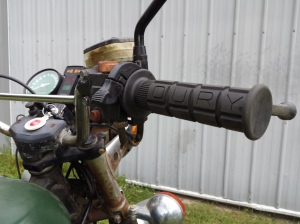
I decided to use new Oury grips for the vintage look and proven vibration dampening abilities. Oury Grip has been in business for decades and have always provided a good product at a decent price. Just be sure to clean your handlebar and throttle tube well, then use a good handlebar grip glue to make sure everything stays in place.

<Oury vintage motorcycle grips>

The new grips are nice and soft so the handlebar buzz is greatly reduced, plus I don’t have to squeeze the throttle so tight to move it. Once up to speed in a place where I don’t need to accelerate or slow down too often just push down on the lever & lock the throttle. Even with the throttle locked you should still be able to move the throttle to adjust your speed as needed. One caveat that is worth mentioning is that you will not get true seamless “cruise control” action. This is a throttle lock if you start downhill the bike will speed up, going uphill it may slow down. On bikes like mine with four old mechanical carburetors and / or strong throttle return springs,  your adjustment to the lock may end up being a compromise. At low speed the leverage of the carb internals and return spring will gradually close the throttle. Once the throttle is opened far enough to negate this problem it will stay locked in place for miles of smiles.  It could be adjusted tight enough to hold at all speeds but then it would not return to idle immediately upon released. This is the single most important thing to remember, for the sake of safety it must always be adjusted so that when the lock is released the engine will return to idle just the same as if you simply let go of the throttle.

After a nice 100 mile test ride I am very pleased to say that my arms & hands felt great & I can’t wait for the next road trip!

<new grips on the assault scrambler>

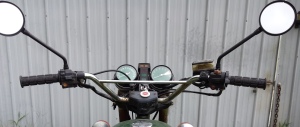
It’s still the same old road running rat but with cruise control & nice new grips!

Products used in this post;

Dry Coat Rust Preventative Review

All of us who work with metal have a common enemy, rust insidious and seemingly unstoppable it creeps into all the places we don’t want it to be, destroying our hard work, valuable treasures & expensive raw materials. About a month ago I did a review of Metal Rescue rust remover from Workshop Hero. The product worked very well & I have been  pleased with it.

One thing we all know by now is that once you get the rust off of a piece of steel is that afterwards you have to keep it off. If you have ever removed rust from steel using any chemical method you may be familiar with a phenomena known as flash rusting. This occurs when you remove your rust free part from the solution (or the electrolysis bath), rinse it off and then leave it to air dry, only to find out that in a very short period of time, often well less than a day, the entire surface is covered in rust again. While there are a few finishes that actually  require a flash rust coating to work such as POR-15 semi gloss black chassis paint  & some gun finishing techniques, most of the time this is not desirable. Freshly machined parts are prone to flash rusting as well. In the past I have always just tried to coat all such surfaces with oil or grease to preserve them, and while this works it is messy, expensive & makes handling a pain. So when the fine people at Workshop Hero offered me a sample to test and to write about in this Dry Coat rust preventative review I jumped at the chance.

<rusty metal by motopsyco>

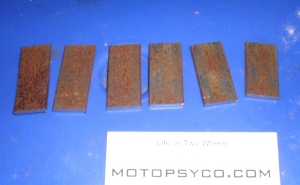
Just to keep thing honest & interesting let’s start by going out to the scrap pile and grab a rusty strip of 1/8″ thick x 1″ wide and cut six strips from it approximately 2 inches long. And then throw the strips into our bucket of Metal Rescue for an overnight soak. Yes this is the same solution that I used for the previous review, it has not been changed but it sure has removed a good bit of rust from various motorcycle parts.

<clean the rust off>

Compare this to the before picture the rust is gone, I rinsed the parts with water and patted them dry with a paper towel

<6 clean strips of steel Metal Rescue>

The plan for this little experiment is very simple to coat 3 of the strips with Dry Coat and allow to dry according to the instructions. Then I placed one coated test strip and one un-coated control strip paired together in 3 different locations around my property. This was on March 14th, 2015.

<metal recue dry coat rust prevenative review>

According to the company website it should give up to 2 years of protection from rust for steel parts stored indoors. The first two steel strips I left here in my office, literally indoors. The next two strips I placed on a ledge in the uninsulated, drafty humidity plagued old horse barn that I have converted into my workshop. Now this is definitely indoors out of the sun and the rain, but temperature swings cause enormous condensation problems that leave all of my bare steel tubing, rods, flat bar etc. coated in surface rust if they are not fabricated into useful items & painted quickly. If it can work here it should work at any other indoor location.

<out in a real workshop hero's workshop>

The final two pieces I stuck in a semi-exposed outdoors location. Let me be perfectly clear about one thing, this product is rated for indoor use by the manufacturer, if the coated strip rusts this is not a failure of the product, it’s just that an extremely curious cat wanted to push the limits. When I say semi-exposed, the two strips in the picture below are lying on the control enclosure of the solar panels that provide the lighting for my workshop. The solar panels are about 18 inches above them but they are exposed to the weather from 3 sides.

<dry coat test strips outside>

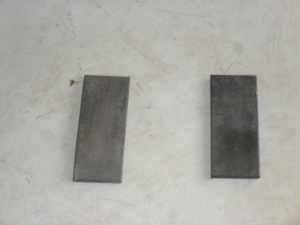
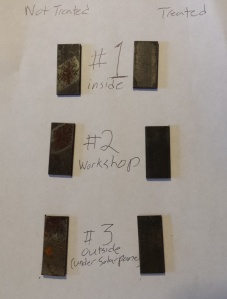
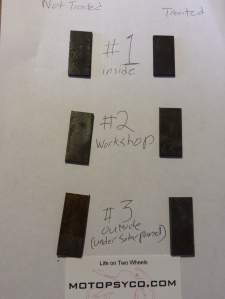
Just over 4 weeks later on April the 6th, 2015, I gathered all of the test strips together & photographed them. The parts that were coated with Dry Coat are on the right.

<workshop hero dry coat test>

I decided to flip the pieces over so you could see both sides.

<dry coat rust prevenative review>

Now lets look at some close up pictures. Here’s the samples that I left in my office. The part on the left is well on its’ way back to the original rusty appearance, but the part on the right is not. You can clearly see the pitting from the original rust before treatment, but not any new iron oxide formation.

<dry coat test sample 1 indoors>

This next sample is the one that I really wanted to check after a month in the old barn with a typical South Carolina late winter/early spring weather pattern. It is not unusual at this time of the year to have temperatures swing from 15-20 degrees Fahrenheit up to nearly 80 and then back down again in the space of a day or two. Of course when the frost melts in the morning it will sometimes look like rain inside of an uninsulated metal building. You can see the difference that this made when looking at the untreated part on the left, it’s a lot rustier than the control strip that was left in the house. Once again you can see that the coated strip is still rust free, even in the pits left behind by the previous rust that was removed at the beginning of this test.

<dry coat test sample 2 shop>

The outdoor test strips are next, the control strip on the left is quite rusty. The test strip on the right has developed a tiny bit of rust down in the existing pits in the metal. It still looks a lot better than the un-coated strip. Just remember Workshop Hero’s Dry coat is sold for indoor use and these last two test strips were just me satisfying my curiosity. The two pieces of steel shown here, have been rained on several times, and subjected to near daily freeze/thaw cycles. I am still pleased with the results and wouldn’t have problem recommending this product to anyone.

<dry coat test sample 3 outdoors>

I did download a copy of the Material Safety Data Sheet for this product so that I could see if there was anything in it that required any special protective equipment beyond the usual safety glasses and gloves. It is non toxic, non-flammable, and does not require any special disposal precautions. I didn’t see anything about welding two pieces of coated steel together so I contacted the manufacturer’s representative, and was told that they suggest washing any parts that are to be welded with soap and water first. The coating is 3 microns thick and probably wouldn’t interfere with most welding or cutting processes, but it would be wise to follow their guidelines.

So who needs this stuff? Obviously those of us who restore or repair old motorcycles, atvs, tractors & automobiles. Also machine shops, especially those of you who are storing & shipping items like re-bored steel cylinders, crankshafts, and other bare steel parts. Steel fabrication shops & o.e.m. manufactures of steel plant equipment, platforms, vehicle parts, or anyone else who stores bare steel either as a raw material or a finished product and needs an inexpensive solution for temporary prevention of rust, without having to deal with a hazardous material.

Both Metal Rescue and Dry Coat are available in a wide variety of sizes ranging from small bottles, 5 gallon buckets, 55 gallon drums and even 330 gallon totes for industrial users. As I said this is not permanent rust protection but it beats using expensive, messy, and hard to remove paints, oils and greases just to keep rust off of steel for a short period of time until you can use it.

Product recommended. I am going to place all of the test strips back in the places where I had them and will check on them over time. If anything changes I’ll be sure to let you know.

Metal Rescue Reviewed!

Mission Main Street Grants

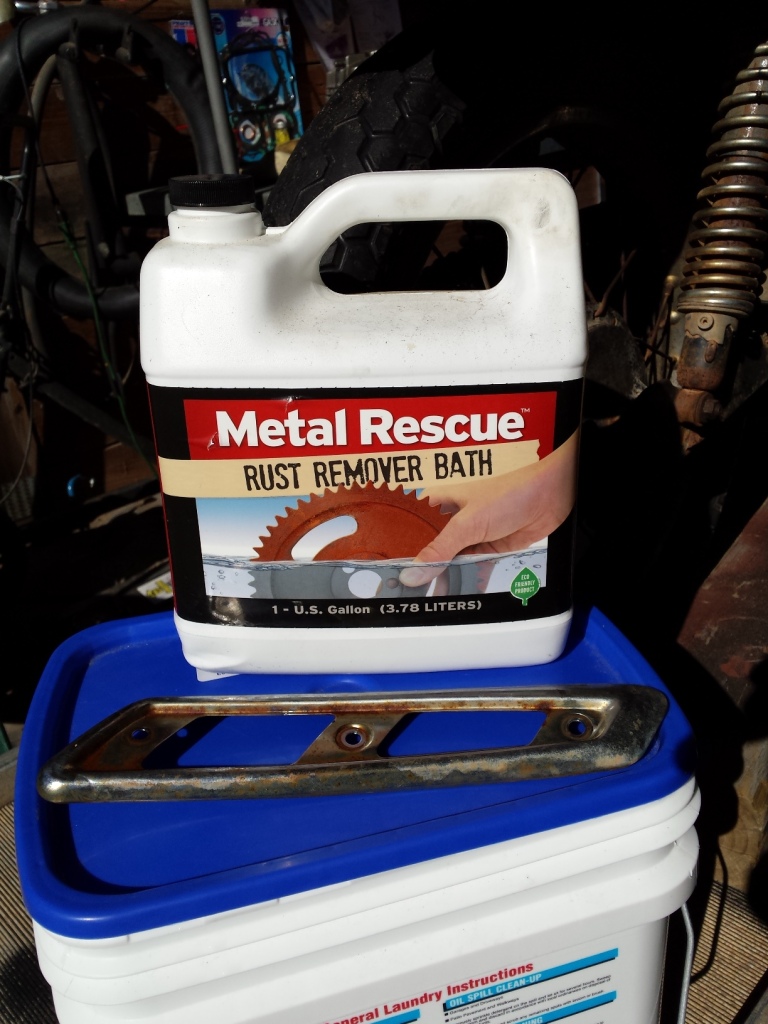
For this ‘Psyco product review let’s checkout Workshop Hero’s Metal Rescue
rust remover. In the past I have always used good old phosphoric acid for removing rust. In fact I have a 15 gallon tank of the stuff carefully stored away for cleaning old gas tanks & stuff like that. It really removes the rust quite well but it is also toxic, smelly and will corrode the base metal while removing the rust. To use it requires rubber gloves and eye protection.
Last year at the VMA swap meet in Eustis Florida, I bought a gallon of Metal Rescue from a vendor and brought it home, then I poured some out in a small container & dropped a couple of extremely rusty parts in it and left them overnight. The next day they were a little better but not as good as I hoped so threw them into the acid tank and stuck the Metal Rescue on a shelf under the workbench until last month (January 2015).
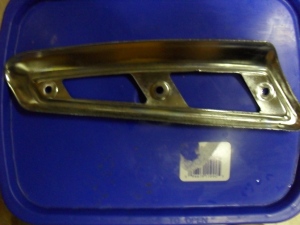
I’m in the very beginning stages of ruining a wonderful dirtbike by restoring it, so I decided to try the Metal Rescue on some of the chrome bits that really needed cleaning up. First I got a good bucket large enough to hold the parts with a good fitting lid to seal it up and poured the entire jug of rust remover into it.

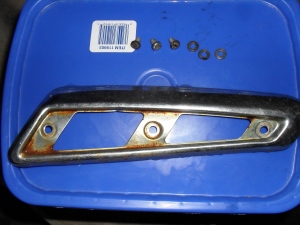
<RUSTY TS185 HEAT SHIELD>
After waiting a day I opened it up and this is what I found, meh give it another day.

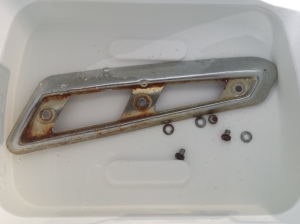
<METAL RESCUE  1 COLD DAY>
This is a picture of the same after 3 days, I am not a happy camper at this point.

<is this stuff gonna work?>
So I pick up the jug to look for a way to file a complaint and read the part of the instructions that says; “For best results, use at room temperature (68°F or 20°C) or above. Metal Rescue™ works optimally at room temperature (68°F or 20°C) and above, so it may require heating in cold temperatures.” Looks like using it in an unheated shop in January is out of the question unless you live closer to the Equator than I do or on the opposite side of it.
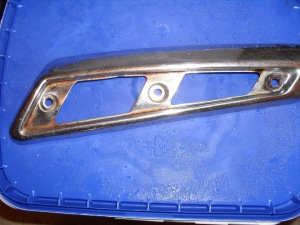
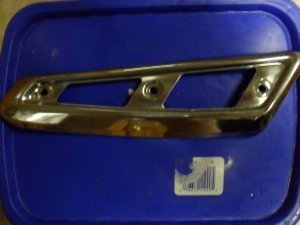
Determined to get my money’s worth out of this product I carried the bucket into the house and put it in the laundry room to warm up. When I checked on it the next day 90% of the rust was gone and on the fifth day of soaking the heat shield looked like this!

<Metal Rescue heat shield>

<Metal Rescue heat shield>
The rust was completely removed from both sides and I was very impressed. It probably would have helped a lot if I had read the instructions first. Since then I just keep this bucket of Metal Rescue in a safe place in the house. It is chemically safe with no hazardous ingredients and if you take care to ensure that no hazardous substances get into it, Metal Rescue can be safely disposed of in most sewer systems but check your local laws first.

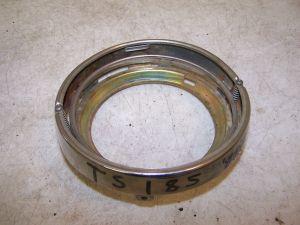
<rusty ts185 headlight ring>
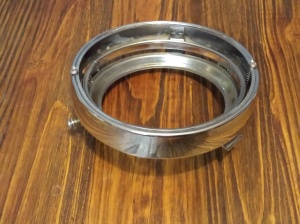
To give you an idea of how much I like this product, I bought some more and put it into the bucket with what I already have. With the solution at room temperature it took less than 24 hours to clean up this headlight ring to the condition that you see here. Plus I was able to leave it assembled with all of the plastic parts & springs while it soaked something you would not dare do with acid.

<Metal Rescue headlight ring >
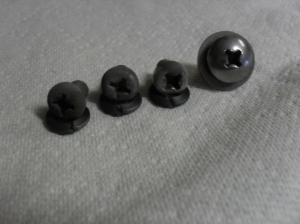
The instructions do warn that if you leave plain steel parts in the Metal Rescue
too long that it will turn them dark after removing the rust. Plated parts don’t seem to be affected by this. The screws in the picture below illustrate this. Since I am going to be re-coating these screws it’s not an issue for me, but if you are restoring something that calls for a natural metal finish you should be aware of this.

<metal rescue screws>
What’s the bottom line, is it worth 25 -30 bucks a gallon? Yes, especially when you consider that if properly stored it can be used over & over combined with the fact that it is biodegradable and contains no VOCs, solvents, acids, bases or hazardous ingredients. Just be sure you read the dadgum instructions on the jug first. It really does work much better when it is warm.
Peace Y’all