D.I.Y. motorcycle head service is possible for the home mechanic at times, under the right circumstances. Of course if you are one of those fortunate individuals who happens to have a fully equipped machine shop and know how to use it you can do anything. But for the ordinary person restoring an older motorcycle or atv that wants to save a buck or two it is still possible to do an acceptable job provided certain conditions are met.
My patient for this job will be the CM400 that I used for the valve adjustment tutorial a couple of weeks ago. After adjusting the valves and putting oil in the cylinders it still had about a 45-50 psi difference in compression from the left to right sides so I pulled it apart for a top end overhaul. It turns out that the right cylinder had oil rings that were stuck from sitting and that the gaps were aligned on the other two rings.

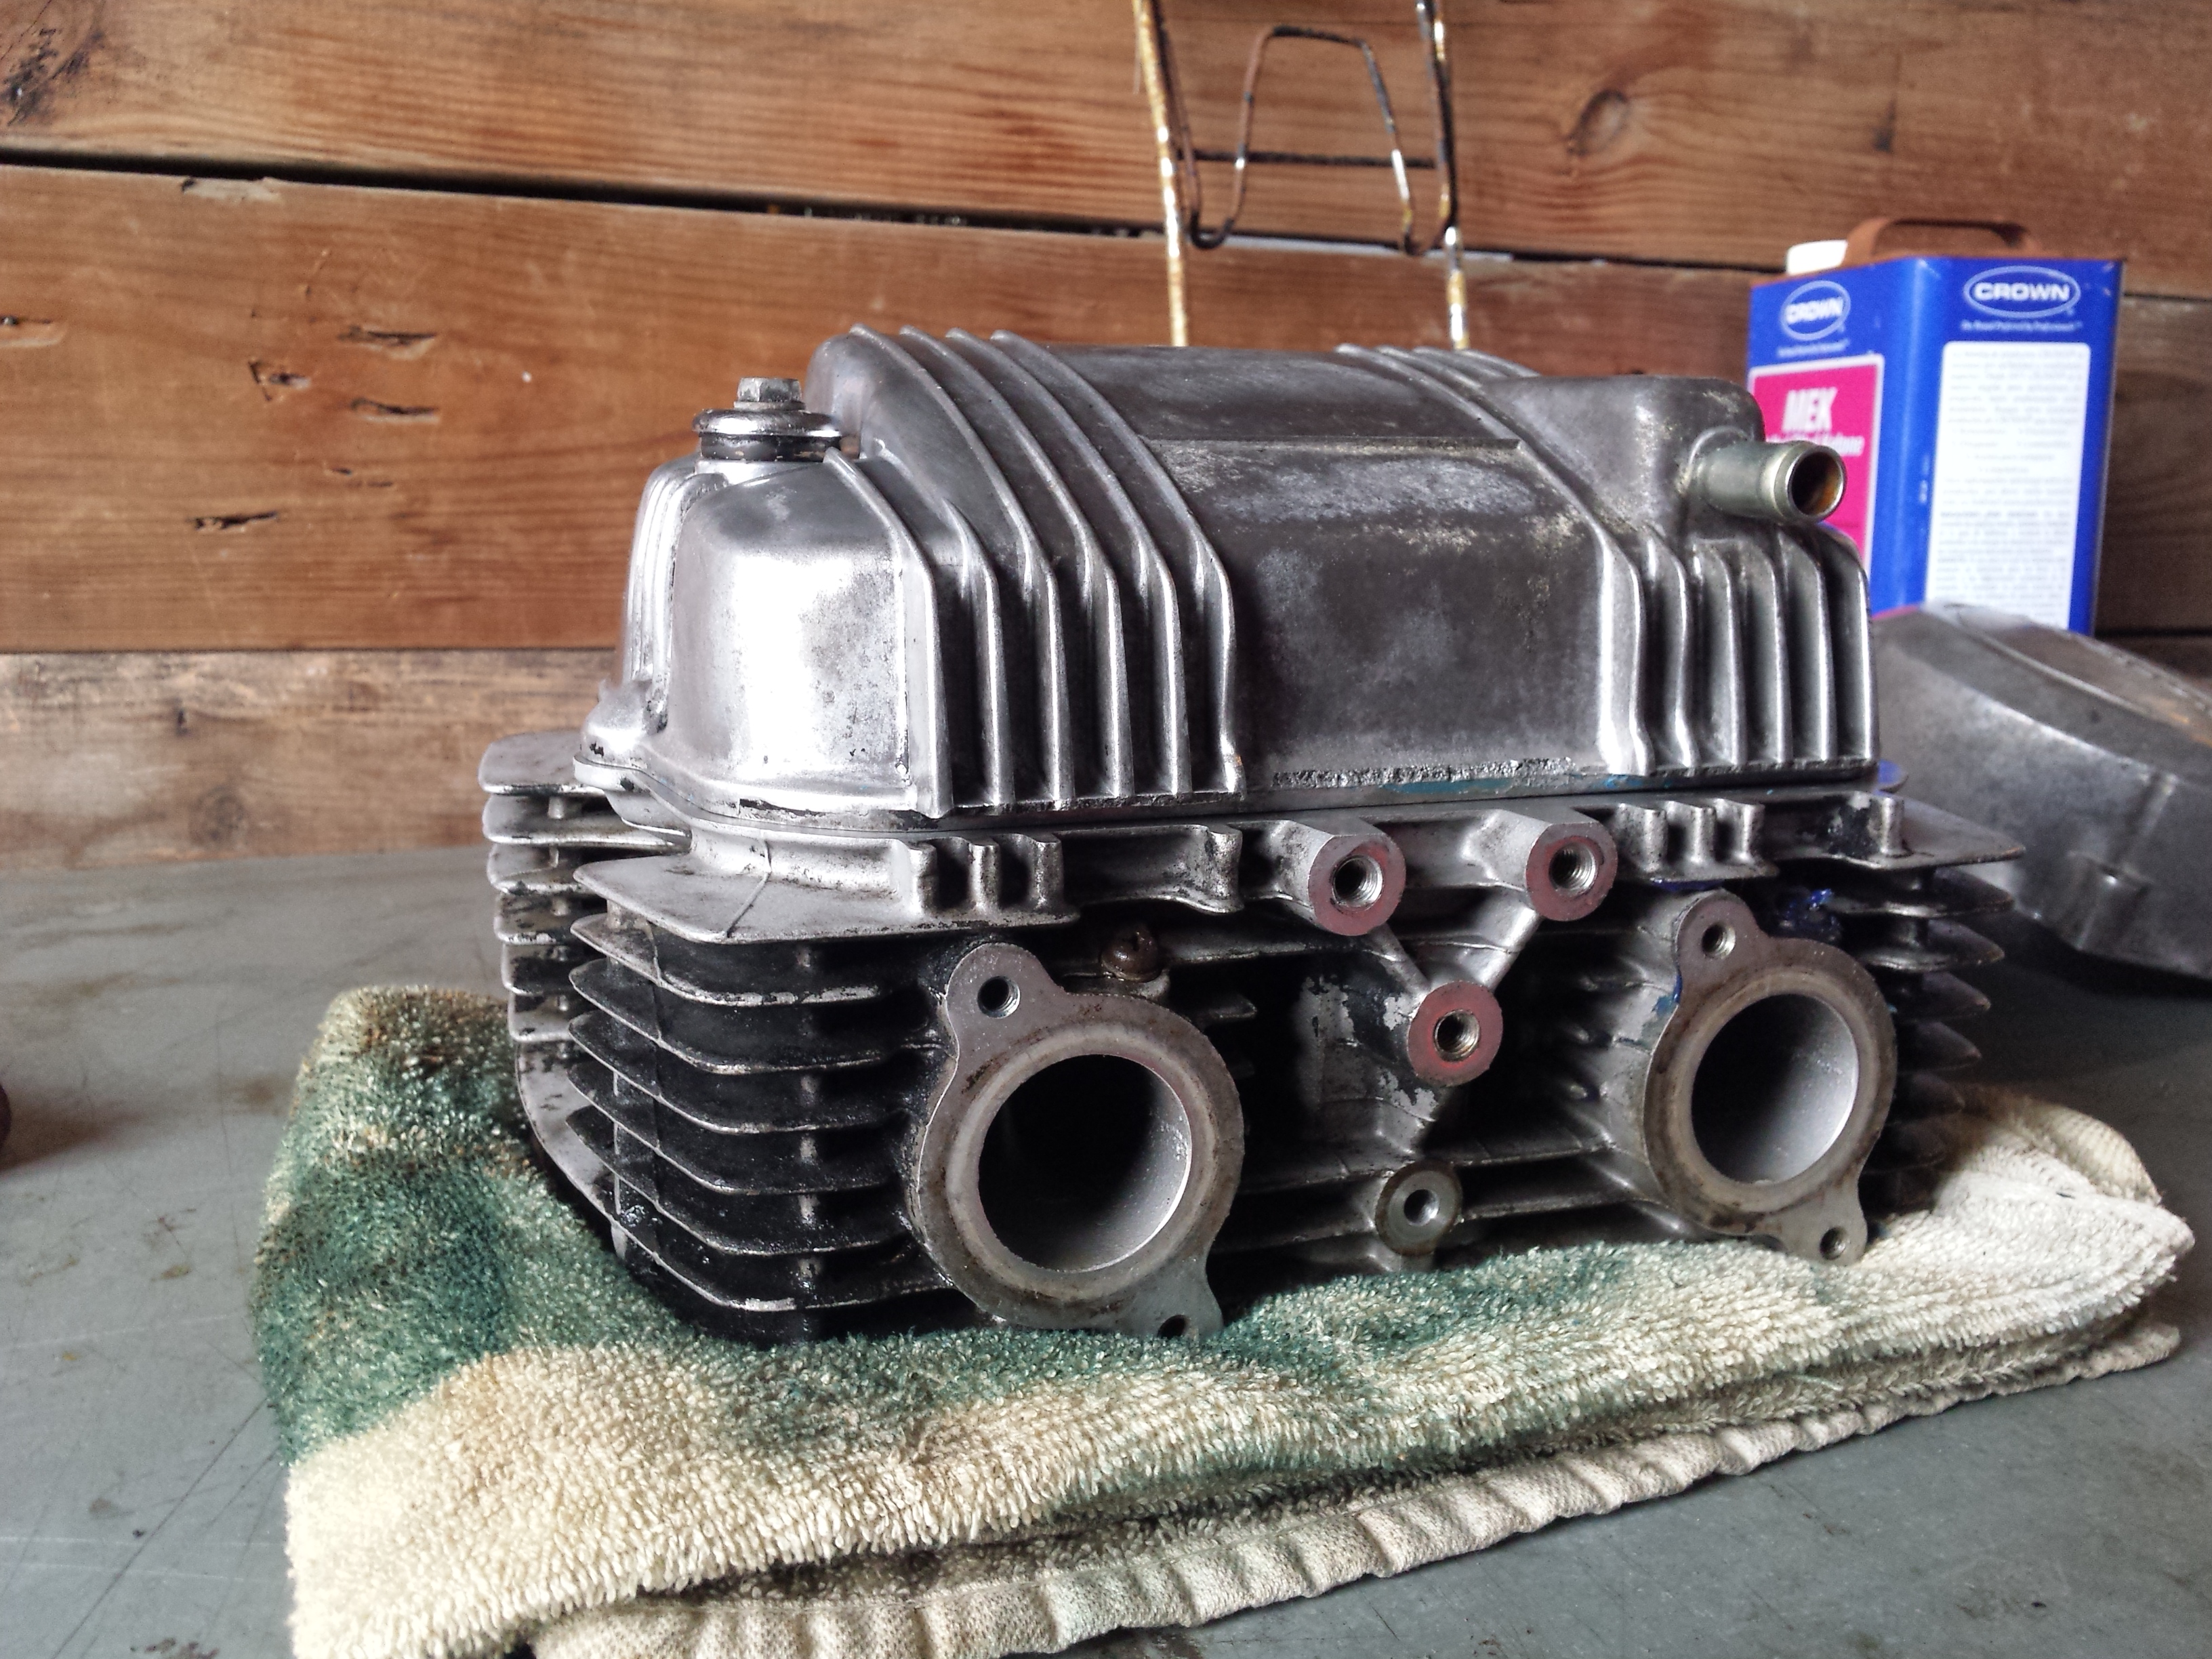
Before disassembling it, I cleaned the head fairly well and removed the carbon from the combustion chambers. This makes handling the parts much nicer and inspection much easier. No matter what method you use to remove the carbon do not allow any type of abrasive or wire brush or scraper to contact the flat sealing surface of the head. Yes I know you may have to use some type of scraper to remove the gasket residue from the head but be very careful not to scratch or gouge it in any way. I actually used soda blasting to clean this head but made sure not to hit the mating surfaces with it.

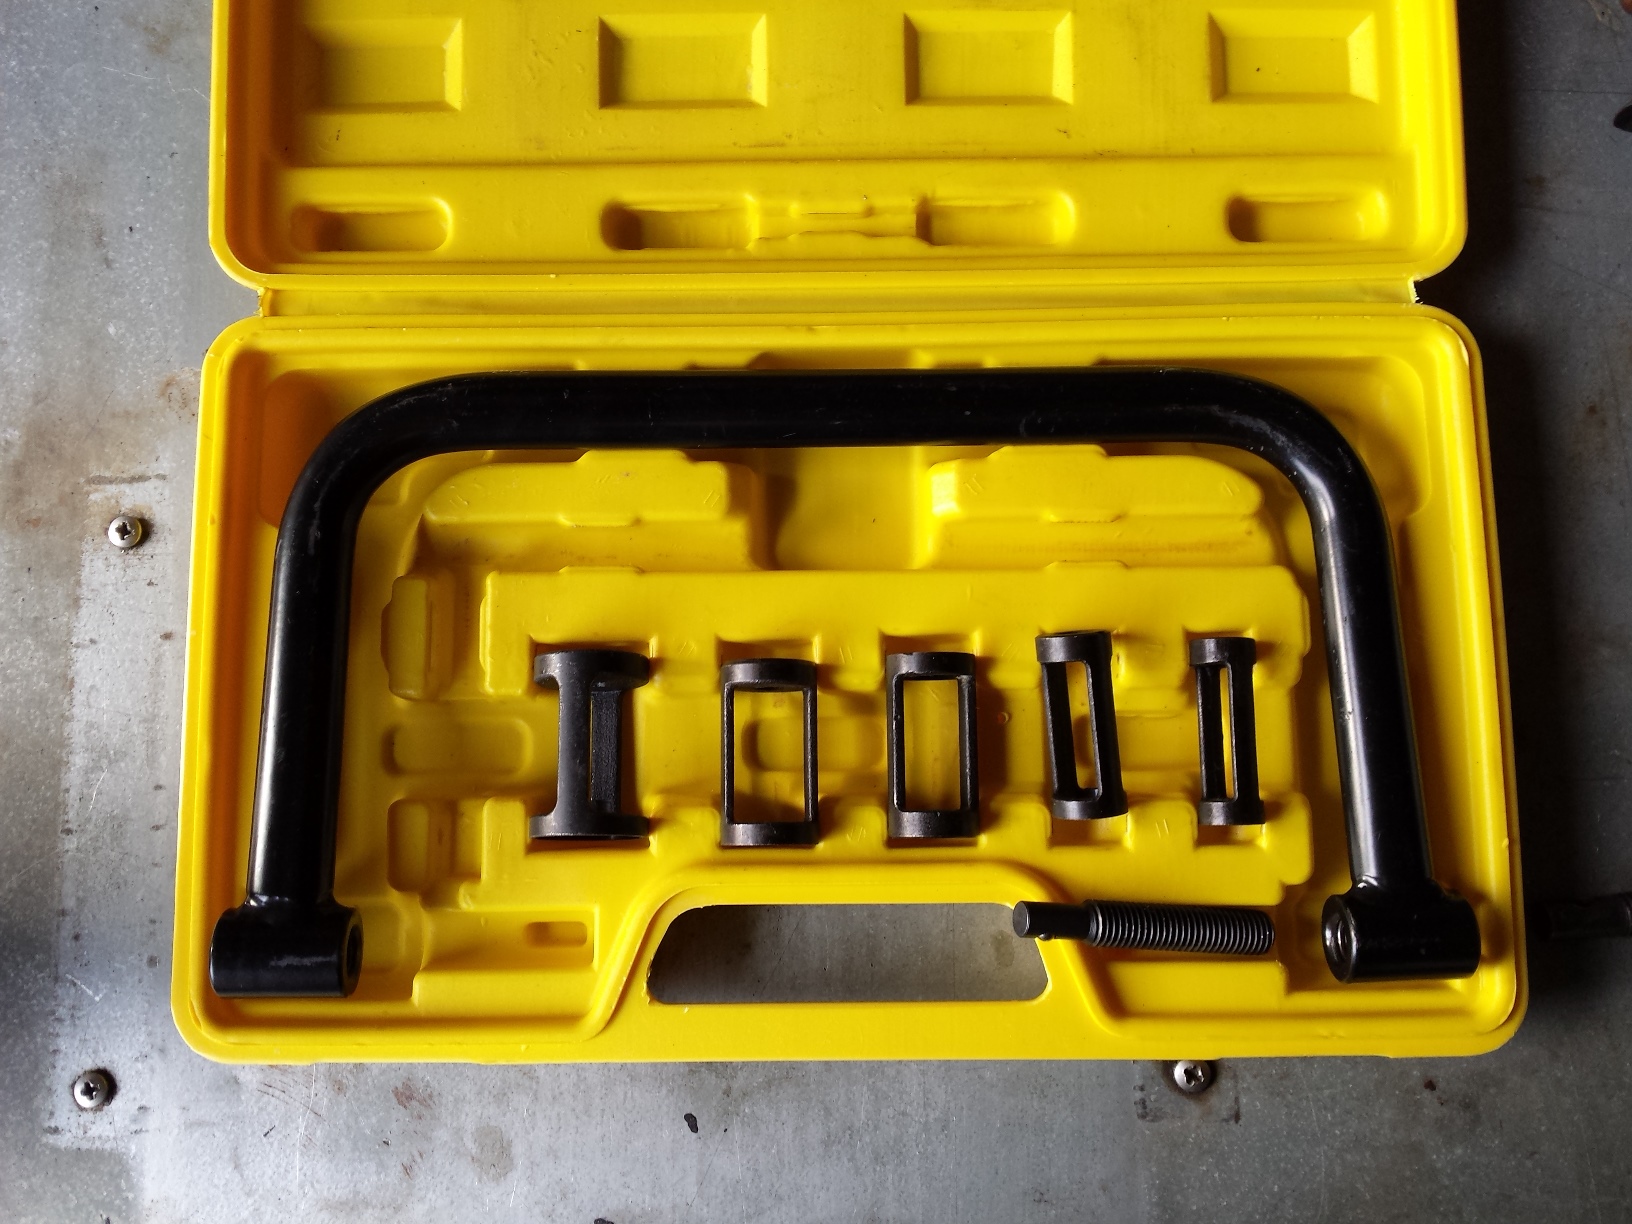
Now I must make a couple of quick disclaimers here. First there are some defects that if discovered during the inspection process that will mean you need to take your head to a machine shop to be repaired anyway. Second, unless you own a set ball micrometers to check them with, you will basically be guessing that the valve guides are okay based on the condition of the valve stems. Chances are that if like me, you are working on something old but with relatively low mileage they are okay BUT it is not guaranteed and excessively worn valve guides can cause oil consumption & smoking even with new seals. Third, this is not the high performance option, if you are building a hotrod and looking to squeeze every last drop of performance out of it you can then I suggest you contact a reputable high performance machine shop for a good 5 angle valve job and new valve guides. This is to get your old heap running as good as possible for the least amount of dough you can spend. The fourth and last disclaimer is to always put safety first in the shop. You will be dealing with strong springs under compression. There is a chance that a tool could slip releasing a spring to go flying out at high speed and hit you or to pinch your fingers between the spring & the tool. Only use a good quality valve spring compressor
in good condition, make sure you read the instructions that come with it, & wear some eye protection too.
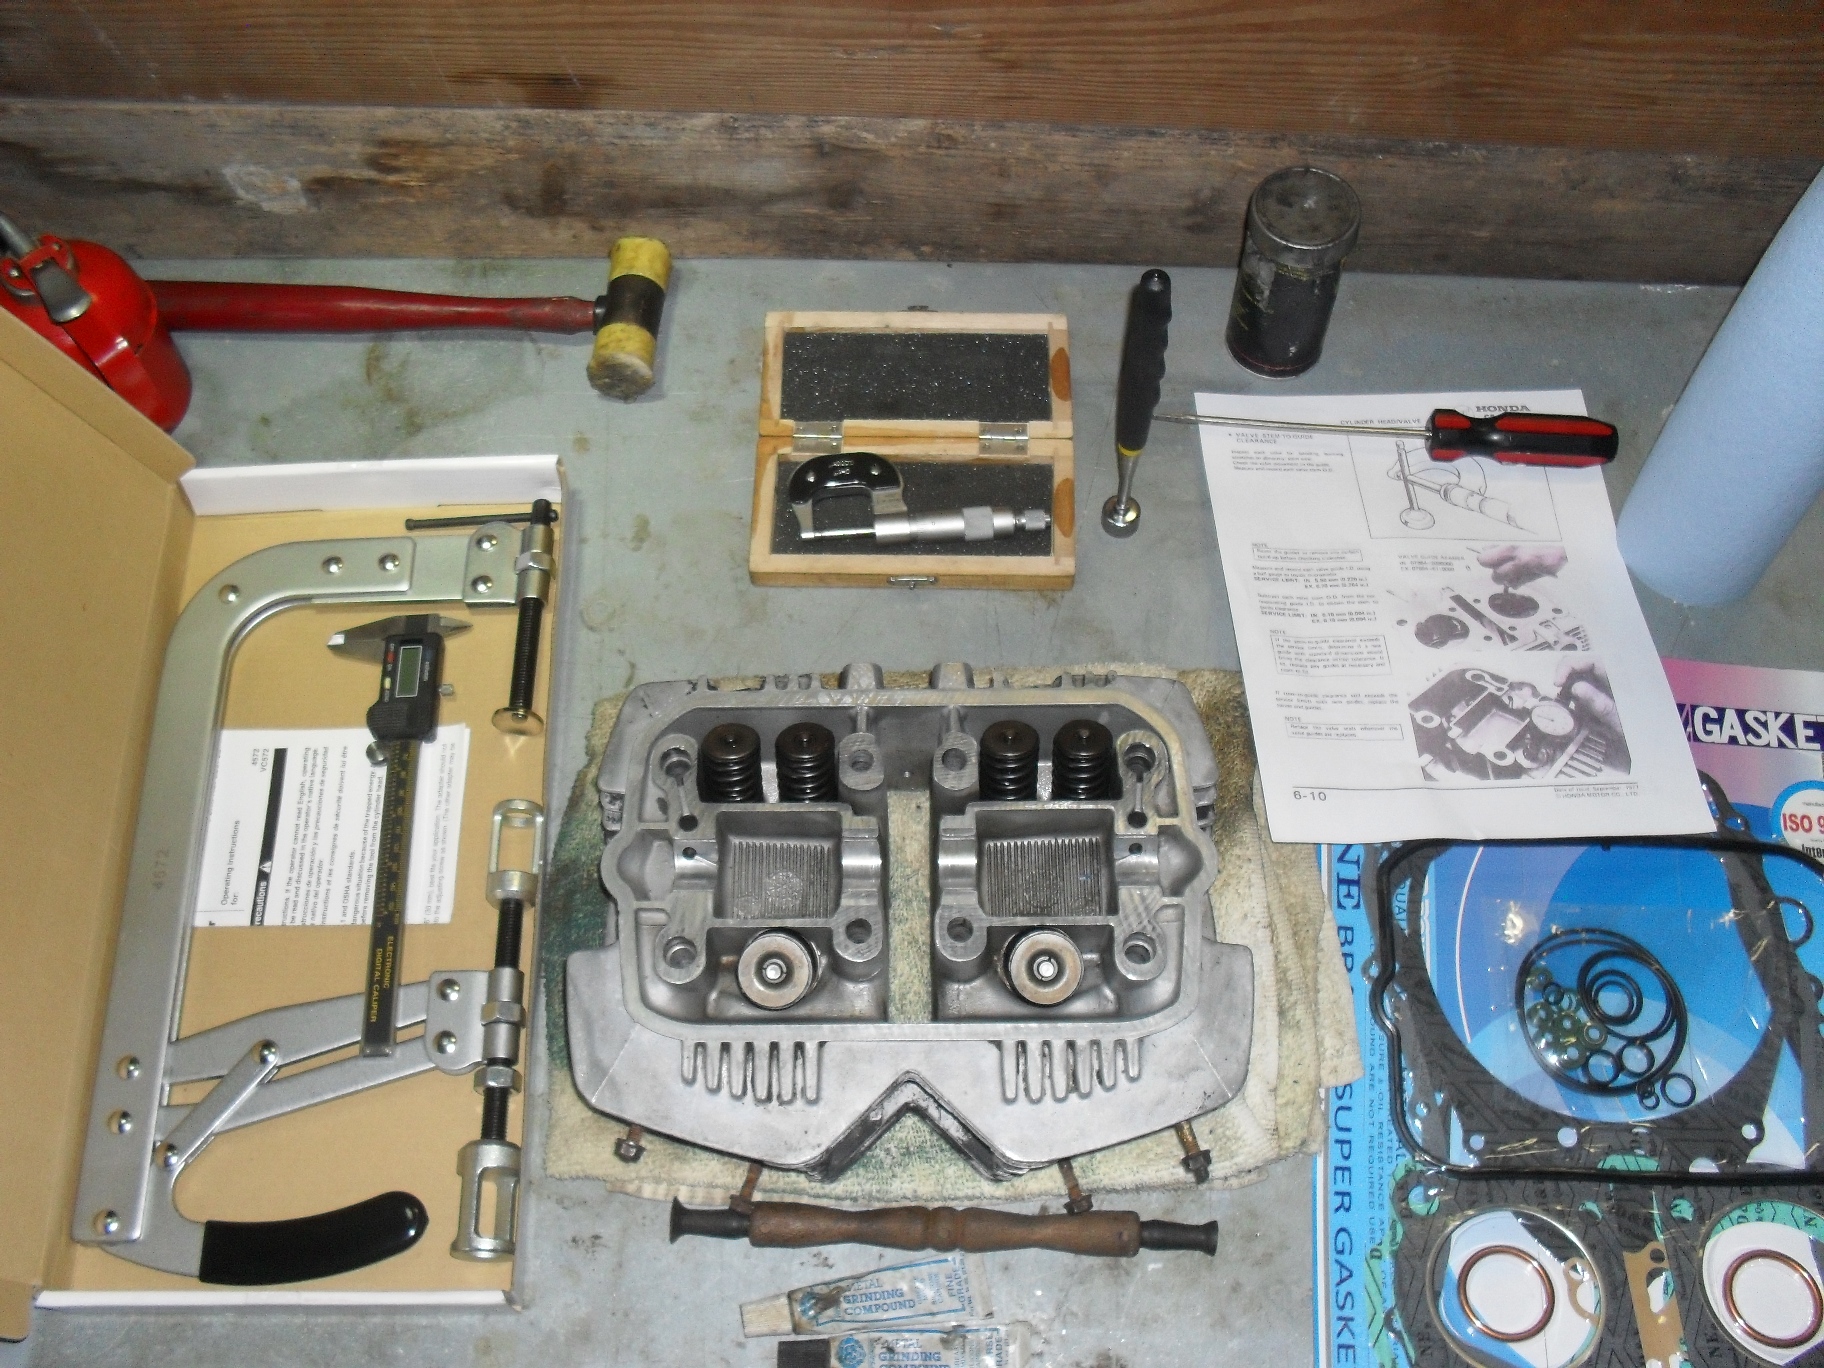
Even so there are some specialty tools you will need to get if you do not have them. In the picture above at the bottom center the thing with the two suction cups on it is a valve lapper with 2 tubes of grinding compound one coarse & one fine. Moving clockwise around the head are the valve spring compressor, a caliper dial or digital whatever you have, a light rubber or plastic hammer just in case something needs a tiny bit of extra persuasion, a micrometer (if you don’t know how to read a micrometer you can either learn how or just buy a digital one.) Next item to the right is a pick up magnet and a flat screwdriver, a few pertinent pages photocopied from the service manual and a new gasket set with valve seals. If you want to learn to use a micrometer watch the 2 videos below.
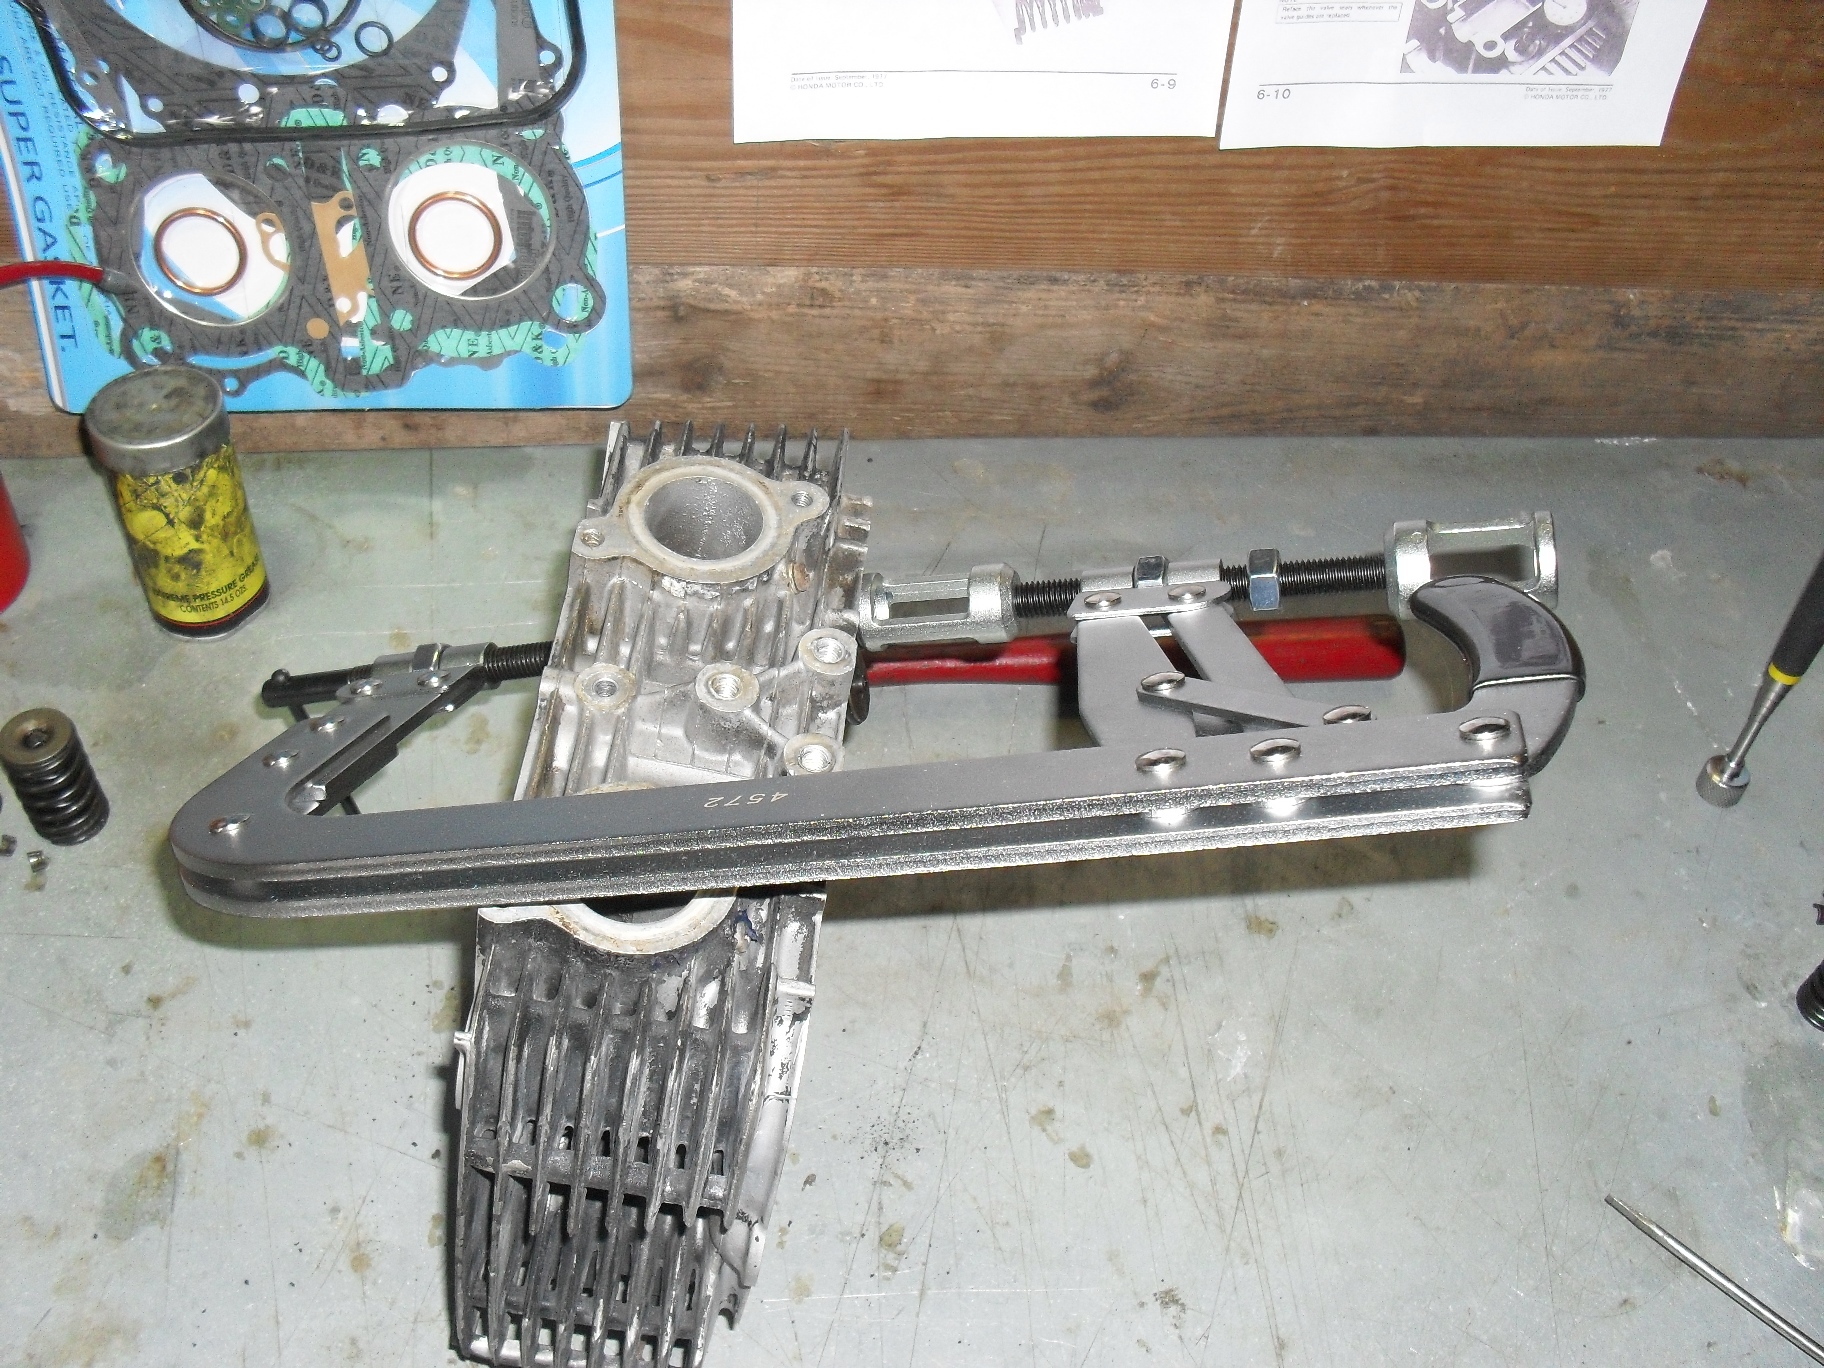
Set your valve spring compressor into place over the first valve you wish to remove and turn the compression screw inward until the spring is compress enough that the valve keepers either fall out or you can reach in with a magnetized screwdriver and pull them out.

It is very important that you keep your valves, springs, & other parts together so that they can be reinstalled in the same opening from which you removed them. This is especially critical for the valves as they wear into their valve guides and seats as the engine is operating. If any of the valves do not come out, or if removal is difficult you may have a bent or seized valve, put everything back together and find a good machinist. The cure for a damaged valve requires replacing the valve & seat as a unit. The valve guide drivers and reamers required for this job are really a bit much to purchase & learn to use for just one head.

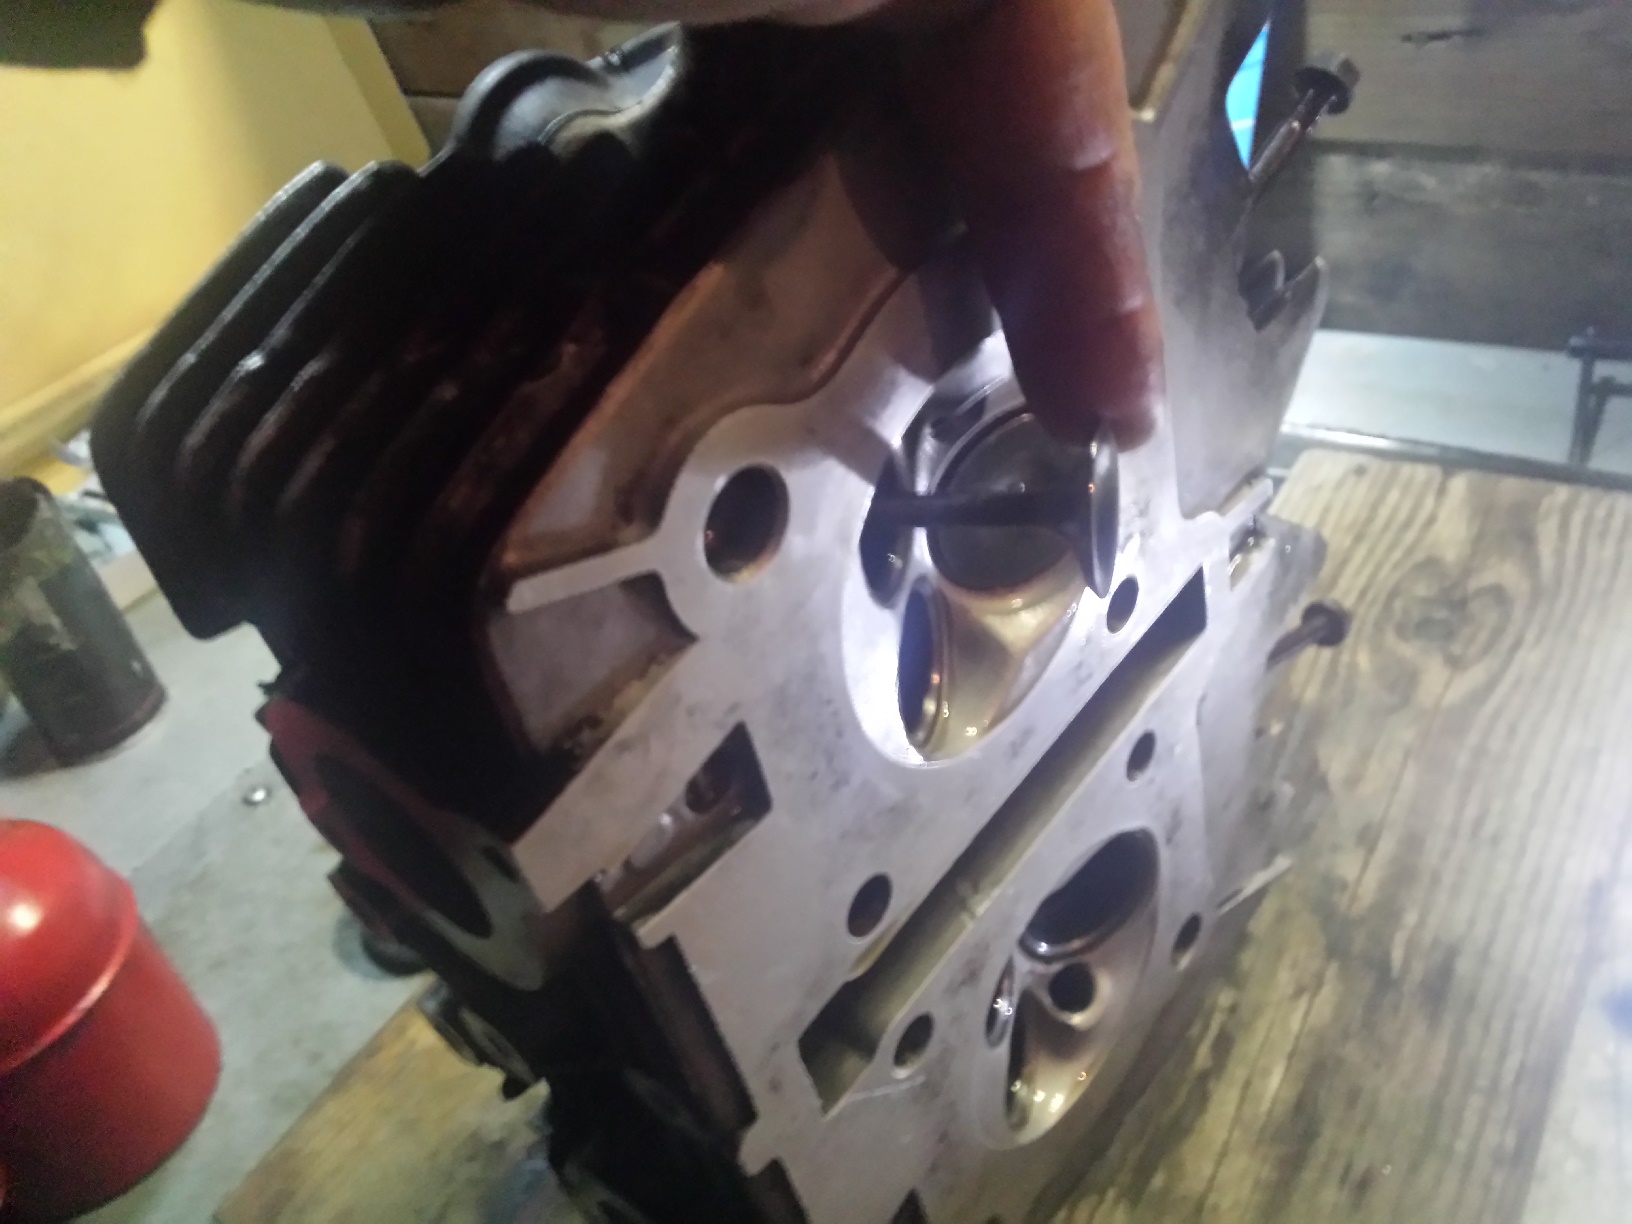
Once you get all the valves out give the head a good visual inspection looking for anything that looks galled, burnt, or cracked

Be sure you check inside the ports to especially around the valve guides. Next check the valve seats which are the hardened steel inserts around the outside of the large holes in the combustion chamber. If any of valve seats 0r guides are burnt, badly scored or pitted , have cracks in them or easily visible excess wear then you need to put it back together & take it to a competent machinist

If all looks good make sure the head is not warped beyond acceptable limits. for this you’ll need a good straight edge and a feeler gauge in whatever size your service manual specifies
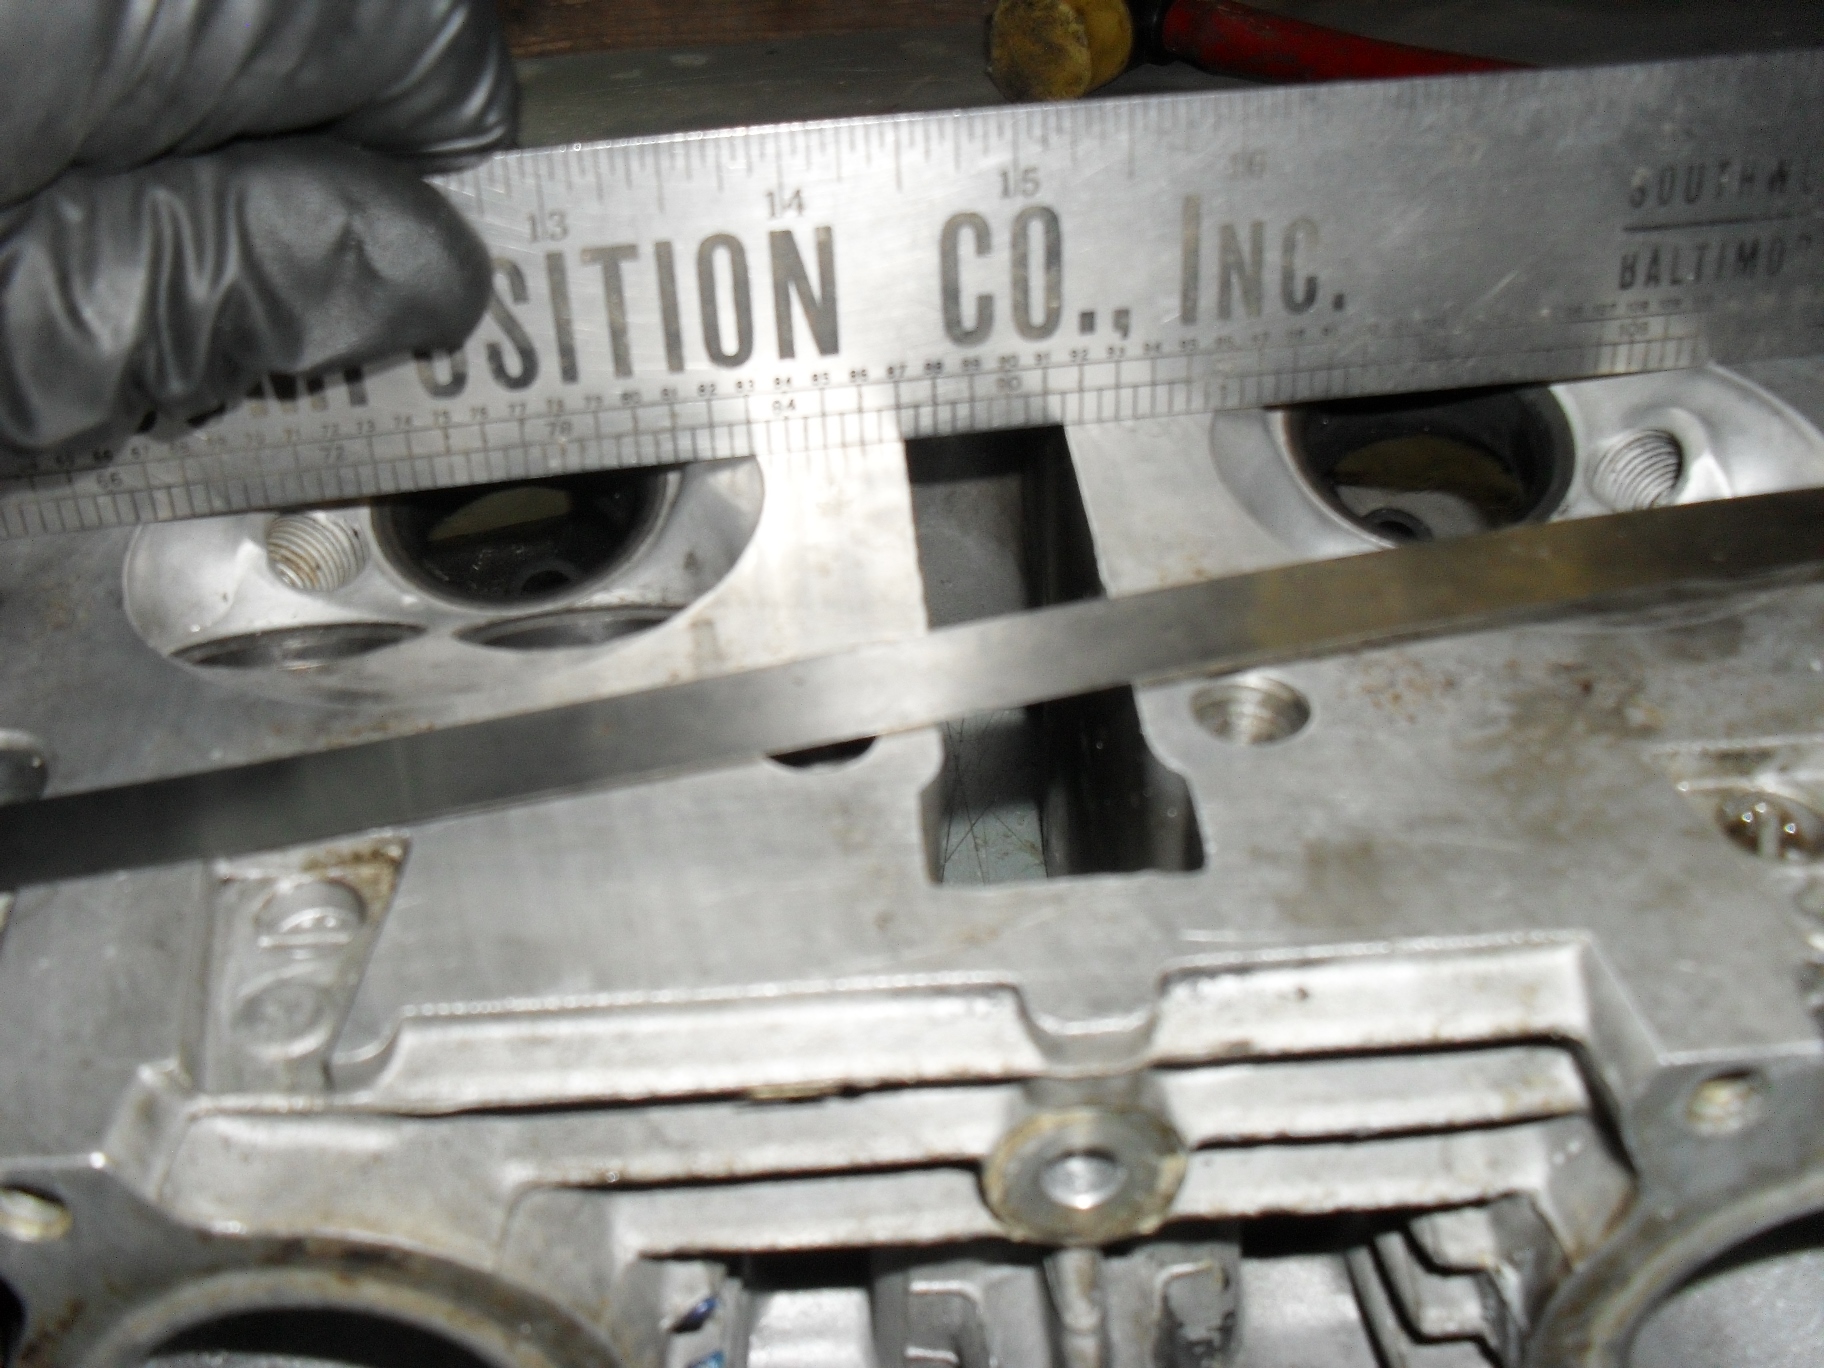
Place the straightedge firmly across the head in several locations and try to insert the feeler gauge between it and the heads gasket mating surface. If it goes between the two anywhere then a machinist will need to shave the head to level it back out.

Now it’s time to grab the micrometer and check the diameter of every valve stem in several places up & around each one. If any of them are worn beyond the service limit, chances are the valve guides are shot too and this is no longer a normal do it yourself job. Double check them for straightness at this time also,

After that get a caliper and measure the extended length of all of your valve springs. Replace any that do not fall into the specified range for your motorcycle.

Once the inspection process is complete and you are satisfied that all of your parts are in good condition & can be reused go ahead & clean the valves & guides thoroughly. Most of the time you can just scrub the intake valves clean in the parts washer, but the exhaust valves usually have a hardened scale stuck to them so I use a brass wire brush to clean them with. For the valve guides I use a gun cleaning brush, but any small round brush with plastic or brass bristles that fits through them will do. I try to avoid using brushes with steel or stainless steel bristles on parts like these because I only want to remove the grease, carbon, and scale without affecting the base metal.

Pick out whichever valve you want to start with and put a small amount of valve grinding compound around the head of the valve on the surface that contacts the valve seat in the head, and place that valve back into the hole that it was originally removed from. Grab the valve lapping tool & stick one of the suction cups on it to the valve like this and then rotate it back & forth to clean the mating surface. The most efficient way to do this is to hold the lapping stick between your palms and pretend you are trying to start a fire with it. Stop occasionally to check on your progress and replenish the lapping compound if needed. I use a coarse compound to start with & then switch to fine grit, but it is possible to make do with just the fine grit if that is what you have.

Stop and inspect rather frequently, you are not trying the grind the entire surface of the valve & seat flat. What you want is a uniform,well polished shiny ring all the way around the valve & seat at the point where the two meet. Once you have that, to keep polishing is just putting unnecessary wear on your engine parts. It should only take you a few minutes per valve to accomplish this, so keep going until you have all of the valves done.

With all of the valves lapped you now need to wash them and the head again and completely remove all of the valve grinding compound so that it doesn’t make its way into your freshly overhauled engine and grind up parts that don’t need it. Then open up your gasket set and find the valve seals. I have the seals for this engine laid out above.

The two larger one are for the exhaust valves and the four smaller ones are for the intake valves.

Once you have all of the seals into place it is time to start reinstalling the valves remembering to put each valve back into the hole that you removed it from to start with. First push the valve back into the hole.

It should go in smoothly, make sure that it doesn’t push the new seal off of the valve guide. Put the matching valve spring(s) and retainer back into place over the valve stem.

You will have to carefully hold the retainer while you put the valve spring compressor into place to compress the valve spring(s).

Compress the springs until you can see the grooves for the valve keepers well enough to reinstall the keepers.

Put a thick coat of grease on each retainer to stick it to the valve stem when you put it into place.

If at all possible use a pair of tweezers or needle nose pliers to put the keepers on the valve stem. If you find that you must use your fingers to get them both into place be extremely careful and make sure that the compressor is securely clamped and not going to suddenly pop loose and crush your fingers while you are positioning the keepers. You have been warned.

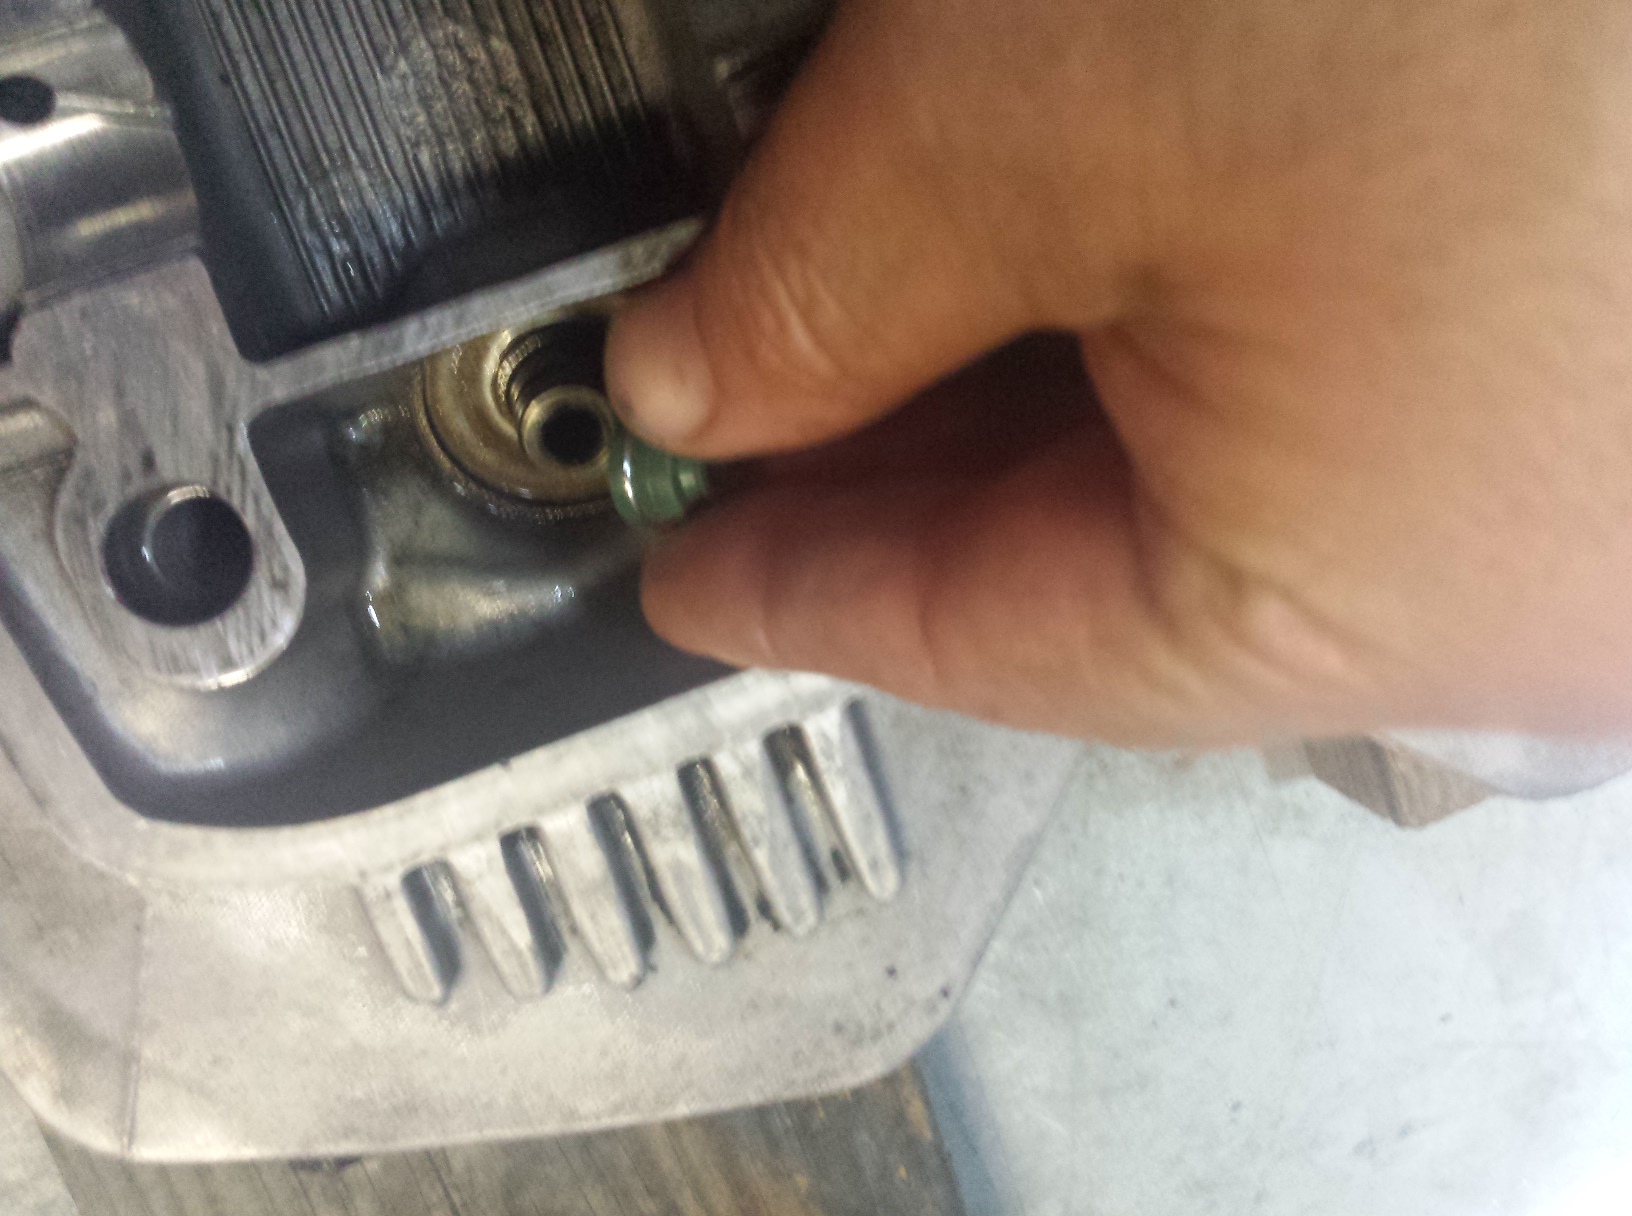
When you have the keepers in place on the valve stem then slowly unscrew the clamping screw and if necessary keep the springs and retainer straight as you release the pressure. Remember if your compressor has a release handle on it like mine does, do not use it to clamp & release the valve springs. Always use the clamp screw. The release handle is there to allow you to move it from one valve to another without having to fully unscrew the clamp every time. When you have fully released the pressure & moved the clamp your vale should look like the picture below with both keepers trapped securely between the retainer & the valve holding the whole lot securely together.

Repeat these steps until all of your valves are securely reinstalled in the head.

I have tried to be as honest as possible with you about the possible pitfalls and risks of D.I.Y. motorcycle head service, but if you are willing to take your time, check everything carefully, and work in a meticulous fashion there’s no reason that you cannot give it a shot. Just be willing to take the risk of trying on your next restoration or overhaul and you’ll find yourself having that much more satisfaction with your handiwork once the engine is up and running.

Of course since I want this one to look as good as it works I covered up all of the mating surfaces & plugged all the ports before spraying my favorite ceramic filled engine paint on it. If you need tools and supplies just visit my webstore’s tool sections and search for what you need. If you can’t find something there let me know & I will point you in the right direction even if it means sending you to someone else.

Happy Wrenching!
Peace Y’all