Late in 2023 I picked up an old 1978 Yamaha SR500 and started working on it and chronicling the build over at my YouTube channel. As a result of such extensive posting on YouTube this blog has been kind of ignored to remedy that situation I’m going to start sharing my videos here. I hope you enjoy them as I have a lot of videos in this series to share with you. In addition to the SR500 I have a 1983 Honda Interceptor 750 that I bought cheap and got running extremely well also. As of today 8/7/24, the Interceptor is as done as I want it but work on the Yamaha continues.

Tag Archives: antique

Drilling Handlebars for Wiring
A lot of old motorcycles like my old 1972 Honda SL100K2 have their switch gear wiring inside of the handlebars for a nice neat clean appearance. I was actually able to locate a couple of sets of genuine Honda new old stock handlebars but the cheapest set I saw was over $150. Plus a lot of the NOS parts I find tend to have some shelf wear or corrosion on them so I just went ahead & bought a set of nice new reproduction bars without the wiring holes for $50. So this post is going to be about drilling handlebars for wiring. Whether you are try to do an authentic restoration or a sleek custom the basic procedure is the same

The first step is to determine where the holes & slots should be. These Thailand sourced bars had holes pre-drilled for the switch housing locating pins but they were in the wrong place. Since I was replacing the old but non-original bars I taped them together wile I measured and marked the locations for the new holes and slots. Pay attention to detail while doing this so that you don’t make any mistakes or remove excess metal from your handlebars. A prime example of this is visible on my old handlebars. The left side only needed a hole large enough for the single horn wire but whoever installed them cut a large slot instead. Watch for little things like that.
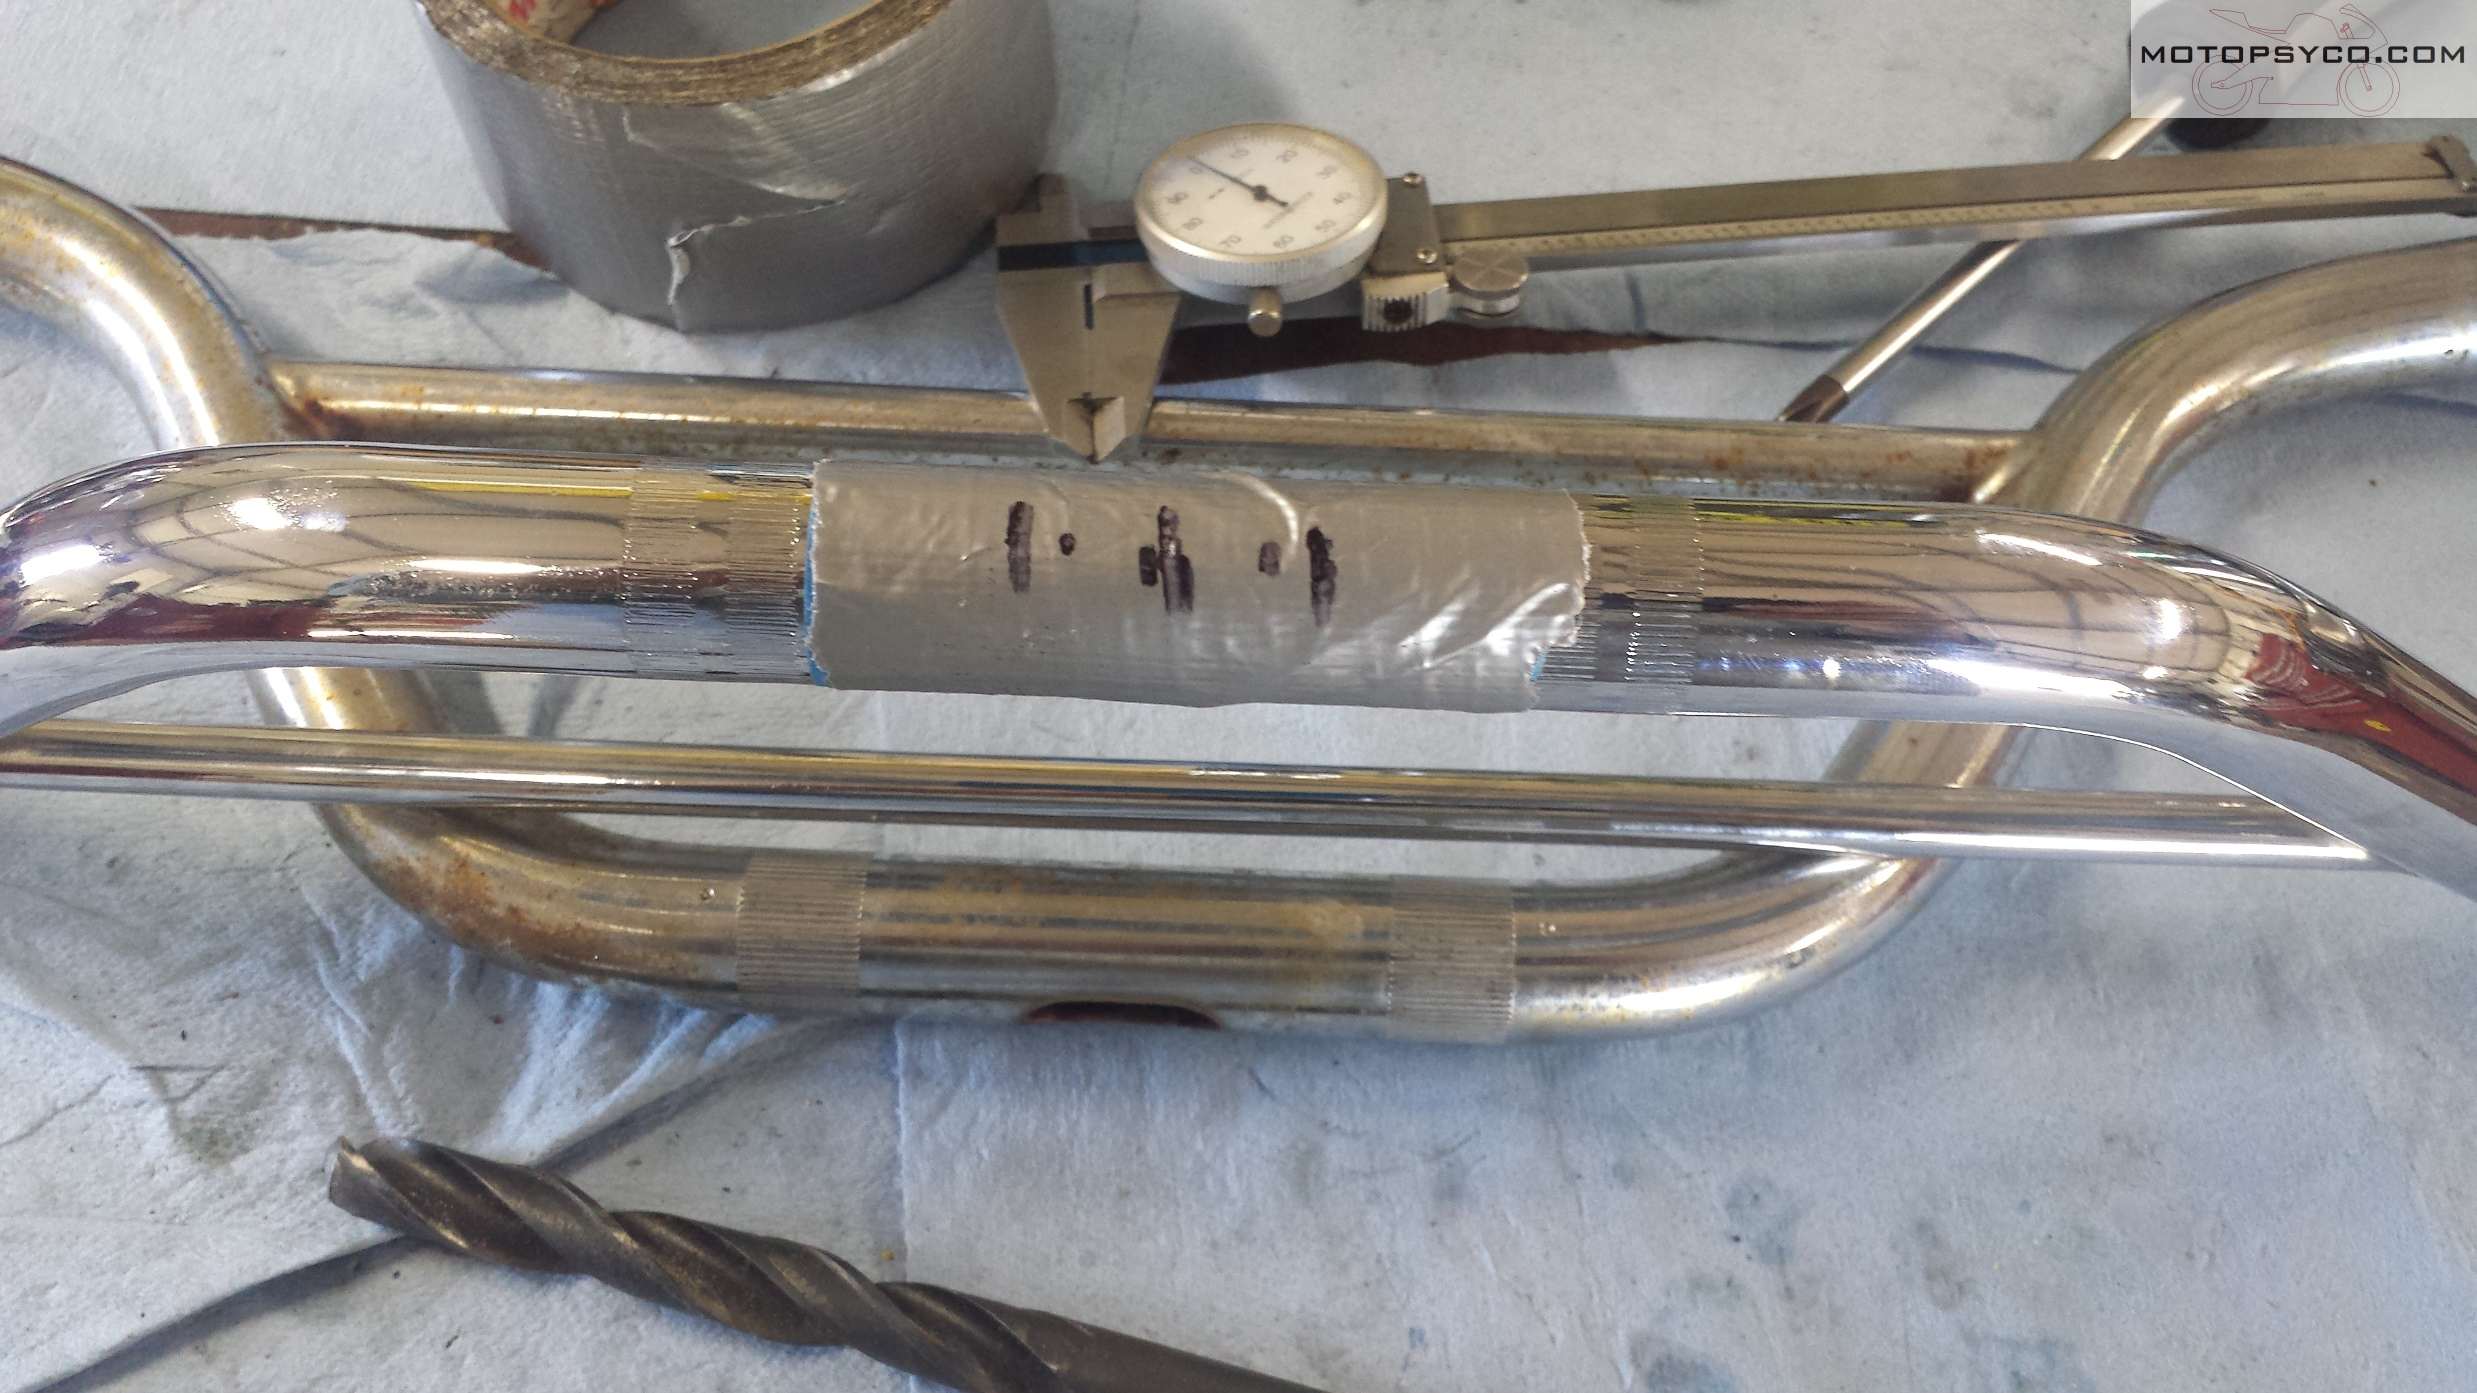
I like to put a couple of layers or masking tape & duct tape on the areas to be slotted out. This does two things, it makes marking the hole & slot locations easier and protects the handlebar from inadvertent tool marks while you are cutting & grinding the slots.

After you get it all laid out & are certain of where you need to drill be sure you use a center punch, otherwise it is nearly impossible to drill a hole straight into a piece of round tubing. For the slots drill a hole of the correct size at each end of the slot & then use a rotary tool or a die grinder with a cut off wheel to cut out the center section. Once that has been done put a small grinding stone or sanding drum on your tool to finish shaping and smoothing the slot. Don’t remove the tape until this step is complete.

Now it’s time to remove the tape, clean up the tape residue & get all of the shavings out of the handlebar. Grab a small file that will fit into your cut outs and go over them one more time to be sure that all burrs & sharp edges that could damage the wires are removed.
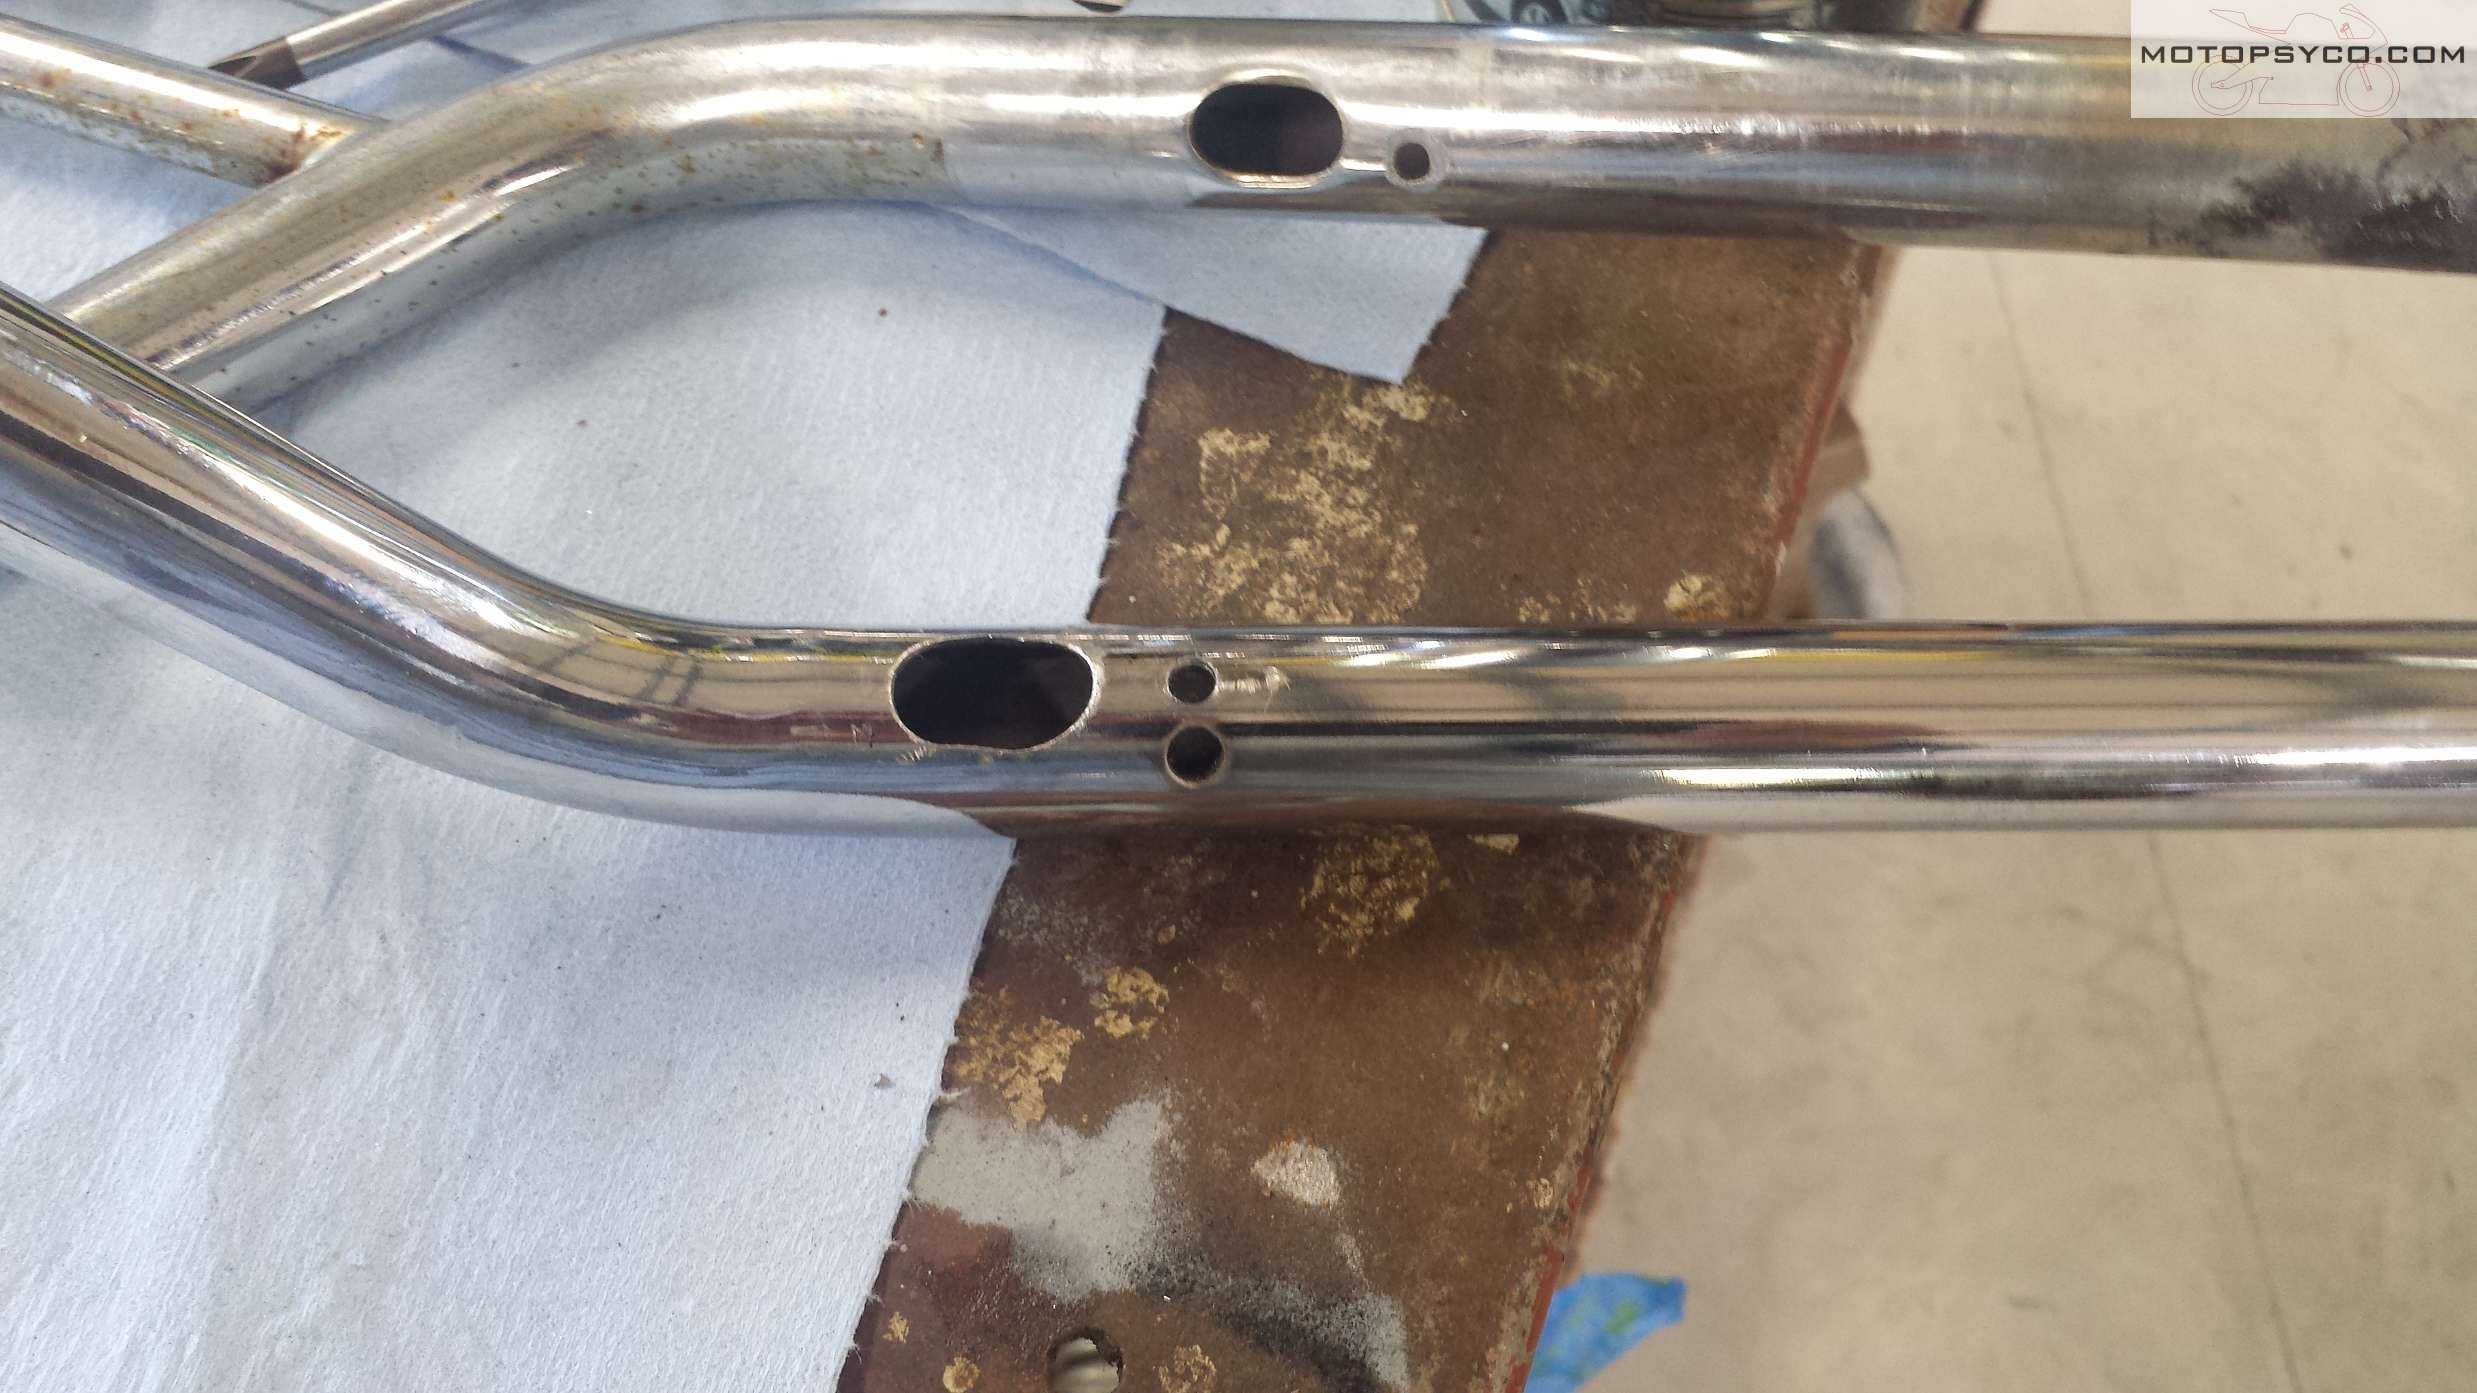
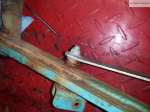
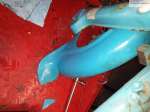
In these next two pictures you can see how I slotted & drilled the left and right ends of the bars.

Before you pull the wiring through, if you have one piece clutch & brake lever perches be sure to put them back on first. I like to put a piece of string through the bars & tape the wire to it as it is much easier to feed the wiring through if you pull it and push it at the same time. Nonabrasive hand cleaner makes a great lubricant for pulling a thick bundle of wires through a small tube with multiple bends in it. The hand cleaner wipes off easily when you get done.

Once you have it a done, reinstall the bars on your bike and admire your handiwork for a minute or two before you get back to work on the rest of your build. If you have ever thought about drilling handlebars for wiring now you have an idea of what is involved. Just work slowly and carefully so that when you finish it will be a job that you’re proud to say, “I did that myself.”

Share this:

Honda Ascot FT500 Junkyard Dog

Honda Ascot FT500 coming home with me.
I had sworn that I wasn’t going to do this anymore. It’s been several months since I had a hit & experienced that euphoria. It’s tough being an addict but I was keeping clean and was even beginning to straighten out my life & get my act together. We all know the first rule to overcoming an addiction is to stay away from temptation.

Then yesterday I ran into my dealer, and he’s got the best stuff on the east coast. Next thing I know money & merchandise were exchanging places. If you’re a collector & restorer there is no better feeling than buying a new old pile of junk motorcycle. Especially when it’s a fairly desirable model like the Honda Ascot FT500 that you actually really wanted but couldn’t get when you were younger. Oh man it felt so good! I’m still riding that high today as I type this.

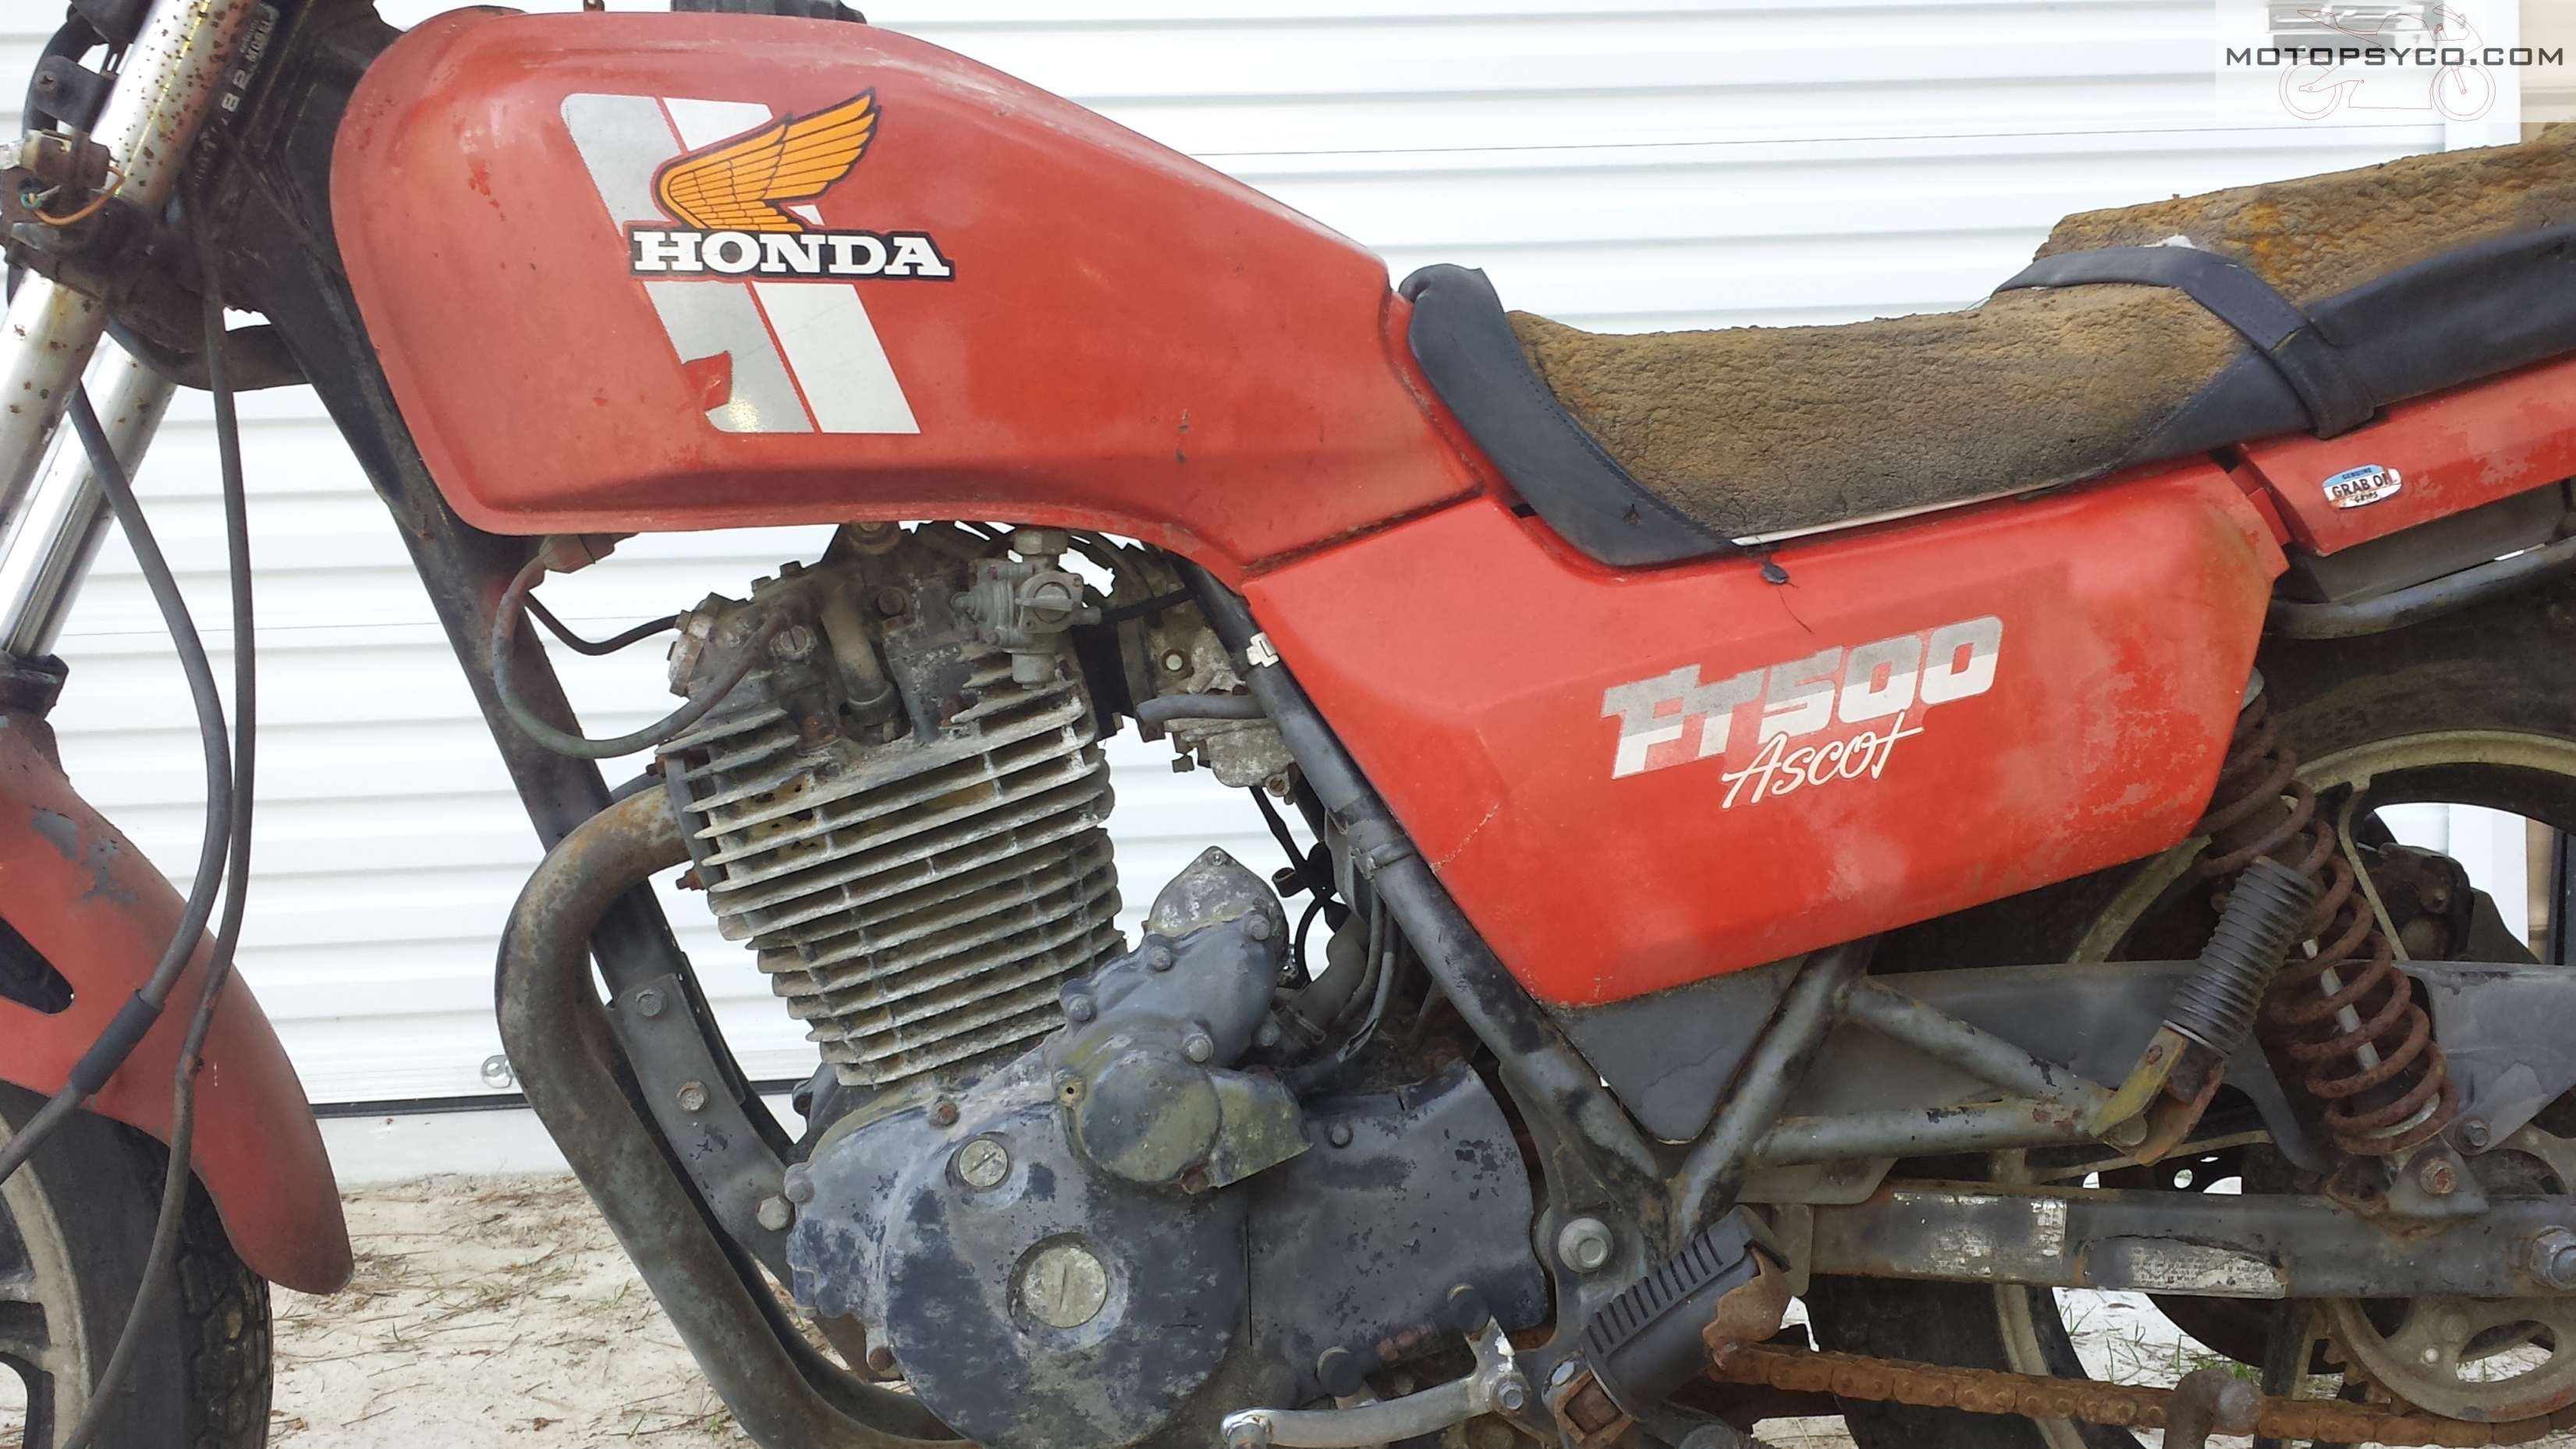
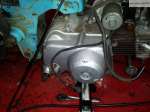
The price on this old Honda Ascot FT500 was righteous enough that the condition really didn’t matter. With dirt cheap motorcycles you just need to go ahead & assume that you need to replace or repair everything. That way you avoid the disappointment that comes with having high hopes.

I love it when they have fuzz growing in the cylinder fins.
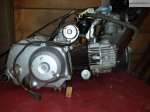
Last night after supper I grabbed a beer, & removed the timing plugs so I could try to turn the engine and it’s seized but that’s okay as the plan is to strip it all the way down & build it back as a fire breathing hot rod.

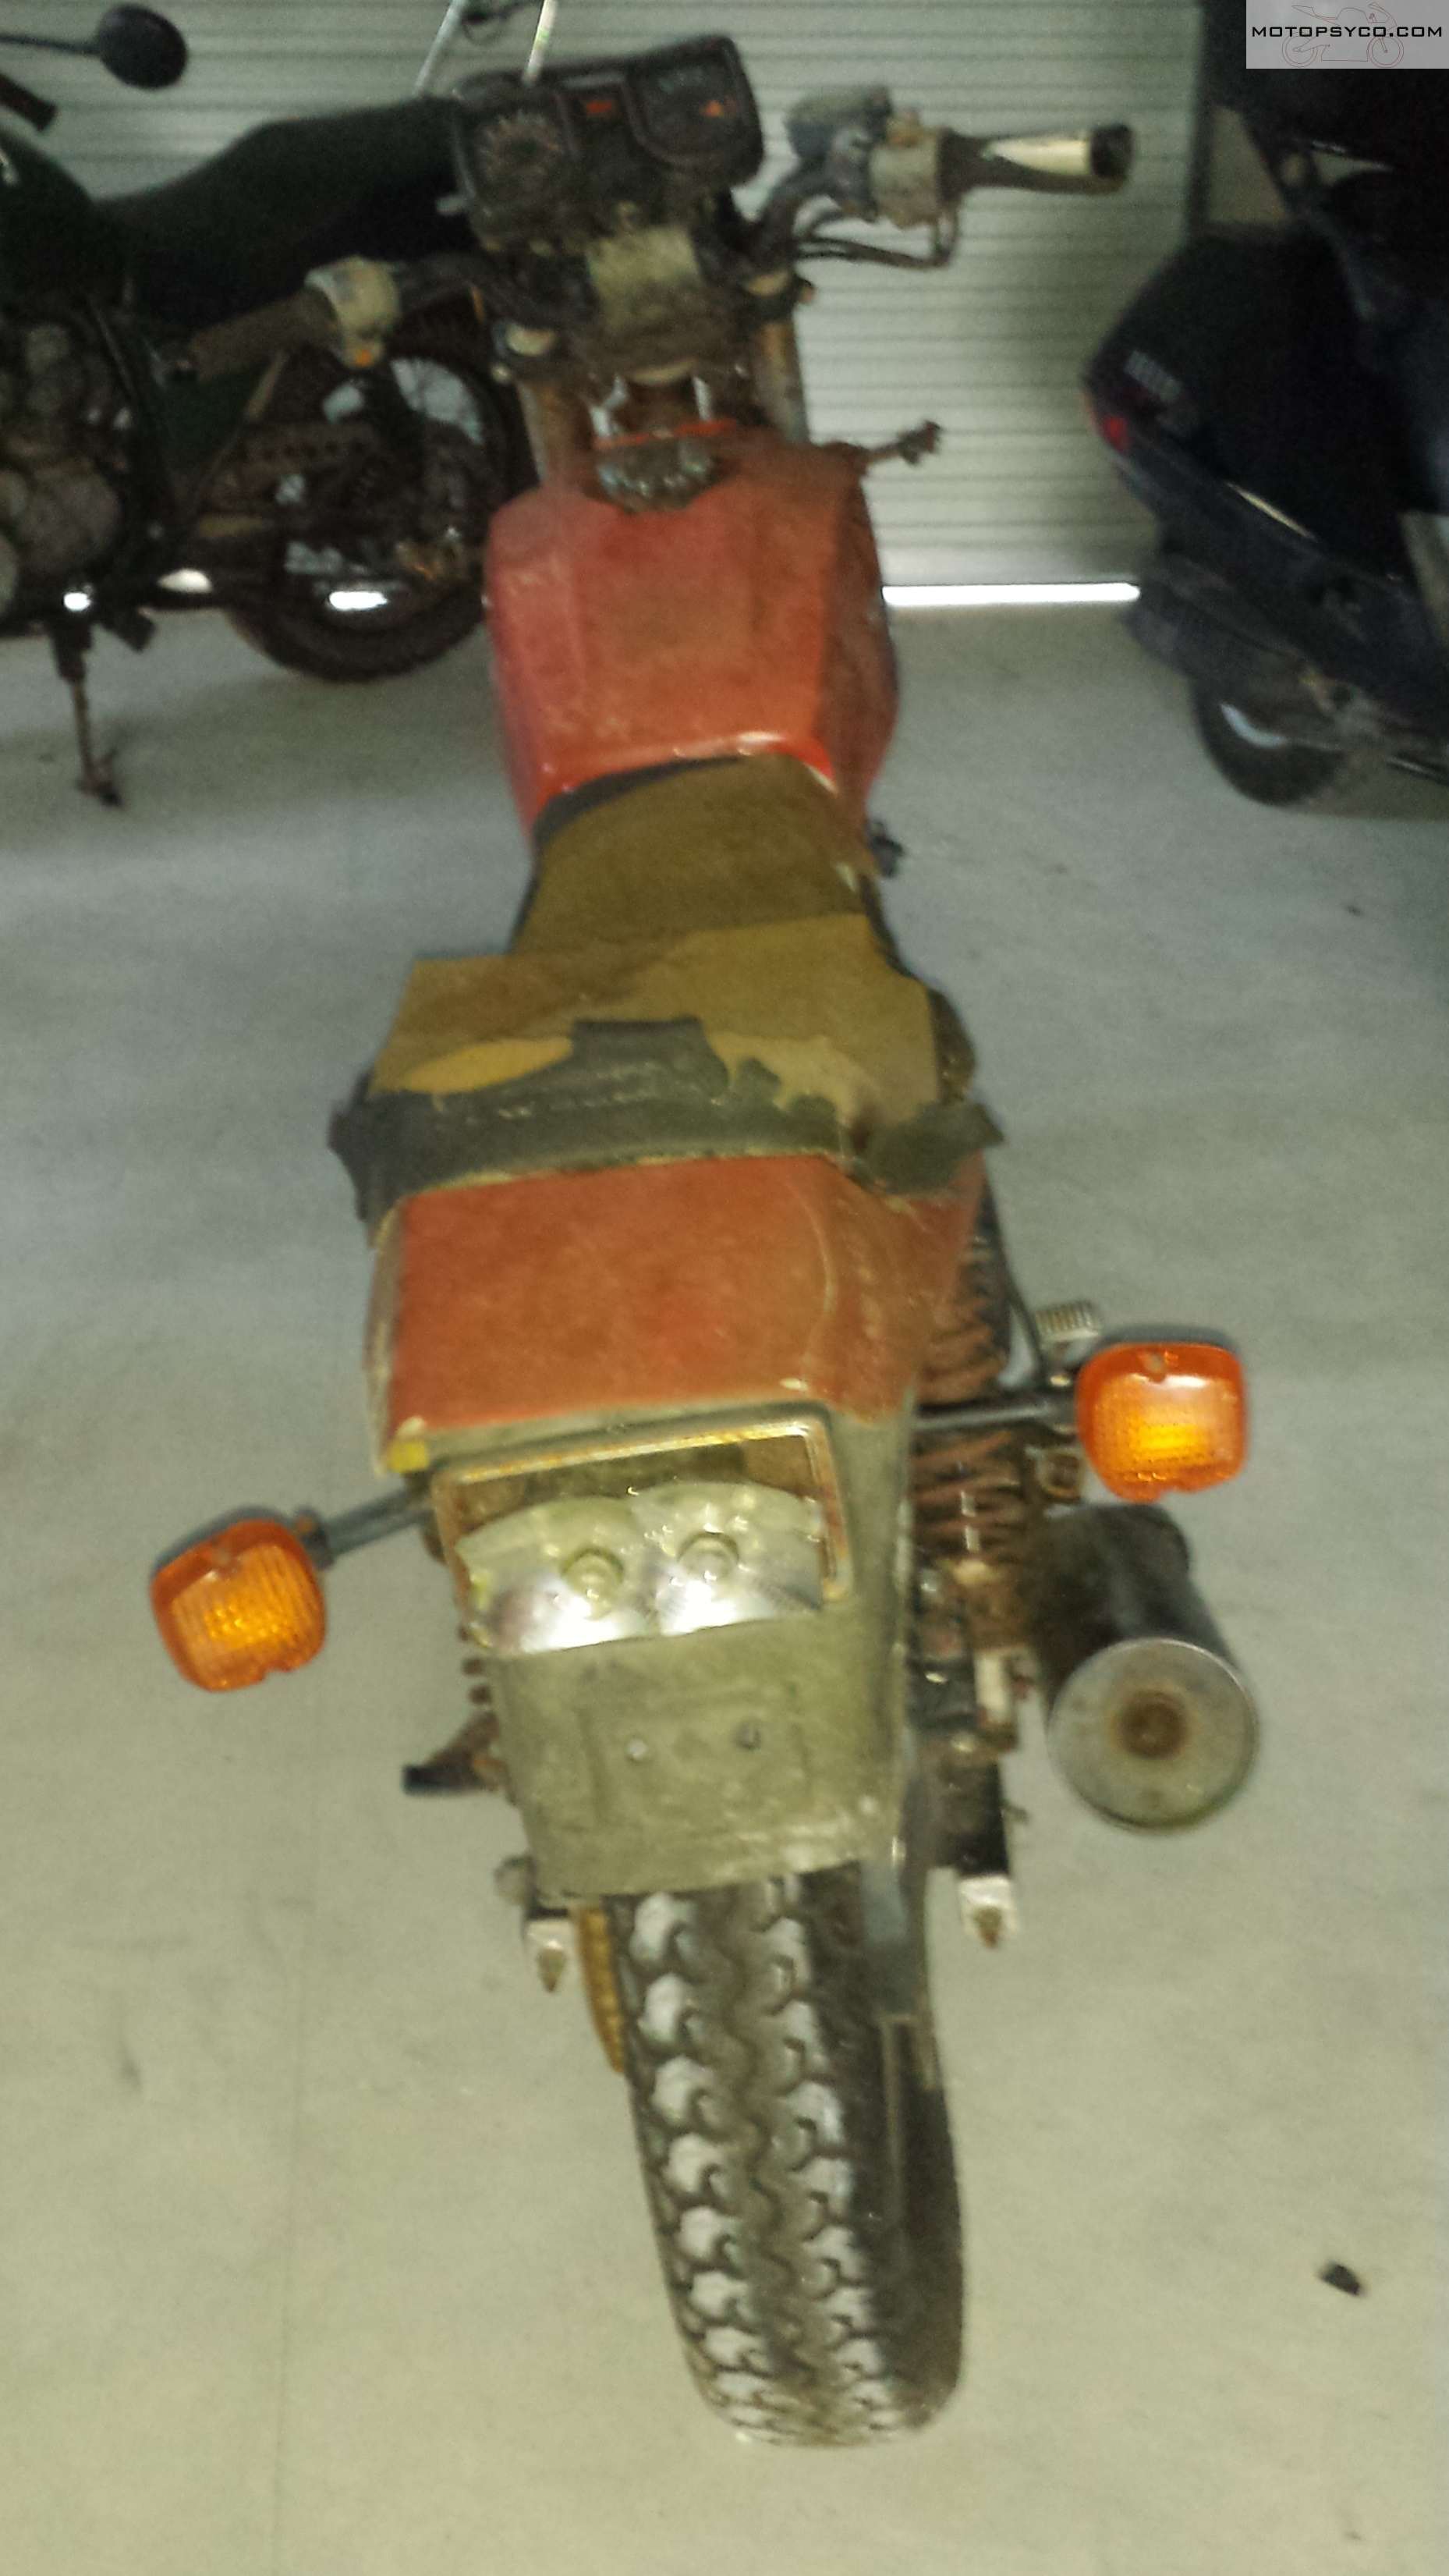
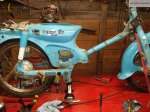
This one is a 1982 model. One of the best things about the Honda Ascot FT500 is the funky flat track styling, it’s the closest thing ever built to a factory street tracker. I’m not a fan of the rectangular headlight that instantly dates what is an otherwise timeless design. Beside it’s rusted out & will be tossed in garbage anyway.

One of the best things about this bike is that it has cast aluminum wheels that are not Comstars. All of my other bikes except for my Helix scooter have wire wheels and quite frankly they are a pain in the rear to restore & maintain

it’s so 1980s
So how did a motorcycle with less than 3500 miles wind up in such horrible condition? My guess is the the original owner thought that it needed a new starter, so he took the old one off & went to his local dealer for a replacement. Once they learned the price of a new starter they either swore off motorcycles altogether or went & bought another bike, leaving this poor old thing to die out behind the barn.
If the engine had not been seized I’d go ahead & start working on it but since it needs a full overhaul it will wind up in the corner of the shop with the other “ladies in waiting” where I’ll walk by occasionally and marinade it with penetrating oil until I complete my 2 current restorations. This one definitely will not be restored but will end up being a fairly nice restomod instead.
<1982 Honda Ascot FT500 >
Until next time
Peace Y’all
UPDATE 2023 I never finished this one and passed it on to someone else who wanted it.
Share this:

Vintage Motorcycle Gifts for the Collector
Hello everyone! It’s that time of year again, yep Christmas is fast approaching and you know that as a vintage motorcycle nut you will not receive any appropriate Vintage Motorcycle Gifts such as a 6 pack of 10mm sockets to replace all of the ones that have disappeared into the black hole behind your work bench.
Instead you’ll ooh and ahh over the latest tie and ugly sweater or sincerely thank the person who at least remembered that you ride a motorcycle and bought you a beanie at the Harley shop even though all you own are classic Bultaco dirtbikes or antique Marusho & Lilac motorcycles, because it means they at least have a vague peripheral idea of why you spend so much time in the garage. Of course if your vintage bike of choice is a Harley Davidson this wont be so terrible but I’m sure it’ll have a picture of a Milwaukee 8 on it and not a Panhead.
That’s why I decided to make this list of vintage motorcycle gifts. Copy this link and send it out to your significant other, and all other family members & friends who spend lavish amounts of money on things that will gather dust in the back of your closet. Since research is a large part of any motorcycle acquisition & restoration let’s start this list with a fine selection of books.
Now if you’re a vintage motorcycle nut like me you are most likely a twisted mechanical genius. After all keeping a several decades old motorcycle running, requires love, dedication, enthusiasm, skill & most of all tools. I often tell people that I’m a tool collector and that the motorcycles and cars are only there so that I can rationalize my real addiction, buying tools.
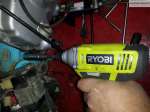
One battery powered tool brand that I sincerely recommend is the Ryobi One+ series 18v tools. Unlike some other big name tool brands, all of the batteries from any year Ryobi One tool series will work in any Ryobi One tool ever made. After throwing away a whole set of perfectly good tools from a “leading national brand” because the batteries were no longer available, I made the switch to Ryobi and have been happy ever since. Hopefully this year Santa will drop the 1/2″ impact in my stocking.
Now a lot of you may already have all of the electric drills & impact drivers you need so here are some other motorcycle specific tools we could all use. Now a lot of this stuff below is metric but if you know what your looking for click on this link for Harley Davidson specialty tools or if your dealing with an ancient British motorcycle you should check out this lineup of Whitworth tools.
This is only a partial listing and yes most of these items are tools that I already have. In full disclosure this is a blatantly commercial page & hopefully some of you will at least begin your shopping from here and help me make enough commission to pay for the web hosting for all of the awesome do it yourself motorcycle restoration content on this site. Plus if it helps one of you get a vintage motorcycle gift you really want this holiday season it was worth it. Share it around & tag the people who love you and buy gifts for you.
Share this:

Emblem & Badge Refurbishment
Author’s Note; Emblem & Badge Refurbishment originally appeared in the Vintage Japanese Motorcycle magazine earlier in 2017.
There are quite a few different methods you can use to restore motorcycle emblems that have paint that needs refinishing. You can repaint them by hand using small artist’s brushes. I have even spray painted tank badges using a solvent soaked rag on a sanding block to remove the paint from the high points of the lettering after spraying on the paint. Of course masking off the different colored areas was a pain.
Recently I learned of a much easier way to quickly and inexpensively refresh your tired looking motorcycle emblems & badges. To give credit where credit is due, I learned of this technique in a post to the Vintage Japanese Motorcycle Club’s Facebook page by Toby Jones in which he spoke of using paint markers from a welding supply house and posted a couple of examples that looked really good. I’d like to say thank you Toby for sharing.
For this article I’m using the front cover badge of my C70 Passport as a Guinea pig to try this technique. The chrome on this part stilled looked good, but the long exposure to the elements had resulted in the paint flaking out of the lettering and accent lines.

C70 badges before
Start by gathering up your supplies, you’ll need oil paint markers, a couple of shop towels, and little bit of odorless paint thinner. For this job I used artist paint markers but you can also get them from welding supply houses. My reason for using odorless paint thinner is that I did this in the house but if you’re working outside you can use whatever paint thinner you have.

Open up the marker and color in the areas that need paint just as if you were a kid playing with a coloring book. Have a shop towel handy with a small amount of thinner on it, not soaking wet, and every minute or so stop and wipe off any paint that has stuck to the chrome outside of the lettering. Be sure to wipe frequently because it will make the paint harder to remove from the wrong places if you let it dry.
When completed, let it dry, and them wipe over the whole thing with a clean shop rag and reinstall it on your bike and enjoy the vast improvement in its looks.

After emblem & badge refurbishment
Prime Day – Prime Membership $3 bounty
Share this:
1st Annual Rails & Roads Motorcycle Show
The 2017 Rails & Roads Motorcycle Show was held yesterday and here are the results.
Before I dive into the numbers and pictures let me say thanks to all that came out to support the show, and to Tom McGrath’s Motorcycle Law Group who provided the trophies for the show.

I’d also like to acknowledge those who provided swag & door prizes, especially Carolina Honda in Columbia S.C. for the helmet & gloves that they provided. Thank you so much.

Rails & Roads Motorcycle Shoe door prizes
We gave out awards in 5 classes. We had trophies for 7 but no one with Kawasaki or a Suzuki showed up ( I guess they were afraid of all the Hondas ). Even so we still had at least 25 or 30 bikes in the show itself. All voting was done strictly by people choice and here are the results;

1st place American
Class 1 American
2nd place went to a gentleman named Tony (last name escapes me) and his beautiful ’96 Harley Davidson Road King.
1st place went to Mark Fisher who brought out his wonderful 1947 Indian Chief pictured above.

1st Place in the European/British Class
Class 2 European/British
3rd place went to Daniel Horn with his original unrestored ’72 BSA Victor 250
2nd place went to Doug Parker & the very nice 77 Moto Guzzi Convertible that he rode to the show.
1st place went to Mark Fisher and the absolutely stunning 1952 Vincent Black Shadow shown at the beginning of this section.

1st Place Winner Honda.
Class 3 Honda This was the largest class with machinery ranging from 1964 all the way up to 1989.
3rd place went to Bryan Bentley and his 1964 C102 Cub.
2nd place went to Todd Brown & his wicked looking ’80 CB750SS Cafe Racer.
1st place went to Donald Wiseman & the well restored ’73 CL350 shown above.
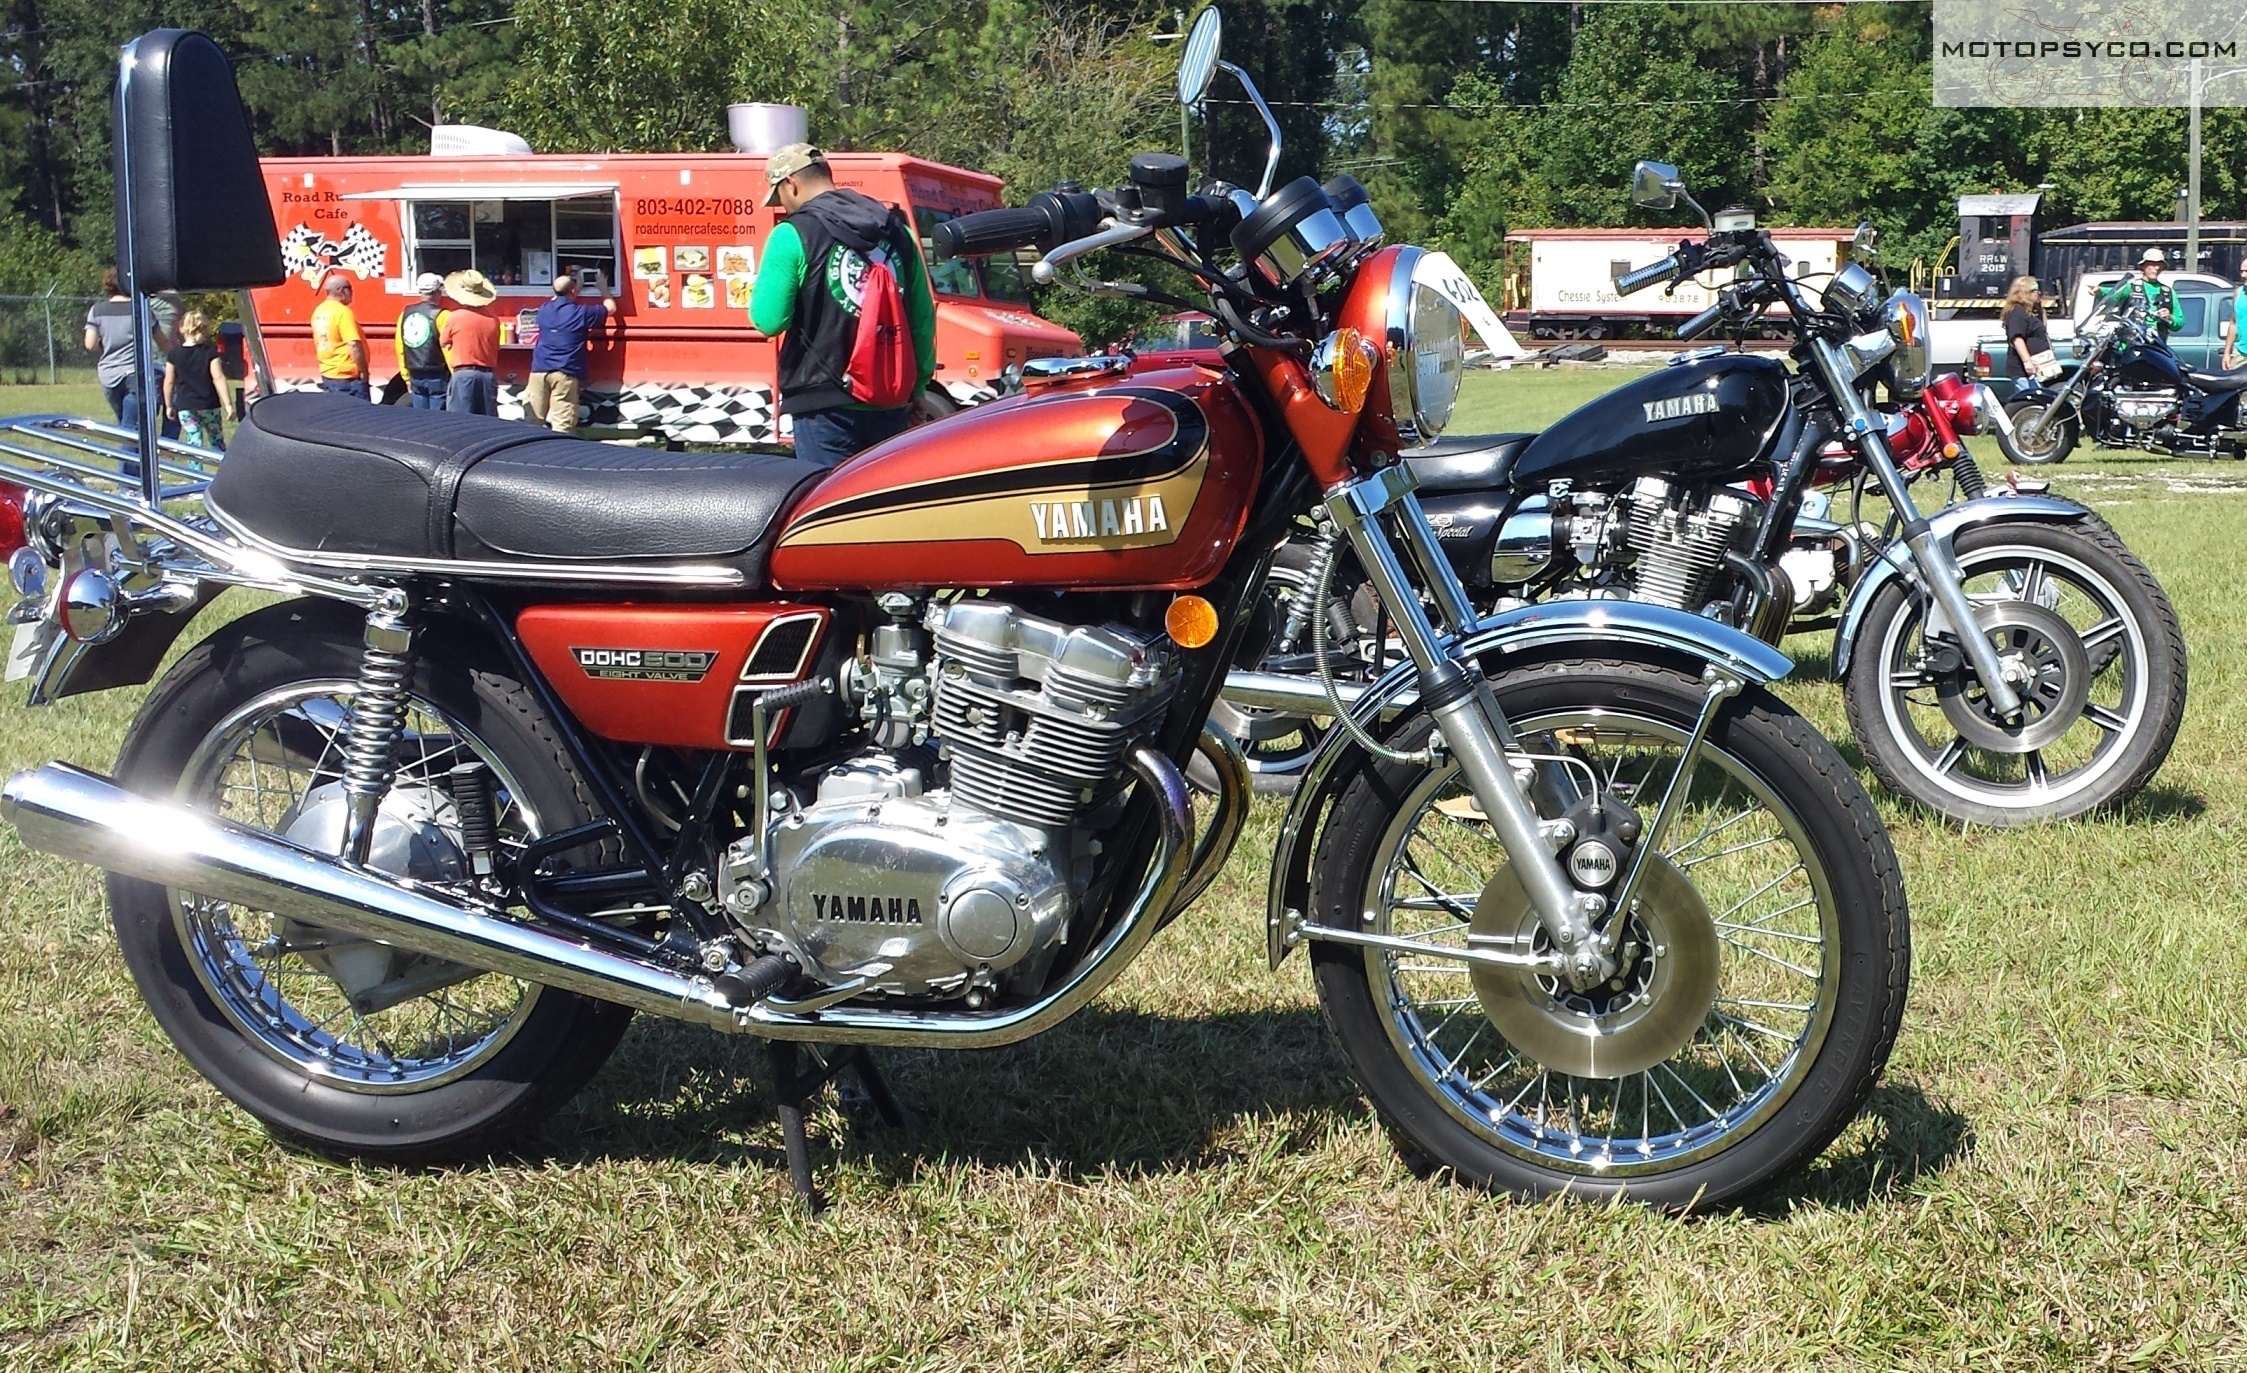
1st Place Winner Yamaha
Class 6 Yamaha
3rd place went to Tony Berry and his 1979 XS1100
2nd place went to Bryan Bentley and his little 2 stroke 1969 Y5
1st place went to Donald Wiseman who brought his unrestored original 1973 TX500 in the image above.

1st Place winner in the Freak Show
Class 7 The Freak Show; while mainly intended as a custom class it was also used as a catch-all class for orphaned Japanese makes as well.
2nd place went home with Mark Krengel & his Kikker 5150 Bobber
1st place was claimed by Jerry Cole who brought the fantastic little bike in the above picture a 1972 Hodaka Wombat 125.
Best of the Rails & Roads Motorcycle Show
The voting for this trophy was a tight race between two black motorcycles. My gut instinct told me that just like in the ’50s the only thing that would beat a Vincent was another Vincent. But when all the votes were counted Best of Show went to the stunning 1980 Honda CB750SS of Todd Brown. Featuring an upside down fork & other serious upgrades, including custom wire wheels (Honda’s funky old Comstars are stock on these bikes) it was a truly tasty custom. The best part of all? He rode it to the show and it sounds as good as it looks.

Best Of Show 2017!
We’re really happy to report that we were able to raise $175 dollars that was donated to the S.C. Railroad Museum to help with the upkeep of the museum and its rolling stock.
We made a few missteps, adapted on the fly, learned some lessons and we plan to return to Winnsboro S.C. next year with an even bigger better Rails & Roads Motorcycle Show presented by the VJMC of The Carolinas.
Share this:

Dear Craigslist Sellers,
One of the best things about the internet is how easy it has made it to search for vintage vehicles and parts, and let’s face it we all love Craigslist, and the other similar for sale sites. That being said, I’d like to talk to you about some of the bullshit that sellers do that just really annoys the hell out of me. In fact I am counting down a list of my top 5 Craigslist pet peeves. So let’s proceed with Dear Craigslist Sellers.
5. When you sell an item and don’t delete the posting. Having sold a few things on Craigslist I know you can’t always make it back to your account settings to delete an item as soon as it sells, but don’t just leave it there. Nothing is more annoying than to call about a bike or a part and hear, “I sold it two weeks ago.” Seriously, just delete the ad at the first chance you get after making the sale.
4. Asking really stupid high prices. Pricing it up a little bit for negotiating wiggle room is one thing, but your hacksawn spray painted bobber is not worth five grand. Likewise just because a fully restored 1969 sandcast CB750 will bring thirty thousand bucks still does not make your 1975 that’s been leaning up against a tree in the back yard since 1977 after it scared the piss out of you worth more than one hundred dollars. Sorry, I usually don’t even reply to such ads because I hate for people to think I’m insulting them just for telling them the truth. Do a little bit of basic research and find out what your stuff is really worth in the condition that it is in. https://www.hagerty.com/valuationtools
3. No pictures or really lousy pictures. Usually a sign of a scam, normally no one in their right mind will even open such an ad. If you are a legit seller and can’t post a picture please see if someone you know can help you.

Honda Manga for sale?
2. Really lousy descriptions that say “Motorcycle for sale” but nothing else, usually with no picture or really lousy pictures, see item 3 above. Once again this tends to be a sign of a scam, but if you really want to sell your motorcycle list the year, make, model, size, odometer reading and title status. I promise you’ll sell it faster if you do.
1. Dear Craigslist Sellers, This is the biggie, my number one most hated thing that advertisers do, deliberately putting a very low price into the Craigslist form and then putting the real price in your description. Dealerships are especially bad about this. Please be clear about one thing when I sort by price from low to high, I don’t want to see your brand new 35 grand FLHDWUCE bagger or your brand new SuperGranTurismo 1400CC racer replica. AND NEITHER DOES ANYONE ELSE. When sorting low to high I am desperately trying to find OLD motorcycles such as KE100s or CB200s and don’t want to waste my time scrolling past a bunch of shiny new overpriced crap. In fact I make a point of remembering which dealerships do this so that I can make sure that they never get a single nickel from me, ever. In fact I want everyone who reads this to contact Craigslist support and request a legally binding stipulation that whatever you sell has to be sold at the price listed in the price box shown on the listing page.

Holy Shit look at all the $1 Harleys. I’mma go buy $20 worth of them and resell them for 5-10 bucks each.
Dear Craigslist Seller’s here’s a little reading material to help you out.
Share this:

1970 Honda CT90 Junkyard Dog
It all started like so many bad ideas with an Ebay auction, followed by a six hour car ride the day after the auction ended. I had been sort of casually looking for a Honda CT90 or CT110, not to restore but just to get running and ride it around on the farm and at bike shows. At last years AMCA Southern National swap meet in Denton N.C. I missed 2 of them that were in my price range by just a matter of minutes. In fact when I spotted one of them and started walking towards it another gentleman had who was much closer walked up and handed the seller cash and they were filling out the paperwork by the time I got there. Since I’m always scanning online sales sites, backyards, junkyards, and trash piles for interesting stuff, I knew sooner or later a Honda CT90 or 110 would cross my path for the right dollar amount.

This one popped up on Ebay down in Ladson S.C., it was not running and missing a lot of parts, but I bid what I thought it was worth and was pleasantly surprised when it actually sold for what it was worth and didn’t run up to a stupid price like things do on Ebay sometimes.

I’m going to confess that I staged the rest of these pictures the next day after work, but the surroundings seem to work really well and you really can almost imagine stumbling across something like this abandoned in the woods.

She hasn’t traveled far in 47 years, only 3,353 mile on the odometer.

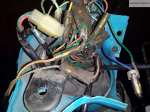
The muffler and battery box are gone, and the wiring harness is a bit of a mess, but the engine still turns free.

One of the coolest features of the early Honda Trail bikes like the CT90 was the rotating handlebar mounts designed to make them easier to transport on bumper mounted motorcycle carriers. You pulled up on the big lever in the center of the bars and then you could turn the bars sideways for more room.

Another great feature that was introduced in the middle of the 1967 model year was a dual range transmission giving you a total of 8 forward gears. Low range was for serious off road work and the high range was for normal trail and road use. A lot of people swap Lifan engines into them for more power and reliability but my plan is to keep the original engine just so that it will still have the dual range transmission.

Honda CT90 in the woods!
That’s it for now, I’m going to check it out further and will keep you informed on the progress as it happens. I also have another antique motorcycle project going that I haven’t shown on this blog yet but it has been all over my Facebook page & Instagram if you want to check those out.
Peace Y’all
Share this:

2016 Barber Vintage Festival & Museum

2016 was our second year attending the Barber Vintage Festival but believe or not it it was actually the first time we actually visited the museum. If this seems strange it’s because this event is so massive with so many different things going on it is impossible to see everything even if you show up early on opening day & stay until the Monday morning after. The Barber Vintage Festival is pure vintage motorcycle overload. The museum is two wheeled gear head heaven. Even if it were possible to show you everything in a blog post (it’s not) I’d be doing you a great disservice by even trying. Instead here a few pictures to whet your appetite.

Above is a shot looking down toward the lowest level where the machine shop is. Motorcycles are the main focus but they have plenty of classic and exotic race & street cars that includes a seriously fantastic Lotus collection.
 “`
“`
The next picture is a pair Moto Guzzi singles near the wall overlooking the racetrack. One of the great features of the museum is that the wall on the track side is all window so we could watch the AHRMA race bikes circulating on the track.
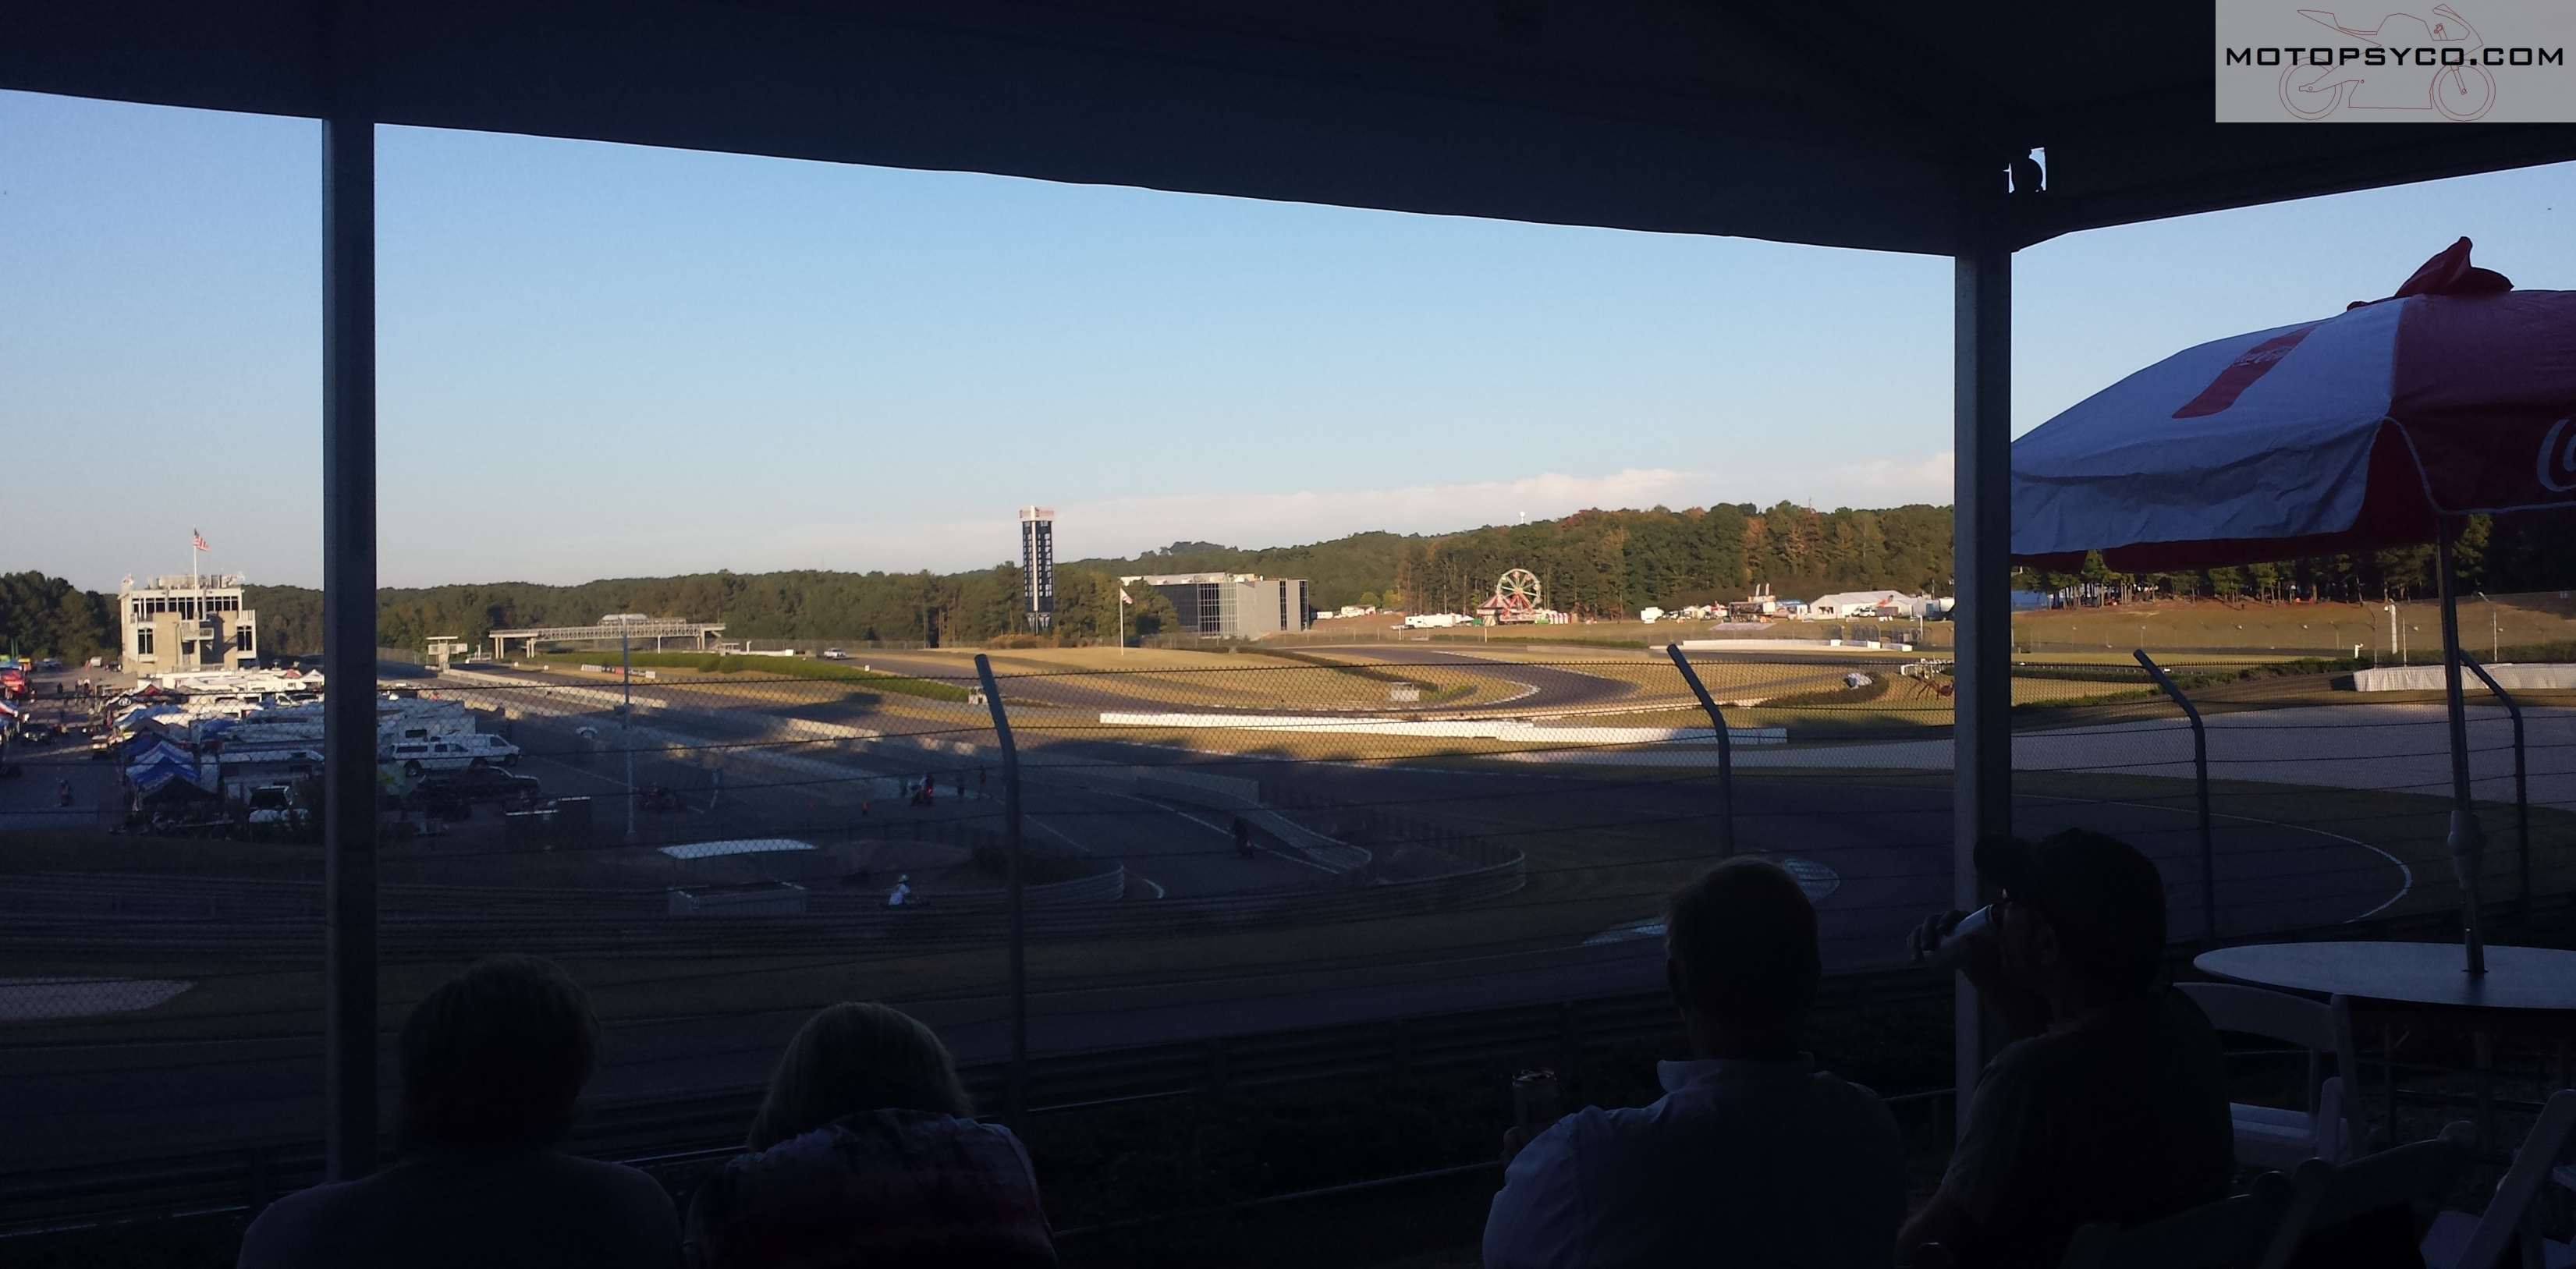
Ace Corner at the Barber Vintage Festival
Speaking of AHRMA road racing, the best view of the action could be found at the Ace Corner, This was also the location of the Dime City Cycles custom bike show. In addition to the road racing there are also AHRMA sanctioned cross country, vintage motocross, and trials. If the racing doesn’t appeal to you there are several bike shows, a freestyle motocross show, the Wall of Death and a huge number of vendors hawking all kinds of motorcycle wares.

Mirror mirror on the wall, what’s the most beautiful Ferrari of them all? To me the answer will always be the Dino.
We all know that Vincent built some of the most innovative motorcycles in the world and the Barber museum has multiple examples including a Black Shadow & the fully enclosed Black Prince. But did you know they made a personal watercraft decades before Kawasaki? Granted the tiny air cooled single in the 1955 Vincent Amanda didn’t give the speed and power of the Jetski but it was first.
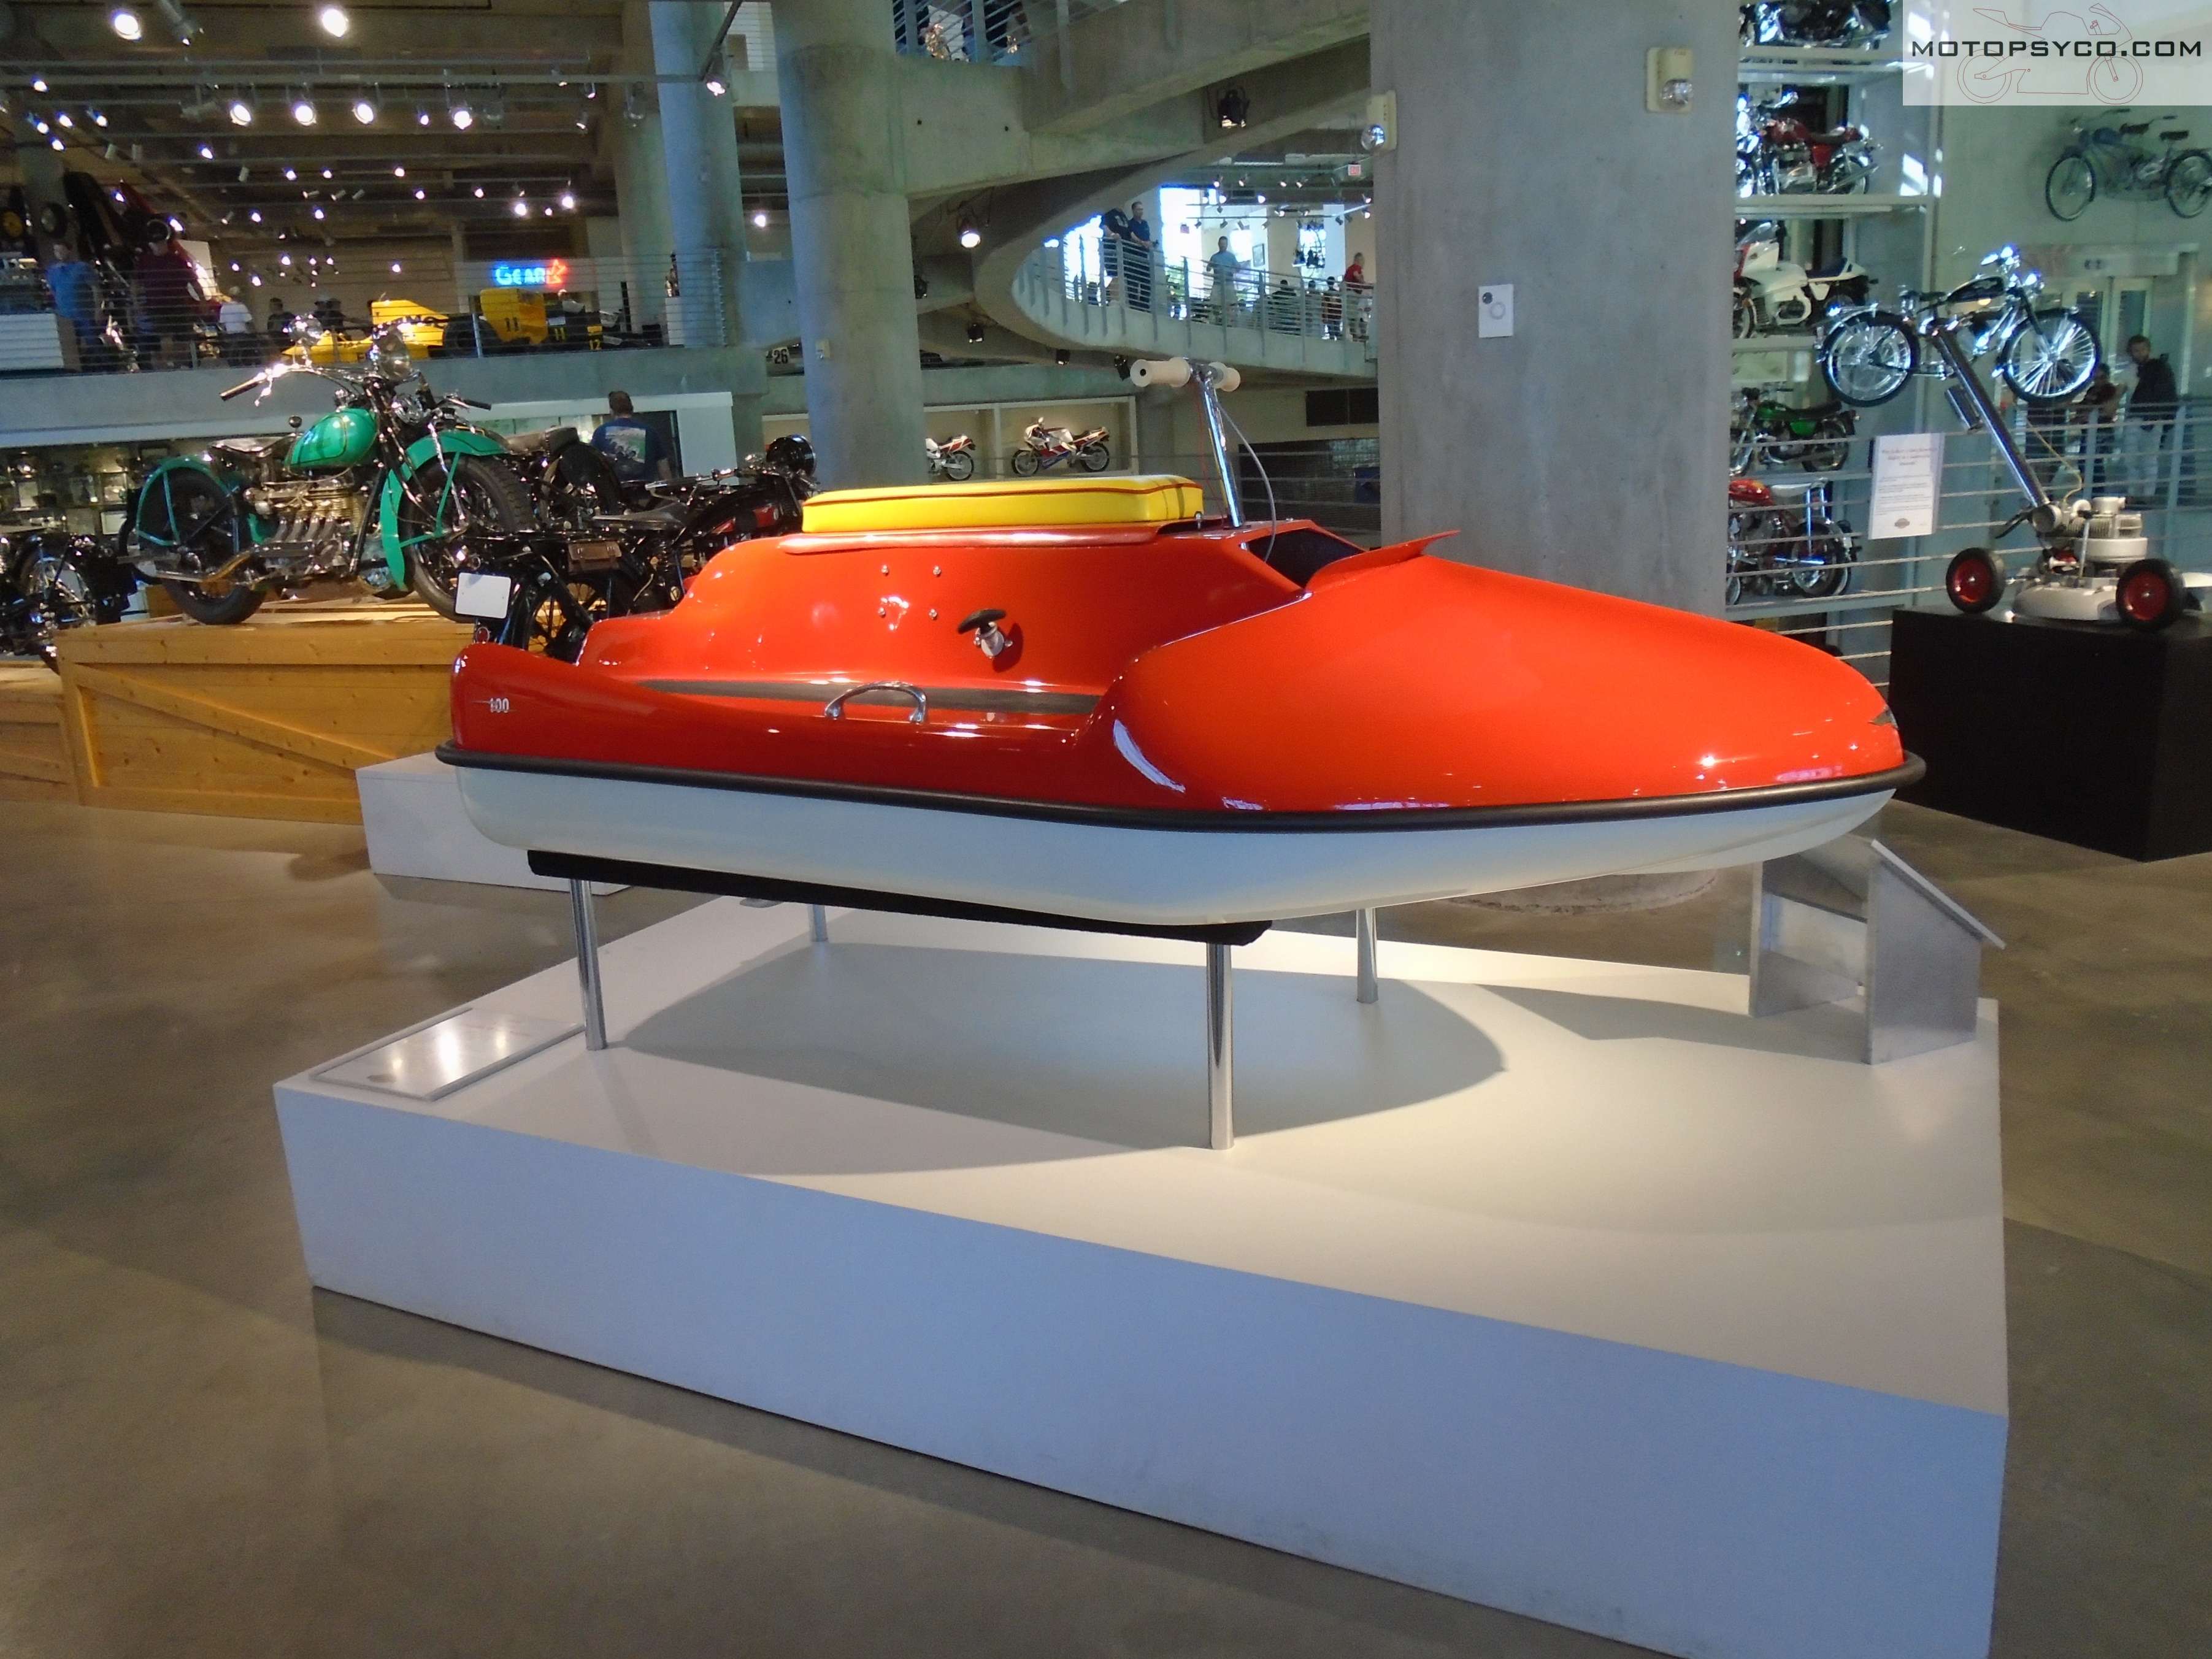
Long before the Jetski, there was the Vincent Amanda

Another Vincent product was this lawn mower. Funny how today aficionados of some other brands pick on us Honda fans about the motorcycles and cars being souped up lawn mowers. Now when somebody starts that line of malarkey, we can all remember that Vincent made a lawn mower.
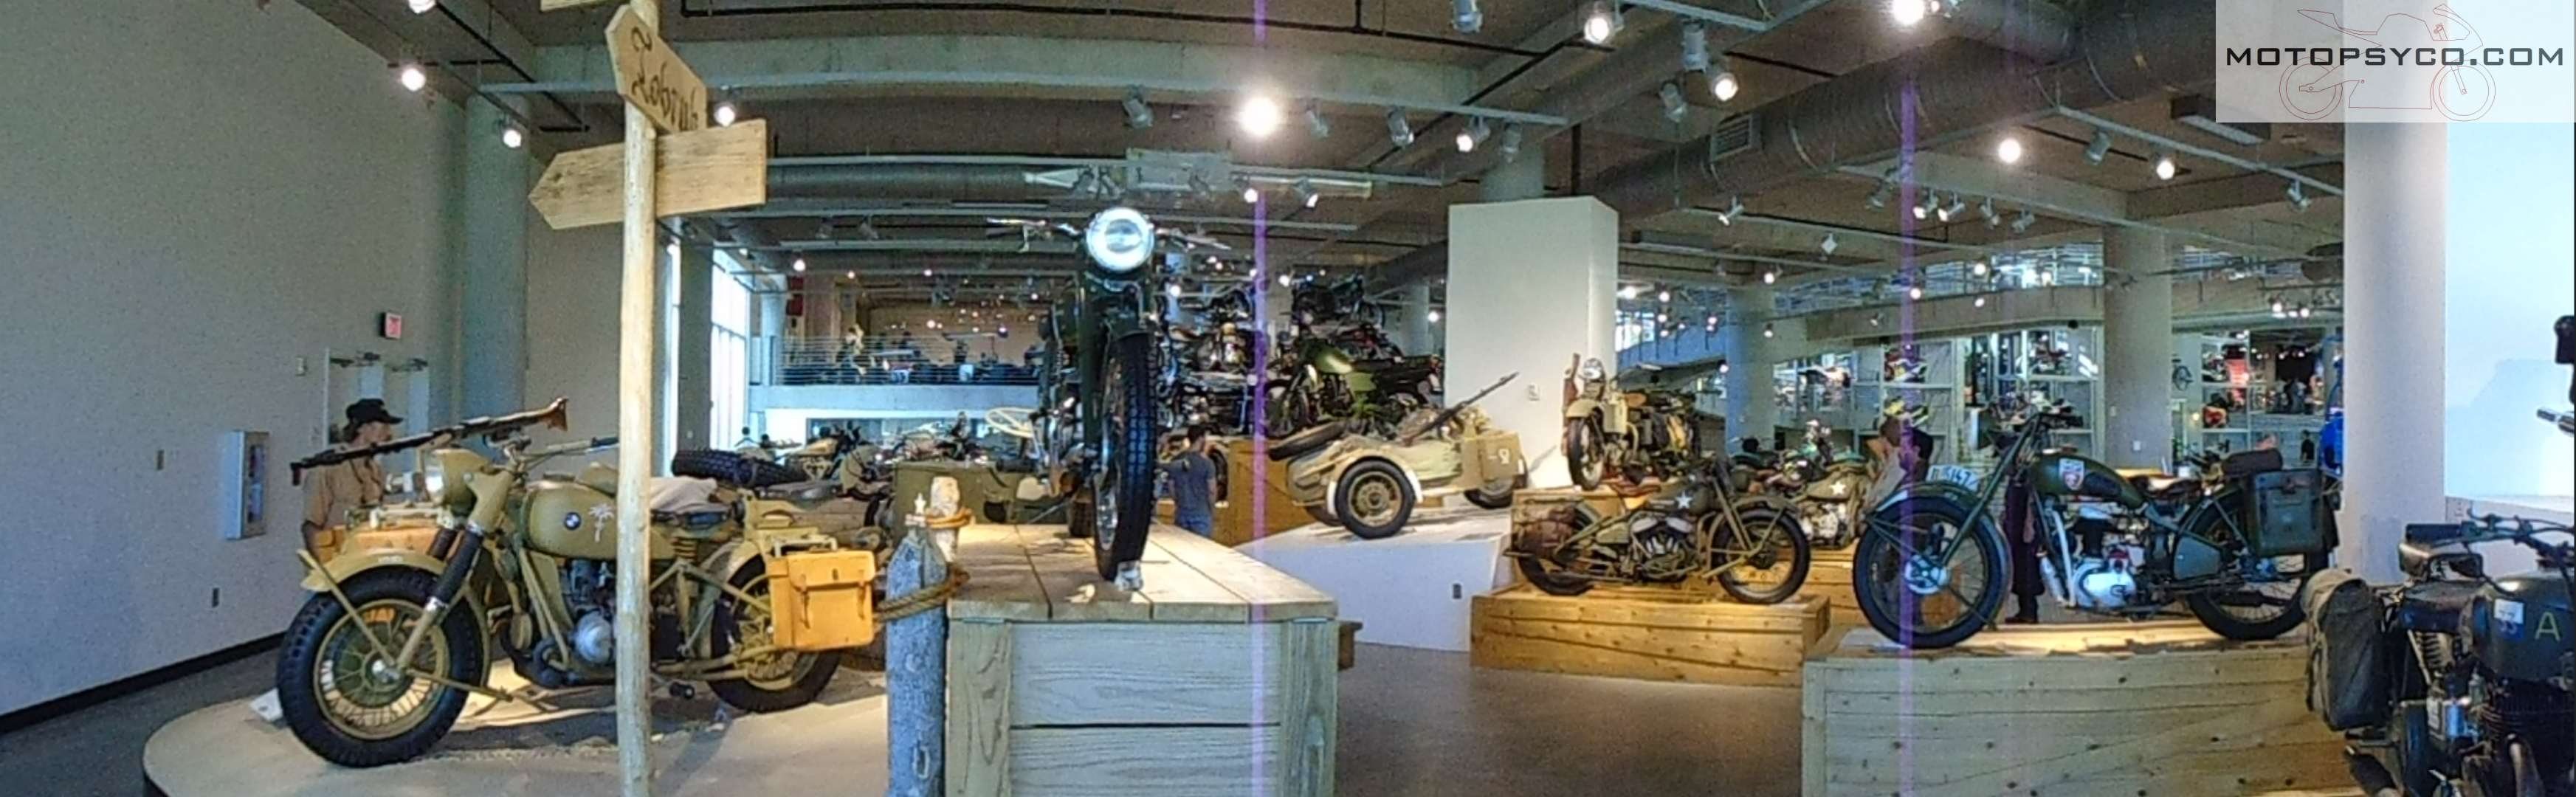
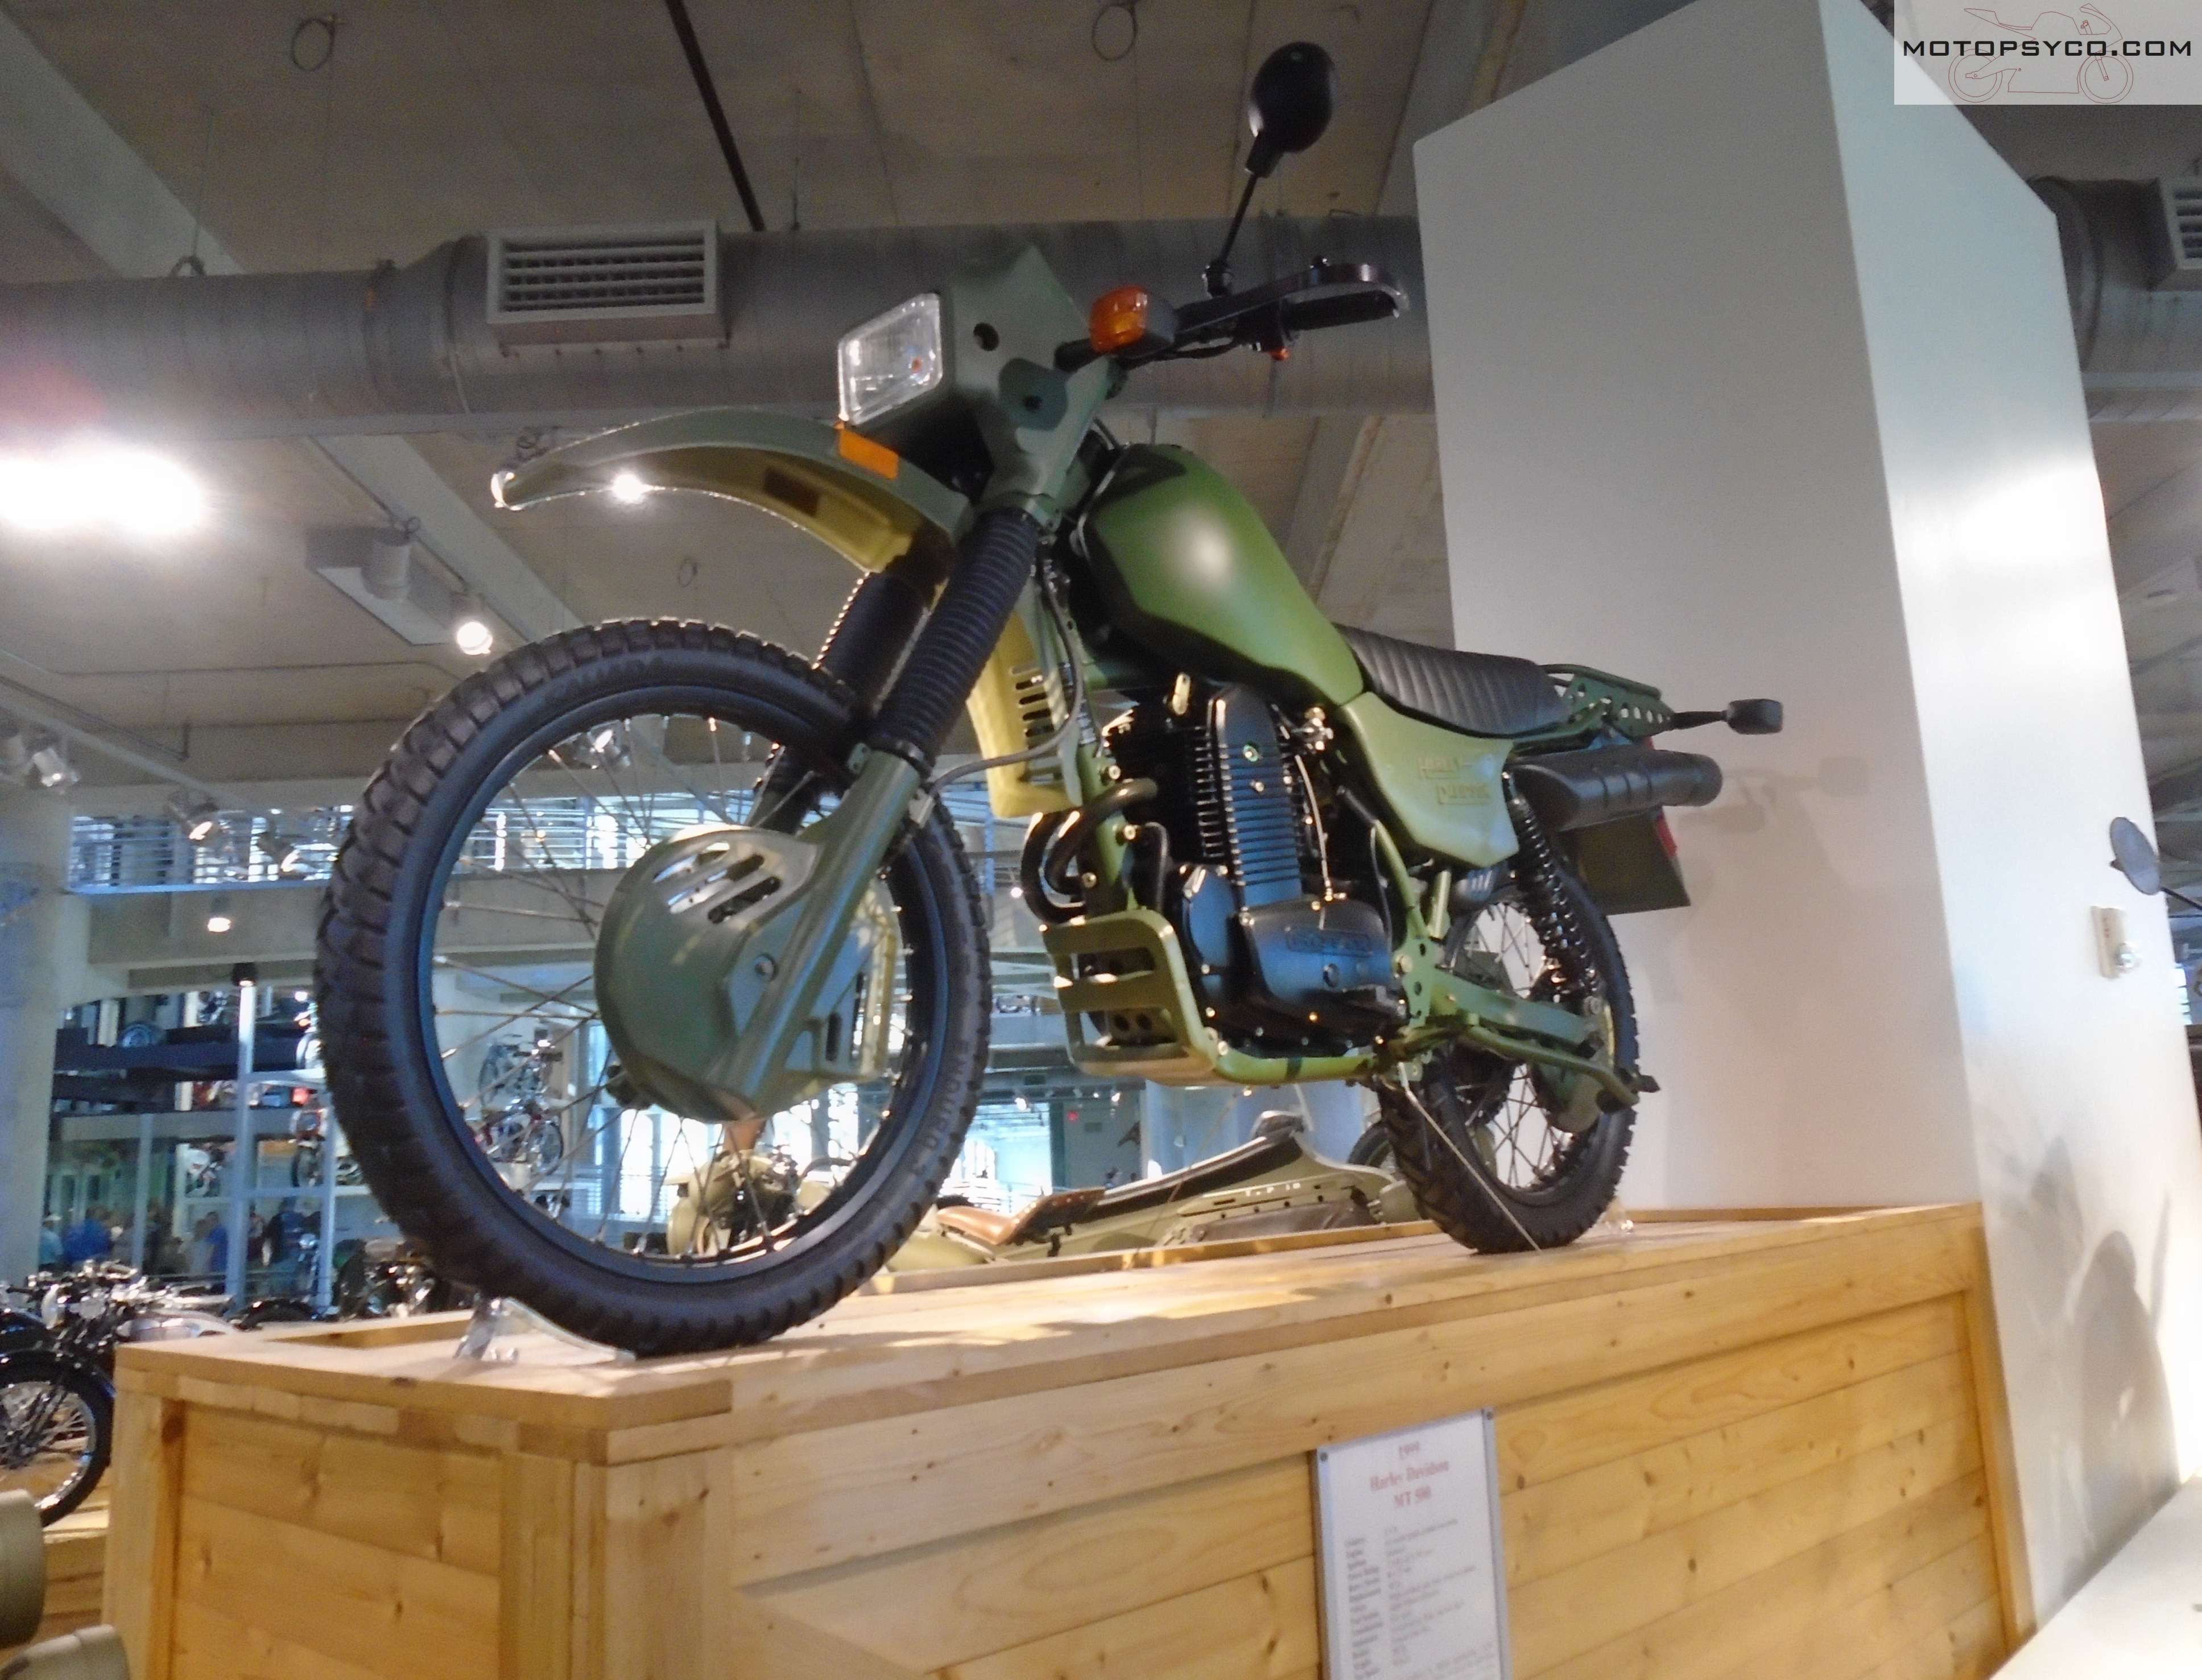
Military motorcycles at the Barber Museum
The museum also has a sizable display of military motorcycles including the 1999 Harley Davidson MT500. Too bad they never sold a civilian version of it.
This original 1913 Yale is a fantastic sight to see with it’s matching sidecar.
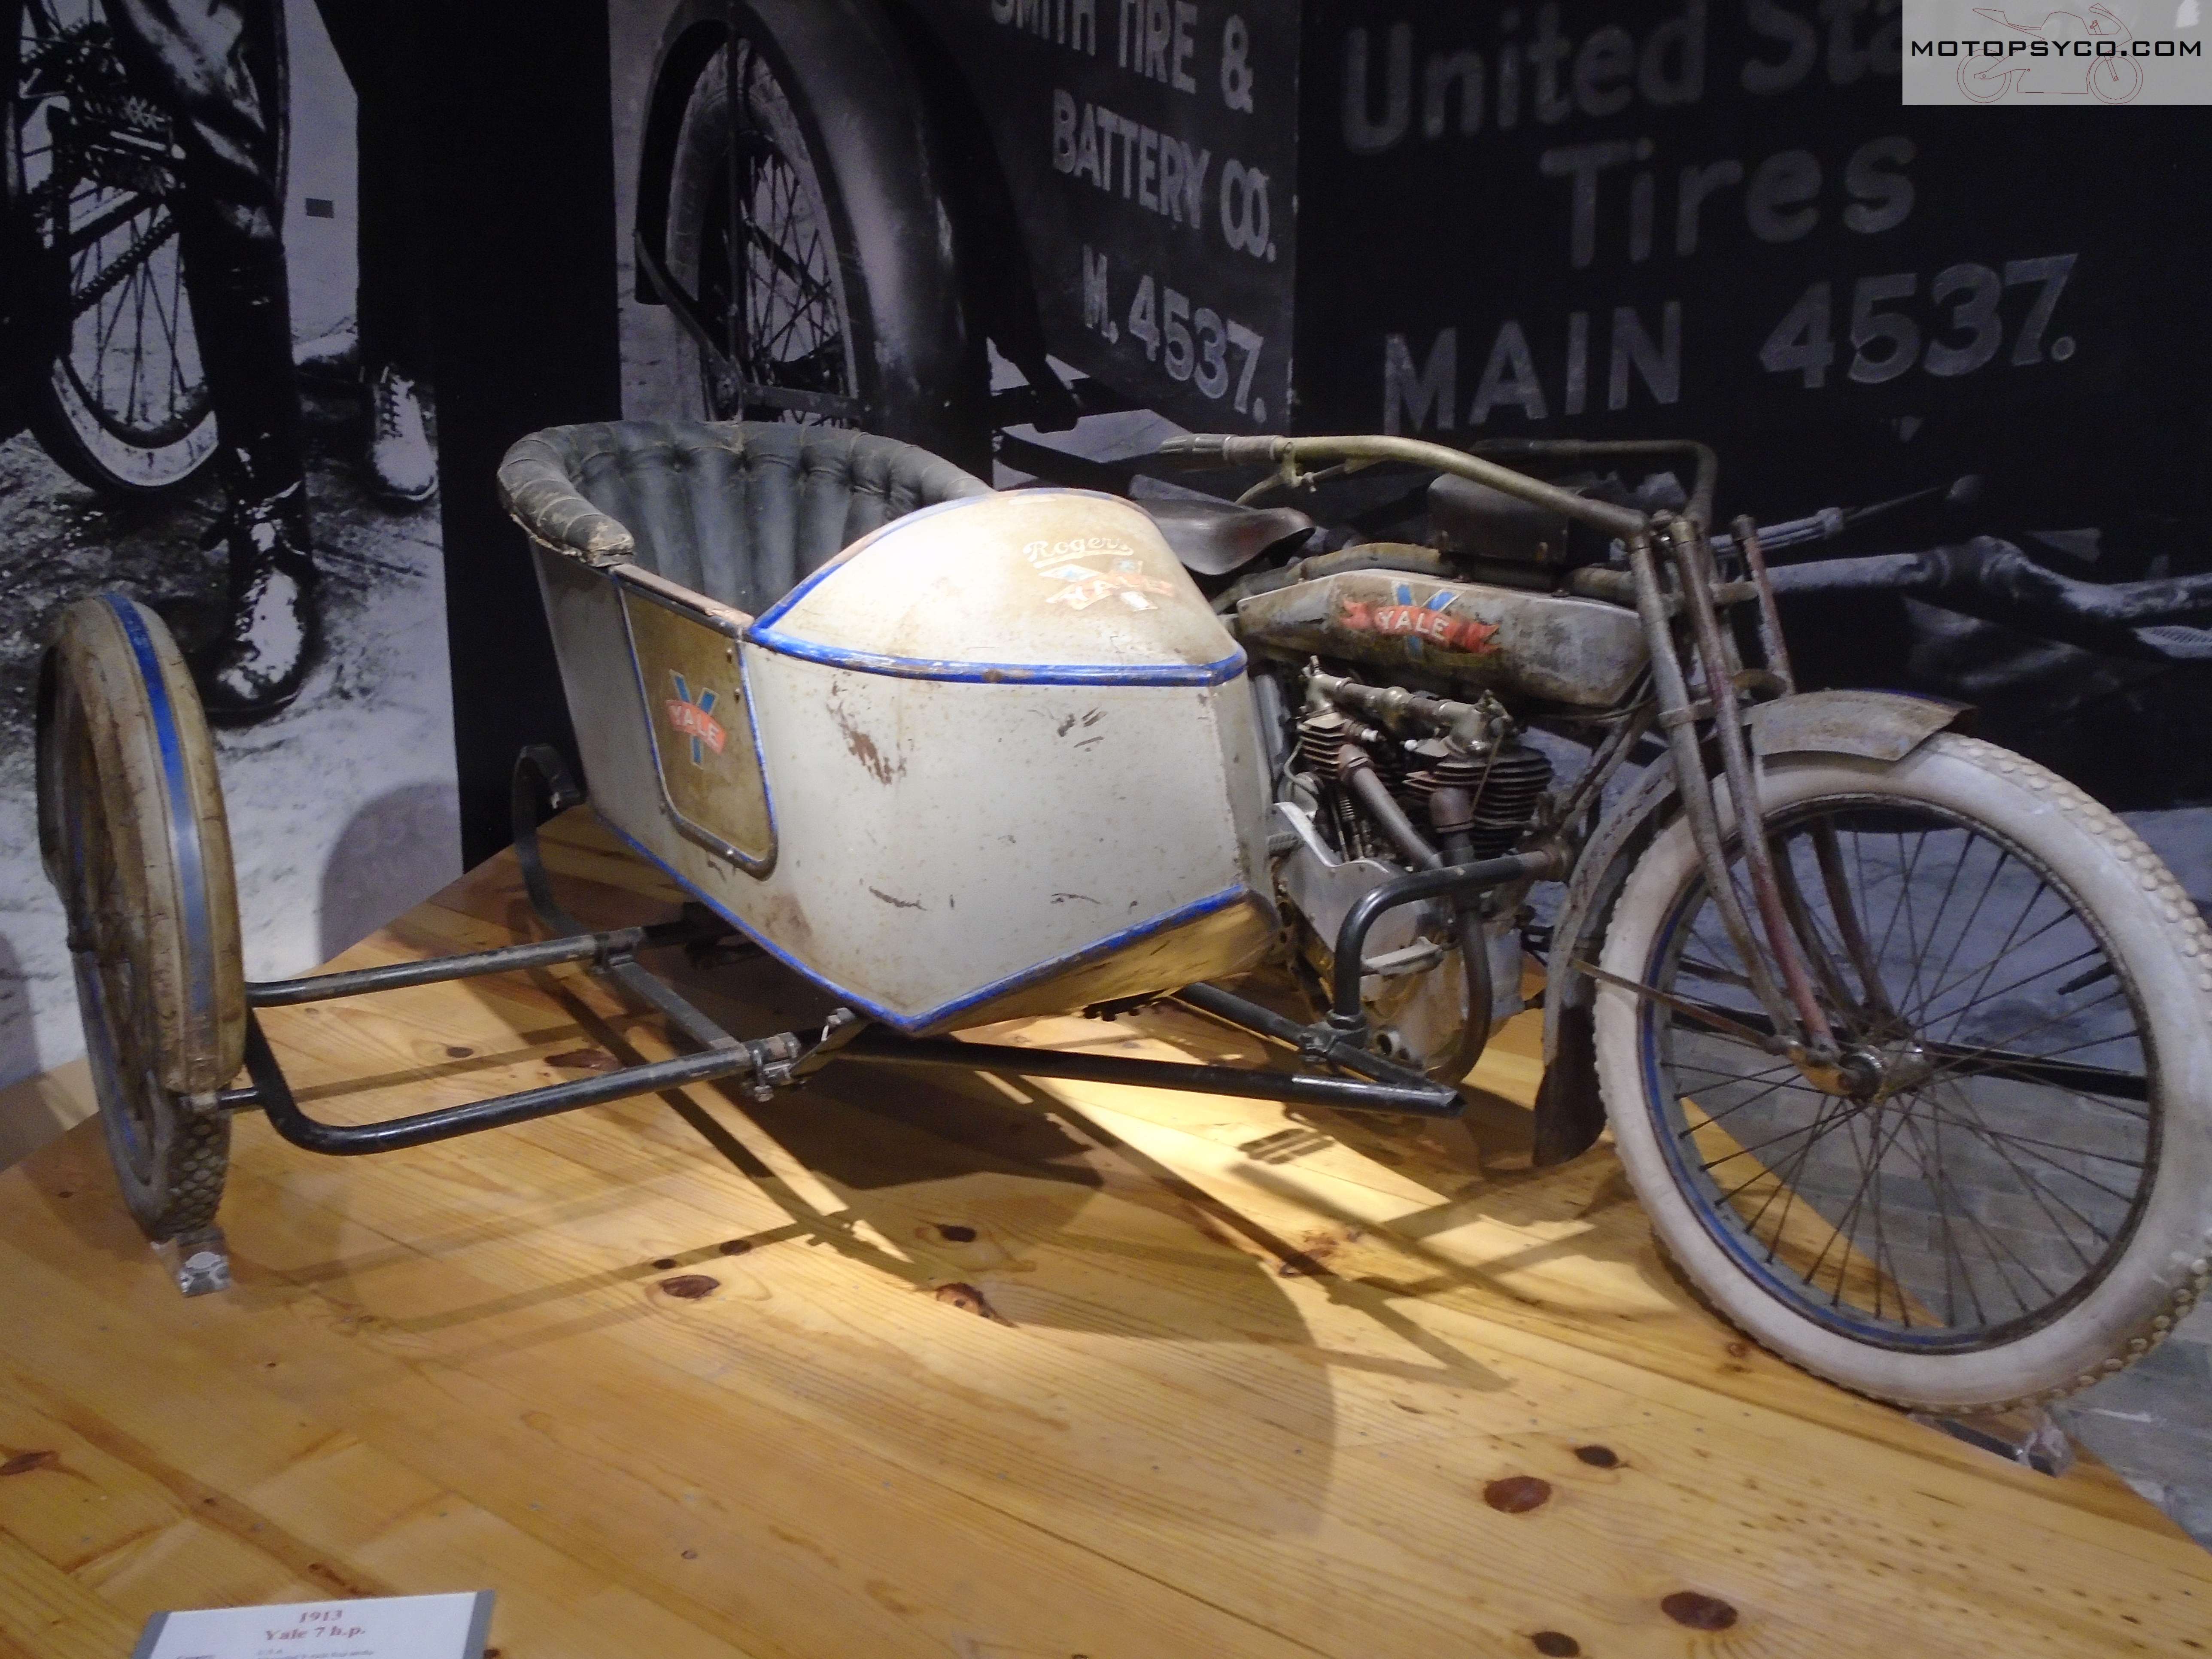
Unrestored 1913-Yale
The massive Bohmerland sidecar outfit has to be seen in real life to be appreciated.
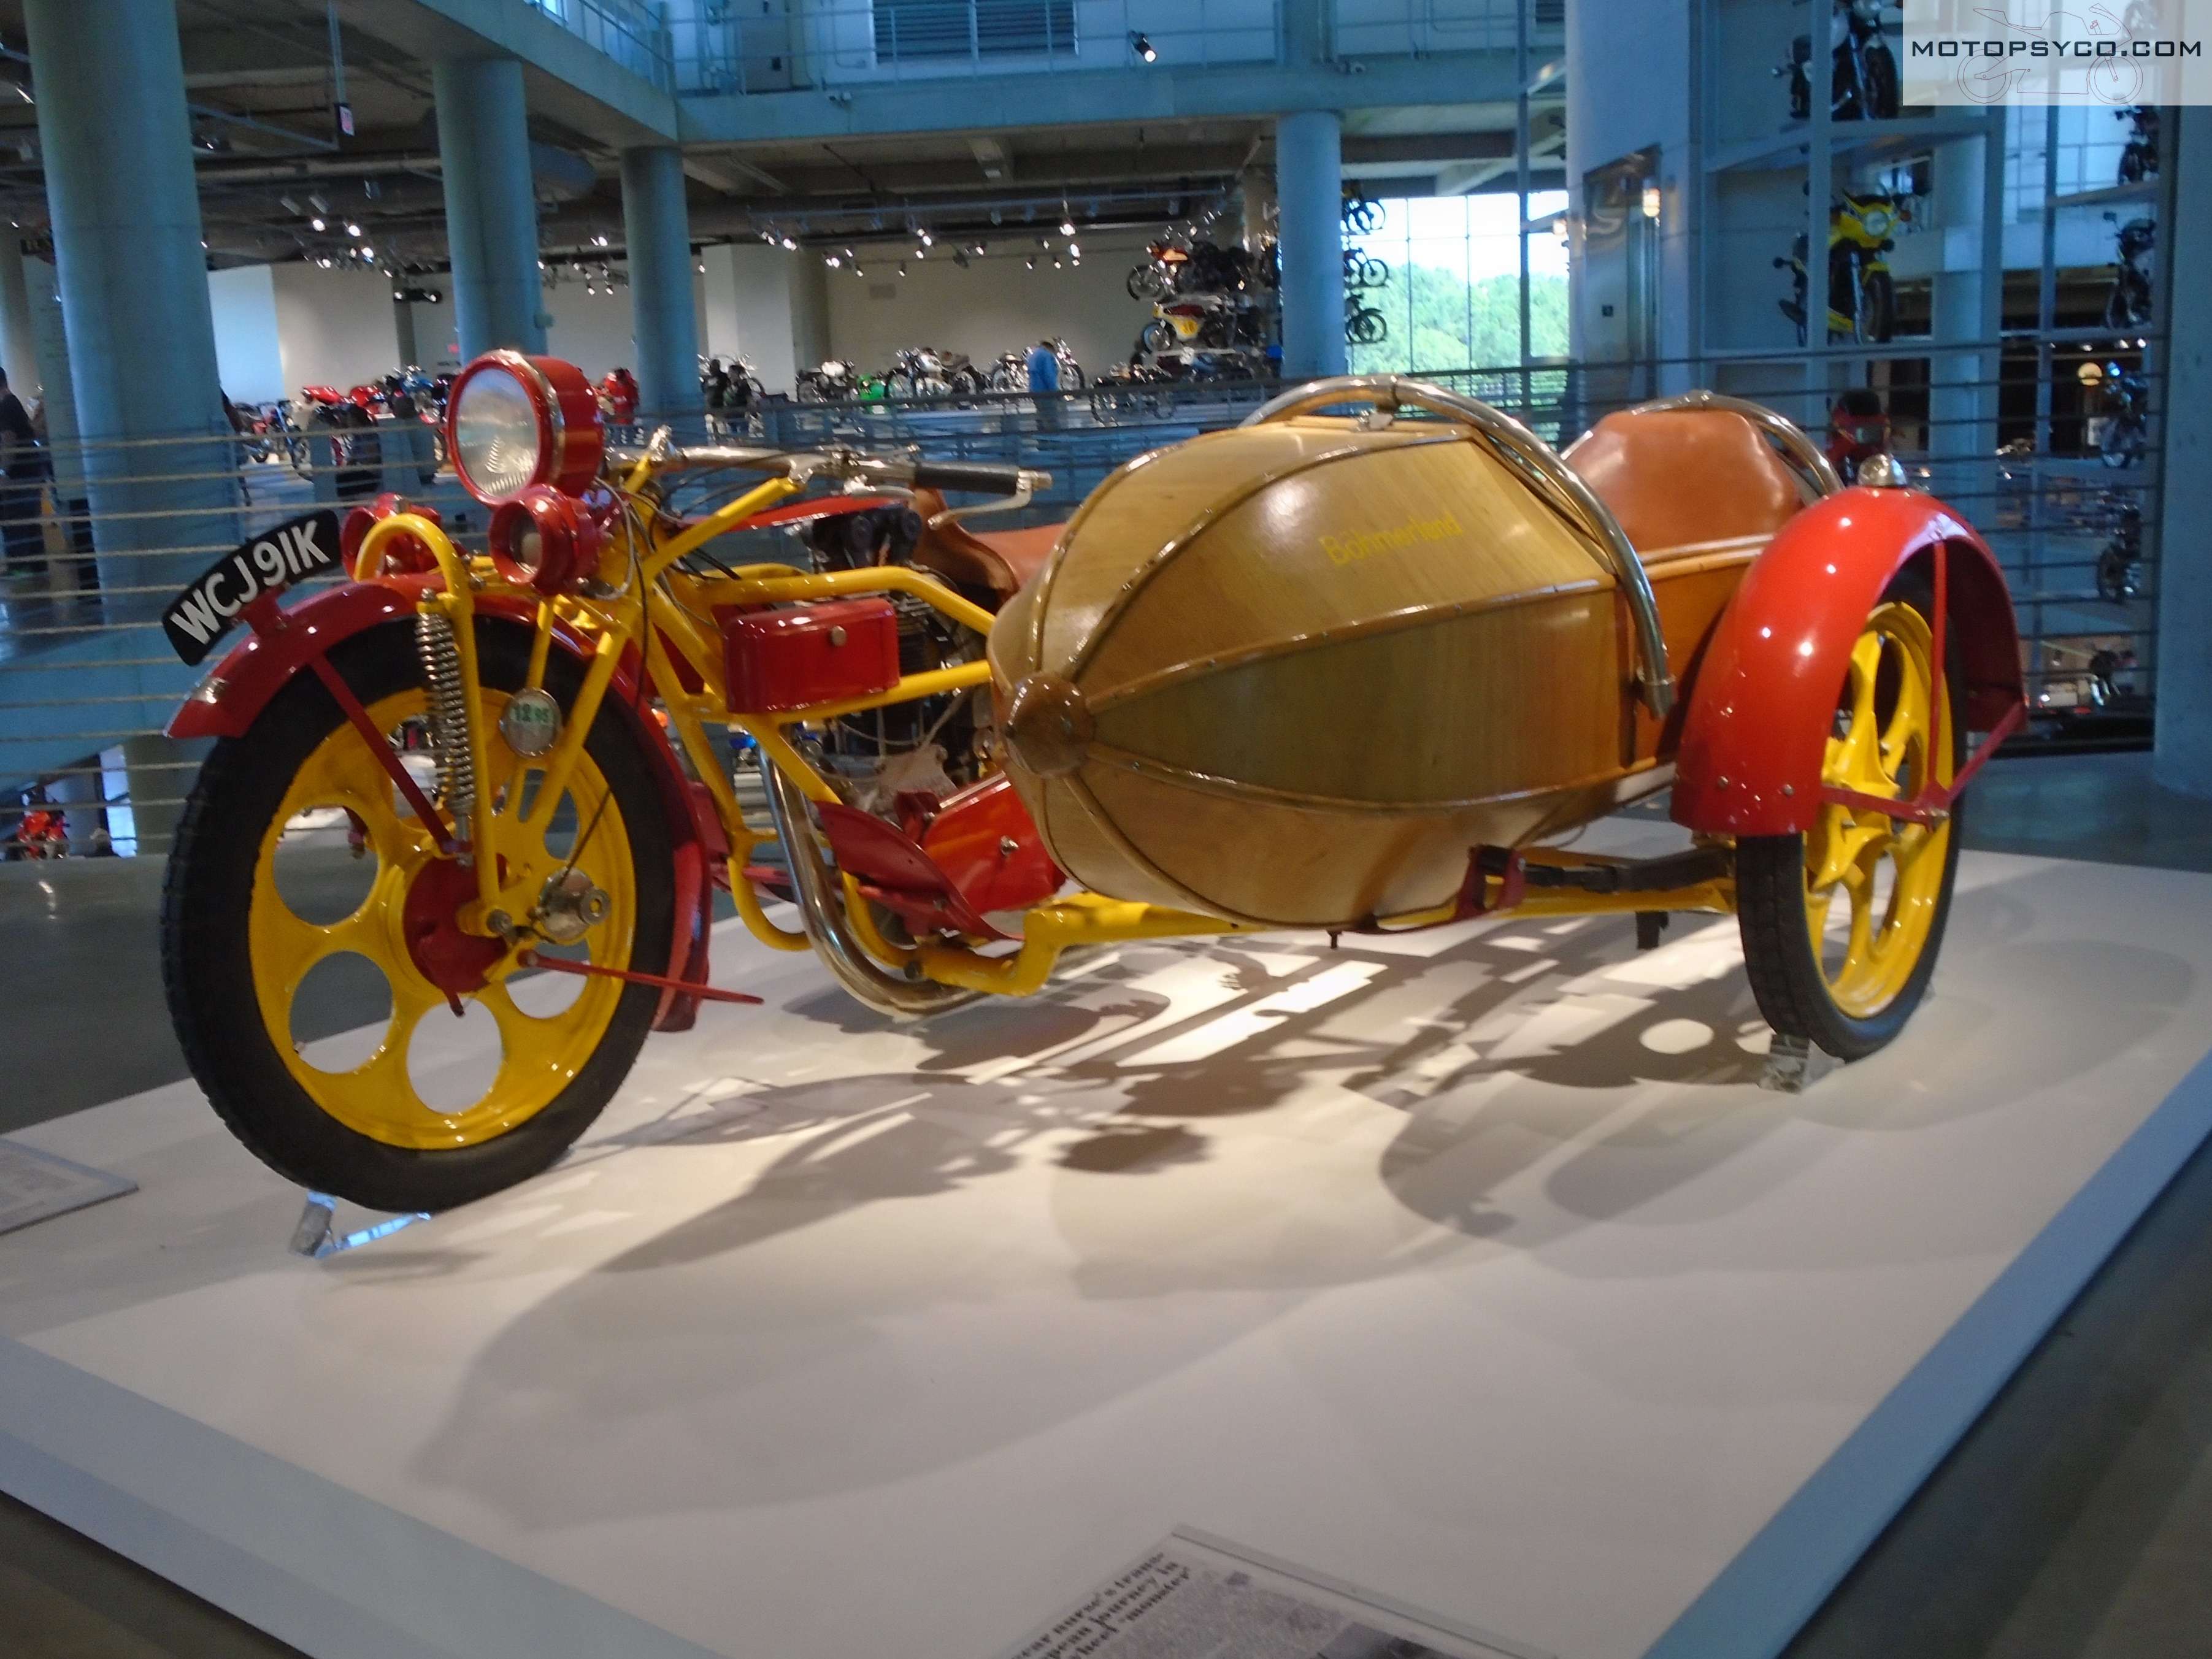
Bohmerland
Scattered through the collection are a few cutaway engines such as the Matchless and Triumph mills pictured here.

Matchless-G50

Triumph Tiger 110
Here’s a special bike for Honda fans.

Dick-Mann-CR750
It’s the CR750 that Dick Mann rode in the 1970 Daytona motorcycle race.
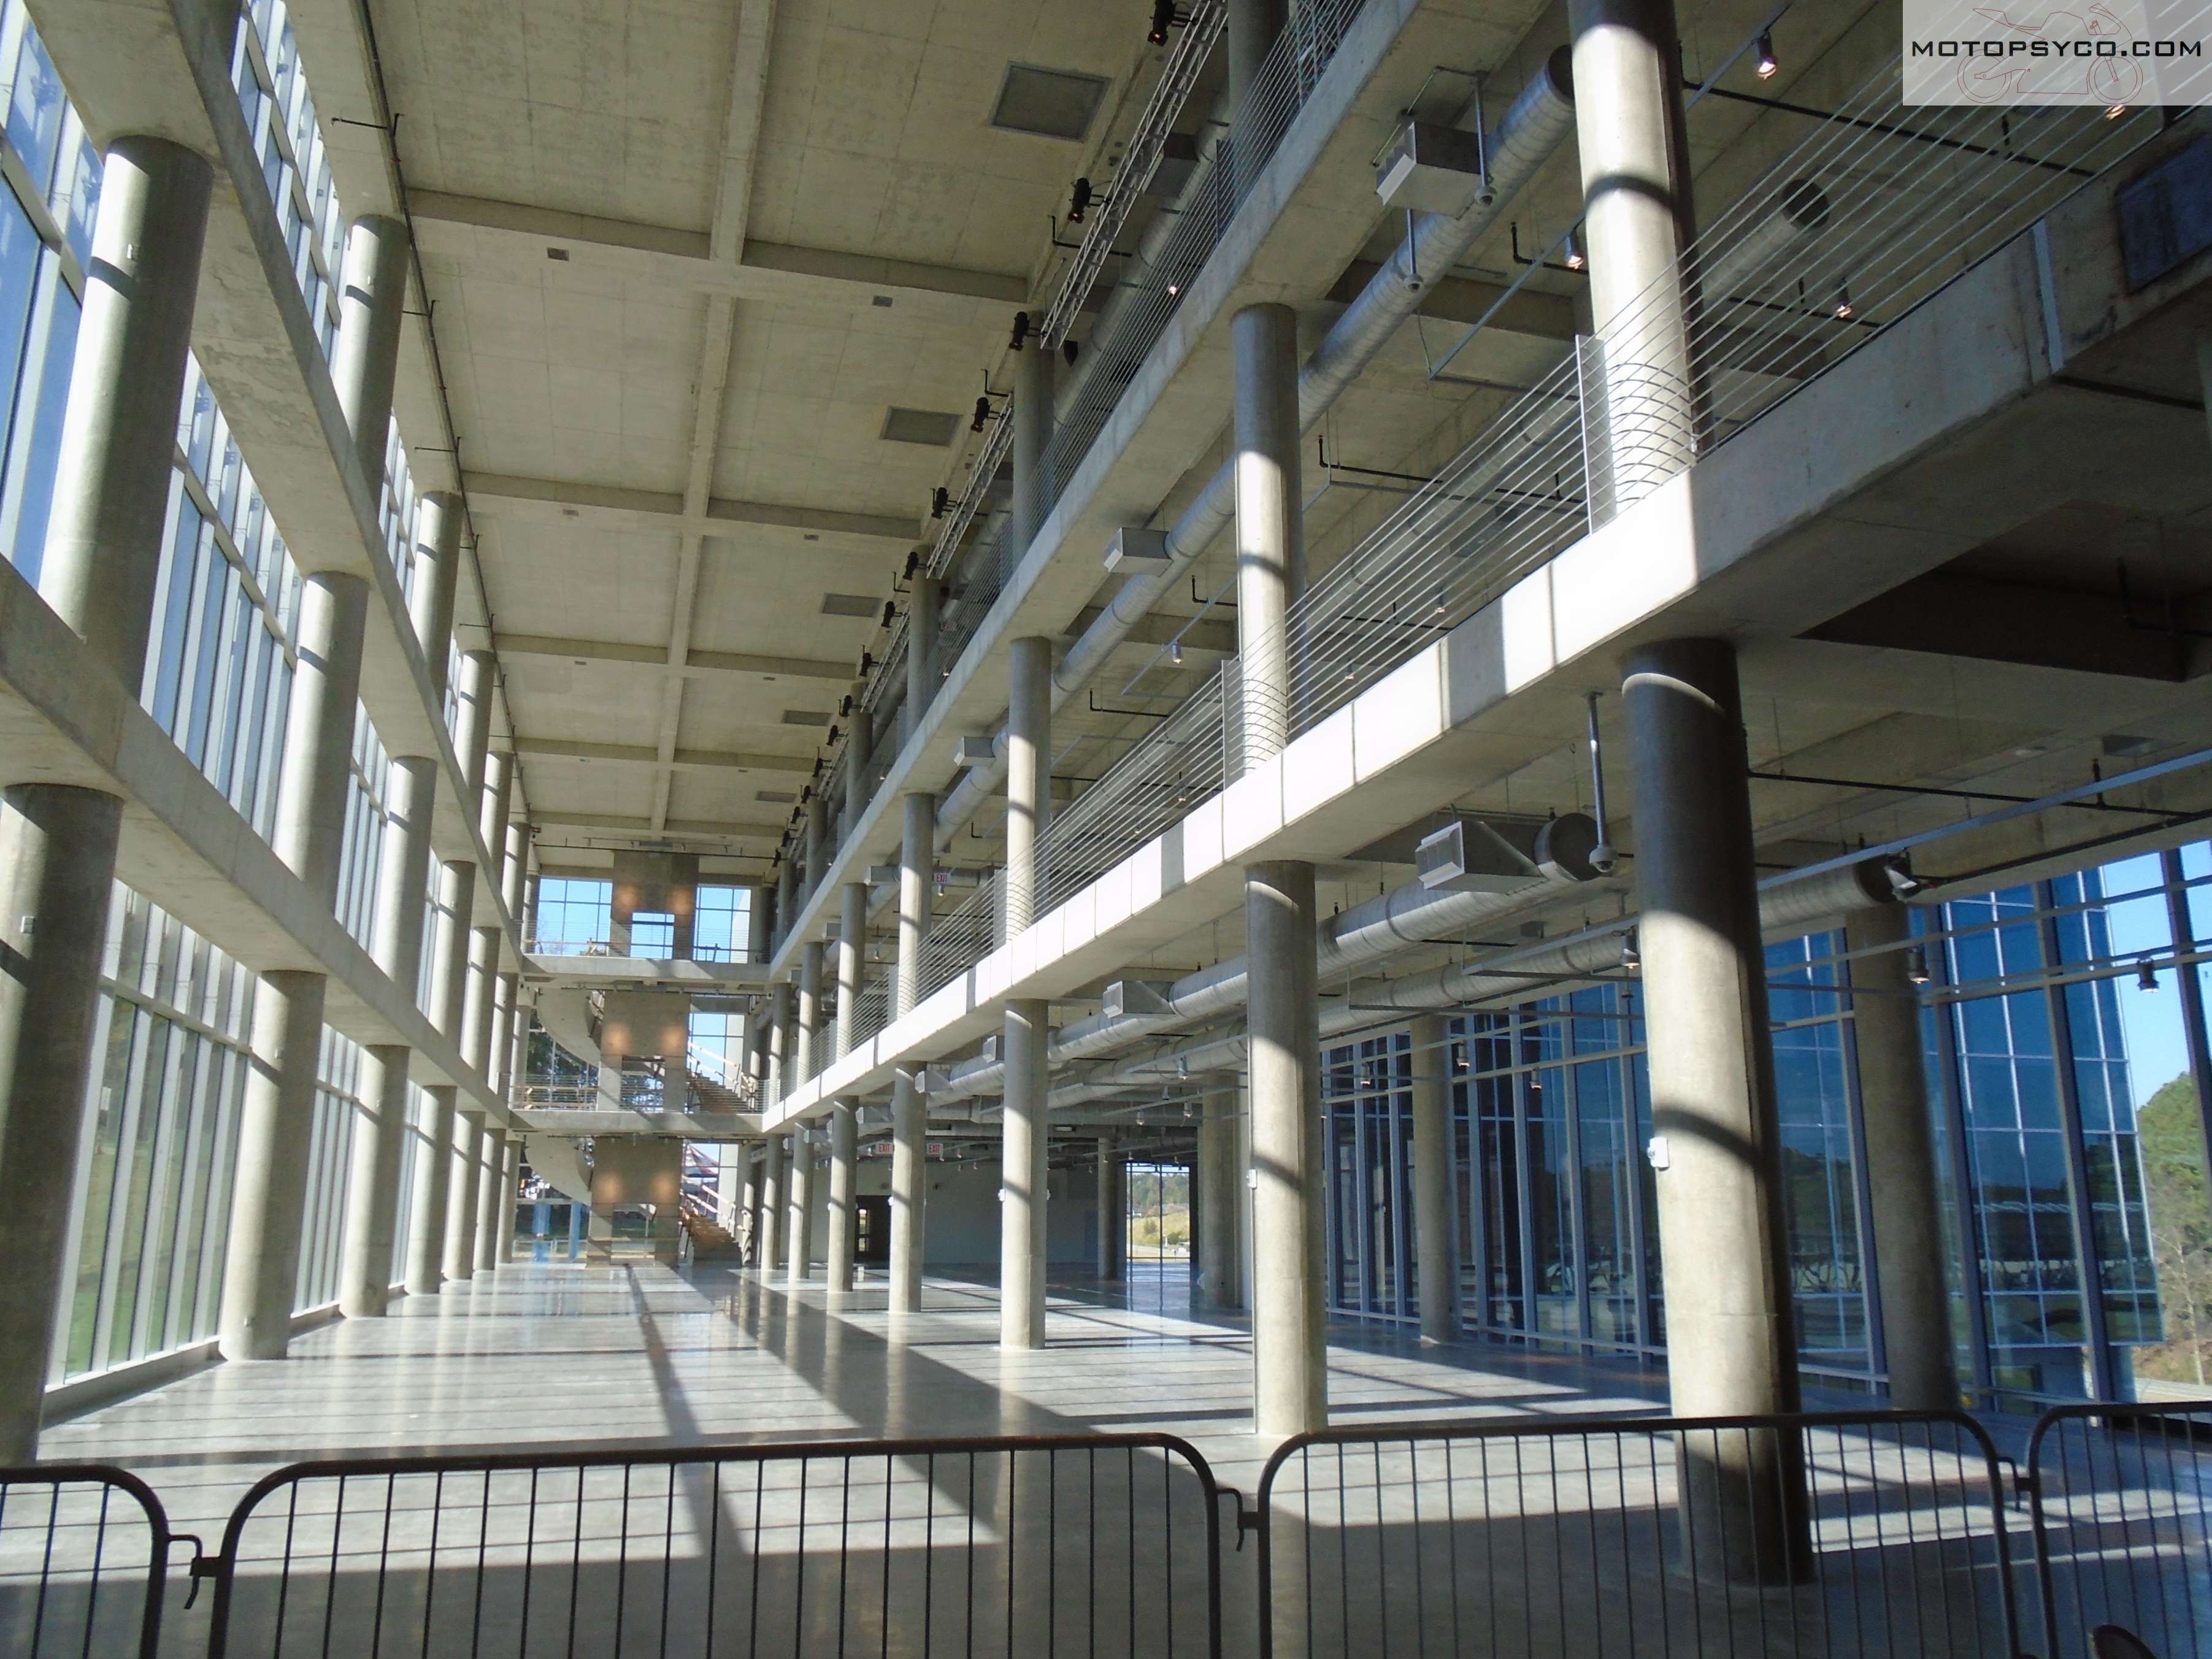
Barber-Museum-new-addition
The museum has many more motorcycles and cars hidden away in storage, but thanks to this newly completed addition a lot of them will be able to come out of hibernation for our enjoyment. It will be wonderful to see it when I return to the Barber Vintage Festival again.
Vintage sidecar motocross?
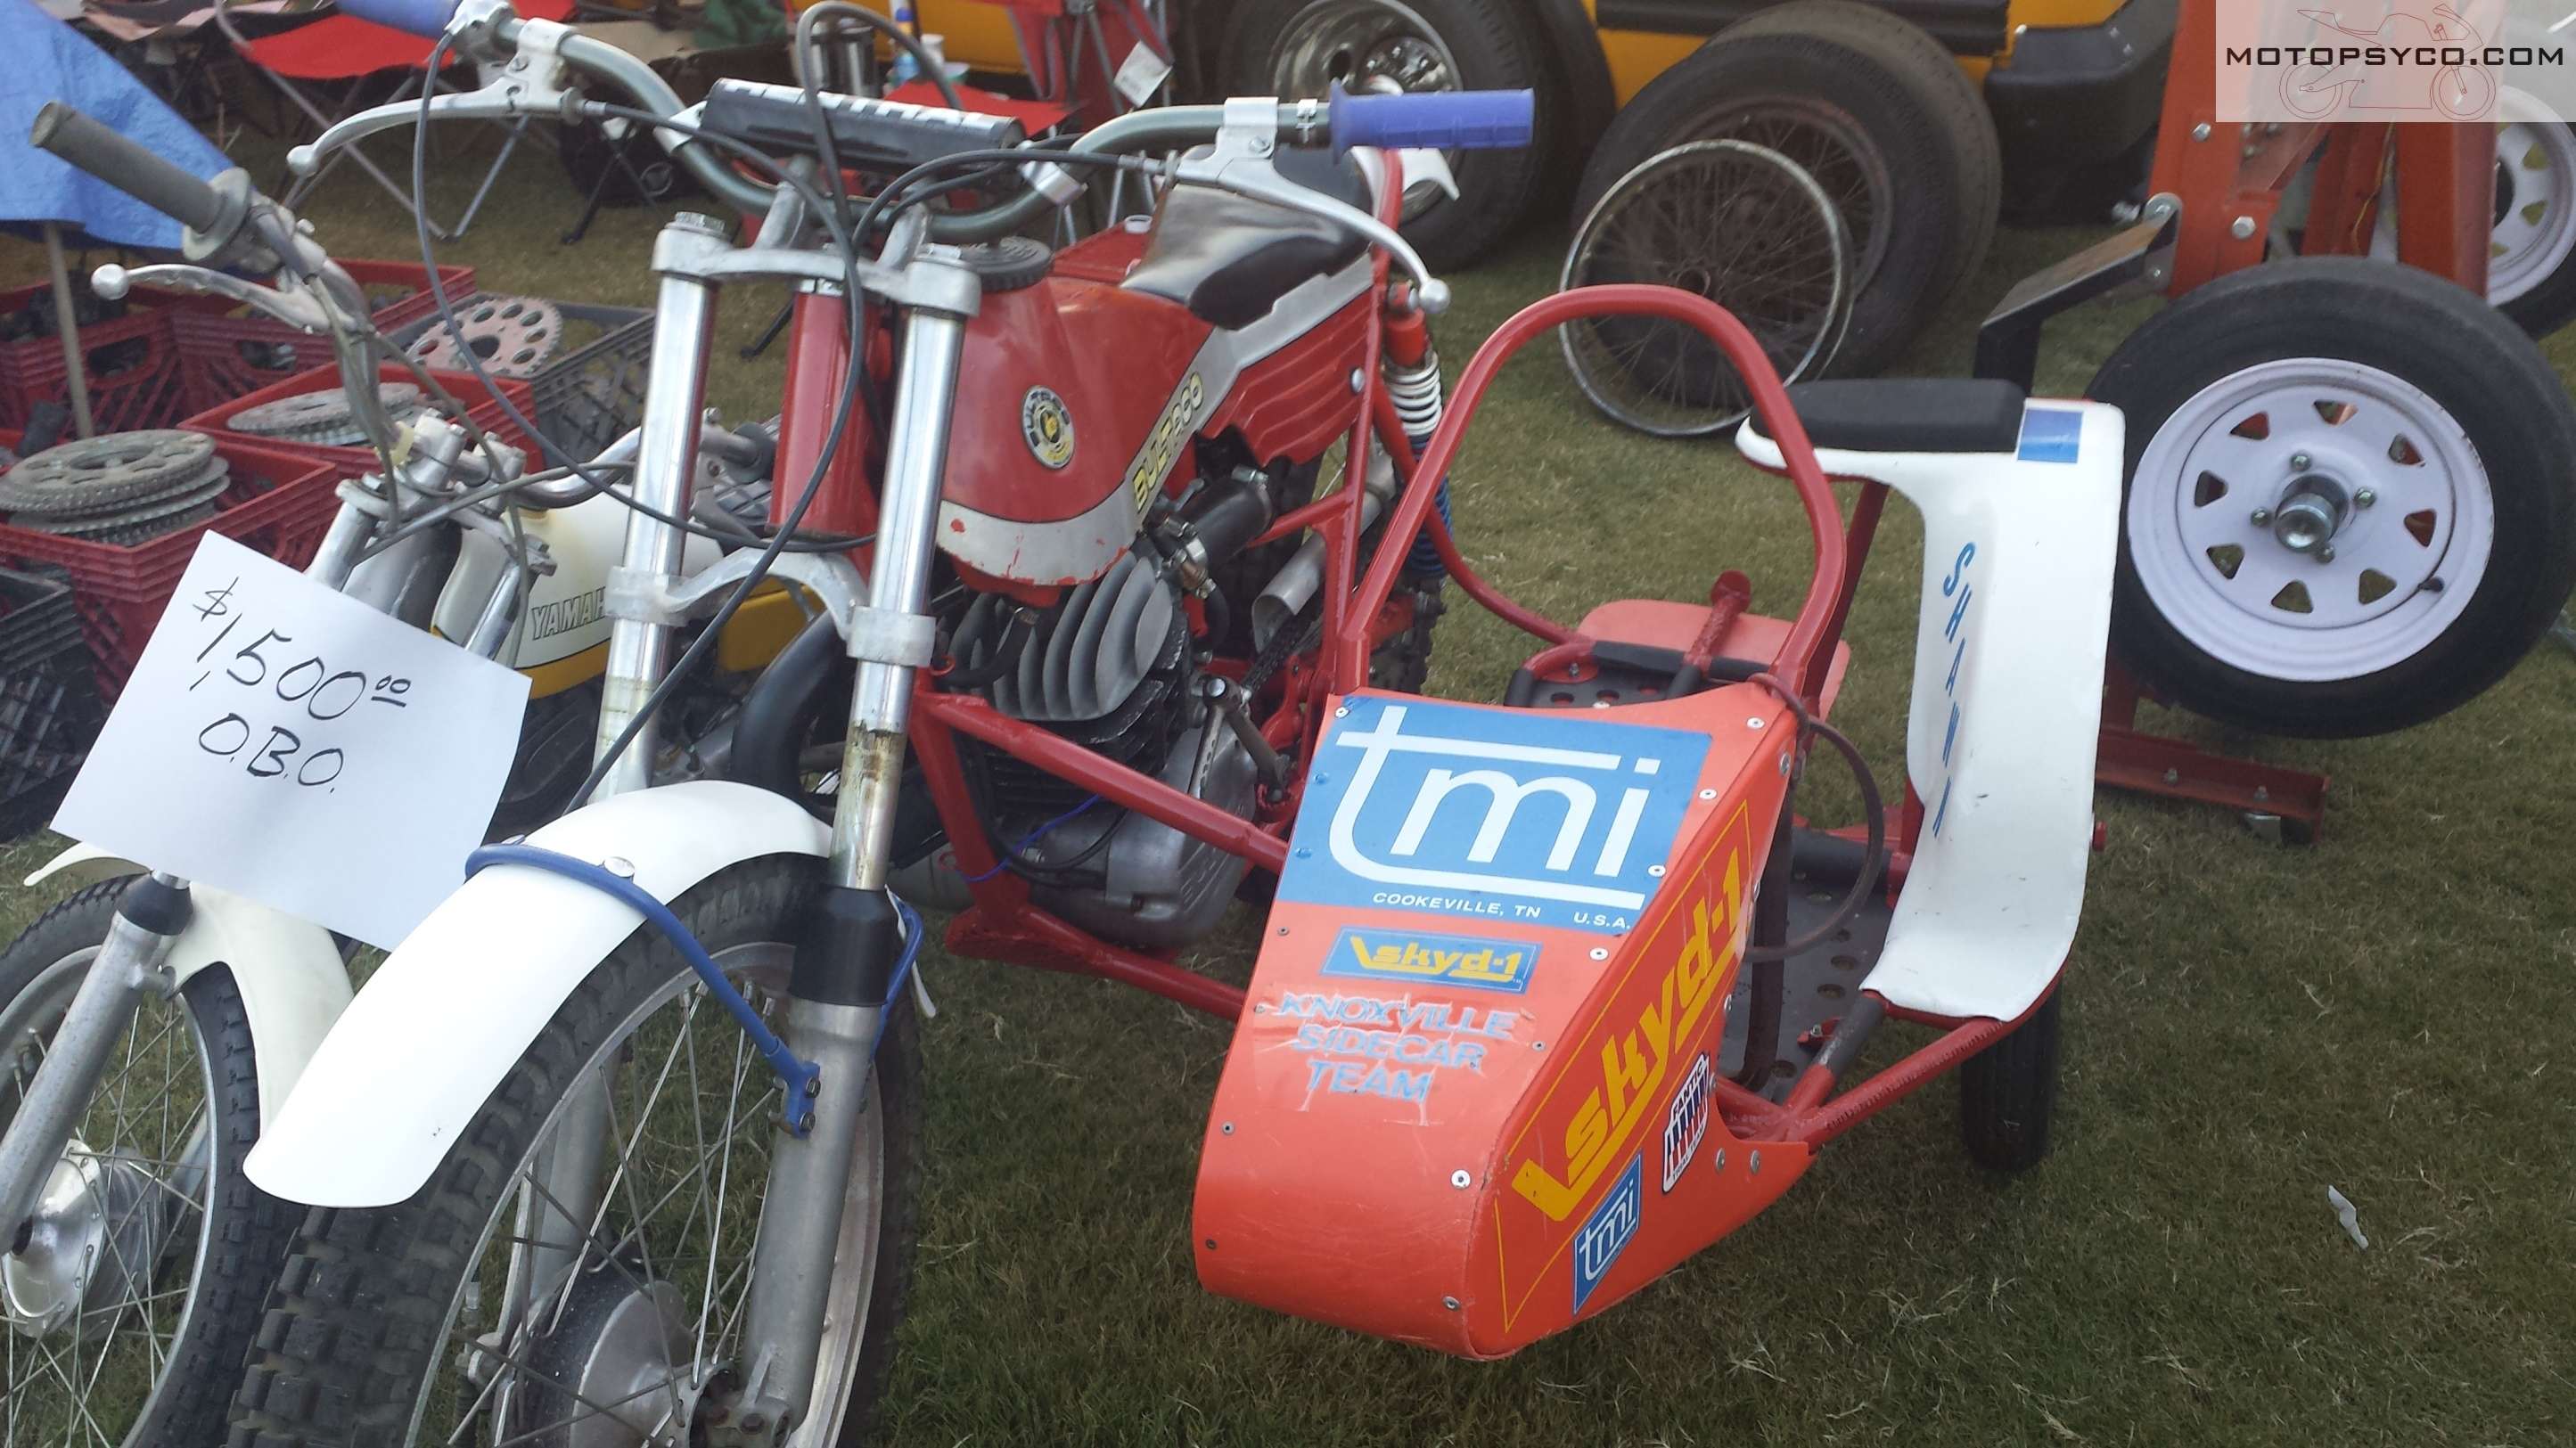
One of my favorite things about Barber is the swap meet. There is such a huge variety of good junk, unique motorcycles, and rusty gold that if you can’t find what you want, you’re probably not looking hard enough. This Bultaco motocrosser with a sidecar was among the coolest items offered for sale.

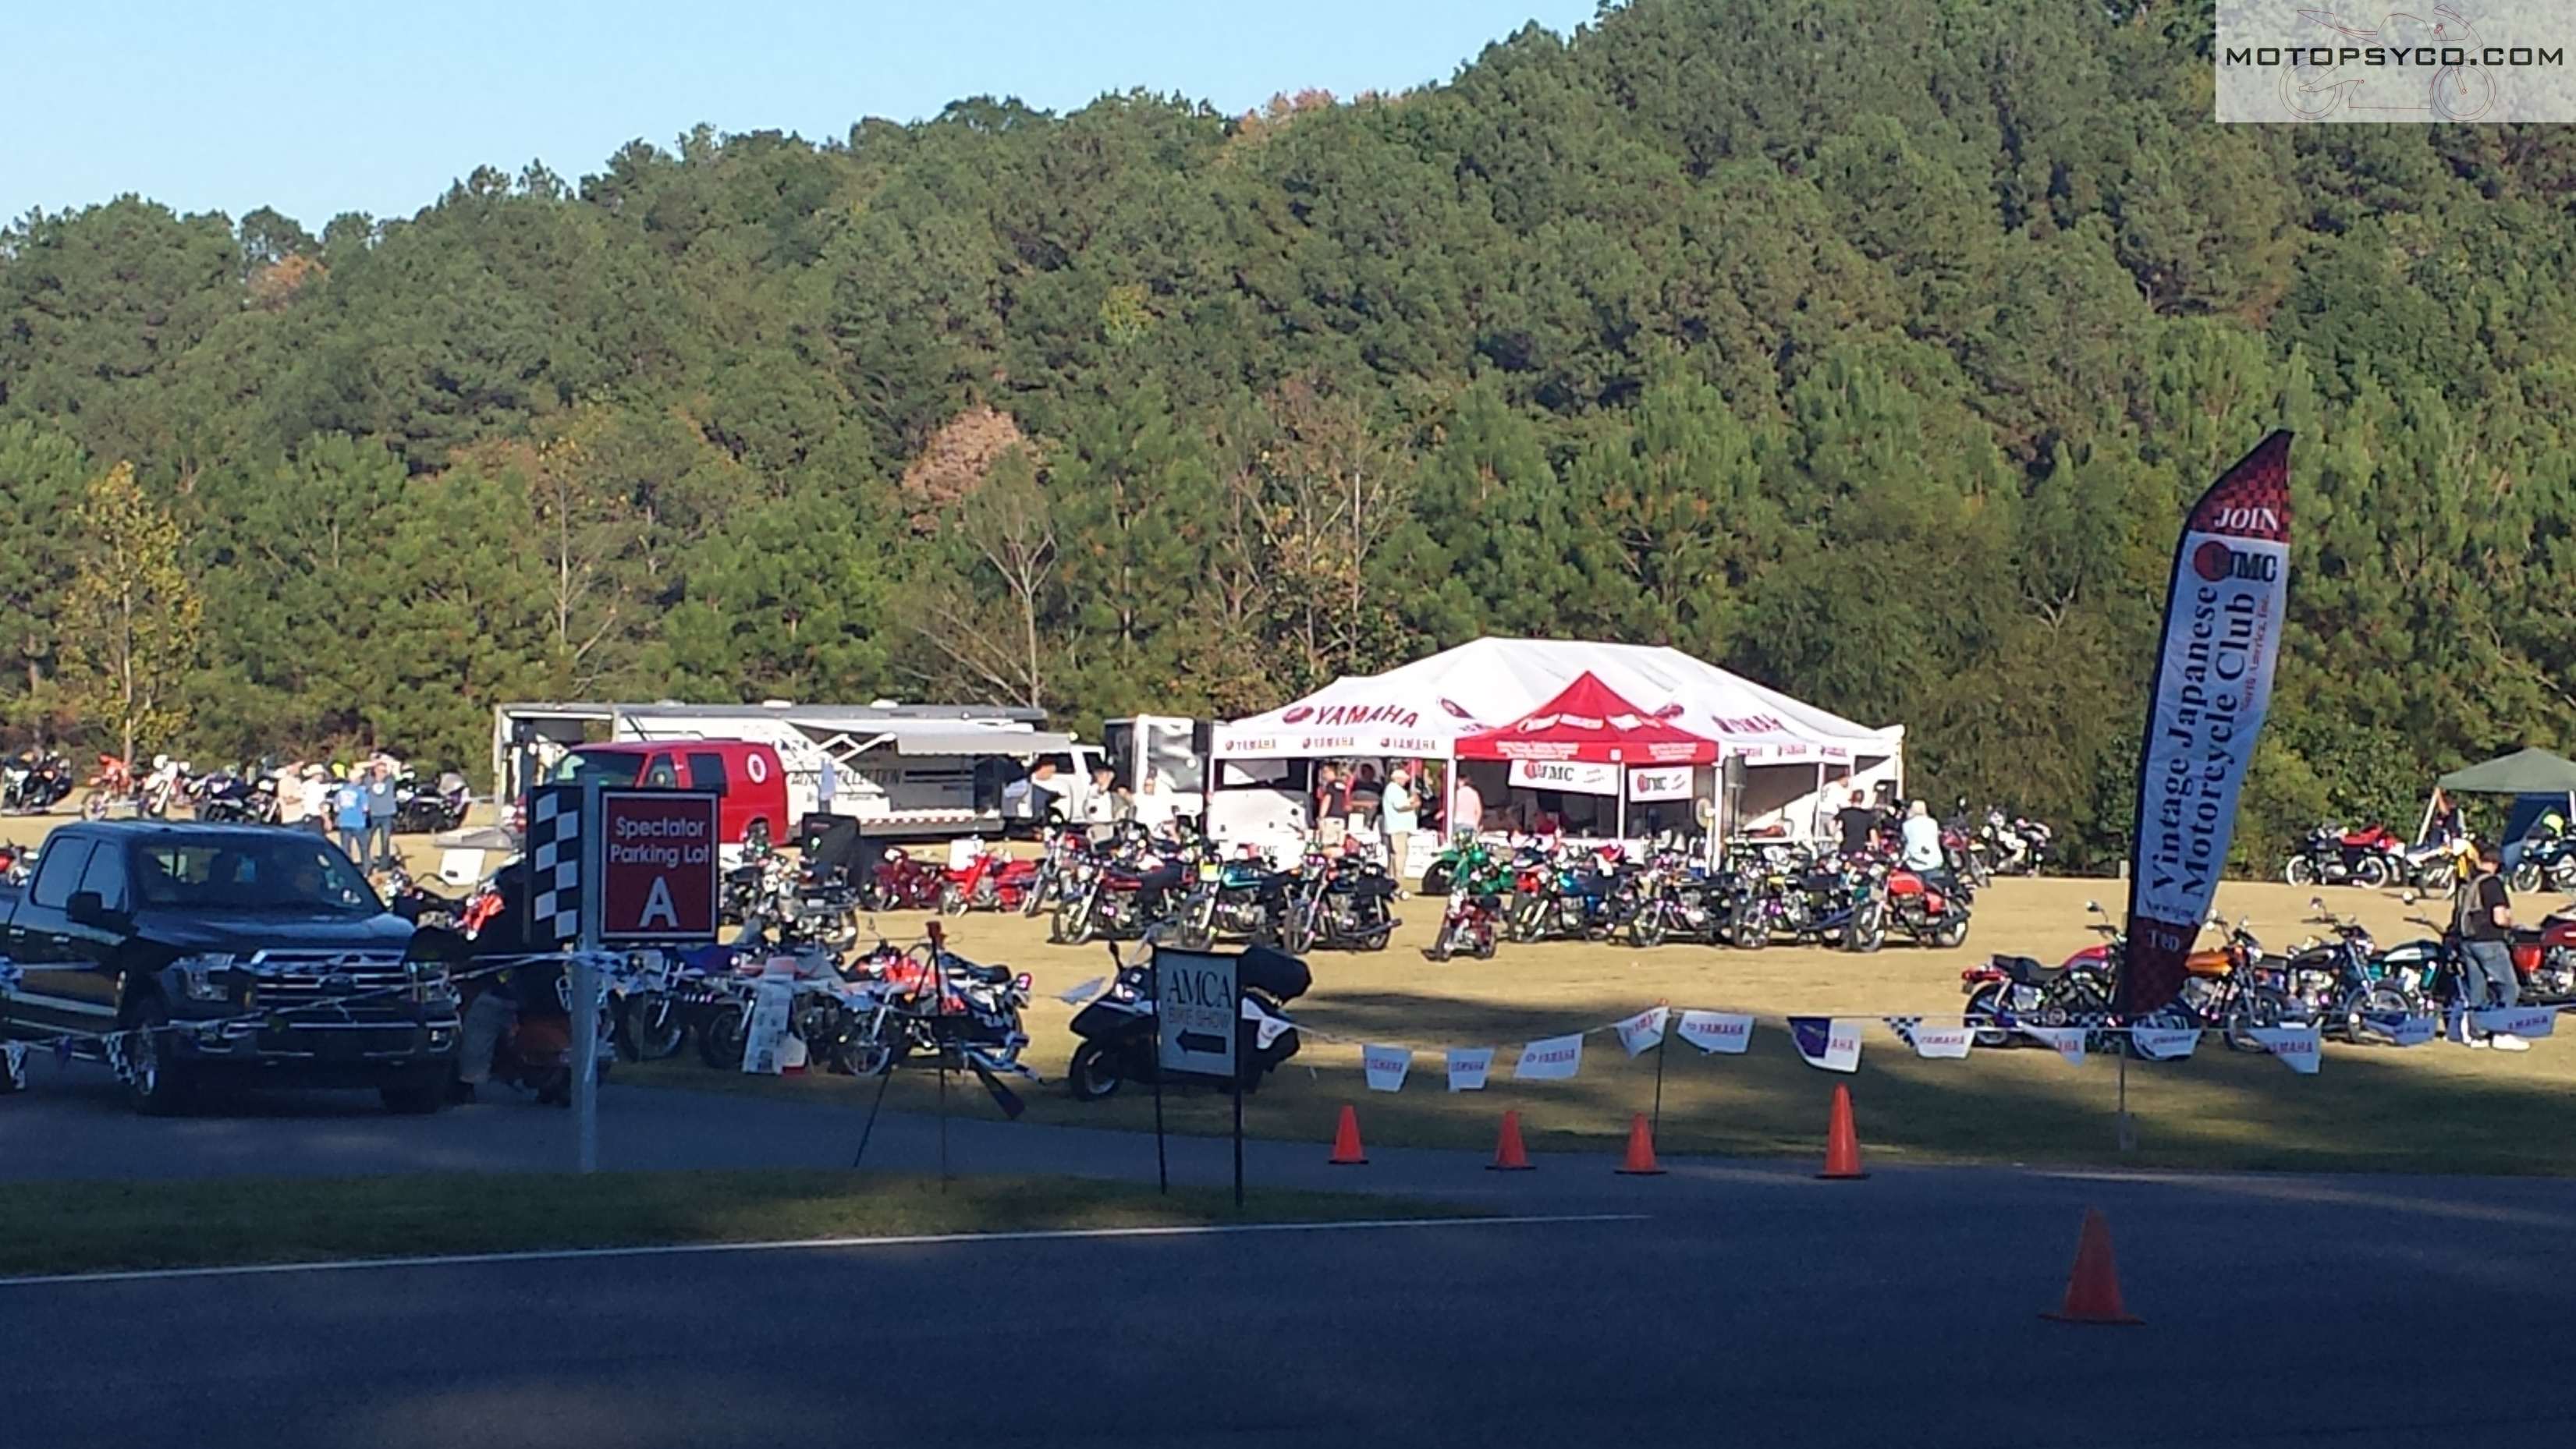
I always enjoy checking out the Antique Motorcycle Club of America display, this is part of the small motorcycle collection. Directly across the road was the Vintage Japanese Motorcycle Club show. This year my freshly restored C70 Passport was displayed there.
There’s so much more to show you and tell you so I strapped two cameras to my scooter and shot a video ride around of the event for you.
If you are crazy about old motorcycles the Barber Vintage Festival is an event that you really need to go and see.
Peace Y’all.
Share this:

1982 Honda Passport Restoration Part 2
Cody, this post about my 1982 Honda Passport Restoration is for you!
I finally have my 1982 Honda Passport Restoration 99.5% done, at this point all I’m waiting on is some custom made decals. Apparently the tank decals for the blue paint version were a one year only special and are completely unobtainable as N.O.S or reproduction parts. Yes I’ve checked every supplier in North America, Europe, and the Orient, so unless you actually have a set in your hand to sell don’t bother telling me to check with so and so because I already have.
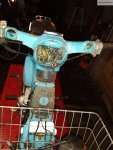
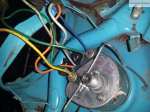
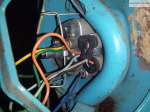
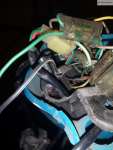
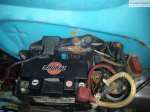
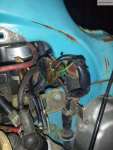
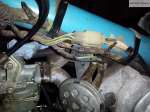
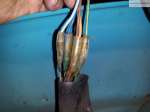
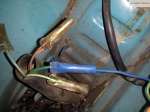
A reader named Cody picked up one of these in boxes and is putting it back together and asked me to share the detailed pile of photos that I took as I disassembled & reassembled this bike so I’m going to put them into a gallery here for all to see. In addition to gleaning all of the free information available on the internet you really should get a service manual. I use the Clymer Repair Manual M310-13 because it covers every small Honda with the horizontal engines up to 1999. Keep in mind as you peruse this gallery of wiring harness connector images that this is a factory 12 volt model with electric start. 1981 and older models are all 6 volt and may be different .
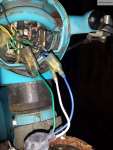
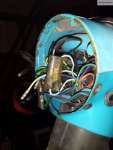


-
- 1982 Honda Passport Restoration
-
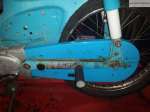
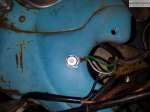
- rear brake stay
This is all of the pictures that I took as I was tearing it down, I frequently referred to these and the service manual as I was re assembling this little Honda Passport Restoration project. I’ll post the pictures I took when putting it all back together next.
Peace Y’all

