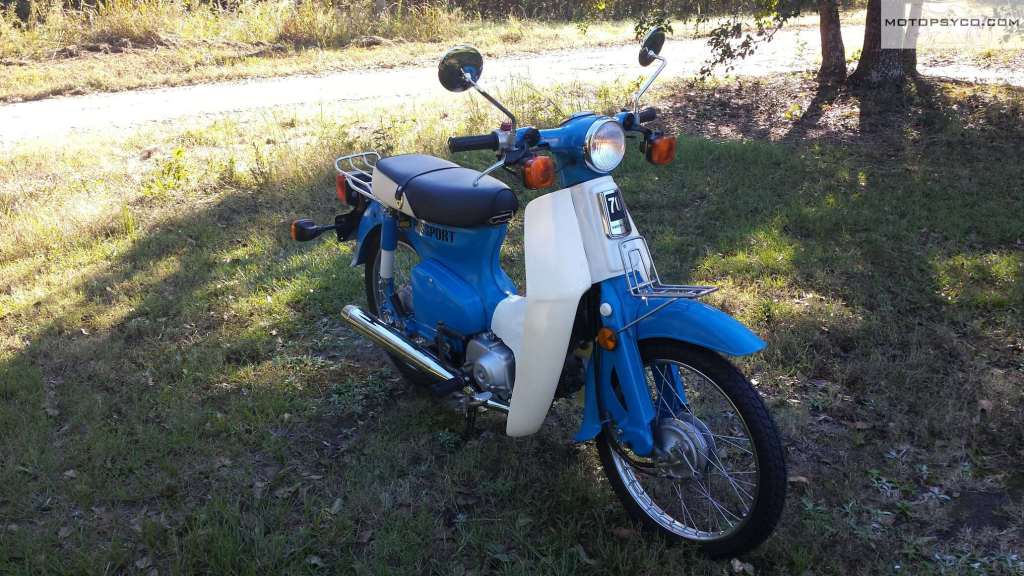
A few years ago I found and restored a 1982 Honda Passport C70 to absolutely pristine condition. The only modification that I did was to change the paint color from Honda’s original Angel Blue to a slightly darker Ford blue. Everything else on it was pure stock and it was an excellent runner. I sold it to pay for my new shop air compressor and while I’m glad to have the compressor I sure did miss that C70 and kept my eyes open for another fixer upper.
Two or three years ago I caught up with an old friend that I hadn’t seen in a while, like myself he’s a collector of projects and things to tinker with, and he just happened to have this Monza Red 1982 Honda Passport sitting in a shed behind his garage. It was crusty & neglected but the engine turned freely. As a bonus it even came with a title!
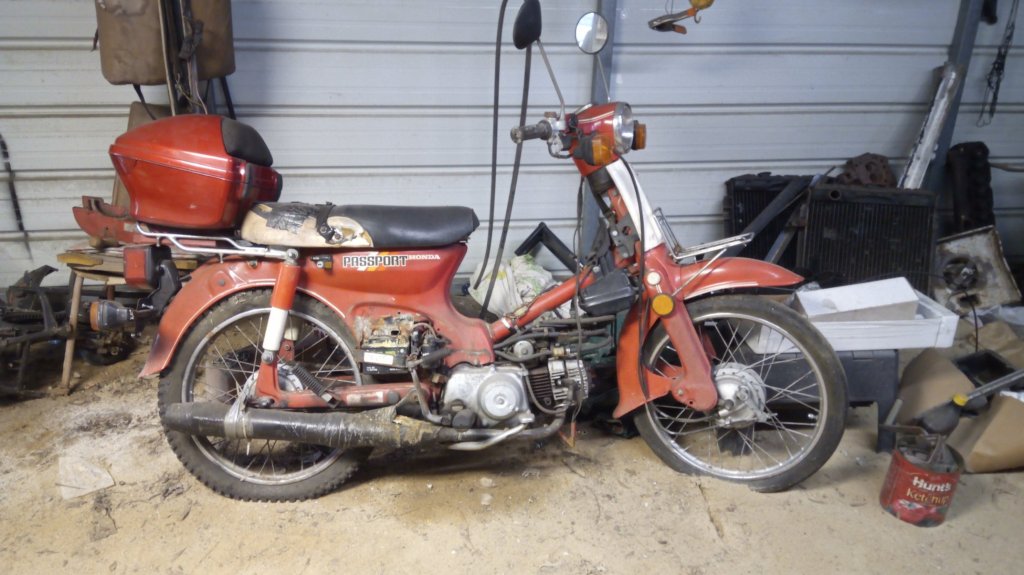
After cleaning the carburetor it would fire up as long as it was sprayed with carb cleaner or starter fluid. It had just enough compression to run and ride but not enough to start without some help. Time to get to work!
I started following several Southeast Asian Instagram accounts promoting the streetcub customs based on the Honda Cub, Super Cub, and Trail models. There’s so much creative craziness going on over there that it was inspiring. The vast majority of custom Cubs in the Orient are stripped down choppers with bobbed rear fenders and minimal bodywork, but there a lot of really cool looking full fender bikes too.
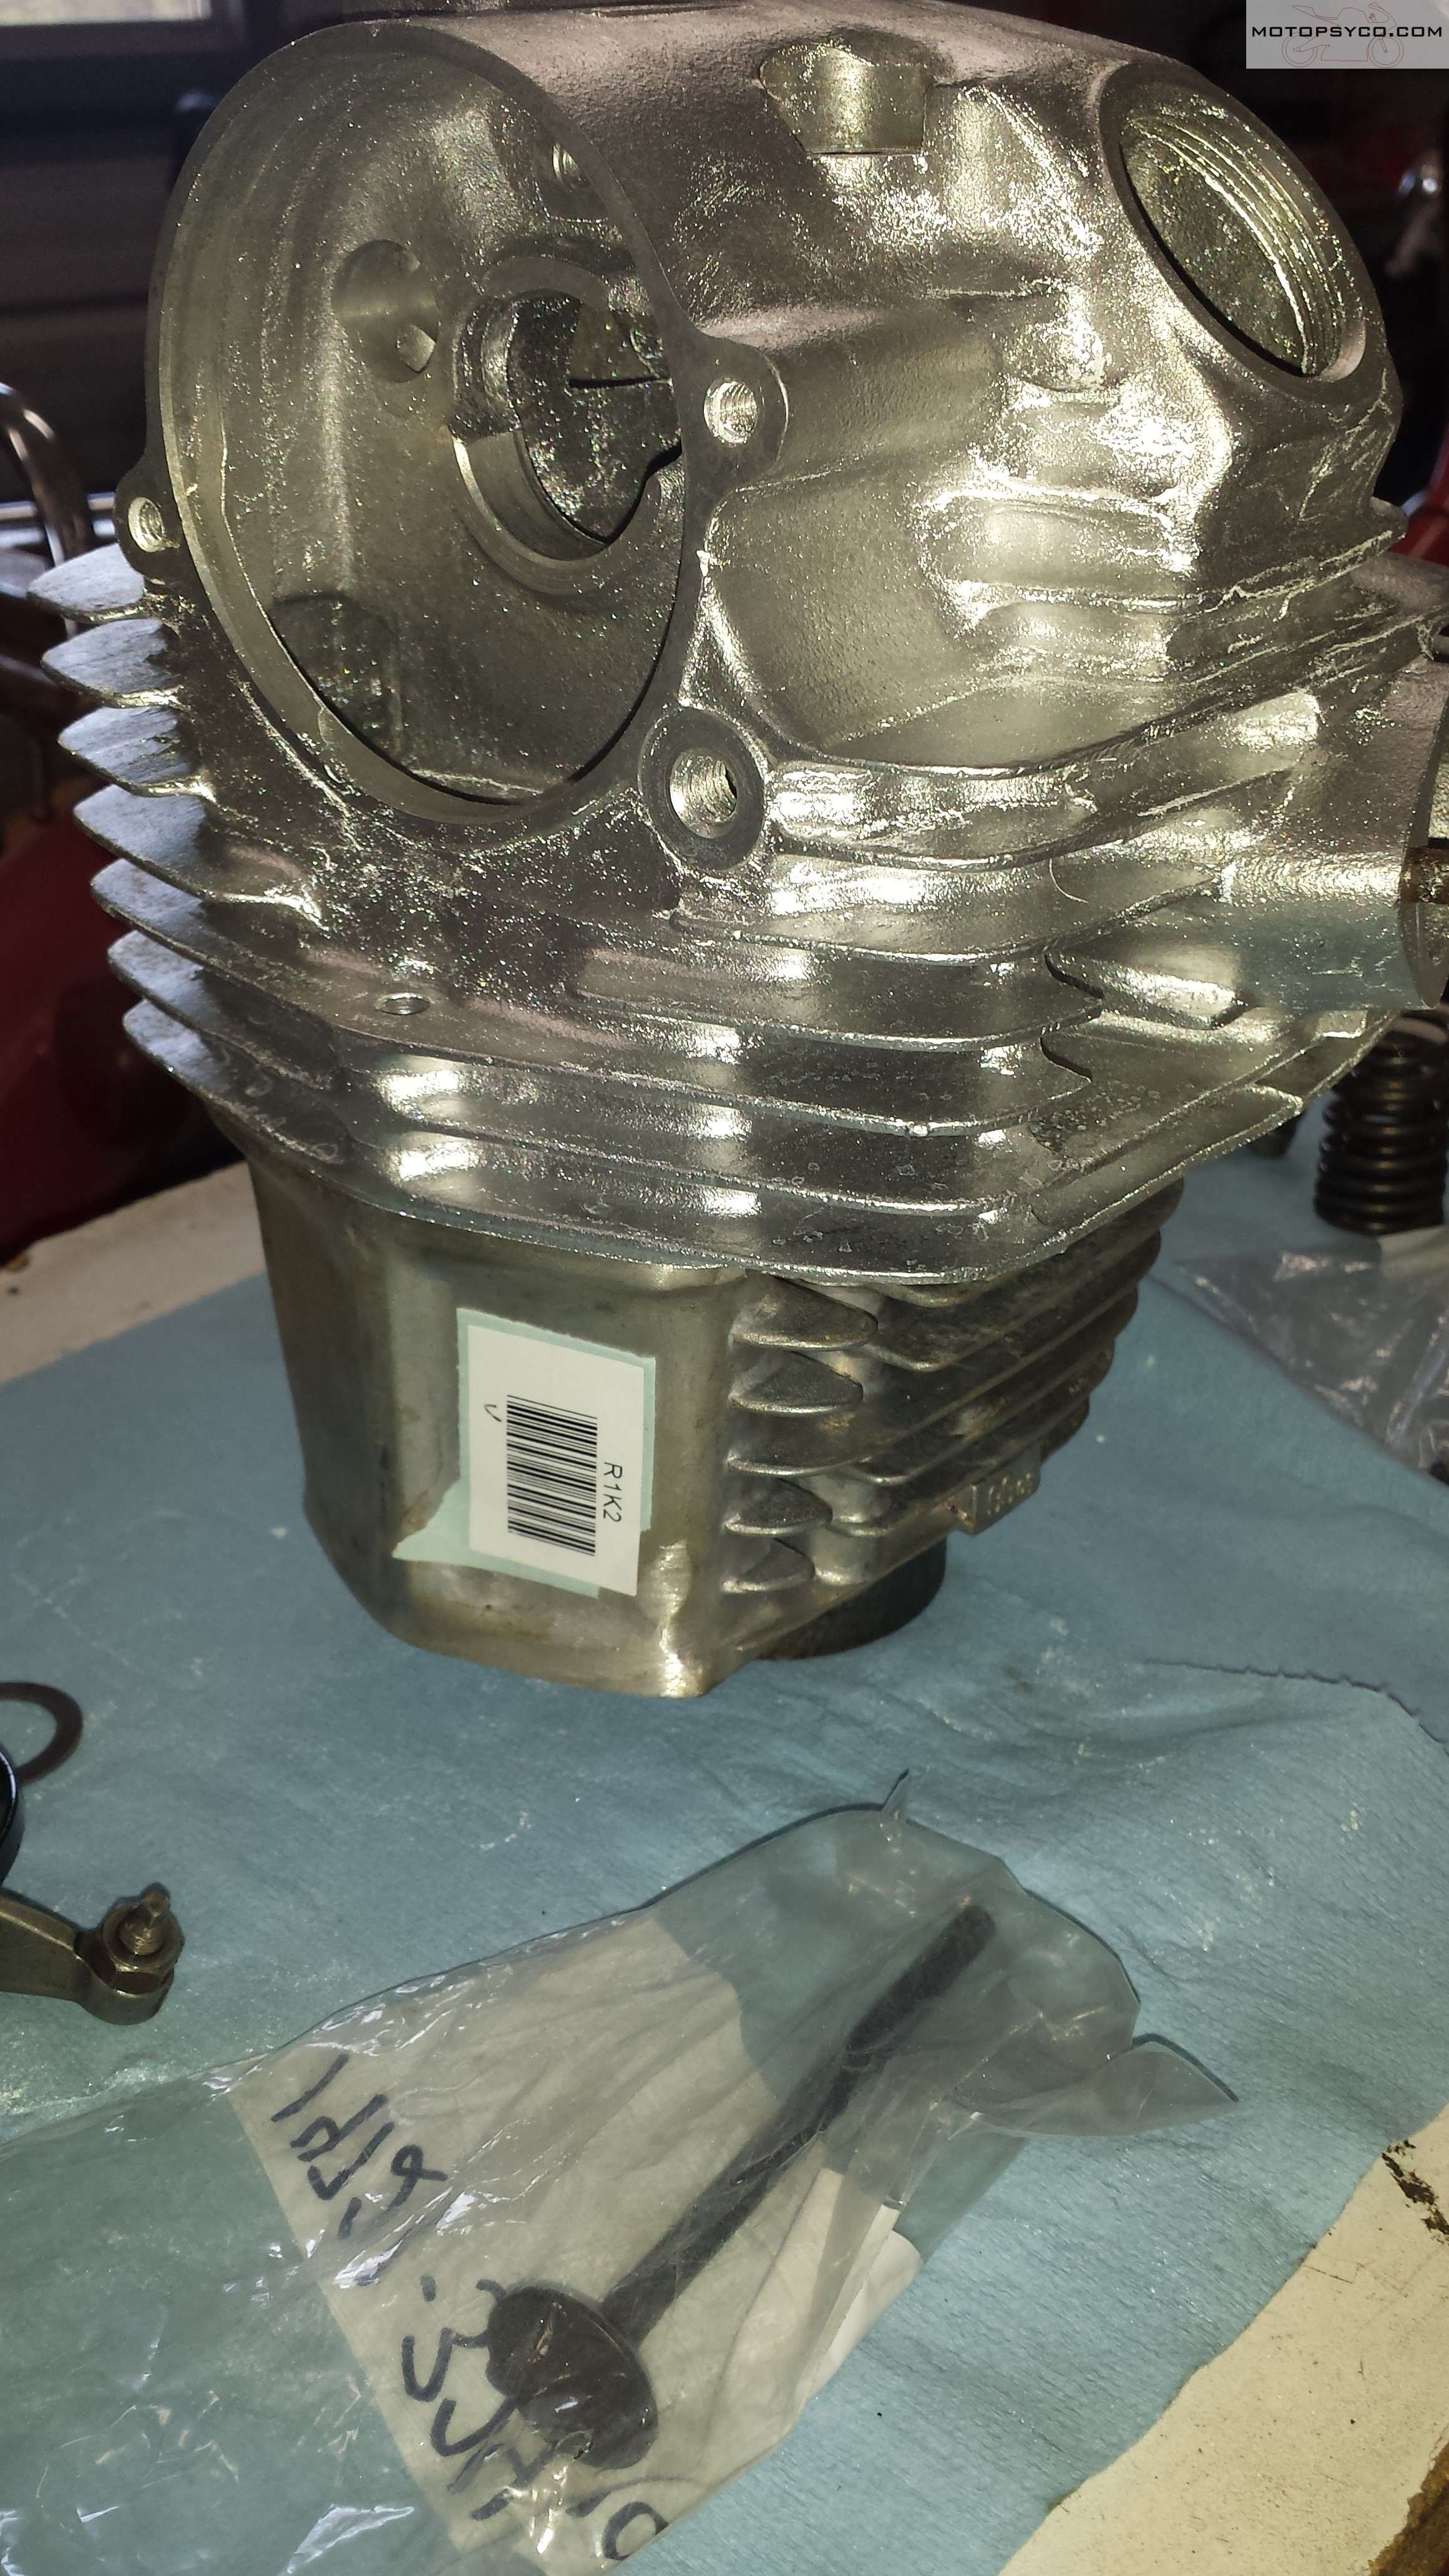
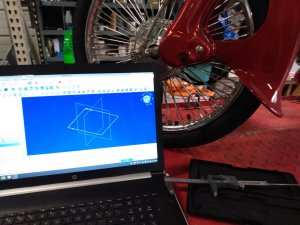
First step was to rebuild the tired old engine, this particular Passport had been abused as a moped for years before my buddy got it and then it spent a few years sitting in his shed. Restoration was not even contemplated for this old machine and I did want more power than could be had from the standard engine so I rebuilt it using an 88cc kit sold by CMS in the Netherlands.
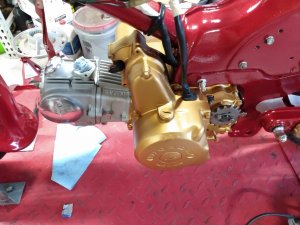
Then using an AFR gauge I re-jetted the carburetor for maximum performance and installed a stainless steel exhaust from a Japanese company called Wirus Win. It has a great look and sound with decent performance now.

Some Paint & Bodywork
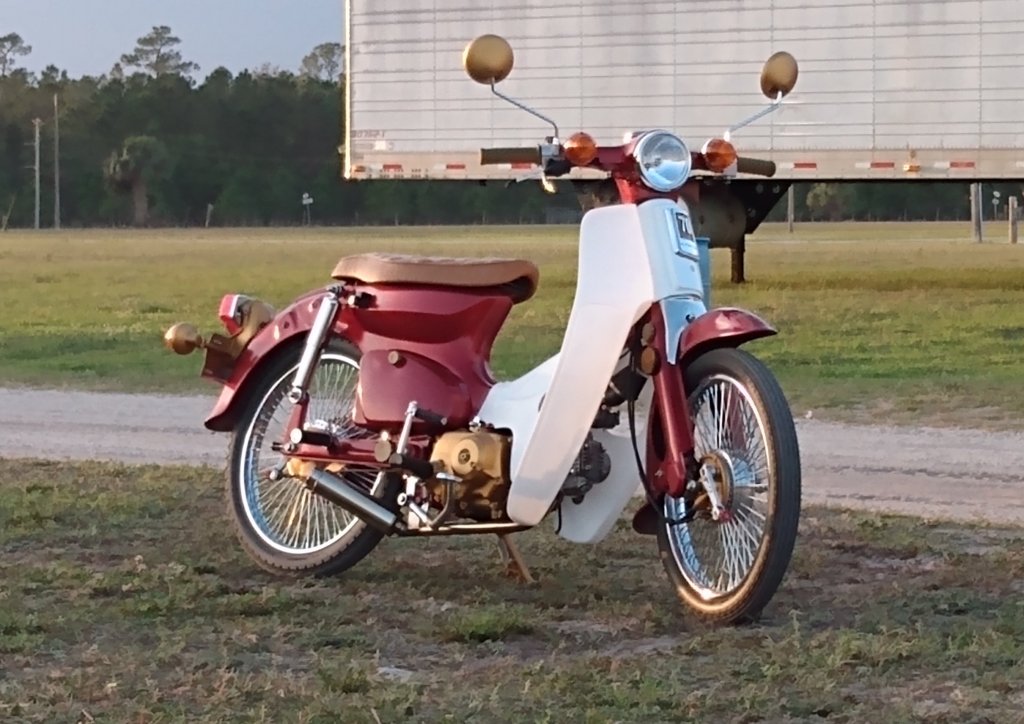
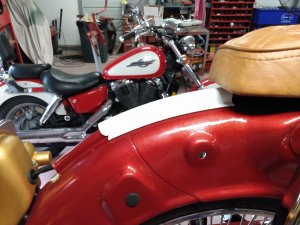
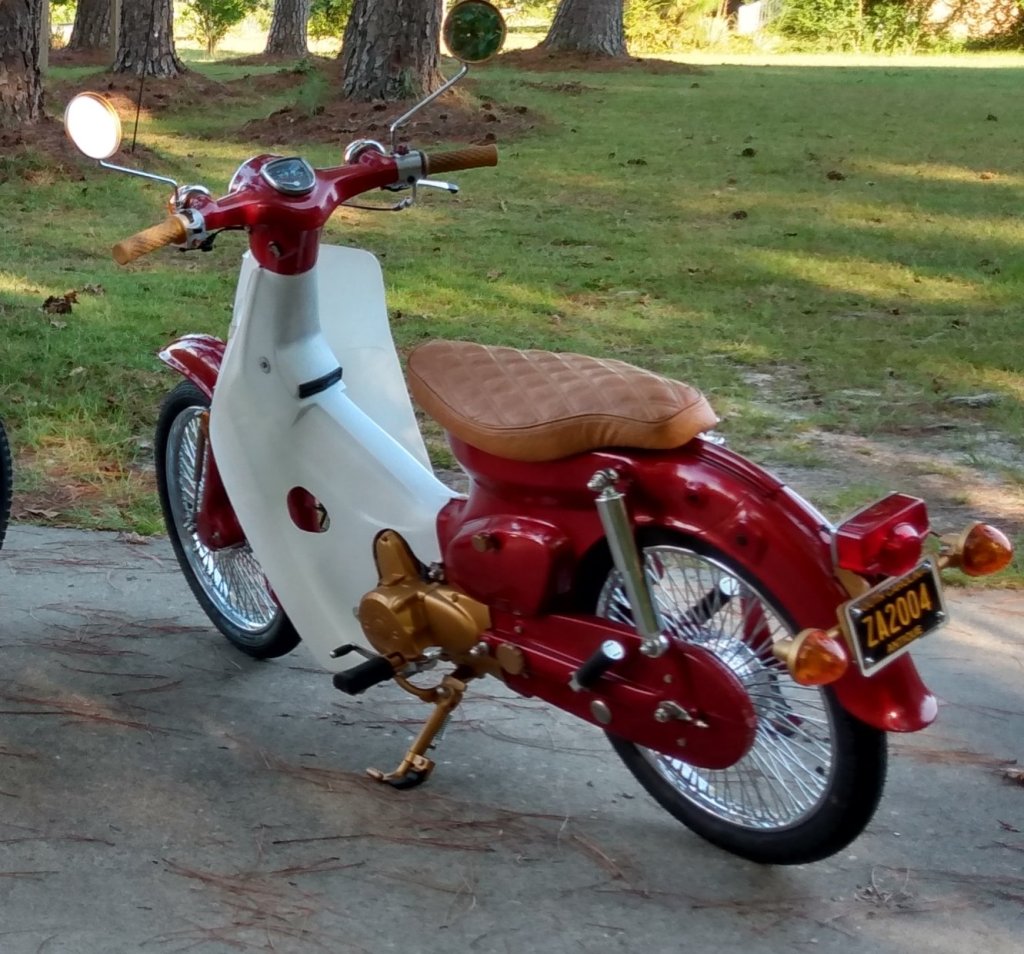
It was going to be red, there was never any doubt about that. There was also never any doubt that it would not be the original Monza Red because it just didn’t have the pop that I was looking for. The color chosen was Firethorn Red Pearl from TCP Global in a single stage urethane. I consider myself to be a decent painter but am especially proud of how this bike came out. This paint job has never been buffed and the shine you see here is how it laid down straight out of the gun.
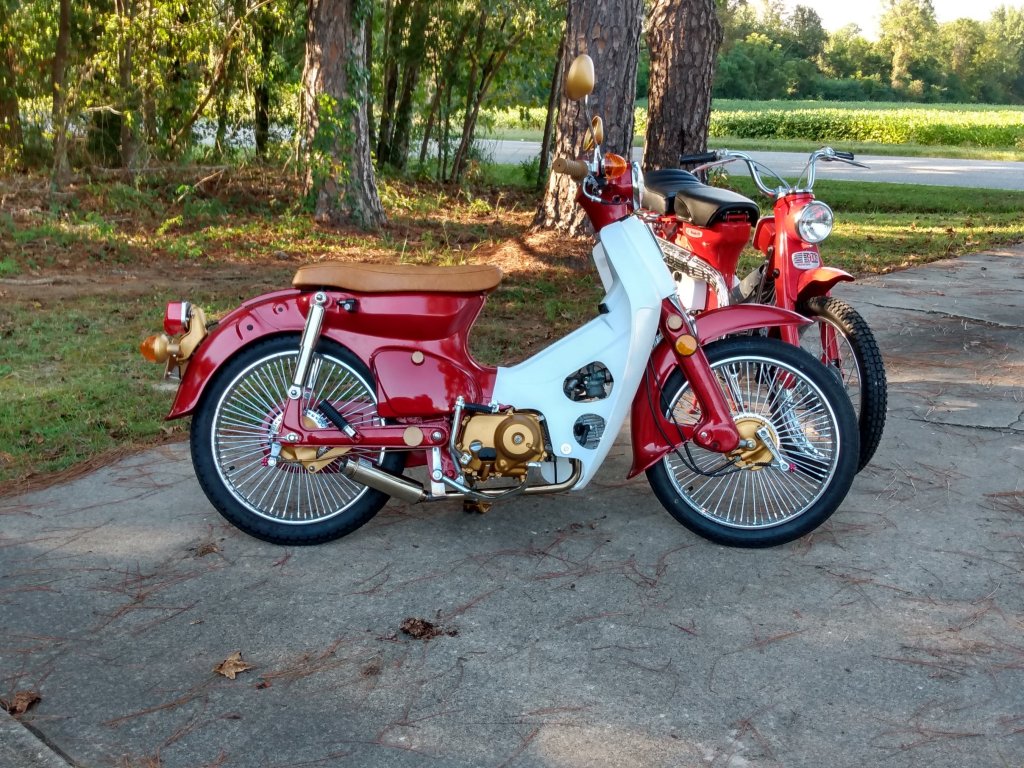
The leg shield is a new aftermarket piece, for it I mixed a couple of spoons full of dry pearls into some urethane clear for a nice sheen to enhance the plain white plastic. A couple of different shades of rattle can gold highlight the engine & a few small parts here and there.
Bought a Few Cool Pieces
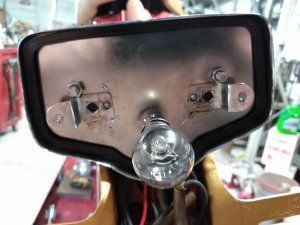
After the paint there are 2 other parts that really stand out; one is the brown custom seat, two are the chrome plated 72 spoke wire wheels, both of which came from Ebay. I also wanted to get rid the dangly eighties style turn signals and have old looking round signal lights mounted on the handlebars not hanging under them on the ungainly looking original stalks which are clearly an afterthought. The rear license plate & light bracket were modified to accept turnsignals from an old CB350 I had laying around. The taillight itself was new but I have no idea what it fit. I did have to 3d print a new gasket for it using a flexible material known as TPU95.
3D Printer Go Brrrr!
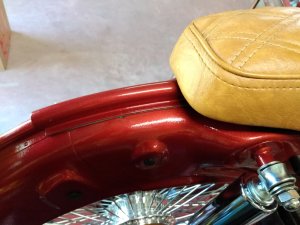
At the time I had just gotten my first 3d printer and I really wanted to do some cool stuff for this little motorcycle so I did. Almost all of the black rubber grommets and frame plugs were replaced with parts printed from black TPU95.
All of the fork, frame and swing arm plugs are of my own design and were printed out, painted & installed during final assembly. Side cover knobs were made to match the style of the frame plugs and look really cool. These little frame and for plugs on the original bikes don’t match each other and this has always irked me as it gave them the appearance of having been designed piecemeal.
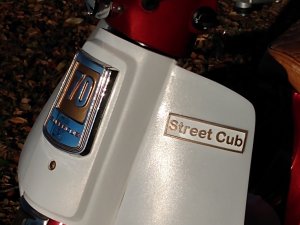
The “StreetCub” emblem on the front was designed and printed in white plastic with the lettering & outlines highlighted with gold paint.
More Than The Sum of Its Parts
Overall the final product makes me very happy and last year it scored a first place trophy as best motorcycle at a large car truck & bike show that happens every year in my home town of Hartsville S.C. I’m convinced that a lot of people don’t realize just how heavily customized it is, but it always attracts favorable attention everywhere I take it even at Daytona Beach Bike Week.

One of the big selling points of Honda Cubs & Passport was their practicality and relative comfort. I think I killed that with that with this one. The seats not very well padded, the exhaust is nearly loud enough to be annoying and without the luggage rack you can’t haul your groceries home with it. But it’s got miles of style and when we were eating supper at the campground in Florida I looked up and saw the evening sun sparkling on the gold pearl in the paint and the chrome gleaming I knew that I had done the right thing with this little 1982 Honda Passport. Originally its form followed its function but now form is the most important thing and its main function is looking good.