Royal Enfield Interceptor 650 1300 Mile Review

Royal Enfield Interceptor 650
Royal Enfield Interceptor 650 in Orange Crush Livery

Let me go ahead and explain why this Review is being done at 1300 miles after I took ownership of the bike and not sooner. The owner’s manual gives a recommended break in period of 1200 miles, since I am a very particular person who believes in doing things correctly I stuck to that. Let me go ahead and say that my Royal Enfield Interceptor 650 has been utterly reliable with no electrical or mechanical malfunction whatsoever. I purchased this motorcycle this summer with my own funds and have complete freedom to praise or disparage it as I see fit. Here’s the best phrase to describe the Royal Enfield Interceptor 650, “It’s a perfectly adequate motorcycle.” This is not meant to be disparaging, for a motorcycle commuter like myself it is high praise indeed.

Royal Enfield Interceptor 650 tank
very nice paint

The only color that I wanted was the Orange Crush version so I began to search dealer’s websites and called around looking for the machine I desired. Here in the American southeast within 3-400 miles of my home all of the Orange Crush painted Royal Enfield Interceptor 650 s were sold out and no one could tell me how long it would take to get one. Motorcycles of Charlotte had the best combination of inventory and prices on hand so I decided to go and purchase whatever they had in stock and simply paint it orange when I got it home. Yes I am a good enough painter to do so and it would have had a better than factory appearance. When I told Cameron the salesperson that I was working with, what my plans were, he suggested that if I was willing to wait a month that they could get me the color that I wanted. So I put down a deposit and almost exactly a month later went back to pick up my new motorcycle. I’m thankful for Cameron & the rest of the crew at Motorcycles of Charlotte for a great new bike sales experience.

my new Royal Enfield Interceptor 650
The first time I ever laid eyes on her.

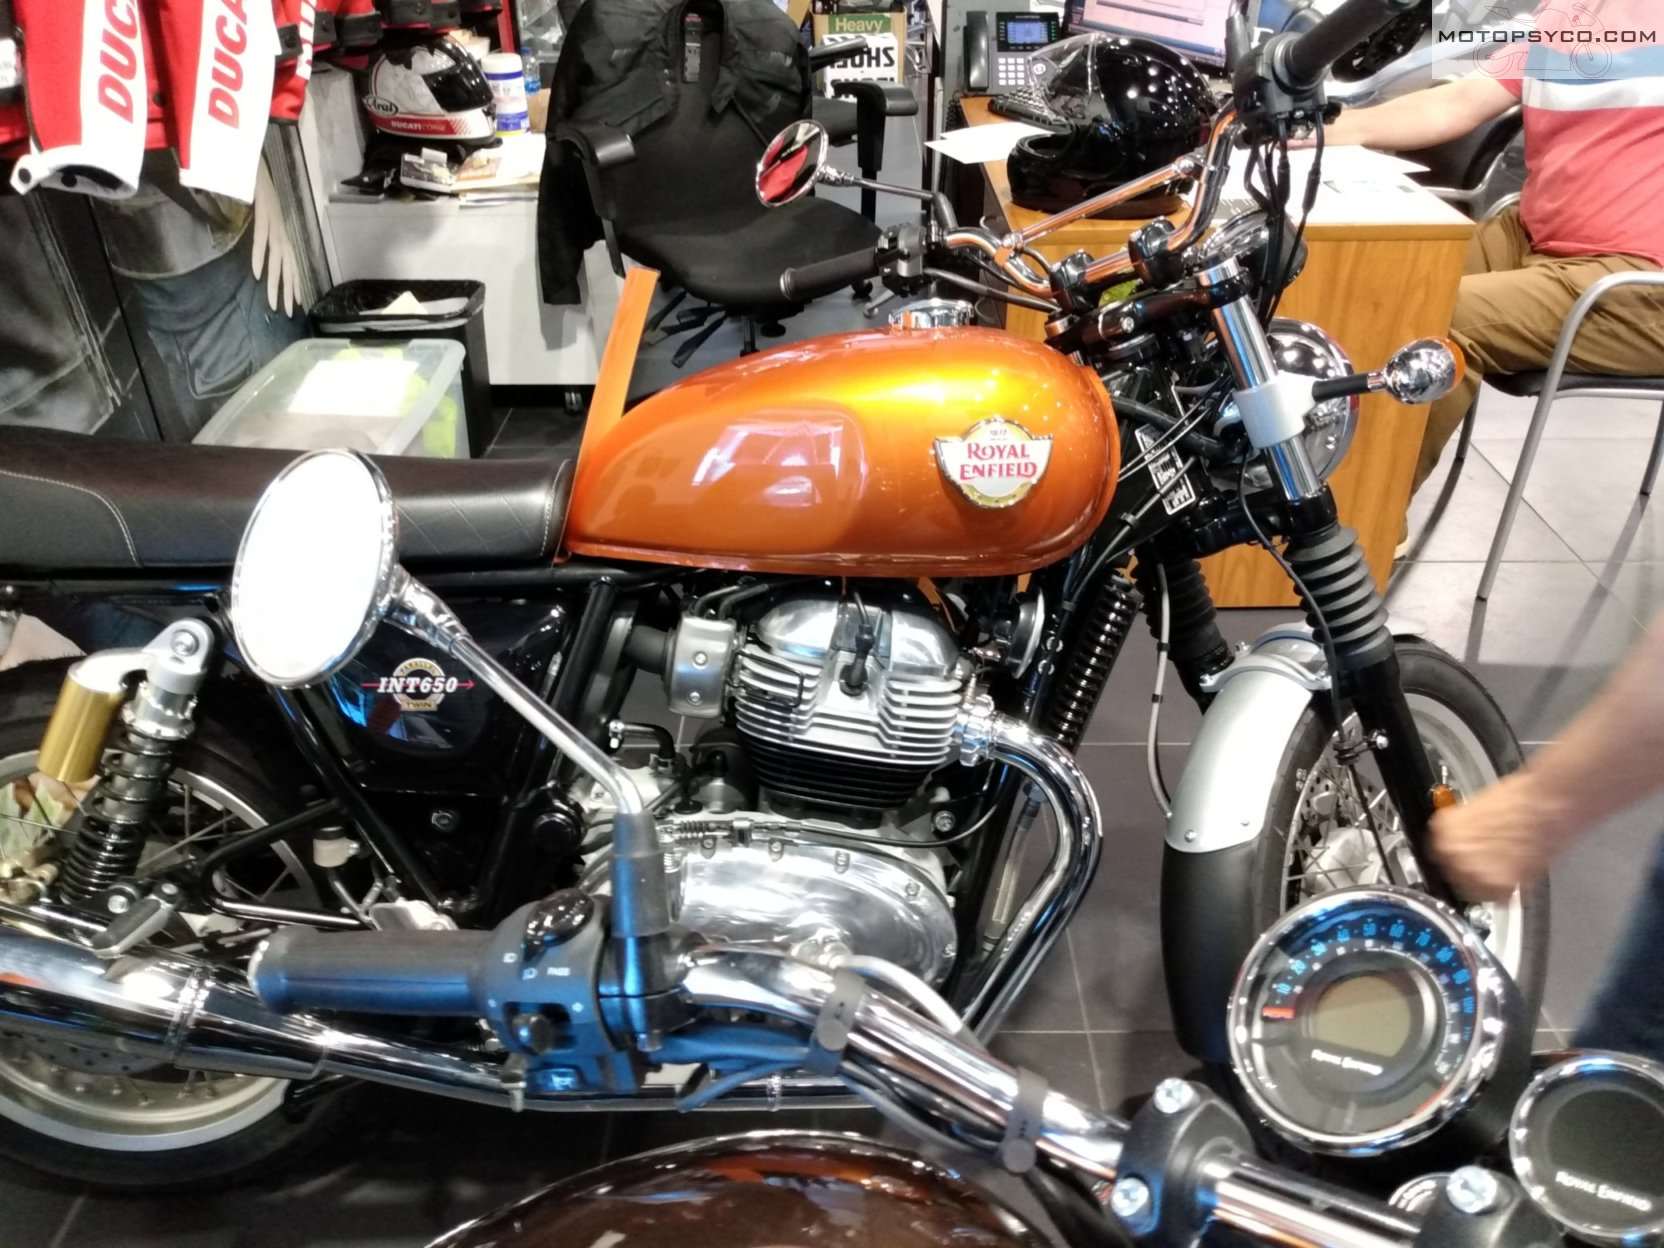
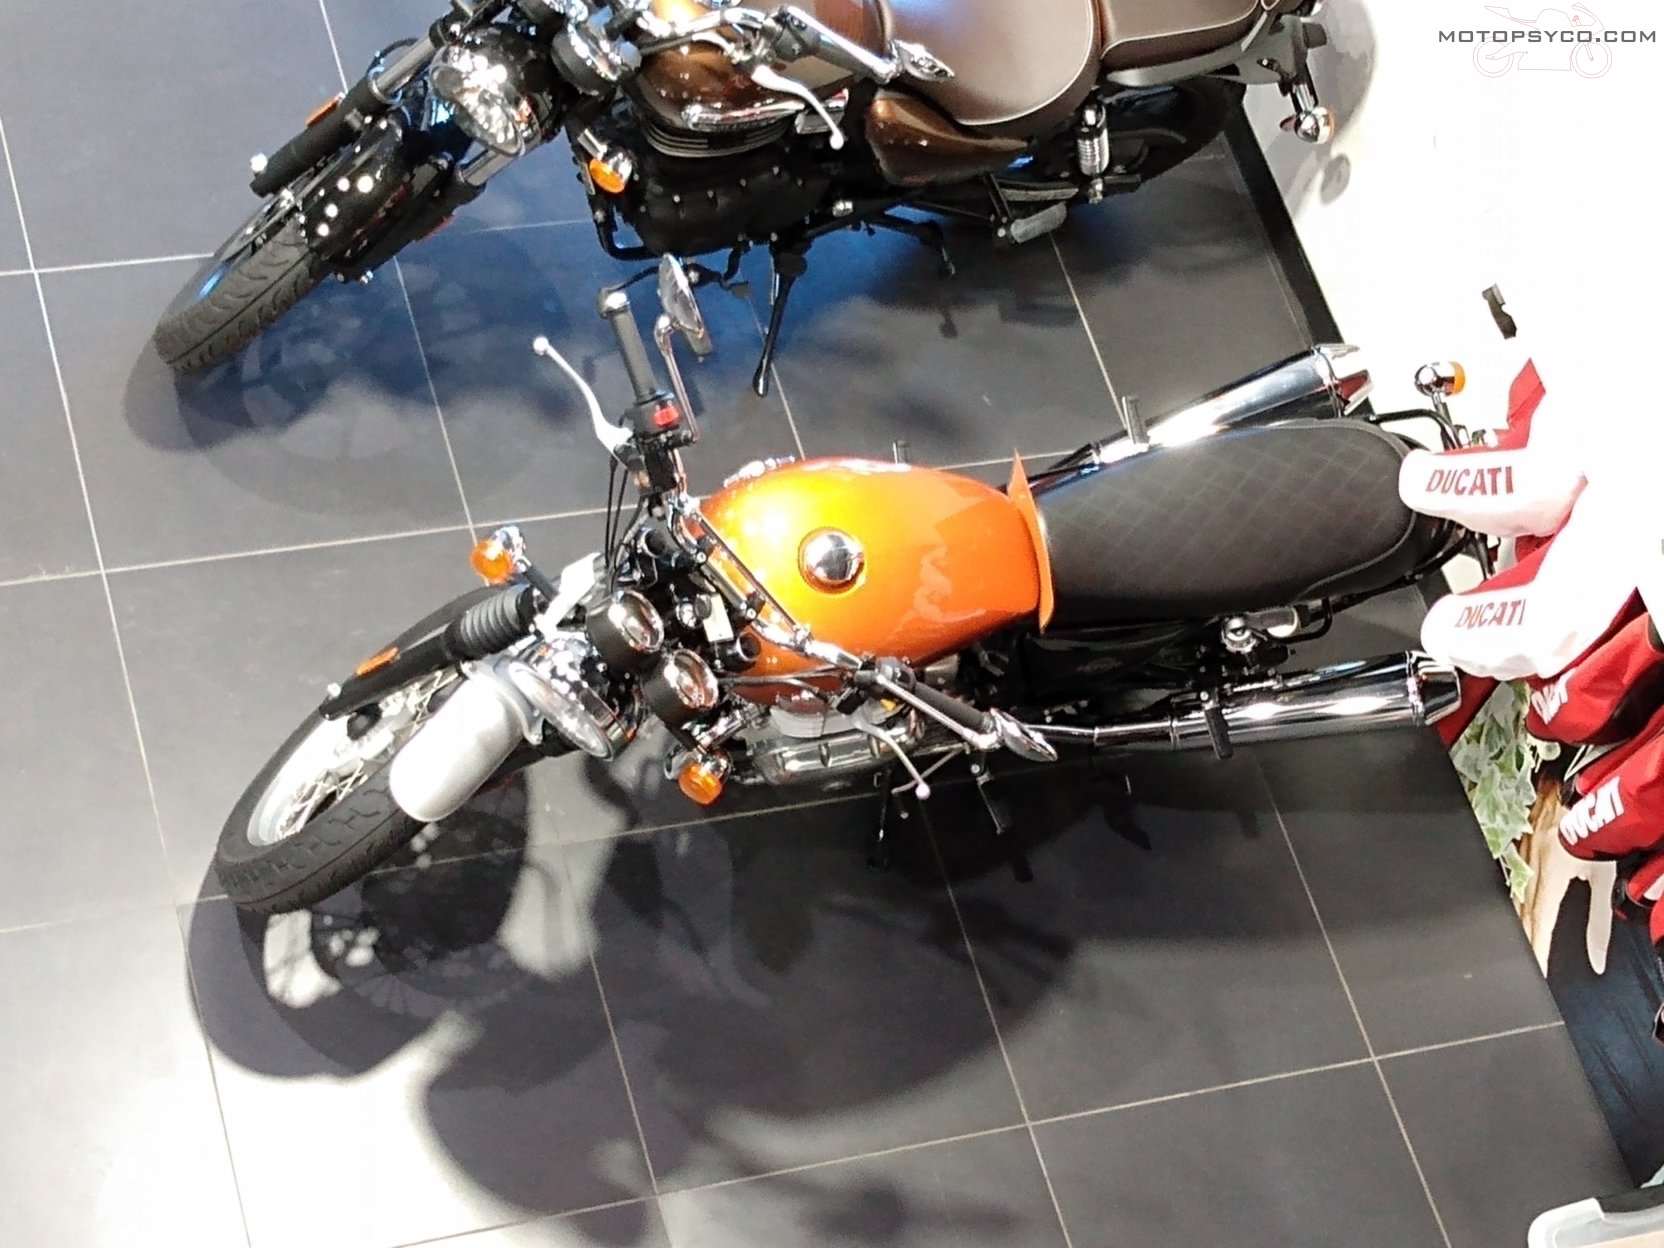
Let’s start by going over the good and bad points of the Royal Enfield Interceptor 650 with what is absolutely the best thing about it, the appearance. They got it right, this motorcycle has the classic British motorcycle look. The proportions and styling are spot on. The paint is very good, much better than the old 500 Classic Bullet that I reviewed several years ago. One reason I wanted this color combo was to get the silver wheels (all other colors come with black wheels) which I prefer. The shapes of the bodywork, engine and tank work together to recall the old Interceptor 700 from the golden age of the Britbike. In fact when I was on my way home with it on the carrier behind my truck a gentleman whose dad had owned several old Royal Enfields flagged me down so that he could take some pictures of it. He thought it was a restoration and was surprised to find out it was brand new. If you don’t want to talk to strangers about your motorcycle this is not a bike for you. The phrase perfectly adequate motorcycle does not apply to the looks of the Royal Enfield Interceptor 650. It is a rolling work of art straight out of the past, and arguably the best looking of all of the new “retro motorcycles” produced today.

Royal Enfield Interceptor 650
A great looking motorcycle!

Reading through the online forums and groups you’ll occasionally see posts about electrical problems most of which seem to be traceable to the dielectric grease on the prongs of the relays that operate the circuits of the motorcycle and are usually solved by cleaning them off. I’ve yet to experience any such problems with mine. It’s been totally reliable thus far. After I put my deposit down I went home and ordered a case of oil filters for it from a reputable vendor and some good 10w50 synthetic motorcycle oil to have on hand for when they were needed. The factory recommends getting the first service done at 300 miles. This seems a bit soon by modern standards but this is a real vintage style motorcycle with real locknut and screw valve adjusters, so I guess the factory is being extra cautious.

first service Royal Enfield Interceptor 650
Time for the first service!

So at exactly 300.6 miles I pulled mine up on the table and gave it a full service. I live an hour and a half away from the nearest dealer so I do my own work unless it’s a warranty repair. This bike has one of the easiest valve adjustments I’ve ever performed. 2 of the exhaust tappets were a tiny bit loose so I set those to spec. I’m not going through the service here but it is easy-peasy to perform. In addition to getting a service manual, go to YouTube and look for Royal Enfield Interceptor 650 service videos by Stuart Fillingham and you’ll learn all you need to know.

Royal Enfield Interceptor 650 valve adjustment
It’s very simple to check and adjust the valves.

Handling and suspension are good. It is built to a price point and that shows some but the handling is good enough that you really can ride it as is without any modifications if you desire. If you’re planning on strafing apexes you’ll definitely want to replace the original tires. I haven’t done too much twisty riding here in the flatlands but on the few curvy roads we have, I’ve found it to be more than adequate. The springs are a little soft and the front end dives under hard braking but it has the good handling characteristics that the old British motorcycles were so famous for, thanks to a frame designed by Harris Performance in England. I may upgrade the suspension to get rid of some of the softness later but for now I am actually enjoying the relatively plush soft ride. Let’s face it if you expect sport bike handling go get a sport bike but for the rest of us this is perfectly adequate as is. The same goes for the braking system, it’s basic but the ABS works and it’s matched to the bikes power & intended mission.

1st test ride Royal Enfield Interceptor 650

Comfort is a very subjective thing on a motorcycle and what works for me may not work for you. Parts to upgrade and modify these motorcycles are available all over the internet for very reasonable prices so bear that in mind if you try one and find it uncomfortable. The seat is adequately comfortable for me & I can ride reasonable distances with no problems. I’ve not taken it on any really long trip yet but don’t foresee me having any problems. Some owners have hated the seat and changed it immediately, the factory accessory upgrade is very reasonably priced. The foot peg location is another thing a lot of people complain about. The driver’s foot pegs really are located right where you naturally try to drop your feet to the pavement when you stop. A lot of people buy foot peg relocation kits to move them and I can see doing this if you’re taller or shorter than me. With my 29 inch inseam the pegs are in a great position for me when I’m actually riding, when I stop I’ve just developed the habit of putting my feet down behind the pegs. Riding comfort trumps comfort while stopped.

Royal Enfield Interceptor 650 motopsyco

The only thing that was a real problem for me was the level of vibration felt through the handlebars. My day job is computer aided drafting and design, so I have arthritis and general repetitive motion deterioration of my hands and wrists. I installed a set of Grip Puppies over the stock grips and that helped a good bit, but I wound up replacing the handlebars and doing some other mods that I’ll tell you about later that took care of my only real complaint.

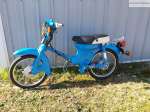
Please note the pictures used in this post are of the 100% factory stock bike on the day I brought it home and do not include any of the changes I’ve made since then. I’ll show you what I’ve done to it later.

The charming vintage experience generated by riding this motorcycle is greatly aided by the traditional air & oil cooled parallel twin engine. It does have a 270 degree firing order instead of a traditional 180 or 360 degree firing order. This is supposed to reduce vibration and give a better sounding syncopated exhaust note. The Bosch fuel injection system works flawlessly and there is no warm up period when cold or stumbling like you would have with a set of carburetors. What’s so vintage about that you ask? Well nothing really but it does have authentic vintage power levels, most reported dyno tests put it at 40-42 at the rear wheel. In 1965 this would have been a bad motor scooter, but here in 2022 that’s not much. Yes dear reader she’ll do the ton but don’t ask for much else. Performance is perfectly adequate for getting back and forth to work or cruising around looking really damn good on the weekend but if you want to go really fast you need to get a different motorcycle. There are no ride modes or traction control, you don’t really need them on this machine.

flush cutting cable ties
Improperly cut cable ties are a pet peeve of mine. Would someone in India please buy some flush wire cutters?

Even with the stock exhaust the engine sound is pleasant with a cool little burble on the overrun while shifting or slowing down. There’s adequate torque so that you don’t have to keep rowing through the six speed gearbox unless you want to. When you run the engine up to the redline the power comes on stronger as you pass 5000 rpm but be careful if you hit the rev limiter at 7500 rpm it cut’s the engine back hard. The abruptness of the rev limiter means that if you really want to get max acceleration out of this motorcycle you need to make sure you shift by 7200 rpm. If you need maximum acceleration very often the Royal Enfield Interceptor 650 might not be the bike for you.

Speaking of that 6 speed gearbox let me sing its praises. Made in India quality has come a long way since the days of the old iron barreled 500 Bullets. I’ve owned bikes from every continent and my love of Japanese motorcycles is well documented but this Royal Enfield Interceptor 650 has the slickest shifting transmission of any motorcycle I’ve ever ridden in my entire life.

No speed demon, not a big loud heavy cruiser, or a giant touring bike, this motorcycle is truly a newly minted vintage style motorcycle with just the right amount of modern electronics in the form of ABS and fuel injection to get rid of the vintage shortcomings but without excessive modern electronic gimmicks that often seem to be added to bikes (and cars) just because they can. The speedometer & tachometer are good old analog gauges, only the digital odometer and fuel gauge give away the fact that this is a new motorcycle.

2nd floo Motorcycles of Charlotte.
Orange Crush top view

Small, uncomplicated and good looking, (a lot like my wife) unless something really bad happens I think this one is a keeper. My all-inclusive out the door cost that I paid for this machine in June of 2022 was just a smidge over $7500. This includes sales tax & registration but not local property taxes. Again I cannot recommend Motorcycles of Charlotte highly enough.

You may have noticed that I keep calling this bike the Interceptor 650. The official North American model designation is the INT650, the Interceptor name as applied to motorcycles is legally owned by Honda who used it for their legendary line of V4 sport bikes. So fellow Americans when you go shopping for one of these look for the INT650, you can change the stickers later to look more like the original Royal Enfield Interceptor of the 1960s.

Royal Enfield Int650

SL100 Speedometer Restoration

We’ve all seen it before, maybe even on our own bikes, beautiful paint, shiny new chrome, highly polished aluminum and dull faded out hazy looking gauges. Granted for custom bikes it’s pretty easy just to swap in a new speedometer, heck it might even be cheaper than fixing your original. I decided to perform this speedometer restoration for 2 reasons; to keep the original correct low odometer reading on this bike and I had never attempted speedometer restoration before and really wanted to try it. Sure I did make a couple of mistakes along the way but overall I am very pleased with the results. Next time I do this it’ll be even better.

Honda SL100 Speedometer Restoration

Disassembly

On some instruments the bezel that surrounds the face and mechanism is crimped to the base with a metal ring that has to be carefully removed & re installed to access the inside of the gauge.  On this little Honda the bezel was a one piece plastic part that appeared to have been either over-molded onto or permanently glued around the base of the mechanism. The first step after removing the chrome trim on the bottom is to cut away the plastic that is folded over the metal part of the gauge. Cut it all the way around so that you can carefully pull the gauge straight out of the housing. Initially I just tried cutting it part of the way around thinking that it would make it easier to re-seal when I put it back together, big mistake as I bent the thin aluminum gauge face when I tried to pull it out and had to carefully straighten it out. Slice it loose all the way around pull the gauge straight out so you don’t damage it.

Honda SL100 Speedometer Restoration

After getting it apart, carefully grasp the needle where it’s attached to the shaft & pull it straight up and off then set it aside in a safe place. On this particular bike 2 screws held the face plate on to the speedometer. There are also 2 tubes that the neutral & high beam lights shine through that have little rubber boots that are glued to the back of the face plate, cut these away carefully.

Cosmetic improvements

For some more popular motorcycles speedometer restoration is easier because ready-made gauge faces are available for them, what I did for this one was to visit my local screen printing & graphics shop and had them scan the old face in and print me a new one on a vinyl decal that was stuck into place over my dirty faded speedometer.

Honda SL100 Speedometer Restoration
The extra one is for sale $18 shipped in North America.

Since the speedometer needle was very faded I gave it a quick shot of white paint. After the white paint dried a little bit of red was applied to the tip of the speedometer needle. One very important thing to remember especially with magnetic drive speedometers & tachometers is that too much paint will make the needle heavier causing it to be slower to respond and affect the accuracy of the gauge. Use the absolute bare minimum of paint necessary to make the needle look good again.

Honda SL100 Speedometer Restoration

The clear plastic lens on this one was a little hazy & had a lot of scratches on it so I spent about 15-20 minutes polishing it with toothpaste & a damp paper towel. This removed the haze & a lot of the scratches. It’s not perfect but it looks really good.

Reassembly

I assembled the face plate to the speedometer carefully lining up the light tubes to the back of their respective lenses sealing them in place with a small amount of my favorite adhesive/sealant, Automotive Goop. Since all of the existing nuts and washers were rusty they were replaced with new hardware at this time.

Honda SL100 Speedometer Restoration

With a little careful work, on the third try I was able to slide the speedometer needle back into place so that when viewed head on at rest the needle indicated exactly zero miles per hour. Just use a little patience and take your time when doing this and everything will be okay.

Honda SL100 Speedometer Restoration

Next I made sure everything was as clean & dust free as possible inside & out and dropped the speedometer into the bezel. When I cut it loose I left enough plastic so that it snapped back into place. Then I took a good look at it and since I was satisfied with the way everything looked it was time to pull the gauge back out of the bezel just enough so that I could run a thick bead of the Goop adhesive all the way around it and then snap it back into place for good, then it was time to reinstall the chrome beauty ring on the bottom.

Conclusion

Honda SL100 Speedometer Restoration

Here’s a picture of the finished assembly mounted on the bike. Even if you never plan to do speedometer restoration yourself at least you know how it can be done. There are a few specialist repair shops out there that do nothing but repair & rebuild gauges. In fact if your gauges are inoperable you should find one of them to do your repair & restoration for you. If they’re just faded & ugly you can do them yourself as I’ve shown here or you can send them to me and I’ll do it for you for a very reasonable price.

Handlebar switch restoration

If you look at a lot of restored vintage bikes, you may notice that even some very nicely restored bikes have switch gear that looks okay but you can tell that the switches were not fully refurbished to the same level as the rest of the bike. I plead guilty to doing this myself because the switches are full of little tiny springs, detent balls, delicate soldered connections etc. and if a single piece gets lost or broken your switches are ruined. Since I am putting so much effort into my current 1972 Honda SL100 project I could not settle for anything less than a full on handlebar switch restoration to make the whole bike look as new as possible. If something had gone wrong I was prepared to spend the money on a set of new old stock switches to replace them.

Handlebar Switch Restoration

Before beginning your handlebar switch restoration clean off your workbench and the floor around it & under it, so that if any of the tiny parts fall out or go flying you at least have a chance of finding them.  Keep a magnet close by in case you need it. Also remember that sometimes the old plastic knobs & buttons often become fragile with age so be careful handling them.

Handlebar Switch Restoration

Take a few minutes to study how the wires & switches are placed & secured in the housing, and then remove the retaining screws & plates. You should also look at and remember how any tape or sleeves are applied to the wires in the housing to protect them from chafing.

In the picture below you can see a detent ball sitting on top of the black slider for the headlight controls, there is a spring under this ball that can (and did) send it flying so use caution to be sure you don’t lose any parts.

Handlebar Switch Restoration

Once I pulled the e-clip off of it, the engine stop switch and its wiring could be removed through the top of the housing. Go ahead and completely remove all of the switches, wiring, & clips from the housings.

Handlebar Switch Restoration

If you have any damaged threads or broken screws in the housings now is the time to deal with that. In this case the throttle stop screw was snapped off in the bottom of the housing so I had to drill it out and tap the hole. You’ll notice that there are magnetic rubber vise jaws attached to my vise. These are an absolute necessity for doing this kind of work without damaging your parts.

Handlebar Switch Restoration
click here for padded jaws for your vise

With your switch housings stripped bare & all repairs made now is the time to clean them up. I use my vapor blasting machine because no other method I know can restore a factory new appearance to old aluminum the way vapor blasting can. If you don’t have access to a vapor blaster you can send your parts to me & I can do it for you. See my vapor blasting page for rates & information.

vapor blasting & Handlebar Switch Restoration

After everything was repaired & cleaned I painted the stop switch with a little spray paint and used an oil paint marker to paint the red lettering & dots as you can see below. For more information on this technique click this link to see my previous post on emblem & badge refurbishment.

Handlebar Switch Restoration

Now that everything is clean & new looking gather up the supplies & tools you need for reassembly. At the least you’ll need some new wire sleeves, tape to match the sleeve, JIS screwdriver, a small pick, some grease, the finest point needlenose pliers that you own, some tweezers, a sharp knife and a multimeter. Depending on what you are working on you may need more or less tools than these, for example if you have a broken wire connection a soldering iron might be needed.

tools for Handlebar Switch Restoration

Carefully reinstall all of the parts in reverse of the order you removed them. Take time to tape & sleeve wires as needed because you might not be able to after everything is back together. Be sure to watch out for flying springs etc. during reassembly, it’d be a shame to get this far and lose a critical part. Work slowly & stay as relaxed as possible when doing delicate work like this.

Handlebar Switch Restoration

The final step of handlebar switch restoration is to test the function of all of the switches using either the ohmmeter or diode tester function of your multimeter.  If everything is working great you are ready to reinstall the switch gear to your motorcycle. If not, it’s a whole lot easier to fix it now than after putting the bike back together.  This is especially if the wires are going to be inside of the handlebars.

test the Handlebar Switch Restoration

I hope that you’ve enjoyed following along while I completed my handlebar switch restoration. The next post that I have planned will show how I measured & drilled the holes in my handlebars for the wiring to pass through.

completed Handlebar Switch Restoration
Ready to install!

Until then, Peace Y’all

Vapor Blasting NOS Parts

Vapor Blasting NOS Parts

Confession time, on of my favorite things about the whole antique & vintage motorcycle restoration business is hunting down good deals on new old stock parts. It’s astounding what you can find for these old motorcycles sometimes. The  joy of finding these 30, 40, or even 50 plus year old gems is often dulled by the fact that when you get them, they look old. Now this may be fine if you’re replacing parts on an original machine with a bit of patina as they will blend right in. But if you are doing a full restoration this just wont do. Let me give you a couple of examples using some parts that I have recently purchased for my current personal project a 1972 Honda SL100 K2. These will illustrate why I recommend vapor blasting NOS parts. When I removed the fork top bridge from the bike, one of the fork tube clamps had broken completely off. A brand new one was sourced on Ebay for a reasonable price, and this is how it looked when I took it out of the box.

Vapor Blasting NOS Parts

NOS top bridge before vapor blasting.

It’s just a little dull & oxidized, plus it has a little bit of magic marker writing on it. Even though it’s obviously 100% new & unused it still looks old, so I put it through the vapor blaster. 15 minutes later it looked like this (below)

Vapor Blasting NOS Parts

NOS top bridge after vapor blasting.

Vapor blasting NOS parts does not give them a polished finish. What it does is restore the aluminum so that it looks like it was freshly cast. Because this process has a light peening effect it closes the pores on the aluminum so that it stays cleaner longer. No clear coat is needed just occasional cleaning.

Here’s another example, a freshly vapor blasted cylinder head sitting on top of a brand new old stock cylinder. The new cylinder looks positively dull & dirty compared to the head, so after I finished all my clean up honing, ring gap checking etc. I ran the cylinder through my vapor blaster to clean up the appearance of it.

Vapor Blastin NOS Parts

NOS SL100 cylinder before vapor blasting.

If you look at the assembled engine below you can see how much better the cylinder looks and how well it matches the rest of the bare aluminum parts on this engine.

Vapor Blasting NOS Parts

Complete SL100 engine after vapor blasting.

Seriously if you’re performing a restoration on a motorcycle and you are not happy with the appearance of your new old stock aluminum parts find a shop near you that does vapor blasting.

1982 Honda Passport Restoration Part 3

As mentioned before I had a request from a reader to share more of my pictures from my 1982 Honda Passport restoration So here are some of the repainting & reassembly process. Due to all the rust and pitting I sandblasted the entire exterior of the frame and them primed it with a green zinc primer. and refinished a few other small parts by various means. For the cadmium plated parts click here to see how I handled those. Although not shown here I had the front rack redone with chrome powder coat.


At the time I was taking these pictures the rear rack was simply sprayed with that horrible looking chrome paint so that I could get the bike back together and ride it, recently I removed it and had it powder coated chrome also. The wheels are still all original with just the best cleaning that I could give them at the time. Since then they have been thoroughly vapor blasted and clear coated, followed by a careful painting of the hubs & spokes.  Some of the pictures may seem kind of random but hopefully this will be of some use to someone out there trying to restore their own 1982 Honda Passport. Sorry but there are no engine rebuild pictures because there was no need for an engine rebuild, just the usual carburetor & crankcase screen cleaning, followed by a valve adjustment and a new spark plug. In the near future I’ll do a post on the trials & tribulations of dealing with aftermarket body parts for these things.

Install a Vista-Cruise Throttle Lock

For the last 3 or 4 months a shoulder injury has severely curtailed my riding and blogging. In addition to this I’ve had problems with numbness & tingling in my hands seemingly forever but simply wrote it off as the cost of working on a computer all day every day for a living. Using a Cramp Buster on the throttle helped, but once I hurt my shoulder it just wasn’t enough anymore.
Although sitting at a desk drawing pictures and filling out spreadsheets on a computer all day often leaves my hands & fingers sore whether I ride or not, some of the things about my main daily driver motorcycle greatly exacerbate the problem. To start with as part of the whole vintage/rat/survivor look it still had the original 35 year old factory rubber grips on it. While they really looked the part, these grips were rock hard and slick, to the point that I might as well have been gripping the steel handlebar directly. The bar itself was robbed from a 71 Honda CL450 and is one of the most rigid & indestructible off road handlebars ever made, this combined with the fact that it is clamped directly to the top of the triple tree with no insulation of any kind, sent the high frequency vibration of the engine straight up into my arms. In all honesty it was nothing that I couldn’t live with until becoming afflicted with bursitis in my right shoulder. Faced with the reality of not being able to ride more than a few minutes at the time, I decide that it was time to do something about it.

<vista-cruise motorcycle cruise control>

So I decided to replace the grips and install a Vista-Cruise Throttle Lock. This universal motorcycle “cruise control” is a product that I have used before on 2 other motorcycles not for pain relief but mainly for long distance riding and for riding no handed and other fun stupid stuff. This like most universal products may or may not work with your particular motorcycle, and it’s highly unlikely that it will fit any motorcycle without some modification. These throttle locks were designed around a typical late ’60s through mid ’80s universal Japanese motorcycle with dual throttle cables. Even then the instructions warn that some cutting or filing may be necessary to make it work. As you see in the picture below it would not fit up against the switch housing as delivered.

<vista-cruise motorcycle throttle lock>

So I had to file it to fit.

<universal motorcycle throttle lock>

Remove the least amount of material possible, & check the fit often. This is how I had to modify it to fit my 1980 Honda CB650, your bike may require something totally different. If you’re not comfortable with cutting & modifying a brand new part to make it work then you probably should not install a Vista-Cruise throttle lock. I recommend that you use a Brakeaway custom fit cruise control instead.

<universal motorcycle cruise control>

It is not really necessary to remove the grip to install the throttle lock but since I was replacing the grips anyway it is much easier. If you are not changing the grips you can just pry it back from the switch housing a little bit and fit it around the throttle tube as directed in the Vista-Cuise instructions.

<motorcycle throttle lock>

Once you have it fitted properly here’s the adjustment key that is supplied. Use it or a flat screwdriver to adjust the tension screw so that it holds the throttle in place when locked but allows it to return to idle as soon as you flip the switch up to unlock it.

<motorcycle cruise control>

Don’t forget the clear washer shown below that goes between the grip and the throttle lock to prevent the grip flange from hanging up on the side of the Vista-Cruise.

<vista-cruise installation>

I decided to use new Oury grips for the vintage look and proven vibration dampening abilities. Oury Grip has been in business for decades and have always provided a good product at a decent price. Just be sure to clean your handlebar and throttle tube well, then use a good handlebar grip glue to make sure everything stays in place.

<Oury vintage motorcycle grips>

The new grips are nice and soft so the handlebar buzz is greatly reduced, plus I don’t have to squeeze the throttle so tight to move it. Once up to speed in a place where I don’t need to accelerate or slow down too often just push down on the lever & lock the throttle. Even with the throttle locked you should still be able to move the throttle to adjust your speed as needed. One caveat that is worth mentioning is that you will not get true seamless “cruise control” action. This is a throttle lock if you start downhill the bike will speed up, going uphill it may slow down. On bikes like mine with four old mechanical carburetors and / or strong throttle return springs,  your adjustment to the lock may end up being a compromise. At low speed the leverage of the carb internals and return spring will gradually close the throttle. Once the throttle is opened far enough to negate this problem it will stay locked in place for miles of smiles.  It could be adjusted tight enough to hold at all speeds but then it would not return to idle immediately upon released. This is the single most important thing to remember, for the sake of safety it must always be adjusted so that when the lock is released the engine will return to idle just the same as if you simply let go of the throttle.

After a nice 100 mile test ride I am very pleased to say that my arms & hands felt great & I can’t wait for the next road trip!

<new grips on the assault scrambler>

It’s still the same old road running rat but with cruise control & nice new grips!

Products used in this post;

Thoughts on a Good Weekend.

Here is a little video I shot of the show in Florida on March 8th 2014 enjoy. For my thoughts about the weekend keep reading below the vid.

Last weekend I did a few live blog posts while I was at the VMAs swap meet in Eustis Florida. Today after I’ve had a week to sitback and reflect upon ago I thought I would share of you things I learned from the experience did take a few used items for sale along with the display of Rock oil products and the battery or two, but my main goal really were to help publicize this blog, and just get out and have a good time and made some people. I am a member of the vintage Japanese motorcycle club so I went for the show and to help support the group. It turned out to be really great show using my favorite judging system which is 100 percent people’s choice the winning bikes decided by audience vote and not by a judging panel. This did lead to a couple of interesting surprises, such as in the all custom motorcycle class a heavily modified Tomos moped took first place while a Harley Davidson V-rod took second. It’s just totally crazy and restores my faith in humanity when things like that happen.

<bsa b50 mx>

T’was great fun and very educational for us meeting some of the other vendors and talking to them. I have a confession to make, I have made a point of deliberately avoiding large motorcycle rallies due to the snobbery of certain groups and types of posers riders and I had forgotten just how much fun it was truly hang out with a bunch of great old fashioned bikers who didn’t really care what you rode as long as you rode. I love old motorcycles of all kinds, hell I love most new motorcycles too, there are just certain styles of machine that I prefer and certain companies whose way of doing business leaves me cold. Motorcycling is about freedom, individualism & personal style not conformity to someone else’s expectations. 

<military bsa motorcycle>

<surplus BSA military motorcycle>

Mrs. ‘Psyco and I would like to thank the other vendors who were so helpful to us, especially the wonderful lady from Crazy Bob’s Biker Apparel who really helped us out with setting up our canopy.

<fine vintage japanese motorcycles>

everything I wanted growing up!

The show was actually very large but the swap meet area was not quite as big as I was hoping it would have be but it was still nice and there was a large variety of different motorcycles. Next time I go to a swap meet, especially if I’m selling I do want to camp out at the meet between the gas and the fact that I wanted to stay in a hotel this week’s profit was not existent but I had mainly went just to enjoy myself and have a good time. My beautiful financial manager said next time we should definitely camp out and she would have done it this time as she is the one who is hardcore where as I’m the old guy with the soft chewy center. In all honesty as far as taking used parts to a swap meet unless they are things that are really older and valuable from a strict point of dollars and sense you’re better off to sell them online, but you would miss the camaraderie the chance to stumble across the good deals or to find unique objects. Even so I have learned a few lessons and next time I won’t take any disassembled mid 80’s motorcycles project bikes and parts. Unless it is something that would be a really great deal to sell as a complete motorcycle those should be left at home, just pack & sell the things that are truly nostalgic. Almost all of my early seventy’s on the stuff was gone the first day I sold a few dirt bike parts, couple a spark plugs, & some points but that was pretty much it.

I should have bought this and installed an early GSXR1100 motor in it!

I should have bought this and installed an early GSXR1100 motor in it!

There were quite a few good deals to be had and next year I might have to leave room in the van so that I can do a little shopping myself. Since I returned home my day job has kept me wide freaking open so I have not even had the chance to fully unpack yet. At least I found a new owner for the Kawasaki that no one would even look at in Eustis, so it can be unpacked at its new home this week. Look for us at a few more events around the southeast this year.

<sweet cb650 cafe racer>

<euro trash>

euro trash makes for fun restorations

<honda st90>

It was great time and I hope to see you all on the road out there, somewhere, someday

Peace y’all

<early Sunday at Lake Eustis>

early Sunday at Lake Eustis

I should probably go back one day just to go fishing…