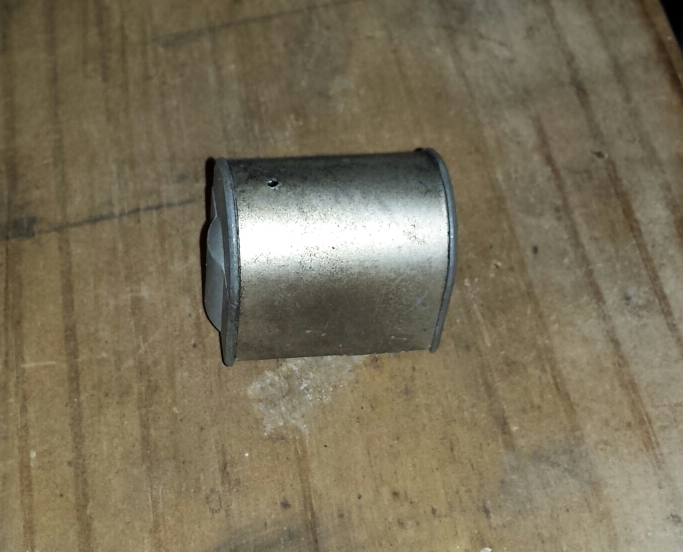
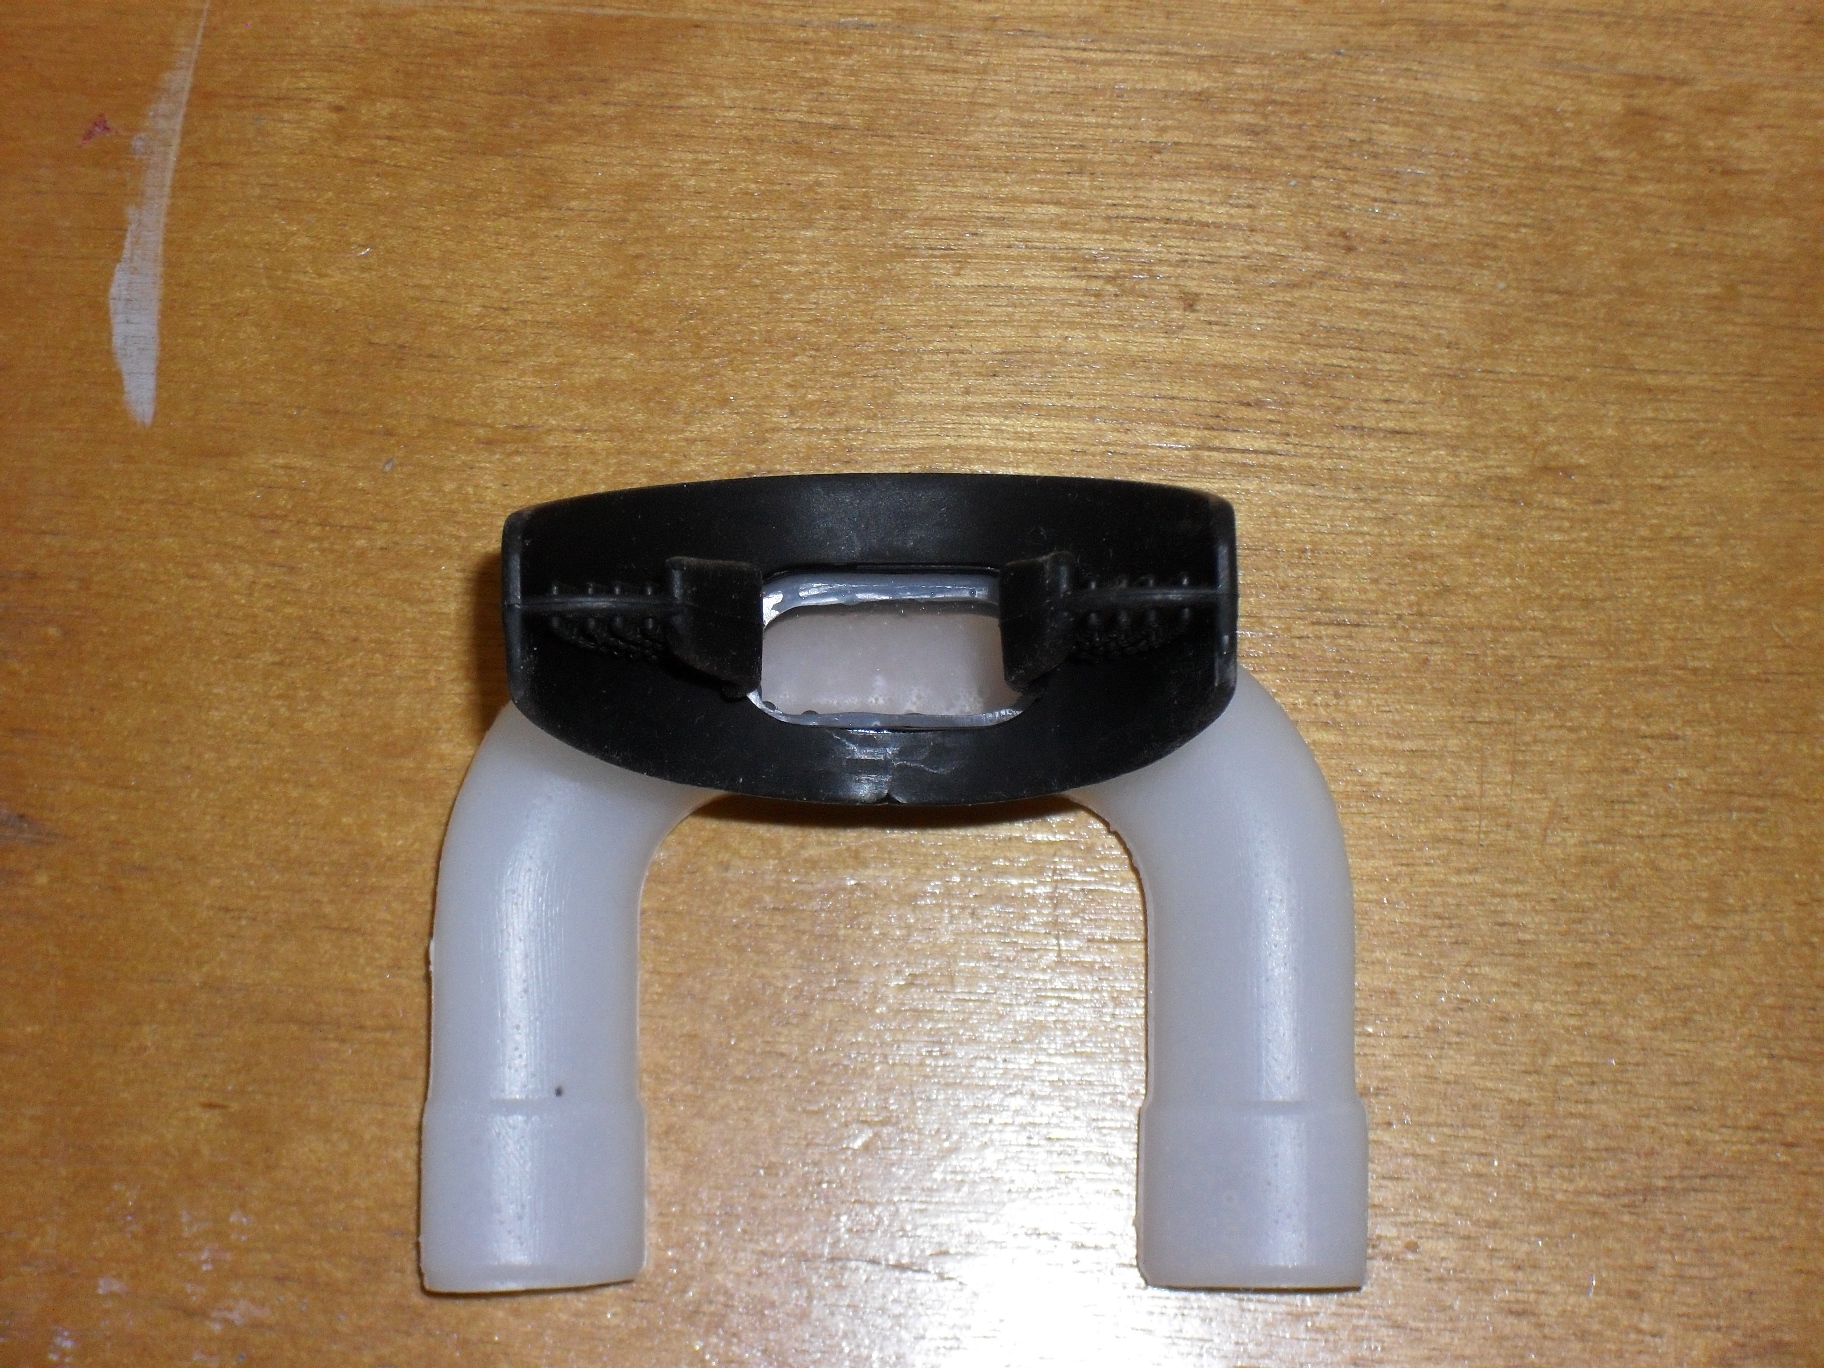
While I was in the process of moving I managed to break the end off of my old auxiliary fuel tank that had served me well for over 20 years. When I went looking for a replacement most of the top name brands were rather expensive starting at $45.99 and going up. At the other extreme were a bunch of smaller unknown brand ones from China or India with decent prices but some long shipping times & unknown quality. As a compromise I settled on this one sold by Pit Posse for 39.99 It came with a decent length of hose & a good quality brass shutoff valve. Let’s be honest here, all of these plastic auxiliary tanks cost more than what they are really worth but comparatively speaking this one is a good deal coming from a U.S. based company. The actual product is still made in China though. I’ve been using this one since June 8th 2018 and am very happy with it.
My setup for adjusting carburetors.
You might notice that in the picture above that I have my vacuum gauges and auxiliary fuel tank hanging from an I.V. pole. If you’re serious about doing carb work on motorcycles & four wheelers you need to get yourself an I.V. pole. It turns out that you can get one pretty dang cheap too, click here to see them starting as low as $23 with free shipping. Well worth every penny.
My sychronizer gauges actually come from Honda and were purchased from the inventory of a shop that went out of business. If you don’t have a set and are thinking of buying some do yourself a favor and get a set vacuum gauges, not the mercury sticks. Of course if you have the money you could go for a Carbtune Pro setup. If my gauges ever quit that’s the one I plan to get.
That’s all for today just thought I’d post a quickie product review and share a couple of tips that you might find useful. Until next time,
There are two things that are commonly found when working on old motorcycles, one is cadmium plated parts that are faded, rusted or discolored somehow, and the other is broken or cracked mounting tabs on plastic parts such as air boxes or side covers. Today we’ll learn how to do a reasonably good job of creating cheap fake cad plating with spray paint. Then we will tackle a minor repair of some ABS plastic parts. Most of the black plastic parts on motorcycles are ABS and on some such as early sport bikes such as EX250 or 500 Ninjas the bodywork is also.
Cheap Fake Cad Plating
Let’s start with this steering lock that goes on my 1982 Honda C70. In the picture it doesn’t look too terrible, but this was after washing it in the parts washer with a Scotchbrite pad to get rid of some light rust.
Once it was dry I taped off the key slot and sprayed on a couple of coats of adhesion promoter.
After giving the adhesion promoter about 8-10 minutes to dry I gave the part a couple of coats of metallic “chrome” paint. This paint doesn’t really look like chrome but it really is a very bright silver.
After allowing the chrome paint to dry thoroughly, take a can of the metallic “gold” spray paint and from 18-20 inches away lightly fog the gold paint over the chrome. Just do one or two light coats. the idea is to lightly tint the part with gold but not to completely cover up the chrome.
It’s really best to do this in a well lit place so that you can see when there’s enough gold on the part and stop spraying it.
Here you can see my cheap fake cad plating next to one of the well sheltered original cadmium plated brackets from this same motorcycle. Naturally if you plan on having a 100 point national show winning motorcycle, real cad plating is the only way to go, but for your average rider or local bike night hero this is a nice inexpensive way to get a clean authentic look to parts that should look cad plated.
ABS Plastic Repair
A major source of aggravation are cracks in plastic parts and or mounting tabs broken off of them. But since since a lot of these plastic parts are made of the same ABS material as sewer & drain pipe there really is quite a simple solution. Glue them back together with common ABS cement that you can find at any local hardware store. The air box on this little C70 that I’m working on had been reinstalled at some point in the past without the metal spacers that are normally used to secure such parts to the metal frame without damaging it. The result was that one mounting tab was split & the other one was broken completely off.
To repair the cracked side was simple enough, it jut needed cleaning up and having plenty of glue applied. For the other side that was completely broken out I put a standoff with a washer in the hole & gave it a good coat of cement, permanently attaching it to the air box. You can also buy ABS plastic sheet & use that to fabricate repair patches, replacement tabs & even custom parts that can be glued together using ABS pipe cement. Once you are done & the glue is dry it can be filed, sanded or even painted over just like any normal plastic.
Hopefully these two tips about cheap fake cad plating & abs plastic repair will help someone out, until next time.
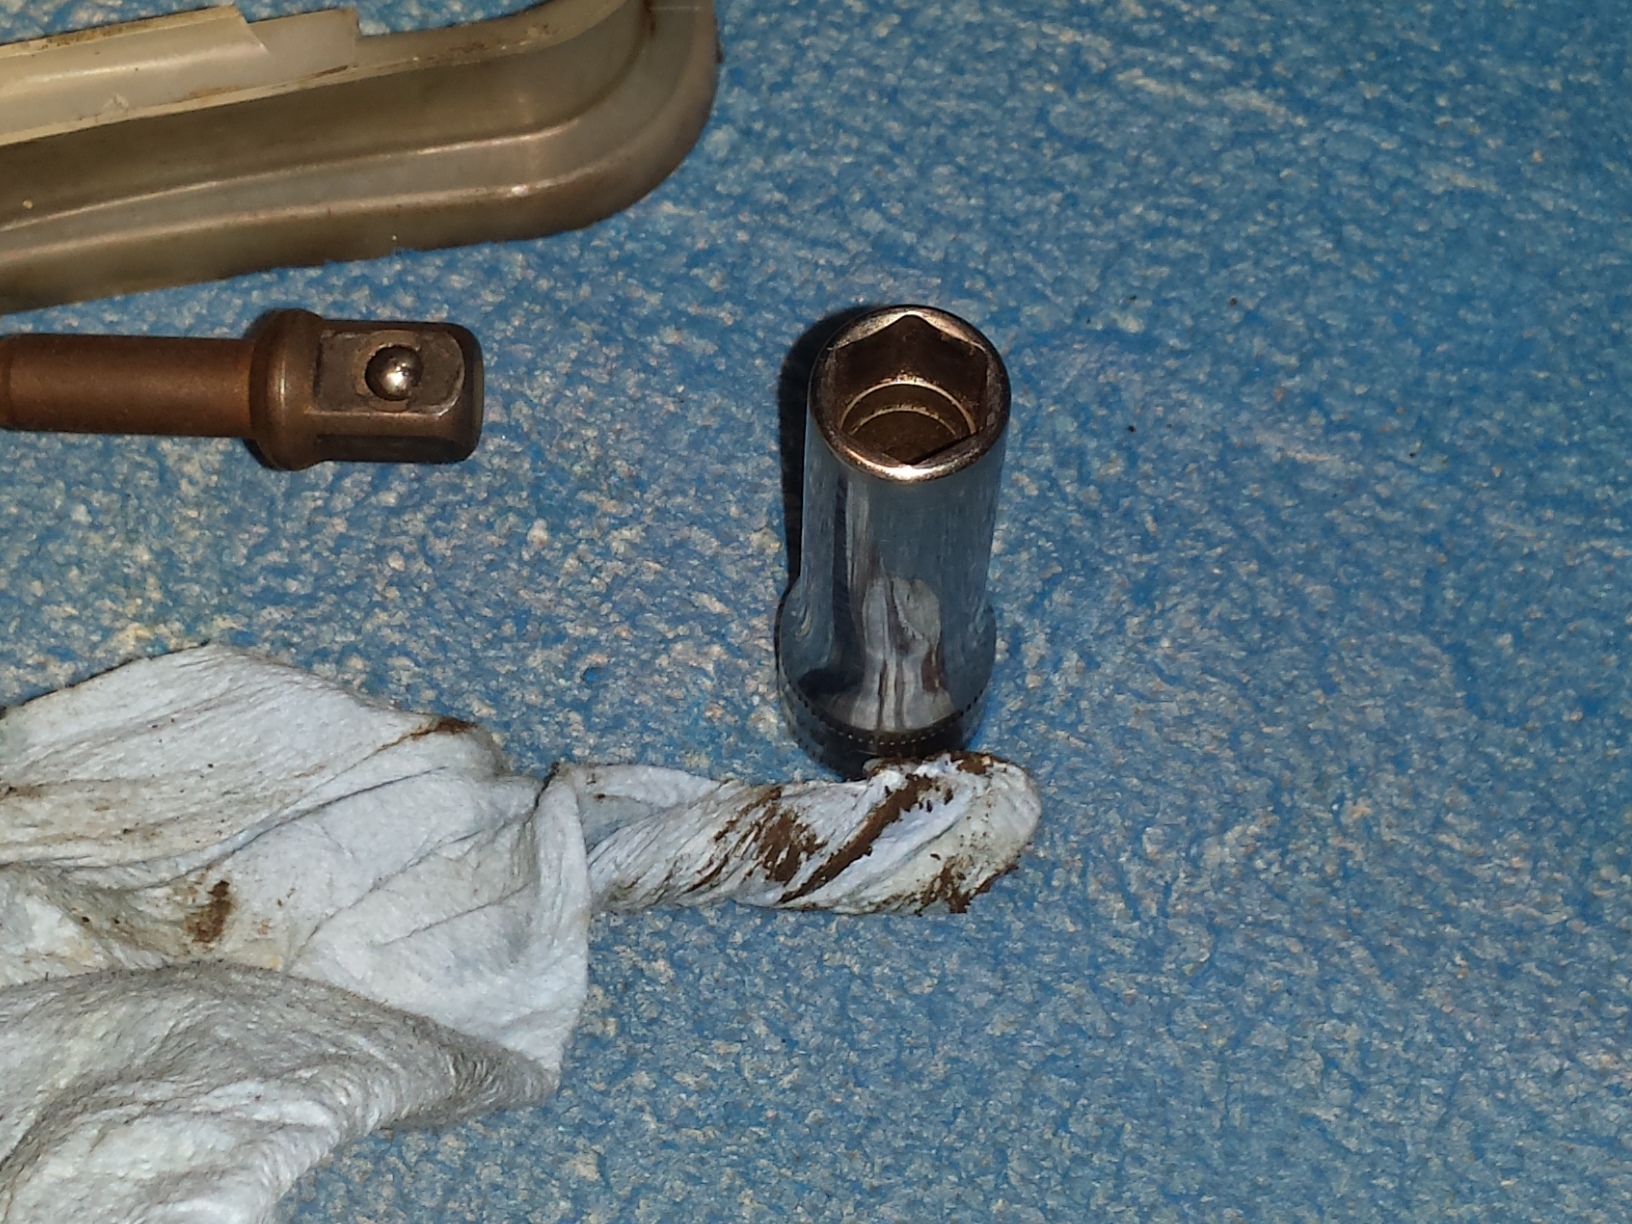
Here’s a quick random tech tip for you. Although this one is mainly aimed at restorers & customizers it will be of benefit to anyone who values a neat and clean appearance on their project vehicle. When it is time to reassemble your motorcycle make sure that you clean the grease out of your sockets and box end wrenches. When appearances count you really don’t want the old grease & dirt that is inside of your tools dirtying up your clean shiny fasteners. Sure on chrome plated or stainless nuts & bolts it’s more of an inconvenience having to go back and clean them but with zinc plated, cad plated or even painted hardware the dirty old crap stuck in the recesses of your tools can stain the surfaces beyond cleaning. Not to mention that grit from dirt or metal shavings can sometimes be suspended in the old grease and scratch even stainless fasteners when you tighten them down.
So even if all you do is just twist up a rag & stuff it through the wrench, it will make a big difference. I think in the future whenever I finish a big greasy dirty project on an engine or an off-road vehicle, I’ll try to remember to run all of the tools used through the parts washer & clean them inside & out.
How I got reminded of this…
My last big project was the resurrection of an old ATV for use as a hunting & farming vehicle. It was filthy nasty & greasy even after being washed thoroughly. When I was done all of the tools were wiped off and returned to the tool box without a second thought. Then I used them to disassemble my crusty little C70 Passport, but today when I started putting it all back together with everything cleaned & painted the grease & dirt marred a couple of the bolts so I began wiping the wrenches out after that.
Today I’d also like to apologize to my regular readers for my reduced post output over the last few months since my shoulder injury. Things are getting better now and there is a ton of material saved up, so look for a lot more good stuff to come, including some classic four wheeler tutorials, product reviews, and the return of the Website of the Month category to active status. Still with so much going on there’s no way that I can fit every cool random event into this blog so why don’t you join me on Facebook, follow along on Instagram or on Twitter.
All of us who work with metal have a common enemy, rust insidious and seemingly unstoppable it creeps into all the places we don’t want it to be, destroying our hard work, valuable treasures & expensive raw materials. About a month ago I did a review of Metal Rescue rust remover from Workshop Hero. The product worked very well & I have been pleased with it.
One thing we all know by now is that once you get the rust off of a piece of steel is that afterwards you have to keep it off. If you have ever removed rust from steel using any chemical method you may be familiar with a phenomena known as flash rusting. This occurs when you remove your rust free part from the solution (or the electrolysis bath), rinse it off and then leave it to air dry, only to find out that in a very short period of time, often well less than a day, the entire surface is covered in rust again. While there are a few finishes that actually require a flash rust coating to work such as POR-15 semi gloss black chassis paint & some gun finishing techniques, most of the time this is not desirable. Freshly machined parts are prone to flash rusting as well. In the past I have always just tried to coat all such surfaces with oil or grease to preserve them, and while this works it is messy, expensive & makes handling a pain. So when the fine people at Workshop Hero offered me a sample to test and to write about in this Dry Coat rust preventative review I jumped at the chance.
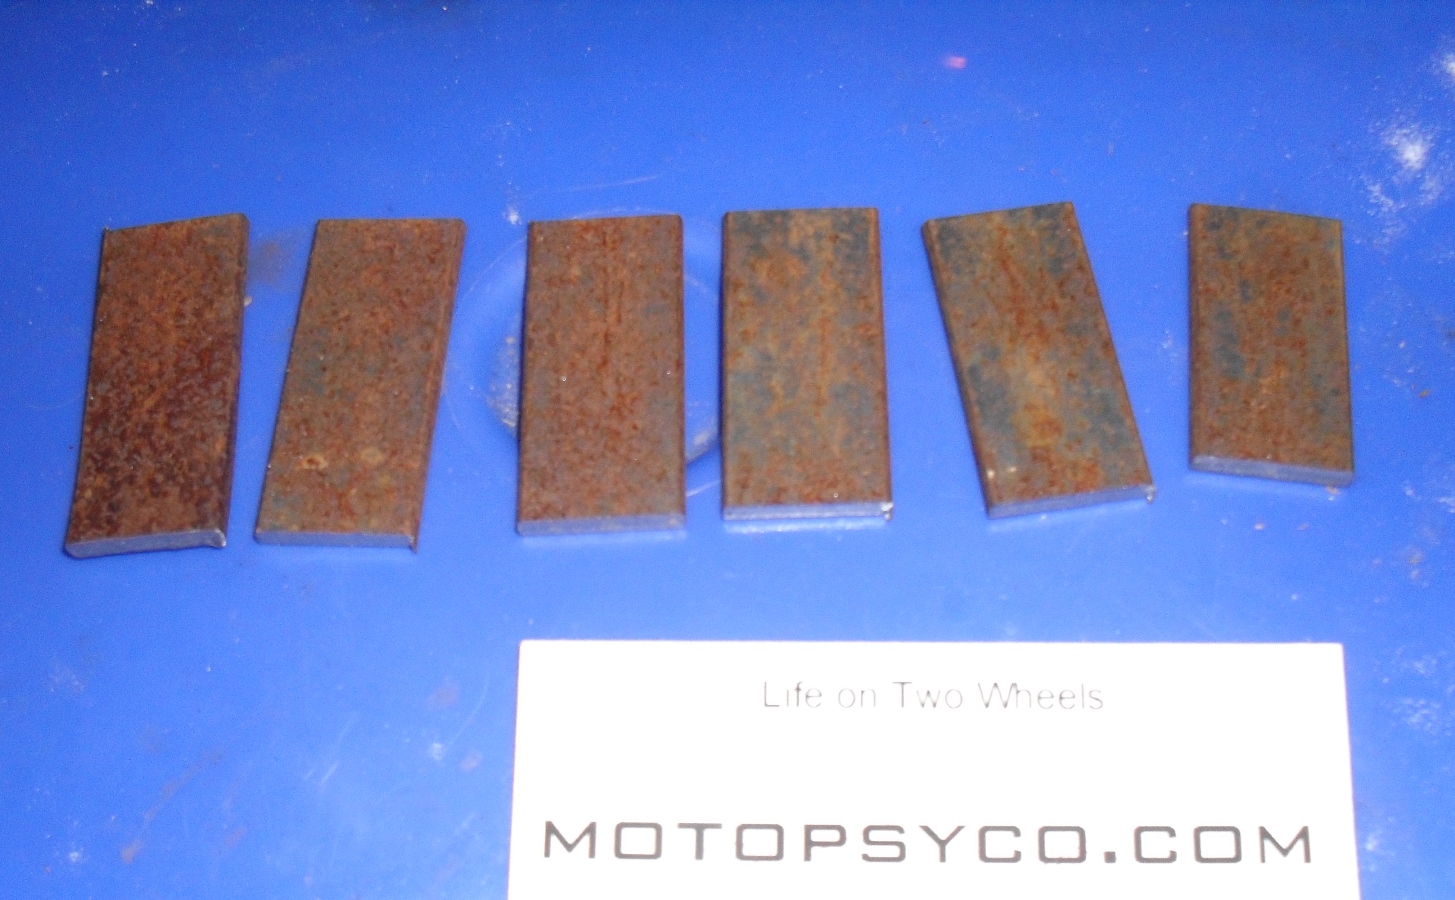
Just to keep thing honest & interesting let’s start by going out to the scrap pile and grab a rusty strip of 1/8″ thick x 1″ wide and cut six strips from it approximately 2 inches long. And then throw the strips into our bucket of Metal Rescue for an overnight soak. Yes this is the same solution that I used for the previous review, it has not been changed but it sure has removed a good bit of rust from various motorcycle parts.
Compare this to the before picture the rust is gone, I rinsed the parts with water and patted them dry with a paper towel
The plan for this little experiment is very simple to coat 3 of the strips with Dry Coat and allow to dry according to the instructions. Then I placed one coated test strip and one un-coated control strip paired together in 3 different locations around my property. This was on March 14th, 2015.
According to the company website it should give up to 2 years of protection from rust for steel parts stored indoors. The first two steel strips I left here in my office, literally indoors. The next two strips I placed on a ledge in the uninsulated, drafty humidity plagued old horse barn that I have converted into my workshop. Now this is definitely indoors out of the sun and the rain, but temperature swings cause enormous condensation problems that leave all of my bare steel tubing, rods, flat bar etc. coated in surface rust if they are not fabricated into useful items & painted quickly. If it can work here it should work at any other indoor location.
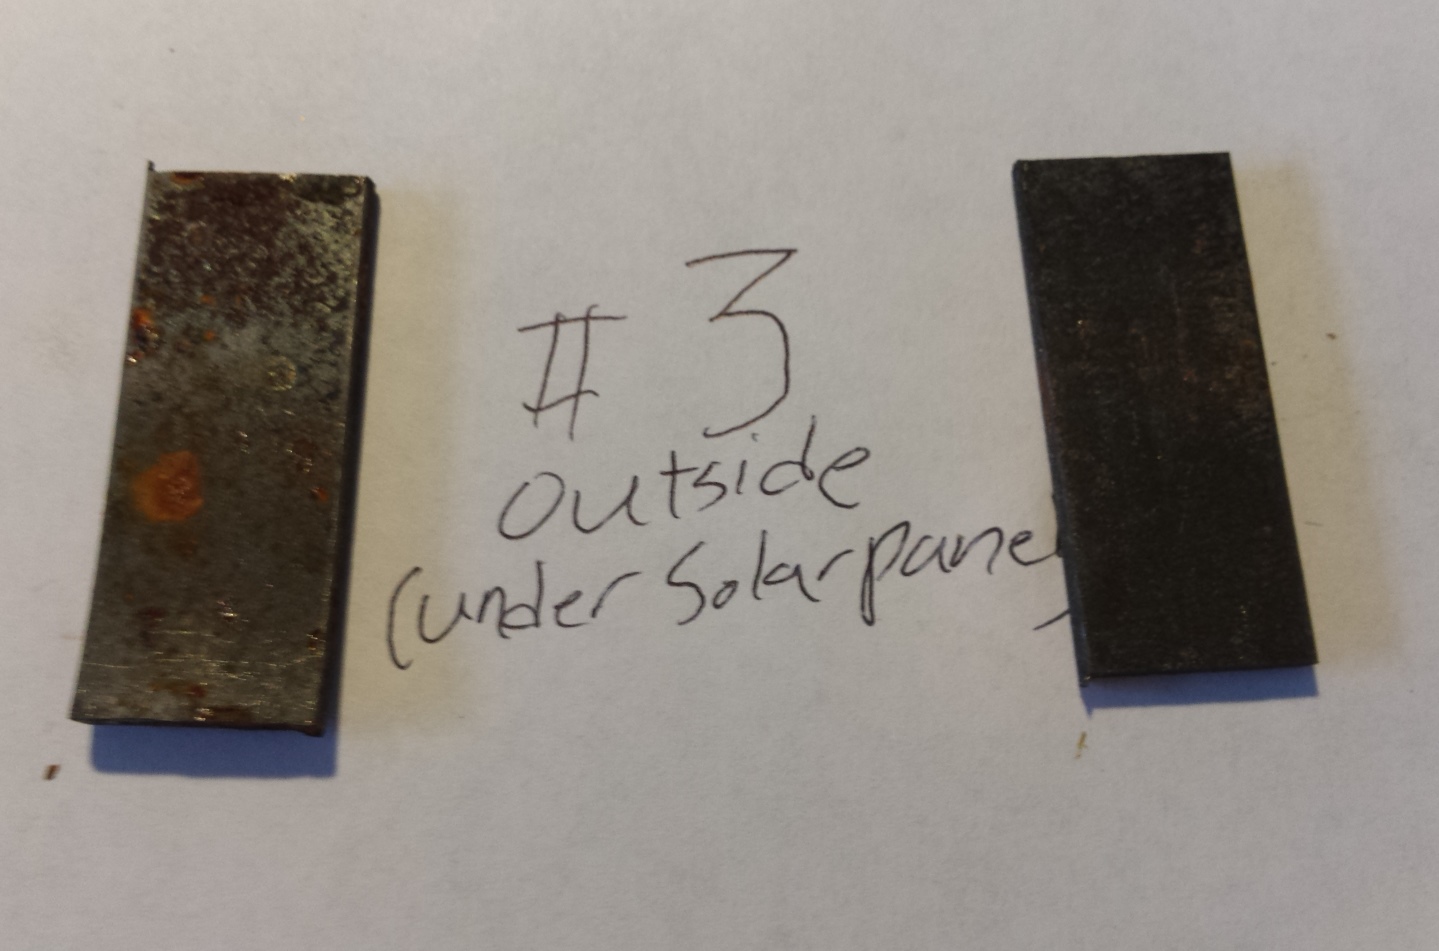
The final two pieces I stuck in a semi-exposed outdoors location. Let me be perfectly clear about one thing, this product is rated for indoor use by the manufacturer, if the coated strip rusts this is not a failure of the product, it’s just that an extremely curious cat wanted to push the limits. When I say semi-exposed, the two strips in the picture below are lying on the control enclosure of the solar panels that provide the lighting for my workshop. The solar panels are about 18 inches above them but they are exposed to the weather from 3 sides.
Just over 4 weeks later on April the 6th, 2015, I gathered all of the test strips together & photographed them. The parts that were coated with Dry Coat are on the right.
I decided to flip the pieces over so you could see both sides.
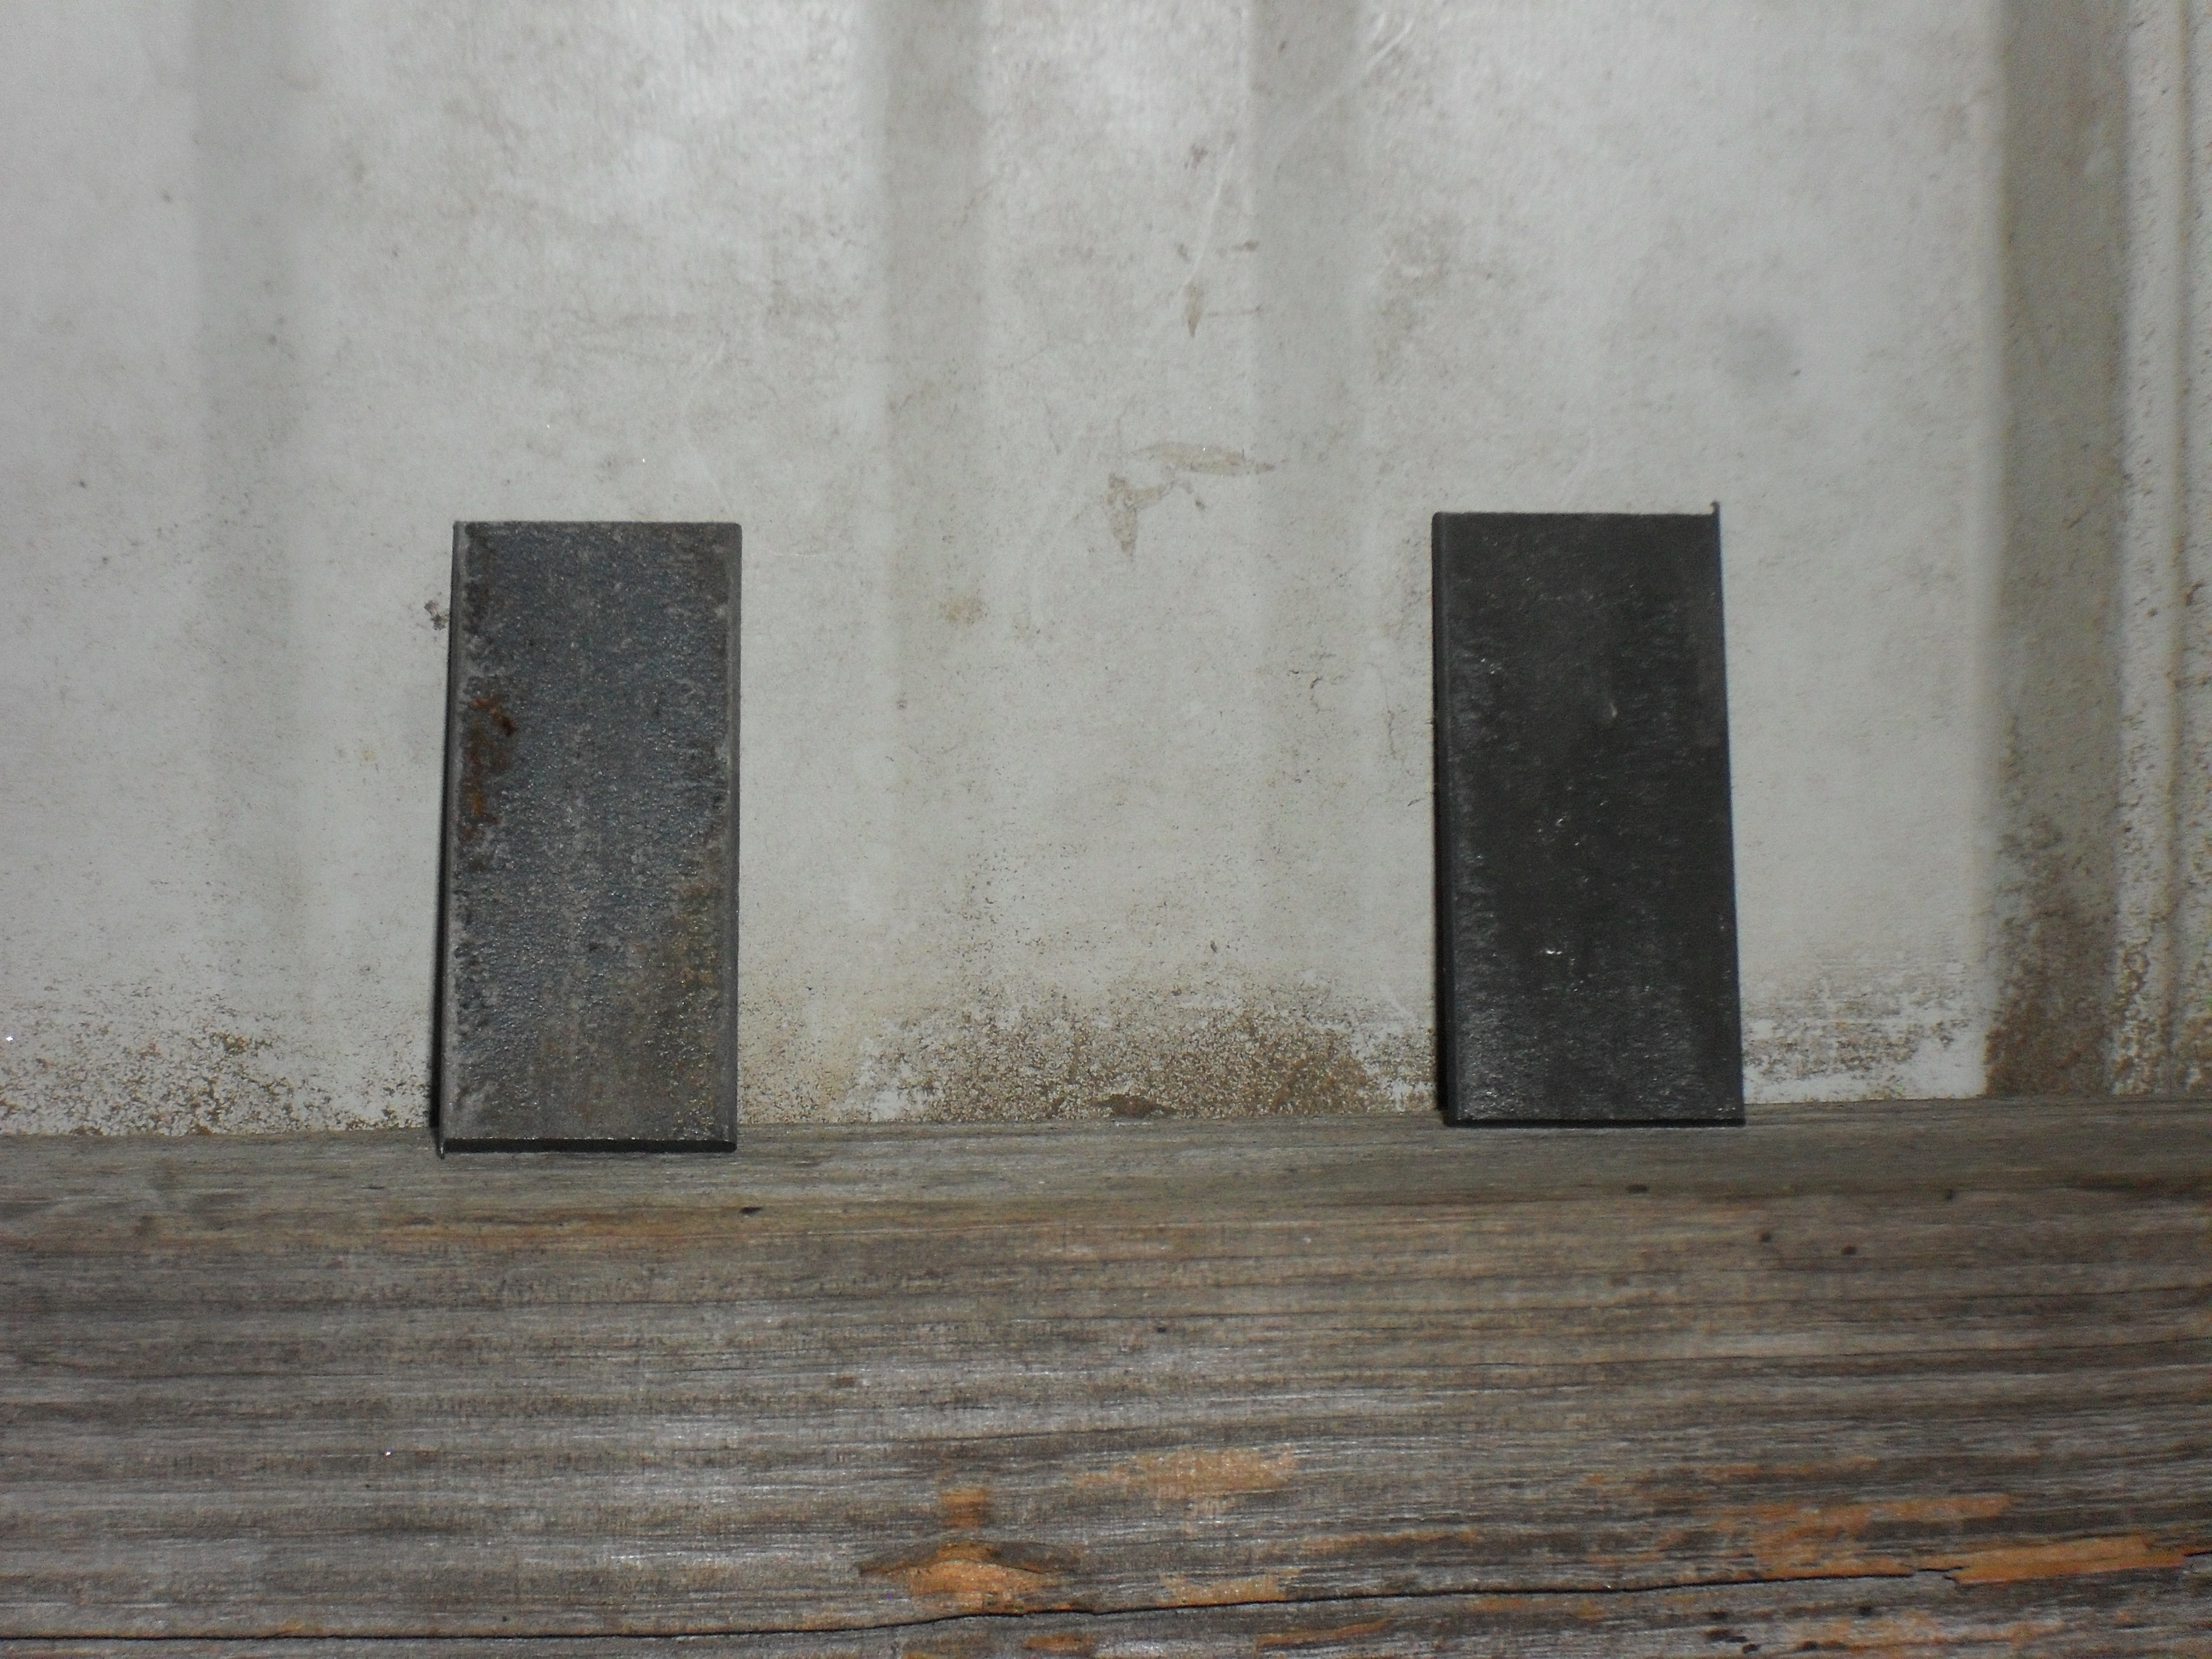
Now lets look at some close up pictures. Here’s the samples that I left in my office. The part on the left is well on its’ way back to the original rusty appearance, but the part on the right is not. You can clearly see the pitting from the original rust before treatment, but not any new iron oxide formation.
This next sample is the one that I really wanted to check after a month in the old barn with a typical South Carolina late winter/early spring weather pattern. It is not unusual at this time of the year to have temperatures swing from 15-20 degrees Fahrenheit up to nearly 80 and then back down again in the space of a day or two. Of course when the frost melts in the morning it will sometimes look like rain inside of an uninsulated metal building. You can see the difference that this made when looking at the untreated part on the left, it’s a lot rustier than the control strip that was left in the house. Once again you can see that the coated strip is still rust free, even in the pits left behind by the previous rust that was removed at the beginning of this test.
The outdoor test strips are next, the control strip on the left is quite rusty. The test strip on the right has developed a tiny bit of rust down in the existing pits in the metal. It still looks a lot better than the un-coated strip. Just remember Workshop Hero’s Dry coat is sold for indoor use and these last two test strips were just me satisfying my curiosity. The two pieces of steel shown here, have been rained on several times, and subjected to near daily freeze/thaw cycles. I am still pleased with the results and wouldn’t have problem recommending this product to anyone.
I did download a copy of the Material Safety Data Sheet for this product so that I could see if there was anything in it that required any special protective equipment beyond the usual safety glasses and gloves. It is non toxic, non-flammable, and does not require any special disposal precautions. I didn’t see anything about welding two pieces of coated steel together so I contacted the manufacturer’s representative, and was told that they suggest washing any parts that are to be welded with soap and water first. The coating is 3 microns thick and probably wouldn’t interfere with most welding or cutting processes, but it would be wise to follow their guidelines.
So who needs this stuff? Obviously those of us who restore or repair old motorcycles, atvs, tractors & automobiles. Also machine shops, especially those of you who are storing & shipping items like re-bored steel cylinders, crankshafts, and other bare steel parts. Steel fabrication shops & o.e.m. manufactures of steel plant equipment, platforms, vehicle parts, or anyone else who stores bare steel either as a raw material or a finished product and needs an inexpensive solution for temporary prevention of rust, without having to deal with a hazardous material.
Both Metal Rescue and Dry Coat are available in a wide variety of sizes ranging from small bottles, 5 gallon buckets, 55 gallon drums and even 330 gallon totes for industrial users. As I said this is not permanent rust protection but it beats using expensive, messy, and hard to remove paints, oils and greases just to keep rust off of steel for a short period of time until you can use it.
Product recommended. I am going to place all of the test strips back in the places where I had them and will check on them over time. If anything changes I’ll be sure to let you know.
D.I.Y. motorcycle head service is possible for the home mechanic at times, under the right circumstances. Of course if you are one of those fortunate individuals who happens to have a fully equipped machine shop and know how to use it you can do anything. But for the ordinary person restoring an older motorcycle or atv that wants to save a buck or two it is still possible to do an acceptable job provided certain conditions are met.
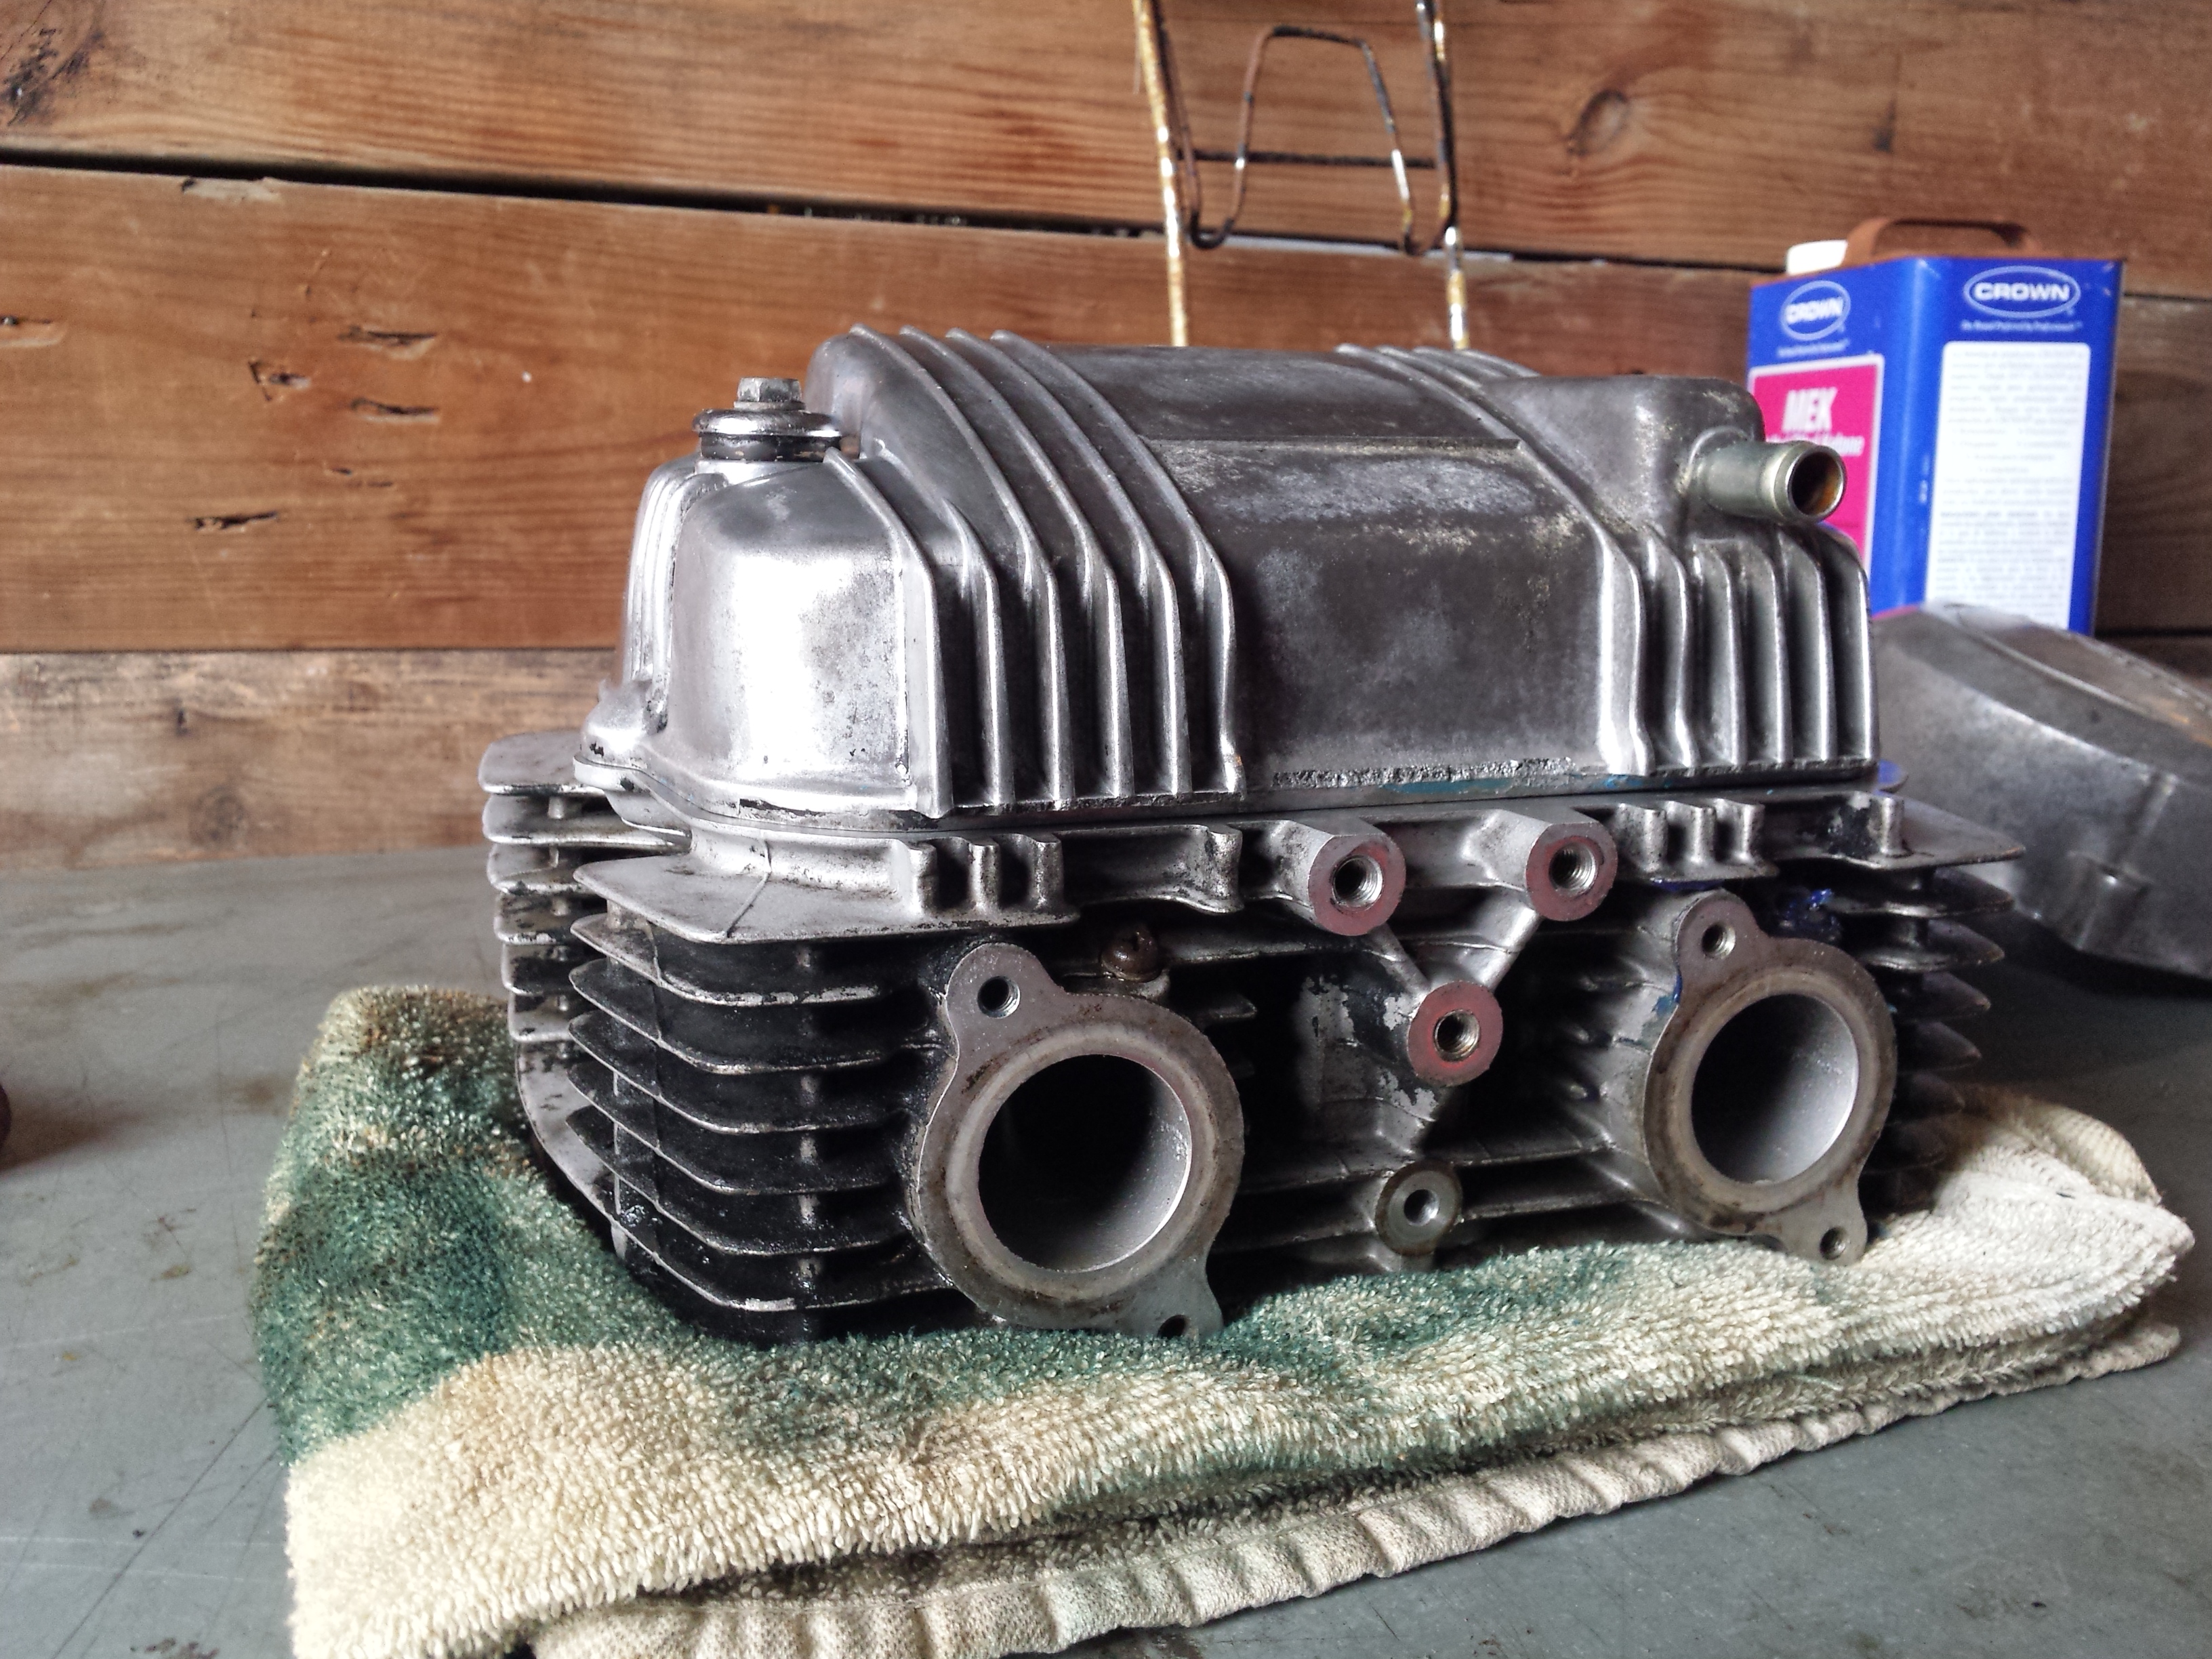
My patient for this job will be the CM400 that I used for the valve adjustment tutorial a couple of weeks ago. After adjusting the valves and putting oil in the cylinders it still had about a 45-50 psi difference in compression from the left to right sides so I pulled it apart for a top end overhaul. It turns out that the right cylinder had oil rings that were stuck from sitting and that the gaps were aligned on the other two rings.
Before disassembling it, I cleaned the head fairly well and removed the carbon from the combustion chambers. This makes handling the parts much nicer and inspection much easier. No matter what method you use to remove the carbon do not allow any type of abrasive or wire brush or scraper to contact the flat sealing surface of the head. Yes I know you may have to use some type of scraper to remove the gasket residue from the head but be very careful not to scratch or gouge it in any way. I actually used soda blasting to clean this head but made sure not to hit the mating surfaces with it.
Now I must make a couple of quick disclaimers here. First there are some defects that if discovered during the inspection process that will mean you need to take your head to a machine shop to be repaired anyway. Second, unless you own a set ball micrometers to check them with, you will basically be guessing that the valve guides are okay based on the condition of the valve stems. Chances are that if like me, you are working on something old but with relatively low mileage they are okay BUT it is not guaranteed and excessively worn valve guides can cause oil consumption & smoking even with new seals. Third, this is not the high performance option, if you are building a hotrod and looking to squeeze every last drop of performance out of it you can then I suggest you contact a reputable high performance machine shop for a good 5 angle valve job and new valve guides. This is to get your old heap running as good as possible for the least amount of dough you can spend. The fourth and last disclaimer is to always put safety first in the shop. You will be dealing with strong springs under compression. There is a chance that a tool could slip releasing a spring to go flying out at high speed and hit you or to pinch your fingers between the spring & the tool. Only use a good quality valve spring compressor
in good condition, make sure you read the instructions that come with it, & wear some eye protection too.
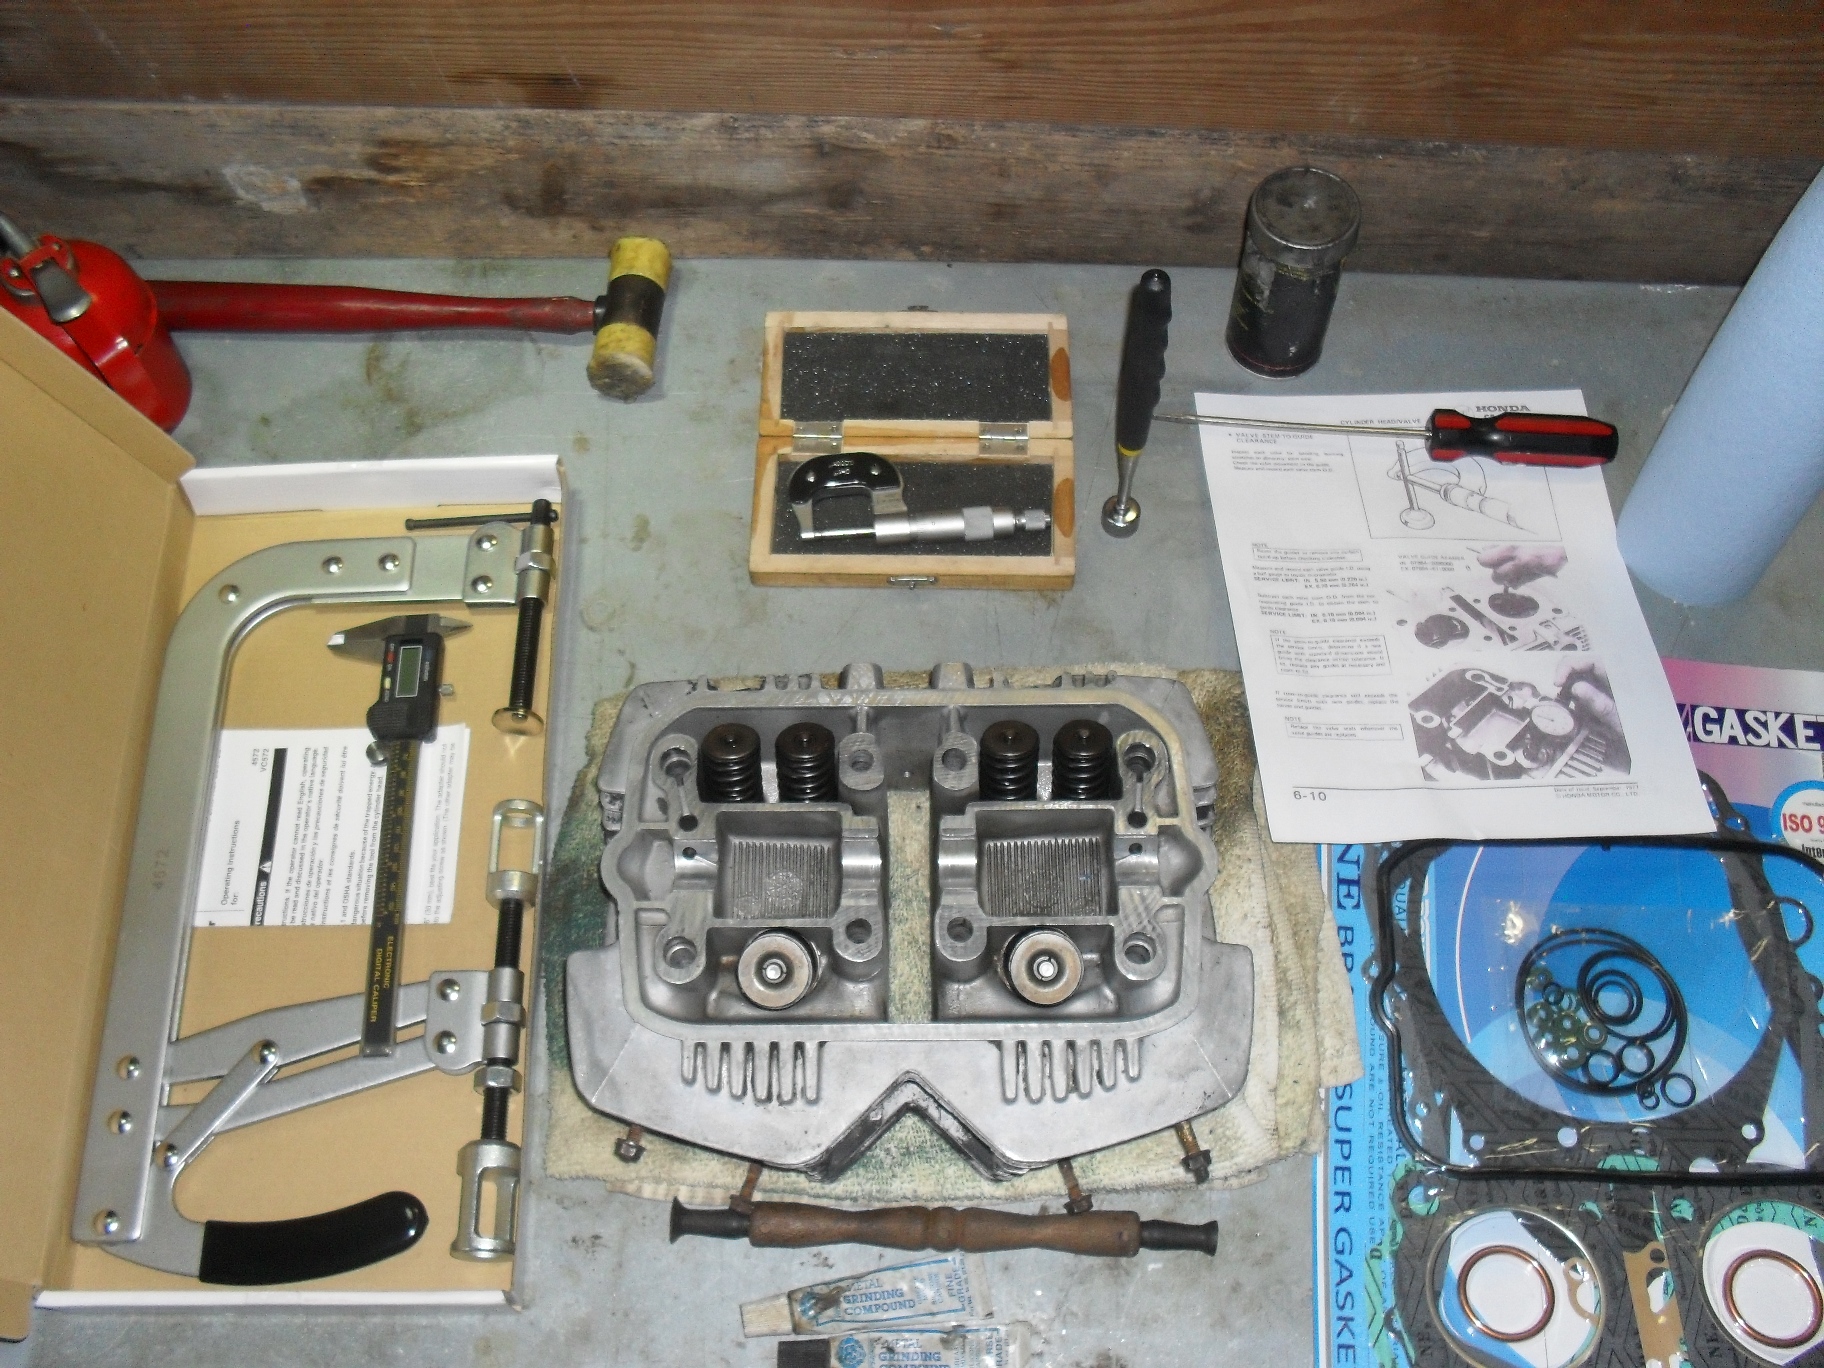
Even so there are some specialty tools you will need to get if you do not have them. In the picture above at the bottom center the thing with the two suction cups on it is a valve lapper with 2 tubes of grinding compound one coarse & one fine. Moving clockwise around the head are the valve spring compressor, a caliper dial or digital whatever you have, a light rubber or plastic hammer just in case something needs a tiny bit of extra persuasion, a micrometer (if you don’t know how to read a micrometer you can either learn how or just buy a digital one.) Next item to the right is a pick up magnet and a flat screwdriver, a few pertinent pages photocopied from the service manual and a new gasket set with valve seals. If you want to learn to use a micrometer watch the 2 videos below.
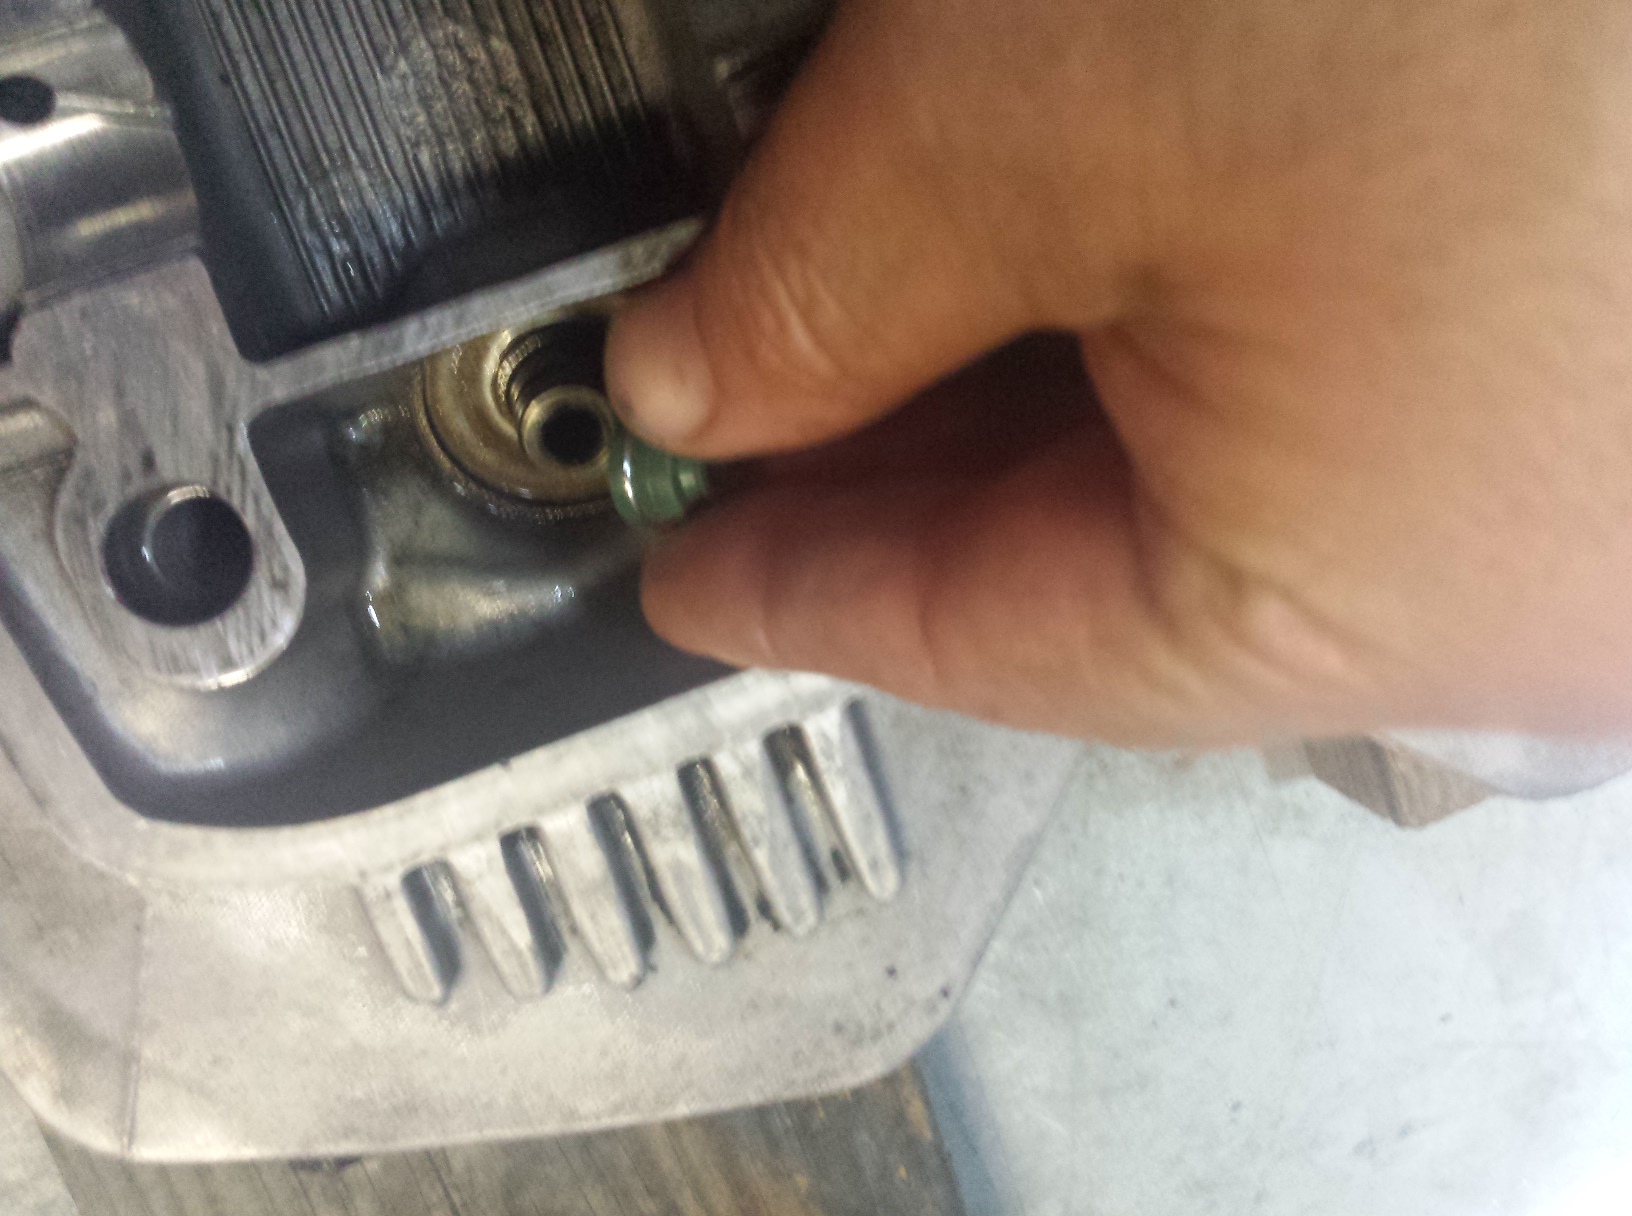
Set your valve spring compressor into place over the first valve you wish to remove and turn the compression screw inward until the spring is compress enough that the valve keepers either fall out or you can reach in with a magnetized screwdriver and pull them out.
It is very important that you keep your valves, springs, & other parts together so that they can be reinstalled in the same opening from which you removed them. This is especially critical for the valves as they wear into their valve guides and seats as the engine is operating. If any of the valves do not come out, or if removal is difficult you may have a bent or seized valve, put everything back together and find a good machinist. The cure for a damaged valve requires replacing the valve & seat as a unit. The valve guide drivers and reamers required for this job are really a bit much to purchase & learn to use for just one head.
Once you get all the valves out give the head a good visual inspection looking for anything that looks galled, burnt, or cracked
Be sure you check inside the ports to especially around the valve guides. Next check the valve seats which are the hardened steel inserts around the outside of the large holes in the combustion chamber. If any of valve seats 0r guides are burnt, badly scored or pitted , have cracks in them or easily visible excess wear then you need to put it back together & take it to a competent machinist
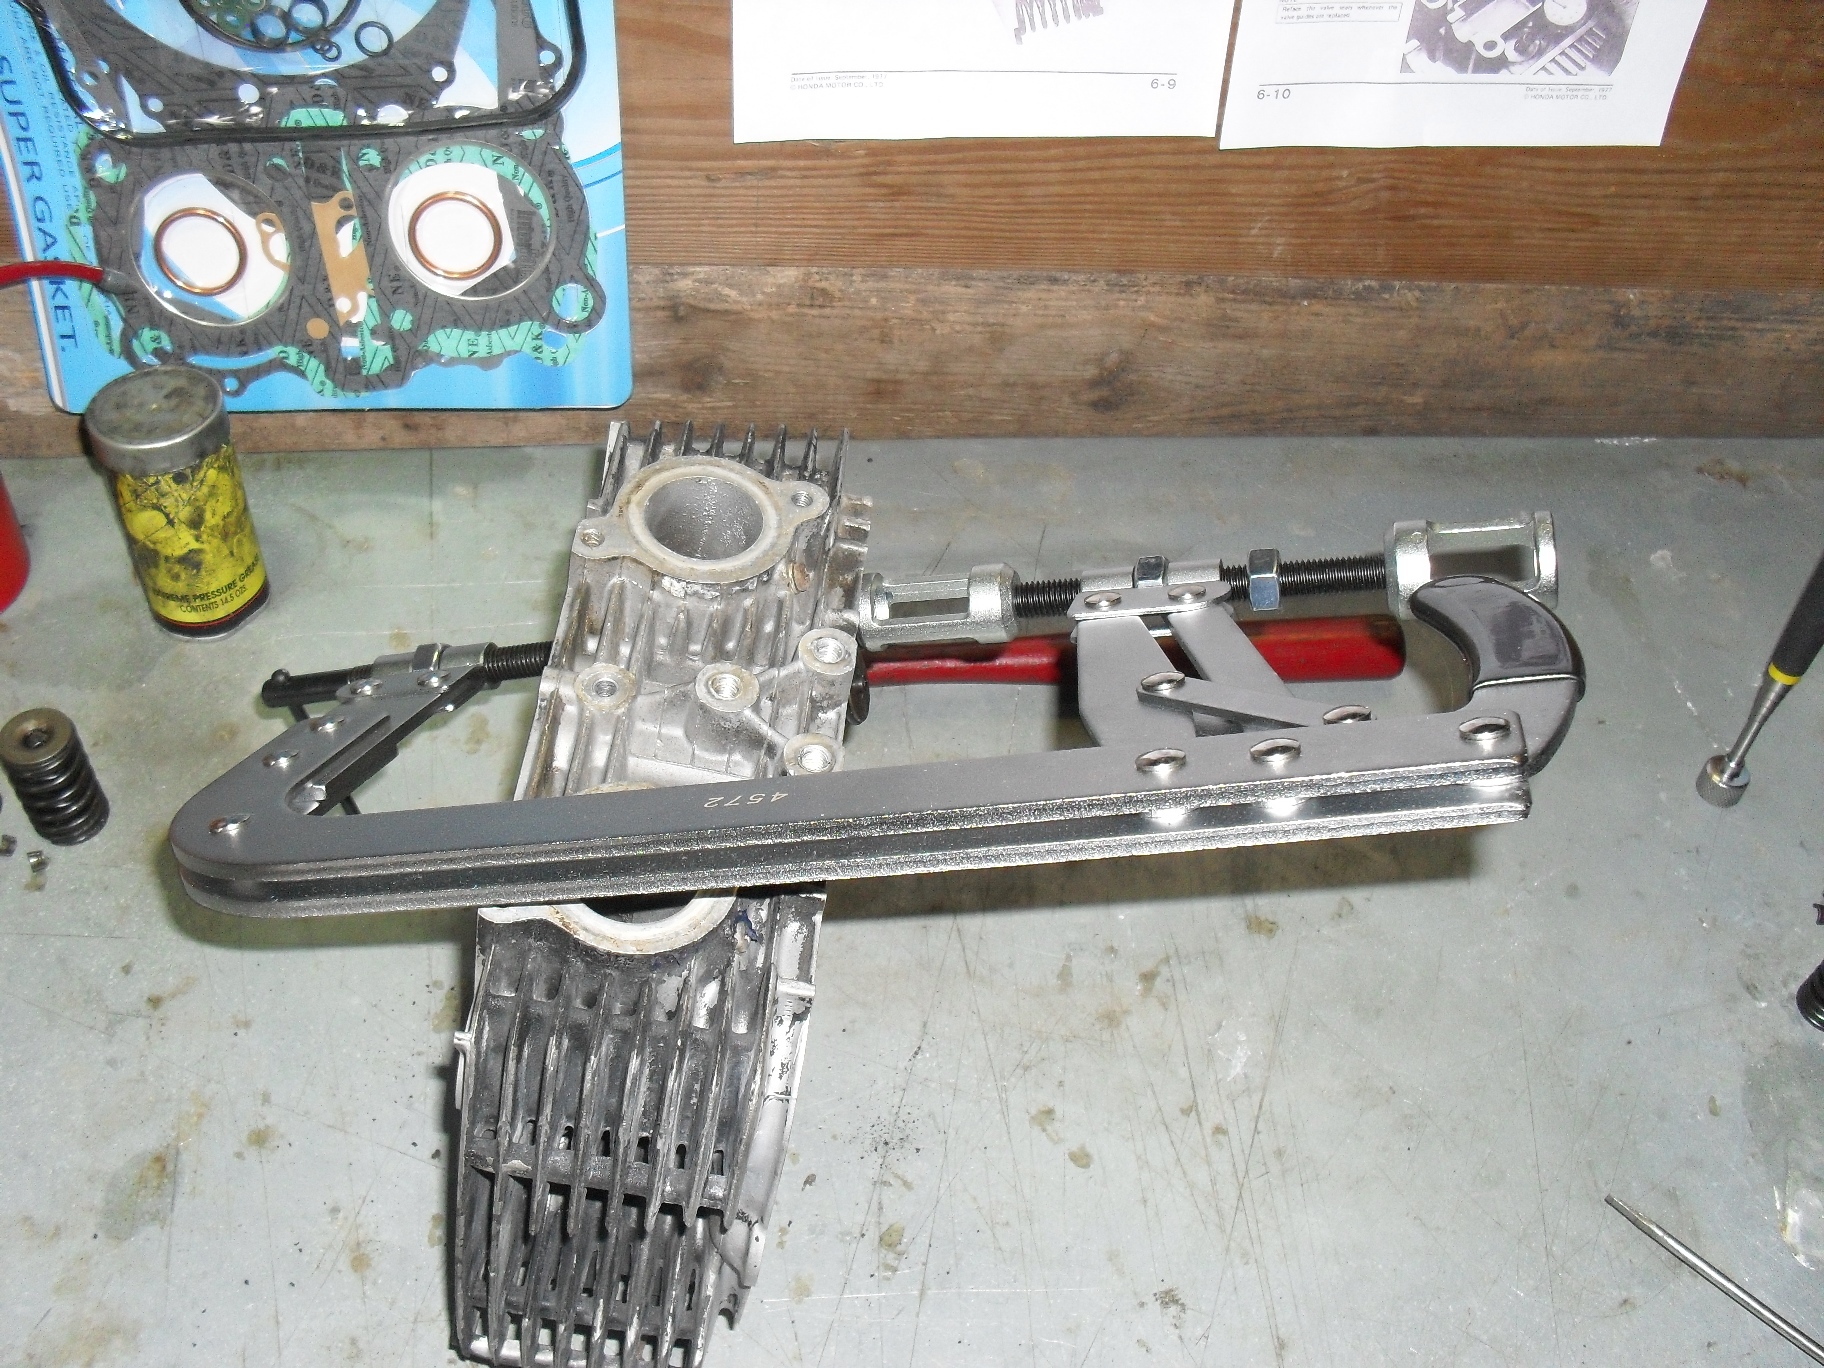
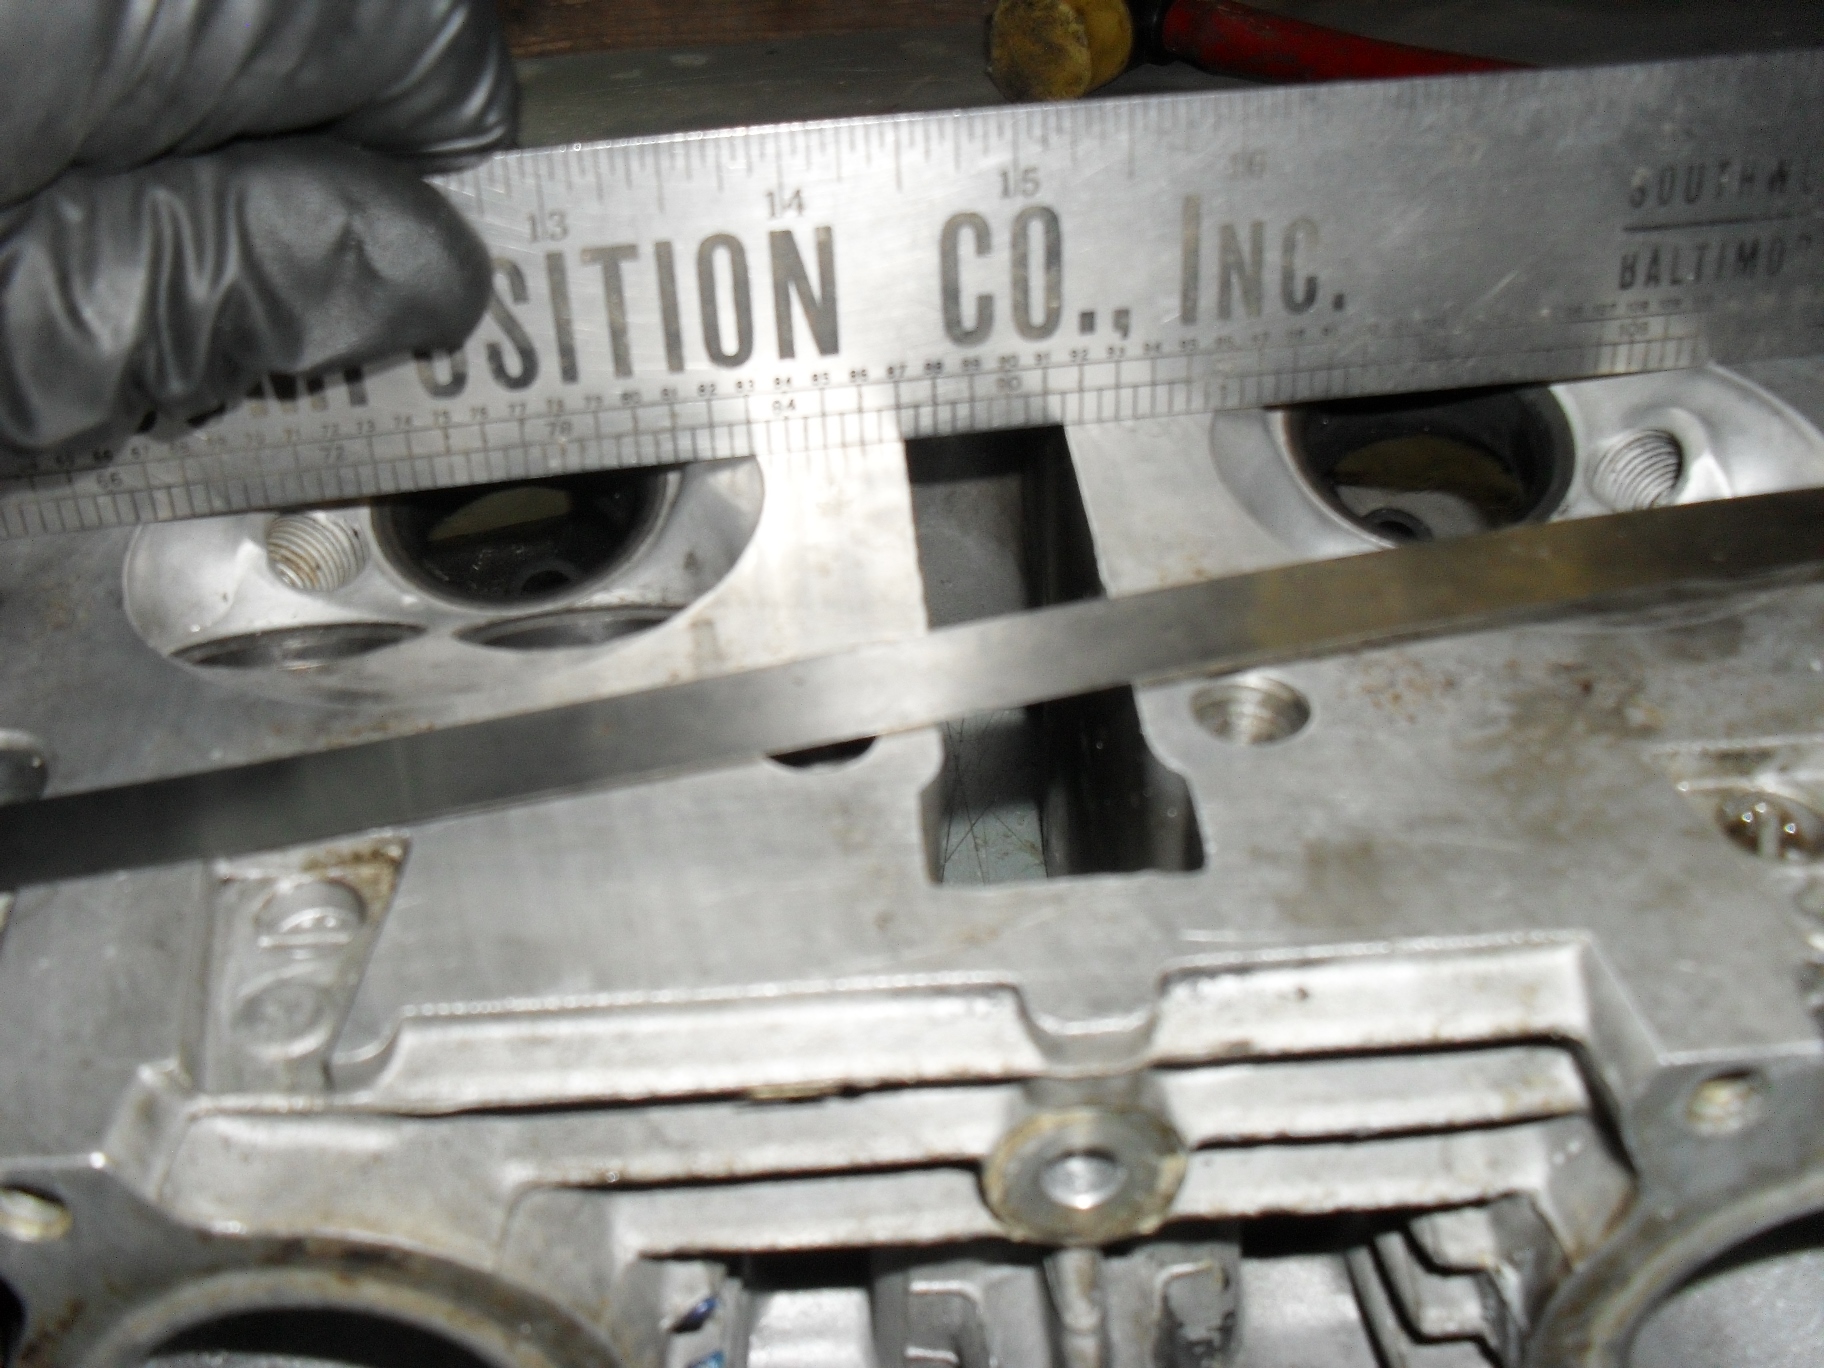
If all looks good make sure the head is not warped beyond acceptable limits. for this you’ll need a good straight edge and a feeler gauge in whatever size your service manual specifies
Place the straightedge firmly across the head in several locations and try to insert the feeler gauge between it and the heads gasket mating surface. If it goes between the two anywhere then a machinist will need to shave the head to level it back out.
Now it’s time to grab the micrometer and check the diameter of every valve stem in several places up & around each one. If any of them are worn beyond the service limit, chances are the valve guides are shot too and this is no longer a normal do it yourself job. Double check them for straightness at this time also,
After that get a caliper and measure the extended length of all of your valve springs. Replace any that do not fall into the specified range for your motorcycle.
Once the inspection process is complete and you are satisfied that all of your parts are in good condition & can be reused go ahead & clean the valves & guides thoroughly. Most of the time you can just scrub the intake valves clean in the parts washer, but the exhaust valves usually have a hardened scale stuck to them so I use a brass wire brush to clean them with. For the valve guides I use a gun cleaning brush, but any small round brush with plastic or brass bristles that fits through them will do. I try to avoid using brushes with steel or stainless steel bristles on parts like these because I only want to remove the grease, carbon, and scale without affecting the base metal.
Pick out whichever valve you want to start with and put a small amount of valve grinding compound around the head of the valve on the surface that contacts the valve seat in the head, and place that valve back into the hole that it was originally removed from. Grab the valve lapping tool & stick one of the suction cups on it to the valve like this and then rotate it back & forth to clean the mating surface. The most efficient way to do this is to hold the lapping stick between your palms and pretend you are trying to start a fire with it. Stop occasionally to check on your progress and replenish the lapping compound if needed. I use a coarse compound to start with & then switch to fine grit, but it is possible to make do with just the fine grit if that is what you have.
Stop and inspect rather frequently, you are not trying the grind the entire surface of the valve & seat flat. What you want is a uniform,well polished shiny ring all the way around the valve & seat at the point where the two meet. Once you have that, to keep polishing is just putting unnecessary wear on your engine parts. It should only take you a few minutes per valve to accomplish this, so keep going until you have all of the valves done.
With all of the valves lapped you now need to wash them and the head again and completely remove all of the valve grinding compound so that it doesn’t make its way into your freshly overhauled engine and grind up parts that don’t need it. Then open up your gasket set and find the valve seals. I have the seals for this engine laid out above.
The two larger one are for the exhaust valves and the four smaller ones are for the intake valves.
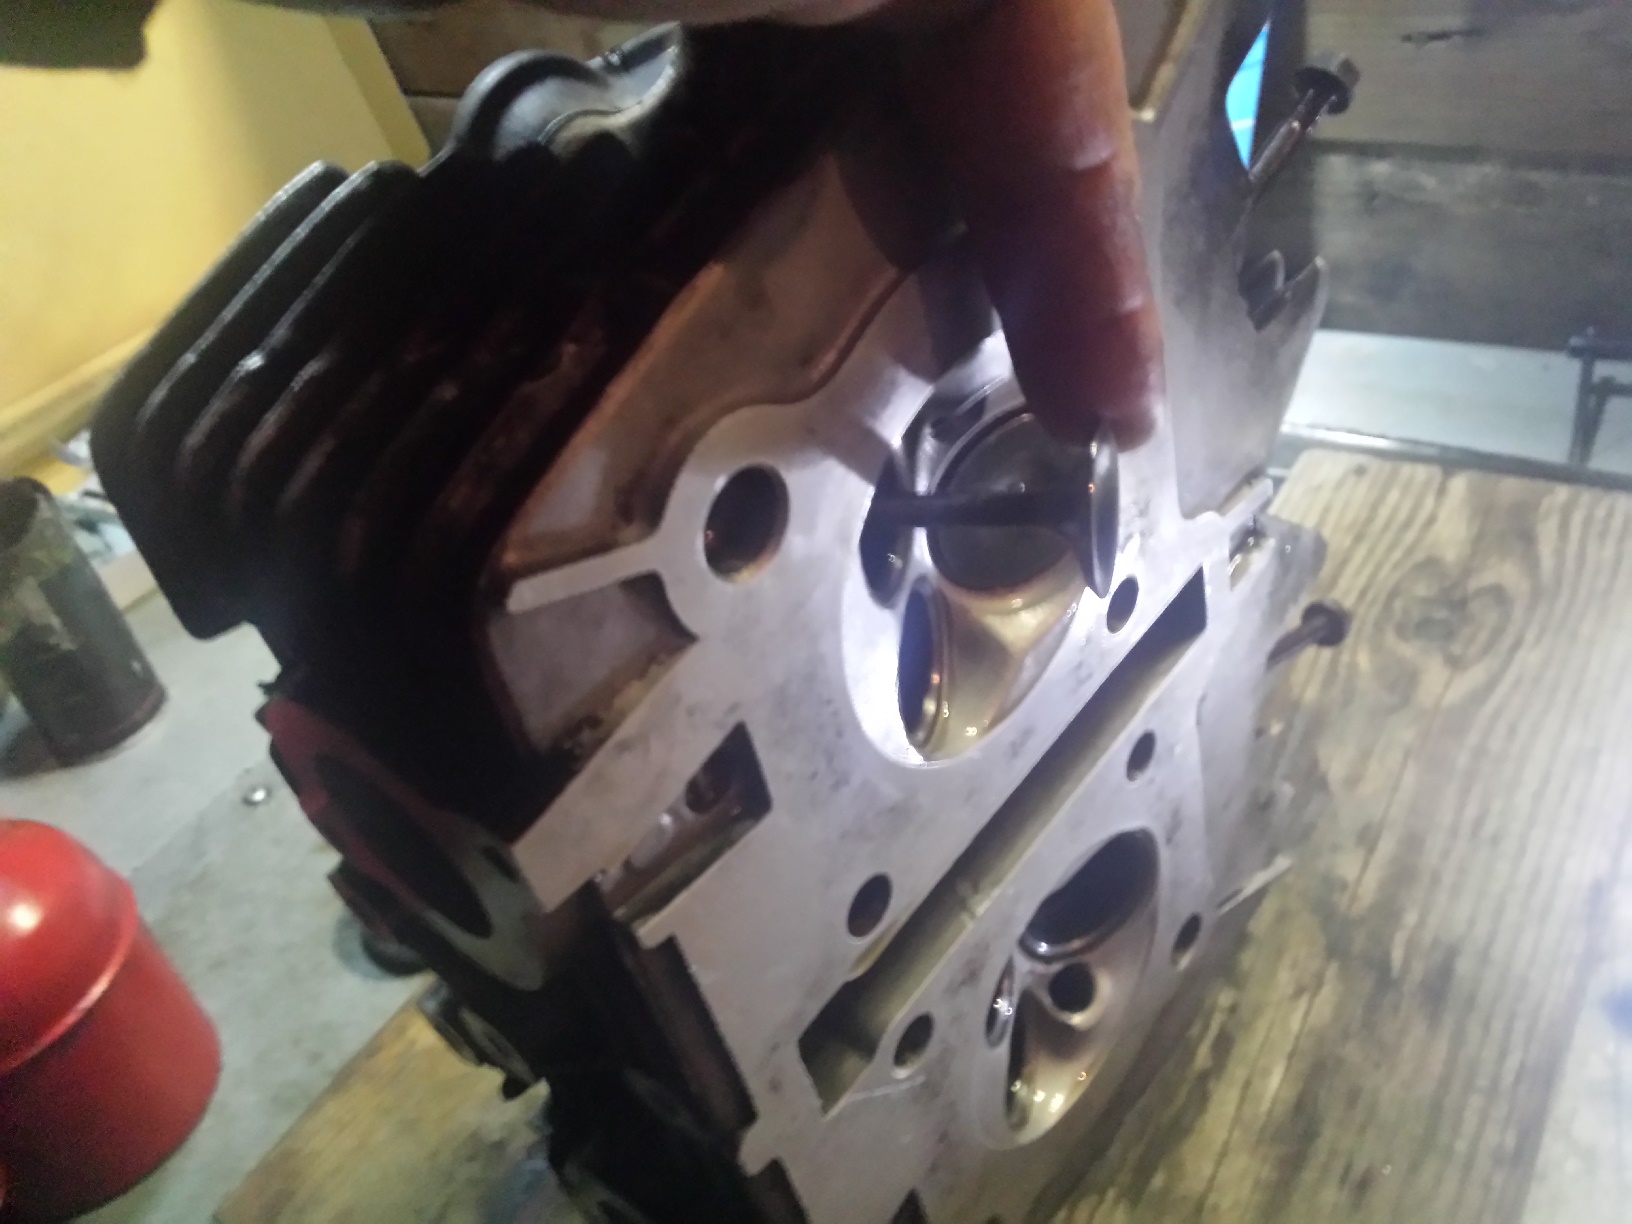
Once you have all of the seals into place it is time to start reinstalling the valves remembering to put each valve back into the hole that you removed it from to start with. First push the valve back into the hole.
It should go in smoothly, make sure that it doesn’t push the new seal off of the valve guide. Put the matching valve spring(s) and retainer back into place over the valve stem.
You will have to carefully hold the retainer while you put the valve spring compressor into place to compress the valve spring(s).
Compress the springs until you can see the grooves for the valve keepers well enough to reinstall the keepers.
Put a thick coat of grease on each retainer to stick it to the valve stem when you put it into place.
If at all possible use a pair of tweezers or needle nose pliers to put the keepers on the valve stem. If you find that you must use your fingers to get them both into place be extremely careful and make sure that the compressor is securely clamped and not going to suddenly pop loose and crush your fingers while you are positioning the keepers. You have been warned.
When you have the keepers in place on the valve stem then slowly unscrew the clamping screw and if necessary keep the springs and retainer straight as you release the pressure. Remember if your compressor has a release handle on it like mine does, do not use it to clamp & release the valve springs. Always use the clamp screw. The release handle is there to allow you to move it from one valve to another without having to fully unscrew the clamp every time. When you have fully released the pressure & moved the clamp your vale should look like the picture below with both keepers trapped securely between the retainer & the valve holding the whole lot securely together.
Repeat these steps until all of your valves are securely reinstalled in the head.
I have tried to be as honest as possible with you about the possible pitfalls and risks of D.I.Y. motorcycle head service, but if you are willing to take your time, check everything carefully, and work in a meticulous fashion there’s no reason that you cannot give it a shot. Just be willing to take the risk of trying on your next restoration or overhaul and you’ll find yourself having that much more satisfaction with your handiwork once the engine is up and running.
Of course since I want this one to look as good as it works I covered up all of the mating surfaces & plugged all the ports before spraying my favorite ceramic filled engine paint on it. If you need tools and supplies just visit my webstore’s tool sections and search for what you need. If you can’t find something there let me know & I will point you in the right direction even if it means sending you to someone else.
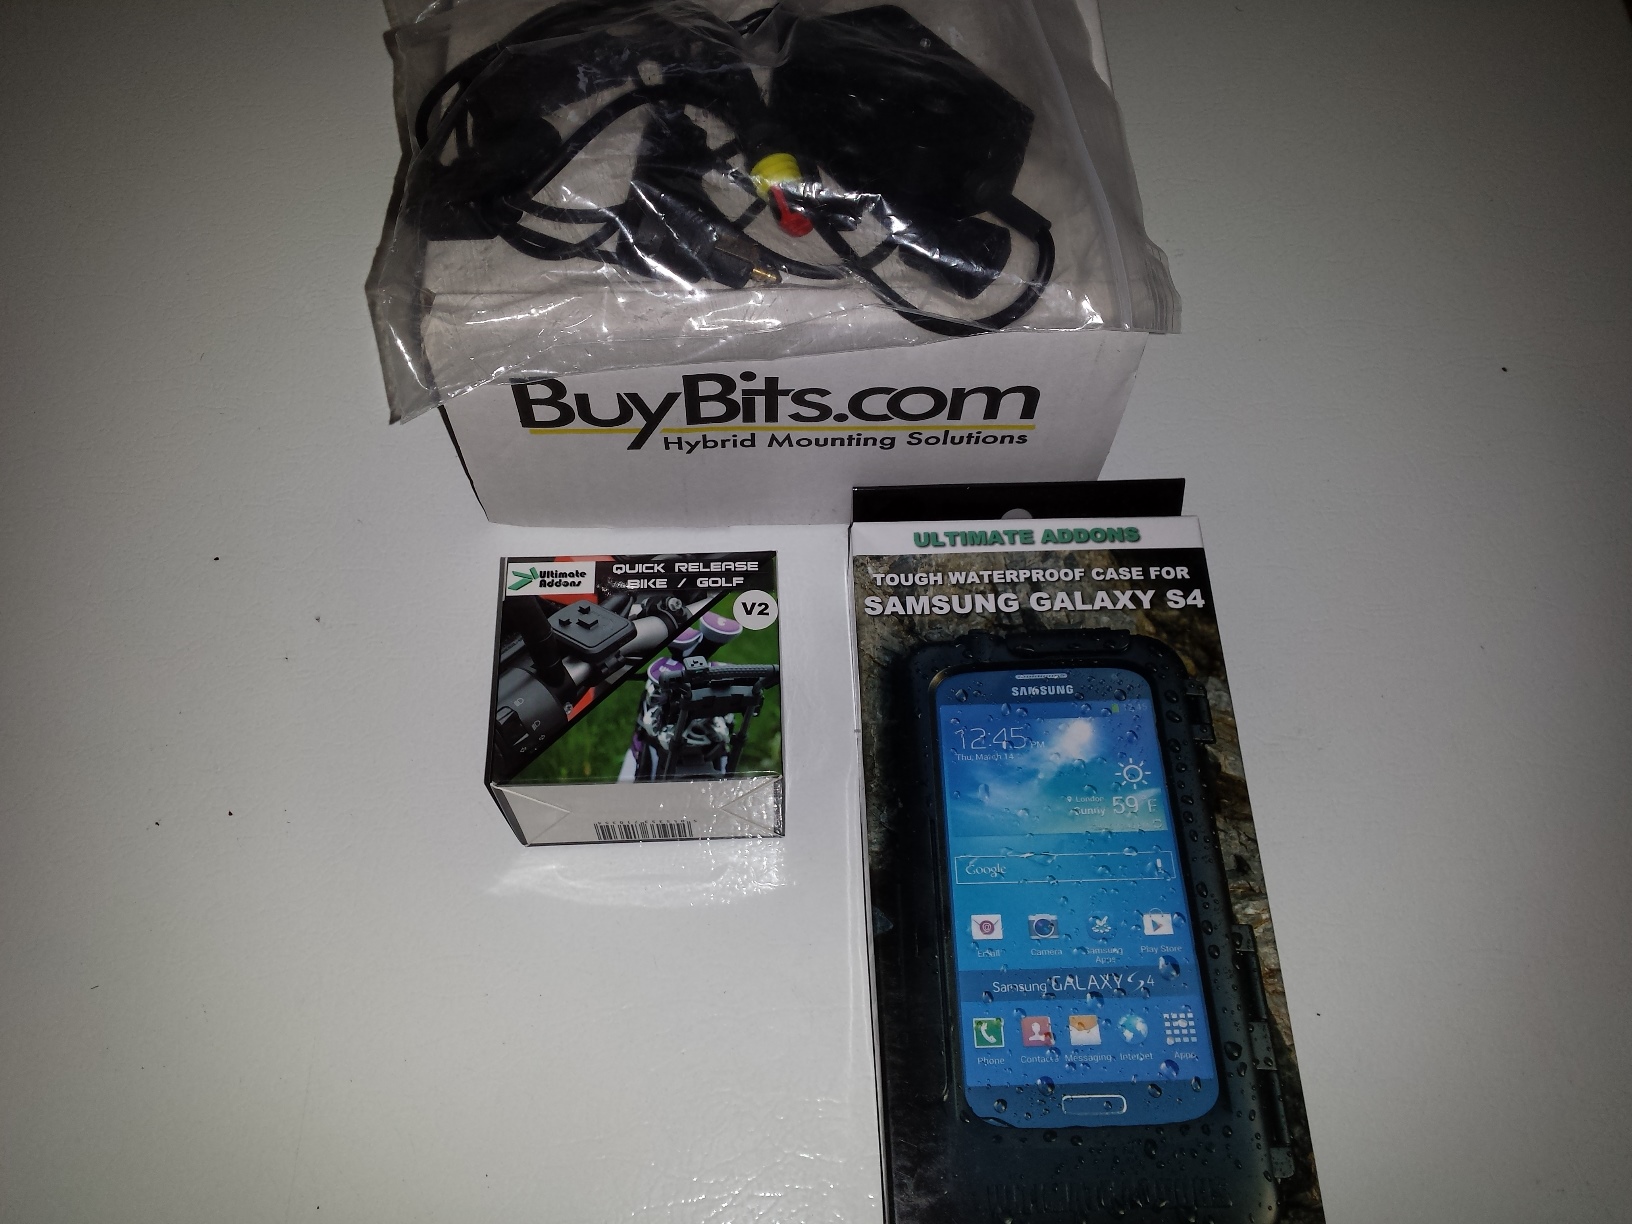
Who is looking for a way to safely mount their smartphone to the handlebars of their motorcycle, bicycle or atv? Initially when I first decided to add navigation to my motorcycle, the first thought was to find a mount for the Garmin Nuvi that I use in the old van, but quickly realized that my smartphone has some seriously good navigation apps installed on it and has the added advantage of always being with me. Keeping in mind the price of my phone and the importance of the data that it contains, any mount purchase would need to be secure, strong, & waterproof, with excellent vibration & impact resistance. After a quick bit of internet research I decided to try one of the Buybits Ultimate Addons mounts, and placed an order with Amazon. At $69.99 plus shipping from the U.K. this is not a cheap product (although it is not the most expensive either, price as of 8-9-14).
As usual my order arrived quickly and was well packaged with no transit damage!
Opening it up and viewing the contents I found the protective case, handlebar mount & power cord. Please note that if your motorcycle or atv is not equipped with a DIN (Hella) style power outlet you will need to install one in order to use the charger, here’s a link to the item I used.
The protective case is a very impressive design, thick plastic with a generous amount of rubber inside both to cushion the phone & seal out the water. Please note this case is not for weight weenies, but if you don’t mind carrying around a few extra ounces in order to keep your device safe & dry it is worth it. A great and pleasant surprise to me was to find out that there was a viewport for the camera, the touch screen worked well, and the case is engineered well enough that all operation functions of the phone could be controlled just as if the phone were not in the case at all.
The handlebar mount itself had me worried a little bit after seeing the relatively bombproof looking case that attaches to it, the mount looked small and while not flimsy looking it seemed like it should be larger and heavier looking to hold up this big case & my oversize $500 phone. In engineering we all know that well designed products can be much stronger than they look, but the barbarian living in my head doesn’t always see that, so for my initial testing I strapped it to the rattliest, roughest riding pile of junk in the shed, a Baja MB165 minibike. My minibike is a frightening concoction, of assorted used parts loosely assembled together and then blessed (cursed?) with a couple of speed enhancing modifications including a CVT drive.
If this don’t kill it nothing else will.
After bouncing around a little while around the field, up & down the dirt road a time or two, and at least 50 laps around the house it didn’t fall off, or even come loose. I even shot a short video that I didn’t post any where but if enough of you want to see it I can add it to this page later. An S4 in this mount actually makes a decent video if you can get the orientation right. This was more than enough of a test to convince me the mount was going to hold up just fine. So now it was time to check the water resistance of the case so I fastened it to the front rack of this ATV and took it out to play in the rain, at night.
After all of this I opened up the case and found that my phone was completely dry and safe, and while I still would not actually submerge it in pond or anything like that I am now convinced that this case properly installed and closed will keep your phone dry and safe during any rain storm you are going to encounter out on the road or trail. After all the Brits who sell this product obviously know all about riding in the rain.
It is a large bulky case, and yes in bright sunlight the screen can be hard to see, but if any of you have a touch screen phone that is easy to see in direct sunlight, I want to see it, because at this time such a phone does not exist. The charger is easy to install, but if you are cutting off the plug and hard-wiring it to your vehicle be sure to connect it to a switched circuit or install a separate power switch as the charger has an LED that is always on whenever power is present. I just installed a DIN outlet so that I could unplug it. It would have been nice if the mount were taller and had more adjustment for position. They do make one one but I admit to being a cheapskate especially when dealing with products that I am not familiar with.
Here’s a shot of it attached to the bars of my main ride with navigation open, ready for me to go get lost & then find my way back home. Having used this mounting and charging set up for a few hundred miles on four different vehicles I am happy with it.
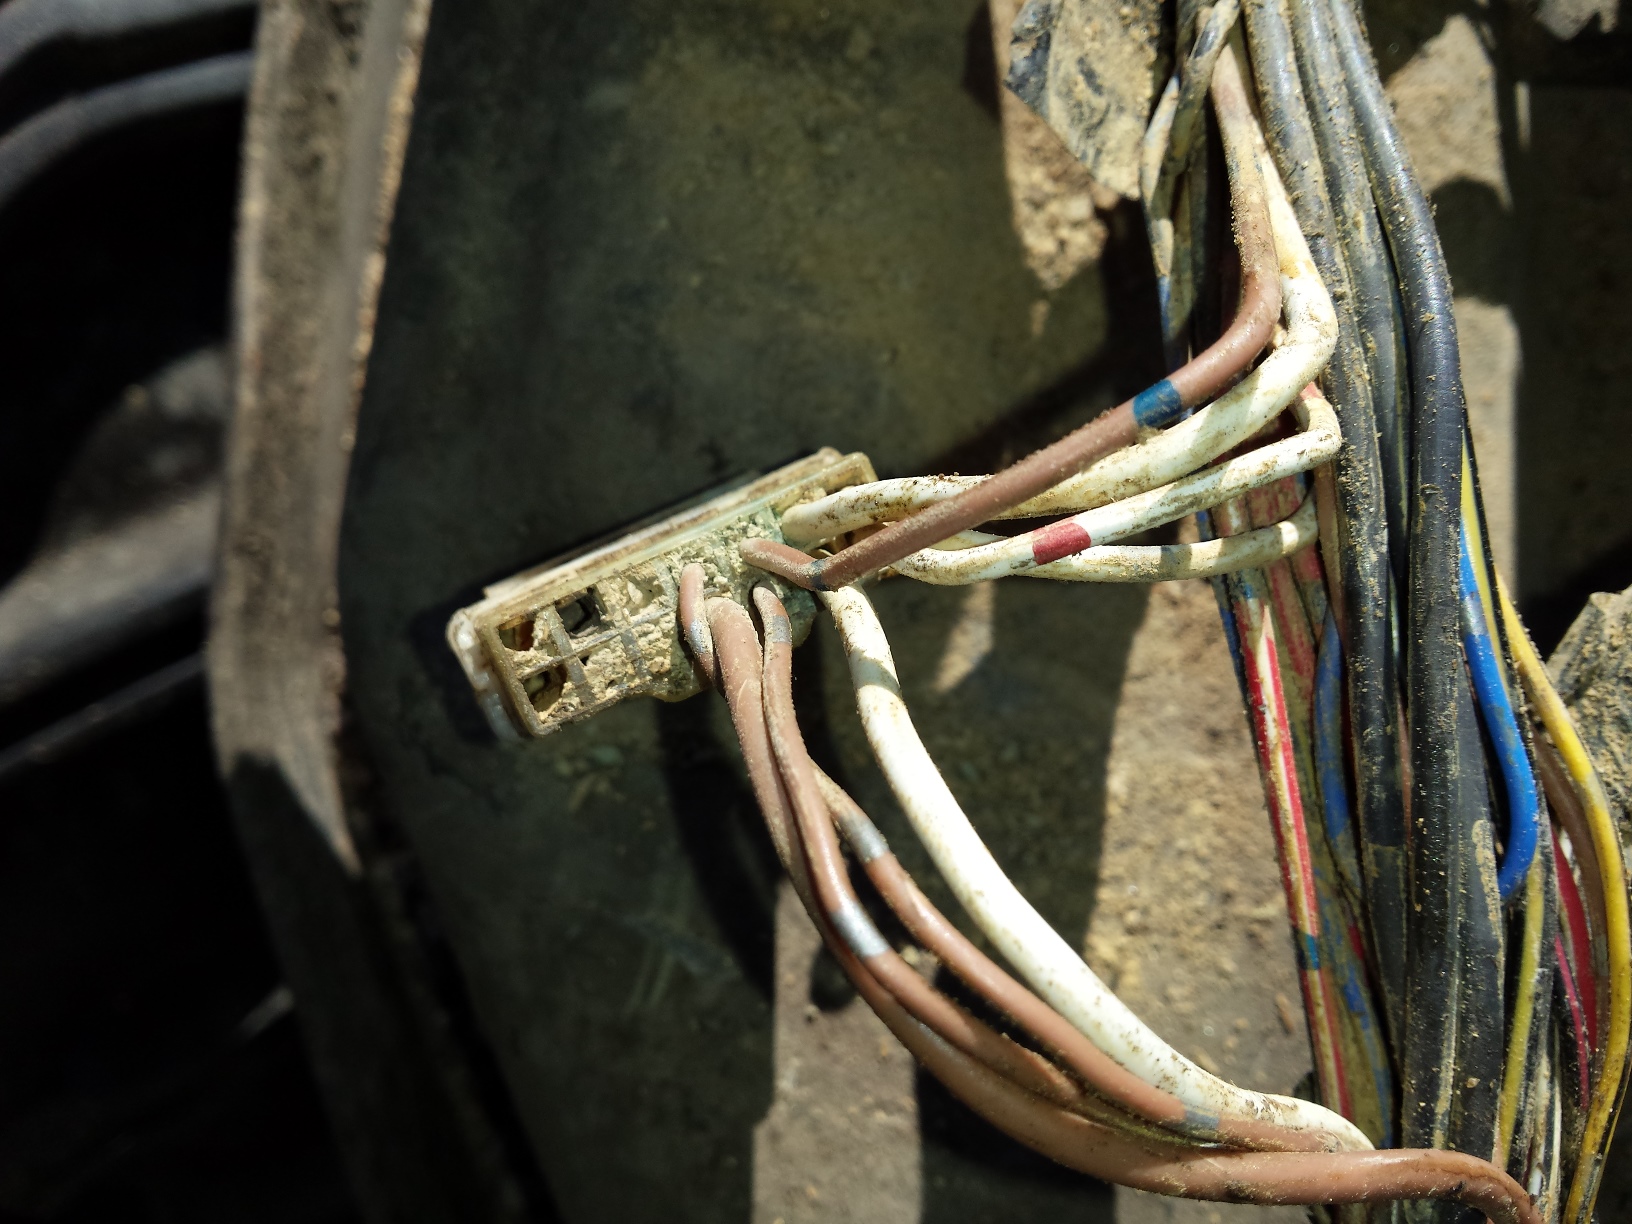
This is a unique problem that affects 2005 & 2006 Kawasaki Brute Force ATVs, you would think that by now all of these would have been fixed already but every now and then one still shows up. Anytime you have any electrical problem with one of these four wheelers this is the first thing you should check. Battery not charging, 4wd switch not working, lights flashing, or any other electrical fault of any kind you should remove the rear fender unit and check the wiring harness for a rectangular bulge like this. There are two of them one at the rear over the gas tank & and one almost in the middle. Usually it is the one in the rear that causes the most problems. This is the front one in this picture. The next picture is of the rear connector, notice that it is packed with mud despite the fact that it was sealed up inside of a tightly wrapped electrical harness. This causes either broken connections or direct shorts depending on how your luck is at the time. A couple of the wires just fell out of this one. Although I have heard of these connectors failing on machines that were not abused, in all honesty if you just keep your late model atv & it’s computer controlled engine out of any water deeper than the top of the differentials you are unlikely to have any problems. I am not going to give you a step by step tutorial on this repair, but will give you links to a couple of excellent ones that already exist on the great tool know as the internet. The first one is at the Mud In My Blood forum and you can get to it by clicking here. One thing that is incorrect in this one is that the author thought that the factory had fixed it starting in ’06. I can assure you they did not as the pictures above came from an ’06 model that I fixed yesterday. Another great one is found at youtube if you would prefer to watch a video, just click on this link right here. What ever you do be sure that you seal your final connections up tightly before re-wrapping the wiring harness and taping it back up. Go play in the mud again just remember it costs cubic dollars in repairs to keep using your land vehicle as a boat or a submarine! Unless you get an Argo 😉
If you liked this post or found it helpful.
Could I please ask a favor of you? Chase is giving away 20 $100,000 grants to small businesses this fall. In order to be considered for this award I have to collect 250 votes for Motopsyco by June 19th 2015. Please click on the picture below and vote for Motopsyco to be eligible for this grant program.
People keep doing a repeated search for, “four turns out from the seating of fuel screw of keihin 4 stroke carburetor do get more mileage in motorbikes.” The answer to this is no. The mixture screw should be correctly called the idle mixture screw, as it only controls the air/fuel ratio at idle. This screw should only be adjusted as needed to correct the idling of your engine & the very beginning of the transition off of the idle stop. And even then all other factors affecting your engine, such as spark & air should be checked & corrected first. Normally the only reason you would turn the mixture screw out that far, would be on a high performance engine that has been re-jetted for maximum power. Of course an engine like that gets the minimum fuel mileage.
On a stock engine if you turn the mixture screws out 4 turns you will develop drivability problems, and there will be an increased risk of engine failure due to overheating caused by an excessively lean mixture at idle. The other problem is that with the screws that loose is that you run the risk of them vibrating out and leaving you stranded. Plus your gas mileage will probably go down due to the way you have to twist the throttle to compensate for the drivability problems.
Since this is a popular topic amongst those who commute by motorcycle, sometime soon I will do a post on how to maximize fuel economy. Except for basic maintenance none of it will involve any work on the carburetor.
I was contacted and asked to review a rather unique device designed to prevent face shield fogging. Since cold weather riding is the best test of anything that claims to prevent fogging inside of a helmet, I told the maker to ship me one to test and in their generosity they also sent me one to give away to a lucky reader. I’ll tell you how you can win a Fog Thief of your very own at the end of this review.
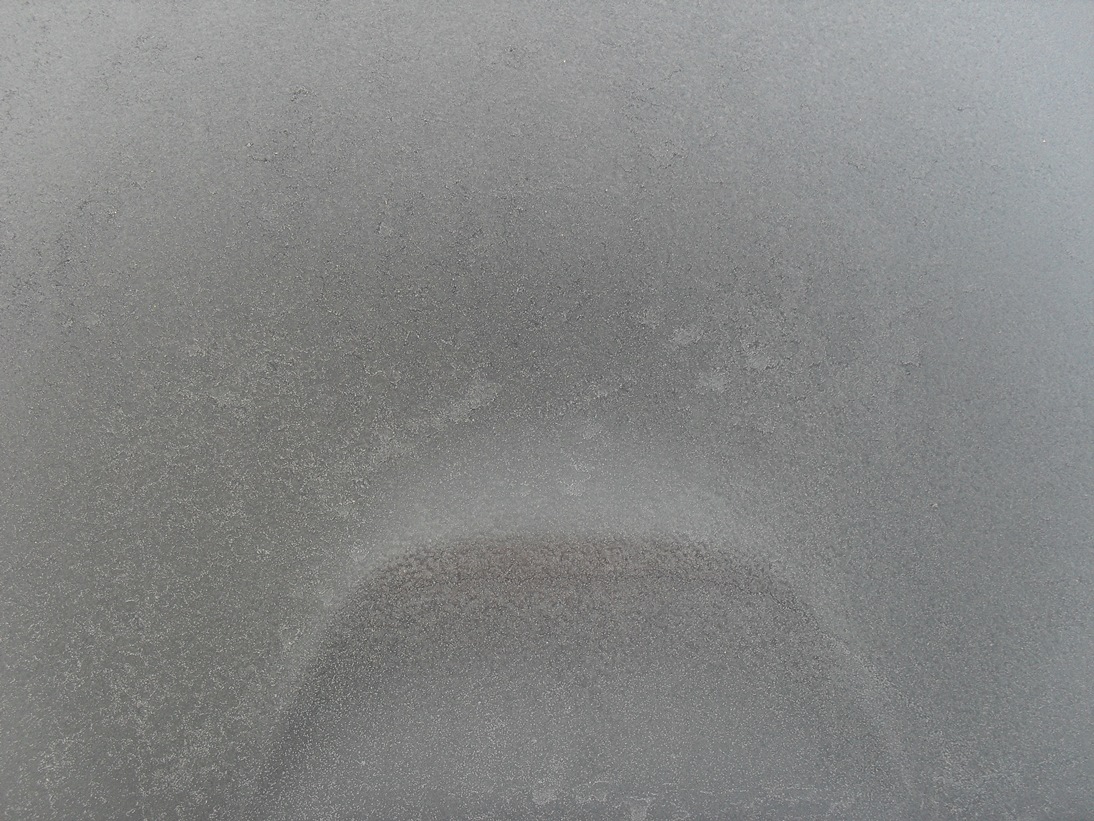
We start out on a chilly Good Friday morning, according to my local weather babe on t.v. my hometown was supposed to be at 34 degrees Fahrenheit, but I think whomever keeps that particular thermometer must keep it under a heat lamp. Here is a shot of my car’s rear windshield at 6:30 a.m. 34 degrees my ass.
thick frost on my car windshield this morning.
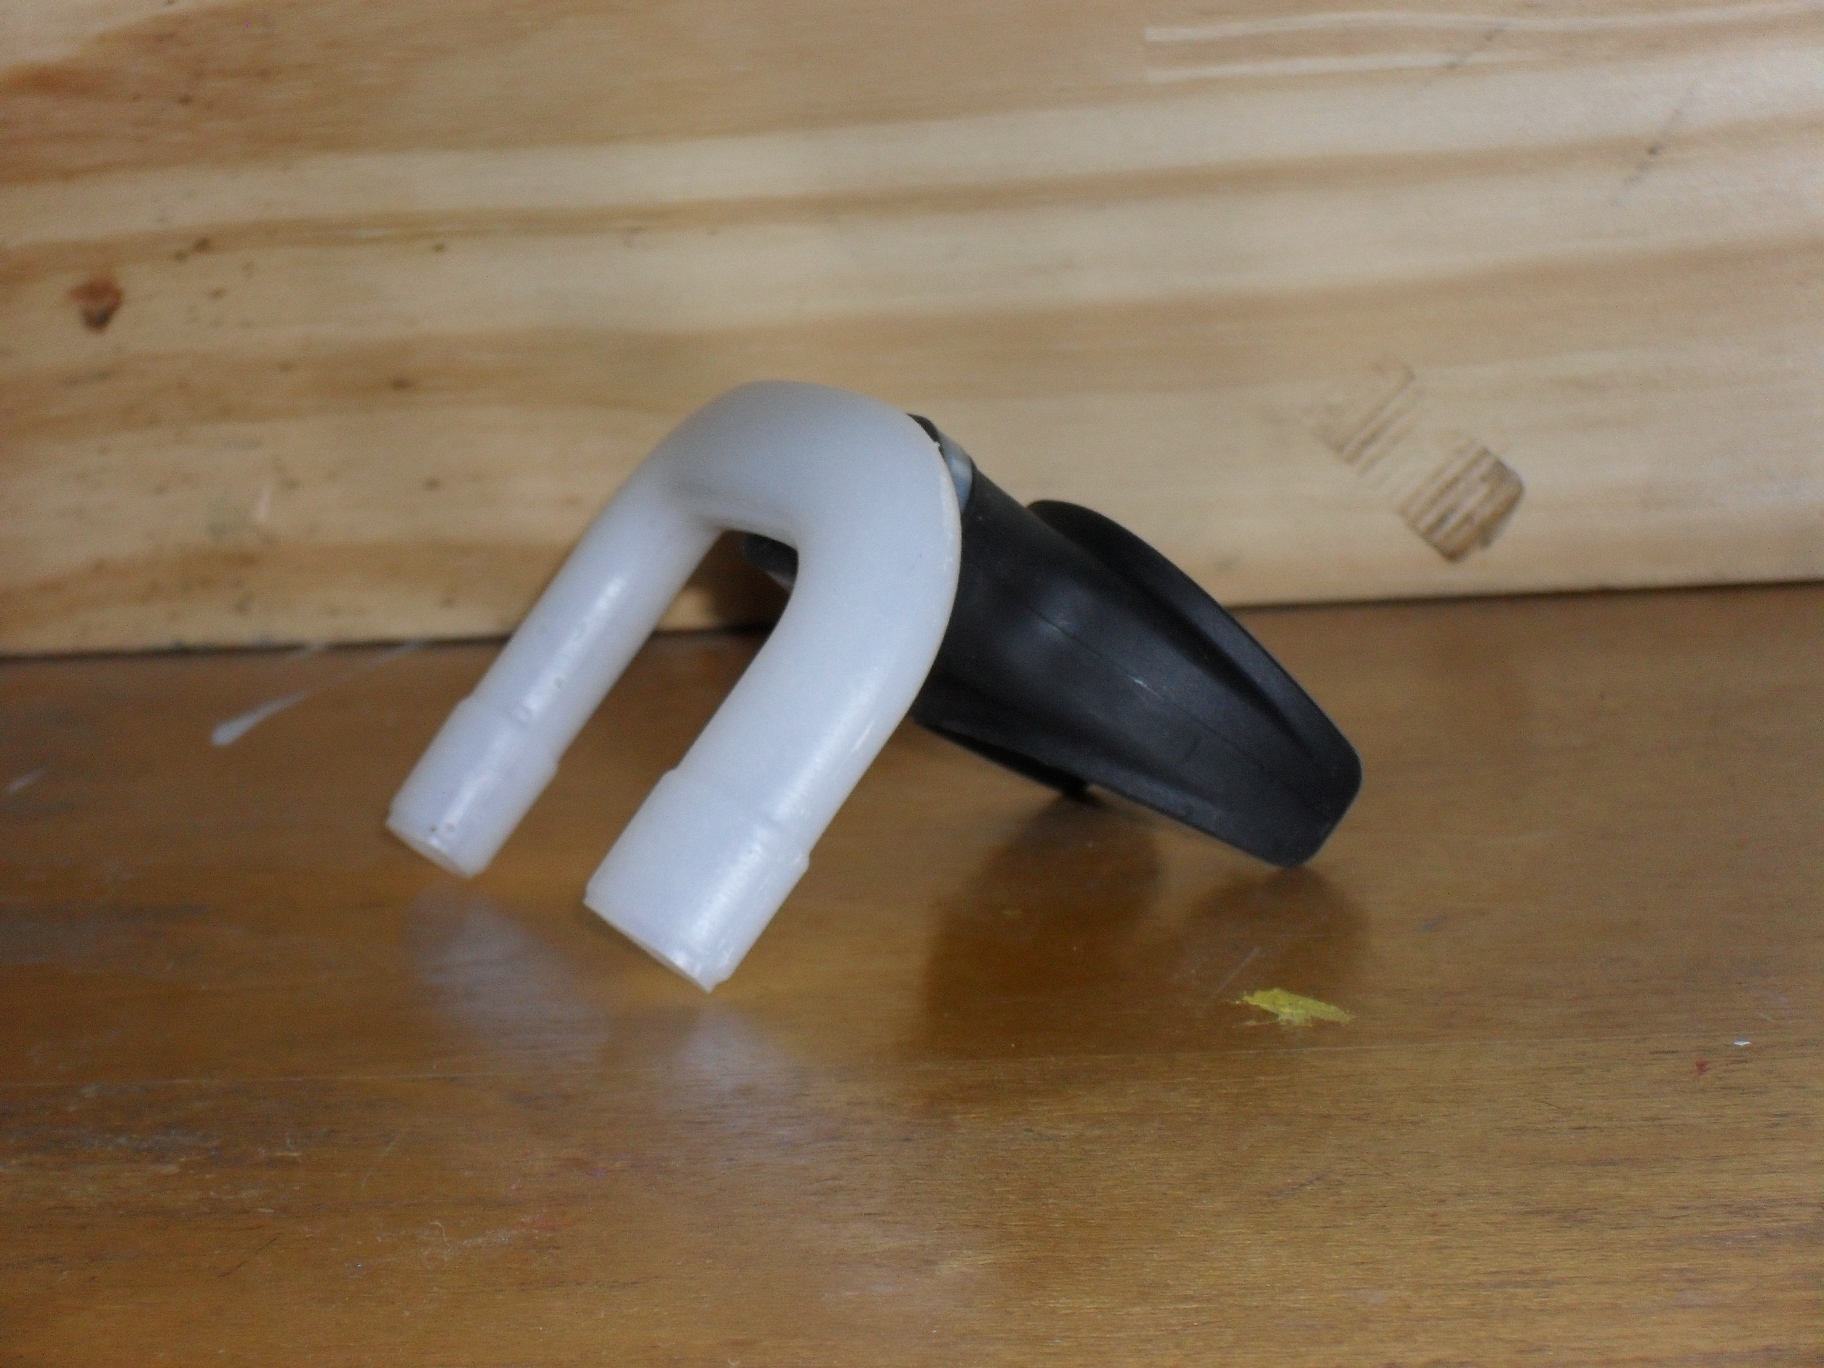
Yesterday when I got home from the office a fedex package from Montie Design the firm that is helping to develop and market this product, was waiting for me with two samples of the Fog Thief. It is a very simple design, imagine if you will an upside down snorkel. The mouth piece seems to be directly modeled from a scuba mouth piece, but instead of a hose leading to a tank there is a u shaped plastic snorkel that simply points down and out of`the bottom of your lid. Such a simple seeming idea you wonder why you have never seen it before.
Now if you are not used to using a snorkel or scuba gear this will take some getting used to. Initially it would trigger my gag reflex after a few minutes, but I got used to it. The mouth piece is top grade neoprene rubber and very tough, I am sure you could eventually chew through it, but you can really clench your teeth on it without any damage to the mouth piece or your teeth.
The company brochure claims that it will work with all helmet designs and it worked with mine but it was a very tight fit, that shifted the position of the Fog Thief in my mouth. On the plus side the tight fit meant that it was not necessary for me to keep my teeth clenched to keep it in place.
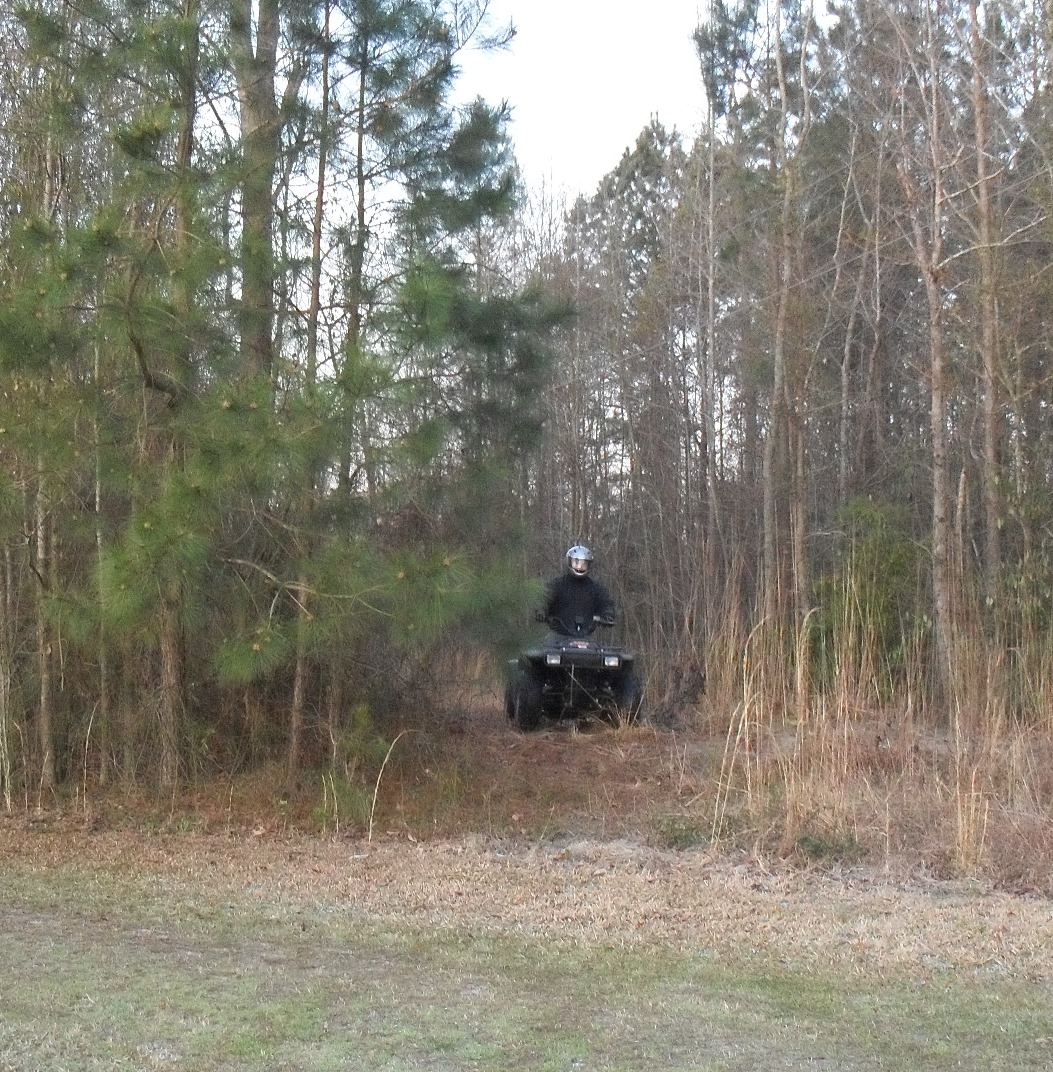
For this test I decided to try a different approach and go offroading instead , this mint condition ’99 Arctic Cat 300 4X4 just happened to be sitting in my shop this week. This is as fine a utility atv as you can find on the planet and makes a great trail crawler.
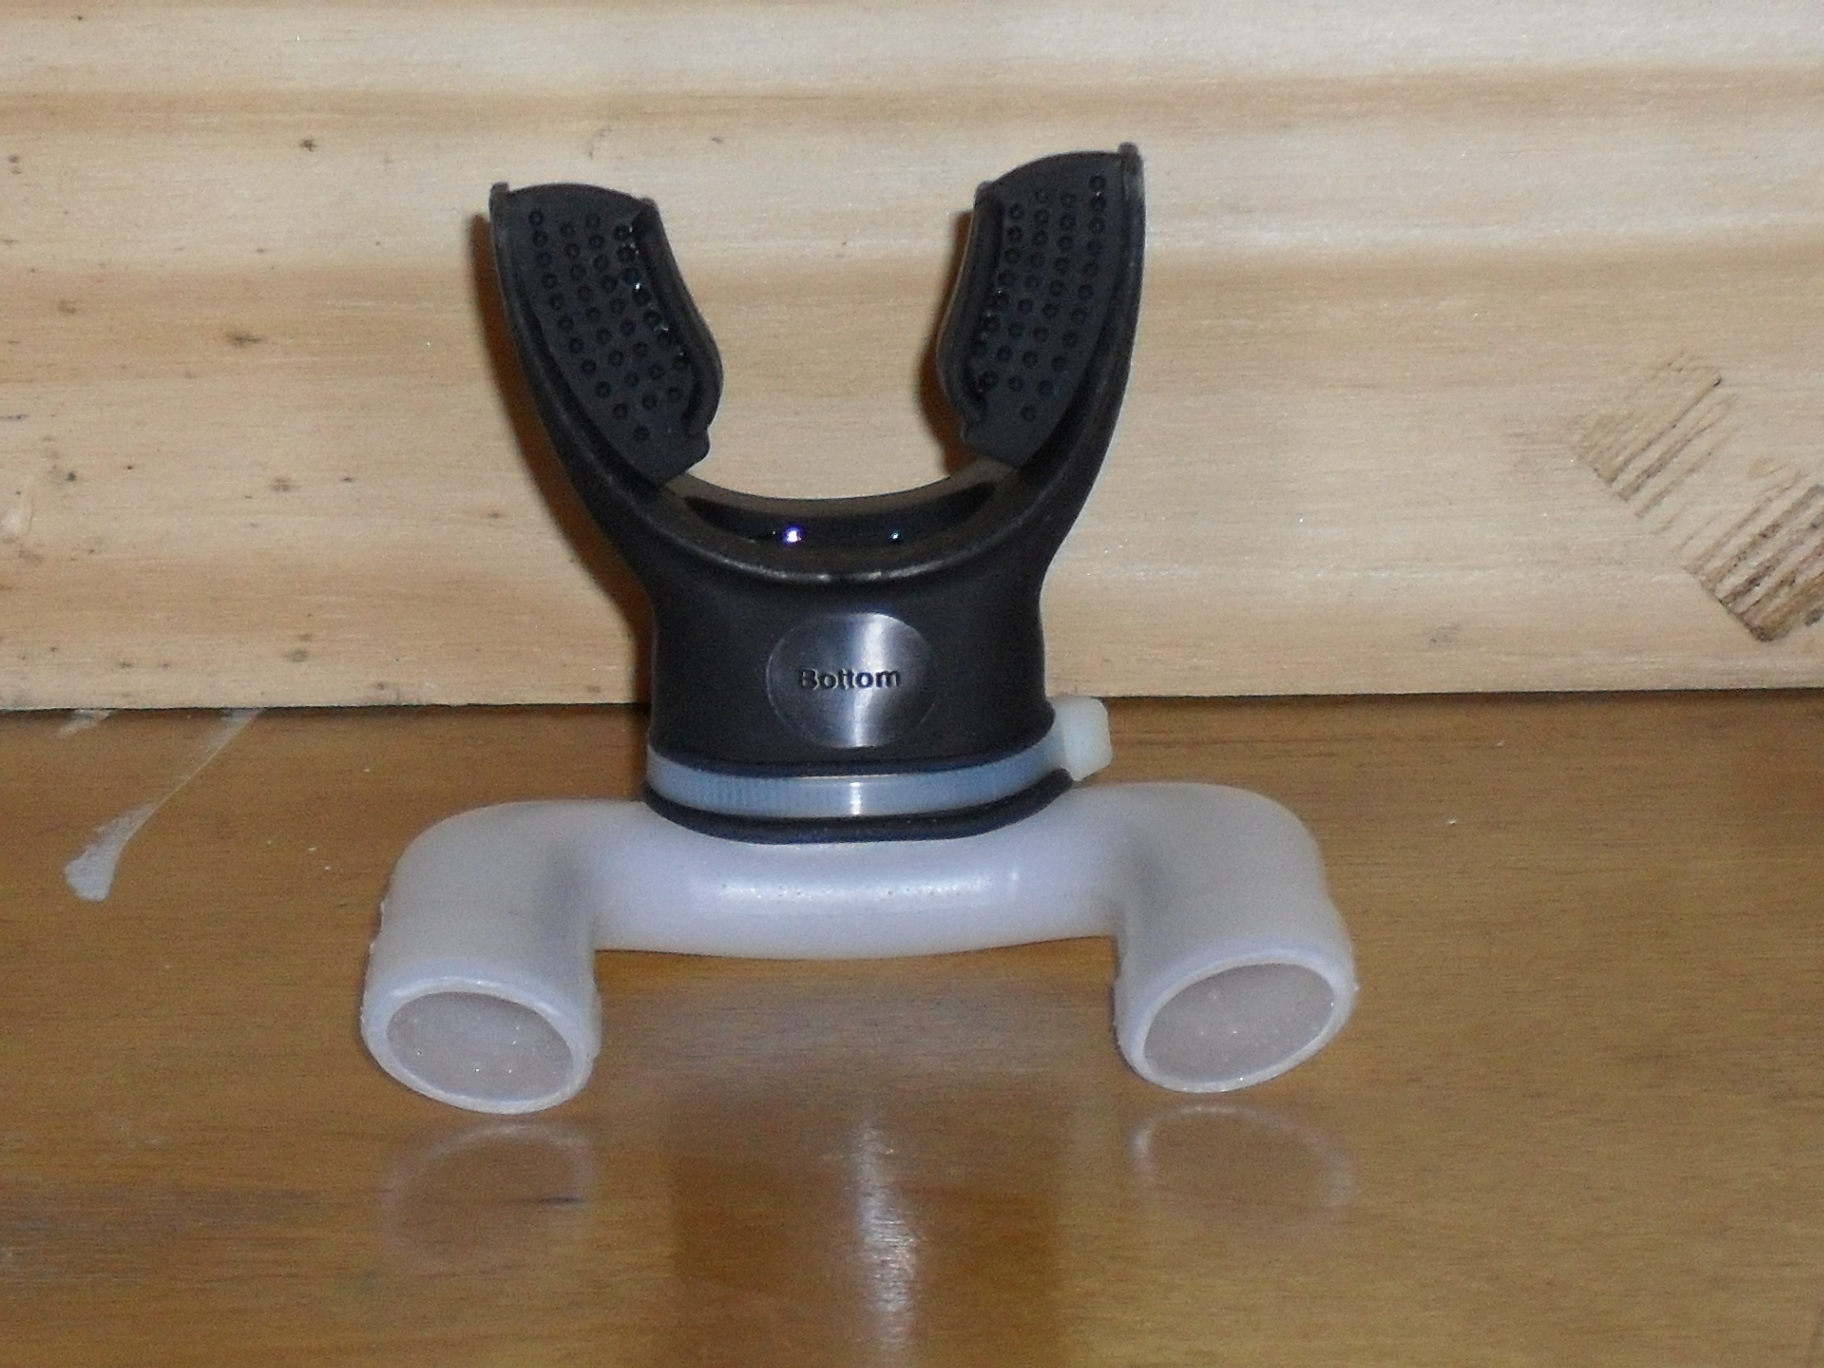
With your helmet on the Fog thief is barely visible.
the Motopsyco on a 300 4×4 Arctic Cat
With your helmet off or open the Fog Thief looks kinda ridiculous.
Can you spot the walrus in this picture?
Does it work as advertised? Yes it does, as long as you remember to breathe through your mouth. A couple of time I got excited and forgot to do this & fogged up my shield. Readers with a sharp memory will remember that I used this helmet to test an anti-fog spray a few weeks ago, but to make this test fair I cleaned the shield with plain soap & water to remove the anti-fog spray. After about twenty minutes or so I was able to relax & get used to it but occasionally did have to stop and wipe away some saliva that leaked out around it. Chances are that if you use an open face helmet with a shield, or any other helmet that has enough room for the Fog Thief to sit squarely in your teeth this probably will not be a problem for you. I really think the fitment and usability will be different for each individual and the only way to find out is to try it for yourself.
It worked well for me but I did not always remember to breathe correctly, every now and then I’d have these little moments and forget. You know how it goes, you spot a little hill & get a little air, Yeehaa! Then you forget and exhale through you nose, oops fogged up again. Oh well you can’t do too much playing like that on this kind of atv anyway.
coming home on the Arctic Cat ATV
Every new item has it pros and cons, let’s start with the cons;
1. Definitely requires some getting used to especially if you have never used scuba or snorkel gear.
2. Fits better under some helmets than others
3. Requires a certain amount of self discipline or nose plugs to use successfully
Now let’s go with the pros;
1. If you do your part it works as advertised!
2. Top quality materials
3. Made in the U.S.
If you are a serious cold weather rider, snowmobiler, or or any kind of racer and you have trouble with the face shield fogging this just might be the solution you are looking for. For more information or to purchase one to try see the Fun Projex website
Now for the give away; I have here a brand new never used Fog Thief that I will be giving away on April 20th 2013. All you have to do is click the Facebook link at the upper right hand corner of this page and like the motopsyco.com Facebook page and leave a comment with the words Fog Thief in it. Alternatively if you do not have a Facebook account or don’t want to use it you may leave me a comment below, but please remember that comments are moderated and may take a day or two to appear. If you have already liked my FB page & would like to enter the drawing, you can just leave a comment as described above.
On April 30th my lovely assistant will draw one lucky winners name from a hat and I will send that person a Fog Thief of their own to try out!
Peace Y’all
‘Psyco
Peace Y’all
I took this shot while out test riding the Fog Thief & wanted to share it with you.
2012 was a very good year for motopsyco.com, I hope to entertain and inform you even more in the years ahead! Thhank you all, come back often and bring friends.
Peace Y’all
The WordPress.com stats helper monkeys prepared a 2012 annual report for this blog.
Here’s an excerpt:
600 people reached the top of Mt. Everest in 2012. This blog got about 12,000 views in 2012. If every person who reached the top of Mt. Everest viewed this blog, it would have taken 20 years to get that many views.