Vapor Blasting NOS Parts

Vapor Blasting NOS Parts

Confession time, on of my favorite things about the whole antique & vintage motorcycle restoration business is hunting down good deals on new old stock parts. It’s astounding what you can find for these old motorcycles sometimes. TheĀ  joy of finding these 30, 40, or even 50 plus year old gems is often dulled by the fact that when you get them, they look old. Now this may be fine if you’re replacing parts on an original machine with a bit of patina as they will blend right in. But if you are doing a full restoration this just wont do. Let me give you a couple of examples using some parts that I have recently purchased for my current personal project a 1972 Honda SL100 K2. These will illustrate why I recommend vapor blasting NOS parts. When I removed the fork top bridge from the bike, one of the fork tube clamps had broken completely off. A brand new one was sourced on Ebay for a reasonable price, and this is how it looked when I took it out of the box.

Vapor Blasting NOS Parts

NOS top bridge before vapor blasting.

It’s just a little dull & oxidized, plus it has a little bit of magic marker writing on it. Even though it’s obviously 100% new & unused it still looks old, so I put it through the vapor blaster. 15 minutes later it looked like this (below)

Vapor Blasting NOS Parts

NOS top bridge after vapor blasting.

Vapor blasting NOS parts does not give them a polished finish. What it does is restore the aluminum so that it looks like it was freshly cast. Because this process has a light peening effect it closes the pores on the aluminum so that it stays cleaner longer. No clear coat is needed just occasional cleaning.

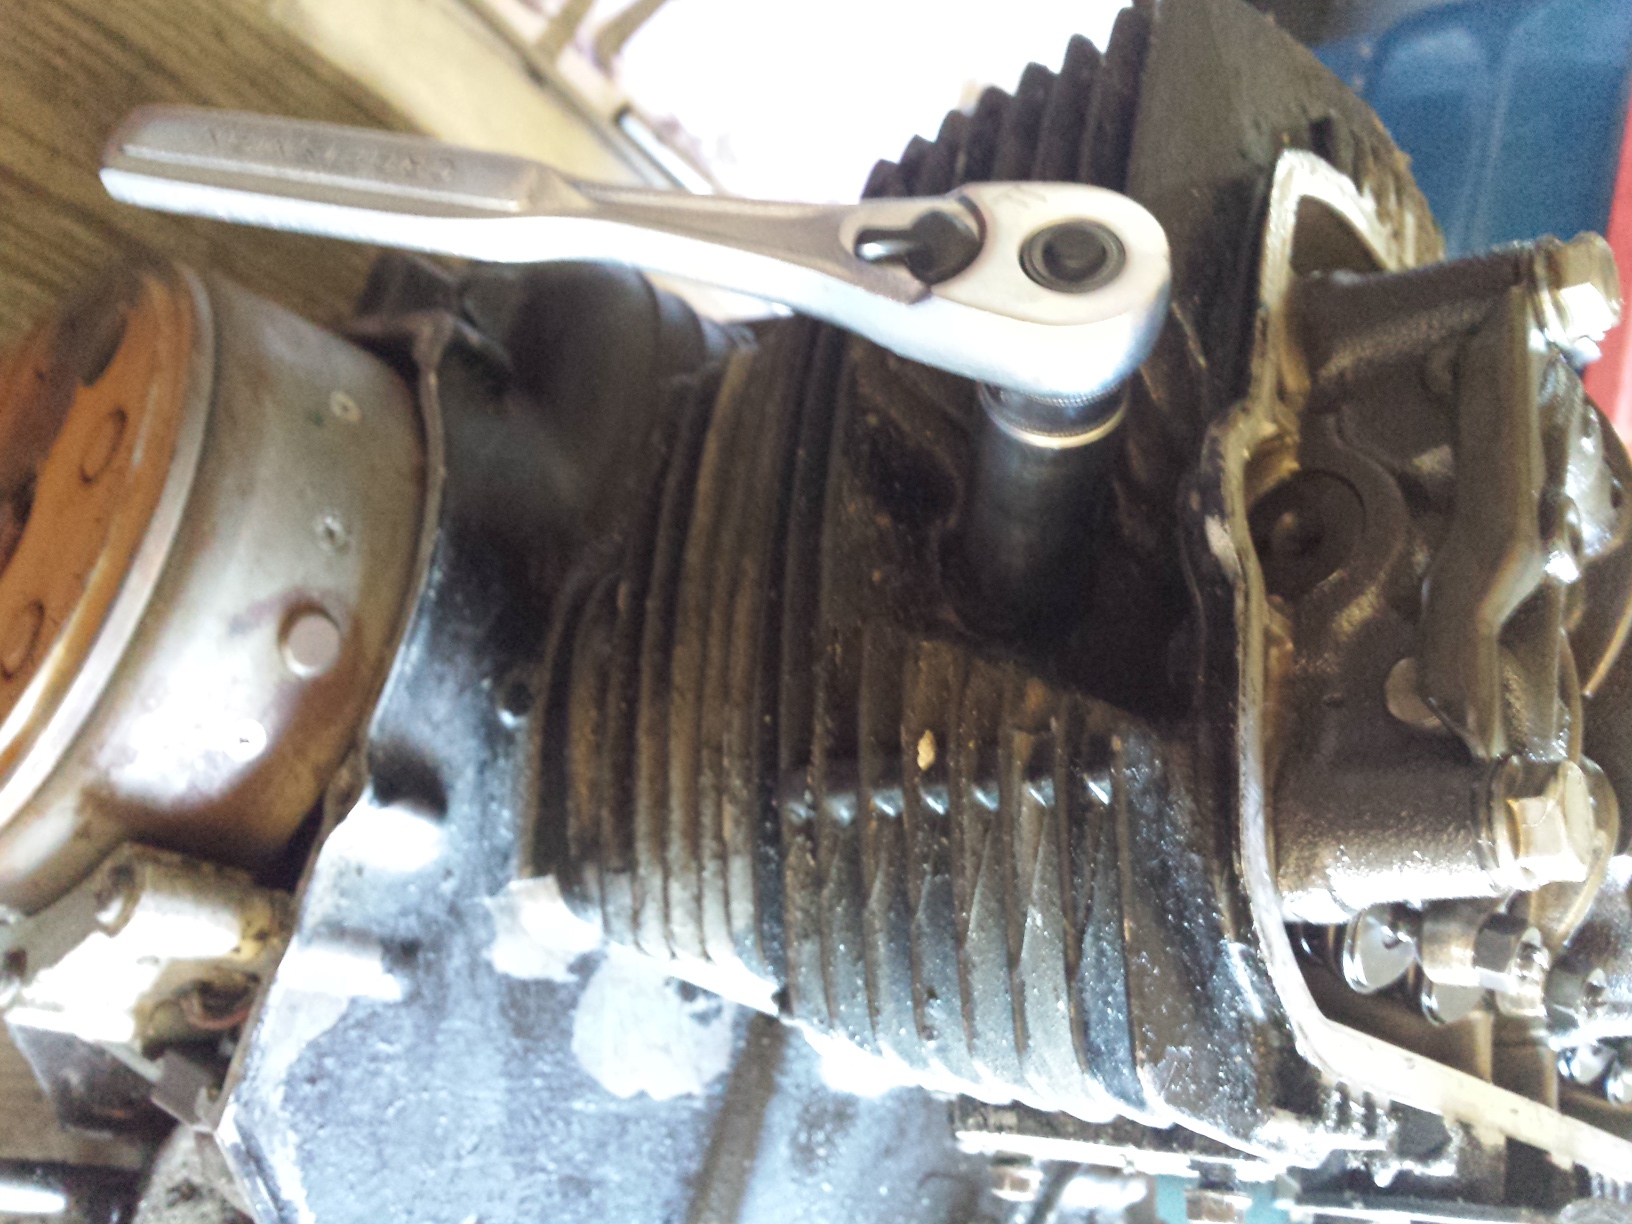
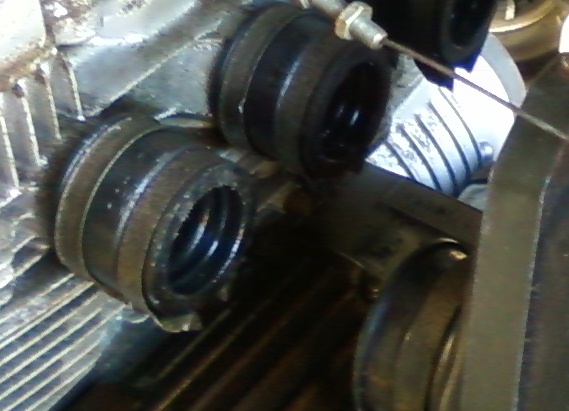
Here’s another example, a freshly vapor blasted cylinder head sitting on top of a brand new old stock cylinder. The new cylinder looks positively dull & dirty compared to the head, so after I finished all my clean up honing, ring gap checking etc. I ran the cylinder through my vapor blaster to clean up the appearance of it.

Vapor Blastin NOS Parts

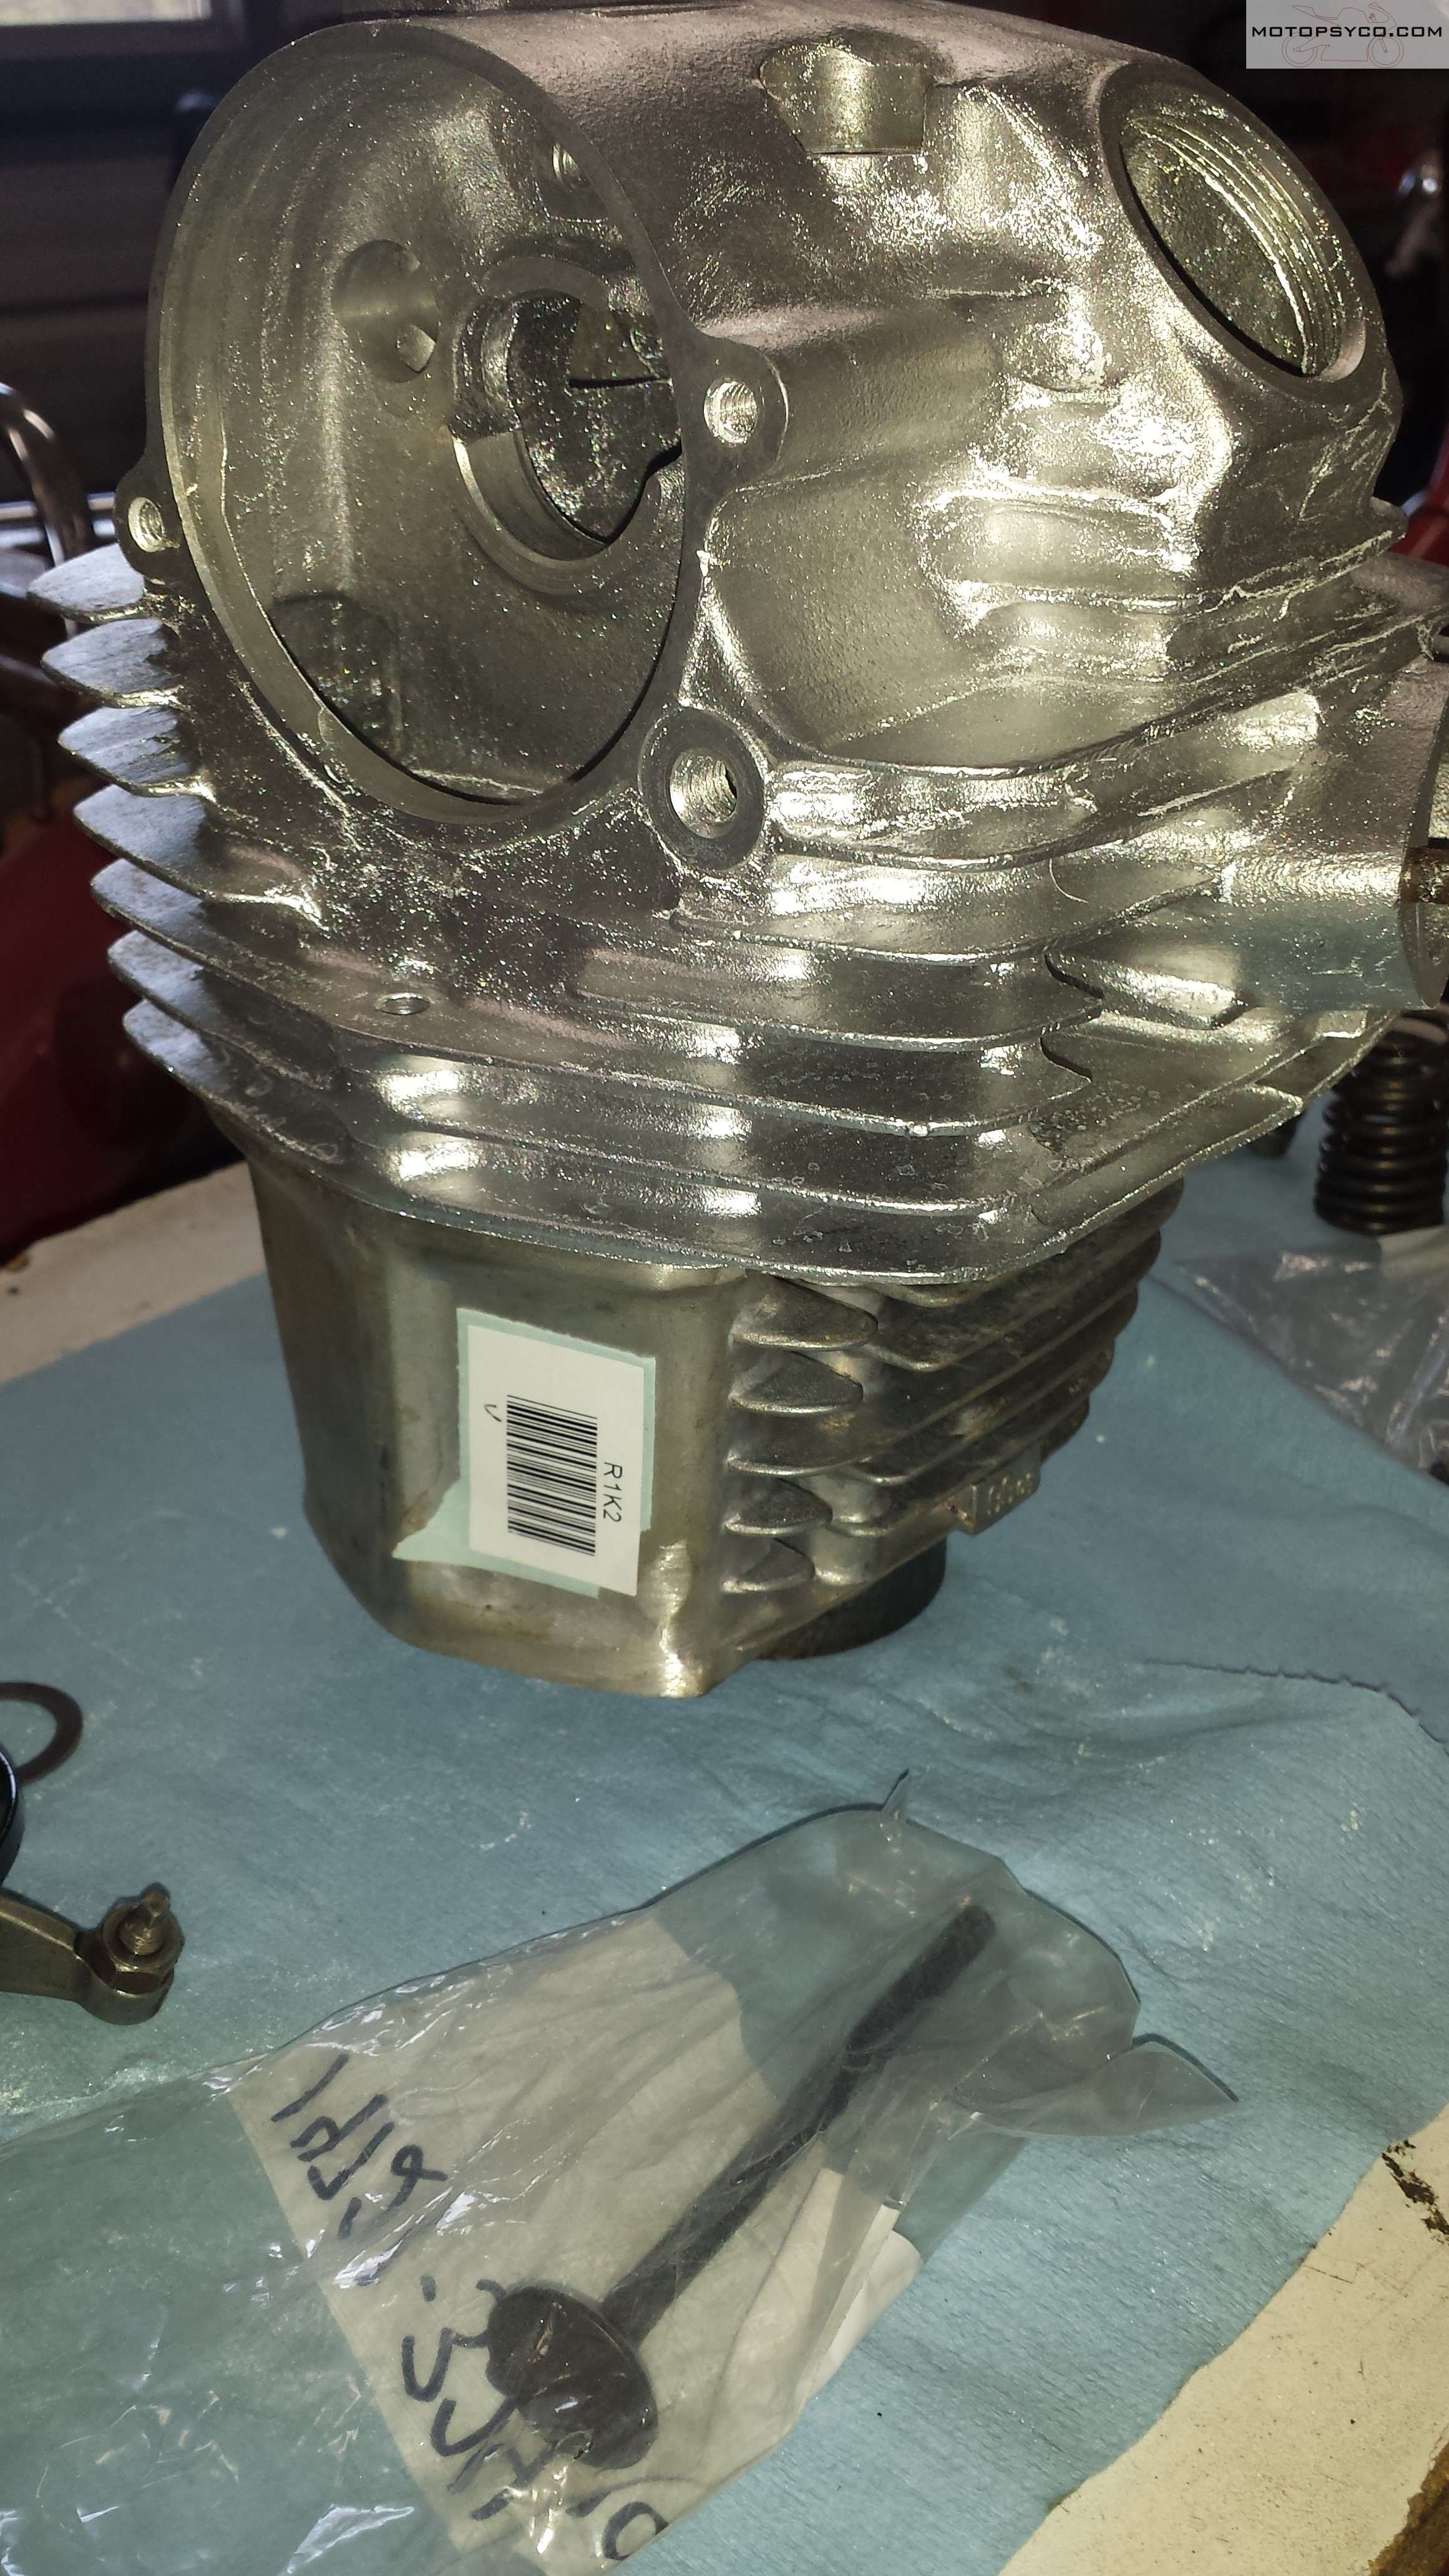
NOS SL100 cylinder before vapor blasting.

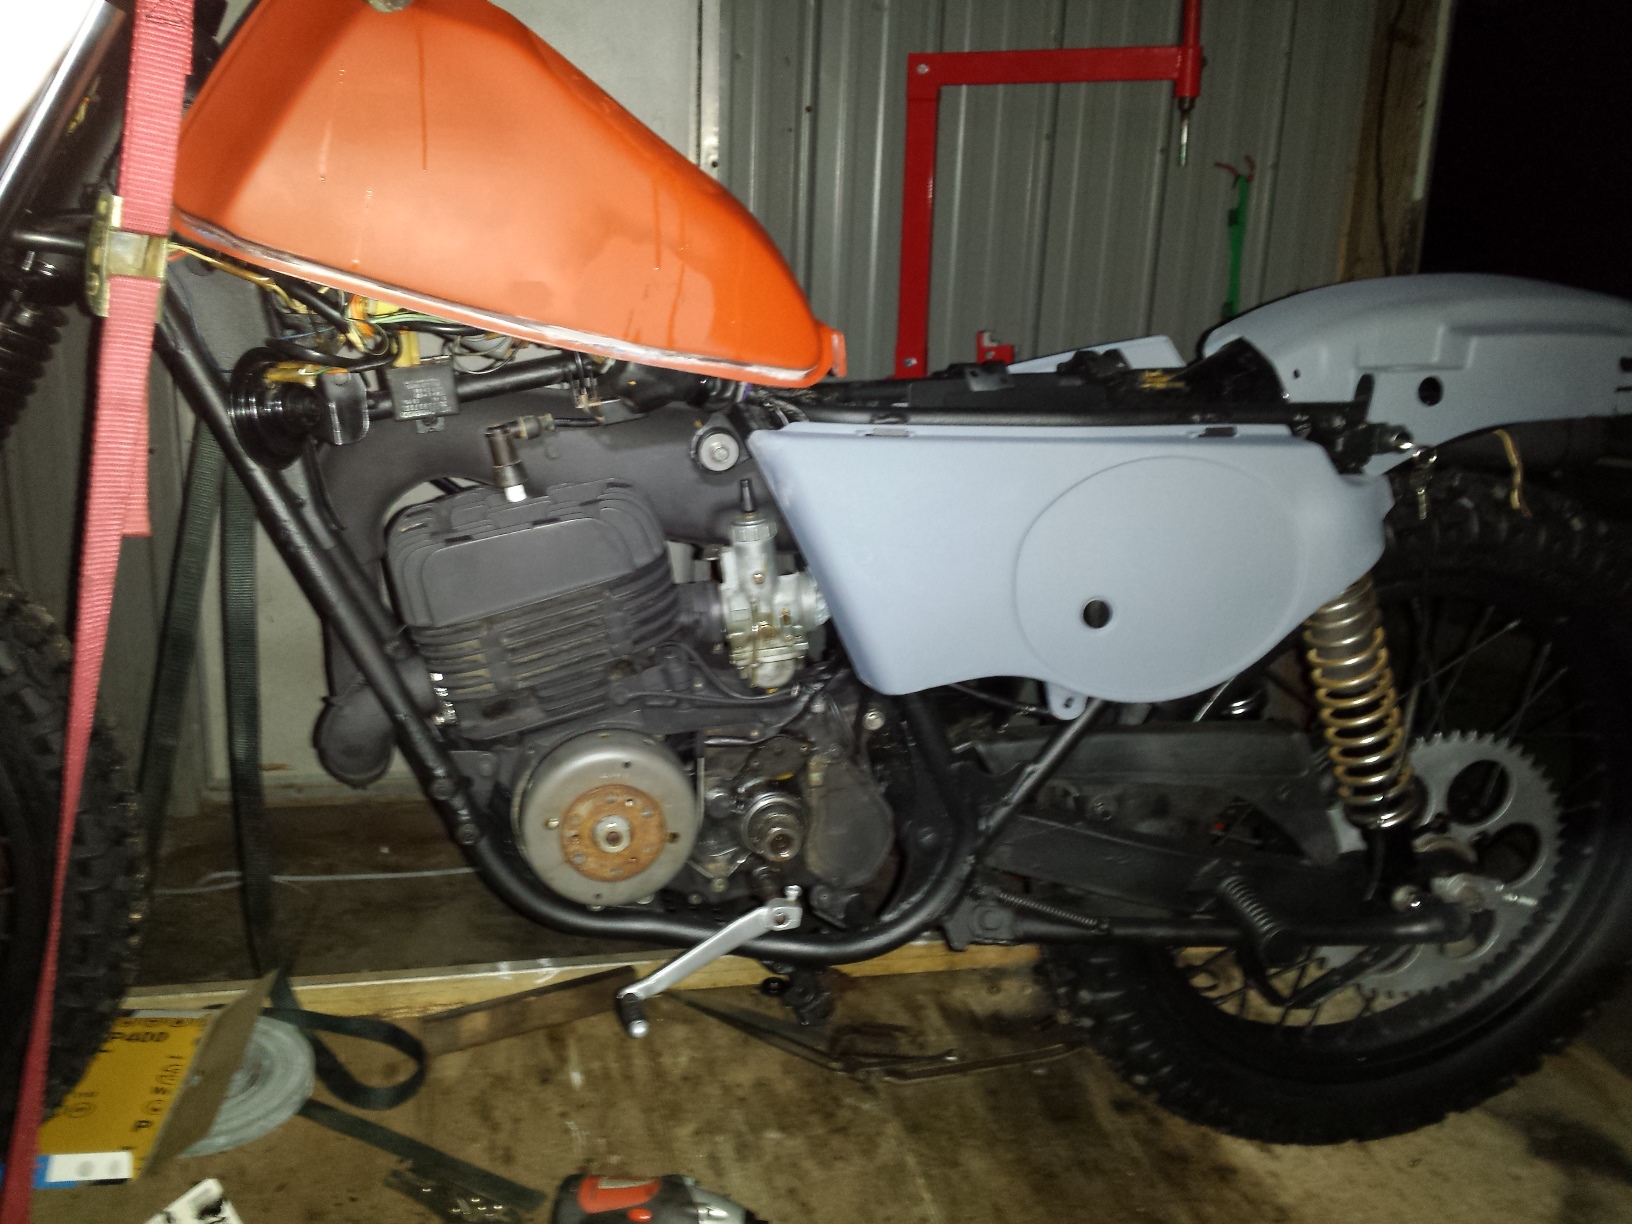
If you look at the assembled engine below you can see how much better the cylinder looks and how well it matches the rest of the bare aluminum parts on this engine.

Vapor Blasting NOS Parts

Complete SL100 engine after vapor blasting.

Seriously if you’re performing a restoration on a motorcycle and you are not happy with the appearance of your new old stock aluminum parts find a shop near you that does vapor blasting.

Honda Ascot FT500 Junkyard Dog

Honda Ascot FT500

Honda Ascot FT500 coming home with me.

I had sworn that I wasn’t going to do this anymore. It’s been several months since I had a hit & experienced that euphoria. It’s tough being an addict but I was keeping clean and was even beginning to straighten out my life & get my act together. We all know the first rule to overcoming an addiction is to stay away from temptation.

at Tired Iron Classics

Then yesterday I ran into my dealer, and he’s got the best stuff on the east coast. Next thing I know money & merchandise were exchanging places. If you’re a collector & restorer there is no better feeling than buying a new old pile of junk motorcycle. Especially when it’s a fairly desirable model like the Honda Ascot FT500 that you actually really wanted but couldn’t get when you were younger. Oh man it felt so good! I’m still riding that high today as I type this.

Trashed Honda Ascot FT500

The price on this old Honda Ascot FT500 was righteous enough that the condition really didn’t matter. With dirt cheap motorcycles you just need to go ahead & assume that you need to replace or repair everything. That way you avoid the disappointment that comes with having high hopes.

Trashed Honda Ascot FT500

I love it when they have fuzz growing in the cylinder fins.

Last night after supper I grabbed a beer, & removed the timing plugs so I could try to turn the engine and it’s seized but that’s okay as the plan is to strip it all the way down & build it back as a fire breathing hot rod.

Trashed Honda Ascot FT500

This one is a 1982 model. One of the best things about the Honda Ascot FT500 is the funky flat track styling, it’s the closest thing ever built to a factory street tracker. I’m not a fan of the rectangular headlight that instantly dates what is an otherwise timeless design. Beside it’s rusted out & will be tossed in garbage anyway.

Trashed Honda Ascot FT500 wheel

One of the best things about this bike is that it has cast aluminum wheels that are not Comstars. All of my other bikes except for my Helix scooter have wire wheels and quite frankly they are a pain in the rear to restore & maintain

Honda ascot guages

it’s so 1980s

So how did a motorcycle with less than 3500 miles wind up in such horrible condition? My guess is the the original owner thought that it needed a new starter, so he took the old one off & went to his local dealer for a replacement. Once they learned the price of a new starter they either swore off motorcycles altogether or went & bought another bike, leaving this poor old thing to die out behind the barn.

trashed Honda Asct FT500 rear

If the engine had not been seized I’d go ahead & start working on it but since it needs a full overhaul it will wind up in the corner of the shop with the other “ladies in waiting” where I’ll walk by occasionally and marinade it with penetrating oil until I complete my 2 current restorations. This one definitely will not be restored but will end up being a fairly nice restomod instead.

1982 Honda Ascot FT500

<1982 Honda Ascot FT500 >

Until next time

Peace Y’all

UPDATE 2023 I never finished this one and passed it on to someone else who wanted it.

Hurricane Matthew VS Motopsyco

I have returned home to Motopsyco World HQ in South Carolina, after 3 wonderful fun filled days at the Barber Vintage Motorsports Festival. There are lots of photos and even some good video to share but unfortunately due to the situation with aftermath of Hurricane Matthew it will be a few days before I have power and can sort them all out to share them with you.

minitrail 50 sidecar

Coolest sidecar outfit ever.

Meanwhile enjoy this picture of the best looking sidecar outfit at the entire show and remember that once the power is back on that Motopsyco will be back!

’77 Honda CT70 A Junkyard Puppy!

This ones a little bit too small to be a dawg

<CT70 in back of Tacoma>

That’s why I’m calling it a puppy. I’ve been searching for a Honda ST or CT motorcycle to restore for a while now, so when this 77 Honda CT70 popped up on the local Craigslist for a bargain basement price I jumped on it asap. When searching for gems like this, if you find one going (relatively) cheap you should be prepared to go see it immediately.

<Junkyard fresh Honda>

It’s got a lot of neglect but still it should be a very cool project. The person I bought it from had started to restore it somewhat with some fresh Chevy engine orange spray paint & new decals. Then they painted all of the chrome black. Unfortunately, they could never get the engine to run so they just gave up & lost interest in it.

<ct70 messed up wiring>

<damaged Honda CT70>

I have no clue how the left handlebar was broken, but that’s okay, it will replaced with a N.O.S. or authentic reproduction. The plans for this one are very simple, it will be as close to a concours quality restoration as I can get it. There will be some internal upgrades to the engine, steering, & suspension but the outward appearance will be 100% box stock.

<Honda Mini Trail 70>

Mini Trails Rule!

Thankfully there’s still plenty of new old stock parts left out there along with tons of reproduction stuff

<Mini Trail needs restoration>

If you drink a beer or two, and squint at this picture long enough you can almost see a restored 77 Honda CT70.Ā  Can’t wait to get started on it.

Peace Y’all

BTW, if you don’t have time money & space for the real thing, why don’t you try one of these little gems below.


1957 Zundapp Junkyard Dog

Here’s some real motor archeology for you, a 1957 Zundapp. I am fairly certain that it is a Super Sabre, feel free to let me know if I’m wrong.

Zundapp Motorcycles were built in Germany beginning inĀ  1919. The KS750 sidecar motorcycle produced for military use was probably their most well known product, but they also made sporting two stroke singles like this one and a wide variety of scooters as well. They had a reputation for being solid well built machines.

<1957 Zundapp>

1957 Zundapp

Shame I couldn’t have gotten hold of it 20 or 30 years ago.

<1957 Zundapp>

<1957 Zundapp speedo>

<1957 Zundapp front hub>

Got Rust?

The cylinder head doesn’t have any broken fins, wonder what it looks like on the inside?

<1957 Zundapp engine>

It’s a shame to see such a fine piece of German engineering in this condition.

<1957 Zundapp tank badge>

<1957 Zundapp>

The original ID tag is still in place behind the headlamp.

<1957 Zundapp>

At this point it is highly unlikely that I will attempt to restore this motorcycle. The plan is to carefully dissect the cadaver to see if there are still any parts that would be of any use to anyone who has one of these rare old motorcycles.

<1957 Zundapp>

1957 Zundapp Super Sabre

If this were a typical Craigslist ad here is where it would say, “tires still have plenty of tread left.”
<1957 Super Sabre>

If you would like to find out more about these motorcycles, or if you are just curious to see what this pile of junk used to look like visit the Zundapp Fool website by clicking here.

Peace Y’all

The 20 Foot Restoration Part 3

Mission Main Street Grants
<1981 Suzuki TS185 roller>

This old motorcycle is finally making it’s way back into one piece. It has new tires, wheel bearings, brake shoes, tapered roller steering head bearings, and anything else it needed to make it safe & reliable. Surprisingly enough even after 34 years of being beaten like a government mule, the engine & transmission are still in very good functional condition. This makes my life a lot easier.

Lets start with a quick look at the rear wheel & brake linkage before I started.

<TS185 rear wheel before>

<ts185 brake pedal before>

Yes I know I need my head examined for riding it for so long in this condition, but it was still a lot of fun!

<TS185 rear wheel after>

I had to replace the brake rod, adjuster and the lever. The rod & its hardware are new old stock parts, & the lever was simply adapted from a junked motorcycle.

<TS185 brake lever after>

This is the exact same brake pedal that is shown in the picture above. I straightened it with a torch, hammer & anvil, before cutting the end off of an old dirtbike footpeg and welding it to the brake lever.

<1981 ts185 carburetor>

I had to buy an entire extra used carburetor to get a couple of parts that are no longer available separately, and I’m still waiting on my throttle cable to arrive from England so for now the carb is just sitting here until I receive the cable.

While waiting on some other parts it was time to start some body work.

<motorcycle repainting>

Have I mentioned anywhere in this series just how incredibly nasty this thing was? Check out the red clay mud dried to the bottom of this tank.

<bottom of ts185 tank>

The side covers are decent used parts that only required minor work to repair, but the tank itself is actually requiring a fair amount of body work to make look good.

<20 foot restoration TS185>

It’s so tempting just to throw money at a project like this, and to a certain extent I have done that with the mechanical & safety bits. Since this is the 2o Foot Restoration the appearance of the machine will be handled in the most economical way possible, with a few cans of Duplicolor spray enamel. So many of the parts needed for this bike are either unavailable or priced beyond what I feel like spending on it, this is actually going to be a resto-mod more than a restoration. Plus the blue has to go, I want a tougher more subdued look for my trail bike so the color will be changed. No I’m not going to tell you yet, keep checking back (or just scroll down & subscribe) o see what it winds up looking like!

<ts185 right side primer bondo>

Peace Y’all


Honda CM400 Valve Adjustment

Today I’m going to show you how to perform a Honda CM400 valve adjustment. This basic procedure covers 1978-81 CM & CB400T Honda twins. This engine is from a 1980 CM400. Please refer to a proper CB/CM400 service manual to verify the exact procedures & specifications for your motorcycle. I will give the valve lash & misc. other tune up specs at the bottom of the page.

<cm400 valve adjustment tools>

Gather up the tools you will need along with a copy of the appropriate service manual. Please note that it is not necessary to remove the engine from the motorcycle to perform this procedure, I already have this engine out so that I could do some some fabrication work & painting to the frame. This is the long delayed Project wAmmo bobber that I should have finished months ago, but now I am back on it with a vengeance. You will need to remove the fuel tank, gear shifter, and whatever other parts are necessary so that you can remove the valve cover & the left side crankcase cover. Once all of that is done then remove both sparkplugs.

<cm400 spark plug removal>

After you remove the spark plugs, switch sockets & turn the engine in the direction indicated by the arrow on the alternator rotor. The big rusty flywheel looking thingy you see in these pictures for those of you who have never seen one before. This one had to have some of the rust sanded off so that I could see the markings on it.

<honda cm400 alternator rotor>

Turn the engine and watch for the intake valve rocker arm on the side you are adjusting to move down and then back up. These little Honda twins have a 3 valve per cylinder layout with 2 intake valves & 1 exhaust valve per cylinder.

<cb400 rocker arms illustrated>

Once the intake rocker arm returns to the top continue to turn the engine slowly and line up the next “T” mark on the flywheel with the pointer on the engine case, as it comes around. If the exhaust rocker arm starts to move you have gone to far & must circle the engine all the way back around & start over. Do not turn the engine backwards to get to the timing mark if you miss it.


<Honda cb400 timing marks>

Then verify that the piston is indeed at top dead center. On this engine it is fairly easy to do just by looking into the spark plug hole.

<Honda cb400 piston tdc>

With the piston at top dead center for the cylinder you are adjusting both the intake & exhaust valves should a little bit of play in them unless the engine has severe wear or improper maintenance that has caused valve recession which will close up the gap. Too much lash is also detrimental to your engines performance and will cause your engine to tap very loudly. Too little lash will eventually lead to a burned valve if it doesn’t close completely.

Loosen up the lock nut for whichever adjuster you choose to start with, here I am starting on the exhaust side.

<cm400 exhaust valve locknut>

Then insert the proper size feeler gauge, loosening the adjuster with a flat screwdriver if needed.

<Honda cb400 exhaust valve lash>

Then carefully tighten the adjuster screw & lock nut until the feeler gauge is able to be removed & re-inserted with just a little bit of drag, but the next size larger feeler gauge should not fit. It will be necessary to hold the adjuster screw with the screwdriver as shown below while you are tightening the lock nut. Be sure to recheck your lash after you tighten down the lock nut for good, sometimes you may have to readjust to compensate for the adjustment screw moving when you torque the lock nuts.

<Honda cb400 intake valve lash>

Once you have all of the valves adjusted properly replace the engine covers being sure to inspect & replace all gaskets & seals as needed.

Valve lash and some miscellaneous tune up specs are below:

Intake valve clearance 0.10mm +/- 0.02mmĀ Ā Ā  0.004″ +/- 0.0008″

Exhaust valve clearance 0.14mm +/- 0.02mmĀ Ā Ā  0.006″ +/- 0.0008″

Idle speed 1200 rpm +/- 100 rpm

Spark plugĀ Ā  NGK-D8EAĀ  or ND-X24ES-U

Spark plug gapĀ  0.6~0.7mmĀ Ā Ā  0.024~0.028″

Oil capacityĀ  3 litersĀ Ā Ā  3.2 U.S. qt.s

Hopefully this has helped someone out.

Happy Wrenching!

Start of the Winter Season

It seems as though the start of the winter season here in S.C. has been pretty decent so far. There have been a few chilly days and a fair amount of rain but most of the time it’s been really nice just a little nippy in the morning on most of my riding days but I haven’t had to break out the snowmobile gloves yet. Next week I think I’ll install the winter liner in my riding suit and try to locate those winter gloves just in case it turns really cold and stays dry.

<motopsyco's Joe Rocket jacket>

It’s Dec. 5th and I may have to put the insulated liner in sometime soon.

Yes all of your supposedly sane friends look at you like some kind of idiot or freak when they see you riding around on a motorcycle in the winter time, even here in the deep south. There are occasional times when I wonder about myself for doing it, but it’s just so much fun to ride a motorcycle! Not to mention the maintenance headaches I save from not winterizing or having to do start up service in the spring. If by some chance I were to move to a location where the snow and ice would make it dangerous to ride the bikes would go into storage for the winter but here in SC we have way too many 60 degree days for me to do that.

Life has been going really well around the farm lately, and I picked up a new shop truck to replace my semi-trusty old van. Just plain white regular cab Toyota work truck. Of course since I live by the motto, “stock sucks” the modifications have already begun starting with a tonneau cover and some cargo control updates.

<white Toyota Tacoma Regular cab>

I couldn’t forget the blogs web address!

<skull & crossed wrenches motopsyco>

Deer Hunting season went really well this year & we’re stocked up on meat for the year, so now it’s time to do a bit of cool weather trail riding. The last 2 stroke dirtbike I had was a Kawasaki KD100 that I got when I was 12 or so. Since then it has been all big 4 strokes until this year when I picked up this little blue Suzuki. This was supposed to be a restoration project but it has turned out to be such a hoot to ride just like it is, that I’m reluctant to get started on it. All of these years I was never a fan of so called “ratbikes” but now I am forced to admit there is something very liberating about riding a motorcycle on which the cosmetics just don’t mater! Tree limbs, briars, mud, dirt, dust, or dropped objects in the shop as long as it fires up with the next kick or push of the button who cares. I still love, admire and plan one day to own more beautiful bikes, but everyone should try living with at least one rat for a while.

<motopsyco suzuki ts185>

in the woods Dec. 5th 2014 8:30 a.m.

I have developed the tendency to blast around my neighborhood without any gear, kind of a throwback to the time when I wouldn’t have been caught dead on a motorcycle wearing a helmet. Yes I still get fully geared up for serious riding but I still understand why some people wont. To each his own, live & let live or die, c’est la vie, etc.

Well that’s the start of the winter season for me, it’s just like summer but with colder shorter days and fewer ravenous biting insects. What is it like for you? Do you ride your motorcycle or do you put it away & wait for brighter days?

Random Tech Tip, Vintage Carburetor Intake Boots & Clamps

Today’s post is about those annoying rubber boots that attach your carburetors to the spigots on the head(s).

dry brittle old carb boots

dry brittle old carb boots

Often on old project bikes these are hardened and brittle, most of the time you can get the carbs out but it is almost impossible to get them back in. One thing that greatly helps is to take a heat gun and heat them up to soften them. Some people on the net have removed them and placed them in very hot water. Regardless of the method a small amount heat will help get them soft enough to reinstall the carbs. Just do not use an open flame or you will end up with a charred & useless mess. On some motorcycles these bolt to the head and on others they clamp to spigots cast into the head. If you are dealing with removal of old intake boots from a set of spigots like shown in the picture above prepare to be very patient. Don’t just grab a big screwdriver & start prying! First loosen & completely remove all of the clamps, then twist and pull them by hand until they will at least wiggle & turn on the spigots. If they still won’t come off you have to decide if it is worth the risk to pry them off. Choose your leverage points very carefully, if you have any doubt at all about being able to remove them safely or if you are working on a rare or valuable antique or classic machine this is where you break out a good sharp utility knife & cut them off. The cooling fins and other castings on most motorcycles are very thin and will often break before an old piece of dry rotted rubber will,so better to be safe than sorry.

intake manifold clamps

intake manifold clamps

Also be sure to look at the clamps when removing the boots. They are not just straight rubber hoses, often one end is bigger than the other, and the clamps are 2 different sizes as on this Honda CB650. The intake manifolds only fit one way but they have directional arrows on them, the clamps are not marked so be sure you note which ones go where.

That’s all for tonight, until next time have a fantastic life!

February Website of the Month: motorcycleshows.com

Yes, I realize the whole Progressive International Motorcycle Show series is a giant money making commercial venture designed to sell products while entertaining the masses. That is cool with me as long as I have a good time while I am there. Most of the events for this season have already concluded, but there are a couple left to go. Plus the website is really cool and packed with lots of information about the various motorcycle line that the manufacturers will have on display including specs and msrp. I am planning to check out the Charlotte N.C. show and will take some pictures to share with you when I get back.

motorcycleshows.com