Ultimate Addons Mounting System for Phones

Who is looking for a way to safely mount their smartphone to the handlebars of their motorcycle, bicycle or atv? Initially when I first decided to add navigation to my motorcycle, the first thought was to find a mount for the Garmin Nuvi that I use in the old van, but quickly realized that my smartphone has some seriously good navigation apps installed on it and has the added advantage of always being with me. Keeping in mind the price of my phone and the importance of the data that it contains, any mount purchase would need to be secure, strong, & waterproof, with excellent vibration & impact resistance. After a quick bit of internet research I decided to try one of the Buybits Ultimate Addons mounts, and placed an order with Amazon. At $69.99 plus shipping from the U.K. this is not a cheap product (although it is not the most expensive either, price as of 8-9-14).

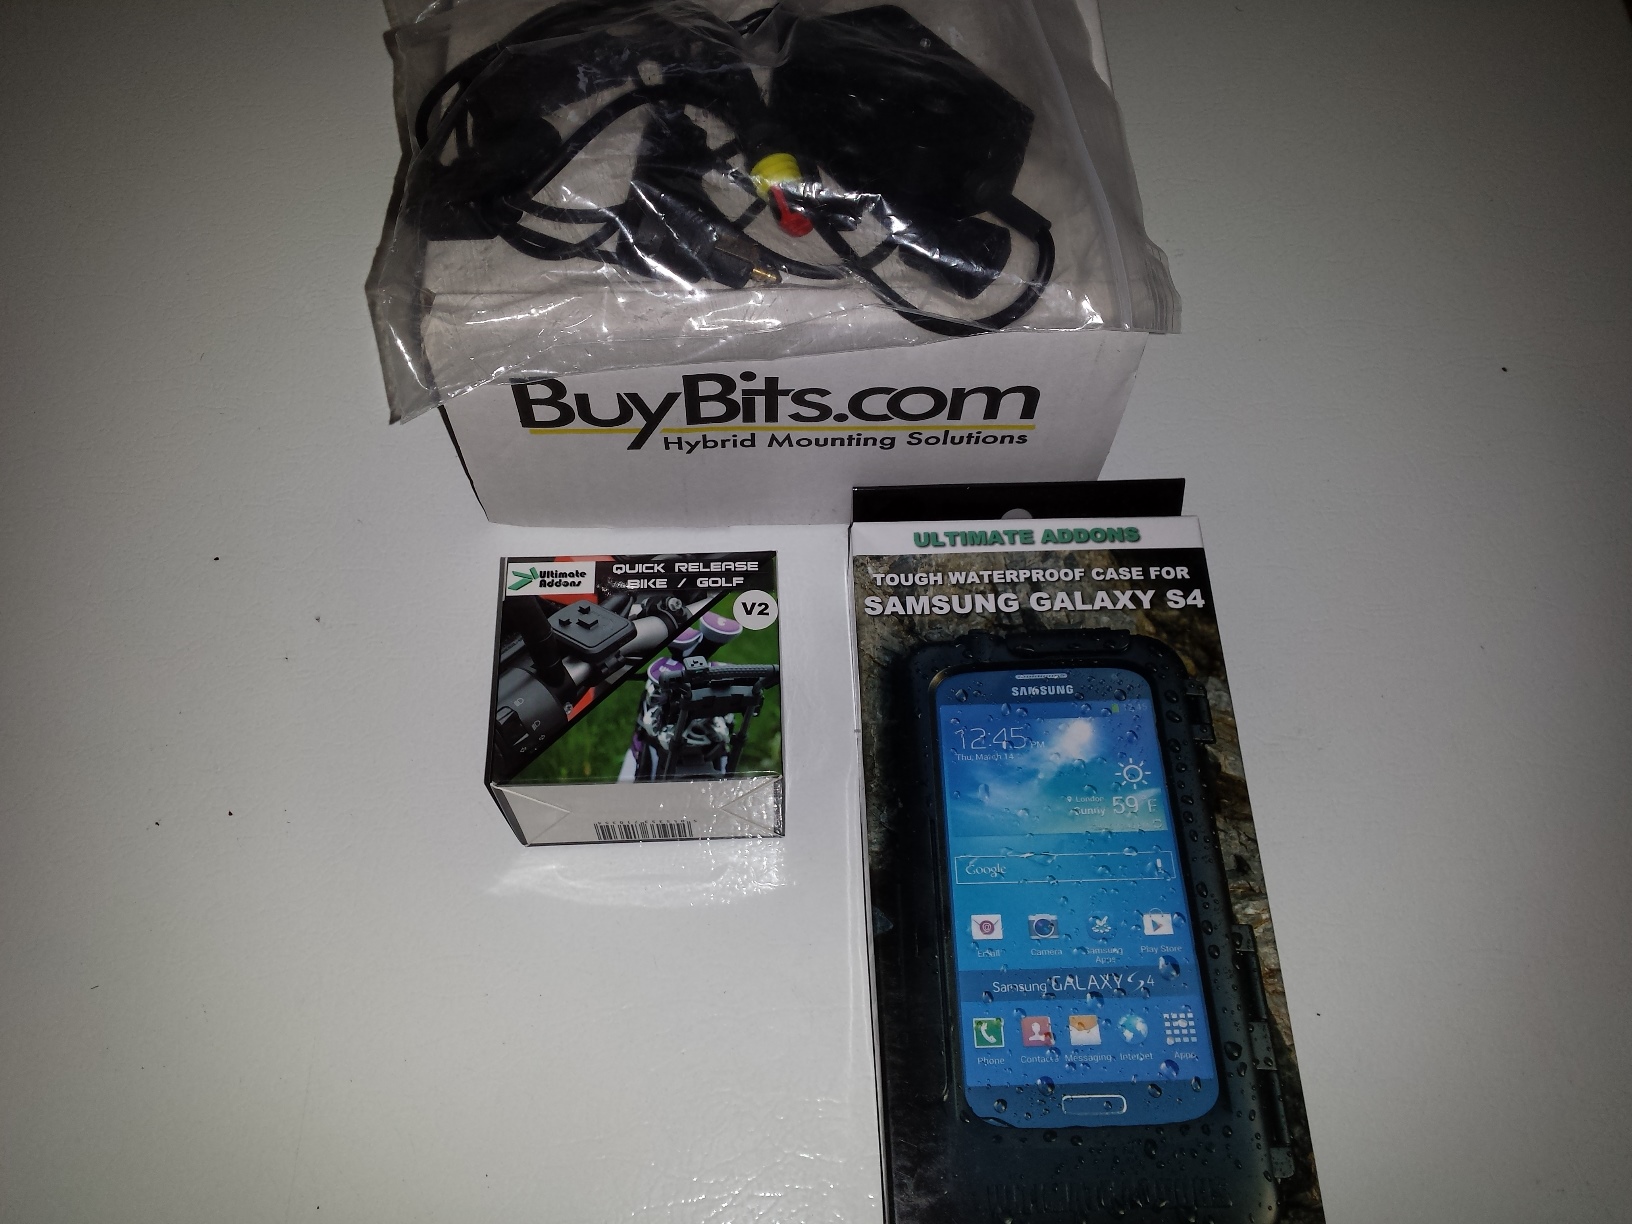
As usual my order arrived quickly and was well packaged with no transit damage!

<happy little fedex box>

Opening it up and viewing the contents I found the protective case, handlebar mount & power cord. Please note that if your motorcycle or atv is not equipped with a DIN (Hella) style power outlet you will need to install one in order to use the charger, here’s a link to the item I used.

<ultimate addons cellphone mount>

The protective case is a very impressive design, thick plastic with a generous amount of rubber inside both to cushion the phone & seal out the water. Please note this case is not for weight weenies, but if you don’t mind carrying around a few extra ounces in order to keep your device safe & dry it is worth it. A great and pleasant surprise to me was to find out that there was a viewport for the camera, the touch screen worked well, and the case is engineered well enough that all operation functions of the phone could be controlled just as if the phone were not in the case at all.

The handlebar mount itself had me worried a little bit after seeing the relatively bombproof looking case that attaches to it, the mount looked small and while not flimsy looking it seemed like it should be larger and heavier looking to hold up this big case & my oversize $500 phone. In engineering we all know that well designed products can be much stronger than they look, but the barbarian living in my head doesn’t always see that, so for my initial testing I strapped it to the rattliest, roughest riding pile of junk in the shed, a Baja MB165 minibike. My minibike is a frightening concoction, of assorted used parts loosely assembled together and then blessed (cursed?) with a couple of speed enhancing modifications including a CVT drive.

<cell phone mount on minibike>

If this don’t kill it nothing else will.

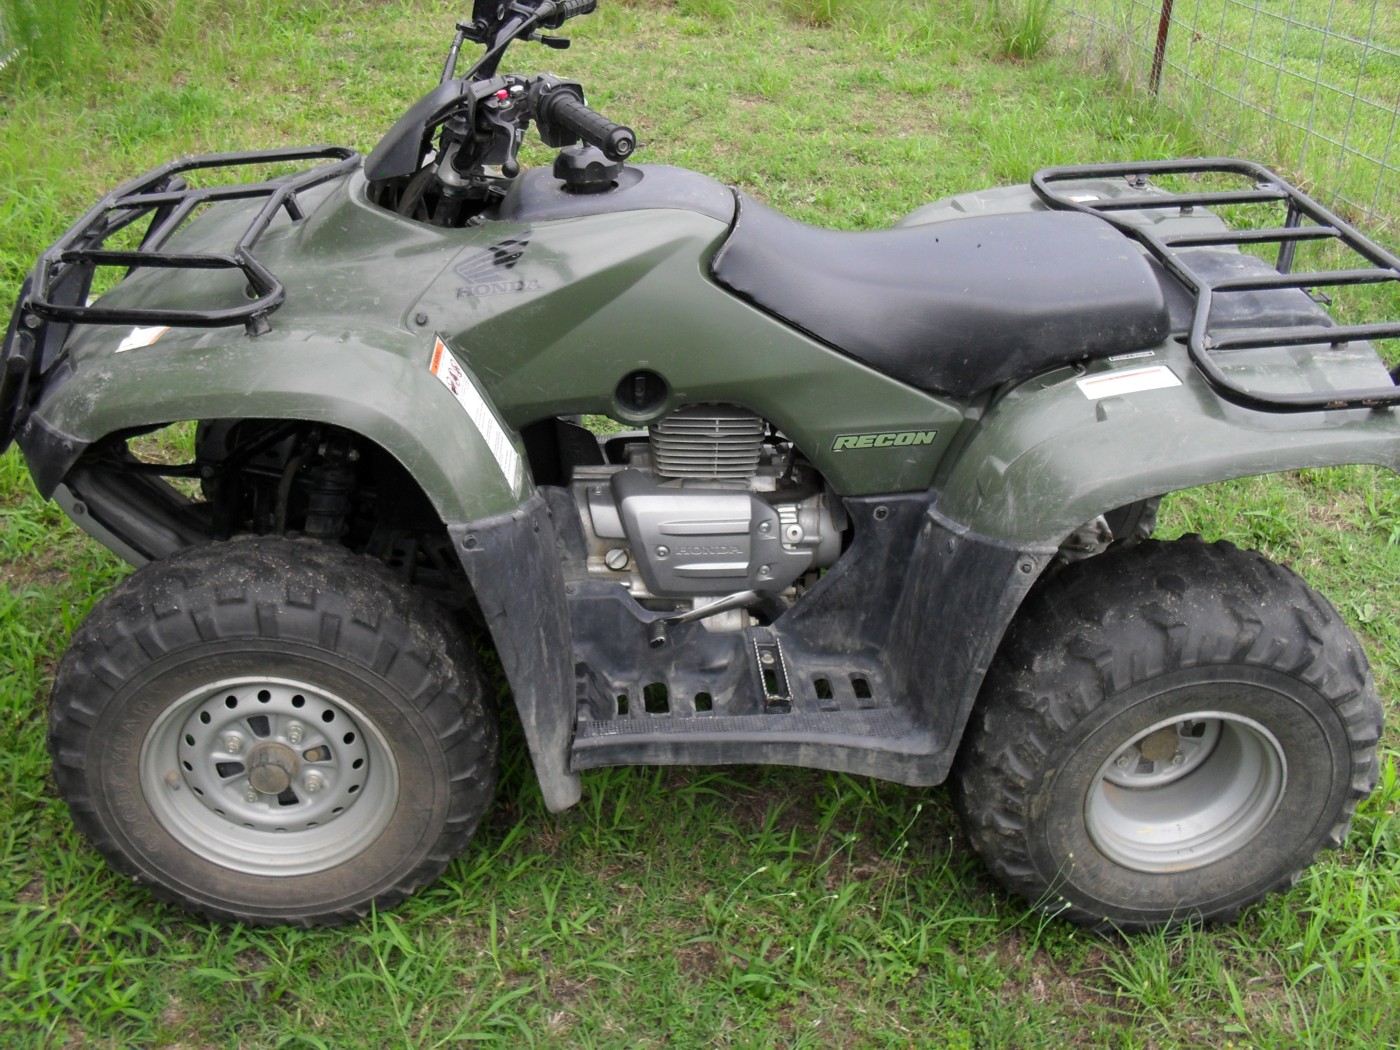
After bouncing around a little while around the field, up & down the dirt road a time or two, and at least 50 laps around the house it didn’t fall off, or even come loose. I even shot a short video that I didn’t post any where but if enough of you want to see it I can add it to this page later. An S4 in this mount actually  makes a decent video if you can get the orientation right. This was more than enough of a test to convince me the mount was going to hold up just fine. So now it was time to check the water resistance of the case so I fastened it to the front rack of this ATV and took it out to play in the rain, at night.

<ragged out p.o.s. brute force>


<Ultimate addons mount on atv rack>

After all of this I opened up the case and found that my phone was completely dry and safe, and while I still would not actually submerge it in pond or anything like that I am now convinced that this case properly installed and closed will keep your phone dry and safe during any rain storm you are going to encounter out on the road or trail. After all the Brits who sell this product obviously know all about riding in the rain.

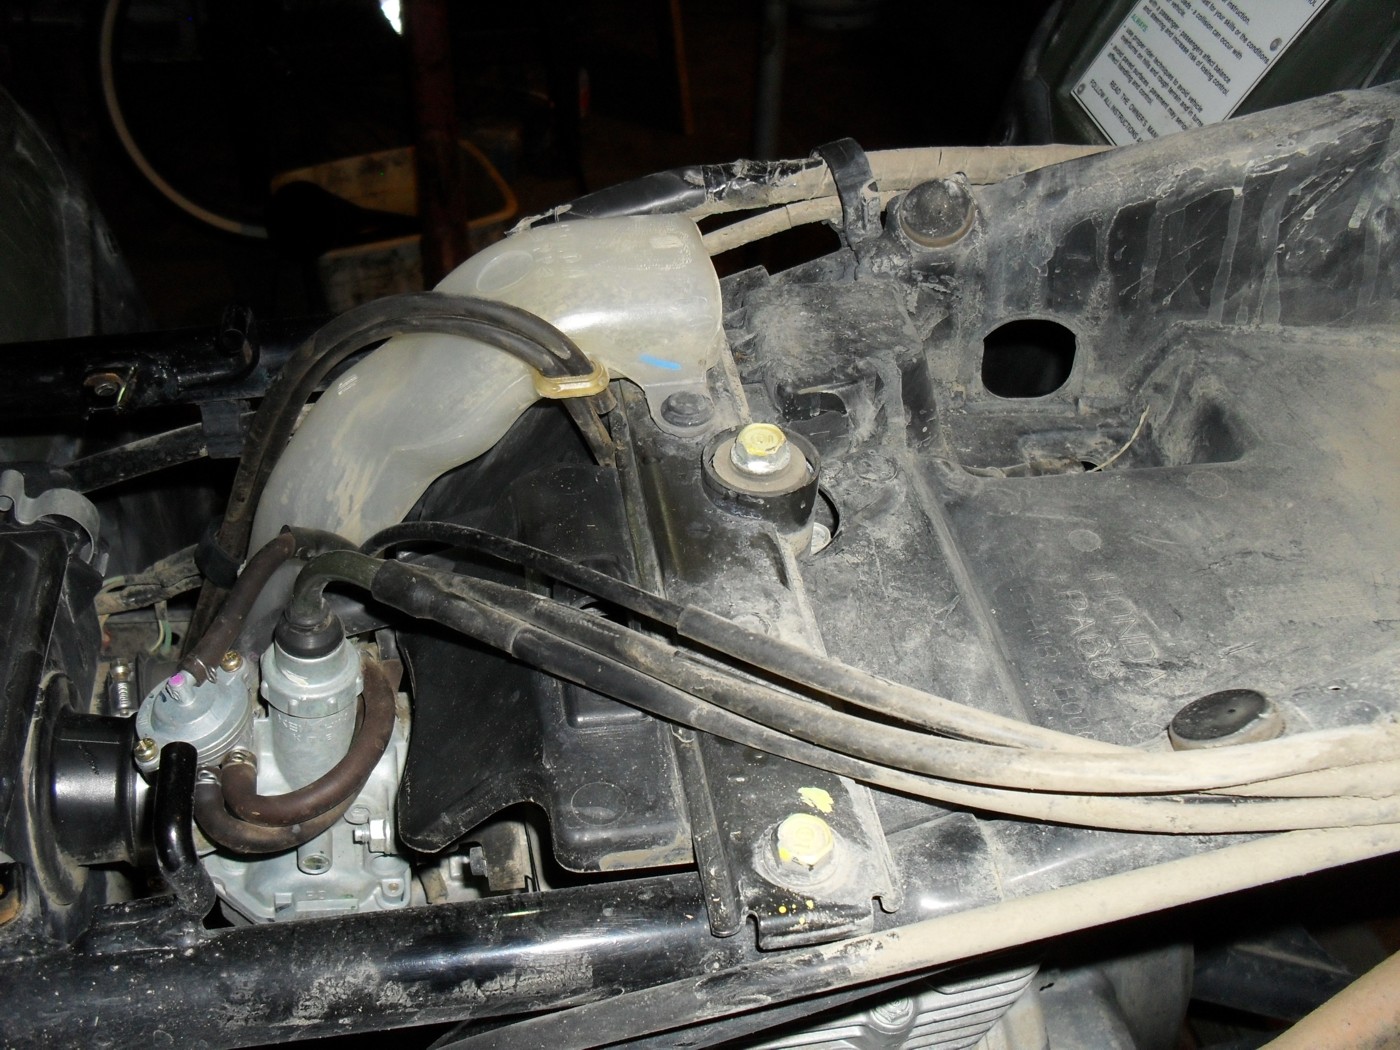
It is a large bulky case, and yes in bright sunlight the screen can be hard to see, but if any of you have a touch screen phone that is easy to see in direct sunlight, I want to see it, because at this time such a phone does not exist. The charger is easy to install, but if you are cutting off the plug and hard-wiring it to your vehicle be sure to connect it to a switched circuit or install a separate power switch as the charger has an LED that is always on whenever power is present. I just installed a DIN outlet so that I could unplug it. It would have been nice if the mount were taller and had more adjustment for position. They do make one one but I admit to being a cheapskate especially when dealing with products that I am not familiar with.

Here’s a shot of it attached to the bars of my main ride with navigation open, ready for me to go get lost & then find my way back home. Having used this mounting and charging set up for a few hundred miles on four different vehicles I am happy with it.

Bottom Line: The Ultimate Addons Mounting System for Phones is well worth the cost, I’d recommend this product to anyone.

Peace Y’all


Dirt Bike Carburetor 101 Part 1 (how to clean a single cylinder motorcycle or atv carb)

Hello everyone and welcome to this multi-part lesson on the basics of carburetor  cleaning for single cylinder motorcycles. The cadaver we will be resuscitating in this lab is an 02 Honda XR100.

“barn fresh” xr100

Believe it or not this bike would still run with the choke on even with the dead gas and clogged jets, gotta love a Honda! This will be a general step by step guide to repairing carbs, so I will not be giving you the actual specifications as they vary so much from year to year on some bikes. As I’ve said before you need to obtain the specific information for your exact bike from a reputable source like say a service manual. For this first post let me show you how to remove the carburetor from this bike.

First let me say that it is possible to pull the carb from an XR100 without removing the bodywork, but A; you need to clean or replace the air filter and B; if it’s been sitting long enough to need the carburetor cleaned you need dispose of any fuel in the tank and clean it out before re-starting the bike after you finish the carb.

Now take off the side covers. This picture shows the location of the air filter cover on the XR100

Next look under the rear fender and remove the 2 nuts holding the seat on. Then pull it up and rearward to remove it.

I like to put the nuts and any spacers back on the studs like this so they will not get lost. In fact whenever possible I do this for all nuts and bolts as it keeps them from disappearing.

Now go the the fuel switch, valve or petcock, whichever terminology you use for it and turn off the flow of gas to the carburetor and disconnect the fuel line. Be prepared to cut it off with a knife and replace it if necessary.

Remove the rubber strap that holds down on the rear of the fuel tank and the two bolts at the front of the tank.

It is not required that you remove the shrouds like I did for this photo, I simply removed them so that I could show you the location of the bolts at the front of the gas tank.

After setting the gas tank aside in a safe location it is time to disconnect the throttle cable. On some models it attaches to an arm on the side of the carb but on simpler ones like this it is attached directly to the carb slide. Unscrew the cap as indicated by the screwdriver and pull the slide out.

This next shot is a little fuzzy but it indicates how the throttle cable is retained in the slide, and the following picture shows the slot in the side of the slide that allows you to remove it from the cable.

Now all you have to do is to compress the spring and push the end of the cable out of its hole, past the end of the slide, pull it out through the slot and then through the big hole at the top.

Here’s the removed and disassembled slide, jet needle, and return spring laid out for you to see.

Loosen the clamp holding the rubber hose from the air box to the carb and then remove the bolts attaching it to the engine and pull it out.

Yes I’m using the obstruction wrenches again. Two tools that I feel are must haves for any serious cycle mechanic are obstruction wrenches of decent quality and some extra long screwdrivers of the finest quality money can buy (i.e. Snap On etc.) Inexpensive wrenches are often okay but cheap screwdrivers will drive you bleeping crazy, by stripping out the soft metal heads on Japanese motorcycle screws.

Here’s a shot of the carburetor on the workbench. I like to use the red toolbox tray shown to help me organize the parts as I disassemble the carb, and to keep the parts from disappearing into the wormhole that exists behind my workbench. No part that falls back there is ever seen again, so I try to keep them from rolling of of the back edge. No dear reader I am not going to move the bench to look for them either. In my shop I coexist peacefully with all matter of snakes and spiders both harmless and venomous, and that is their territory and I stay out of it.

Don’t’ forget to protect the engine by plugging the intake hole while the carburetor is off.

I’ll show you the rest later, don’t forget to bookmark this page or to sign up for the email notification of updates on the right side of this page. Click here for part two!

Peace Y’all

Let’s Split! (engine cases that is.)

Hello once again Ladies, Gentlemen and Russell,
When last I posted the engine was sitting on the bench with the top end and most of it’s accessories removed. The next thing I did was to remove one of the piston pin circlips and push the pin out far enough to remove the piston from the connecting rod.

If you don’t have an impact wrench available you should probably remove the alternator rotor before removing the top end. This is one job that really does require the factory special rotor puller. Fortunately they are not expensive and like the service manual worth every penny.

To remove the camshaft and timing chain first remove the camshaft bearing retainer and rotate the engine until the crankshaft is at top dead center and the timing marks on the cam sprocket and the crankcase line up. Now you can slide the camshaft out while working the cam chain off of the crankshaft. For the picture below I stuck the camshaft bearing retainer back into place after removing the camshaft so you could see how it fits.

Now it’s time to split the cases first remove all of the bolts and gently tap on the small projection around the cases and they should begin to come apart. If they do not easily come apart double to be sure that you have not missed any bolts like the one in this picture, that is inside of the engine where you might miss it.

With a TRX250 Recon engine I like to place it front side down on a workbench that allows me to place the protruding shafts through the bench so that it sits level. Then gently lift up on the rear case while tapping down on the transmission output shaft until it pops free. If you need to pry on the case to move it remember that you should never pry on any of the gasket sealing surfaces or around the cylinder hole. The outside of the engine mounting lugs is okay and there is on small place in between the lifter holes that can be used.
Just remember that if it requires any kind of force to remove something may be wrong and you should re-check everything before proceeding.

Here’s another shot of the transmission innards.

As you pull the pieces out of the transmission and lay them out on the bench like this be sure that you keep track of every single piece, all the washers bearings etc. and where they go in the assembly. I like to re-assemble them all back to their respective shafts as fast as possible. Keeping these parts in order is critical because just 1 misplaced or omitted washer can destroy the transmission and maybe the engine itself.

Here’s a picture of the failed gear so far I have only found one of the lugs that snapped off of it. The others probably drained out with the oil.

One last shot of the nearly empty crankcase, only the crankshaft and bearings remain.

Now I have to clean everything up good and order the required parts so it may be a week or two before you see this engine again.
If you really want to keep up with how this is going please be sure to subscribe to this page via the link on the upper right side of the page.
Peace Y’all

Recon 250 Into the Engine!

At the end of my last post about this the engine was sitting on the bench, so let’s pull it apart now. Start with the external accessories such as the starter motor, rope starter, etc.

On a full tear down like this I prefer to remove the clutches from the engine before removing the cylinder and head. That way there’s not any damage to the connecting rod or piston should I accidentally spin the crankshaft around too fast.

Of course the best way to remove the clutch nuts is with an impact wrench, but if you do not have one wedge something good and solid in the clutch gears to hold it still, and don’t forget the centrifugal clutch nut is reverse threaded.

You’ll need a steering wheel puller to get the centrifugal clutch out. It’s possible you could get lucky and break it loose with a rubber hammer, but I doubt it. Don’t try it because you can damage either the clutch, the crankshaft or both by hammering on the clutch.

Now you can see the timing and oil pump drive chain, along with the shifter meachnism in the front of the shifter drum.

After pulling all the little parts off the front making sure to not exactly where all of the thrust washers go, it’s now time to move up top and unbolt the rocker box.

Now set the pushrods off to one side and unbolt the head an pull it straight up to remove and then do the same thing with the cylinder

Here you can see me using the magnet to remove the lifters from their holes.

Next I popped the rear cover off after unbolting it. The magnets in the alternator will make it feel like it is sticking together so be careful.

In these lat 2 pics for the day you can see the alternator parts, the stator is in the top one and the rotor is in the bottom picture. Next time we’ll split the cases!


Peace Y’all

Honda Recon 250 pg.2

The next order of business is to dis-connect the negative cable from the battery as shown here.

Remember any time you are working with any vehicle with a negative ground system (which is practically everything) always dis-connect the negative battery cable first and re-connect it last when you are working on the electrics.
The next 2 pics will show how I use the door panel tool to remove the plastic retainers from the bodywork. First you wedge up the sliding pin in the center enough to get the forks of the tool started under it.

Afterwards you can slide the tool into place as shown and pull the clip right out.
Of course you can just use a couple of screwdrivers or a pair of wire cutters to remove the clips. Don’t forget to look for clips or screws in hidden places like this.

To get the fuel tank out you first need to remove the handle for the fuel switch.

Once you have the tank out be sure to note the position of the various vent hoses and take note of the routing. If you pinch them closed during re-assembly your four wheeler may not run correctly, or may stall going up hill.

Once all the plastic is off it’s time to get down to the nitty-gritty. Now remove the foot pegs. This will save you lots of needless foul language and bleeding. Plus on some models you can’t get the engine out with them in the way.

Remove the foot brake and shifter after you get the pegs off and then drain the oil so it won’t be sloshing out all over the place when you lift the engine. It’ll take some weight off too.

Do take a little time now to put some penetrating oil on all of the exhaust system nuts and bolt that you can reach and let them soak a few minutes.

Then remove the plastic covers from the sides of the engine and the muffler & header as well. While I was doing this the head of one of the screws stripped out so I got out my extractor set to remove it. Normally I am a fan of inexpensive tools especially for the hobbyist but there are 2 things that I recommend that you buy the absolute best in the world even if you have to save up for it. The first is a good set of screw extractors and the other is a Phillips screwdriver set.

85% of the time I don’t even have to use the extractor because the left handed drill bit will walk the broken screw right out.
Back to our engine now it’s time to remove the carburetor and then unhook all of the other cables going into the engine. Leave the throttle and choke cables attached to the carburetor unless you plan to remove it to work on it also,

Be sure to loosen the clamps over the drive shaft boot!
The last item to get to is the reverse lock out cable located at the bottom rear of the engine under this little metal cover.

Now unbolt the 2 motor mounts on either side, carefully remove the spacers and slide the engine forward and tilt it as need to make the frame look like this.

Finally here’s a shot of the engine sitting on the workbench waiting to be completely disassembled… starting tomorrow.
Peace Y’all

Honda Recon 250 Tear Down pg.1

Hey Everybody welcome back!
I am going to step away from the pedal powered world for a little bit and start posting a few things to help you out with the care & feeding of your ATVs & motorcycles as the mood strikes me (and as people bring me guinea pigs to feature) Yes, I reserve the right to write about anything I please but this new category for repair and maintenance will be a continuing work.
The first patient will be this 2005 Honda Recon 250. Recons are my favorite ATV. They are big enough to do a little work, but small enough to fit down a tight trail. Plus they are tough, reliable, and simple.

It doesn’t look all that bad but has had a lot basic service work deferred until now. 5th gear is stripped out. Since the transmission is inside the engine that means a complete engine overhaul is needed to fix it. I have decided to document the process here on my blog for you. This will not be a complete step by step but I give you a lot of useful information that will be helpful for simpler regular maintenance chores.
Since none of the brakes were operational at all the first order of business was to adjust the rear brake cable adjusters shown here.
Neither the owner of this atv or his 16 year old son whom is the main rider were aware that as the rear brake shoes wear down you can adjust the wing nuts shown in the picture to maintain brake operation until the shoes are fully worn. Instead they just rode it without any brakes at all. Not cool…
If you have to do any kind of major work on any powersport vehicle you should have a lift table or some safe means of raising it up high enough to save your back while working on it. Not having a lift table I use my engine hoist to pick it up and set it on stacked 6 x 4 timbers to place it at a comfortable working height.

Once it was up and secure with the parking brake locked. I set up a clean table and laid out a few basic tools that will handle most of the work and took some pics for you.

Here you see some Motion Pro tee handle wrenches, a couple of screwdrivers, sockets, wrenches, WD40, and a door panel removal tool.
Okay the door panel tool is optional but it works really well to get the plastic bodywork retainers off of a Honda ATV.
Two other recommended tools are a parts washer and a telescoping magnetic pick up tool. No explanation needed for these two I hope.

There is one more tool that you should have if you are contemplating any kind of service work on any type of motorcycle or ATV, a good service manual, preferably a factory one if you can afford it. If I did not already own one for this model of four wheeler I’d be buying one. Regardless of what anyone tells you a good service manual is absolutely essential to performing any major service to any motorcycle or ATV.
Tomorrow we’ll start removing the body work and gas tank in preparation to remove the engine.
Peace Y’all