1981Suzuki TS185 Finished!

Well, I got it finished! The entire build is chronicled from start to finish in the 23 minute video. I started out with a little bit of step by step video, but quickly realized that with the time constraints, that would not be possible so I morphed it into an overview video. The last few minutes is me taking it out of the yard and down the road for it’s first test ride.

It ran and handled fairly well, but the stock suspension is too light for a big guy like me to do any serious off-roading with it. I just have a couple more little things to tweak, and then if I can’t find  reasonably priced suspension upgrades, I’ll probably put it up for sale after I return from the VJMC National Rally.


The 20 Foot TS185 Restoration Part 4!

Mission Main Street Grants

Hello everyone & welcome back! It’s time for just a few more pictures of this little project TS185 I’ve been working on but first let me talk to you a little about the banner ad above. I have applied for one of these grants and I only have until June the 19th 2015 to reach the required number of votes. If you have a couple of minutes of time & a Facebook account could you please go vote for me? It would be greatly appreciated.


<bmx platform pedals on a motorcycle>

As mentioned last time this motorcycle is more of a restomod than a proper TS185 restoration and one of the things that I have always wanted to try out was putting a set of BMX bicycle platform pedals on a motorcycle. So out came the reciprocating saw some scrap metal & the welder.

As I mentioned the last time I was changing the color so here it is just a plain old machinery gray from a Duplicolor spray can.

<suzuki TS185 headlight & fender>

Added the shop logo to the number plates

<motopsyco.com>
Of course there were some new parts installed, missing bolts replaced & a few leaks stopped while I was at it.

<ts185 restoration>

Some hard lessons were learned such as don’t install the clutch release arm upside down and that cheap enamel clear really doesn’t spray well in 100 degree temperatures. There are still a few odds & ends that need doing but it is mostly done. Now I just need the upholstery shop to have my seat ready this week!  I also think the new pedals are fantastic looking but I do have to be careful when using the kick starter.

<motorcycle with bmx pedals>

One advantage to doing all of this was having time to sort out the various electrical bodges that previous owners had inflicted on this poor machine. It now has a fully functional key switch, brake & taillights, a battery, fuse etc. Of course it still starts easily & runs like a top!

<1981 TS185 restomod>

Peace Y’all


The 20 Foot Restoration Part 3

Mission Main Street Grants
<1981 Suzuki TS185 roller>

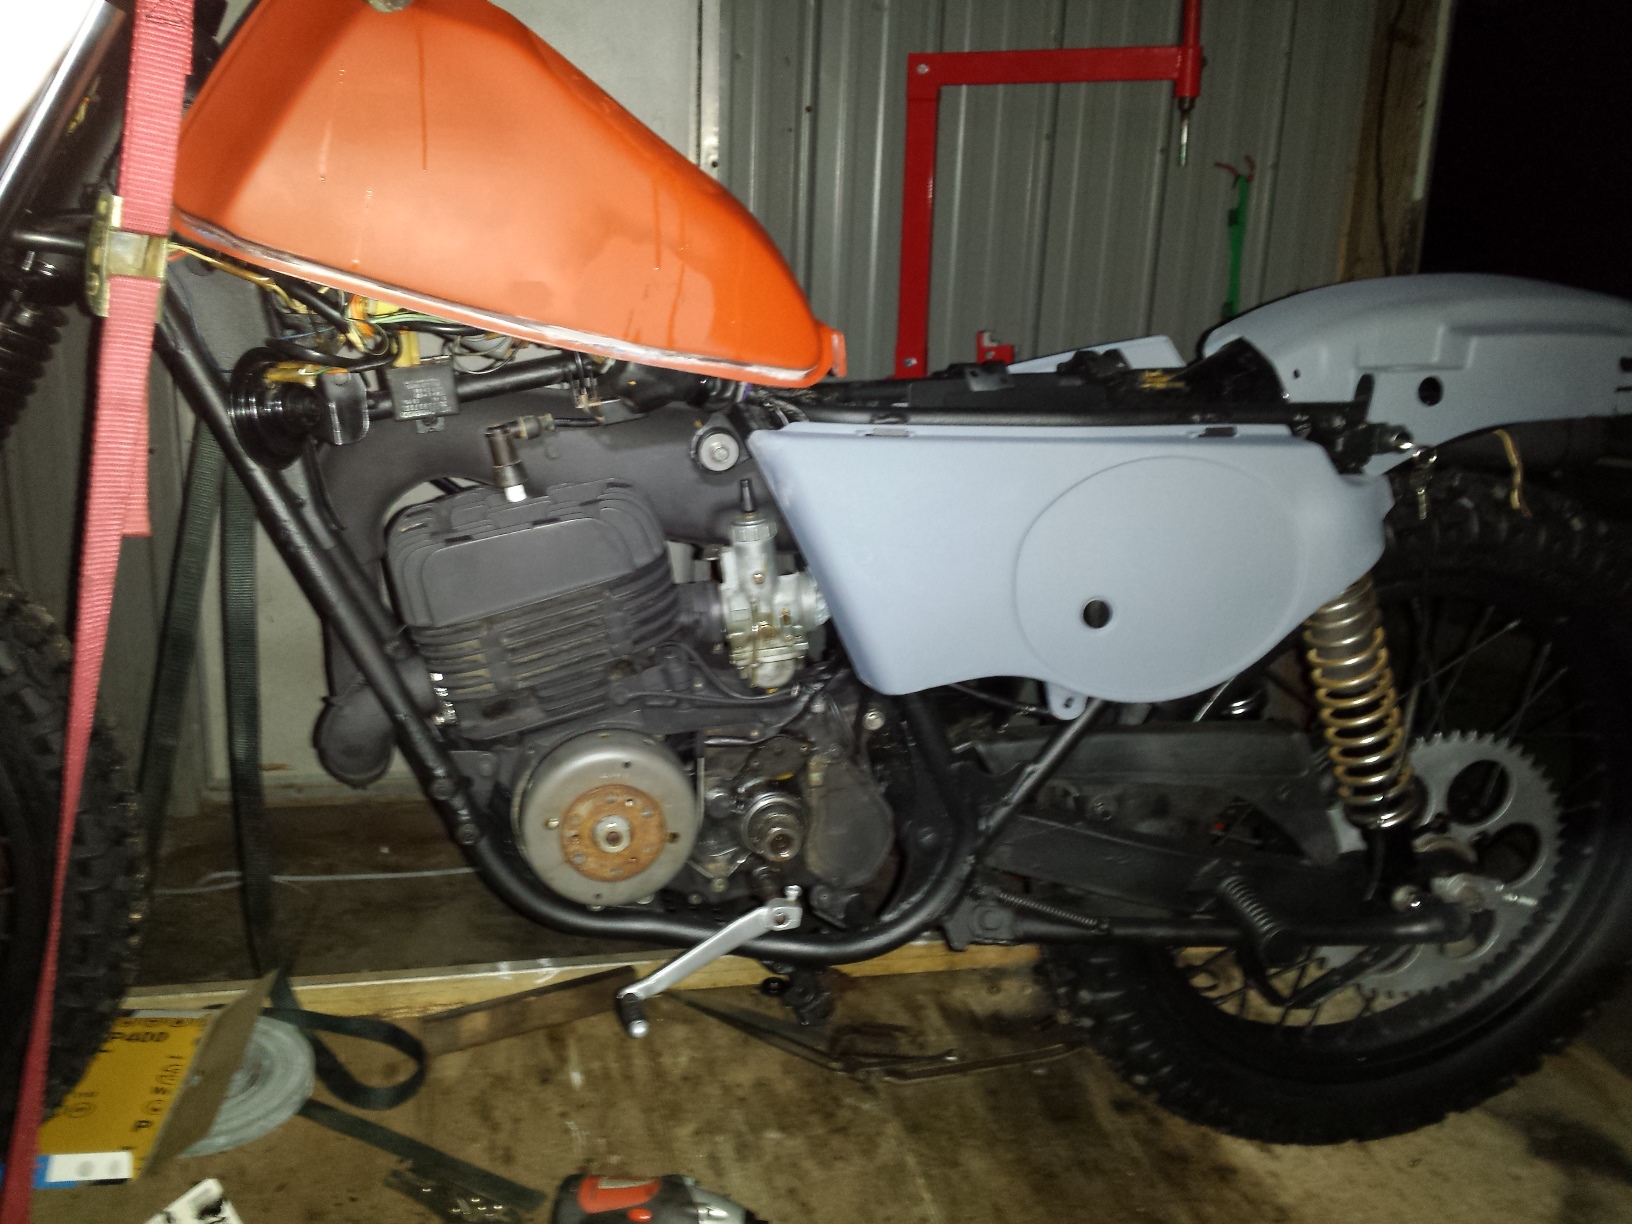
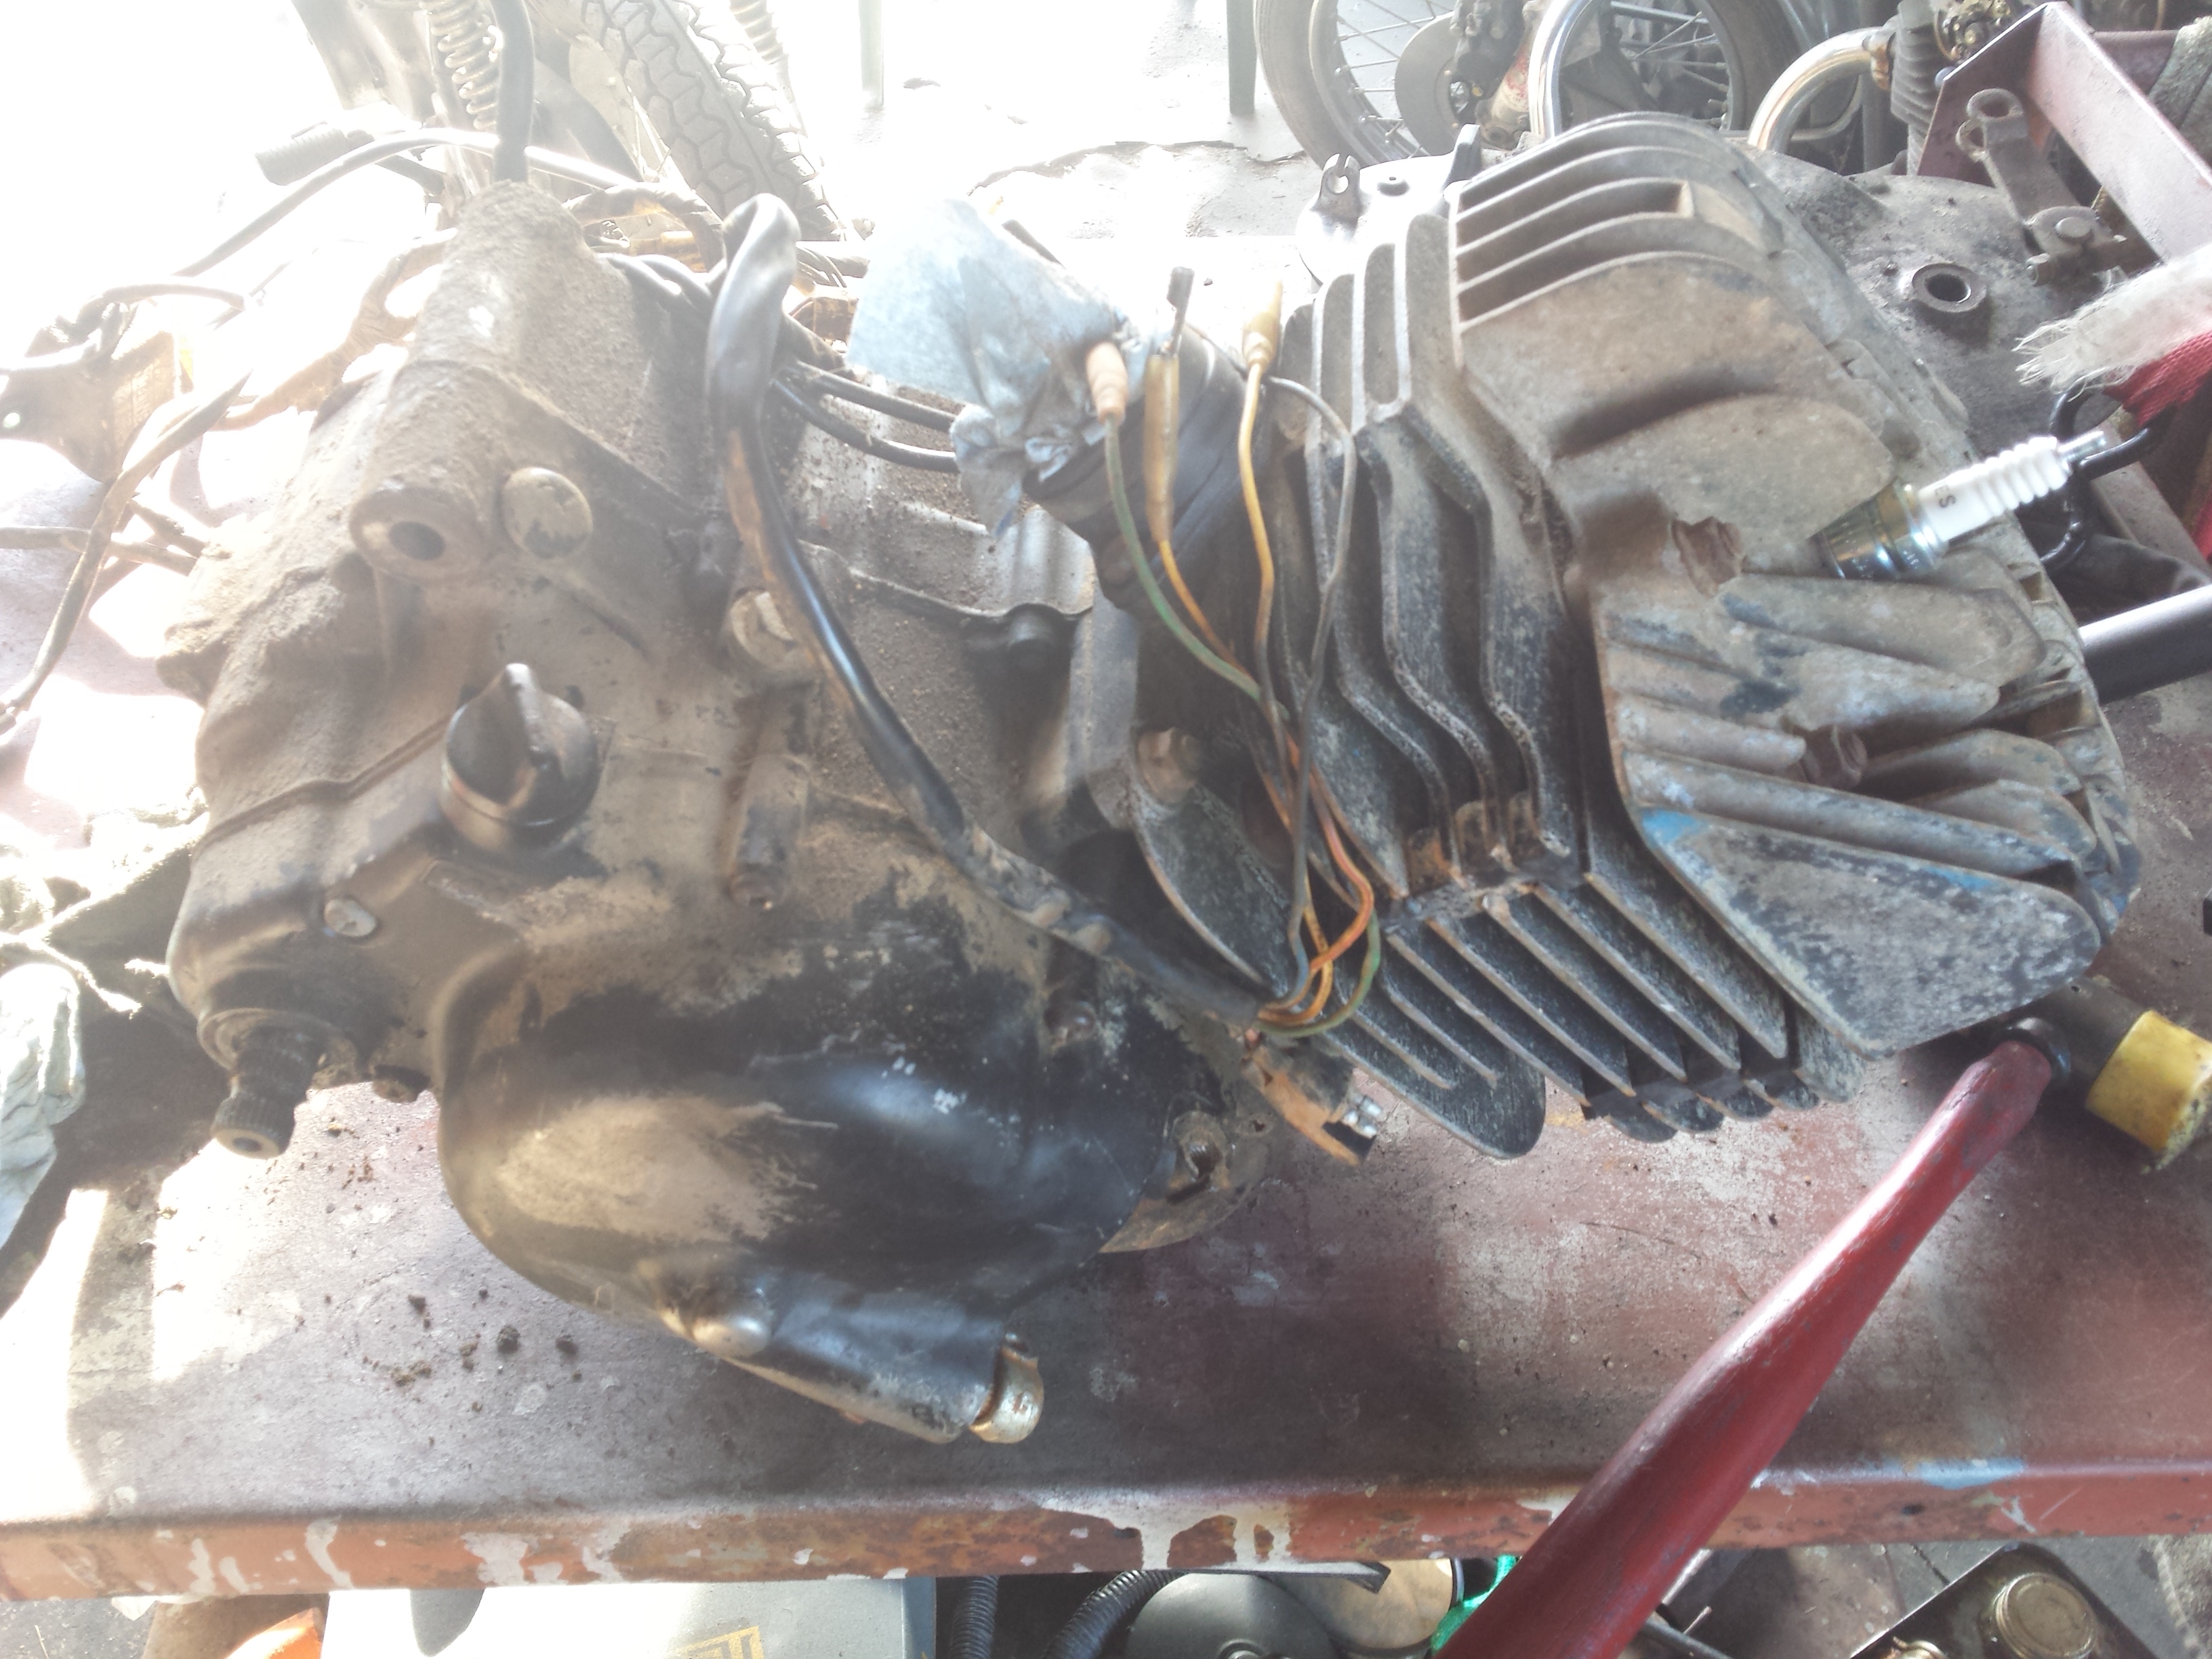
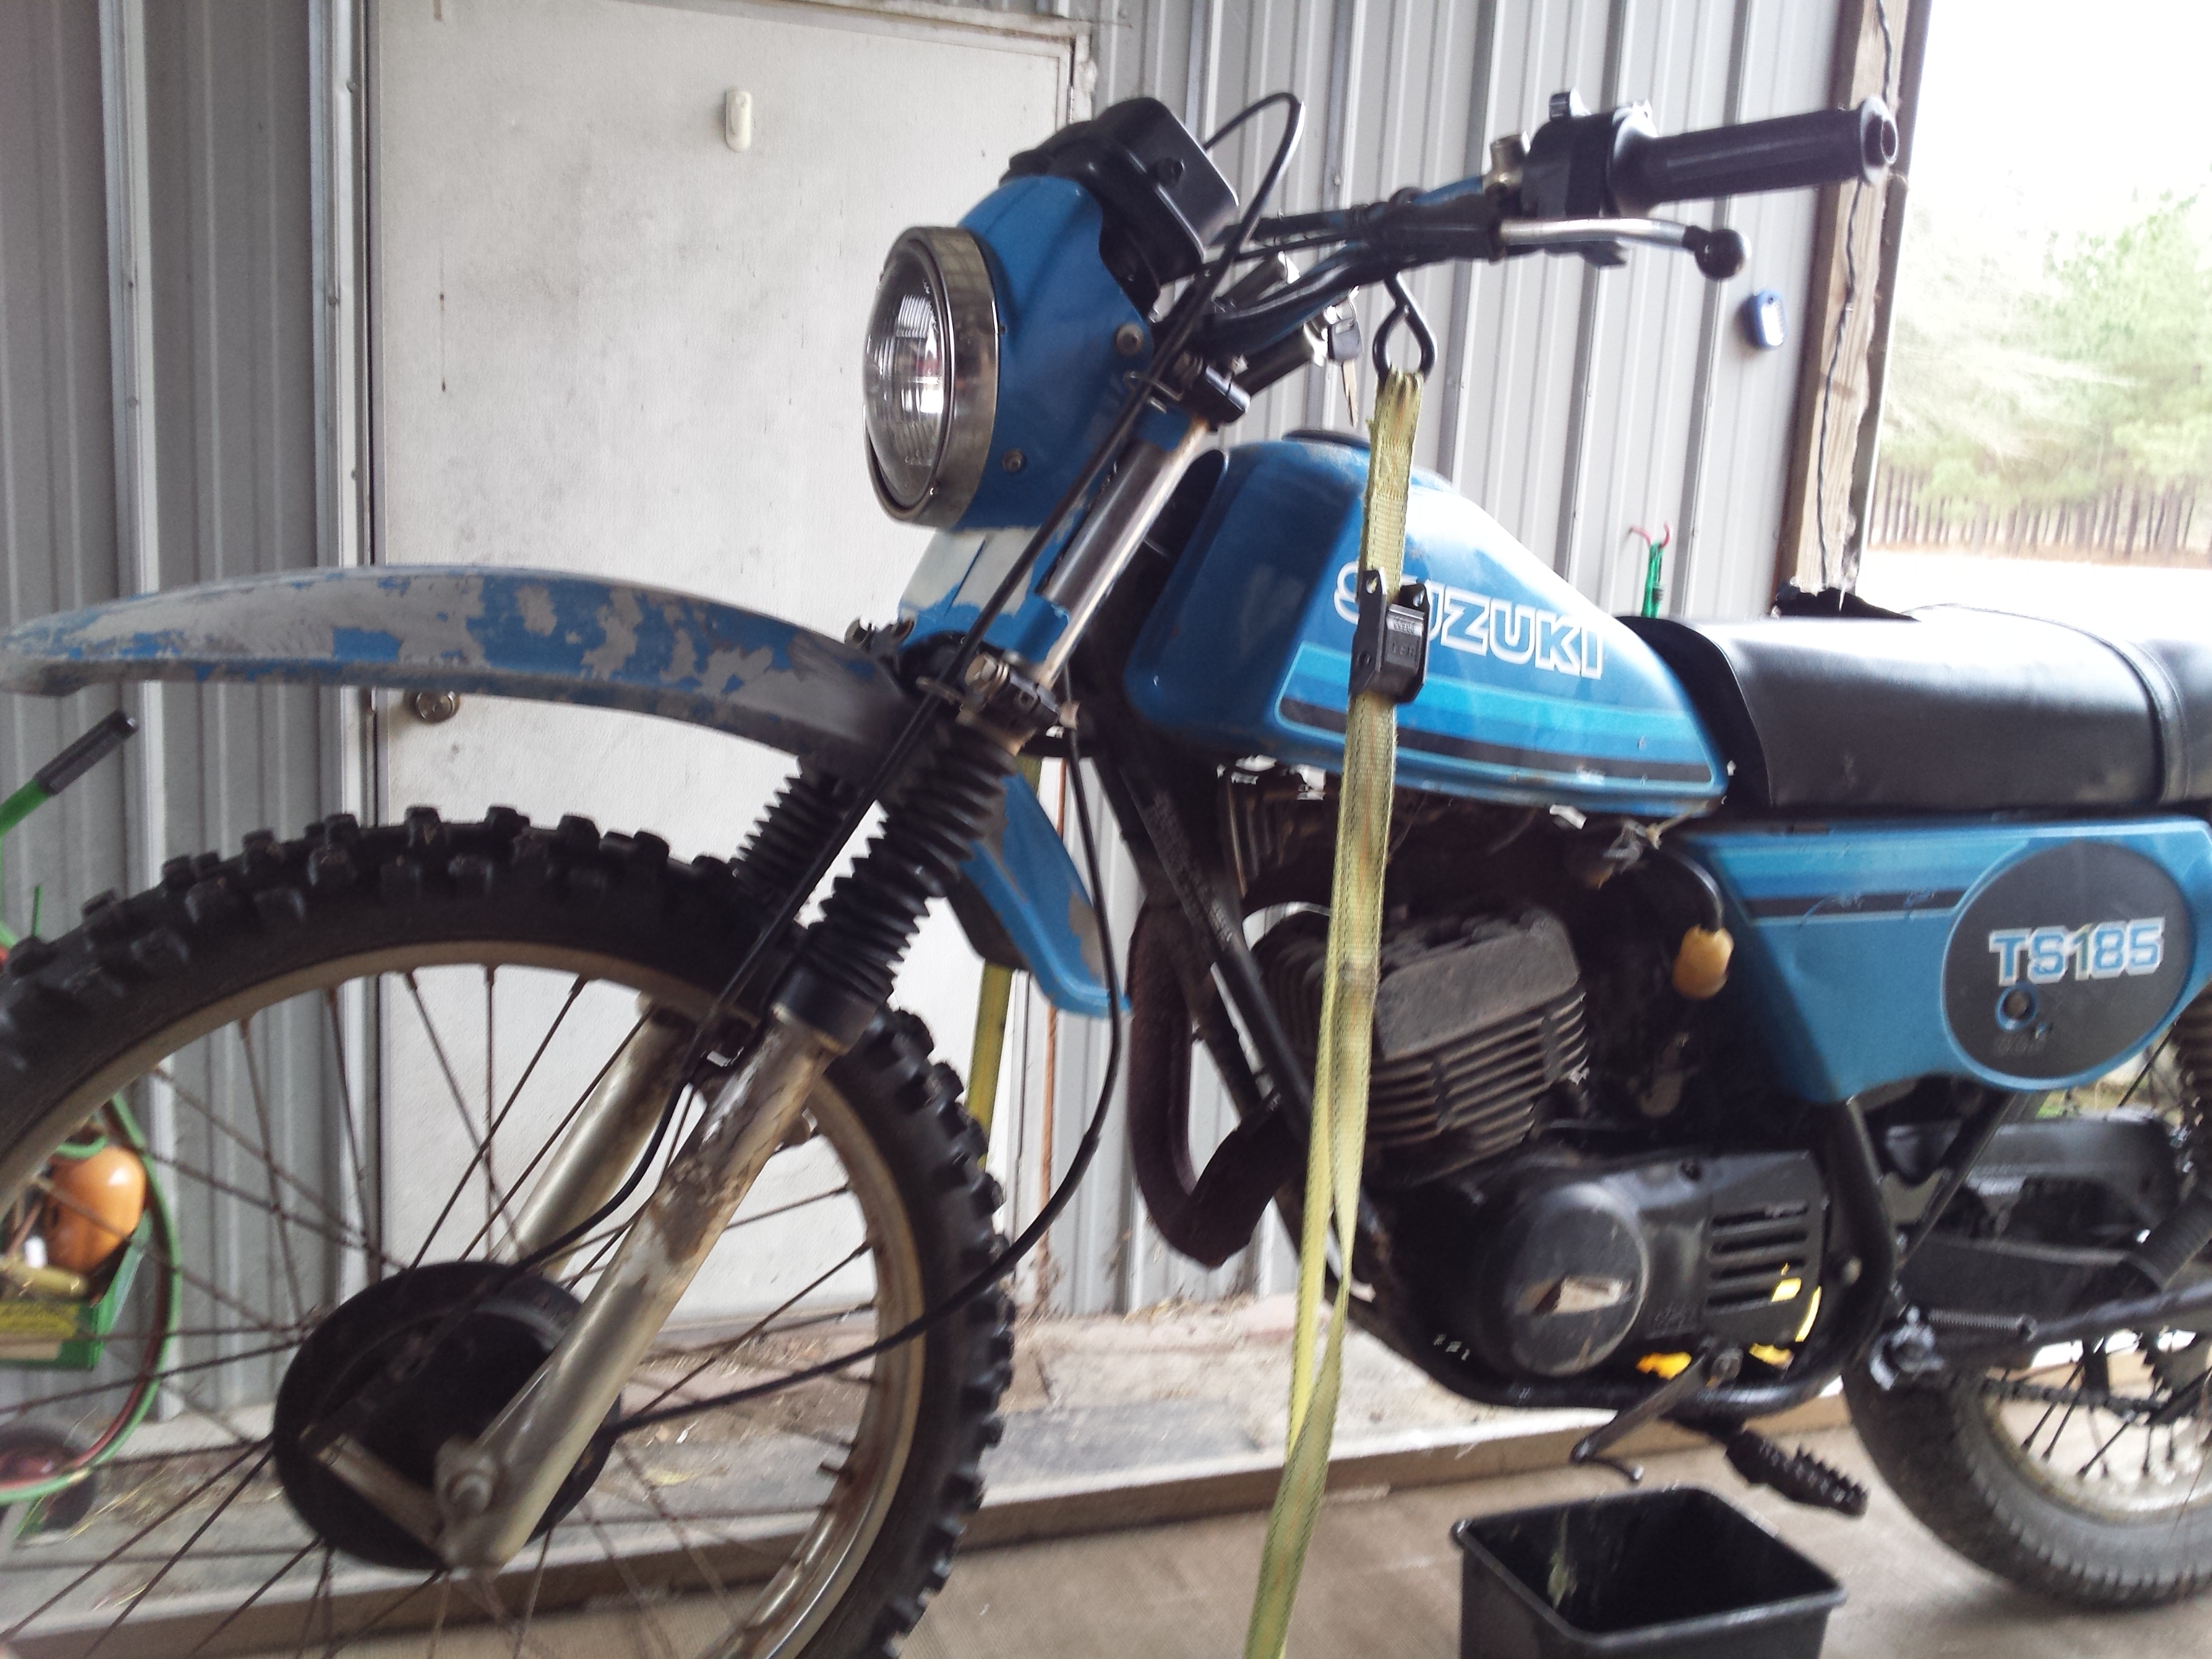
This old motorcycle is finally making it’s way back into one piece. It has new tires, wheel bearings, brake shoes, tapered roller steering head bearings, and anything else it needed to make it safe & reliable. Surprisingly enough even after 34 years of being beaten like a government mule, the engine & transmission are still in very good functional condition. This makes my life a lot easier.

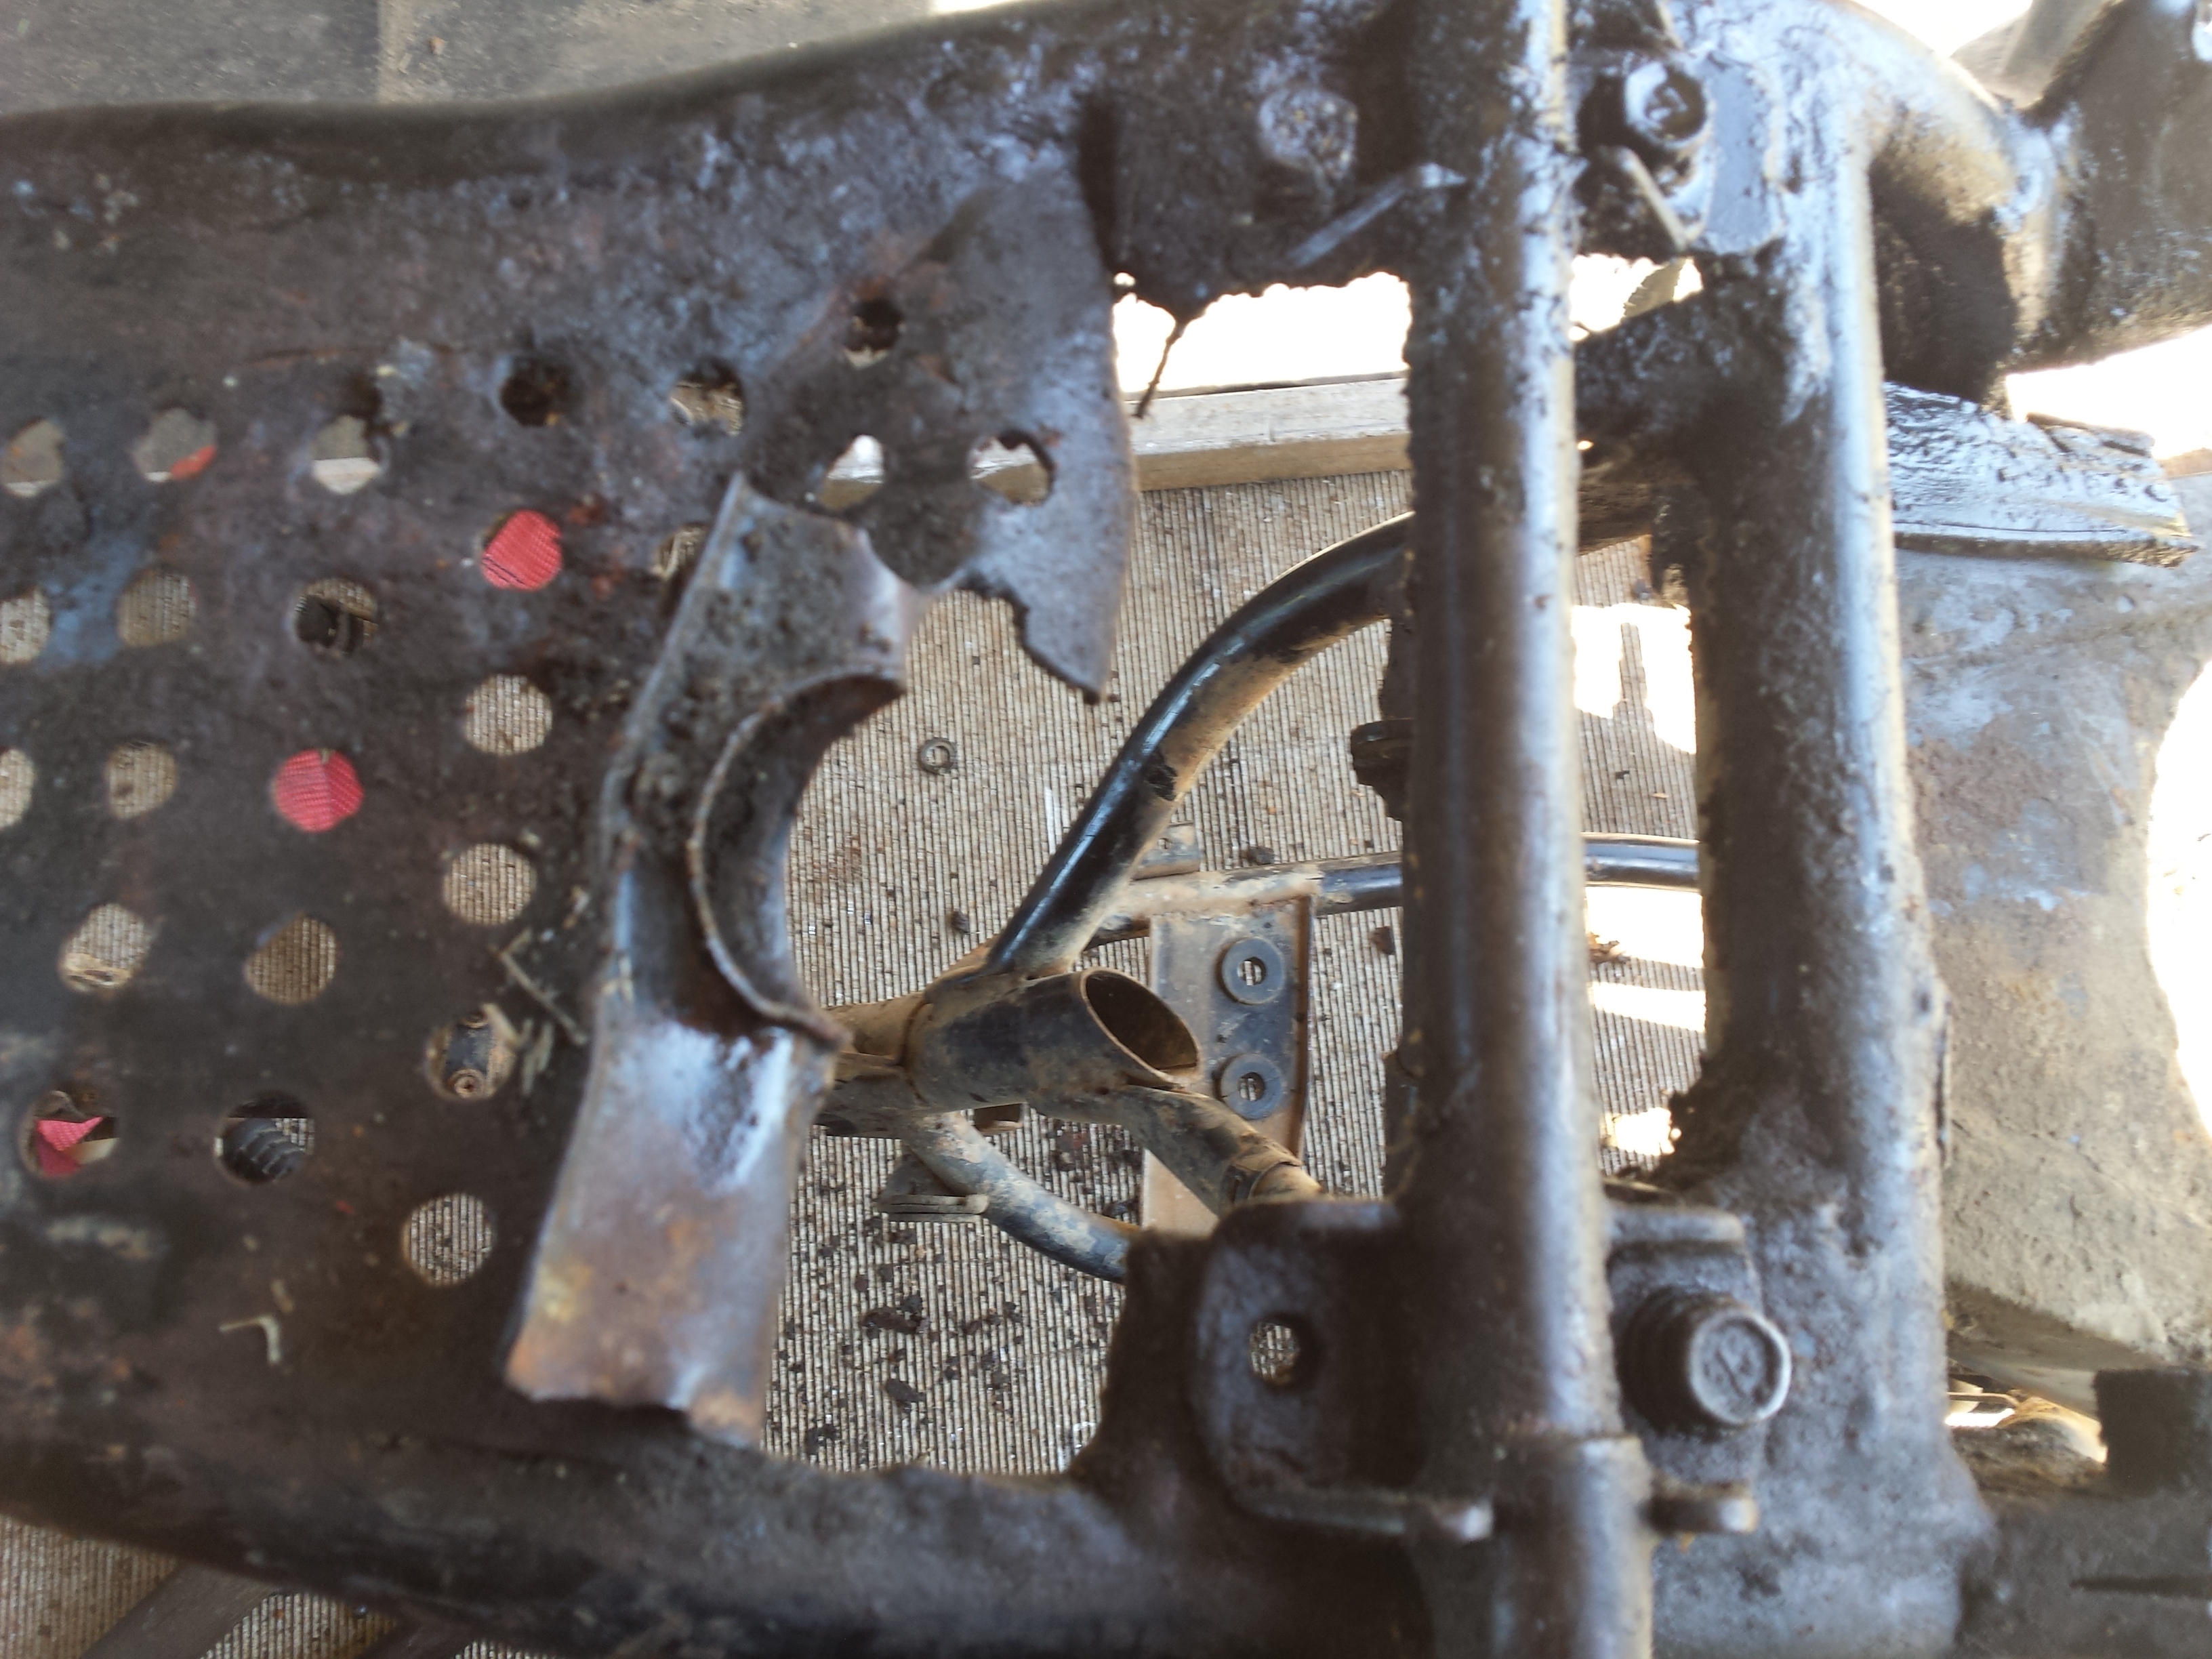
Lets start with a quick look at the rear wheel & brake linkage before I started.

<TS185 rear wheel before>

<ts185 brake pedal before>

Yes I know I need my head examined for riding it for so long in this condition, but it was still a lot of fun!

<TS185 rear wheel after>

I had to replace the brake rod, adjuster and the lever. The rod & its hardware are new old stock parts, & the lever was simply adapted from a junked motorcycle.

<TS185 brake lever after>

This is the exact same brake pedal that is shown in the picture above. I straightened it with a torch, hammer & anvil, before cutting the end off of an old dirtbike footpeg and welding it to the brake lever.

<1981 ts185 carburetor>

I had to buy an entire extra used carburetor to get a couple of parts that are no longer available separately, and I’m still waiting on my throttle cable to arrive from England so for now the carb is just sitting here until I receive the cable.

While waiting on some other parts it was time to start some body work.

<motorcycle repainting>

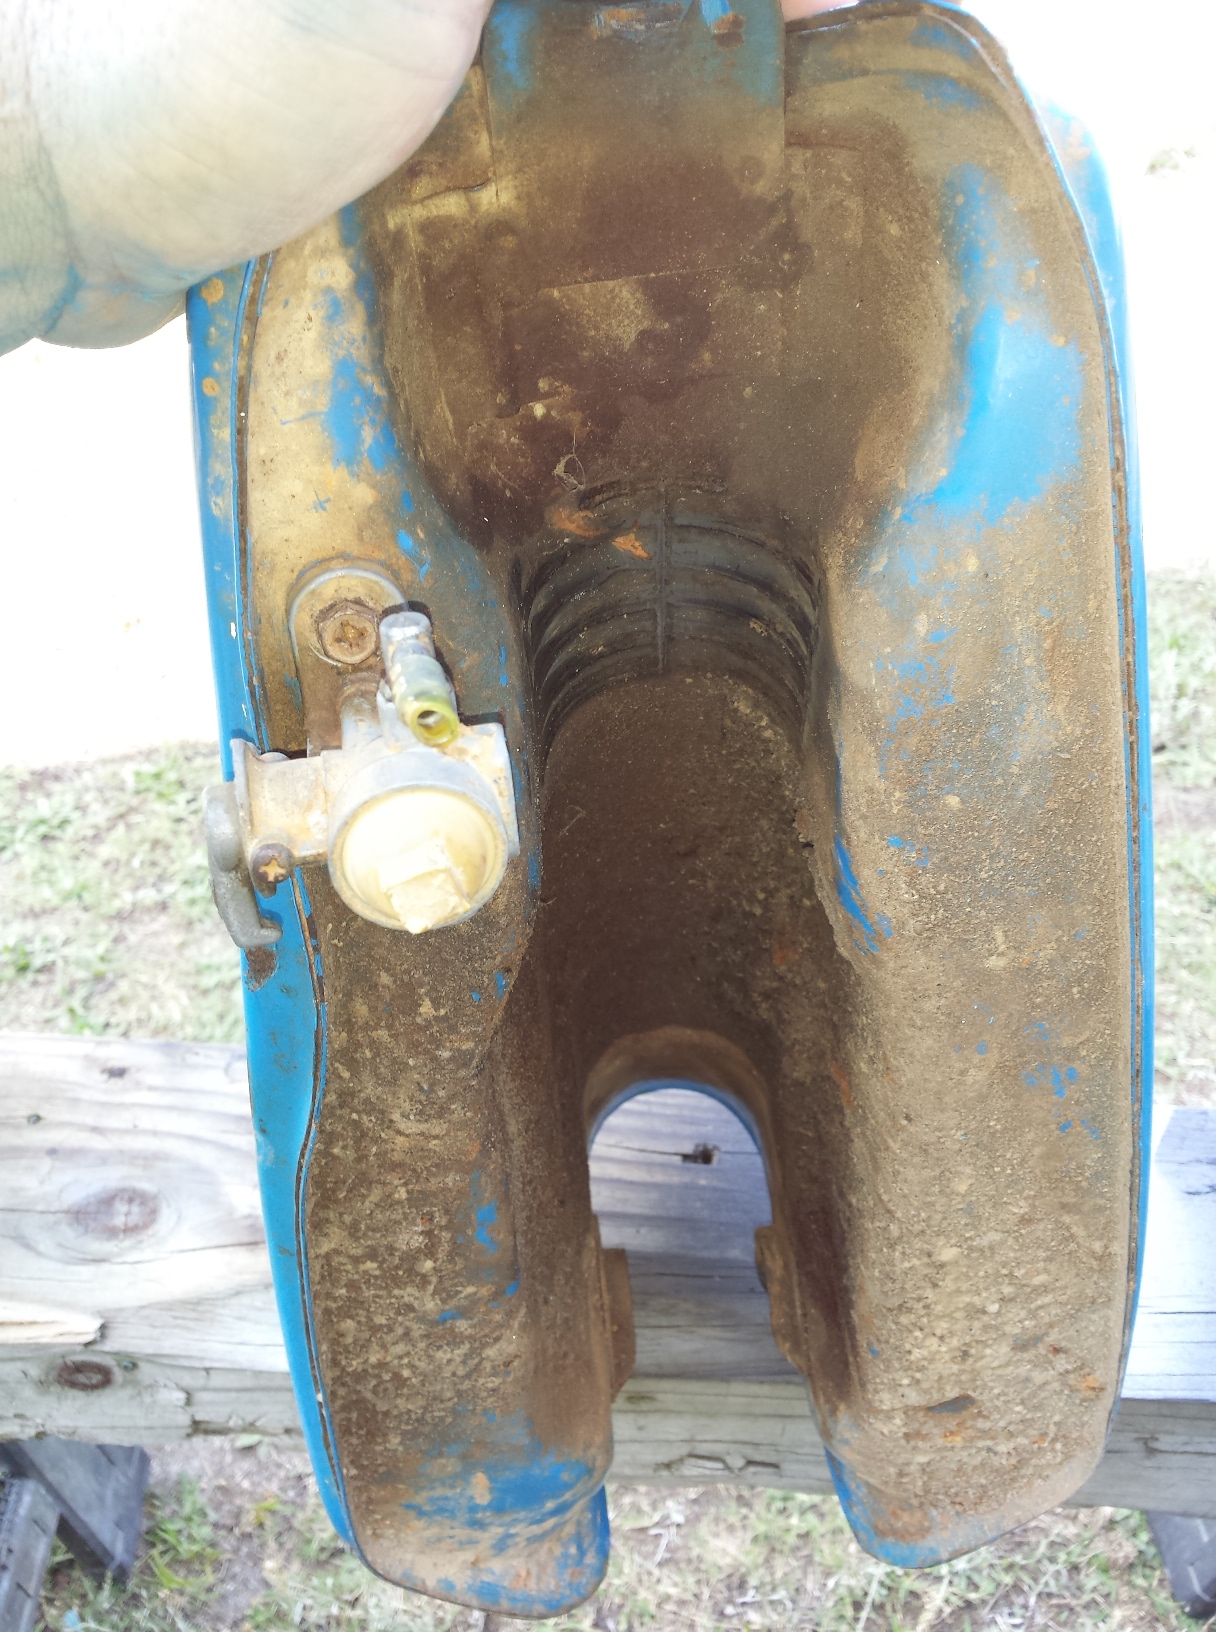
Have I mentioned anywhere in this series just how incredibly nasty this thing was? Check out the red clay mud dried to the bottom of this tank.

<bottom of ts185 tank>

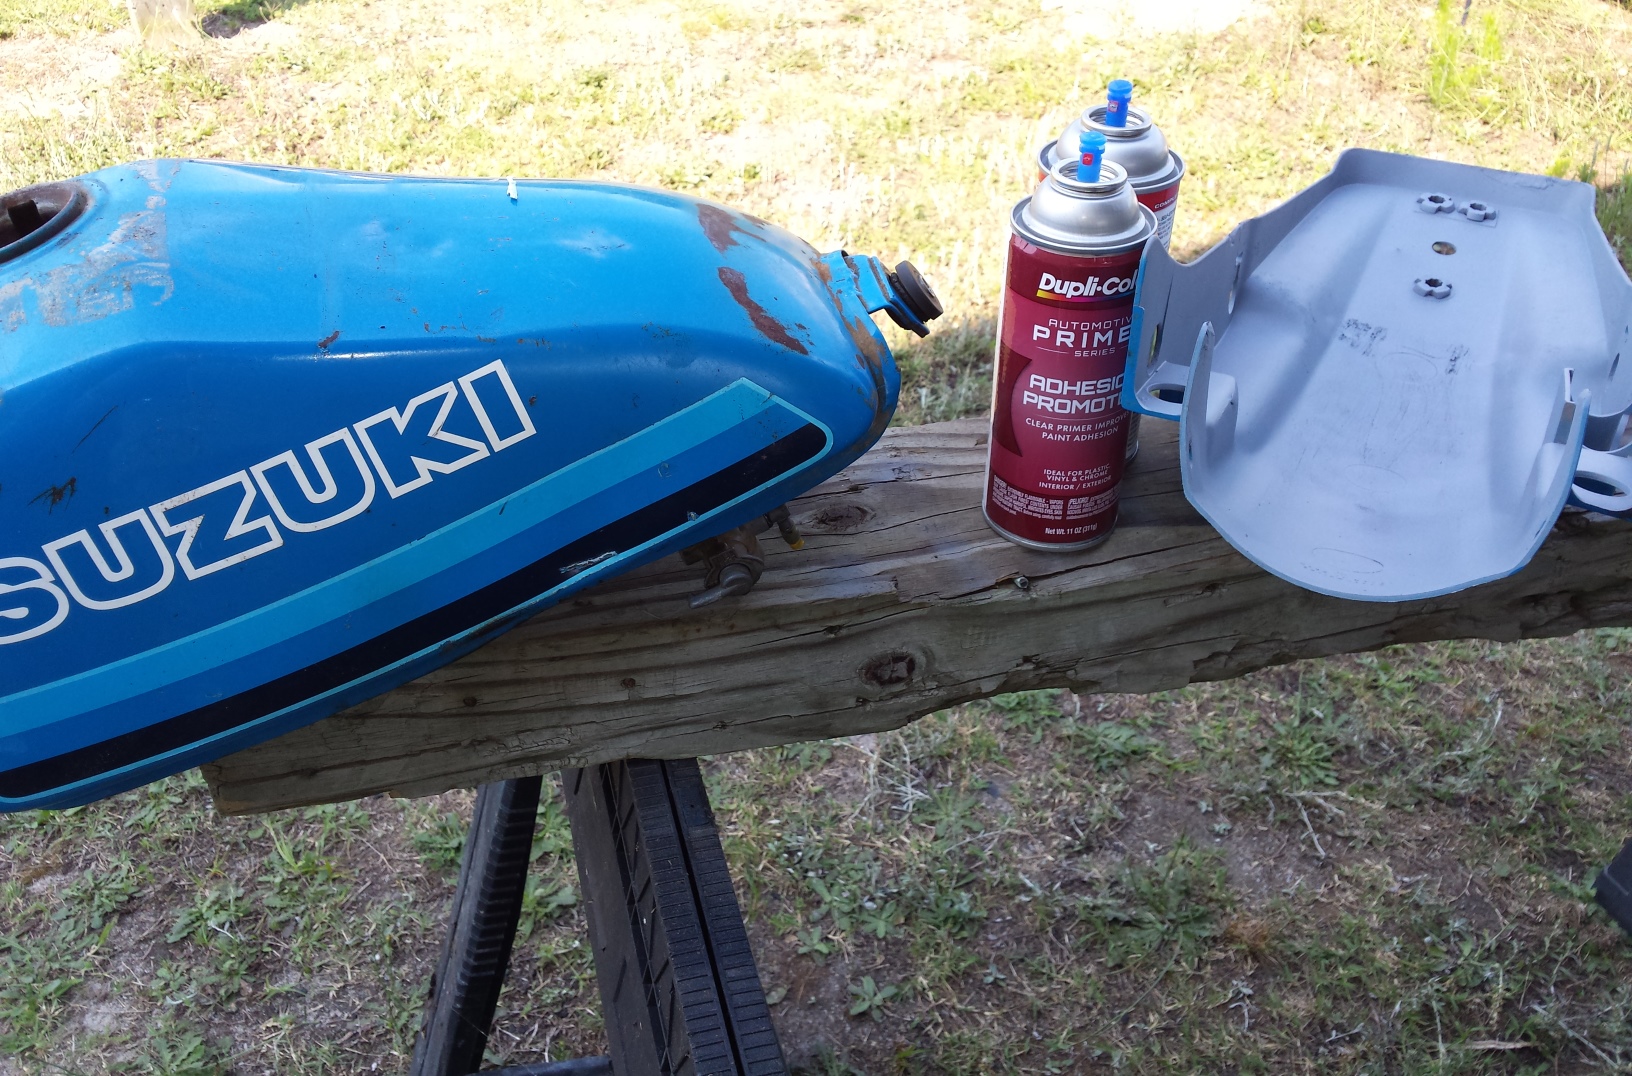
The side covers are decent used parts that only required minor work to repair, but the tank itself is actually requiring a fair amount of body work to make look good.

<20 foot restoration TS185>

It’s so tempting just to throw money at a project like this, and to a certain extent I have done that with the mechanical & safety bits. Since this is the 2o Foot Restoration the appearance of the machine will be handled in the most economical way possible, with a few cans of Duplicolor spray enamel. So many of the parts needed for this bike are either unavailable or priced beyond what I feel like spending on it, this is actually going to be a resto-mod more than a restoration. Plus the blue has to go, I want a tougher more subdued look for my trail bike so the color will be changed. No I’m not going to tell you yet, keep checking back (or just scroll down & subscribe) o see what it winds up looking like!

<ts185 right side primer bondo>

Peace Y’all


The 20 Foot Restoration Part Two

When I posted this morning this was the picture of my stopping point last night.

The engine was still sitting on the bench looking like this.

<nasty filthy engine>

and most of the small parts hadn’t been touched yet & most of them had a thick coating of baked on red clay mud. But with the aid of my beautiful assistant I was able to get it back together this far.

<my fantastic old lady>

<ts185 frame & engine>

It’s been a long time since I have pulled a hard weekend thrash on any vehicle like this, the fact that I didn’t have to push so hard was part of the challenge for me. When I was younger I spent may a weekend or late night wrenching non stop just to be able to get back to work on Monday, and it’s really nice not to be in that situation any more. It’s also nice to know that I can still pull it off if I have to.

<ts185 20 foot restoration>

So far so good, now of to order the rest of the parts that I didn’t anticipate needing! Appearance wise this might be a 20 foot restoration but all of the mechanical bits will be in 100% working order!

The 20 Foot Restoration

Finally started the repairs & upgrades to the old TS185. It was in dire need of new steering head bearings and brakes. A set of matching dual sport tires wouldn’t hurt either, along with a thousand other little things. So the day before yesterday I pulled it all the way down to a bare frame.

<81 ts185 before>

This is not going to be a show quality restoration by any stretch of the imagination. You may have noticed that the title of this post is The 20 Foot Restoration. If you’ve never heard that term before it describes a vehicle that looks really good from a distance of 20 feet or more, but when you get up close you can still see the dings & other imperfections.

If the skid plate had been removable I probably would have left the engine in the frame for all of this as it runs excellent. But the skid plate is an integral part of the frame, and the area between it and the engine was packed with a mixture of red clay mud & two stroke oil. Plus there was some damage to repair.

<ts185 skid plate damage>

After getting it cleaned up reasonably well, I took some body hammers to it, straightened it up some,  and the welded all of the broken bits back together. Then I hit it with the wire brush & sandblaster before shooting a coat of rattle can primer.

<motorcycle frame on clothes line>

All of the frame bits & pieces are painted with some some cheap spray on truck bed liner, while parts such as the shock bodies etc. are being done in brake caliper paint. I disassembled the shocks & dropped the springs into a bucket of metal rescue to soak overnight. they’re not perfect but they look a lot better.

<oem ts185 shocks repainted>

After 2 days of hard work this was my stopping point last night, this morning I am going out to detail the engine as much as I can without actually taking it apart. and will continue the reassembly of this poor old thing.

<fresh painted TS185 frame>

<The VJMC>

Start of the Winter Season

It seems as though the start of the winter season here in S.C. has been pretty decent so far. There have been a few chilly days and a fair amount of rain but most of the time it’s been really nice just a little nippy in the morning on most of my riding days but I haven’t had to break out the snowmobile gloves yet. Next week I think I’ll install the winter liner in my riding suit and try to locate those winter gloves just in case it turns really cold and stays dry.

<motopsyco's Joe Rocket jacket>

It’s Dec. 5th and I may have to put the insulated liner in sometime soon.

Yes all of your supposedly sane friends look at you like some kind of idiot or freak when they see you riding around on a motorcycle in the winter time, even here in the deep south. There are occasional times when I wonder about myself for doing it, but it’s just so much fun to ride a motorcycle! Not to mention the maintenance headaches I save from not winterizing or having to do start up service in the spring. If by some chance I were to move to a location where the snow and ice would make it dangerous to ride the bikes would go into storage for the winter but here in SC we have way too many 60 degree days for me to do that.

Life has been going really well around the farm lately, and I picked up a new shop truck to replace my semi-trusty old van. Just plain white regular cab Toyota work truck. Of course since I live by the motto, “stock sucks” the modifications have already begun starting with a tonneau cover and some cargo control updates.

<white Toyota Tacoma Regular cab>

I couldn’t forget the blogs web address!

<skull & crossed wrenches motopsyco>

Deer Hunting season went really well this year & we’re stocked up on meat for the year, so now it’s time to do a bit of cool weather trail riding. The last 2 stroke dirtbike I had was a Kawasaki KD100 that I got when I was 12 or so. Since then it has been all big 4 strokes until this year when I picked up this little blue Suzuki. This was supposed to be a restoration project but it has turned out to be such a hoot to ride just like it is, that I’m reluctant to get started on it. All of these years I was never a fan of so called “ratbikes” but now I am forced to admit there is something very liberating about riding a motorcycle on which the cosmetics just don’t mater! Tree limbs, briars, mud, dirt, dust, or dropped objects in the shop as long as it fires up with the next kick or push of the button who cares. I still love, admire and plan one day to own more beautiful bikes, but everyone should try living with at least one rat for a while.

<motopsyco suzuki ts185>

in the woods Dec. 5th 2014 8:30 a.m.

I have developed the tendency to blast around my neighborhood without any gear, kind of a throwback to the time when I wouldn’t have been caught dead on a motorcycle wearing a helmet. Yes I still get fully geared up for serious riding but I still understand why some people wont. To each his own, live & let live or die, c’est la vie, etc.

Well that’s the start of the winter season for me, it’s just like summer but with colder shorter days and fewer ravenous biting insects. What is it like for you? Do you ride your motorcycle or do you put it away & wait for brighter days?

Oops I Did It Again. A Junkyard Dog Double Feature. (updated w/ video)

I went prospecting for rusty gold again. Brought home a couple of early 80’s Suzukis.

image

One is an RM 80 condition unknown, some parts missing,  in fact I am not even sure what year it is. This one is truly a junkyard dog and it is for sale right now as is where is, to the first person willing to give me $50

image

The second one is a 1980 Suzuki TS185. It’s rough but will start and idle.

image

I really like the headlight assembly.

image

There are plenty of interesting crusty bits on this one.

image

image

Overall this old cycle is not the worst I I have ever tried to restore.  At this point my plan is for a basic restomod as a woods bike, but if too many of the parts needed for that are not available, it may become a “brat style” custom scrambler.

image

Peace Y’all