A Truly Unique Dirty Chopper

Mission Main Street Grants
Carolina Honda Powerhouse, hosted a really nice vintage motorcycle rally today (Saturday May 30th, 2015). While I plan to post a few pictures from that at a later time right now I am overwhelmed with the desire to share this fantastic custom. The owner shall remain nameless here, but he was willing to pose for a couple of pictures with his creation. First just let me give you the list of parts that make up this unique dirty chopper custom bitsa. (You know a few bits of this and a few bits of that, none of it matching but it all works together.)

<Maverick Dirt Chopper>

1978 Yamaha XT500; frame

2000 something Honda Rebel; engine

1969 Yamaha DT-1; rear wheel, brake, sprocket & sidestand

1984 Honda CR125; gas tank, forks, front wheel & brakes

1980 something Harley Sportster; shocks, seat, front & rear fenders

1972 Honda CB500-4; footpegs

1960 something Triumph clutch lever,

It also had a utility trailer tailight, cheap driving lamp headlight, a bicycle handlebar and a bunch of homemade small parts!

Yes I would ride it, would you?

<a dirty bitsa chopper>

<extended shifter>

<auxillary gas tank dirty chopper>

I forgot to mention this awesome auxiliary fuel tank sourced from some unknown ancient lawnmower.


<home built chain guard>

<cheap ass air filter>

<Honda Rebel Voltage Regulator on chopper>

<unique dirty chopper>

How about a view from the cockpit?

<mountain bike handlebars on motorcycle>

Amazingly enough despite it’s ratty origins & seemingly haphazard design when you view it from the side the proportions are nearly perfect.

< a Unique Dirty Chopper>

a Unique Dirty Chopper

<a Maverick Chopper builder>

The final flourish to set off this masterpiece of junkyard art is this emblem added to the numberplate!

<not a ford maverick>

Peace Y’all!

2015 Carolina Classic Motorcycle Show

<Carolina Classic Motorcycle Show>

Carolina Classic Motorcycle Show registration tent

The Triad Vintage Motorcycle club hosted their 9th annual Carolina Classic Motorcycle Show on May 2nd 2015. Mrs. Finch & I saddled up the old Suburban Assault Scrambler and rolled out of our driveway headed toward the N.C. Transportation Museum in Spencer N.C. Rather than running up on the super boring slab I plotted a course to Spencer that involved rolling up to Chesterfield, S.C. and picking up Highway 742 and rolling into N.C. and picking up U.S. 52 for the rest of the way into the Show.

Let me get started by praising the venue, the Transportation Museum is a very nicely laid out train museum with great parking for visitors and a really nice grassy area with paved pathways for the show grounds. Although you will see glimpses of it in the pictures the best way to see how nice of a facility they have is to watch this little video clip I made riding into the museum. Some of the show bikes are also featured in the video as well.

I have decided to make this mostly a pictorial post with random comments. There was something for everyone here.

<1929 Indian Scout>

Lets go ahead and start out with this 1929 Indian Scout!

<29 Indian Scout engine>

Of course while our baby boomer parents have driven the collectible motorcycle market so far, I predict that as those of us in Generation X take over you will see the motorcycles that we lusted over in our younger days such as this pristine Suzuki Katana experience a surge in value & collect-ability.

<1st Gen Suzuki Katana>

<81 82 83 Suzuki Katana>

No motorcycle show is complete without a couple of nice Harleys

<old shovelhead Harley>

The old FLH was nice but I really loved this Evel Knievel replica Sportster.

<Evel Kneivel replica sportster>

Is that cool or what?

Some really nice British iron was there also.

<triumph tr6>

<Norton Commando 750>

<77 Triumph Bonneville sidecar>


Some off road racers were being shown as well.

<CR Honda & YZ Yamaha>

<restored Suzuki TS185>

The cafe racer crowd was well represented.

<classic cafe racers>

<80 CB650 Cafe Racer>

A very tasty looking Yamaha RZ350 Kenny Roberts signature edition.

<RZ350 Kenny Roberts>

<2 stroke Yamaha>

For once mine was not the only rat bike in the show, check out this XS400 chopper.

<rat yamaha chopper>

Great looking patina on this old Norton

<Norton Rat>

<Norton Rat>

Another Gen X favorite we couldn’t afford when we were 19, the Honda Interceptor

<Honda VFR1000 Interceptor>

The trains rolling in and out during the day greatly added to the atmosphere of the event.

<historic transportation>

It’s time for me to stop writing now & let the pictures do the rest of the talking…

<Yamaha Seca Turbo>

Yamaha Seca Turbo

<Sears Puch 250 Twingle>

Sears Puch 250 Twingle

<1966 Honda Super 90>

1966 Honda Super 90

<the Gold Wings>

To see more visit the Triad Classic Motorcycle Club Facebook page

Peace Y’all


Meditative Machinery April 2015 Website of the Month!

Meditative Machinery is the personal blog of Michael Morgan. Now I have never met Mr. Morgan but I know that he is a kindred spirit who loves his time in the workshop with his motorcycles as much as he loves riding them. I hope he doesn’t mind me quoting a few words from his “about me” side bar.

Finally I am doing what I want to do in my shop at my own pace. I have discovered that under these circumstances, if I can keep my mind clear, my mechanical work really is a type of meditation. It clears my mind and profoundly relaxes me. That is the point of this blog. Relax, stay in the moment and enjoy the opportunity to restore and refresh these wonderful machines.

This is a nice simple little blog  with great writing & decent photography and although there are a couple of street bike restorations shown, he specializes in vintage off road machinery especially old trials bikes such as the Honda TLR & Yamaha TY series.

Thank you for sharing your workshop with us, and should I ever find myself headed to Baja, I’ll be sure to look you up.

Click here & go spend a little time at Meditative Machinery, you’ll be glad you did.

Another Project wAmmo CM400 Update

It’s time for another Project wAmmo CM400 update. Let’s start with my confession that I lost interest in the project for a little while and was really short on time for it. Had some issues with getting the frame sandblasted so I wound up bringing it back home and hit the frame with some paint remover and went over it with my little hand held sandblaster before coating it with spray on truck bed liner. Did the same thing for the tank before brazing up a couple of damaged spots on it and sealing it with Caswell Epoxy Gas Tank Sealer. I also wound up replacing the fork because I was unable to identify the one that was on it to get the proper repair parts so I replaced it, and installed a set of tapered roller steering head bearings for good measure.

<project wammo cm400 bobber>

I got the modified Harley solo seat covered in olive drab Cordura fabric to match the overall theme planned for the bike.

<olive drab solo seat>

Even though the engine would start and run okay, compression on the right cylinder was consistently 50 psi less than the left cylinder. Even after adjusting the valves (click here for the proper procedure) which didn’t help, and putting some oil in the cylinder to see if it would come back up temporarily indicating worn rings, the right side was still 50 psi lower than the left side so I went ahead and pulled the engine apart for a top end overhaul.

<CM400 Engine top end>

The problem turned out to be that the oil rings were frozen to the piston and the gaps were aligned on the top 2 rings preventing them from sealing. The downside to this bike originally being such an artistically created “natural” ratbike is that it was incredibly nasty. Here I am soda blasting the cylinder to clean it. Yes that is the cheap hand held sandblaster
and it works just fine with blasting soda, so if you’re on a budget & just need to clean a few small parts without damaging them the way sandblasting can try this. Just do not hit any gasket mating surfaces with the soda.

<soda blast motorcycle cylinder>

Once everything was cleaned & honed I taped off the mating surfaces so that I could spray on some Duplicolor cast iron gray engine paint.

<paint prep motorcycle cylinder>

<Honda CM400 clutch cover>

The original clutch cover will be replaced with this good used one and since I was not splitting the cases for a full overhaul I sealed up the bottom half of the engine with duct tape so that I could degrease it and remove the existing paint.

<aircraft peeler really works>

Since the head needed a good clean up, it became the subject of a head service tutorial that you can read by clicking here. The next picture is of the original pistons with new rings ready for the cylinder to be re-installed. The blocks of wood  held the pistons up and level while beautiful assistant slid the cylinder slowly into place while I compressed the rings.

<Honda CM400 pistons>

<freshly honed Honda cylinder>

This looks a lot better than the before picture doesn’t it? Once I got the head back on it was time to line up the timing marks for the crankshaft & camshaft as shown below and put the camshaft back in.

<Honda 400 timing marks>

<Honda 400 twin camshaft timing>

Afterwards it was just a matter of putting the rest of the parts back on and torquing everything down properly. Don’t forget to fill the oil pockets under the cam lobes with oil before putting the rocker box cover back on.

<cm400 bobber engine>

The engine is now ready to reinstall, I am going to leave the rotor cover off until later, ditto for the new clutch cover.

<wammo engine in frame>

Now the engine is sitting back in the frame. The intake spigots are new replacements for the damaged originals.

<I like puzzles>

I like puzzles

Now its time to sort out the wiring harness. Sometimes it is easier to start from scratch but for right now I am going to attempt to reuse at least some portions of the factory harness.

<honda twin regulator rectifier>

Normally on a custom motorcycle one would attempt to hide such parts as the regulator rectifier but since I am going for a post apocalyptic paramilitary look on this machine it is bolted to the side of the rear fender out in plain sight.

<Honda CV carbs>

Once I get the wiring sorted out and get the wheels back on it’ll be time top restore this set of CV carbs. I will probably do an in depth post on that process when the time comes.

Peace Y’all

Destination Eustis Vintage Motorcycle Show

<Destination Eustis Flyer>

It’s time once again for the one of the premier shows on the Vintage Japanese Motorcycle Club calendar; The Destination Eustis Vintage Motorcycle Show! I attended this show last year and although I am unable to attend for this year I was so impressed that motopsyco.com is one of many fine sponsors of the event this year. At this time I am definitely planning to return in 2016.

Please note that just because this is a VJMC show does not mean only Japanese bikes, Bring out any old iron you have be it American, British, or European there are classes for everything as long as it is vintage!

Just a reminder that this Vintage Motorcycle Show will take place inside the Lake County Fairgrounds EXPO Building. It is a secure facility with the ability to load and unload motorcycles inside the facility in the event that it rains. This is a premier VJMC show venue. There will be no Bike for Sale signs on any bike entered into the show. Also only bikes entered in the show will be displayed in the main expo building.

Here’s a little walk through of last years show to give you an idea of the quality of machines you can expect to see there.

The International Motorcycle Swap Meet and Vintage Motorcycle Show is taking place at the Lake County Fairgrounds in Eustis, Florida March 6-8, 2015. This year’s event continues a legacy of more than 20 years of vintage motorcycle events at this location. We would like to thank the City of Eustis for graciously supporting this event. Once again they will host in our honor a Downtown Block Party on Friday evening, March the 6th. On Saturday, March the 7th local business will provide entertainment and local restaurants will open their doors for all event attendees. So come join us as share our event with the City of Eustis and their local businesses. 

For more information or to register for the show please click on this line.


Honda CM400 Valve Adjustment

Today I’m going to show you how to perform a Honda CM400 valve adjustment. This basic procedure covers 1978-81 CM & CB400T Honda twins. This engine is from a 1980 CM400. Please refer to a proper CB/CM400 service manual to verify the exact procedures & specifications for your motorcycle. I will give the valve lash & misc. other tune up specs at the bottom of the page.

<cm400 valve adjustment tools>

Gather up the tools you will need along with a copy of the appropriate service manual. Please note that it is not necessary to remove the engine from the motorcycle to perform this procedure, I already have this engine out so that I could do some some fabrication work & painting to the frame. This is the long delayed Project wAmmo bobber that I should have finished months ago, but now I am back on it with a vengeance. You will need to remove the fuel tank, gear shifter, and whatever other parts are necessary so that you can remove the valve cover & the left side crankcase cover. Once all of that is done then remove both sparkplugs.

<cm400 spark plug removal>

After you remove the spark plugs, switch sockets & turn the engine in the direction indicated by the arrow on the alternator rotor. The big rusty flywheel looking thingy you see in these pictures for those of you who have never seen one before. This one had to have some of the rust sanded off so that I could see the markings on it.

<honda cm400 alternator rotor>

Turn the engine and watch for the intake valve rocker arm on the side you are adjusting to move down and then back up. These little Honda twins have a 3 valve per cylinder layout with 2 intake valves & 1 exhaust valve per cylinder.

<cb400 rocker arms illustrated>

Once the intake rocker arm returns to the top continue to turn the engine slowly and line up the next “T” mark on the flywheel with the pointer on the engine case, as it comes around. If the exhaust rocker arm starts to move you have gone to far & must circle the engine all the way back around & start over. Do not turn the engine backwards to get to the timing mark if you miss it.


<Honda cb400 timing marks>

Then verify that the piston is indeed at top dead center. On this engine it is fairly easy to do just by looking into the spark plug hole.

<Honda cb400 piston tdc>

With the piston at top dead center for the cylinder you are adjusting both the intake & exhaust valves should a little bit of play in them unless the engine has severe wear or improper maintenance that has caused valve recession which will close up the gap. Too much lash is also detrimental to your engines performance and will cause your engine to tap very loudly. Too little lash will eventually lead to a burned valve if it doesn’t close completely.

Loosen up the lock nut for whichever adjuster you choose to start with, here I am starting on the exhaust side.

<cm400 exhaust valve locknut>

Then insert the proper size feeler gauge, loosening the adjuster with a flat screwdriver if needed.

<Honda cb400 exhaust valve lash>

Then carefully tighten the adjuster screw & lock nut until the feeler gauge is able to be removed & re-inserted with just a little bit of drag, but the next size larger feeler gauge should not fit. It will be necessary to hold the adjuster screw with the screwdriver as shown below while you are tightening the lock nut. Be sure to recheck your lash after you tighten down the lock nut for good, sometimes you may have to readjust to compensate for the adjustment screw moving when you torque the lock nuts.

<Honda cb400 intake valve lash>

Once you have all of the valves adjusted properly replace the engine covers being sure to inspect & replace all gaskets & seals as needed.

Valve lash and some miscellaneous tune up specs are below:

Intake valve clearance 0.10mm +/- 0.02mm    0.004″ +/- 0.0008″

Exhaust valve clearance 0.14mm +/- 0.02mm    0.006″ +/- 0.0008″

Idle speed 1200 rpm +/- 100 rpm

Spark plug   NGK-D8EA  or ND-X24ES-U

Spark plug gap  0.6~0.7mm    0.024~0.028″

Oil capacity  3 liters    3.2 U.S. qt.s

Hopefully this has helped someone out.

Happy Wrenching!

StoriesofBike Website of The Month December 2014

<Stories_Of_Bike_Brat_Honda>


I have a confession to make. I love to watch hipster motorcycle videos. In fact they have to be downright stupid for me not to like them. Hell I’m even thinking about making one of my own, after all even though I am old as dirt I’m still so hip I have trouble seeing over my pelvis.

The website that will be brought to your attention today goes quite a bit beyond the typical bike videos normally produced by guys in small shops with custom wares to hawk or questionable skills to show off, and gets deeper into the personalities of the people who ride and love these motorcycles.

<Stories_of_Bike_Cafe_Suzuki_Tu250>

We all dream of riding

Based in Australia, Cam Elkins is the creator of Stories of Bike, with the aid of his brother Jack who creates the music that accompanies the videos. Yes there is a video or two involving your typical tattooed 20 somethings with piercings, flannel shirts, and fuzzy beards working on some variation of custom bikes. There’s absolutely nothing wrong with that, and if that were all there is to it, watching these clips would still be a great way to waste a few minutes of your time on a fairly regular basis because of the strong production values the StoriesofBike.com team bring to the table .

<StoriesOfBike_Forge>

But these videos blow right past that, talking to the riders and builders in depth about motorcycles, life, love and how they came to be the people they are today. Yes there is fine machinery in these videos, but there are also fine people in these videos too, from different places & backgrounds but all connected by a common love of riding motorcycles. When you watch one of these clips you end up feeling like you know the person or persons being filmed & interviewed, a very difficult feat to pull off in the short film format.

The video embedded below especially touched my heart, there is nothing better than love that lasts all the way to the end. This is my favorite video at StoriesofBike.com watch it all the to the end.


Love baby, it’s what makes life worth living, especially when you have motorcycles to go with it.

So is StoriesofBike Website of the Month material? I absolutely think so, let me know if you like it as much as I did

<Stories_of_Bike_Poster>

Peace Y’all,

Psyco

67 Honda CL77 Scrambler

A few weeks ago I attended a small but but high quality motorcycle show hosted by the VJMC (Vintage Japanese Motorcycle Club) of which I am a member. It was nice to see the other folks in the club at this meet which was held in conjunction with the Squealing on the Square barbeque festival in Laurens S.C.

<1967 Honda CL77 Scrambler Right>

Fantastic 1967 Honda CL77 Scrambler

One of our state field reps and one finest gentlemen you could ever hope to meet brought a portion of his collection. One of the bike he brought was this most excellent 67 Honda CL77 Scrambler. Since I have a soft spot in my heart (or is that in my head?) for this style of motorcycle no matter what it’s country of origin, year of manufacture, or even it’s condition I decided to take a few extra shots of this one and do a bike feature on it.

<all the gauges you really need>

all the gauges you really need

Need some parts for your Scrambler? Click here!
Even though they are all commonly called 305s today you can see that the original tank badges on this one call it out as a 300 cc. This badge is completely authentic but it is exactly the same engine.

<CL77 300 tank badge>

<Honda 305 Scrambler Engine>

Note the steering damper in the above photo. To me the early Honda twins like this are some of the finest looking engines ever built. The fact that nearly every surface on the cylinder and the head, except for the points cover are covered in cooling fins really sets it off from later machines.

<Honda Type 1 points cover>

Of course we can’t forget one of the coolest looking features of these old scramblers, the high pipes.

<Honda Scrambler High Pipes>

High Pipes Baby!

An interesting feature of these early scramblers is that the mufflers are not an integrated part of the exhaust system but were actually an add on that the owner could choose to install and remove at will depending upon where they were riding.

<more cl77 high pipes>

So when you see one out in the wild and it looks like this remember the muffler isn’t missing, it was optional.

Twin leading shoe drum brakes brakes on both ends were state of the art back in the 1960s, and are still reasonably safe & effective on lightweight machines like this for today’s traffic when set up properly.

<vintage honda twin leading shoe brakes>

Truly a handsome old bike from all angles so I am going to close out this post with a head on shot that I really liked.

<The 1967 Honda CL77>

The 67 Honda CL77

Peace Y’all

P.S. I am going to be accepting submissions and suggestions from other motorcyclists for this feature, please click here to reach the contact form on my about page, and let me know what you have, and if I think it is cool and/or oddball enough to suit my tastes it will be featured here..

Attention Deficit Project Disorder!

Well it was another rough week at that thankless job that I go to everyday of every week to keep the lights on around here until my web store catches fire & I can sell enough products to retire from everything but blogging. (go buy something, click on any ad here and help a brother break free!) My original plan for the evening was to go climb up in a tree  & try to shoot Bambi’s father, but it was starting to rain kinda hard when I got home so instead I decided to grab a beer, & carry the forks that the mail carrier just dropped off from the house out to the shop and maybe work on fitting them to the CM400 bobber that I’ve been tinkering with for the last few months, but decided that the shop really needed cleaning up a little before proceeding so I pushed some of the junk bikes out into the rain for more room.

<honda bobber frame & seat>

What’s under your desk?

Then I moved the two portable work benches back to the sides of the shop to clear up floor space. Then I decided to go ahead & start soaking my new to me,old pile of junk Suzuki with penetrating oil so that it would come apart easier when I go to replace the rear inner tube and the 40 or 50 other parts it probably needs to be trail worthy. Of course it’s a lot easier for an old fart to work on a motorcycle if he doesn’t have to bend over so I grab the old furniture truck ramp from the yard and dig through my lumber pile for a couple of timbers to set it up on since my motorcycle lift table is loaded down with my CB360T restoration project. For some reason as I was digging through my scrap lumber pile, a misshapen piece of wood that was left over from some long forgotten construction project jumped into my hand and said, “hey look at me, wouldn’t I make the perfect Plains Indian gunstock war club?” But by this time I had enough of a buzz going that there was no way you could ever get me near the bandsaw so I threw it back on  the pile, got the timbers and headed back inside to prop up the dirtbike. Hopefully I can find it again when I am sober & have some time on my hands as it would go so well with my Hawken,  powder horn etc. In fact it would look really sweet hanging up next to my black powder shotgun if I ever finish building it….

Can you see the pattern here? It’s a serious disease that afflicts middle age men. ADPD Attention Deficit Project Disorder It’s incredibly dangerous, because the problem just gets bigger & bigger. You become an addict scanning Ebay & Craigslist for just the right item at the right bargain basement price. The problem is that you don’t need it, there are a dozen projects, plus your honey-do list ahead of it, and just as sure as hell your boss will start demanding extra overtime on top of what you already work, so your discretionary income is temporarily enlarged while your time to enjoy it is diminished, this leads to more shopping & less doing until your place starts to look like a salvage yard, and your neighbors start calling you Fred G. Of course this is also the time when everything in your house will break down too, so you have to take care of those things first. Sure you could pay someone to fix the plumbing or the light fixture but for two things 1; the guy you call can’t do it any better than you can & maybe not even as good. 2; You just scored the deal of the century on another old piece of shit motorcycle, gun, car, jeep, boat, plane or what ever your addiction is & spent the money already.

<1980 Suzuki TS185>

At any rate I got the TS185 up on the ramp so I can work on it, but since the weather is supposed to be nearly perfect for riding tomorrow, it was time to give the old CB650 a good going over & adjust the chain so I stopped to do that instead. Hey you got to look after your main squeeze if you want her to look after you! Well it’s been fun blogging with a little buzz going on, but right now I need to find a carb kit & battery for the 1969 CJ5 under the carport & figure out when I’m going to get time to fix my tractor so I can keep the wood lot clean & get the garden ready for next year. Then maybe I can relax, watch a little television while checking out the crack-list on my tablet.

Peace Y’all
//

97 Honda Shadow 1100 Carb Cleaning & Jetting ~ Part 1

<97 Honda Shadow American Classic Edition>

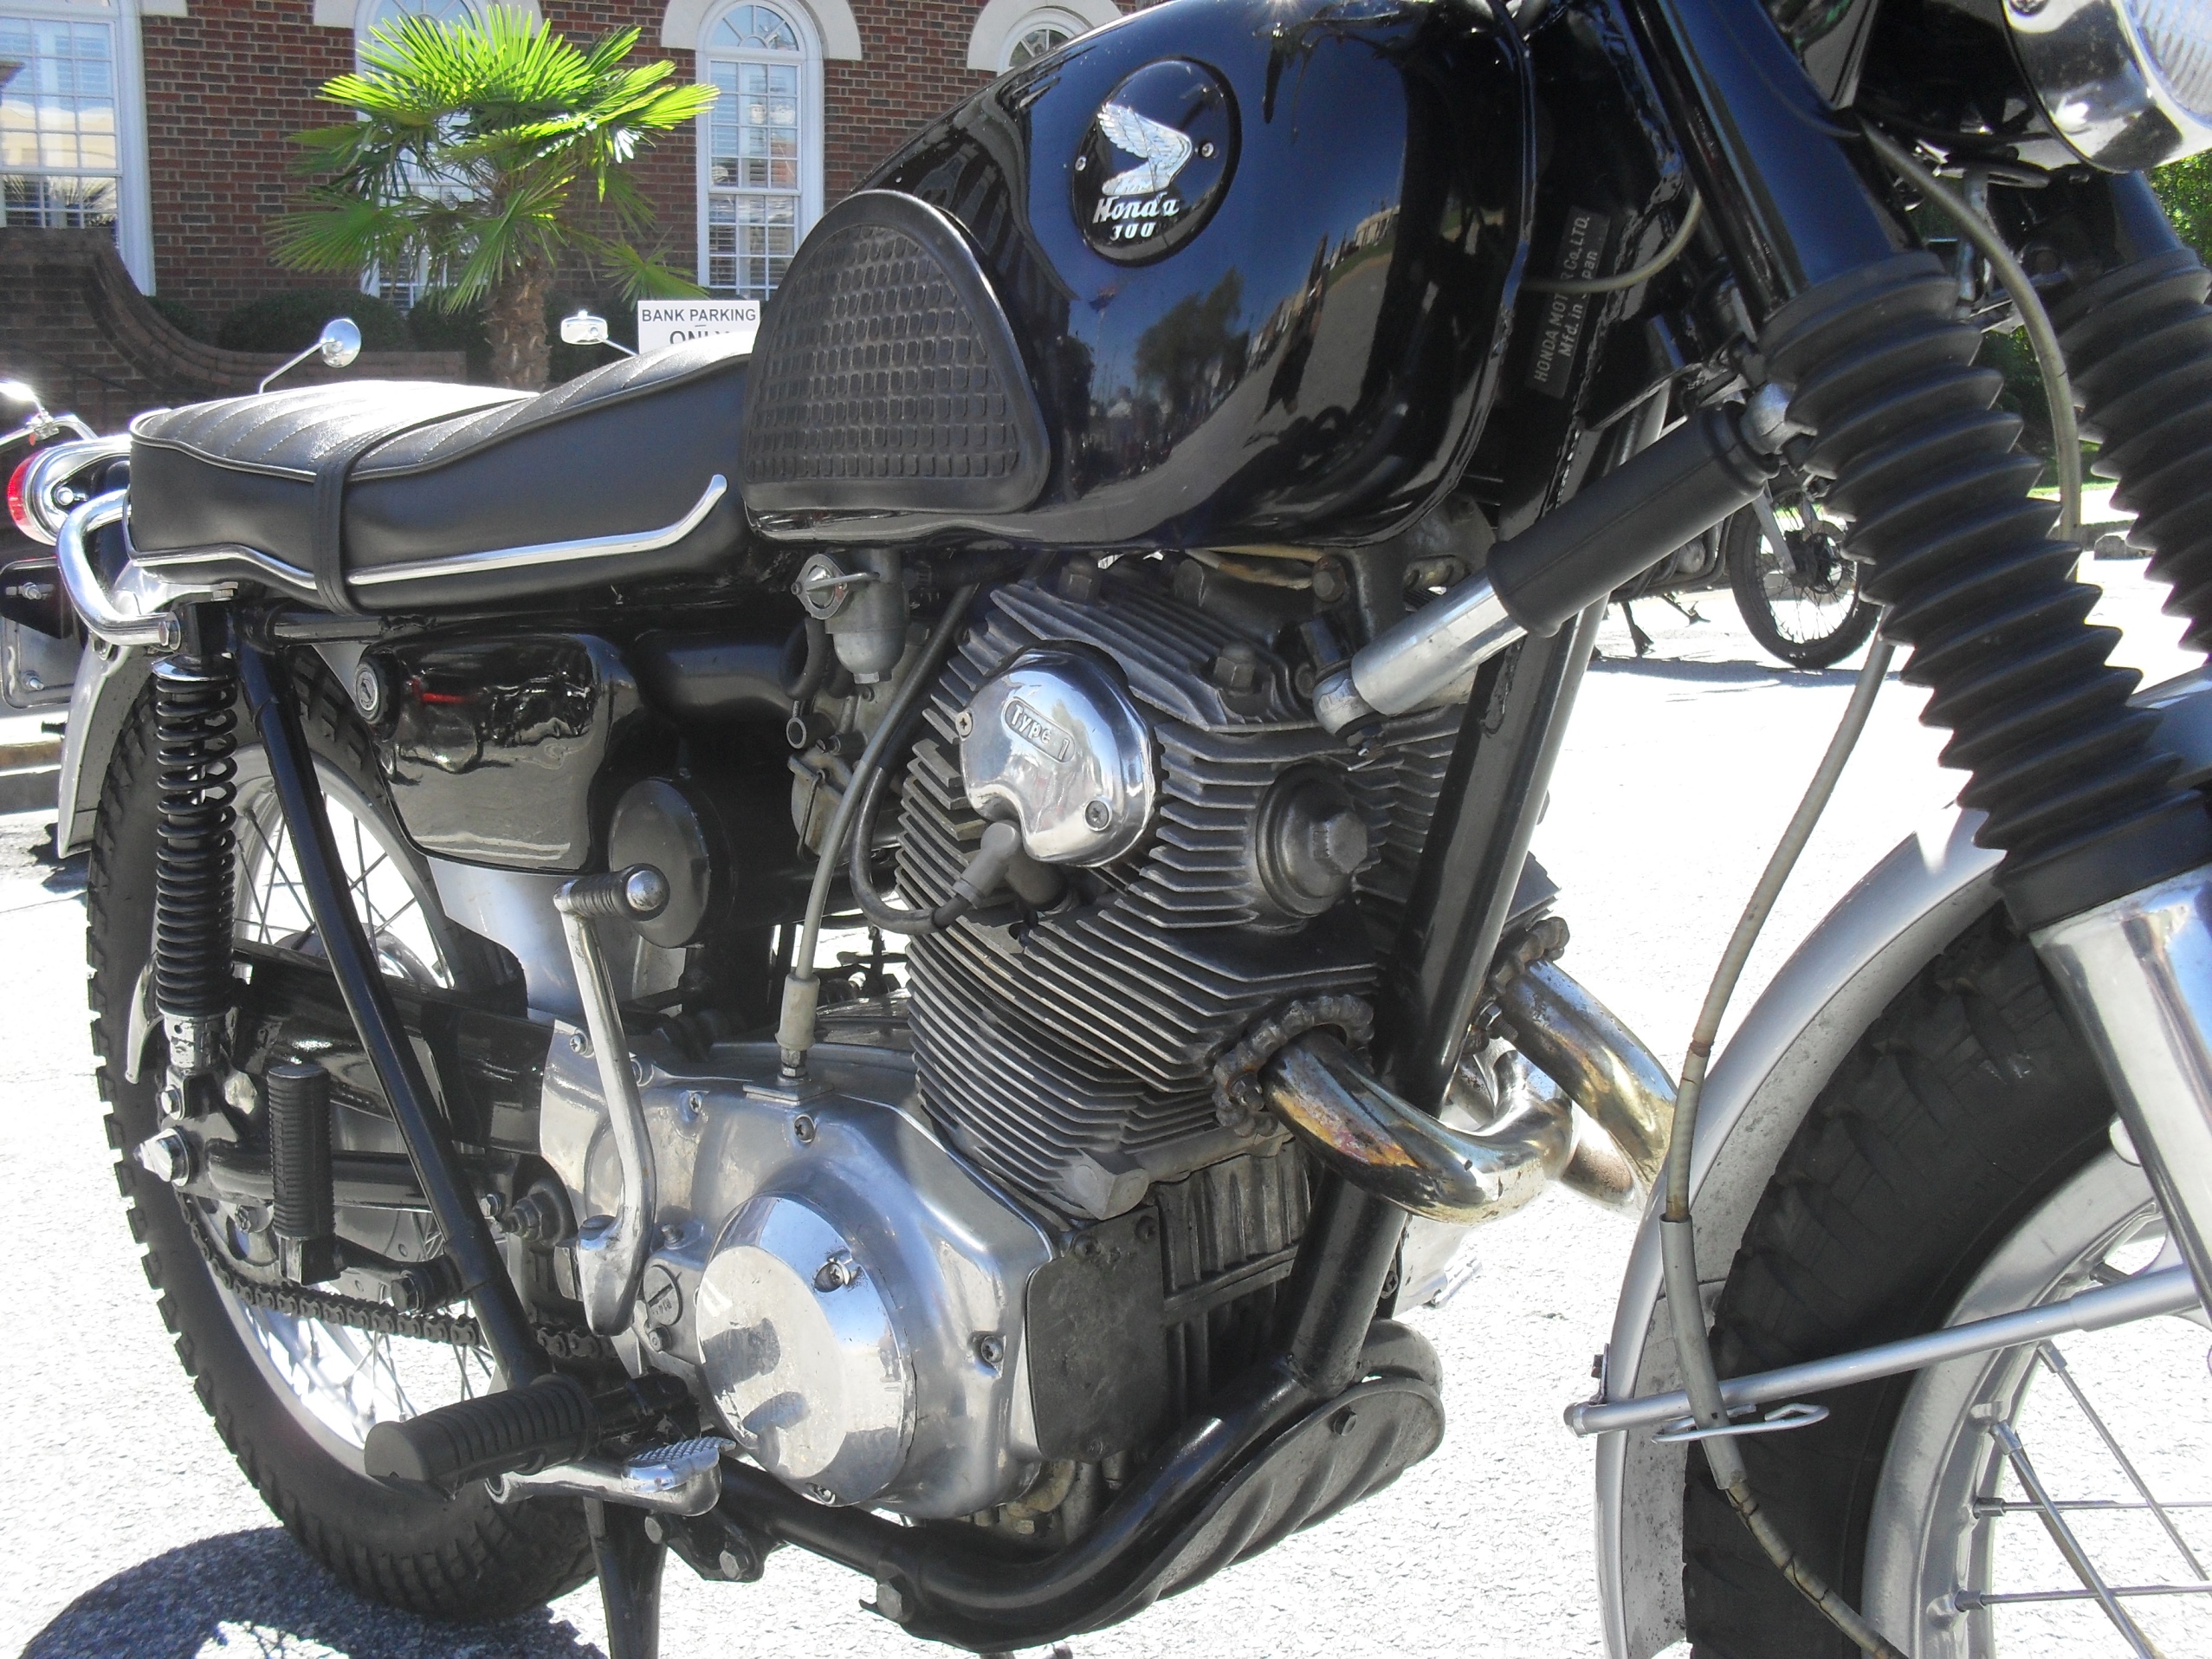
Let’s jump into another “how to” post! Above is today’s patient a 1997 Honda Shadow, a great riding 1100cc v-twin that while still running very well, needed a little tweaking.  These motorcycles came from the factory with the carburetors set up toward the lean end of the spectrum for emissions reasons. This led to some drivability issues on some of them, when you combine the original lean jetting with a set of drag pipes, and 17 years of ethanol contamination it was running mighty lean indeed. The engine had a tendency to run hot, hesitate on acceleration, and frequent backfiring on deceleration. So I am going to pull the carbs off, clean them up a bit and install a Dynojet Research jet kit in them. To hear what this bike sounds like before the carb tuning click here go to my youtube channel.

First get the bolt out of the rear of the passenger seat.

<001 ace seat bolt>

Then remove the 2 from beneath the drivers seat one on either side

<002 ace shadow seat bolt>

Lift it up and set it out of the way.

<003 honda shadow seat remove>

Locate the petcock and shut off the fuel.

<004 honda 1100 petcock off>

Remove the bolt at the rear of the tank,

<005 shadow 1100 tank bolt>

and the other one at the front of the tank.

<006 shadow ace tank bolt>

Disconnect the fuel line from the petcock.

<007 remove fuel hose>

afterwards lift the tank high enough to remove this vent hose from the bottom

<008 honda shadow tank vent>

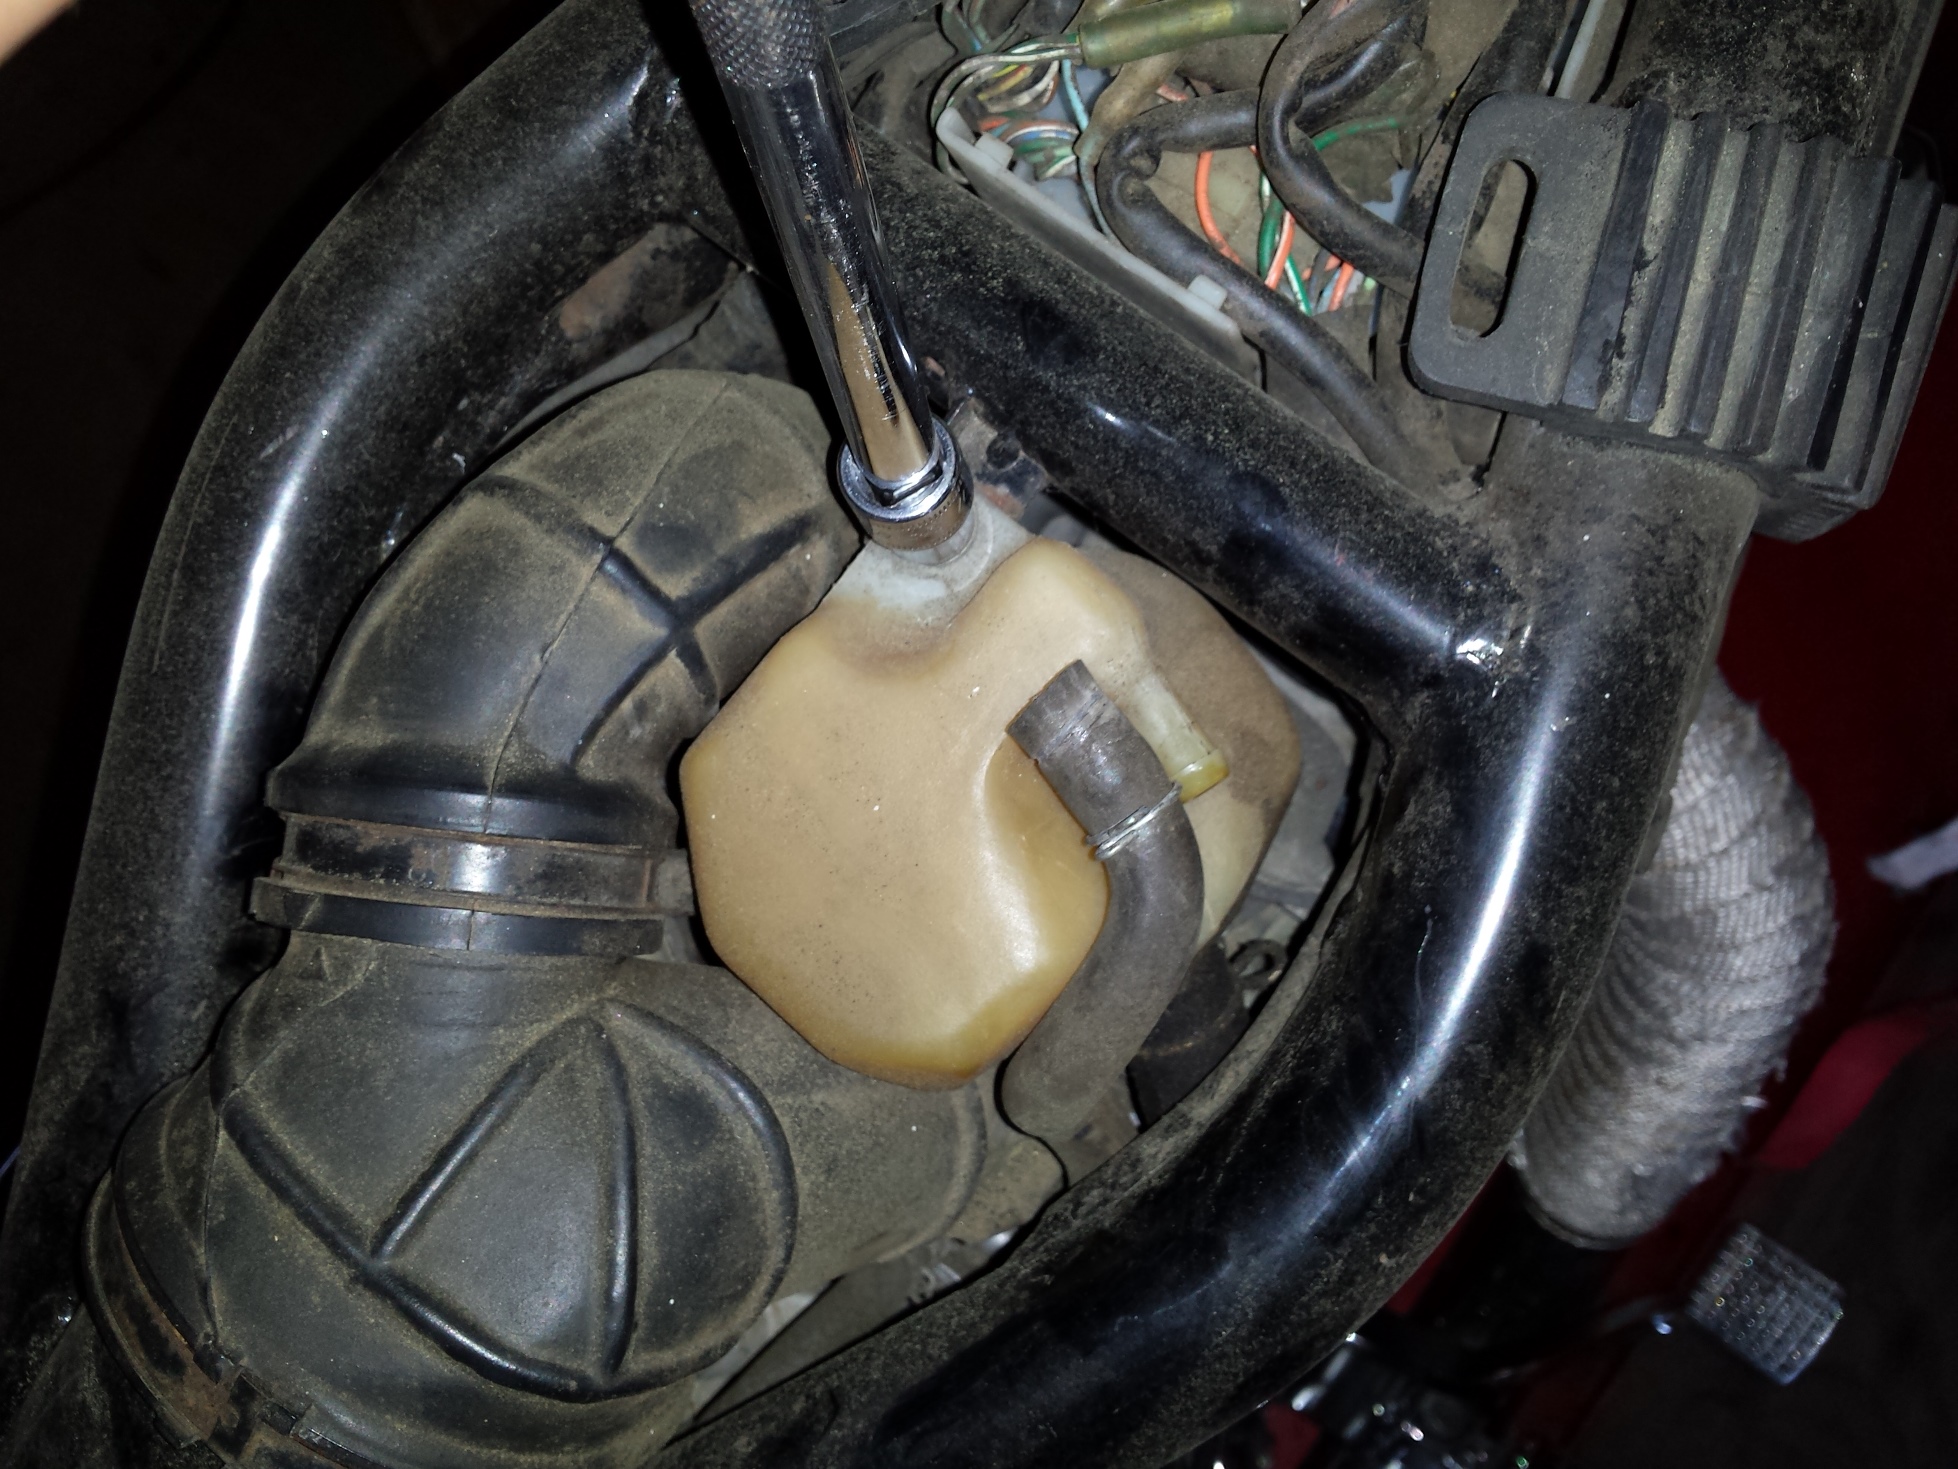
After you have removed the gas tank and placed it in a safe location this is what you should see.

<009 honda 1100 air inlet>

The yellow plastic container is there to catch any oil that happens to emanate from the crankcase ventilation system, so unbolt it,

<010 shadow ace oil breather catch>

pull the hoses loose, and set it out of the way.

<011 crankcase vent hose honda>

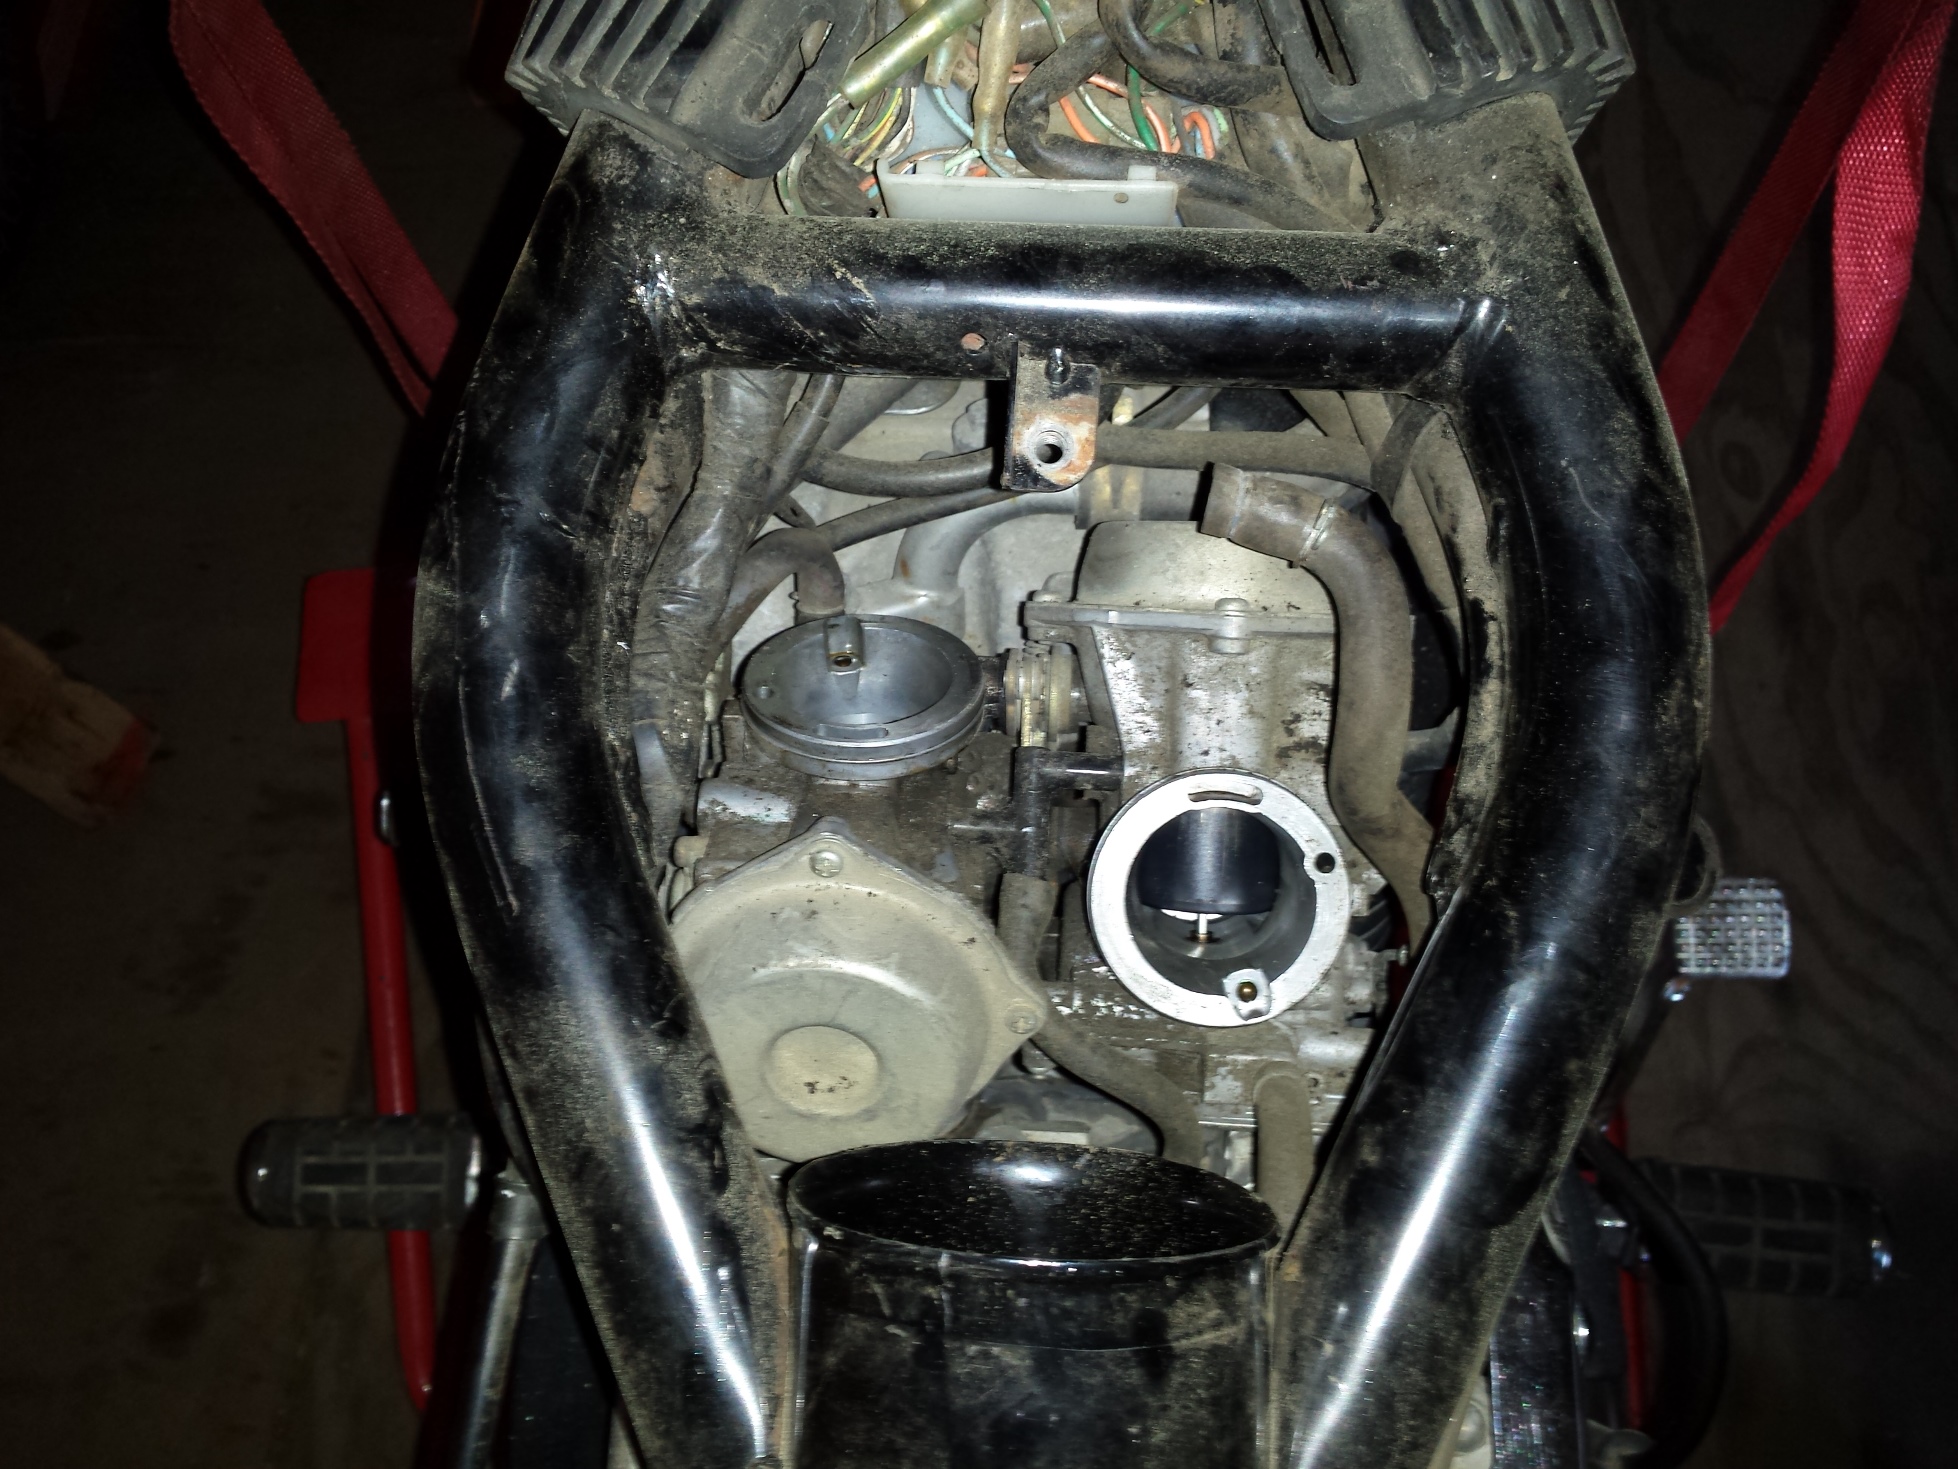
Next loosen the hose clamps on the rubber piping that leads from the frame to the inlet of the carburetors.

<012 honda shadow air hose removal>

Now we can finally see the carbs!

<013 there be the carburetors>

Time to remove the throttle cables, remove the 2 screws (indicated by arrows) and you will be able to get the cables out of the pulley on the end of the butterfly shaft.

<014 1100 shadow throttle cable>

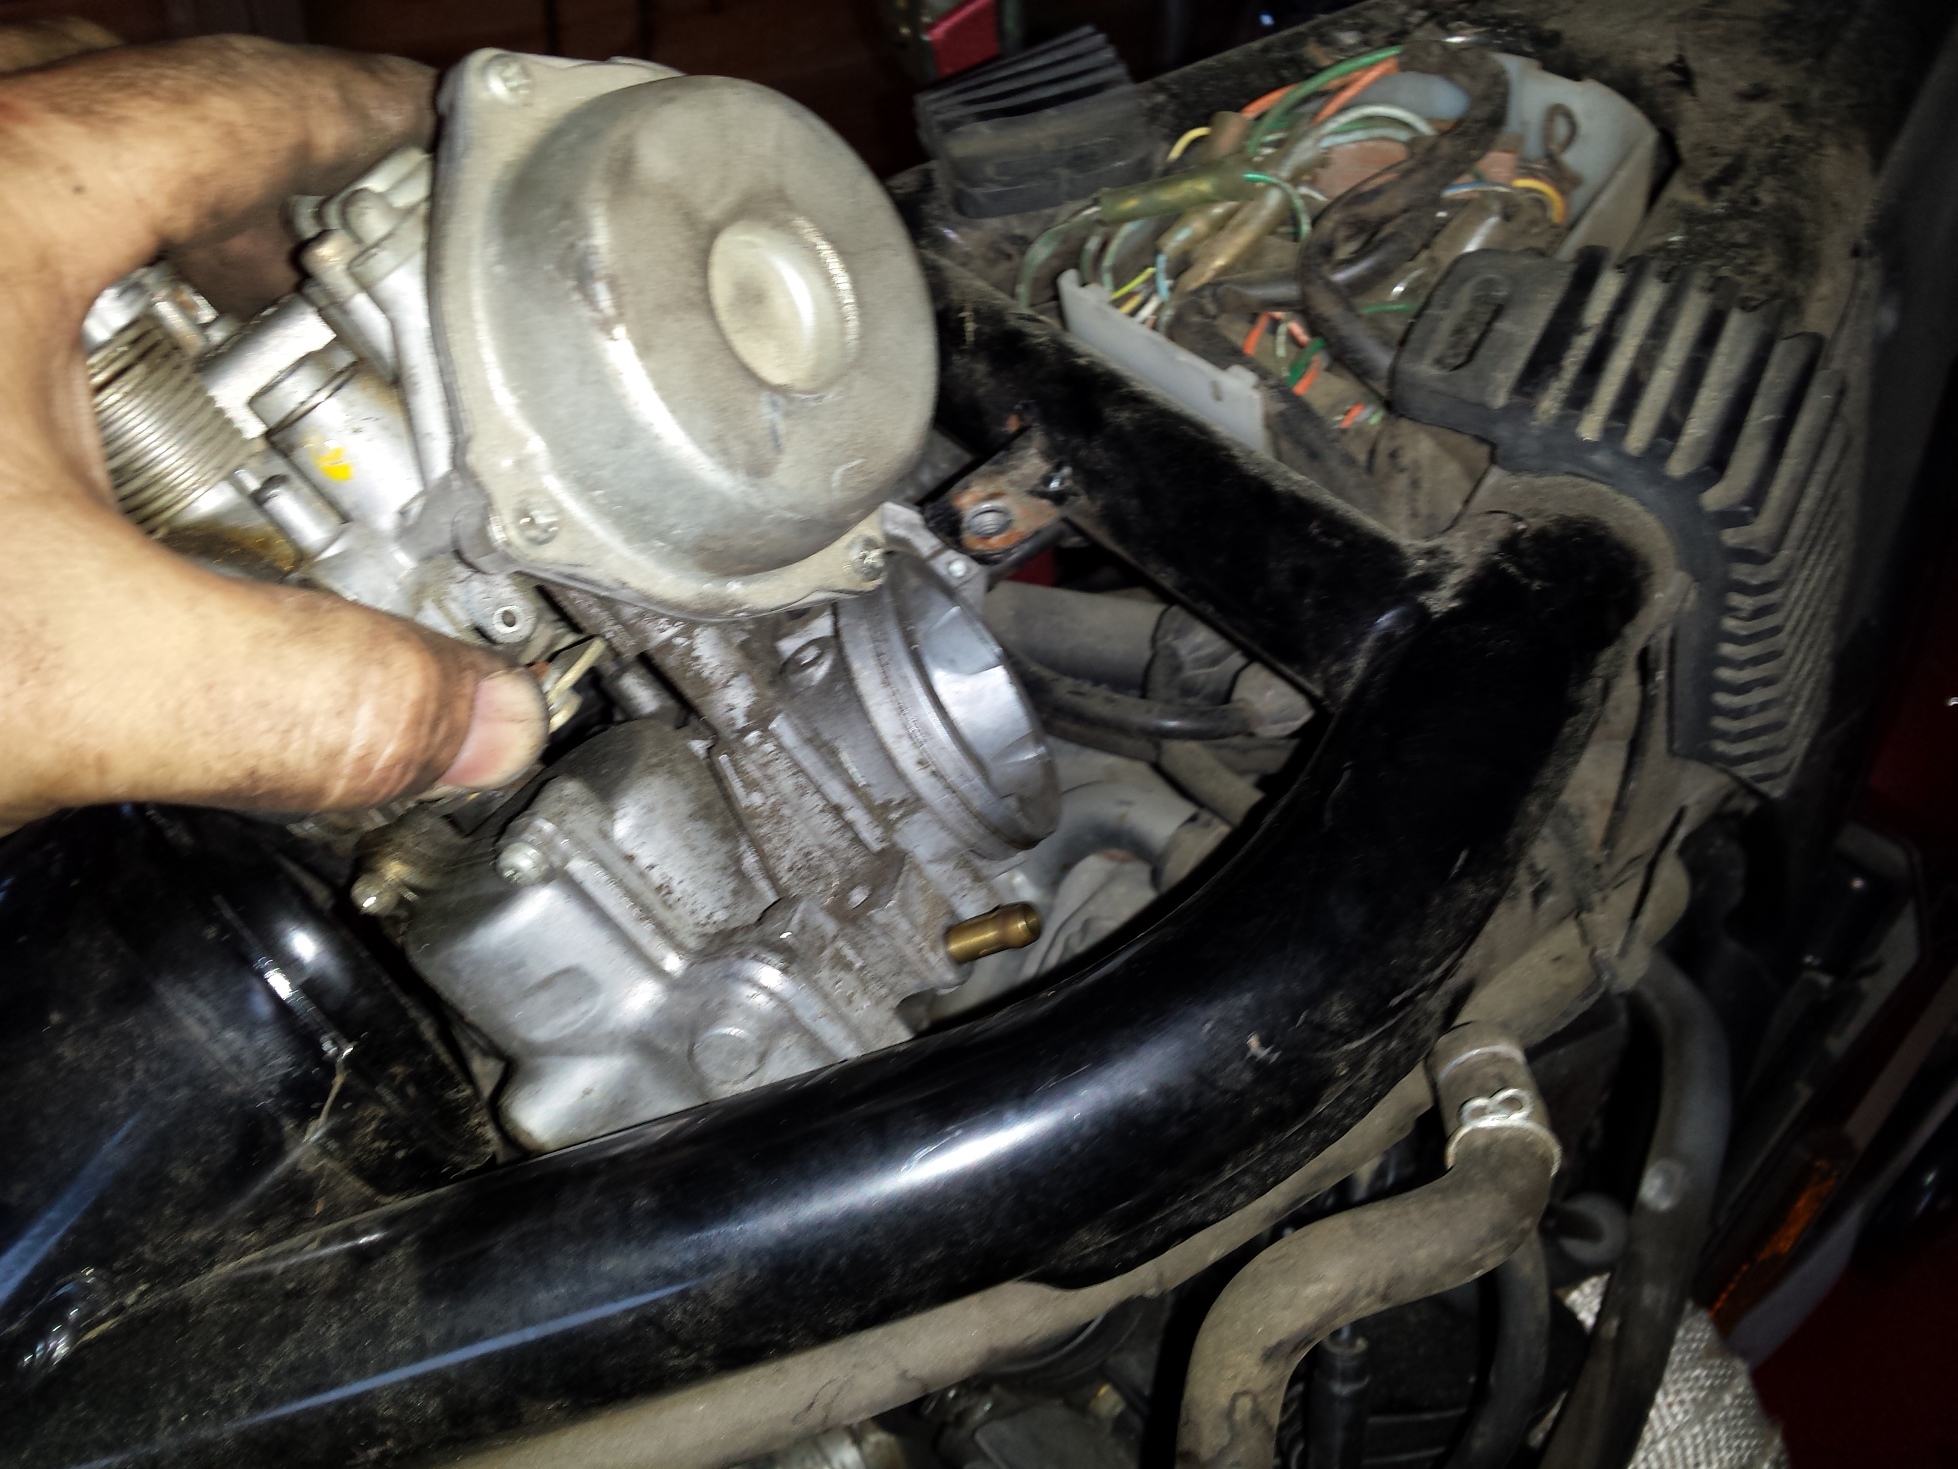
The cold start enrichener is next. These 2 little plungers take the place of choke flaps on the most of the last production carbureted motorcycles. Instead of blocking the air they just add more gas. It works well but is a bit more aggravating to remove. I used to have a special home made tool for getting these out but it has been at least 10 years since I saw it last so I just you whatever combination of open wrench & needle nose pliers that allows me to remove & reinstall them without boogering them up.

<015 honda enrichener aka choke>

Here I am holding one of the enrichment plungers so you can see what it looks like on the inside.

<016 cold start enrichner honda ace>

Go around to the right side of the bike and pull the hoses in this tee junction that was connected to the crankcase vent reservoir and fold them back out of the way.

<017 shadow crankcase vent hose>

The rear spark plug wire runs through a loom that is attached to the right carburetor so remove it and the enrichener  on this side.

<018 rear plug wire standoff 1100 shadow>

You can reach under the carbs now & loosen the clamps holding the carbs to the spigots.

<019 carb boot clamps honda shadow>

With a rocking and twisting motion you should be able to pop the carburetors loose, but dont rush to pull them up out of the frame just yet.

<020 pop the carburetors loose>

Before you try to pull them all the way out remove all of the fuel lines and vent hoses, being sure to note which hose goes to which barb.

<021 pull off all the hoses>

These carbs come out of the top, just tilt them up sideways and turn them as needed, this is actually much easier than most Japanese cruisers of the same time period that require you to remove the carbs from the side.

<022 shadow carbs come out the top.>

Here are the carbs sitting on the workbench ready for cleaning. The next step is into the parts washer to get all of the exterior crud off for dis-assembly.

<023 dirty nast filthy carburetors>

Keep checking back as I will be posting part 2 of this series very soon.

Peace Y’all

Part 2 of this how to article is up & you can reach it by clicking here.