At the end of my last post about this the engine was sitting on the bench, so let’s pull it apart now. Start with the external accessories such as the starter motor, rope starter, etc.

On a full tear down like this I prefer to remove the clutches from the engine before removing the cylinder and head. That way there’s not any damage to the connecting rod or piston should I accidentally spin the crankshaft around too fast.

Of course the best way to remove the clutch nuts is with an impact wrench, but if you do not have one wedge something good and solid in the clutch gears to hold it still, and don’t forget the centrifugal clutch nut is reverse threaded.

You’ll need a steering wheel puller to get the centrifugal clutch out. It’s possible you could get lucky and break it loose with a rubber hammer, but I doubt it. Don’t try it because you can damage either the clutch, the crankshaft or both by hammering on the clutch.

Now you can see the timing and oil pump drive chain, along with the shifter meachnism in the front of the shifter drum.

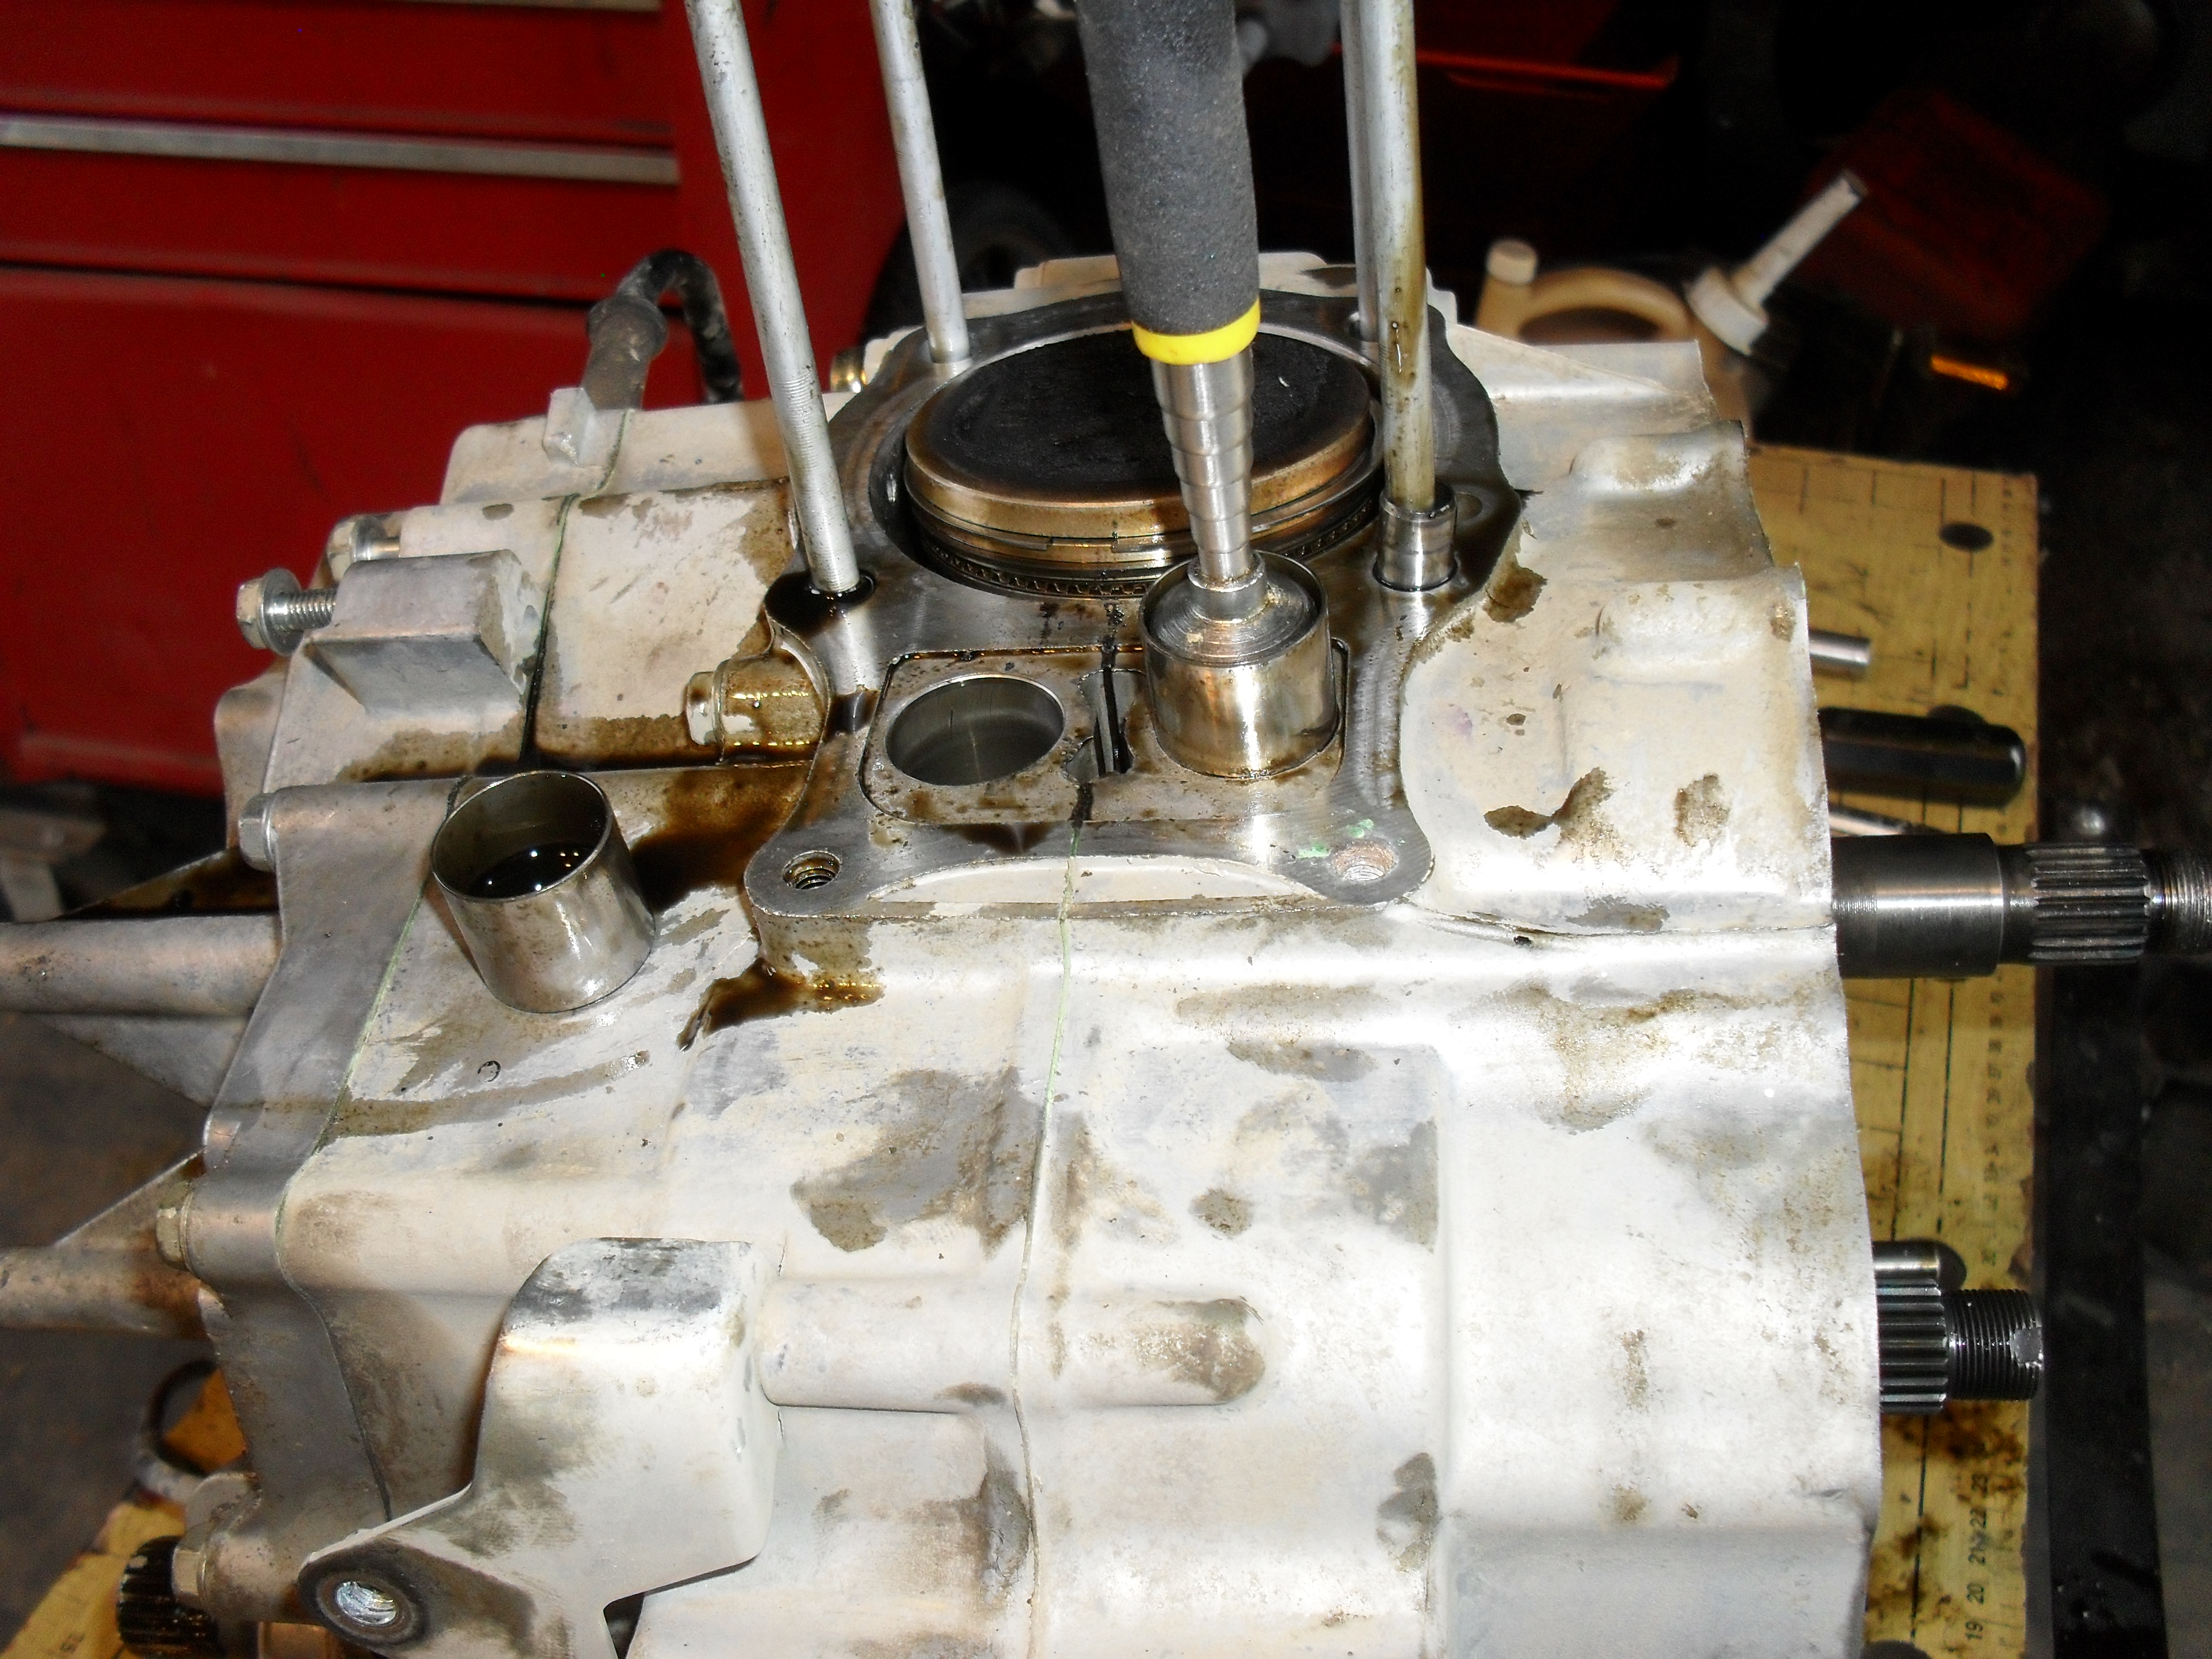
After pulling all the little parts off the front making sure to not exactly where all of the thrust washers go, it’s now time to move up top and unbolt the rocker box.

Now set the pushrods off to one side and unbolt the head an pull it straight up to remove and then do the same thing with the cylinder

Here you can see me using the magnet to remove the lifters from their holes.
Next I popped the rear cover off after unbolting it. The magnets in the alternator will make it feel like it is sticking together so be careful.
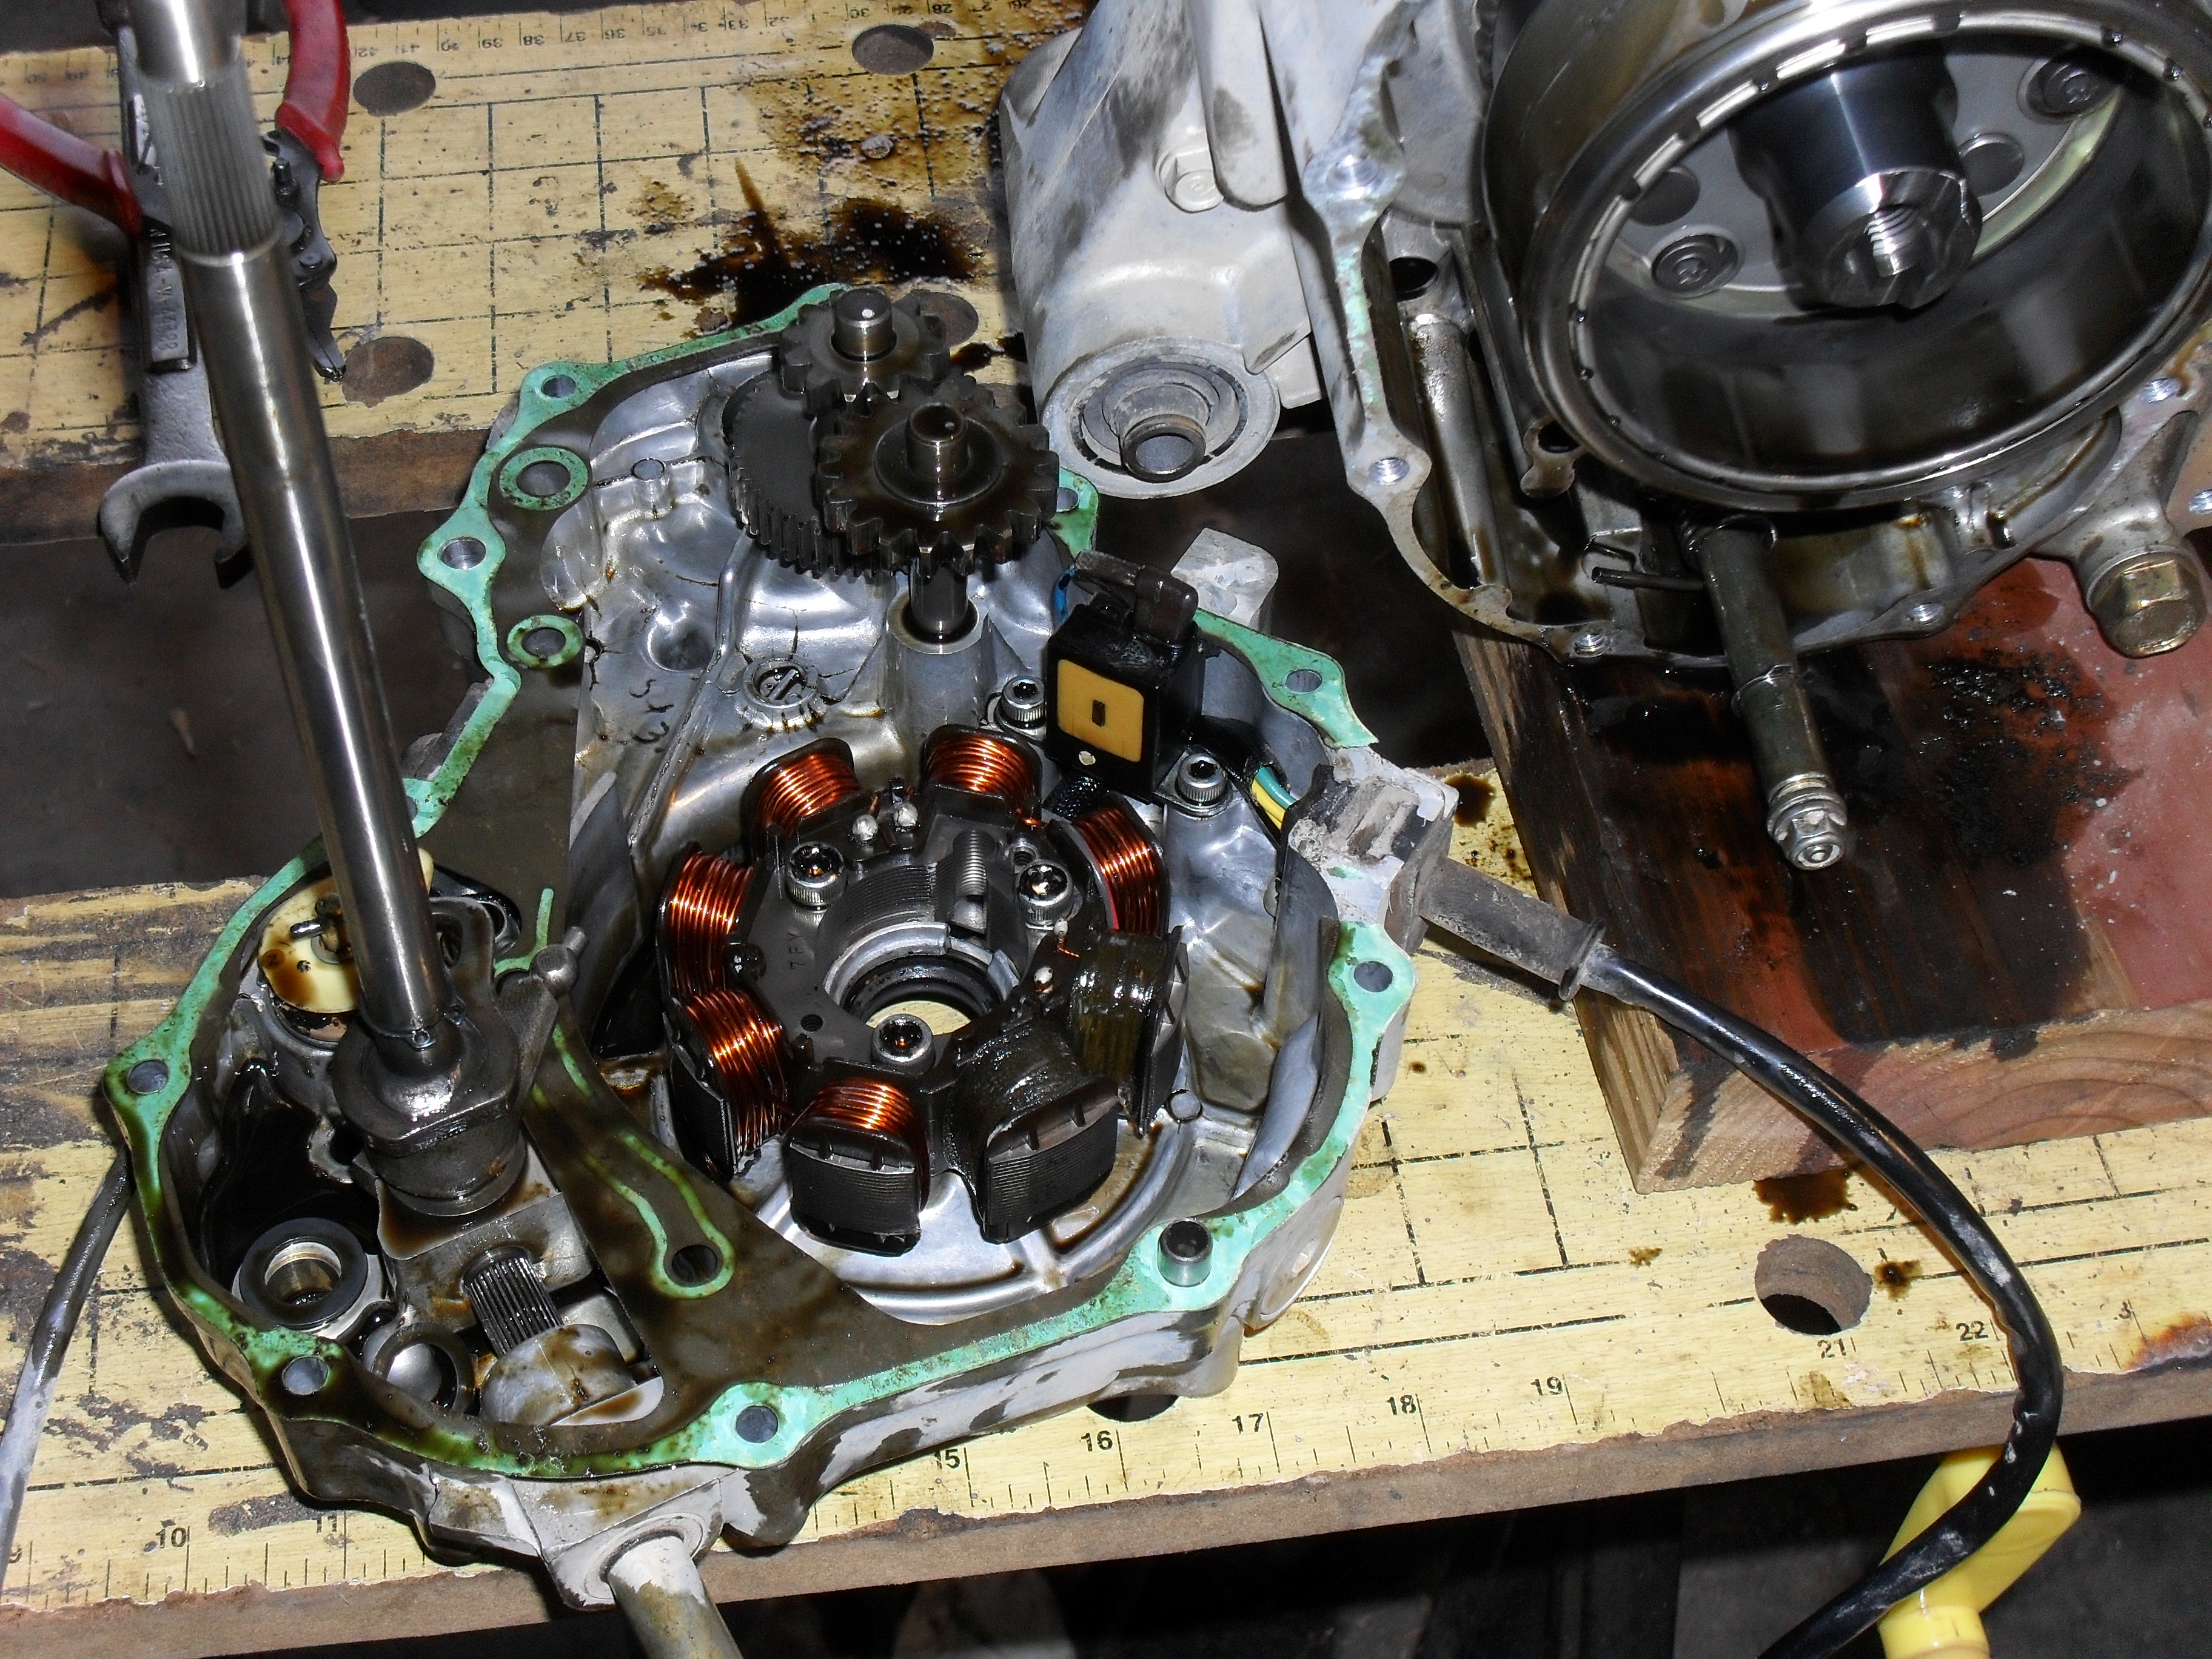
In these lat 2 pics for the day you can see the alternator parts, the stator is in the top one and the rotor is in the bottom picture. Next time we’ll split the cases!


Peace Y’all


Ninja 250 Riders Club June Website of the Month
This is the best forum that I never joined. I wanted to & I still may if there is ever time to add another distraction to my life. Even so the Ninja 250 wiki was all the information that I needed to make the upgrades to my favorite little motorcycle, so that it hauls my big old butt around at reasonable speeds with superior handling. If you are even thinking of getting a Ninja 250 you should visit this page. Sure I would have had no problems restoring mine from the cheap hunk of junk it was to the beauty you see in the picture above, but it was nice to find that someone else had done all of the homework and sorted out the sensible modifications that can be done to these little gems.
Sorry Hyosung and CBR250 fans but the little Ninja is THE 250!
Share this:

Honda Recon 250 pg.2
The next order of business is to dis-connect the negative cable from the battery as shown here.

Remember any time you are working with any vehicle with a negative ground system (which is practically everything) always dis-connect the negative battery cable first and re-connect it last when you are working on the electrics.
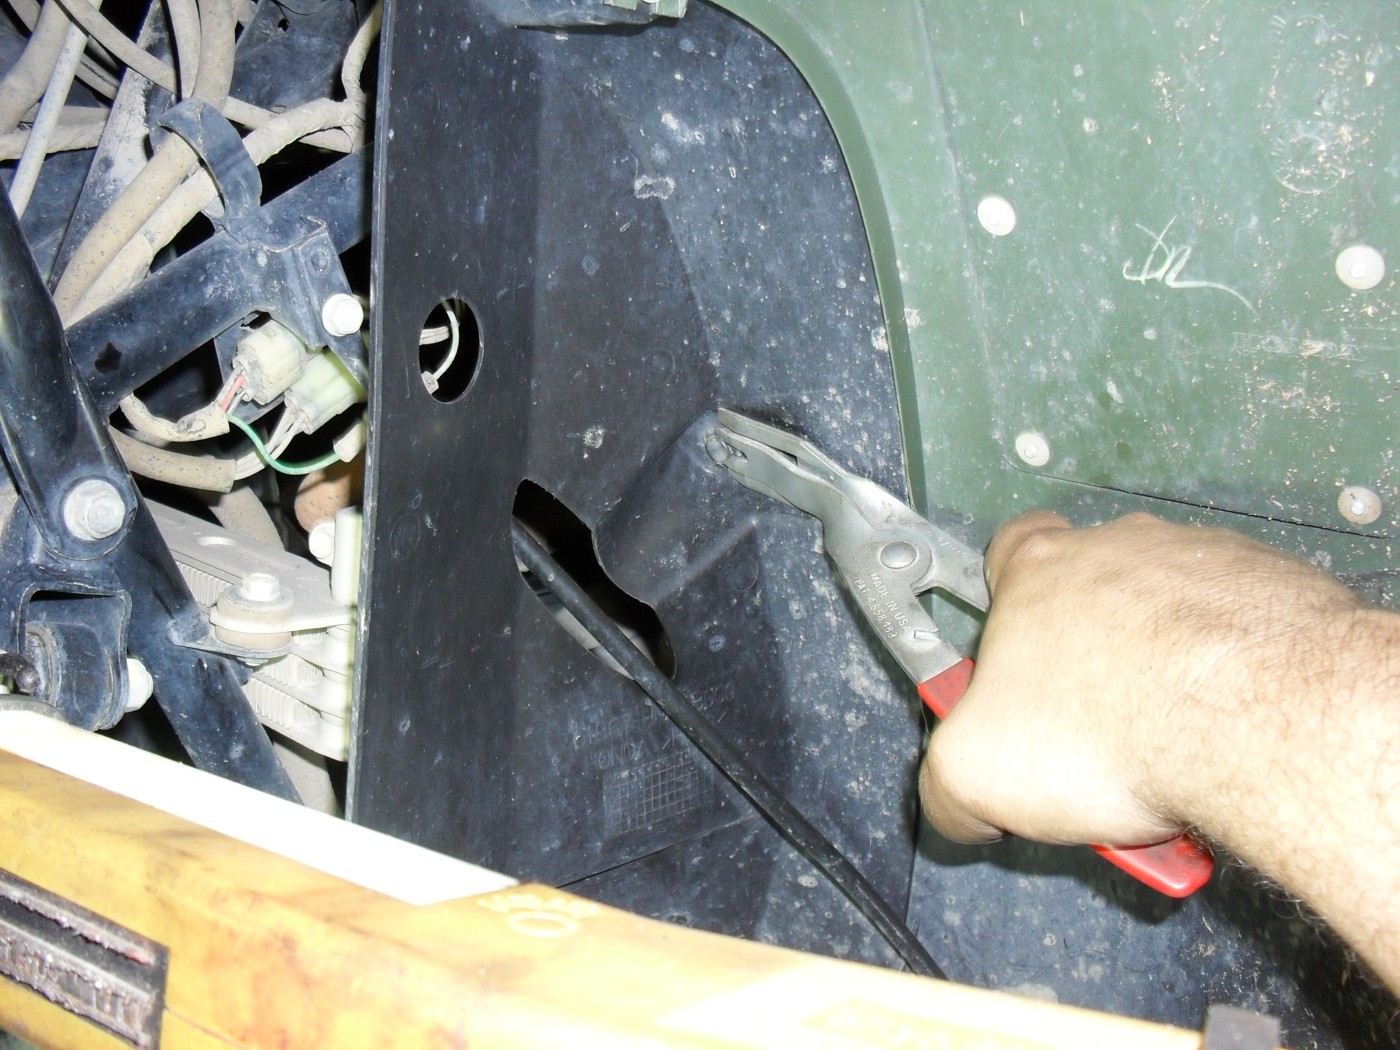
The next 2 pics will show how I use the door panel tool to remove the plastic retainers from the bodywork. First you wedge up the sliding pin in the center enough to get the forks of the tool started under it.

Afterwards you can slide the tool into place as shown and pull the clip right out.
Of course you can just use a couple of screwdrivers or a pair of wire cutters to remove the clips. Don’t forget to look for clips or screws in hidden places like this.
To get the fuel tank out you first need to remove the handle for the fuel switch.

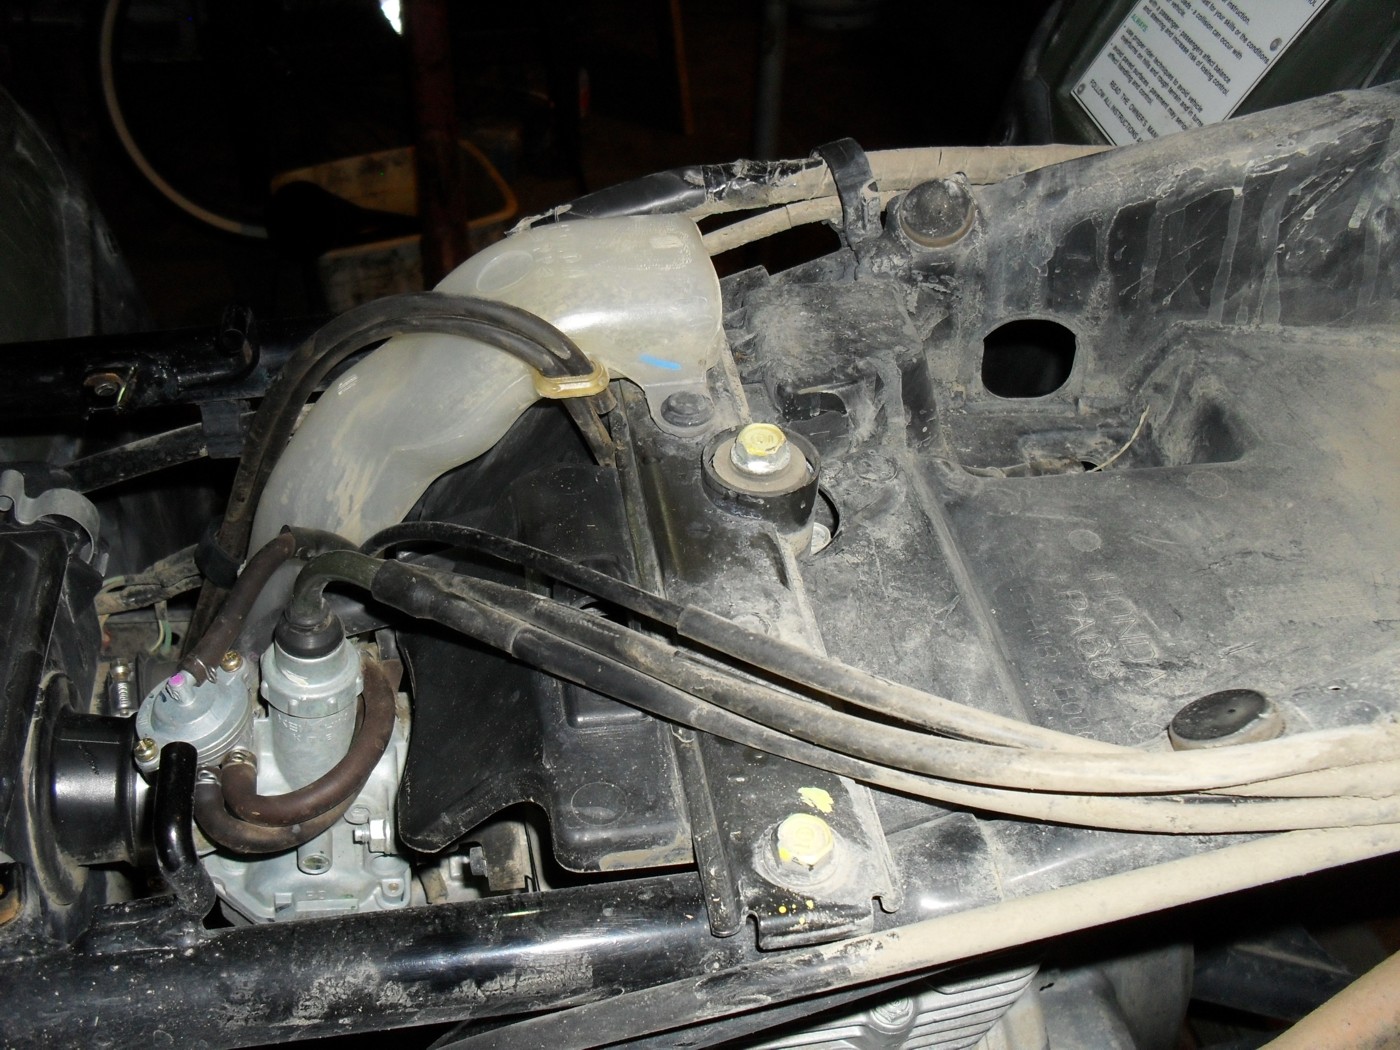
Once you have the tank out be sure to note the position of the various vent hoses and take note of the routing. If you pinch them closed during re-assembly your four wheeler may not run correctly, or may stall going up hill.
Once all the plastic is off it’s time to get down to the nitty-gritty. Now remove the foot pegs. This will save you lots of needless foul language and bleeding. Plus on some models you can’t get the engine out with them in the way.

Remove the foot brake and shifter after you get the pegs off and then drain the oil so it won’t be sloshing out all over the place when you lift the engine. It’ll take some weight off too.

Do take a little time now to put some penetrating oil on all of the exhaust system nuts and bolt that you can reach and let them soak a few minutes.

Then remove the plastic covers from the sides of the engine and the muffler & header as well. While I was doing this the head of one of the screws stripped out so I got out my extractor set to remove it. Normally I am a fan of inexpensive tools especially for the hobbyist but there are 2 things that I recommend that you buy the absolute best in the world even if you have to save up for it. The first is a good set of screw extractors and the other is a Phillips screwdriver set.

85% of the time I don’t even have to use the extractor because the left handed drill bit will walk the broken screw right out.
Back to our engine now it’s time to remove the carburetor and then unhook all of the other cables going into the engine. Leave the throttle and choke cables attached to the carburetor unless you plan to remove it to work on it also,


Be sure to loosen the clamps over the drive shaft boot!
The last item to get to is the reverse lock out cable located at the bottom rear of the engine under this little metal cover.

Now unbolt the 2 motor mounts on either side, carefully remove the spacers and slide the engine forward and tilt it as need to make the frame look like this.
![]()
Finally here’s a shot of the engine sitting on the workbench waiting to be completely disassembled… starting tomorrow.
Peace Y’all

Share this:

Honda Recon 250 Tear Down pg.1
Hey Everybody welcome back!
I am going to step away from the pedal powered world for a little bit and start posting a few things to help you out with the care & feeding of your ATVs & motorcycles as the mood strikes me (and as people bring me guinea pigs to feature) Yes, I reserve the right to write about anything I please but this new category for repair and maintenance will be a continuing work.
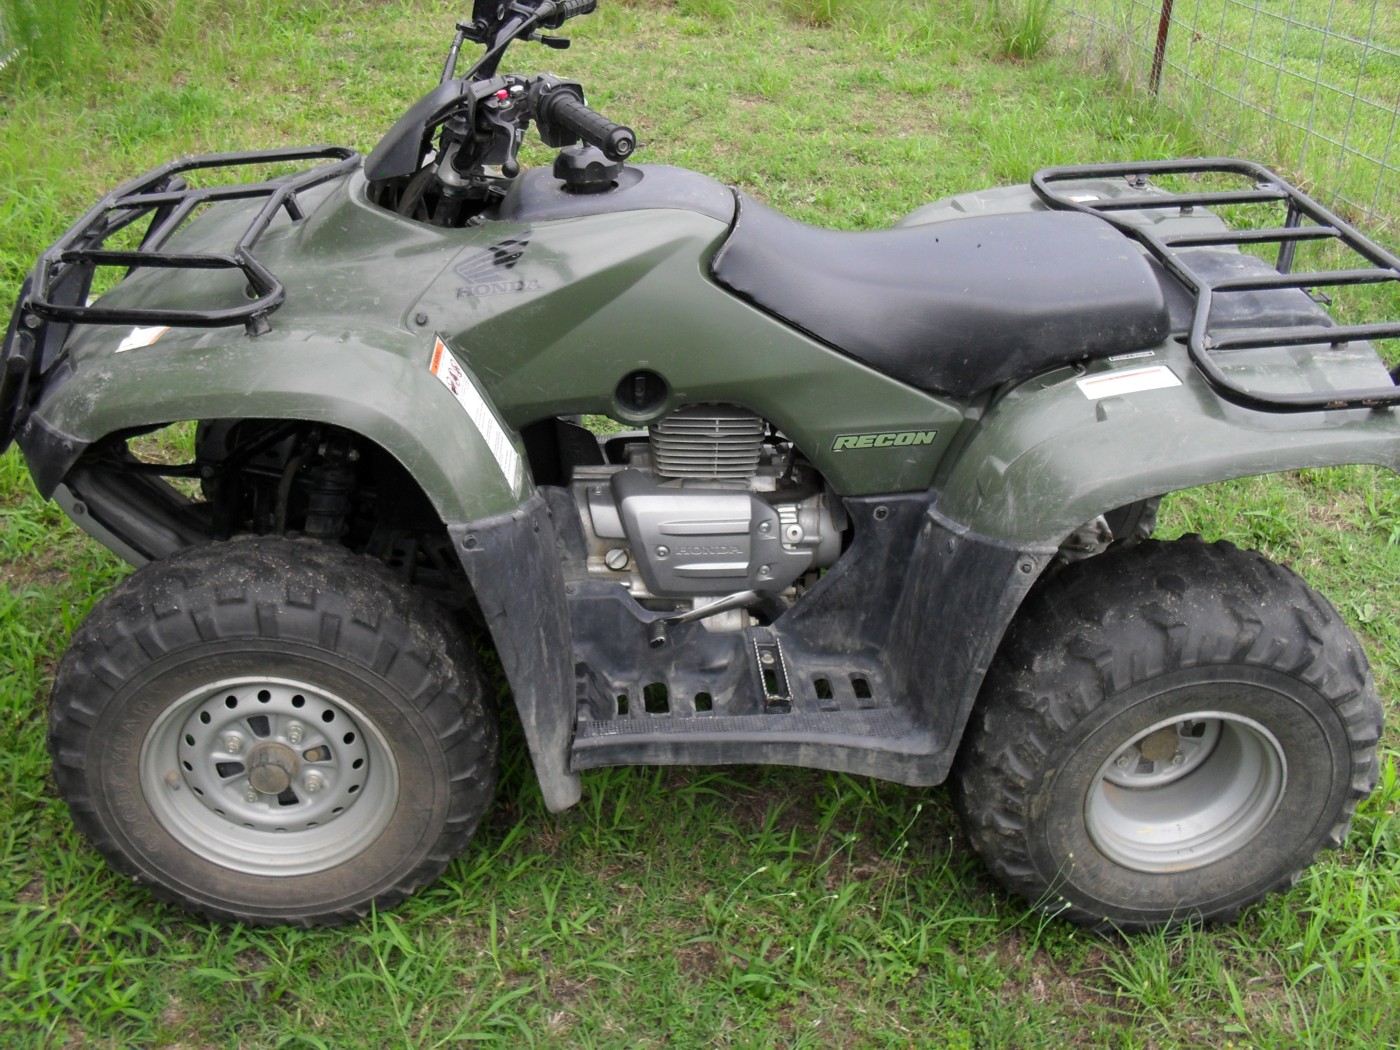
The first patient will be this 2005 Honda Recon 250. Recons are my favorite ATV. They are big enough to do a little work, but small enough to fit down a tight trail. Plus they are tough, reliable, and simple.
It doesn’t look all that bad but has had a lot basic service work deferred until now. 5th gear is stripped out. Since the transmission is inside the engine that means a complete engine overhaul is needed to fix it. I have decided to document the process here on my blog for you. This will not be a complete step by step but I give you a lot of useful information that will be helpful for simpler regular maintenance chores.
Since none of the brakes were operational at all the first order of business was to adjust the rear brake cable adjusters shown here.
Neither the owner of this atv or his 16 year old son whom is the main rider were aware that as the rear brake shoes wear down you can adjust the wing nuts shown in the picture to maintain brake operation until the shoes are fully worn. Instead they just rode it without any brakes at all. Not cool…
If you have to do any kind of major work on any powersport vehicle you should have a lift table or some safe means of raising it up high enough to save your back while working on it. Not having a lift table I use my engine hoist to pick it up and set it on stacked 6 x 4 timbers to place it at a comfortable working height.

Once it was up and secure with the parking brake locked. I set up a clean table and laid out a few basic tools that will handle most of the work and took some pics for you.

Here you see some Motion Pro tee handle wrenches, a couple of screwdrivers, sockets, wrenches, WD40, and a door panel removal tool.
Okay the door panel tool is optional but it works really well to get the plastic bodywork retainers off of a Honda ATV.
Two other recommended tools are a parts washer and a telescoping magnetic pick up tool. No explanation needed for these two I hope.

There is one more tool that you should have if you are contemplating any kind of service work on any type of motorcycle or ATV, a good service manual, preferably a factory one if you can afford it. If I did not already own one for this model of four wheeler I’d be buying one. Regardless of what anyone tells you a good service manual is absolutely essential to performing any major service to any motorcycle or ATV.
Tomorrow we’ll start removing the body work and gas tank in preparation to remove the engine.
Peace Y’all
Share this:

History of the Mighty VFR at Cycle World WOTM
The Interceptor

1984 VFR 1000
Repeat after me INTERCEPTOR The original VFR was one of the greatest motorcycles ever produced. I have thoroughly enjoyed the ride every time I threw my leg across on. But you have to be a serious masochist to enjoy working on them. The complexity of these engines is both intimidating and awe inspiring at the same time. Sure the GSXRs, Ninjas, and Honda’s own CBR soon left the VFR behind, (but not far behind). All too soon the maximum rocket-ship of the eighties became the competent sport tourer/sport commuter of the nineties and beyond. Even so it stayed at the head of the sportbike class technology wise and always seemed to have the power and handling needed to get the respect of all the local “Ricky Racer” boys, while being cerebral and practical enough for the older guys to try to pretend that they were not trying to pretend to be young again.
Apparently John Burns over at Cycle World must be a fan too because he compiled a nice multi-part history of this bike that you can read here.
History of the VFR Part 1
Should you happen to have one the old 80s 700-1100cc VFRs lying around taking up space in your garage and you really need to get rid of it let me know. I’m exactly the kind of masochist who would enjoy restoring one.
Share this:

May Website of the Month
I am going to cheat a little bit on this one and list my favorite BICYCLE website as the wotm. It’s hard for me to believe that this month is already half over.
Go check them out, join if you like it, check out this years build off (yes I have an entry in it).
http://www.ratrodbikes.com/
Share this:

Ratty Flathead Hog

ratty flathead harley with NOS
Another from my buddy Brian P.
This is tripping! An old flat head Harley with a great big NOS Bottle
Share this:

April Website of the Month
When I read about this guys accomplishments in WERA roadracing on an electric motorcyle I was amazed. I watched the electric racers at the Isle of Man and have been somewhat following the development of street going electrics.
But Mr. Yates has done a fantastic job of promoting the performance potential of the electric motorcyle.
go see for yourself at chipyates.com
Share this:

Strange happenings
Okay I officially got out of the motorcycle business years ago. Nothing ruins something you love faster than making it your job, but I still take care of bikes and ATVs for a few of my friends and one of my favorites of the whole bunch is this old 1100 Virago. Normally I detest most cruiser styled motorbikes, disliking the feel of forward controls and I’m not fond of having my knees next to a big fat gas tank or engine.

These older Viragos were uniquely Japanese cruisers that still remember how to run and handle like a real motorcycle, so I always take this one for and extended test drive just to be sure it is working right 😉
As I pulled back into my shop the trip meter displayed;

To borrow a phrase from one of the guys over at the bicycle forum
Rat Rod Bikes
“I’m not superstitious but I am a little stitious” so immediately after snapping this pic I reset the trip meter.
Share this:

March Website of the Month Twistgrip.com
Years ago this great little motorcycle magazine came & went for a brief season. It was more than just a motorcycle magazine it was a magazine that celebrated the actual lifestyle of people who rode real motorcycles on a frequent or daily basis. Articles such as “A real ride real cheap” warmed the hearts of those of us who are going to ride a motorcycle whether we can buy one new or if we have to cobble it together out of scrounged parts. Plus there was an edge to the editorial stance of the staff, no they weren’t gratuitously offensive but what was said or felt is what got printed.
Now let me warn you up front, this website has not been updated in years. You can try the free stickers links if you wish but I doubt it works anymore. Go read the articles! Hell the archives of Art Bennett’s old column Stressed Member are worth going to the website for even if there were nothing else.

