A Quick Update on the Suburban Assault Scrambler!

This bike is now 90% complete and I have actually put a couple of hundred miles on it in the last week or two. The shake down runs have been encouraging once I got the final adjustment of the carbs correct and finally broke down and replaced the original 1980’s plugs with a fresh set. Speaking of the carbs, I did a full teardown & took lots of pictures and I am in the middle of writing a carburetor restoration post now, hopefully to be completed later this week. Ditto for the fuel tank mods & the paint.
Let me apologize for the fact that progress on the bike has outpaced my postings, but at this time life is so incredibly full of good things and huge opportunities that it’s a bit overwhelming for me. I will be showing you the major points that I changed on this bike asap.
BTW; it is a great commuter!

<1980 Honda CB650C>

The SAS & the Minimum Ninja bask in the sunshine outside my office.

82 Honda XL250! Another Junkyard Dog!

From a distance this one doesn’t look that terrible but once you get up close, you realize just how dilapidated it really is.

<Honda XL250>

Ahh memories…

<1982 Honda XL 250 r>

<82 xl 250>

Oh shit, why did I bring this thing home?

Oh well there’s nothing I like better than the smell of a rotten old motorcycle corpse, except perhaps the joy of re-animating it.

<rusted out motorcycle muffler>

rusted out motorcycle muffler

At this point it’s fate is still undecided, it might be a future project or it might just become ebay parts fodder.

<vintage Honda Dualsport>

<vintage honda emissions equipment>

Proof that this one is 100% stock

<dirty nasty old jug>

dirty nasty old cylinder

<vintage Honda Pro-Link suspension>


Peace Y’all


Mac Four Into One Exhaust for Vintage Motorcycles.

This is the first time I have purchased a Mac exhaust system for one of my motorcycles. In the past I have purchased a few from Kerker, Vance & Hines, Yoshimura etc. Never really gave Mac products much thought as high performance was always the ultimate goal, and I, like so many young men thought they just made cheap replacement systems for oddball old Jap bikes. Fast forward a few years & now my favorite thing to do is customizing oddball old Jap bikes such as this CB650 here. Performance & sound are still important, just not nearly as important as they use to be. Bang for the buck & good availability mean a lot in this day and time & that is two main things that Mac has going for them. Lets get started installing a set shall we? For this ratty old scrambler conversion I picked out a plain black 4 into 1 system with a shorty muffler.

First thing to do is remove the old exhaust and set aside the parts that you may be re-using. One of my favorite things about this system is that it uses the o.e.m. finned exhaust flange that to me, are very important to the looks of an old air cooled engine.

original Honda CB650 exhaust flanges

original Honda CB650 exhaust flanges

I had actually pulled the stock pipes off a couple of weeks ago and just stuffed the ports with rags to keep the critters out.

<cb650 exhaust ports>

the mud daubers around here, love to nest in motorcycle engines

Lets look at what comes with the new Mac exhaust system.

Mac exhaust hardware

Mac exhaust hardware

As you can see in addition to the muffler this set came with new split collars, muffler clamp & bolts, and 2 different hanger bracket. not shown in this picture is the new center stand stop that comes with it.

The split collars were joined together by a small strip of metal that was left when they were sawed in two. Resist the urge to break them apart.

new Mac split collars

new Mac split collar

After you place the o.e.m. exhaust flanges on your new head pipes carefully spread the collars open just barely enough to go over the pipes and then squeeze them back together so that you only have one piece to hold in place while you position the flanges & start the nuts.

split collars on Honda exhaust

split collars on Honda exhaust

I always use plenty of anti-seize compound on exhaust studs and so should you.

anti-seize compound on exhaust studs

Have some mercy on the next person to remove he exhaust system on your scoots …

Here’s a shot of the pipes in place, I had to pull on the pipes a little to persuade them into place, nothing major just a little tugging & spreading. After you get the pipes in the ports and the flanges back on do not tighten the bolts all the way down until you get the entire system installed.

<Mac Performance Motorcycle Exhaust>

Mac shorty muffler

Mac shorty muffler

Put the clamp on the muffler and slide it into place and then get your hanger bracket and figure out which one you need to attach the muffler to the passenger foot peg bracket.

exhaust hanger brackets

exhaust hanger brackets

The enclosed instructions said to use the short bracket for a CB650C (custom cruiser model) which is what this bike started off as, but in my case it did not fit. I don’t know why and it really does not matter that much to me. The longer bracket worked just fine, I bent the dog leg into it so that it would support the muffler at its natural resting point on the head pipe instead of pulling it in toward the bike. Now tighten all of the bolts attaching your new exhaust to the motorcycle to the correct final torque.

The process of tightening the clamp & muffler mount does bring me to my one major pet peeve with darn near every major motorcycle accessory manufacturer doing business in America. Here I am working my way through this install with the 3 wrenches that will disassemble 90% percent of motorcycles existing in the world today a 10mm, a 12mm & a 14mm, and I have to stop what I am doing and go get a 1/2″ wrench to install the last 2 bolts. I realize that when some of these products were first created back in the ’70s & early ’80s metric hardware was a little more “exotic” and not as cheap and easy to find as the “standard” stuff, but here in 2013 there is no excuse whatsoever to still have standard fasteners on accessories for European & Japanese motorcycles or for that matter modern Harleys & Triumphs too. It would only take a little effort & I for one will be eternally grateful.

On the other side of the bike install the new center stand stop, unless of course you are planning to remove the stand.

<center-stand stop>

After I got it all on, it looks the part & sounds great too.

Mac 4 into 1 On Honda CB650

Mac 4 into 1 On Honda CB650

With this system I get to retain the center stand, have easy access to the oil filter & I have a little cash leftover too!

Did I mention that it has a mean sounding growl too! Click this link to have a listen.

Peace Y’all

9-1-113  Just a quick update on one minor problem that surfaced after 3-400 miles of road time. The rivet holding the baffle in became loose, allowing the baffle to rattle inside of the muffler until it got hot and expanded. My solution was to tack weld the baffle into place & repaint, but one could just drill out the rivet & replace it with a bolt & nut, if by some chance you have the same problem too.

Use the Right Tool for the Job! A Tech Tip & Product Review Combined!

It is time for me to make a confession of my own ignorance. For over two decades I have not been using the correct screwdrivers to work on my beloved old rice grinders. Even during the time I worked as a dealership mechanic I destroyed countless fasteners by using the wrong screwdrivers. I did find by experience, that the really high quality & expensive Snap On brand could usually remove those annoying cheesy easy to strip cheap ass Japanese Phillips screws. But even then the heads still looked mangled for some reason.  Day after day I cursed the engineers at Honda, Kawasaki, Yamaha & Suzuki for sourcing such horrible fasteners to hold such fine machinery together.

Fast forward a couple of dozen years and one day while wandering through a motorcycle show, I stop at a VJMC display and pick up a copy of their magazine.  When I finally slowed down enough to read through it a couple of weeks later I saw a really great article on the difference between Japanese Industrial Standard screws & Phillips screws as used here. It was a real eye opener, no wonder these screws were so difficult to remove. The angles of the sides and the shape of the center are just different enough to cause these two different styles not to be interchangeable.

I jumped onto the internet to research these JIS screwdrivers & found the two most commonly available brands to be Vessel & Hozan. I decided to order a 4 piece set of Hozan screwdrivers for about $25 USD.

Hozan JIS screwdrivers

Hozan JIS screwdrivers

These screwdrivers have hard plastic handles, this bugs some people but most of my screwdrivers have hard handles it  is what I’m used to. Plus they are a lot easier to clean than cushion grips. The distinctive shape keeps me from confusing them with my regular Phillips head screwdrivers which is important. They will probably bugger up a Phillips screw the same way a Phillips screwdriver buggers a JIS screw.

Even though I’ve only used them a few times I am really impressed with how much better they fit & grip the screw heads on a few dirtbikes that I am working on. And the best part of all is that the screws still look good when I am done. This is very important if you are doing restorations or building show bikes.

Save yourself a lot of trouble, learn from my mistakes and get yourself a set JIS screwdrivers. You’ll be glad you did!

A Custom Battery Tray & Other Stuff

Just thought I’d do a quick update on some of the things that I have done with my CB650 project. I have been working on it a little at the time between my normal day job, a few bikes & atv’s for other people, & some painting (airbrush practice & landscape oil painting). Since I’ve decided to go with the “rat suburban assault scrambler” look some of the things about this project have gotten easier, but other design ideas require just a little more ingenuity. Rather than sawing off the back half of the frame & welding in a new seat loop as required to get the proper cafe racer look I am opting for a modified stock seat with a 74 CB750 tank, but I still wanted to eliminate the stock side panels. My plan now is to replace the side covers with 2 pieces cut from some rusty old expanded metal sheet I have lying around. To do that I still needed to modify the mounts for the electrics, and since I will be using a Shorai lithium battery that is much smaller than stock, a custom battery tray was in order also. Since this is a rat I decided to do this with nothing but materials I already had on hand. After sitting down & staring at it a while with my note book, pencil & ruler in my hand I came up with a basic design that tucks everything up high, bolts into the stock mounts, & allows me to reuse the inner fender to protect the electronics. Here’s how it goes…

First I removed the stock battery tray, along with the airbox & some other now useless items. Then I drilled out all of the spot welds holding the mounts, & various brackets to it.

butchering a Honda CB650 battery box

butchering a Honda CB650 battery box

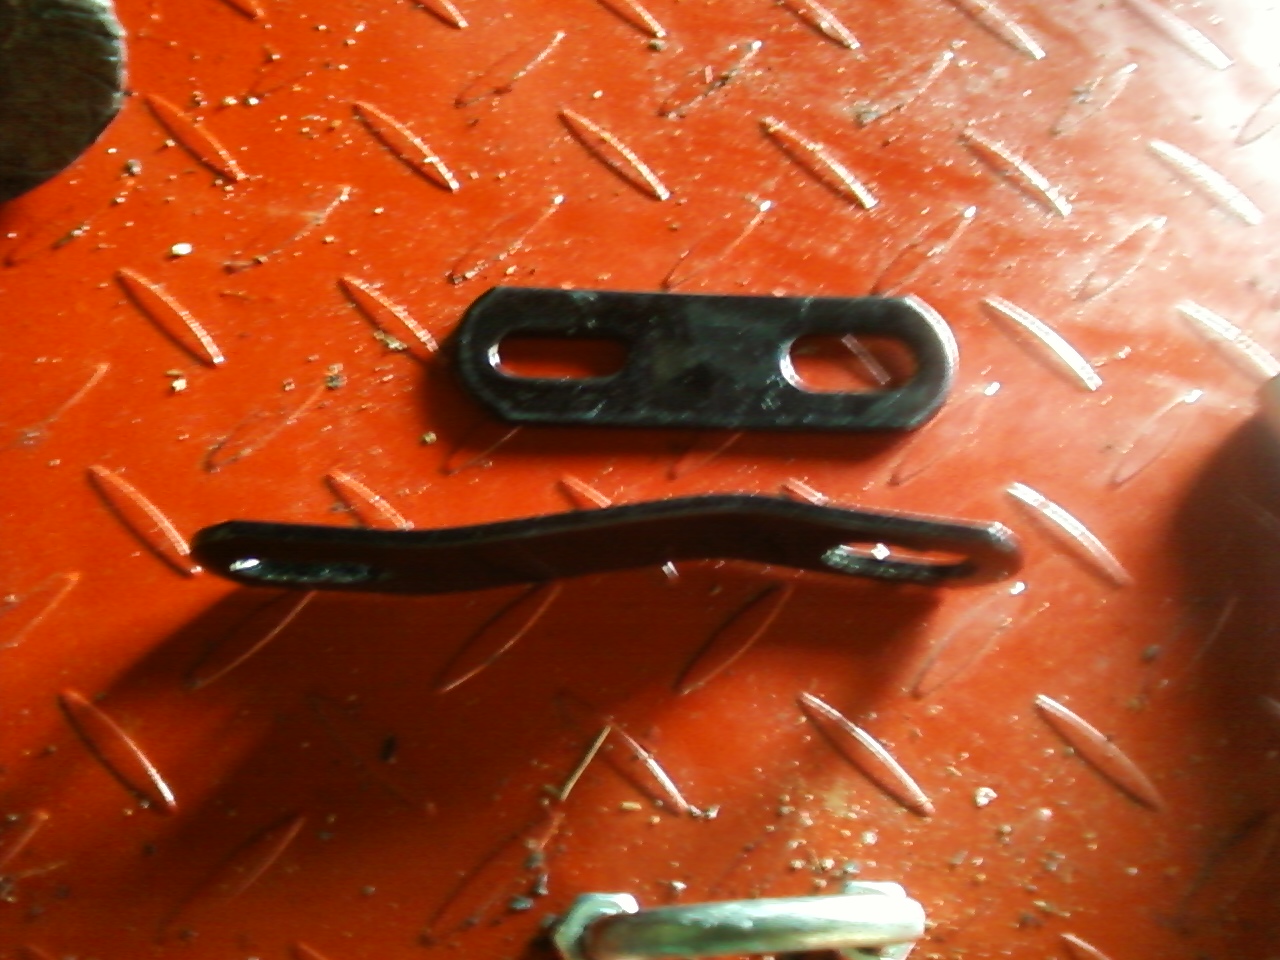
In the spirit of my deep back country roots I decided to make do with the stuff I had on hand & not buy any new stuff to make this from, so this left over shelf divider that was destined for the scrap bin will get to live on as a motorcycle part. Here it is with all of the brackets & mounts salvaged from the original battery box.

custom built motorcycle parts

a custom battery & electronics tray in kit form 😉

Then using my band saw I cut the tray to shape & bent it in a vise.

<custom motorcycle battery tray blank>

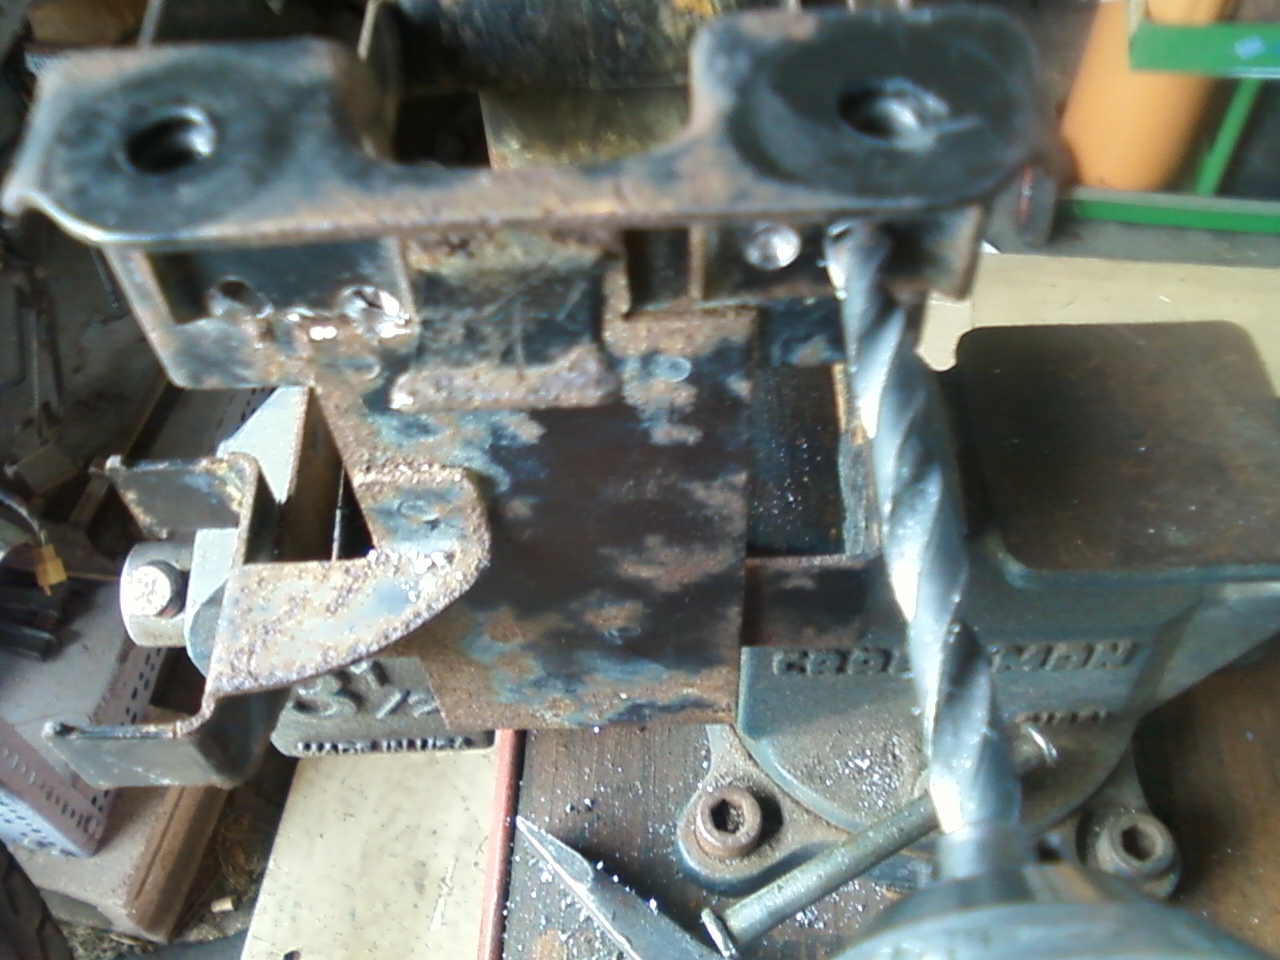
Then I bolted the stock mounts back into place using the original hardware & clamped the tray in between them. Since I do not have a tig box for my welder (YET) I simply use a 1/16″ 6013 rod to tack the pieces together without burning through the sheet metal too much.

tack welding battery box

tack welding battery box

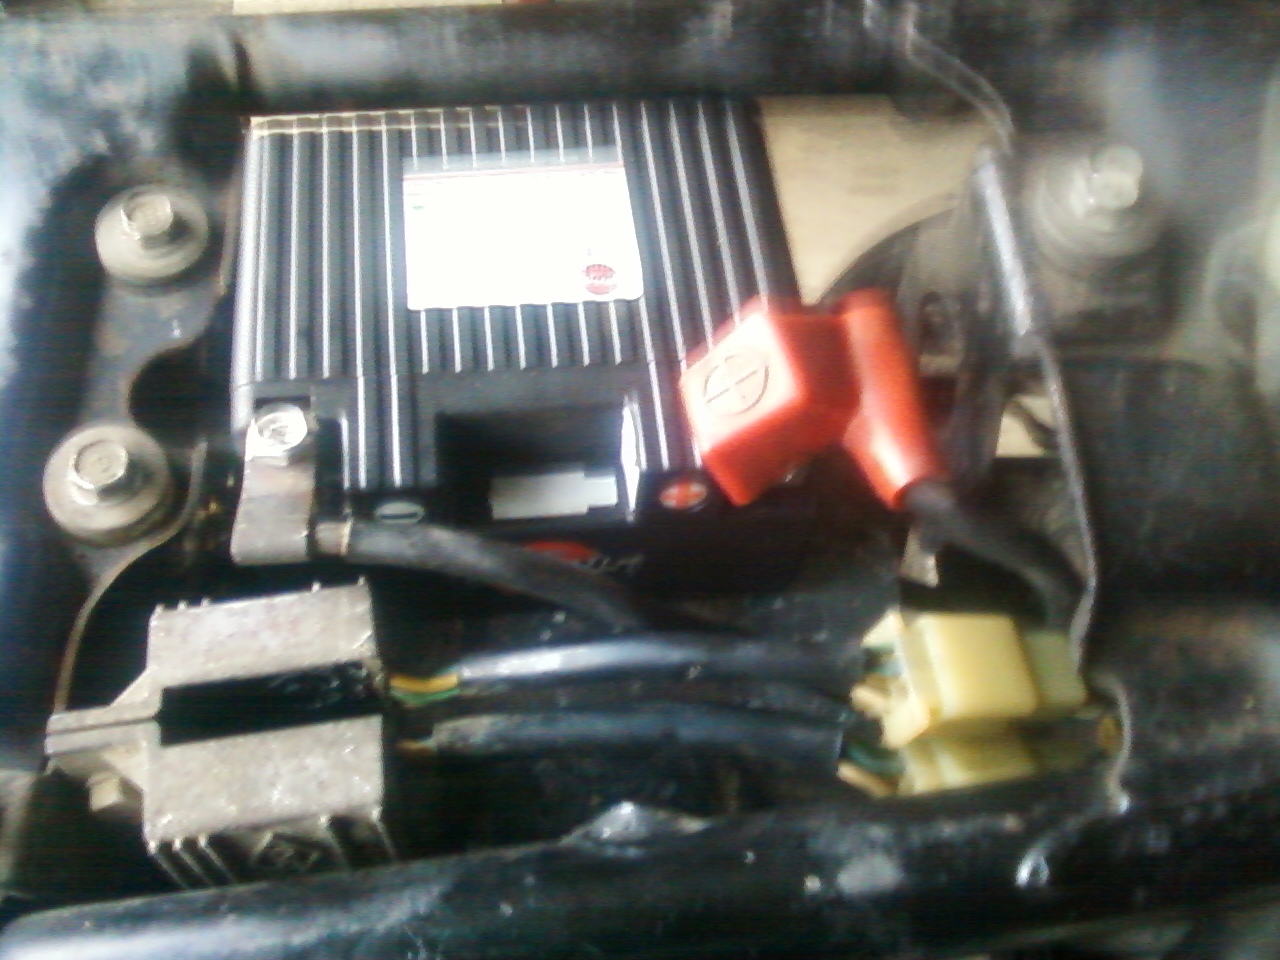
After I got it tacked together with the stick welder I took it out and flipped it over & then brazed it securely together with the oxy-acetelyne torch. Then I laid out the various components such as the rectifier, turn signal flasher & etc & then brazed those mounts to the bottom of the plate.

custom rat motorcycle electronics mount

custom rat motorcycle electronics mount

I know it looks awful, but I might just leave it that way, this is a rat after all. I will have to sort & secure all the wiring though, because neatly sorted wiring is easier to trouble shoot in the future & is less likely to develop problems that need trouble shooting.

Here’s a view from the top side showing the Shorai battery lying on it’s side. I still need to make a plastic box to keep the battery from sliding around. Since my day job is doing design work using Solidworks, I may just draw one up & have it printed out using a 3d printer. If not I’ll form one out of ABS sheet.

<Honda CB650 battery box Shorai LFX>

fits just right!

I can’t say enough good things about these batteries, they’re light, powerful & durable. I’ve installed them in a couple of customer bikes, this one, and even have one in my lawn mower! Sure the cost a little more than the lead acid batteries, but are in my opinion a threefold improvement in all areas. I do sell these & would be happy to quote you one if you contact me.

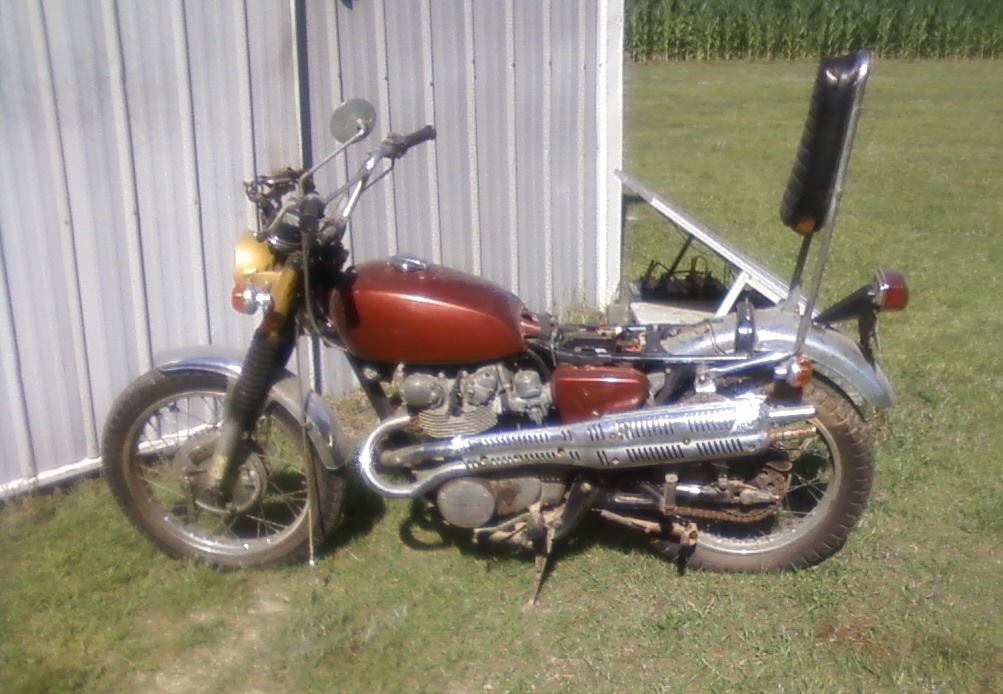
Here a couple of other items that have been added, first an Ebay find of a 74 Honda CB750 fuel tank. This fit with modified rubbers & a custom rear mount. I’ll show you some more details later after I have it all worked out with the seat fitment. but I think it looks really good on here!

Honda CB650 with CB750 tank

Honda CB650 with CB750 tank

Another Ebay purchase is this 1970 Honda CL450 Scrambler. I bought the whole bike just to get the handlebars!

1970 Honda CL450

1970 Honda CL450

It’s pretty much seized up and there’s no paper work but the handlebars gave me exactly the look I wanted for my project. Good solid bars with just enough crust to blend in. No need to treat a new set of bars to a faux patina.

1970 CL450 handlebar on 80 CB650

1970 CL450 handlebar on 80 CB650

The CL450 will be parted, I plan to keep the frame, engine, carbs, gauges, charging system, fork & wheels. All of the sheetmetal and the exhaust are up for grabs to my fellow hobbyists who want them. The fuel tank is rusty bondoed junk but everything else is decent. Contact me using the form below.

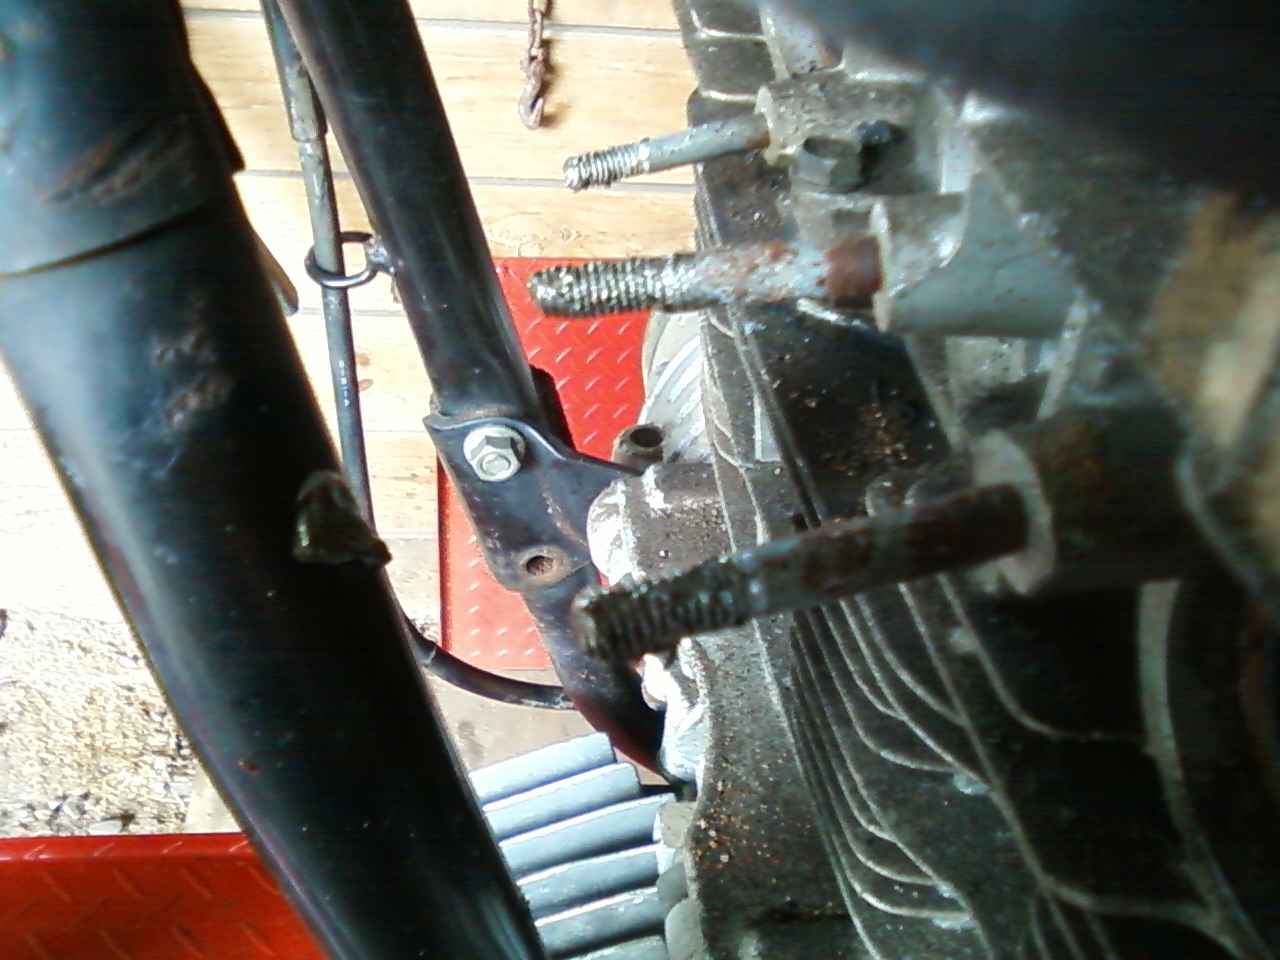
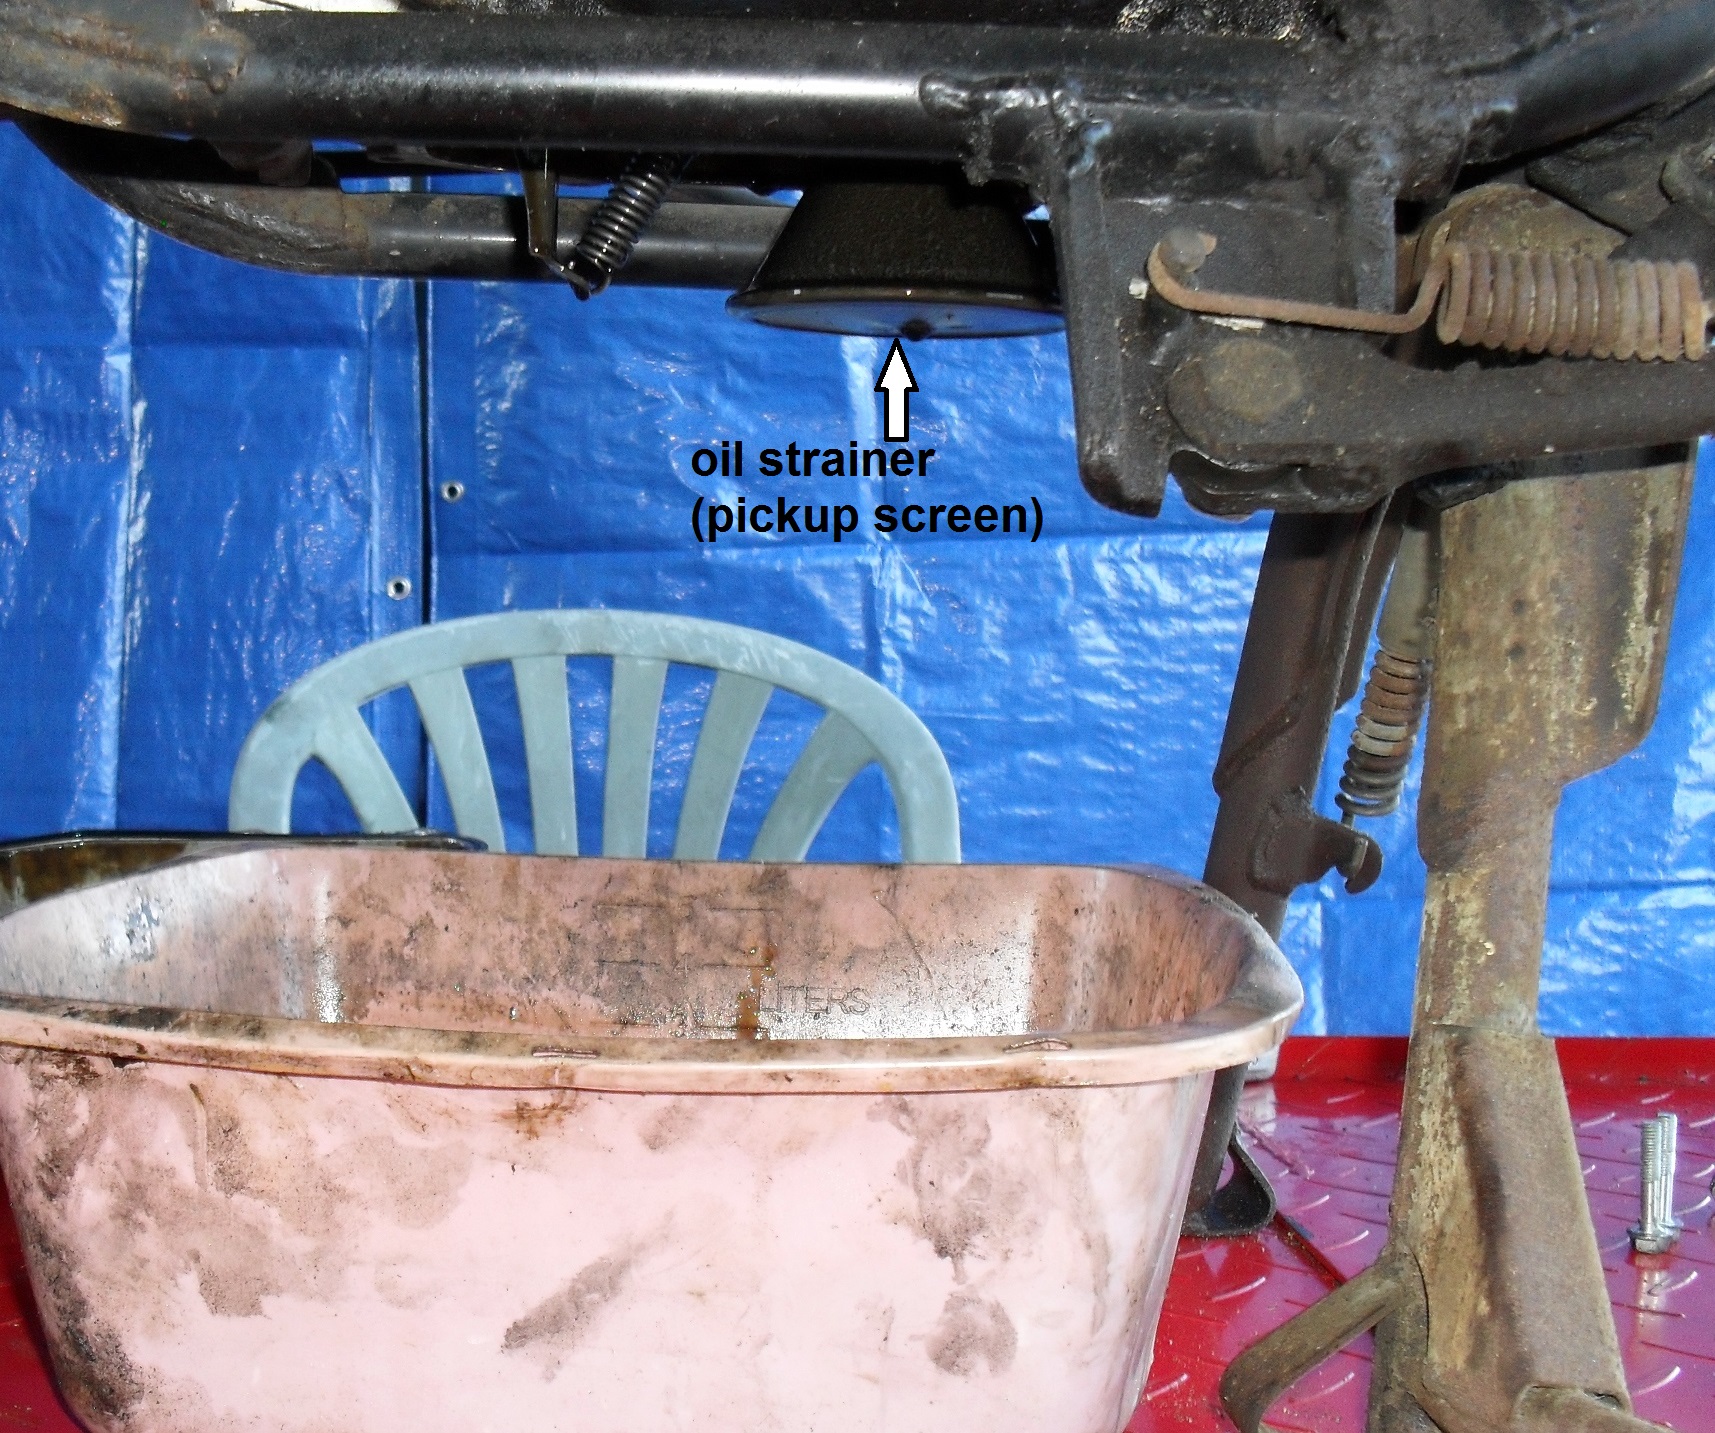
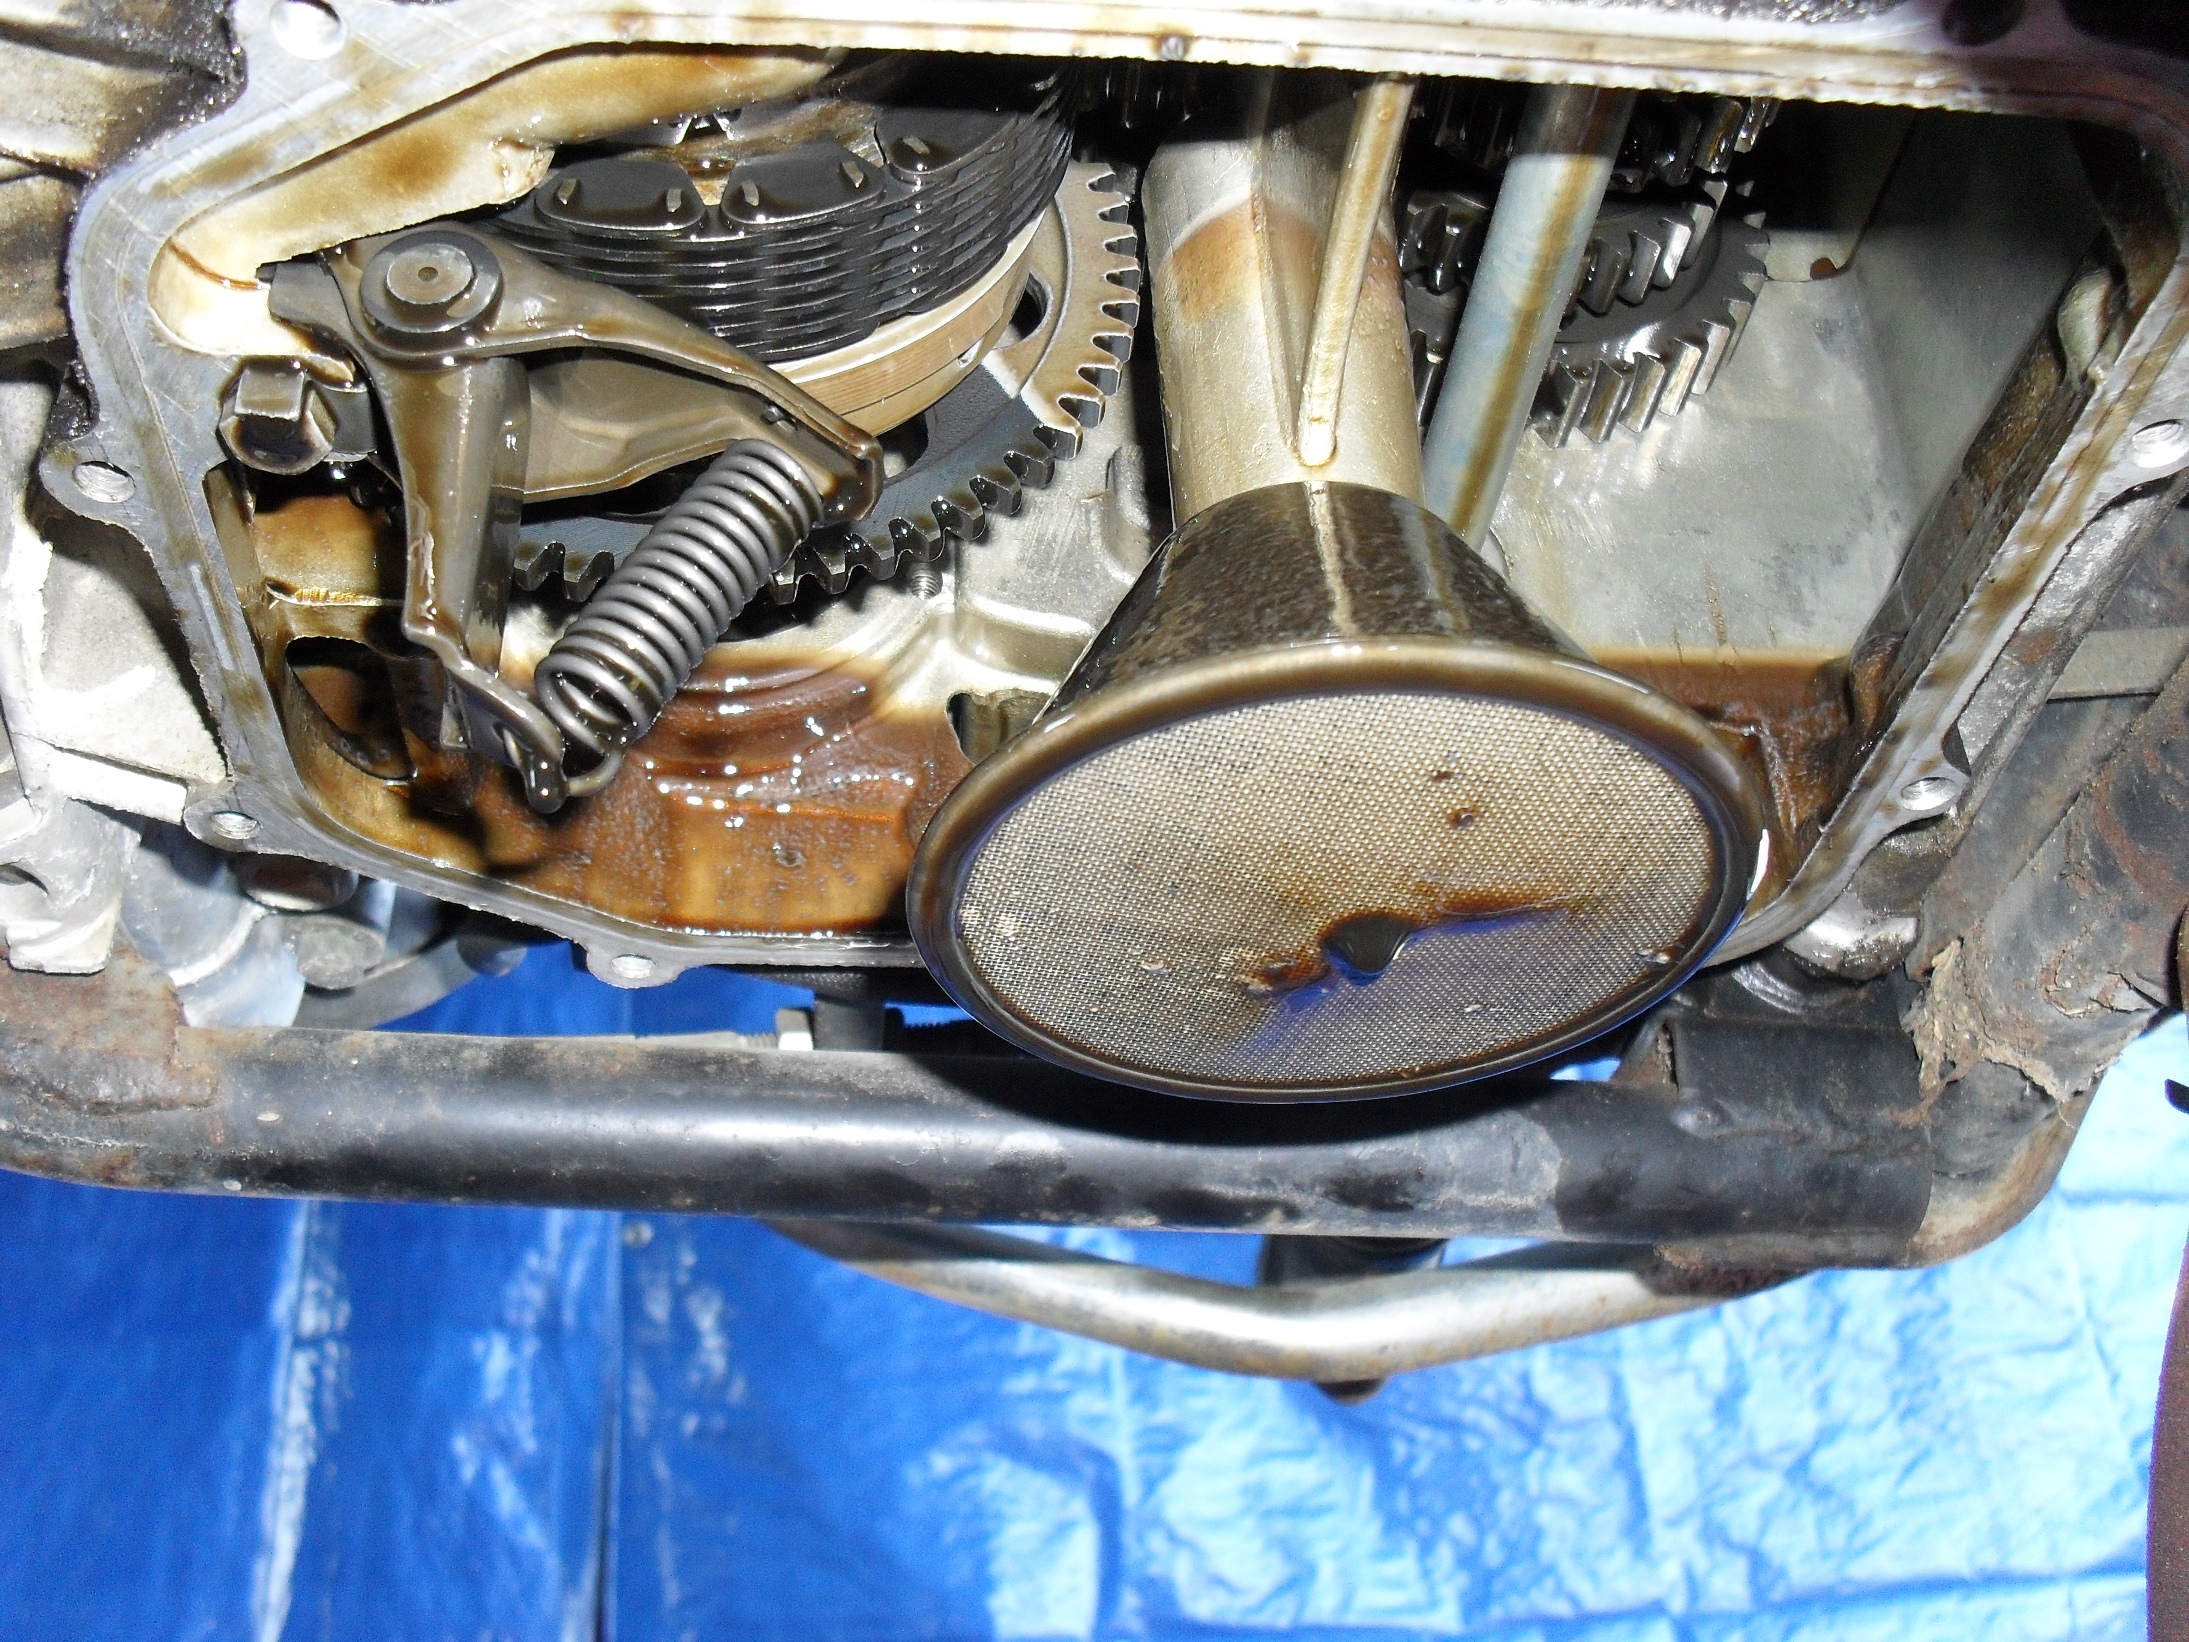
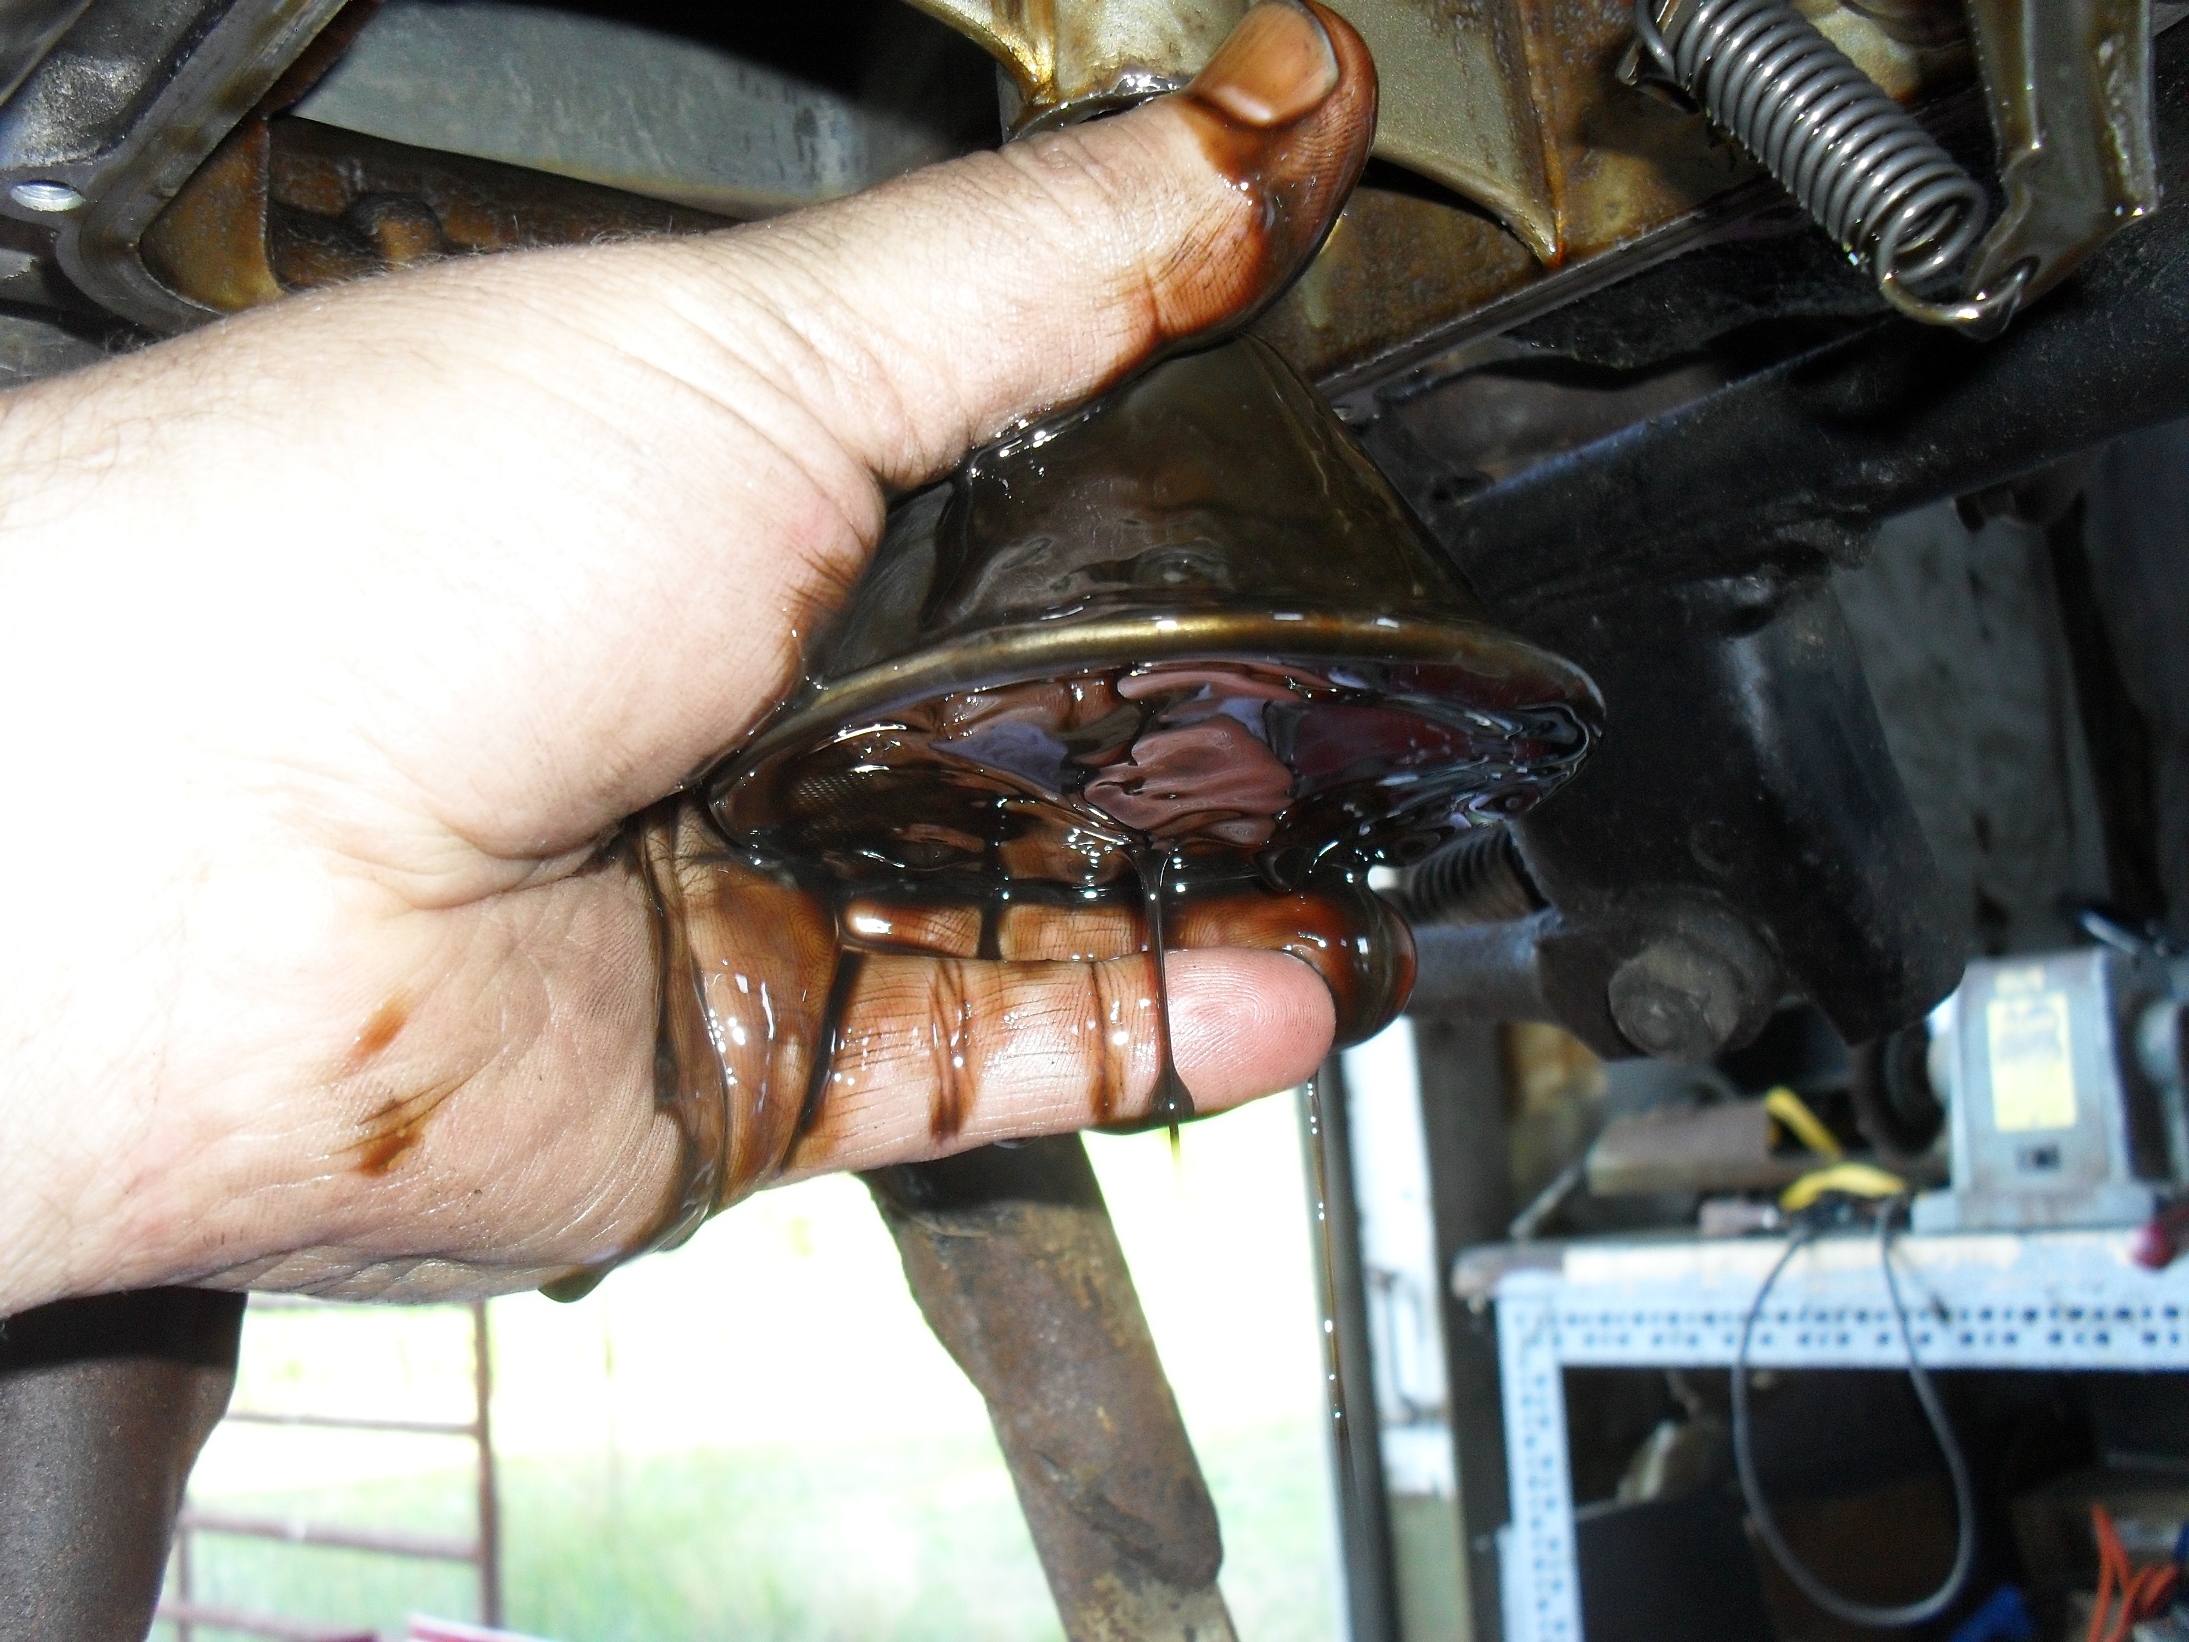
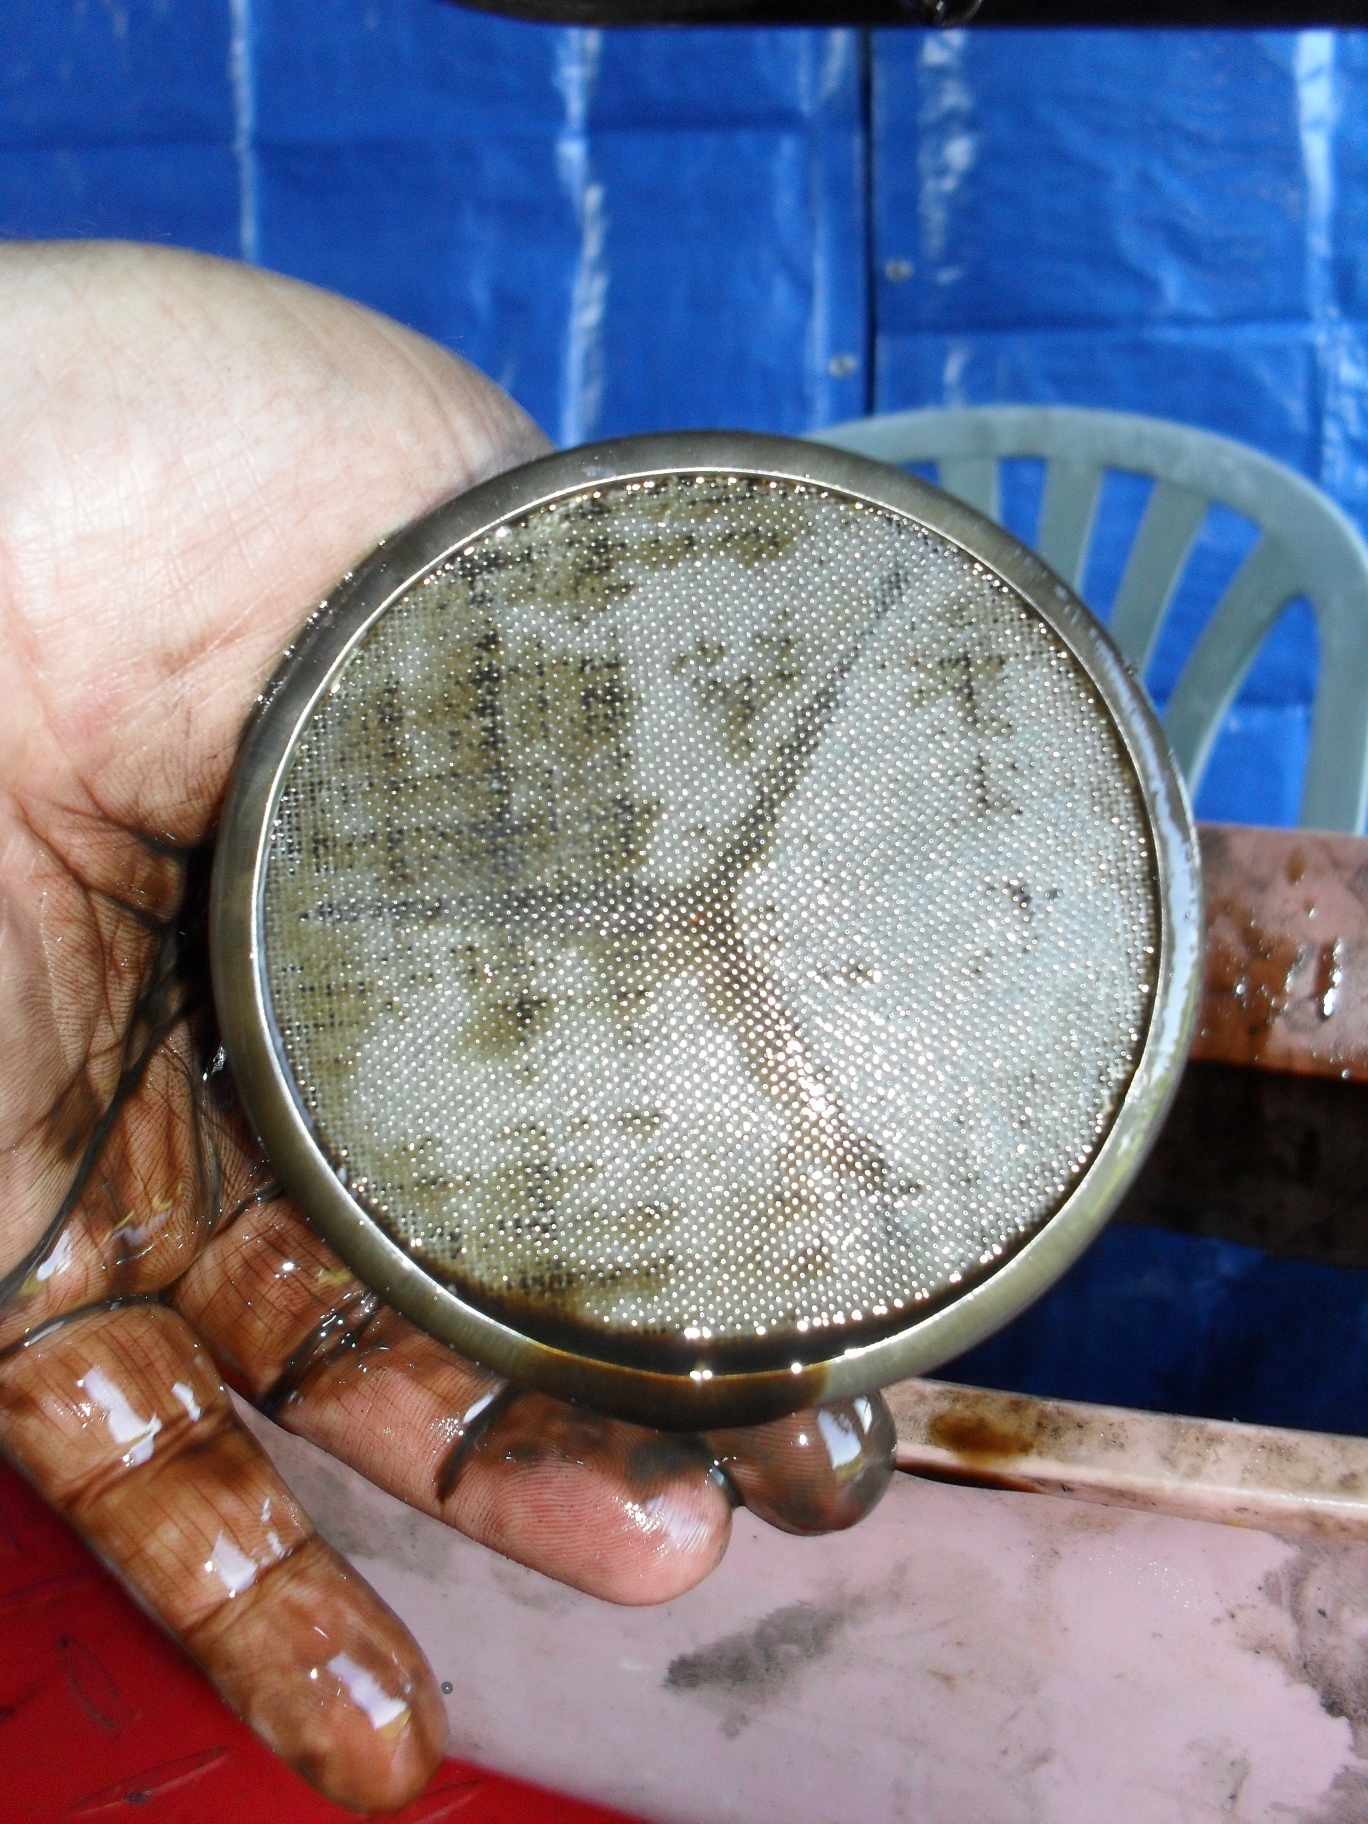
I had a few other adventures including dealing with a stuck oil filter bolt that I’ll go over with you soon including how far I had to go to get it out.

Peace Y’all

Go back

Your message has been sent

Warning
Warning
Warning
Warning
Warning

Warning.

Oil Sump & Strainer Cleaning

Alright! You’ve got your latest barn/field/junkyard find home, it still had good compression, so after cleaning the carbs, topping off the oil and putting in fresh gas it actually fired up and ran okay. Yeehaa! now comes the hard part, do not immediately go running in the house to scour the internet looking for the thousands of dollars worth of parts & accessories you need to restore or customize your new to you machine, there is one more thing you must do to be sure that you don’t need to tear the engine down to bare cases, or perhaps just throw the whole damn thing in the trash. Most vintage Japanese & British machines have an oil sump (oil pan to some of you) strainer, that has probably never even been looked at since the machine left the factory. For this lesson we are going to remove the oil sump (pan) from my personal 1980 Honda CB650 and see what we find inside. After a few minutes running time  & a valve adjustment this old thing has less the 8 p.s.i. difference in compression from the lowest to highest cylinder, I can live with that, if there is nothing wrong in the bottom end. Lets have a look shall we.  First if you have a lift put it up on the lift securely.

1980 Honda CB50 on Harbor Freight Motorcycle lift

Let the serious work begin!

The mufflers are off of mine because I am planning on binning them anyway, it is not necessary to remove them for this job on this motorcycle.  On some bikes it may be required, refer to your service manual for details.

Locate the oil drain plug,

Honda CB650 oil sump drain plug

the location of the drain plug & oil pan bolts

and remove it with the appropriate wrench and drain the oil into a catch pan.

Honda CB650 Drain Plug Location

be sure to catch the aluminum sealing washer.

Since this involves changing the oil you might as well go ahead & change the filter too. On these old air cooled Hondas the filter is a cartridge in this housing on the front of the engine.

Honda SOHC Four oil filter housing

Oh no! this bolt has pliers marks on it. Not cool.

Remove the filter and housing, be sure to move the catch pan so that it catches the oil from the housing.

removing the oil filter bolt

removing the oil filter bolt

Now move to the bottom of the machine and begin loosening the bolts on the sump. The CB650 has 10 bolts that are all the same size & length, so all I have to do is don’t lose any. If you motorcycle has different size or length bolts holding the sump on be sure to note which bolts go into which holes.

the motopsyco hard at work

the motopsyco hard at work

Before you completely remove the last bolt and thus the sump be sure you slide the drain pan back into place beneath the engine.

Before you rush to dump the oil pan set it on the bench and have a good look at the goo stuck in the bottom of it. This will tell you a lot about the health of your engine. Believe it or not the crappy looking mess in the picture below is actually what you hope to find.

inside the CB650 oil pan

inside the CB650 oil pan

This one has a thick coat of clutch dust & what ever dirt that got into the engine & settled out of the oil, what I don’t see are any pieces of gear teeth or metal shavings that indicate an serious problem with the engine or transmission. Now take a magnet & swish it around in the muck to see if it picks up anything. Mine came back clean this time. This is no 100% guarantee that all is well with the transmission etc. but it does make me feel better about buying the parts needed to get it ride-able.

<cb 650 oil sump craftsman magnet tool>

Now it is time to inspect & clean the strainer screen.

location of oil strainer Honda CB650

location of oil strainer Honda CB650

While you are down ther3 have a peek up into the engine to see how everything looks.

<inside the bottom of a Honda engine>

this all looks good in here

On a CB650 slide the drain pan back under the engine & pull down on the strainer, it should slide out.

remove CB650 sump strainer

just pull it straight down.

Once you get it out carefully inspect the screen and if it is damaged or loose replace it. If it looks good wash it out in the parts washer.

1980 CB650 oi sump screen

Inspect the strainer & its o-rings if you have any doubt about their condition, replace them.

Now you just have to clean everything up inspect & replace all gaskets & o-rings as needed, and reassemble everything in reverse order installing a new oil filter & fresh oil. NOw you know that you have one less thing to worry about.

Peace ‘Yall

The 2013 AMCA Southern National Meet!

Indian Chief

A fantastic motorcycle but just a little out of my price range.

This was the first time I have attended this event, the AMCA Southern National Meet. I went on Saturday & had to duck a few showers in the morning but other than that it was a great day! There were some truly outstanding motorcycles on the grounds along with a few neat old bicycles too. Here are a few of the pictures I took around the show grounds, enjoy!

Schwinn Cycle Truck

Kinda Rough & Crusty

Ross badge on Schwinn Cycle Truck

I have no idea why it had a Ross head badge on it.

<neat little bobber>

Triumph in a Bubble!

Triumph in a Bubble!

antique Harley with a saddle

Giddy Up!

Triumph Cubs

Triumph Cubs Hard to resist!

Vintage Vespa & old moped.

Vintage Vespa & old moped.

Carbide Bike Headlight

Who doesn’t love an old bicycle?

rusty Monark Super Twin

rusty Monark Super Twin

BSA Motorcycle

A nice ride able BSA!

antique Benelli 2 stroke

antique Benelli 2 stroke

another great vintage Triumph

I really enjoy seeing bikes like this Triumph Scrambler getting ridden. instead of merely displayed.

another nice old hog

old Harley with bare sheet metal

BSA B50MX

BSA B50MX

crusty project for sale

crusty project for sale

<old motorcycle>

The theme for this year was British Iron and the were some first class examples placed inside of one of the exhibition halls.

Ariel Square Four

Ariel Square Four

A Magnificent Triumph

A Magnificent Triumph

beautiful restored Vincent

beautiful restored Vincent

 cool custom Bonneville

cool custom Bonneville

AJS all decked out for touring

AJS all decked out for touring

Harley Davidson Sprint

I would like to have one of these

1960 Triumph Thunderbird

my dream machine

1960 Triumph Thunderbird

fantastic looking engine

Thunderball BSA

Thunderball BSA

<BSA Thunderball>

Cushman Eagle V2

Cushman Eagle with v twin engine

 coolest dog at the show

coolest dog at the show

Harley K model

Harley K model this would be a great restoration project

<Harley K>

kool tow trucks

kool tow trucks #1

kool tow trucks #2

kool tow trucks #2

field events pictures

field events pictures

Cushman in plank  race

Cushman in plank race

winner of the plank race

winner of the plank race

slow race

slow race

slow race

slow race

immaculate Moto Guzzi Eldorado

immaculate Moto Guzzi Eldorado

immaculate Moto Guzzi Eldorado

Moto Guzzi Eldorado another of my dream bikes

Briggs and Stratton motor wheel

Briggs and Stratton motor wheel

This was the first time I had ever seen a Briggs & Stratton  motor wheel. Neat old piece. The same gentleman also had the Smith motor wheel pictured below.

Smith motor wheel

Smith motor wheel

This event is held each year at Denton Farm Park in Denton, N.C. This is a fantastic venue for events of this type check their website for a schedule of different interesting events throughout the year.

The 2013 Charlotte International Motorcycle Show Pg.1

<XDL Street Jam at Charlotte International Motorcycle Show>

XDL Street Jam at Charlotte International Motorcycle Show

Hello Dear Readers,

Last weekend the lovely Mrs. Psyco and I attended the 2013 Progressive International Motorcycle Show at the Charlotte Convention Center in Charlotte N.C. Since it was my first time attending this show I wanted to share my experiences with you. We are morning people and like to pretend we are children of privilege so I sprung for the early admission VIP tickets. This worked out very well for us as two weeks ago my lovely wife slipped and fell in the kitchen on our way out the door. It turns out that some ladies shoes are probably far more dangerous than motorcycles. The first picture above is from the XDL Street Jam show.

motopsyco on a 2013 Ducati Diavel

The Diavel made me do it!

A couple of years ago one of my very first blog posts was about the introduction of the then brand spanking new Ducati Diavel. Well I finally got to see one in the flesh and throw a leg across it. It fit very well and everything seemed to fall perfectly into position for me, plus with my but firmly on the seat I was able to put my feet flat on the floor. Now I really gotta go get a demo ride on one. The fine people at Ducati Greensboro provided the bikes on display at the show.

The Nelsonore Custom 76 Honda CB750

Gary Nelson’s Cafe/ Scrambler CB750 was my favorite bike at the show.

Moving on to the show bikes in the J&P Cycles Ultimate Custom Builder contest. The above 76 Honda CB750 is the coolest thing I have ever seen. At the risk of sounding conceited I’ll confess that up until now my all time favorite was my very own Yamaha XT600 supermoto that I featured in an earlier post. But Gary Nelson is one of the most talented vehicle engineers to ever live. Just look at all of his work in NASCAR. No wonder this is my new favorite custom motorcycle of all time.

The Brew Racing CB350 Racebike

The Brew Racing CB350 Racebike

In 2011 Brew Racing Frames was my listing as website of the month for December. Nothing is more awesome than seeing a genuine for real racing motorcycle entered in a show like this against all of the pampered show bikes. Enlarge the picture below for it’s racing pedigree.

Brew Racing CB350 Credentials

Brew Racing CB350 Credentials

Triumph Scrambler

Triumph Scrambler

Here are a couple of beautiful bikes from the Triumph display, one new & one old.

classic rigid frame Triumph

nothing classes up the joint like a beautiful old Triumph.

One of the most interesting things on display was the Tharo EV Scooter by a division of Tharo Systems.  It does have a much more realistic MSRP (around $4200 or so) than most big electric scooters.

Tharo EV electric scooter

Tharo EV electric scooter

Of course since I just love old rice grinders the VJMC booth was my favorite club/vendor display stand at the meet.

Check out this old CL450 Scrambler.

Check out this old CL450 Scrambler.

There’s a soft spot in my heart (or is it in my head?) for old scramblers of any make.

Honda CBX1000 six cylinder

Honda CBX1000 six cylinder

The six cylinder Honda CBX was the epitome of early ’80s muscle bike development. But with introduction of the GSXR soon to come the original musclebike era came to a close in the mid “80s with only the Mighty V Max soldiering on alone until the beginning of the 21st century.

side view of CBX

side view of CBX

That’s all for now, but check back soon as  I will post some more pics and my analysis of the good things, and the shortcomings of the show.

Why I love bicycles so much now!

Yes this is mainly but not exclusively a motorcycle related blog some of you may wonder why I seem so enamored with bicycles. The contents of  this post were originally written as a reply to the thread “What triggered your bicycle revival” over at Rat Rod Bikes. After re-reading it I decided to share it with you.

I was a really small little geeky nerdy kid. As a child I learned to ride a bike and rode around a lot, didn’t think much of it. I had go-karts & mini-bikes to play on. The bicycle wound up just being around the neighborhood transport. I was too small, too slow, and perhaps too lazy to really care about even trying to race anybody or jump anything so even though I grew up through the infancy of BMX & mountain biking I honestly did not care. Being a twerpy deaf guy with thick glasses athletic endeavors were something I strenuously avoided.  At the age of 12 I got my first motorcycle, and my last bicycle. Both were green, a Kawasaki KD100 and a 26″ Western Flyer cruiser. Once I mastered the operation of the motorcycle the bicycle never moved unless I was either out of gas, or prohibited from riding the Kawi for some reason. At 15 I got a license and a junkyard Mustang. The bicycle was never seen again, and was probably abandoned in the garage when we moved. Many years, cars, motorcycles, jobs, & a family later it finally happened, I had that gnarly bone grinding crash that every motorcyclist dreads. My left knee was repaired by a partial knee replacement and I spent some time in a wheelchair until the broken ribs I also incurred healed enough to walk on crutches. When the leg healed enough for me to begin walking on it again it was a flabby atrophied shadow of its former self. I had a really bad limp and would occasionally fall flat on my face just because it was not strong enough to hold me up. In order to build up strength in it I purchased and began using an exercise bike, but riding and not going anywhere got b-o-r-i-n-g. At the flea market I grabbed an old $20 mountain bike, and took up light trail riding.

But I really liked styling and profiling on a mean looking ride so when a friend of mine gave me this even though it actually rode great I instantly jumped on the internet looking for ideas to customize besides the “Lowrider” style and that is when I found this site and this community

Vintage Huffy bike

The start of my custom bicycle fetish!

Today I have a great hobby, have met and befriended many interesting people, built an interesting collection of bicycles, and plan to continue indefinitely. Oh yeah as I nice bonus I no longer walk with a cane, rarely fall down any more. 😯  Plus my wife loves trail riding with me and doesn’t mind going to the bike show either. Wins all around as far as I am concerned.

Peace Y’all

amtique Murray bicycle

Yes this is my home office/studio.

<custom Western Flyer with truss rods>

One of my favorite customs that I have done.

20" Ross Polo Bike Jr

My show winning 20″ Ross custom.

The 2012 Royal Enfield Bullet Classic 500 A Psyco Road Test and Review!

a real1956 Royal Enfield Bullet!

a real1956 Royal Enfield Bullet

a real 2012 Royal Enfield Bullet

a real 2012 Royal Enfield Bullet

Let’s take an adventure, a time machine trip of sorts if you will. Imagine if you could take a trip back to 50’s, the golden age of the British motorcycle industry, snag yourself a snazzy new 500cc sporting machine and bring it back to your garage. Since we are dreaming big, now pretend that you have your hand crafted real steel motorcycle back in your fully equipped garage with all the latest and best machine shop equipment you could want. Then while your “friends” in the gasket industry make you a set of the finest modern gaskets and seals, you tear down the engine and re-machine and re-assemble it using modern tolerances and technology. While you are in there update the valve train to hydraulic lifters, so you don’t have to spend any time adjusting valve lash ever again.

A genuine 1954 Royal Enfield Clipper

A genuine 1954 Royal Enfield Clipper

A genuine 2012 Royal Enfield Classic 500

A genuine 2012 Royal Enfield Classic 500

Next load it into your private jet & fly it to Japan for an electronic ignition. While you are there have Kehin to custom build you a fuel injection system and calibrate for your engine. No more tickling the carbs, or cleaning them, or gas dribbling all over your garage from a 1950’s Amal trying to cope with  our 21st century imitation gasoline.

How 'bout a fuel injected thumper?

How ’bout a fuel injected thumper?

Oh well it is a nice fantasy, but one part of it is true. You can get a brand new hand built “British” (in name and style anyway) motorcycle that looks like it fell out of a time capsule from 1955. The first Royal Enfield motorcycles were produced in 1901. In 1967 the factory in England closed but the Indian made Enfield Bullets soldiered on and have evolved into the reliable, oil tight and modern emissions compliant machines we have today. While these are not fantastically powerful machines compared to our modern machinery they are much better in so many ways than an actual antique motorcycle.
Immediately when approaching the Classic or Bullet 500 you are struck by its relatively compact looking dimensions. Today so many “retro” styled machines have turned into larger than life caricatures of the machines they are trying to imitate. This is one of the reasons I dislike so many of them, being a fan of 50’s-70’s bikes such as the CB400, XS650, or old Triumphs and Enfields, to me the new “retro bikes” look tacky compared to the real thing. The 2012 Royal Enfields are not retro replicas; they are still the real deal. An upgraded genuine vintage motorcycle that is available right now with a 2 year warranty, imagine that.

See what I mean about the size of modern bikes?

See what I mean about the size of modern bikes?

When I threw my leg over the Classic 500 and hoisted it off the kickstand the first though that went through my mind is whoa this thing feels substantial. Not overweight & porky but definitely dense, solid, and hefty feeling. You can feel the steel in this one. With my 29 inch inseam I can sit on the saddle with both boots firmly on the ground.

motopsyco on Enfield Classic 500 with Desert Storm paint

Just hit the magic button and you’re ready to go!

2012 tan Royal Enfield Classic 500

Rolling it round a little bit.

Bike; 2012 Royal Enfield Classic. Rider; motopsyco

Bike; 2012 Royal Enfield Classic. Rider; Motopsyco

Hit the starter button and the fuel injected single starts up with a nice thump-thump-thump idle note that is a characteristic of a big slow revving single. Yes it vibrates a little but it’s a pleasant soothing feeling not annoying. Pull in the clutch, snick it into first gear, and ease out on the lever. Just remember that you are working with authentic 1950s horsepower (27.5hp @ 5250 rpm) so don’t pull out too closely in front of that sports car that is barreling down the street at twice the speed limit. Even 1950s horsepower is more than enough to stay ahead of most traffic from stoplights around town. Plus people look. These are good looking motorcycles that are different from the mundane and commonplace Hogs and crotch rockets that litter the streets around here.
In addition to thanking LA Motorsports for allowing me to borrow a couple of their motorcycles I really want to thank general manager John for pointing me towards Jamison Road in Summerville. While it had too much traffic to really cut loose it is the kind of road that is perfectly matched to the feel and great handling of these bikes. It was just a couple of miles of nice sweeping turns that let me roll the bike from side to side in a most enjoyable fashion while the engine played a slow bass drum beat as I rolled the power on through each curve, and slowed back down just so I could do it again & again. This is the kind of handling that comes only from classic British motorcycle architecture. No high tech suspension and wheels, just good frame design and a nice wide handlebar. Sure I could probably run that same road at 3 times the speed of the Enfield on any late model plastic covered crotch rocket, but to be honest with you, I would not have been any happier, nor had a better time doing so.

leaving LA Motorsports in Summerville S.C

leaving LA Motorsports in Summerville S.C. for a ride on an accessorized Enfield

A red Classic Royal Enfield 500

The Accessory exhaust sure sounds good on a Royal Enfield 500

I did not try any interstate trolling or top speed runs, and quite frankly as the top speed is around 85 or so I would not be afraid to, but this is a bike that really belongs on twisty country roads. The suspension is basic stuff but competent. The single disc front brake & rear drum brake are well up to the task of handling what this bike can dish out.
One selling point of this machine is its 85 mpg fuel economy. Folks, that is getting close to moped territory, but on a real solid steel motorcycle that can haul 2 people around with aplomb and looks damn good doing it.
As India becomes more and more of a manufacturing powerhouse the fit and finish of these motorcycles is now much better than when they were first reintroduced to the western world back in the early ‘80s. They have always had the right look, but now they have the polish and refinement to go with it. Plus this is probably the most comfortable motorcycle I have ridden in the last ten years.

one good looking classic motorcycle

one good looking classic motorcycle

The Royal Enfield 500 engine is the epitome of classic style

The Royal Enfield 500 engine is the epitome of classic style

<the 2012 Royal Enfield Classic in red>
the 2012 Royal Enfield Classic in red

If you want to turn curves at reasonable speeds in the country and turn heads like a rock star in town, and you don’t care about being able to run 150 mph, or looking like a rich yuppie poser, then this is the bike for you. My road tests are not about outright performance, but about how a motorcycle makes me feel, and this bike makes me feel damn good. It’s not badass, does not have exotic cachet, power, and is not a status symbol, it is just a motorcycle without all that extra bullshit. Plus you can get a brand new one out the door tax, title, tags & all for around 7 grand.
And I can see myself owing one….

Peace Y’all