
Alright! You’ve got your latest barn/field/junkyard find home, it still had good compression, so after cleaning the carbs, topping off the oil and putting in fresh gas it actually fired up and ran okay. Yeehaa! now comes the hard part, do not immediately go running in the house to scour the internet looking for the thousands of dollars worth of parts & accessories you need to restore or customize your new to you machine, there is one more thing you must do to be sure that you don’t need to tear the engine down to bare cases, or perhaps just throw the whole damn thing in the trash. Most vintage Japanese & British machines have an oil sump (oil pan to some of you) strainer, that has probably never even been looked at since the machine left the factory. For this lesson we are going to remove the oil sump (pan) from my personal 1980 Honda CB650 and see what we find inside. After a few minutes running time & a valve adjustment this old thing has less the 8 p.s.i. difference in compression from the lowest to highest cylinder, I can live with that, if there is nothing wrong in the bottom end. Lets have a look shall we. First if you have a lift put it up on the lift securely.

Let the serious work begin!
The mufflers are off of mine because I am planning on binning them anyway, it is not necessary to remove them for this job on this motorcycle. On some bikes it may be required, refer to your service manual for details.
Locate the oil drain plug,

the location of the drain plug & oil pan bolts
and remove it with the appropriate wrench and drain the oil into a catch pan.

be sure to catch the aluminum sealing washer.
Since this involves changing the oil you might as well go ahead & change the filter too. On these old air cooled Hondas the filter is a cartridge in this housing on the front of the engine.

Oh no! this bolt has pliers marks on it. Not cool.
Remove the filter and housing, be sure to move the catch pan so that it catches the oil from the housing.

removing the oil filter bolt
Now move to the bottom of the machine and begin loosening the bolts on the sump. The CB650 has 10 bolts that are all the same size & length, so all I have to do is don’t lose any. If you motorcycle has different size or length bolts holding the sump on be sure to note which bolts go into which holes.

the motopsyco hard at work
Before you completely remove the last bolt and thus the sump be sure you slide the drain pan back into place beneath the engine.
Before you rush to dump the oil pan set it on the bench and have a good look at the goo stuck in the bottom of it. This will tell you a lot about the health of your engine. Believe it or not the crappy looking mess in the picture below is actually what you hope to find.

inside the CB650 oil pan
This one has a thick coat of clutch dust & what ever dirt that got into the engine & settled out of the oil, what I don’t see are any pieces of gear teeth or metal shavings that indicate an serious problem with the engine or transmission. Now take a magnet & swish it around in the muck to see if it picks up anything. Mine came back clean this time. This is no 100% guarantee that all is well with the transmission etc. but it does make me feel better about buying the parts needed to get it ride-able.

Now it is time to inspect & clean the strainer screen.
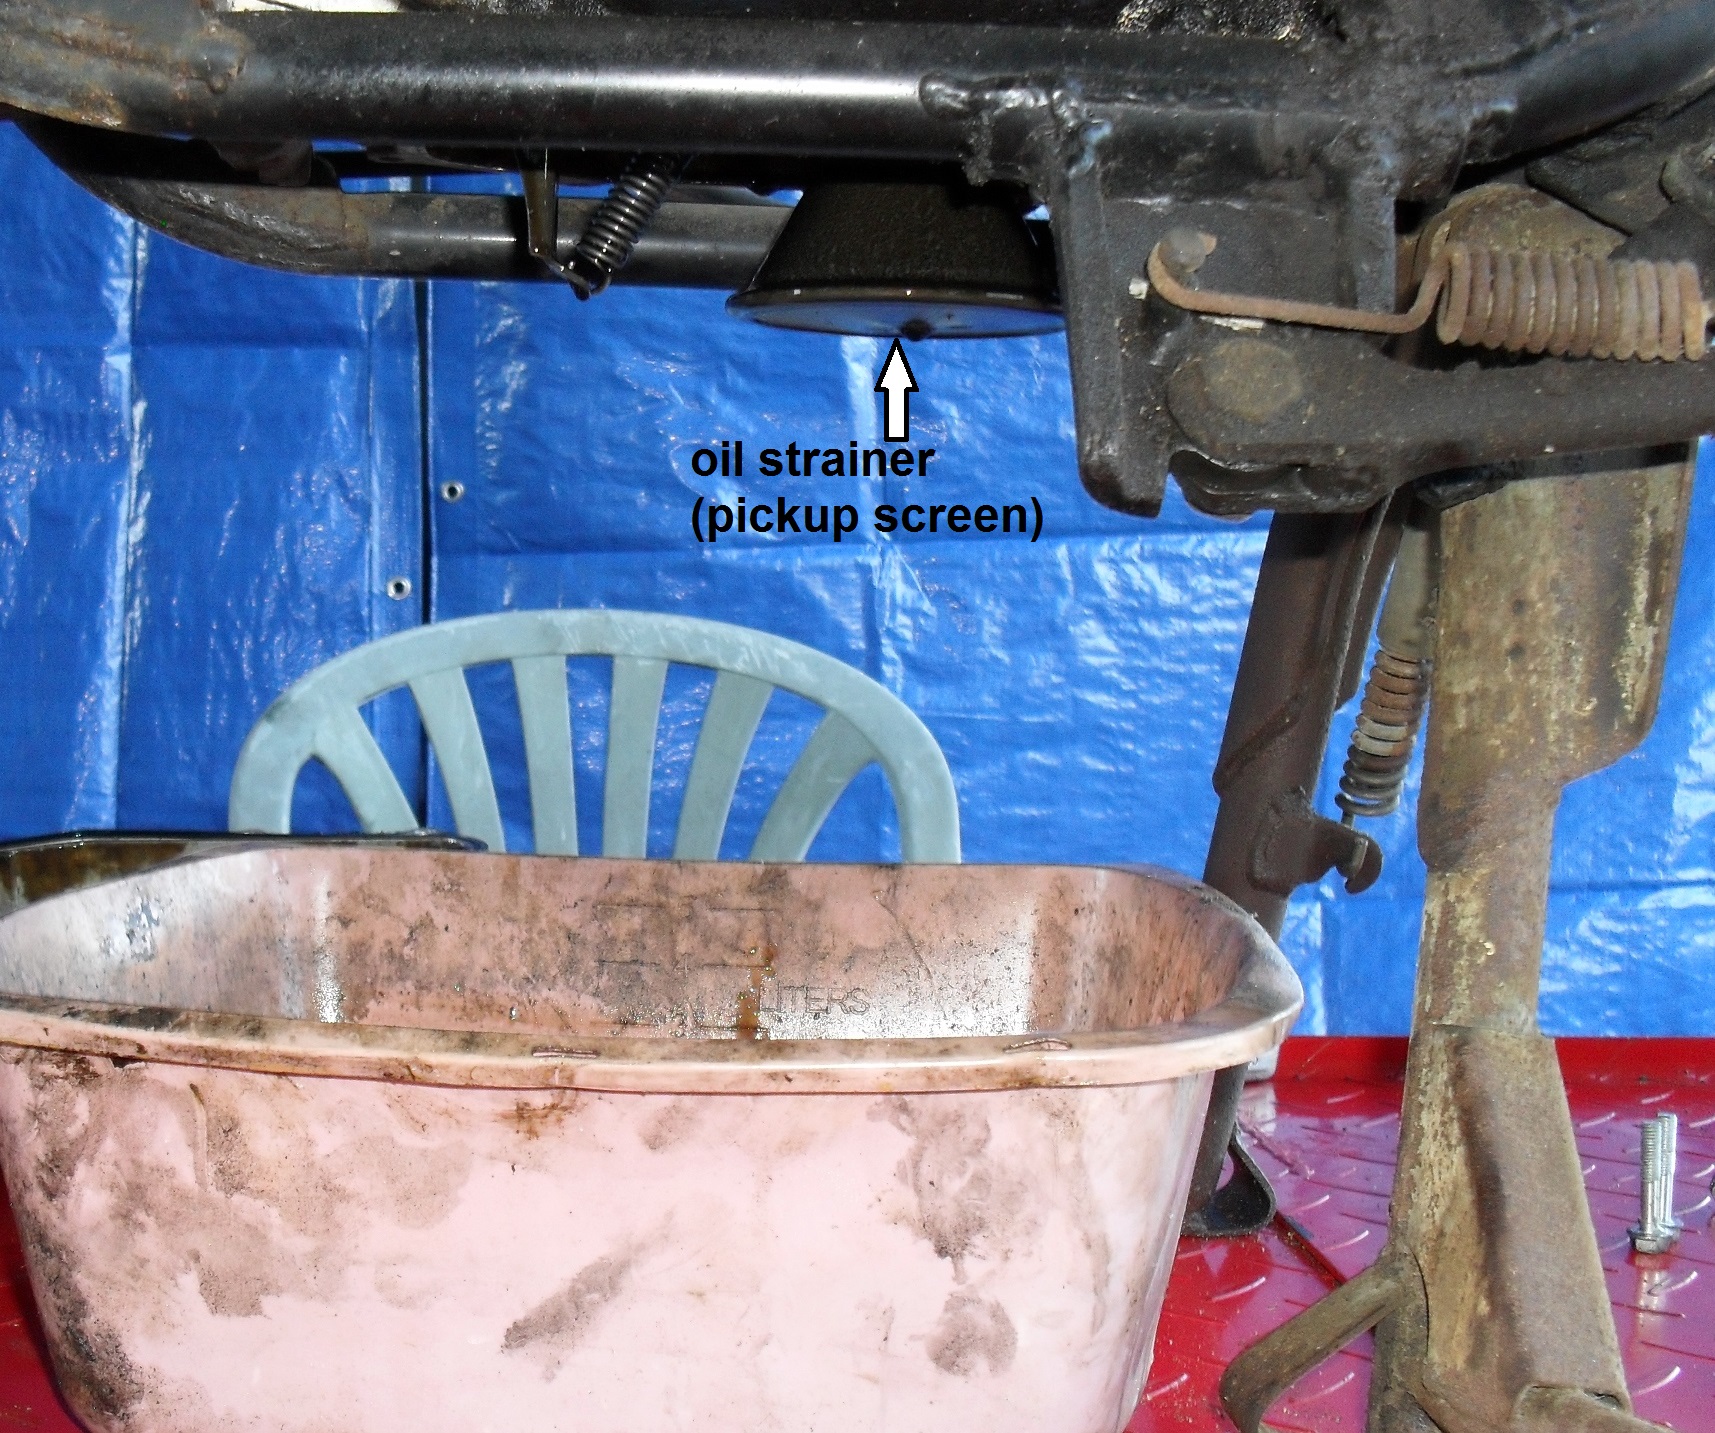
location of oil strainer Honda CB650
While you are down ther3 have a peek up into the engine to see how everything looks.
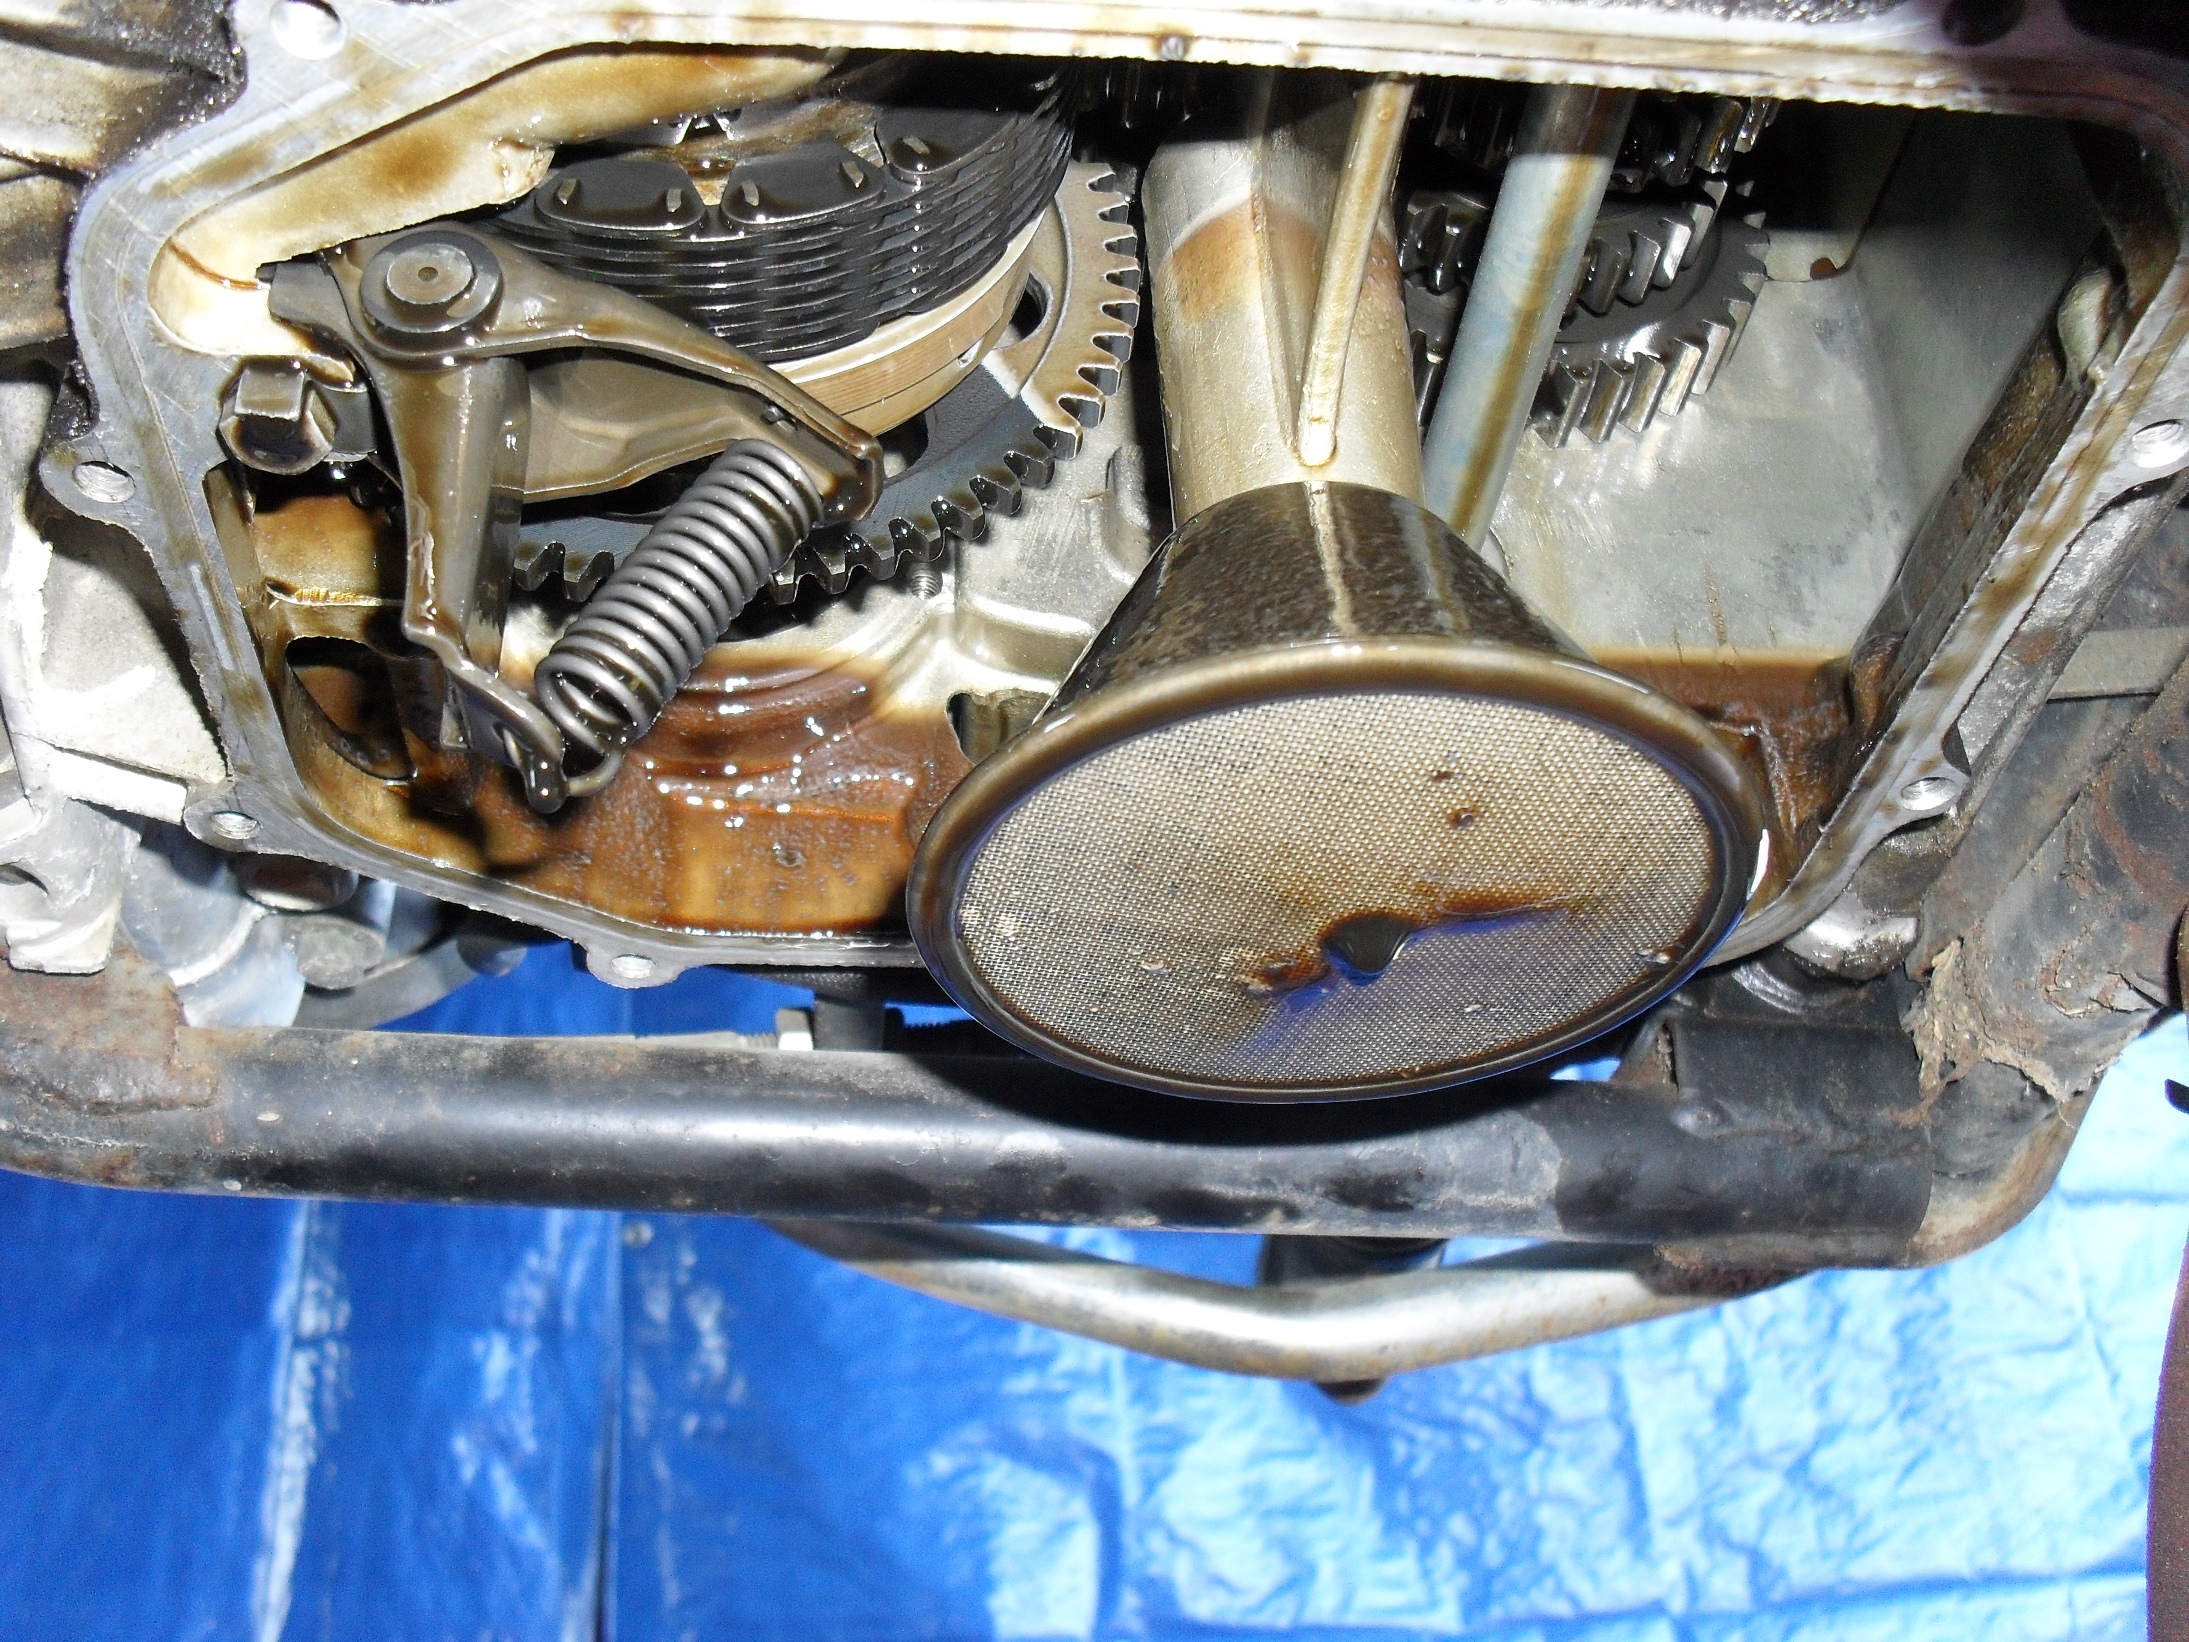
this all looks good in here
On a CB650 slide the drain pan back under the engine & pull down on the strainer, it should slide out.
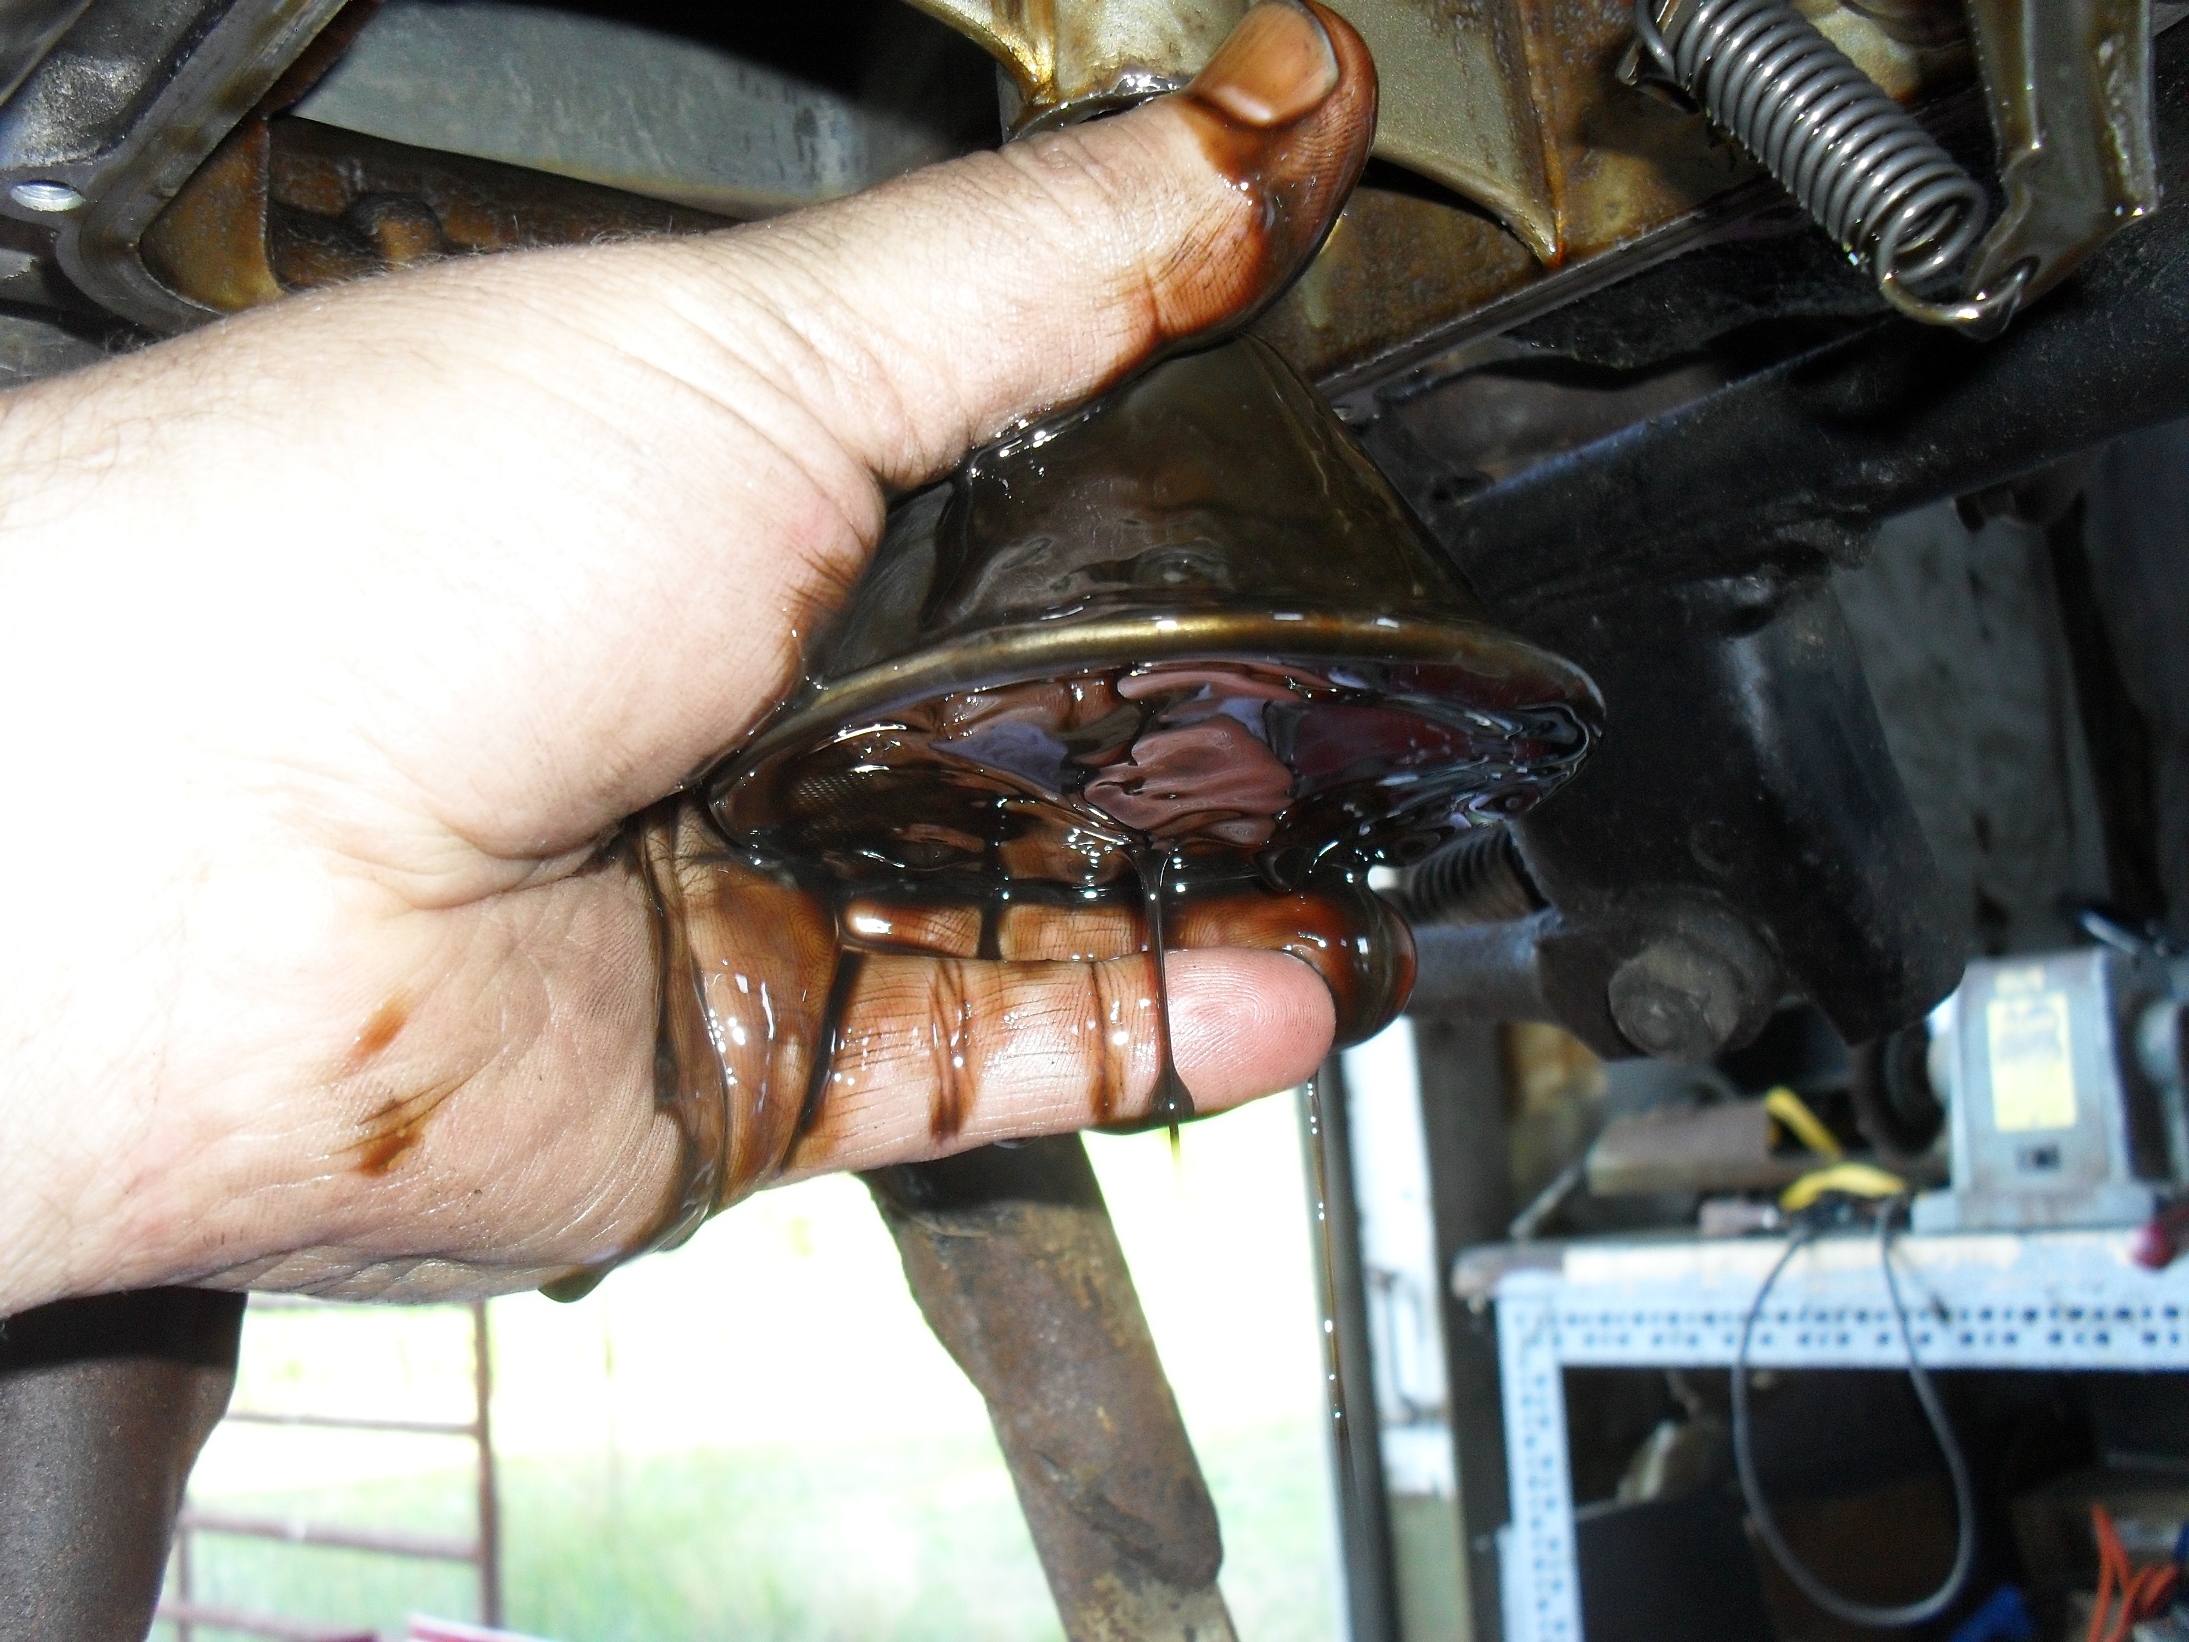
just pull it straight down.
Once you get it out carefully inspect the screen and if it is damaged or loose replace it. If it looks good wash it out in the parts washer.
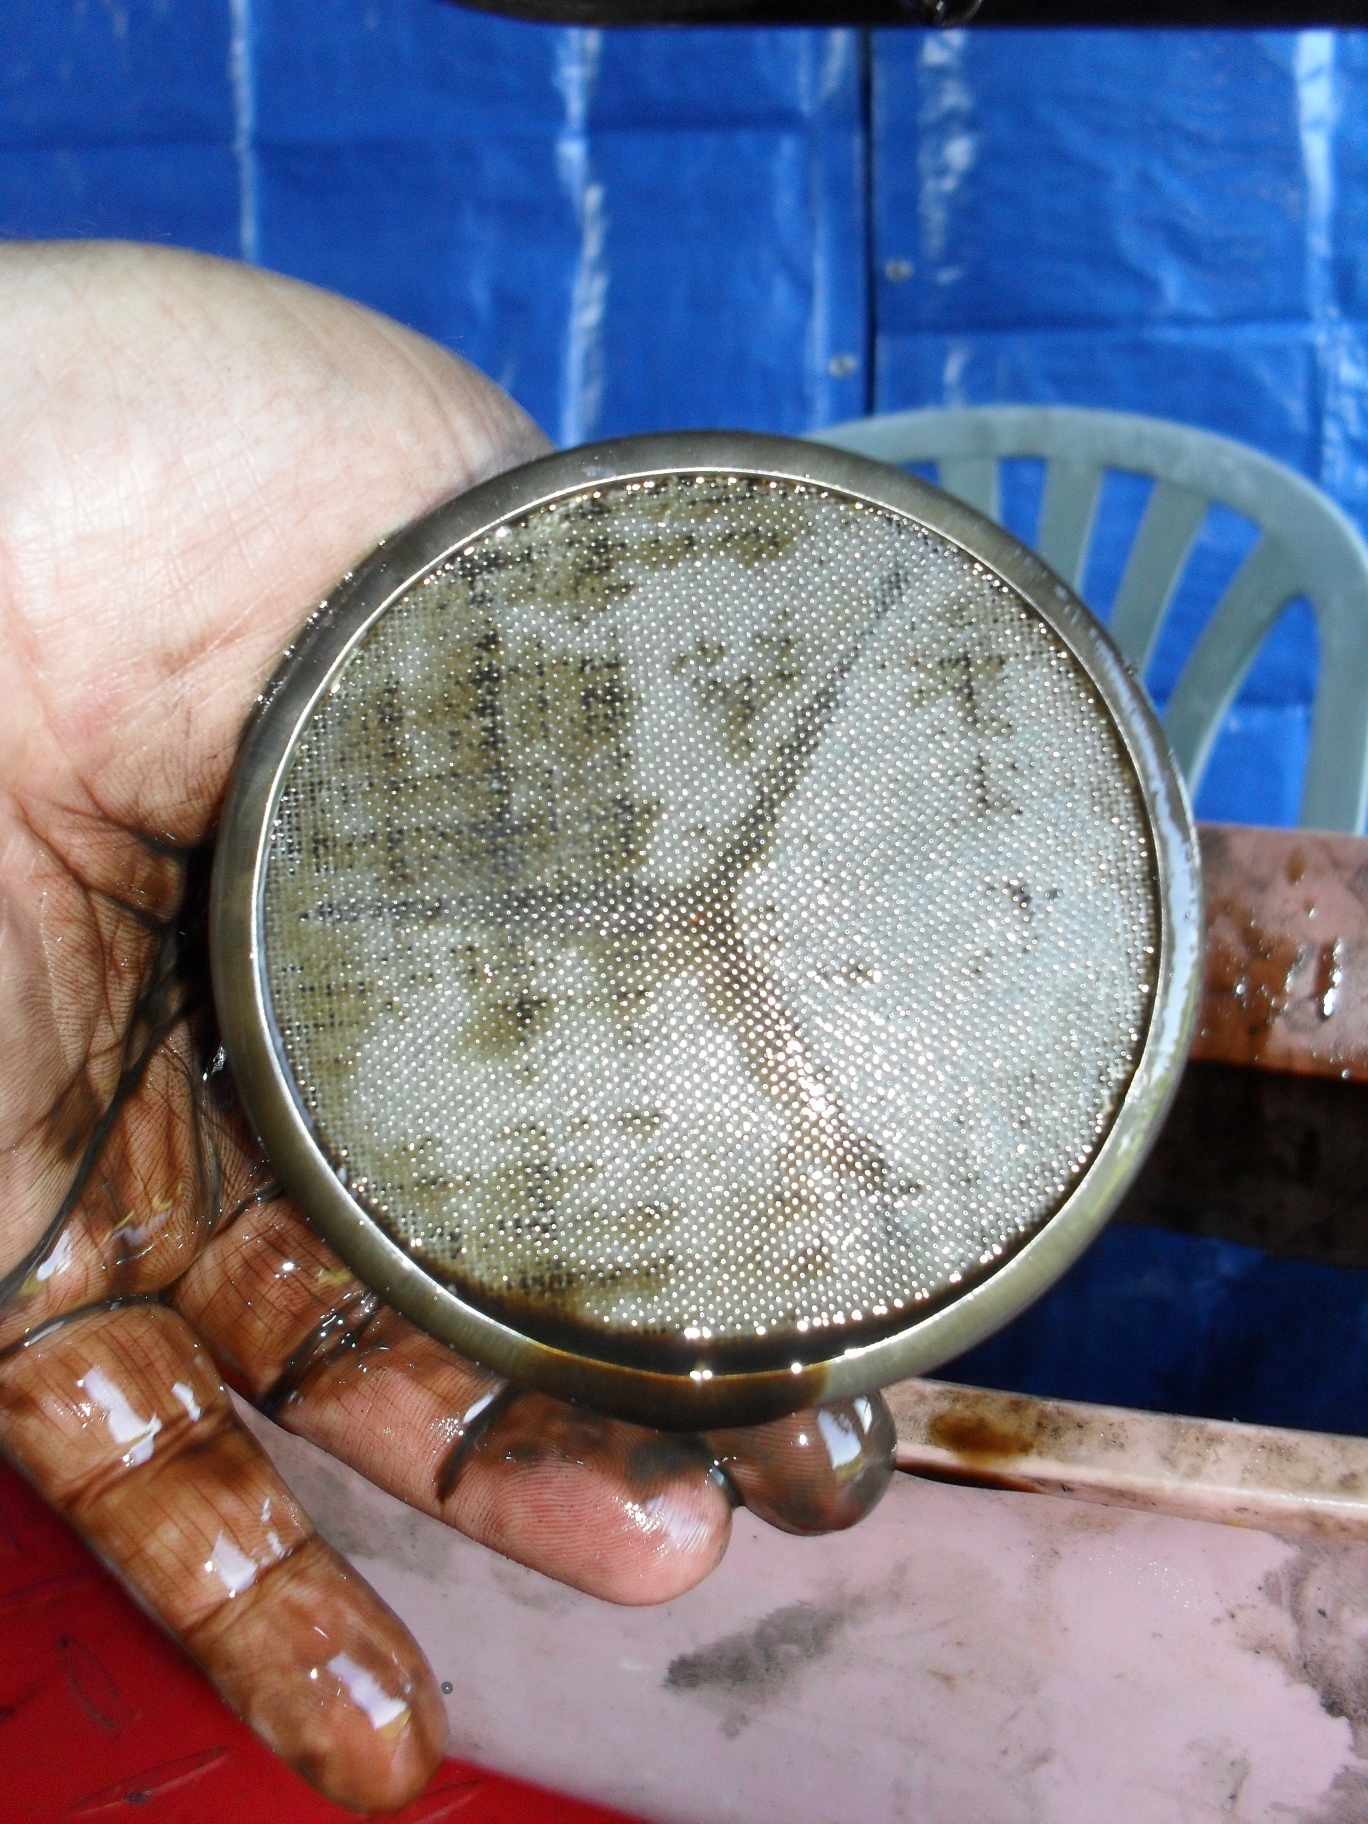
Inspect the strainer & its o-rings if you have any doubt about their condition, replace them.
Now you just have to clean everything up inspect & replace all gaskets & o-rings as needed, and reassemble everything in reverse order installing a new oil filter & fresh oil. NOw you know that you have one less thing to worry about.
Peace ‘Yall


