The mixture screws & fuel mileage.

People keep doing a repeated search for, “four turns out from the seating of fuel screw of keihin 4 stroke carburetor do get more mileage in motorbikes.” The answer to this is no. The mixture screw should be correctly called the idle mixture screw, as it only controls the air/fuel ratio at idle. This screw should only be adjusted as needed to correct the idling of your engine & the very beginning of the transition off of the idle stop. And even then all other factors affecting your engine, such as spark & air should be checked & corrected first. Normally the only reason you would turn the mixture screw out that far, would be on a high performance engine that has been re-jetted for maximum power. Of course an engine like that gets the minimum fuel mileage.
On a stock engine if you turn the mixture screws out 4 turns you will develop drivability problems, and there will be an increased risk of engine failure due to overheating caused by an excessively lean mixture at idle. The other problem is that with the screws that loose is that you run the risk of them vibrating out and leaving you stranded. Plus your gas mileage will probably go down due to the way you have to twist the throttle to compensate for the drivability problems.
Since this is a popular topic amongst those who commute by motorcycle, sometime soon I will do a post on how to maximize fuel economy. Except for basic maintenance none of it will involve any work on the carburetor.

Peace Y’all


Joe Rocket Ballistic Revolution Jacket & Ballistic Pants (7.0) A ‘Psyco Product Review!

Hello again everyone,

A couple of weeks ago I tried on a Joe Rocket one piece suit but it just did not fit, so I decided to try one of the two piece outfits and quickly settled on the Ballistic Revolution jacket & the Ballistic pants, for three reasons, one if not getting a one piece suit I wanted to get a 3/4 length coat to prevent unintended exposure of my midriff section to freezing cold & fast moving asphalt, two the pants were the only ones I could find in the lower end of the price range with a true short inseam of 30″, and three the price was right. Yes unfortunately the price does matter, but the general consensus found in my research is that the Joe Rocket stuff will save your skin as well as anything else if you are comfortable wearing it. I am comfortable in this outfit, but quite frankly I hope to never test it’s protective abilities.

<Joe Rocket textile suit>

I like Hi-Viz colors!

Since the vendor that I bought the Survivor suit from was out of stock on the pants, I went over to good old reliable denniskirk.com and ordered this set. I placed my order on a Wednesday or Thursday (CRS* kicking in sorry) and the following Monday it was delivered, plus it was a dollar cheaper too.

Some folks might be put off by the high visibility colors shown here but this jacket is available in other color schemes & solid black. As for me I want the drivers of the cages that attempt to kill me to admit that they were deliberately trying to murder me without being able to soothe their consciences by saying, “I didn’t see him.”

I bought this outfit with my own funds and paid full retail price & plan to keep it as long as it works. What this means for you is that I don’t owe anybody any favors so if it screws up, I will tell you the whole truth about my experiences. So far I have worn this outfit while riding in temperatures ranging from 28°F (-2°C) to 72°F (22°C) and I am happy to report that once I got in and get everything zipped up & buttoned down it was actually reasonably warm & comfy for my 30 mile commute in the wee hours of the morning. Yesterday was unseasonably warm for December and as I was leaving the office I was worried that it would be too hot with the liners in place but it was okay once I got moving. Leaving the front zipper 1/3 the way down resulted in the wind entering the front of the coat with a sort of parachute effect that separated the fabric from my torso, greatly aiding my comfort. Whether this was by design or just a result of my particular riding style/body shape combination I do not know. As a package so far it works well, but getting into it and out of it is a little more involved than a one piece or plain leather jacket & pants or chaps combo.

This outfit is supposed to be water resistant but I have no plans to put that to the test. When I get caught out in the rain I’ll come back & let you know how it does.

Now lets talk about the individual pieces, the Ballistic Revolution jacket is a really good example of bang for the buck. It has CE approved armor for  your elbows & shoulders. There is a foam spine pad but it is just that a dense foam pad. It can be easily removed & replaced with an approved spine protector if you so desire. Joe Rocket calls their exterior shell fabric RockTex which is similar to most other heavy duty abrasion resistant synthetics. It has five outside pockets. With the liner in you have four interior pockets including a nice vertical zippered pocket on the left side, that is just the right size to hold something small like a Walther PPK in it. Anything the least bit larger has to go somewhere else. Once you take the liner out there is only one pocket inside, and I wouldn’t put much in it.

The 2xl size fit my large frame well and the sleeves were the right length and large enough in diameter so that my arms fit inside and I could still bend them. Being a 3/4 length means that it is adaptable to a variety of motorcycle riding positions and it is easy enough to get in an out of. It is not perfect and I have a couple of quibbles, first the velcro style closure for the neck leaves something to be desired. I guess this comes from being built to a price point, but the neck closure needs to be redesigned with either a larger tab to give the hook and loop fabric they currently use a larger gripping surface or to switch to a stronger grade of material for this one spot since it is the only one where the velcro actually has to hold something in place as opposed to keeping a flap closed. It would also be nice to have the good inside pockets without the liner installed. It’s too early for me say anything about the long term quality or durability but right out of the box I am impressed.

These pants that I ordered are the Ballistic 7.0 size 2xl short. Joe Rocket list the short inseam as being 30″ which means that with my boots on they are just barely off the floor when I am standing straight up. When the liner is in you have to be very careful zipping the leg closures down or the zipper will catch the fabric of the liner & jam. When the weather warms up & I remove the liner this problem will be resolved but for now I am just being very careful not to jam the zippers. Walking around the house it feels as if the knee pads are way to low but once I sit on the bike they cradle my knee & shins perfectly. There was no problem putting these pants on over my triple e wide work boots. As with the jacket there are a couple of relatively minor complaints, the biggest complaint is the fact that you really have to be careful of the liner & storm flaps when zipping up the pants as the zippers will grab them and jam pretty easily if you are not careful. If you know you are going to be needing your wallet or house keys etc. you need to transfer them to the pockets of these pants or your coat. They could have put in a zipper to reach into your street clothes but that would have been one more potential entry point for cold air or rain so it’s no big deal, until you get to the gas station and have to unzip your coat and pants to get your money out.

<Joe Rocket Ballistic Revolution>

So far my impressions are great and I would feel comfortable recommending that you try the jacket, the pants, or both if you are in the market for protective gear. Just purchase from a reputable vendor with an easy return or exchange program just in case it really doesn’t fit you well.  If by some chance either piece falls down on the job I will be sure to come back here & let you know all about it.

Peace Y’all

(*Can’t Remember Shit)

The Organic Rat! Honda CM400 Junkyard Dog!

This one has a kind of an interesting story to it. I had stopped at lunchtime a couple of weeks ago to fill the Suburban Assault Scrambler up up with ethanol free premium at my favorite gas station, when a local folk artist named Frank Cooper rolled up next to me in his mural covered Roadmaster. He comes over & tells me that he has an old Honda 400 in a storage unit that he might like to sell.

art car

super cool acrylic painted sled

I really didn’t think anything more of it for a week or two and then this morning  I gave him a call and met him at the rented storage unit where he stored this bike & apparently the rest of his worldly possessions also. After moving piles of junk (aka art supplies) this little bobber came into view. My immediate reaction was oh no I don’t want anything to do with that one. but after we got it outside he hooked up a battery & poured some gas in the tank and within a minute or so it fired right up and the engine sounded pretty good.

<ratty old cm400 motorcycle>

After negotiating a price I loaded it into my van & let it ride along to lunch with my beautiful wife & I. She didn’t even roll her eyes at me for buying it, I wish every man were as lucky as me. Here it is tucked into the back of my old Astro van. A normal sized motorcycle will not fit without removing the mirrors & maybe folding down the handlebars, but this one is so low it fits with plenty of headroom to spare.

<rat bobber chevy van>

loaded up and ready to haul

After getting it home I snapped a few pics of it to share with you. Lets start with the details first. I have no idea where this hardtail came from or what that silver thing is that is hose clamped to the frame.

<honda twinhard tail>

It kind of sketchy and dangerous looking….

The bottle opener is a nice touch.

<crazy dangerous motorcycle>

I might trade the bottle opener for one that says Guinness

I have no doubt this was the license plate he rode around with. 😉

<folk art license plate>

The seat is literally a junkyard dog.

<junkyard dog motorcycle seat>

woof woof!

How ’bout a top view?

<bobbed Honda CM400>

I hope any passengers don’t mind the comfy looking rear fender.

Come on you have to admit it has a mean looking stance!

<bobbed honda chopper 400>

“The Gunn”

The design and fabrication look as dangerous as a gunfight but all I plan to do to this one is to get it as functional & dependable as possible without changing anything about the way it looks or worrying about safety beyond making sure that it is not too likely to break in half if it hits a bump in the road. All motorcycles are dangerous, but some are more dangerous than others.

<wicked evil dangerous chopper motorcycle>

“The Bullet”

I am more than willing to entertain reasonable offers on this machine, as long as you understand that it is being sold as folk art with no warranty that you would ever be able to ride it at all and that it was fabricated by an unknown amateur of questionable talent & that I am not responsible for anything that happens to you as a result of attempting to ride this motorcycle. Of course the longer I keep it & the more I do to it, the better your offers must be.

Peace Y’all

Motopsyco.

QUICK UPDATE! A friend of mine saw this bike on Facebook & has purchased it from me. It is still parked in my shop because I have been commissioned to rebuild it to his specifications. Though I hate to see a real vintage rat disappear it will be a gritty down & dirty bobber, just right for him to tool around on down here in the dirty south! STAY TUNED!

advrider.com The November Website of the Month

This is one of the largest, craziest, motorcycling communities on the internet. I have actually joined this forum even though so far I have only made one post. But when I am researching a motorcycle, accessory, or gear advrider.com is my “go to first” resource. It’s all in there sometimes you may have to dig through layers of bullshit but the information I needed was always there. Beside a lot of the BS is amusing or interesting. The Shinko 705 tires on my scrambler were purchased based on reviews there. After consultation with another inmate I just ordered a Joe Rocket one piece suit to try.

Let me go ahead & clear one thing up. I am not an adventure rider (anymore & yet) but I do pose like one at the local coffee shop. I’m just another guy who loves motorcycles but puts in most of his mileage commuting with the occasional 50-100 mile weekend ride. I used to ride more & someday hope to do so again.

One thing you need to do right now is just open up the advrider.com home page and just sit there and watch the slide show of fantastic pictures that play on the screen. Since I am running multiple monitors I often just open the home page & let the slide show play. They do rotate in new pictures on a regular basis so check it often.

If you are a thin skinned politically correct wuss, you probably want to stay away from this site. This forum does not have members it has inmates. Down in the basement there a many things that are both disturbing and fun. You will find things that will offend you no matter who you are, so if you are not man or woman enough to suck it up & get over it, stay the hell out of this asylum.

As I said at the beginning this website there is more real motorcycle & gear related information at advrider.com than I have found anywhere else on the internet, but I must admit, being the garage rat that I am, that my favorite sub-forum is the “Some Assembly Required” section.

Just be careful, you can get sucked into this place, and next thing you know the sun is coming up and you haven’t been to bed yet. Some threads have had me laughing so hard that my wife was wondering what was wrong with me. If you are just browsing the site out of curiosity or to see what is new I recommend using a tablet or laptop so that when the battery goes dead you know it is time to take a break.

Peace Y’all

‘Psyco

Various Motorcycle Sounds

I have made a few video clips of various motorcycles, and how they sound that are posted over on the Motopsyco.com Facebook page just in case you are interested. While there are not many now I will be adding more as time goes by. The first 3 vids I link to will be 3 different exhaust systems on 250 Ninjas.

The first video up is an older one of an EX250 with a mean sounding Yoshimura System on it. Click here to go directly to the video!

In the second video the bike has a pair of Emgo Dunstall Replica mufflers on it. This was shot as the owner was leaving work one day when the temperature was about 40 degrees Fahrenheit. Click here to go directly to the video!

The third video features one of the most earsplitting loud motorcycles I have ever heard. If I had not heard it with my own ears I would never have believed that 250cc could make that much noise. Thankfully it is done & I never have to hear it run again! Click here to go check it out. It does have a severe case of “megaphonitis” at low speed but once it gets “on the pipe” it pulls alright.

And just in case you were wondering how that Mac System on the Suburban Assault Scrambler sounded you can listen to it by clicking here.

There is also a video with the sound of a totally stock Honda CRF150 posted, just click here.

I’ll continue to add to this library of short clips as I get the chance so check back often, sign up for notifications on the right side of the page, like the Facebook page.

Good & Cheap! The Harbor Freight Motorcycle Rear Wheel Stand

I’ve had this for a couple of weeks now and so far so good! What prompted me to buy this thing was believe it or not a craigslist ad. Some guy had a used one that he was trying to sell for $30, but it turns out a new one is only $35 bucks at the regular retail price (in October 2013) and since it is getting nearly impossible to find a motorcycle with a center stand on it I decided to try this one out. I wanted one with the paddles on it so that I could use it for the greatest variety of motorcycles possible.

<Motorcycle swingarm rear lift & stand>

Haul Master Model 65620

Here is how it came from the store, bubble wrap & packing tape.

<Motorcycle swingarm rear lift & stand>

It only took my lovely assistant a minute or two to unwrap it and put it together for me.

<Motorcycle swingarm rear lift & stand>

According to the paperwork that was taped to it it is rated at 1000 pounds capacity! If you have a thousand pound motorcycle don’t bring it to my shop, I don’t want to deal with it. It is obviously cheap and looks it. The only thing that really concerns me is the wheels are kind of lightweight looking but I guess as long as I don’t throw it against the wall or smack the wheels with a hammer they will be okay.

<Motorcycle swingarm rear tire lift >

For the first test lift I stuck it under just the kind of motorcycle it was designed for, a 2005 Kawasaki Ninja. Easy enough, to use and stable even outside on the grass.

<ex250 ninja on harbor freight swingarm stand>

An inexpensive motorcycle on a cheap stand!

<Motorcycle swingarm rear lift & stand>

Some exhaust systems can interfere with universal paddle stands. This is why most people whom have a single motorcycle, and race teams use stands with spools but for me there is no telling what I will be working on next so the most universal fit possible is what I am after.

<Motorcycle swingarm rear lift & stand>

A shot of the ground clearance with this bike.

If you have a vintage bike with round swing arm tubes this stand will work on those as well, if you have enough clearance around the exhaust system, such as the high mounted mufflers on this 1971 CL450.

<Motorcycle swingarm rear lift & stand>

Lets try this out with an old motorcycle.

Properly adjusted it is sturdy enough that I feel safe using it to work on motorcycles with.

<Motorcycle swingarm rear lift & stand>

If your vintage bike has low exhaust pipes this stand probably won’t work for you.

Just for shits & giggles I took a picture of it holding up an old dirt bike too.

<Motorcycle swingarm rear lift & stand>

It worked great for this old dirt bike.

Let’s be honest here, it is cheap, and as far as looks and finish go, it is not in the same ball park as some of the really expensive stands  out there, but to me function is king. It has turned out to be safe & useful so I really don’t care if the paint fades or if the rubber coating on the paddles gets a crack or two in it, just as long as it holds up motorcycles like it is supposed to. And if it ever fails at that job, I’ll be sure to come back here and let you know what happened.

Peace Y’all

How To Adjust Valve Lash (1980 Honda CB650 SOHC)

<Honda 650 SOHC Valve adjusters>

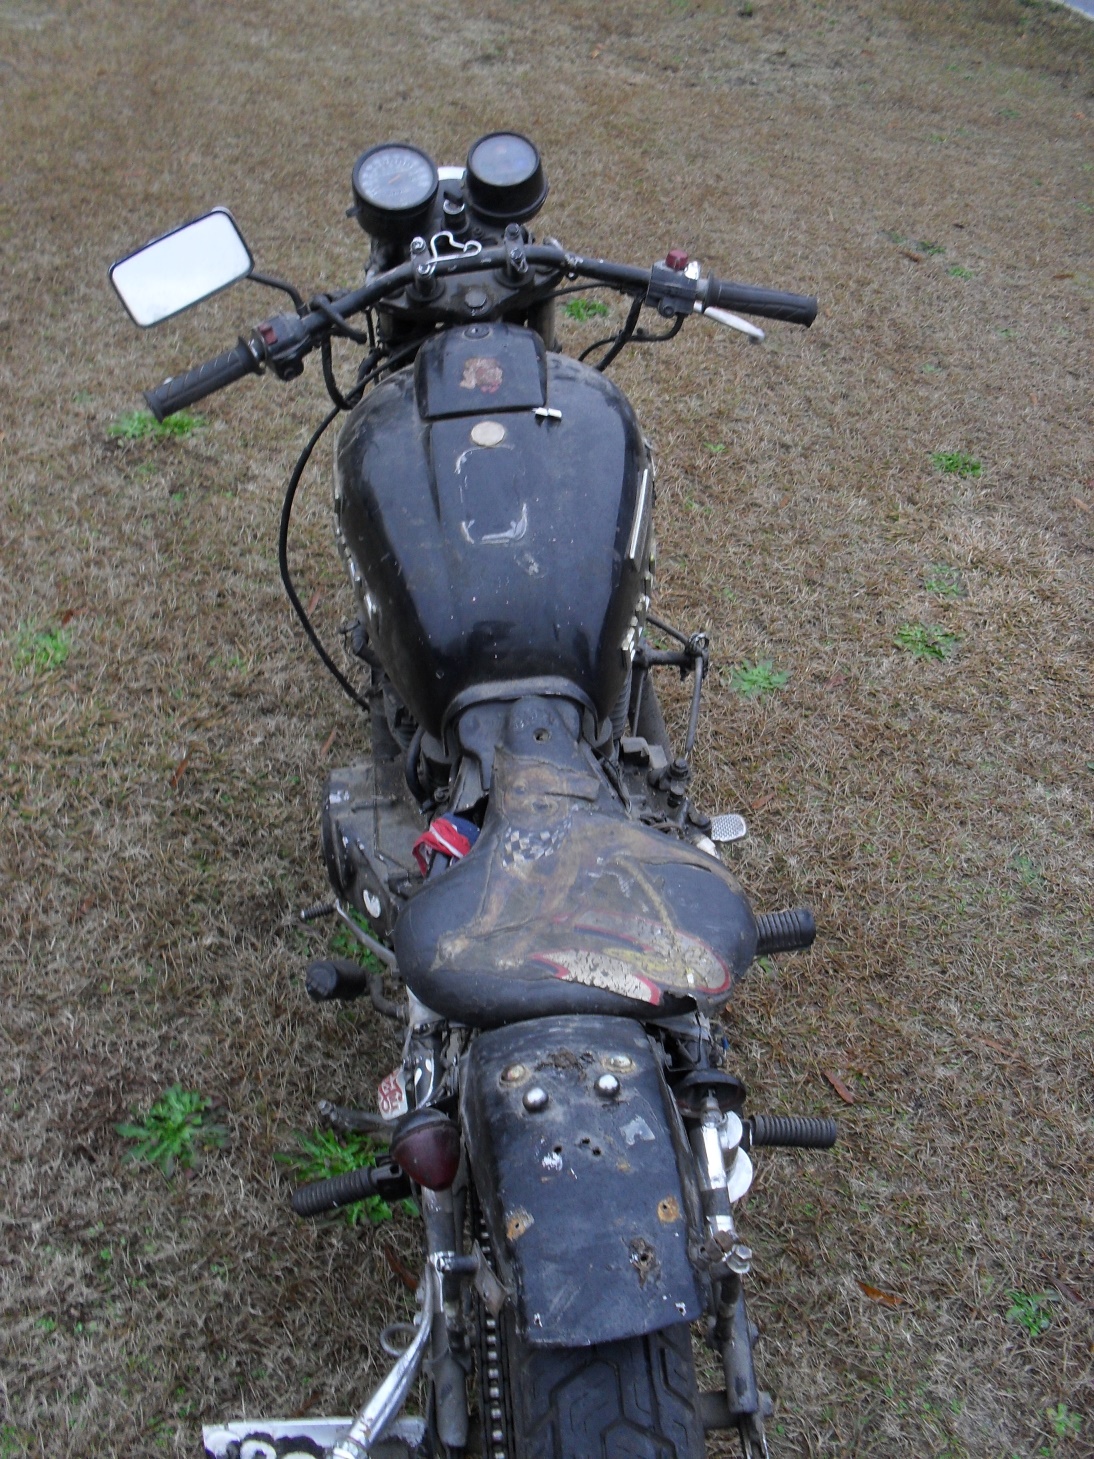
Here I’ve already removed the tank and all of the necessary engine covers.

Since I have already put enough miles on this bike since I got it running to warrant an oil change I decided to re-check the valve adjustment for two reasons; one is that as long as the engine had been sitting without running I want to keep a close eye on it for a while & two so that I could show everyone how I do it. As you can see in the photo above I’ve already removed the gas tank, all four spark plugs  and all of the appropriate engine covers. The first thing to do before you adjust the valve lash is to adjust the cam chain tensioner. On a 1980 Honda CB650 this is done by loosening the nut on the rear of the cylinder just a little bit. Do not remove it just loosen it some

Honda CB650 Cam Chain Tensioner Nut

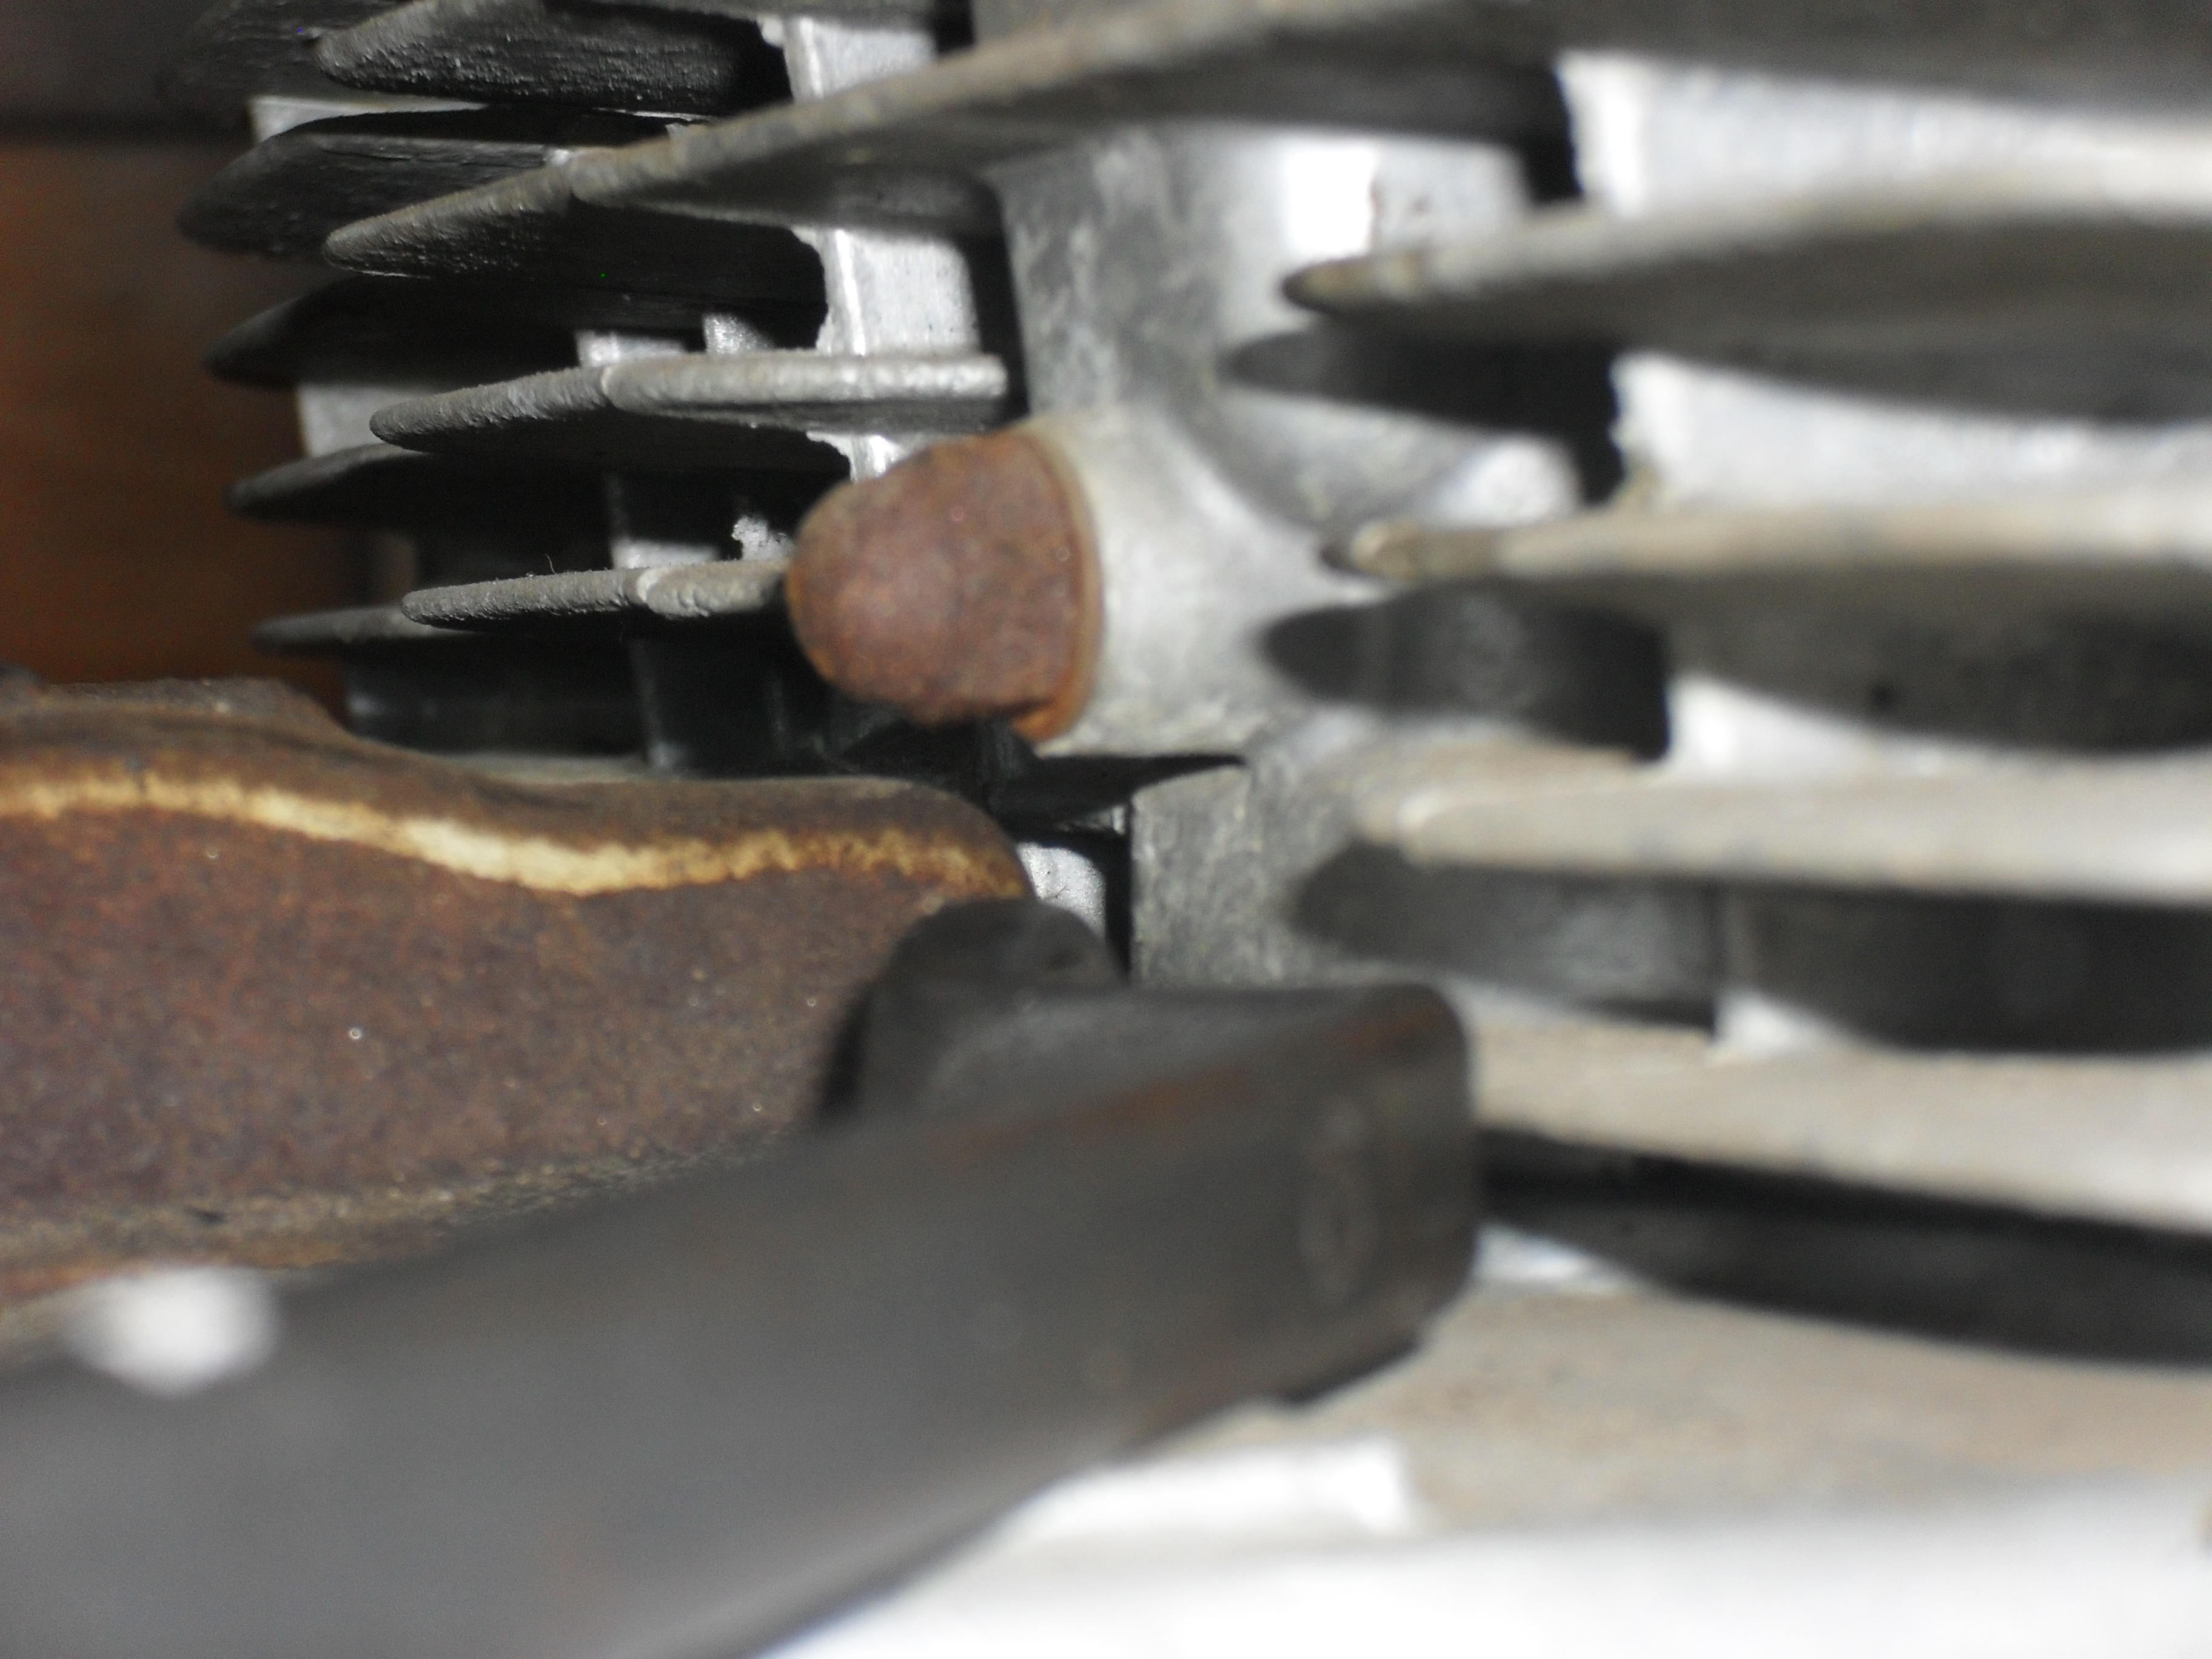
This is the nut you loosen to adjust the cam chain tensioner.

Then put the correct size wrench on the hex spacer behind the nut at the ignition unit on the right side of the engine. Then rotate the wrench clockwise slowly 4 to 5 turns as you simultaneously tighten the lock nut that you loosened at the beginning of this step. This is also the first thing you should try if you own a motorcycle and you can hear the cam chain rattling, but if after making the correct adjustments you still have a rattle then it will be time to start replacing parts. Keep the wrench that you used to turn the crankshaft handy, you are gonna need it a few more times.

1980 Honda Ignition Pulse Generators

The Clymer manual describes this as a 15/16″ nut. That is wrong this is a 24mm. OOPS

Here in this picture taken on the left side of the engine you can see 2 of the three openings in which we will be working to check & set the valve lash. The adjusters for the intake valves are on the back of the head in front of the carburetors and the exhaust valve adjusters are on the front of the head behind where the exhaust pipes stick out. The first step is to get the number 1 cylinder to top dead center. Take your large wrench and rotate the crankshaft clockwise and watch for the intake rocker arm on the first cylinder to drop down into the head and start to rise back up. Then look at the timing marks on the ignition advance unit (photo is further down the page) and continue to slowly turn the engine until the 1.4 T mark is aligned with the pointer that is cast into the crankcase.

Honda SOHC Cam & Rockers

The camshaft & rocker arms are in the left hole & one of the adjusters is in the right hole.

At this point both the intake & exhaust valve on cylinder number one should be loose enough both rocker arms to be wiggled. If not you either have a valve that is way too tight or you did not stop turning the crankshaft at the right mark, either way you should verify which problem you have before moving on. a simple way to see if the cylinder is at top dead center is to take a long small diameter wooden or plastic dowel and insert it into the spark plug hole. If the piston is at the top of the cylinder the dowel will not go in very far at all.

With the number one piston at TDC on a 1980 CB650 you should be able to adjust both valves on the number one cylinder, The exhaust valve on number two, & the intake valve on number three. Once you have those done you need to repeat the step above but this time watch the intake rocker of cylinder 4 on the right side of the motor cycle. With that one at TDC you can adjust both valves on number four, the exhaust valve on number three, and the intake valve of number two.

Lets talk about tools for a little bit. All of the shop manuals show a special tool for adjusting the valves, but the simple truth of the matter is that for a number of engines you don’t need them and this CB650 is one such example. For the lock nut, I just clamped a pair of Vise Grips around an old cheap 10mm socket that I have on hand and then just used the proper size of flat-head screwdriver to turn the adjustment screw with. Works great for me on this motorcycle, your mileage may vary, if you break something I’m not responsible, etc.

tools for valve adjustment

Macgyver was an amateur!

Speaking of tools let’s get the feeler gauges to set the valves with. The ones that I use are from Snapon and are about a foot long. The also came with a nifty holder that is very handy for working with the really thinner sizes in hard to reach places. The intake valve lash setting for this generation of Honda CB650 is .05mm (.002 inches) and the exhaust setting is .076mm (.003). So to do this job I will get out three feeler gauges in sizes .002,.003 & .004 (.1mm). Why three sizes? I’ll explain in a minute.

The next picture is of the .002 feeler gauge slipped in between the rocker arm & camshaft. This is where you measure the lash on this engine. Basically what I do is turn the adjustment screw until I can just slip the feeler gauge into place with just a little bit of wiggling. You should tighten the lock nut each time you do this as it may affect the final adjustment. If you tighten the lock nut and find that your lash setting has changed tighten the adjustment screw a bit to compensate, re-tighten the lock nut and check it again. Usually after I do all of this, and I am satisfied with my setting, I then take the next larger feeler gauge (.003) and try to insert it into the gap. If it doesn’t fit great I move on to the next one but if it slips in I readjust the lash until the correct sizes slips in fairly easy but the next size up wont go in. You may wonder why not just set it a little tight and not worry about it? I like to set these things exactly as needed for the best performance. The other reason is the way that motorcycle engine valves wear. Very rarely is there any wear at the top of the valve, most of the wear occurs where the valve closes at the valve seat in the head, this causes the valve lash to get tighter as the engine wears & not looser. This is especially problematic when you are running old motorcycles on the toxic, corrosive, & environmentally unsound corn juice that passes for gasoline in this day & time. If you must err on the side of caution it would be a little tiny bit better for your valve lash to be just a hair too loose than to be to tight.

<setting the 1980 CB650C intake valve lash>

For really thin feeler gauges like this .002 I recommend a holder like this one from Snapon tools.

Next take the .003 feeler gauge & set the exhaust valves as shown here. Then use the .004 gauge to make sure your adjustment is just right. It is especially critical not to over tighten the exhaust valve lash. If the valve wears down and is not able to close all the way due to a lack of clearance you may get a burned valve & a big repair bill.

<adjusting the 1980 CB650 exhaust valve lash>

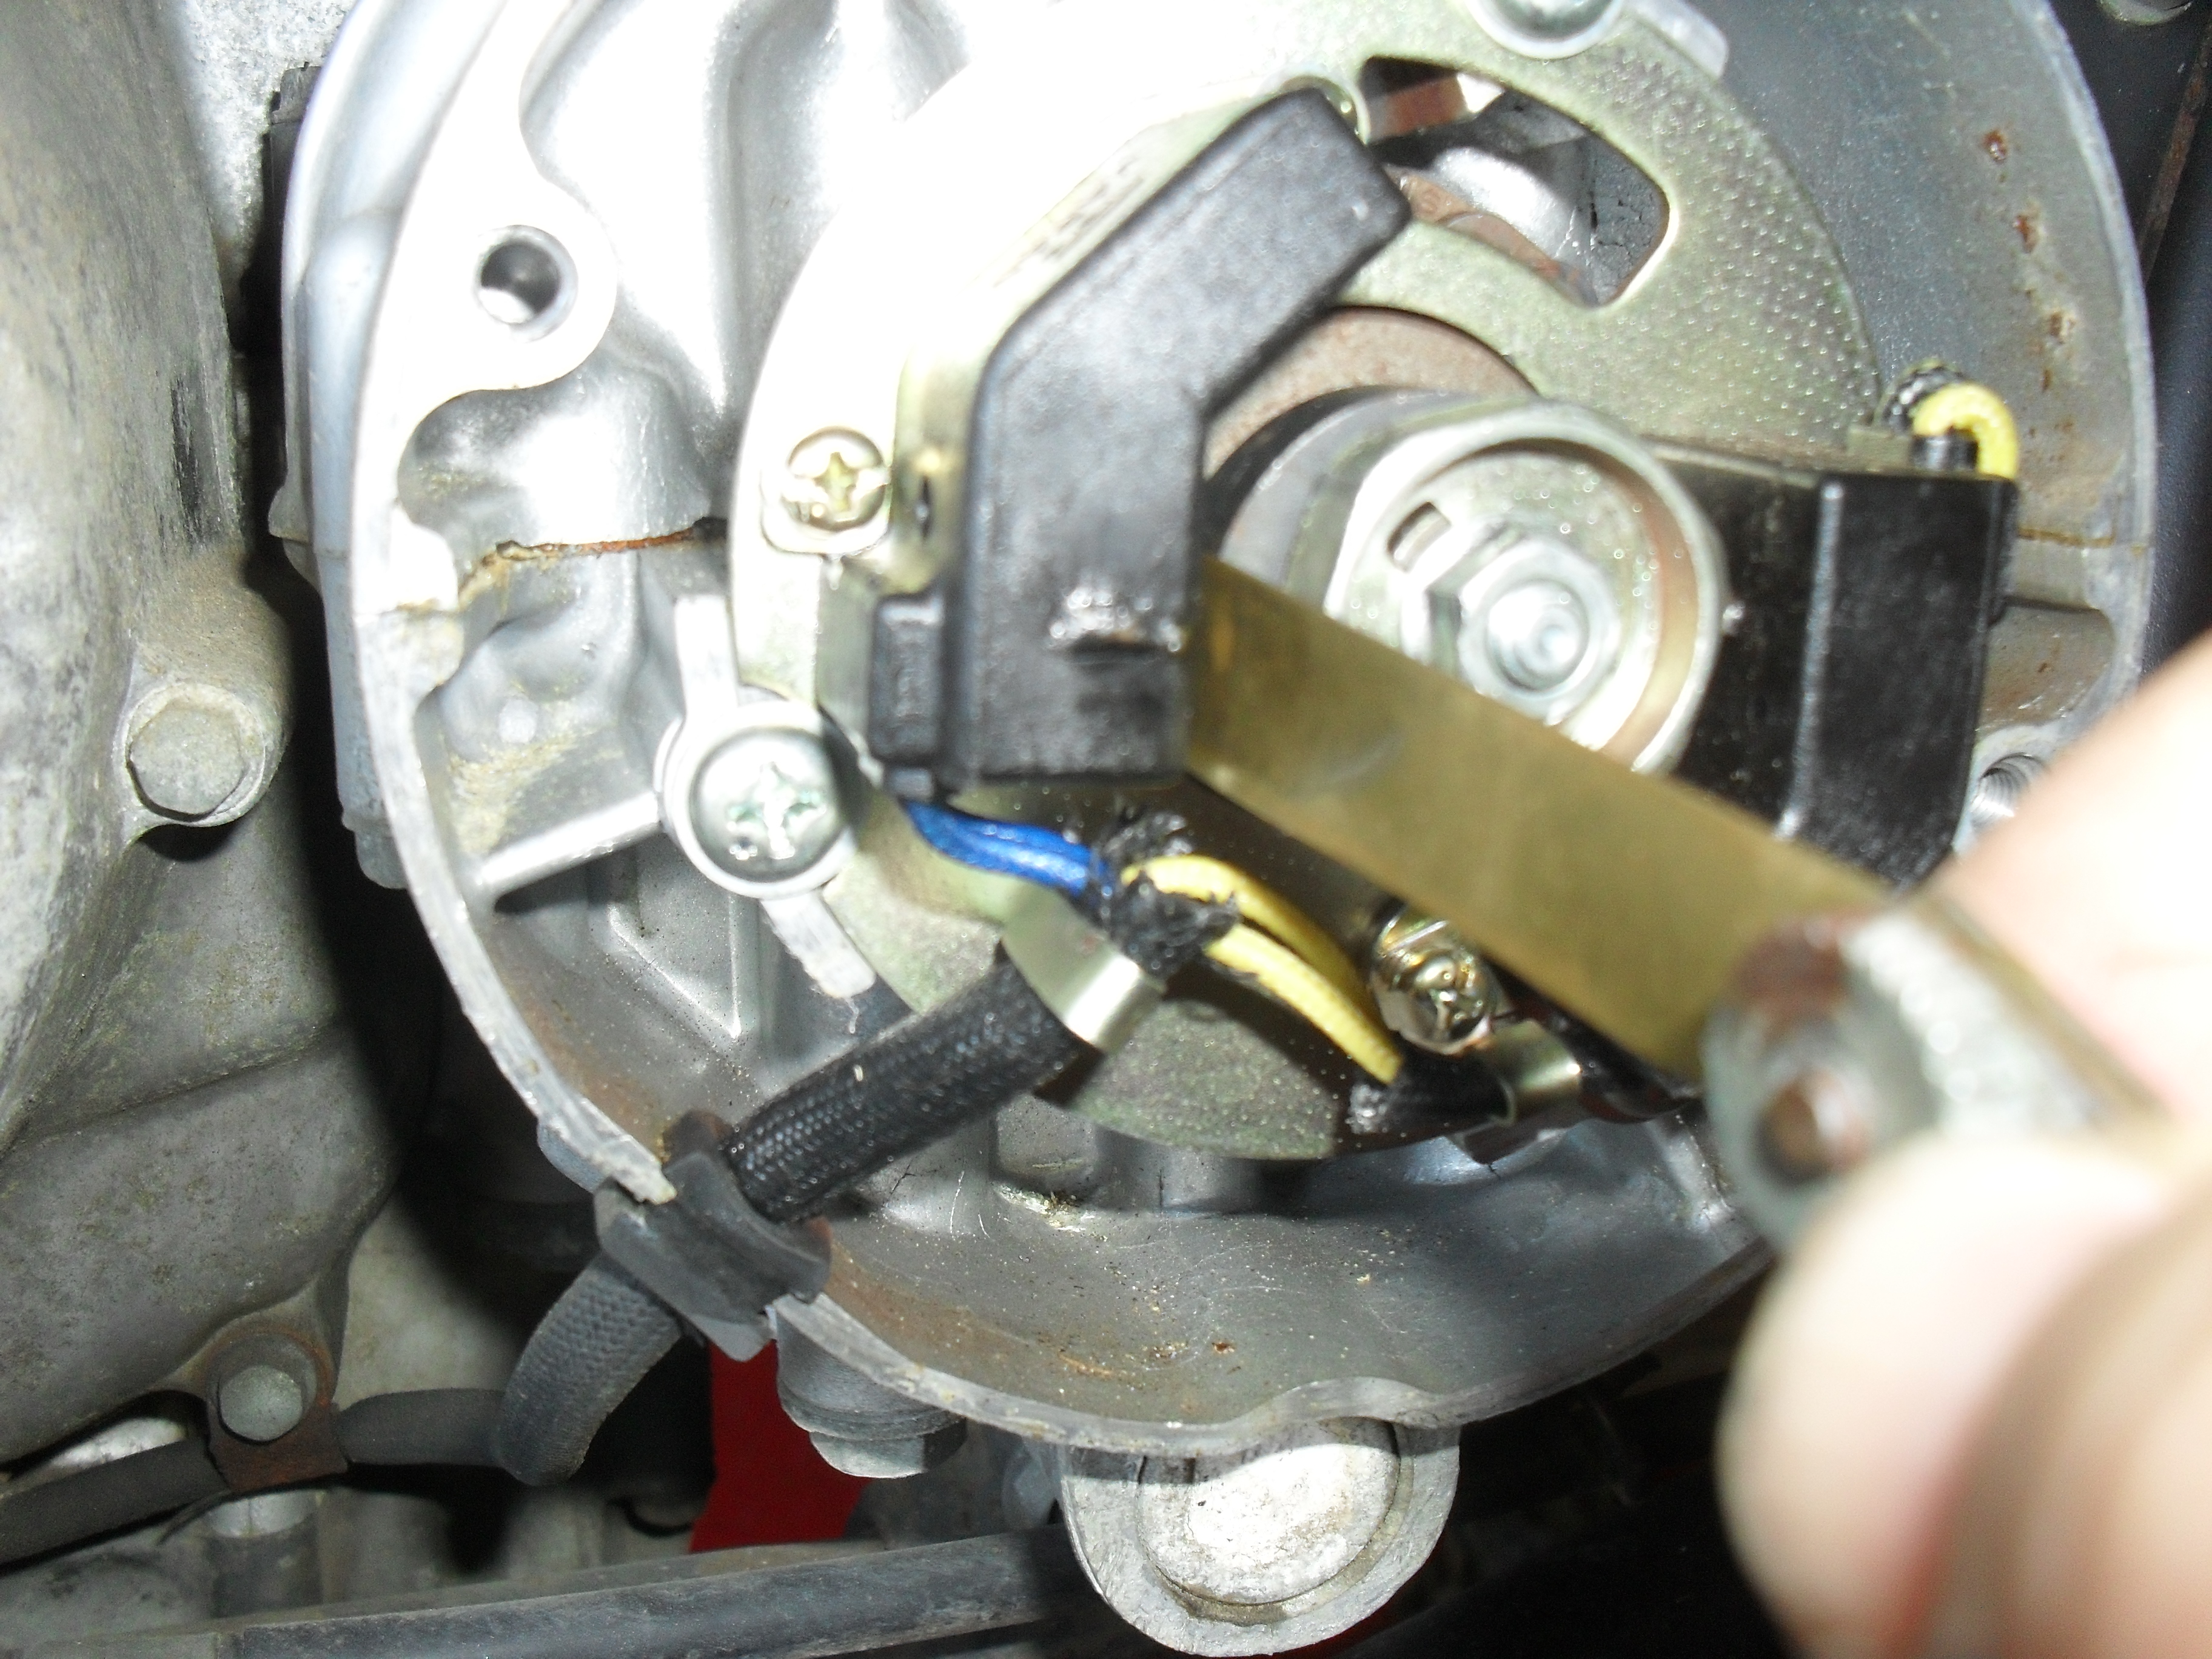
If you have a late 70s or early 80s Honda with the factory electronic ignition you definitely want to perform this next step. First get yourself a set of nonmagnetic feeler gauges. DO NOT not use steel feeler gauges to set the magnetic pickups aka pulse generators on these bikes.

Brass non-magnetic feeler gauges

Non-magnetic feeler gauges are a necessity to set air gap on the pulse generator of most OEM electronic ignitions of this time period.

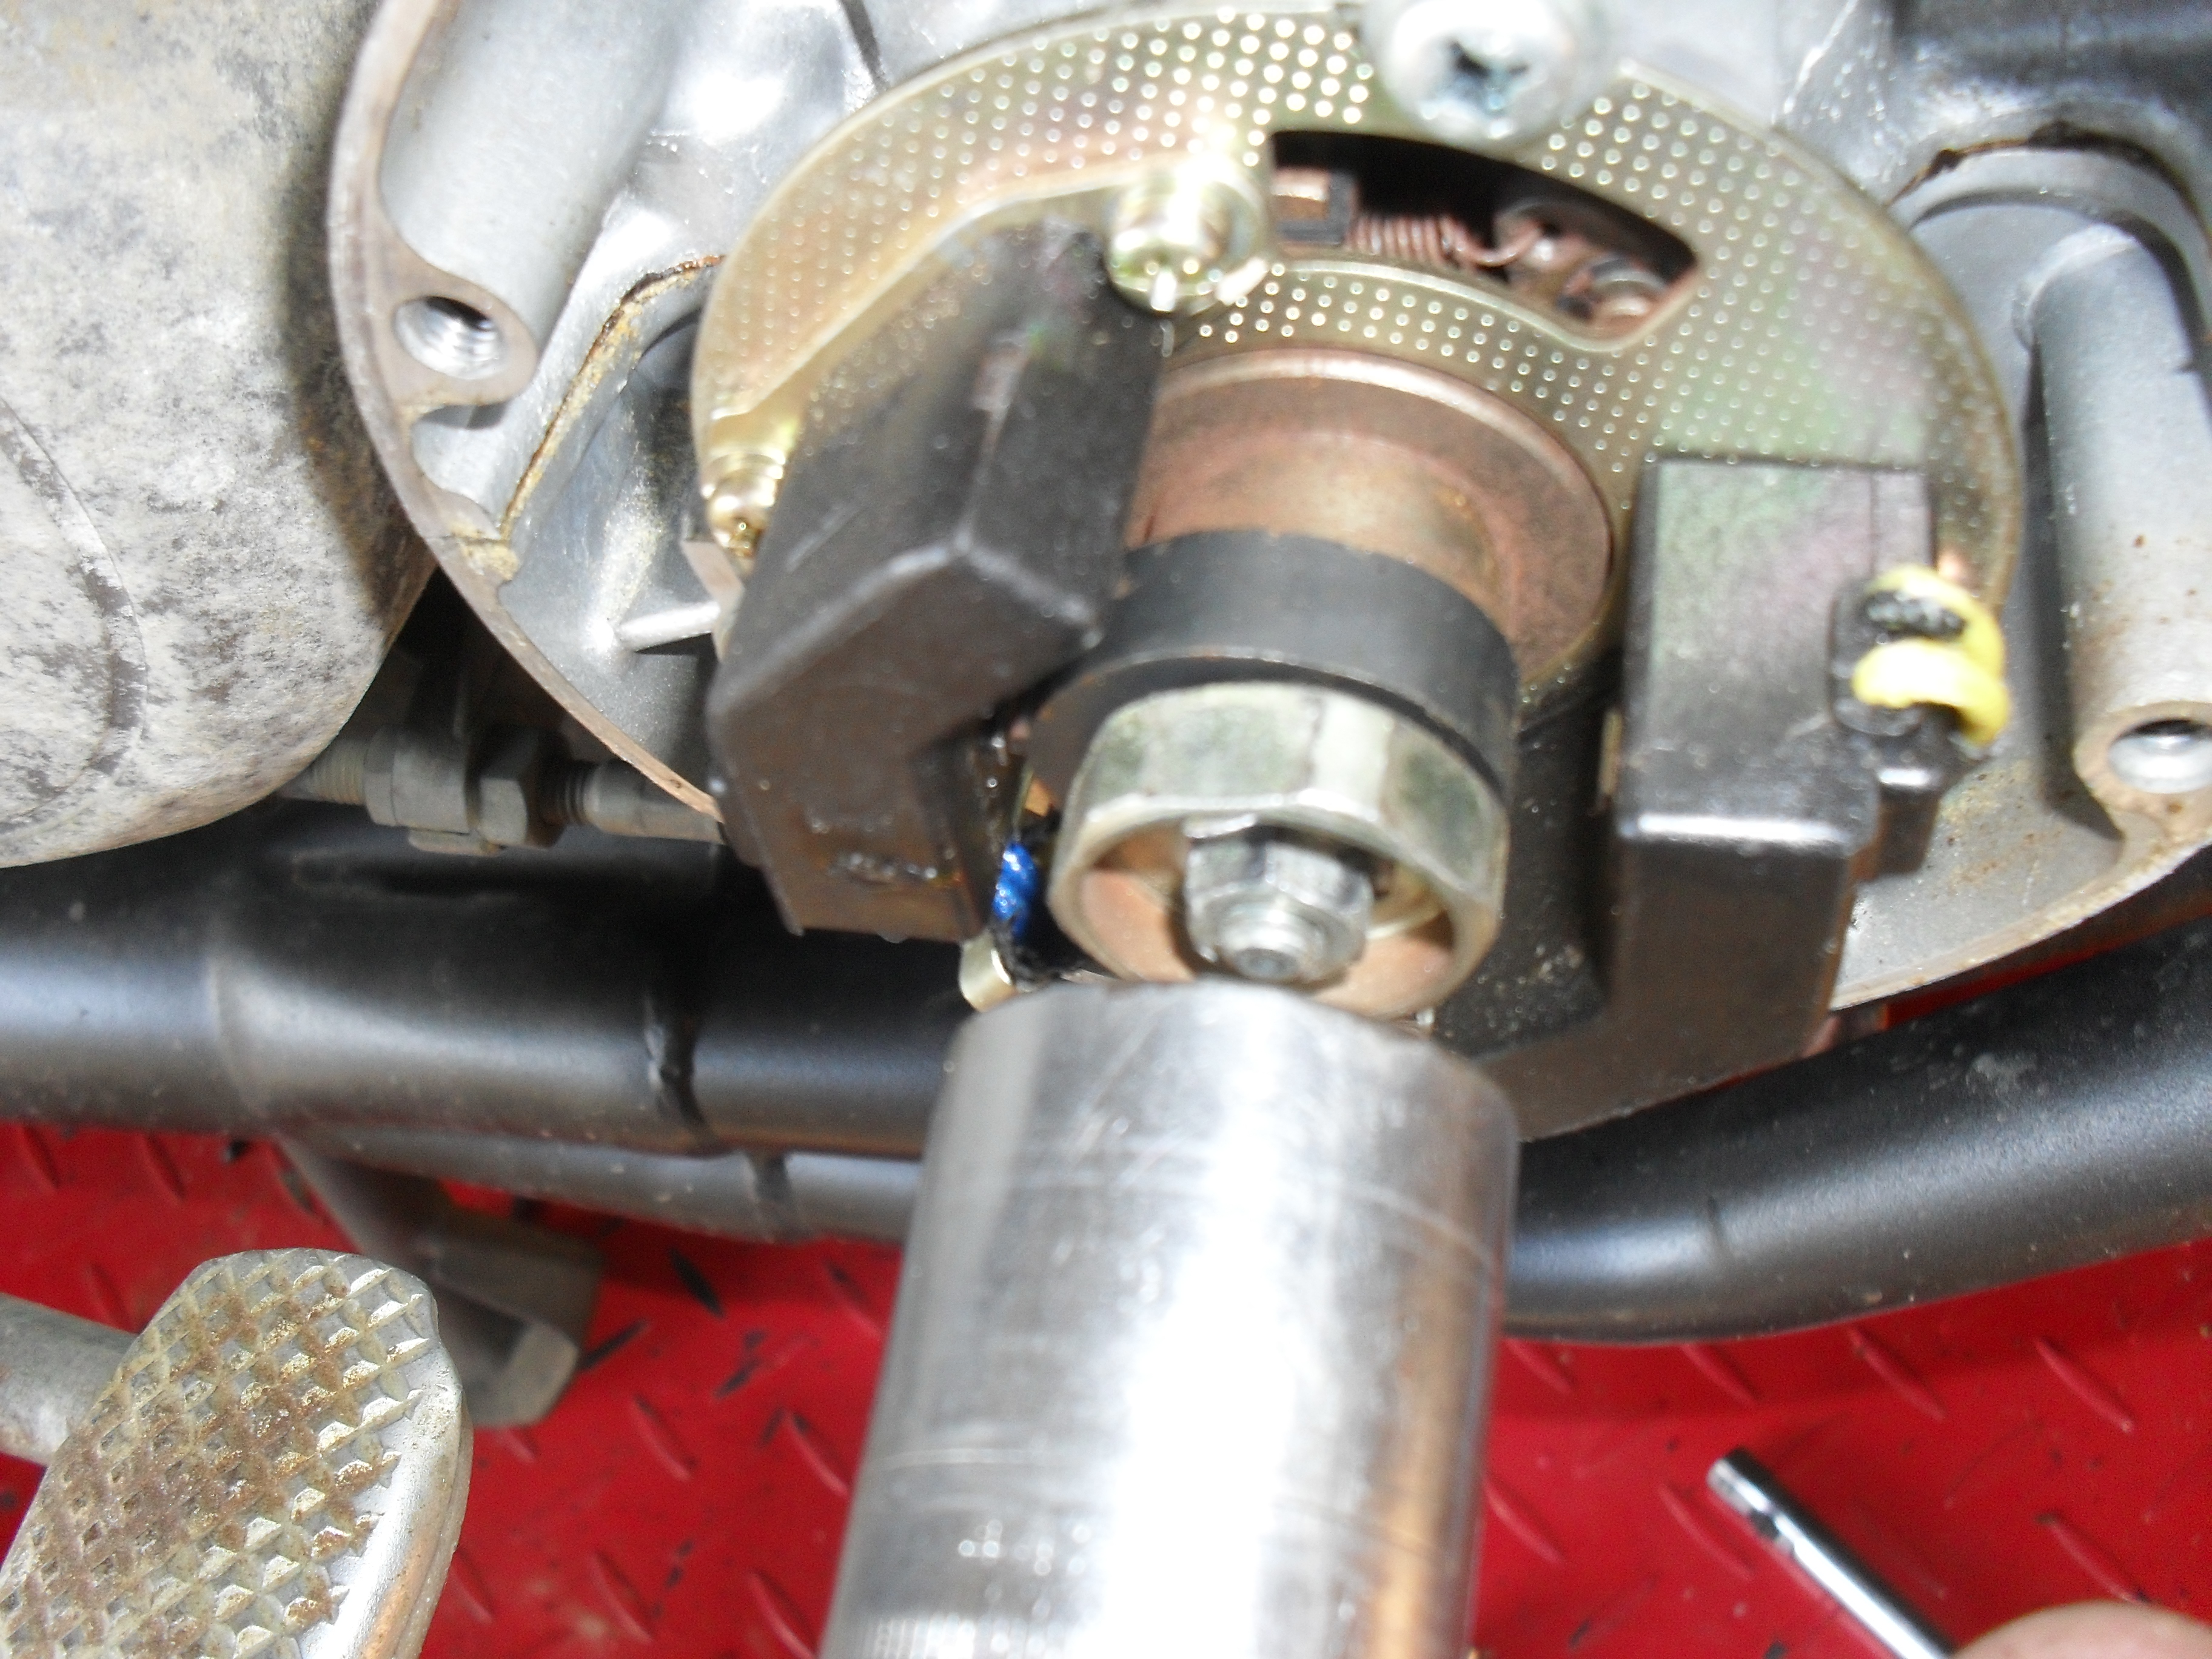
The range of settings for the air gap between the pulse generators (black boxes in the picture below) and the trigger mounted on the end of the crankshaft is .012-.016 inches (0.3-0.4mm) You can also see the pointer & the timing marks that I mentioned above in this picture.

<80 CB650 timing marks, pulsers & advance plate>

1980 CB650 timing marks, pulse generators & advance plate

Believe it or not I have never seen any motorcycles with this gap set correctly from the factory, but the system is still good enough so that most bikes run without any problems whatsoever. Still if you have one of these and it runs okay except for a little surging & hesitation the pulse generator air gap should be the first thing you check. To set mine I just rotate the engine until the trigger ( little square nib sticking out of the crankshaft ) is aligned with nib on the pickup, loosen up the adjustment screws, stick the feeler gauge in place, & hold it all together while tightening the screws back down. Then rotate & repeat to do the other one.

<Honda electronic Pulse generator Air Gap>

This makes a huge difference in engine performance if it is set correctly.

There you have it, put a little lube on the advance mechanism behind the plate, reinstall all of your covers, spark plugs & fuel tank. Now it’s time to fire it up & check it out. Once you are sure that you did everything correctly & your engine is sounding just the way it should take it out for a ride & enjoy the fruits of your labor!

Peace Y’all

Why We Ride Film Motopsyco’s October Website of the Month!

<Whyweridefilm.com ValleyOfFire>

It’s worth going to the website just for the great pictures like this.

Whyweridefilm.com

Let me be up front with you, when International Motorcycle Shows first posted the trailer for this movie on Facebook I almost didn’t click on it. So often these “documentaries” about motorcycling are so one dimensional that they seem to be written for a narrow group of riders and/or racers. While I have yet to see the movie itself I have watched the trailer about 10 times already! There are interviews with kids, moms, street riders, Harley aficionados, crotch rocket jockeys, & racers from a variety of two wheeled motorsports all talking about how much they love to ride motorcycles & trying to explain the feeling to the rest of the world. Those of us who already ride understand the passion that just overflows out with the words they speak. Hopefully some of the normal people that get dragged to this film by friends and family will feel it too, and if they don’t at least want to try it will at least get an understanding of what draws us to these machines that so many people mistakenly see as deathtraps.

<whyweridefilm.com Sturgis>

another fantastic pic from whyweridefilm.com

I ride a motorcycle & I love it. When I was a skinny little nerdy kid it was my favorite escape. No matter how bad my days at school were, when I slid that two stroke Kawasaki around a curve in the woods behind the cow pasture & then jumped one of the hills at the side of the canal ditch I was the ultimate 6th grade badass and all was right with the world! Today most of my riding is commuting back & forth to work on my ancient Honda, but it is still my escape and when everything is just right, I still roll on the throttle exiting that last turn before a long straight and pin it to the stop, while the ghost of Hunter S. Thompson whispers in my ear, “screw it on you big pussy” as the speedometer hurtles toward that magic number that all the Ton Up Boys lived & died for. It has been approximately 37 years since I got my first motorcycle and even though age and injuries have made me more cautious it still thrills me. Just like the first time! Every time. Even when just putting around at slow cruising speeds like the old fart that I am becoming. Bottom line is, I’ll quit riding when I die.

Even if you don’t visit the website at least click on this line and go watch the trailer!   Then come back here & tell me & the rest of the world why YOU ride in the comments section. I am going to close this out by quoting from the synopsis on the movie website.

“Your senses will heighten as the world rushes in, your heart will beat to the pulse of the engine, your mind will race and set you free. Once you let a motorcycle into your life, it will change you forever.”

Sums it up for me,

Peace Y’all

The 2013 Bull City Rumble in Pictures

<Norton Commando Tank Art>

Who wants to ride this Night Train?

<at the Bull City Rumble>

a look down the street

<a yellow CB400F>

The first of a pair of great looking CB400F Hondas.

<a red CB400F Honda>

a better view of the red one

<a far out Honda bobbber>

a spaced out Honda bobber

<wild chopped Honda>

the super low riding alien Honda

<kids love vintage scooters>

kids love vintage scooters

<Kawasaki 120TR Enduro>

Vintage Kawasaki Enduro

<street legal 50cc Suzuki>

Who else remembers street legal mini-enduros like this 50cc Suzuki

2 stroke Yamaha flat tracker

Check out the radial cylinder head!

<Yamaha XS650 street tracker>

a very well done Yamaha XS650 street tracker

other side of xs650

other side of xs650

organic transit pedal electric three wheeler

organic transit pedal electric three wheeler

rare Bimota Kawasaki

rare Bimota Kawasaki

Bimota Kawasaki

a better view of this exotic motorcycle

Moto Guzzi 850T

Moto Guzzi 850T

1935 Royal Enfield

1935 Royal Enfield original but not mint

35 Royal Enfield 500

35 Royal Enfield 500

1982 National Champion Honda Superbike

1982 National Champion Honda Superbike

number 1 plate

it aint bragging if you really did it

sweet looking CR750 Honda

sweet looking CR750 Honda

Honda CR750

Got velocity stacks?

CCW Tha Heist

not in the show but too kool to ignore

 A row of British iron.

A row of British iron.

a tasty looking bathtub Triumph

a tasty looking bathtub Triumph

serious looking Norton Comando Interstate

serious looking Norton Commando Interstate

Triumph bobber

Triumph bobber

GS Suzuki

GS Suzuki

<a pic of down the street>

Henderson SuperX

Henderson Super X

super X engine

super X engine

nice red BSA

nice red BSA

Laverda Jota

Laverda Jota

<Laverda tank close up>

a bevy of Italian beauties

a bevy of Italian beauties

<bevel drive Ducati 750 Super Sport>

drool….

What a good looking engine.

What a good looking engine.

<registration tent Bull City Rumble

<randum bikes parked on the street>

1983 Honda CB1100F

1983 Honda CB1100F

ratty old Triumph

ratty old Triumph

neat old Chevy

neat old Chevy

my CB650C and a nice CB750 Super Sport

my CB650C and a nice CB750 Super Sport

<Bull City Rumble 2013>

<Bull City Rumble 2013>

<Bull City Rumble 2013>

<Bull City Rumble 2013>

Raring to go for October!

over the bars

over the bars

Greetings Dear Readers,

Let me apologize for not posting any goodies for you for the past three weeks. The old ‘Psyco has been down and out with a severe case of shingles. Not only have I missed communicating with you, I also missed the first 3 weeks of hunting season, not to mention some of the best riding weather we’ve had since spring. Okay I did sneak the bike out a time or two but trust me when you got shingles you feel every single tiny imperfection in the road. Even a little tar strip felt like riding into a 4 inch high curb. But I am recovering now, & boy have I got some plans for this month.

There are a few event pics to show off from Labor Day weekend. I have scoped out a fantastic Website of The Month, and of course another of my profusely illustrated mechanical how-to articles. It’s gonna be a great month!

Have a fantastic day!

Kawasaki GPZ900

Kawasaki GPZ900