Destination Eustis 2016 Motorcycle Show

Friday at the Destination Eustis 2016 Motorcycle Show

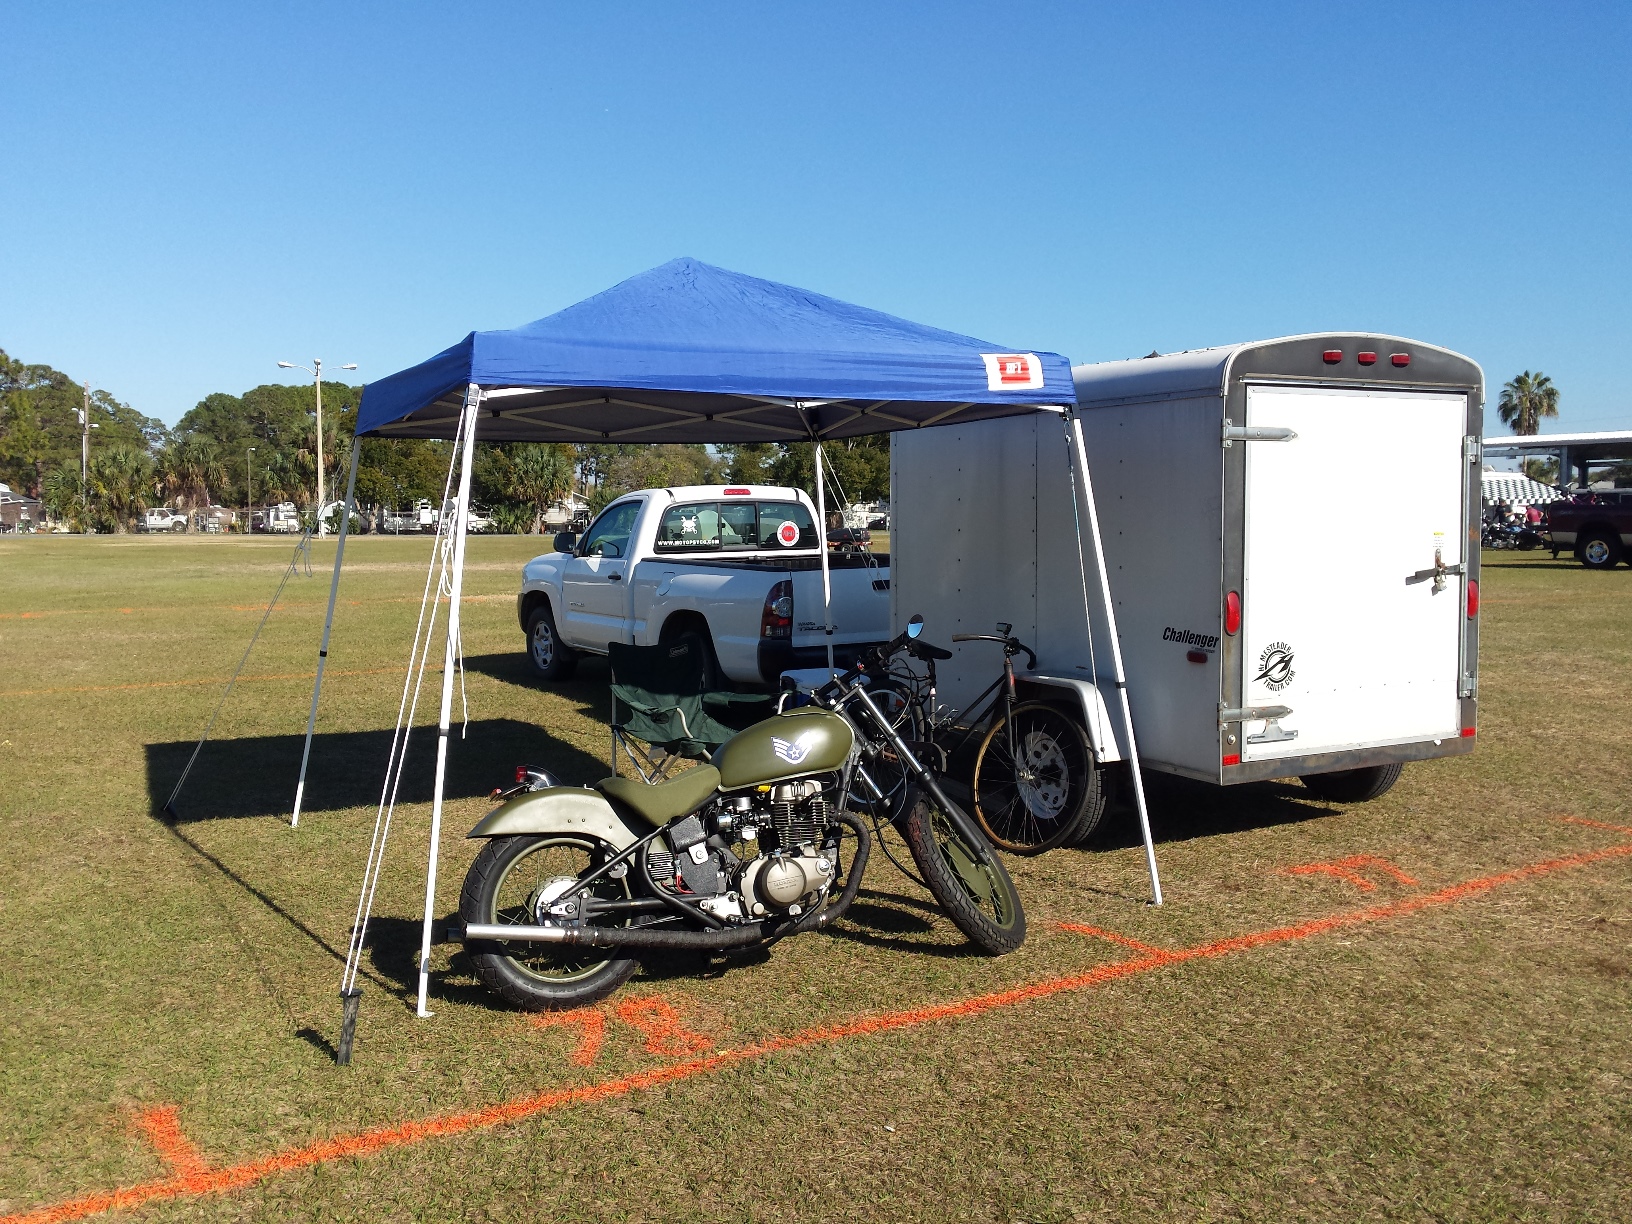
There wasn’t really a lot going on yet when I rolled into the Destination Eustis 2016 Motorcycle Show early on Friday March 4th. So I went ahead and set up my base camp for the weekend. To stretch my budget this year, instead of staying in a hotel I decided to sleep on an air mattress in the back of the enclosed trailer. This actually made a decent camping arrangement as a simple tent heater kept it nice and cozy on the cool early spring nights.

Motopsyco's camp @ Destination Eustis 2016 Motorcycle Show

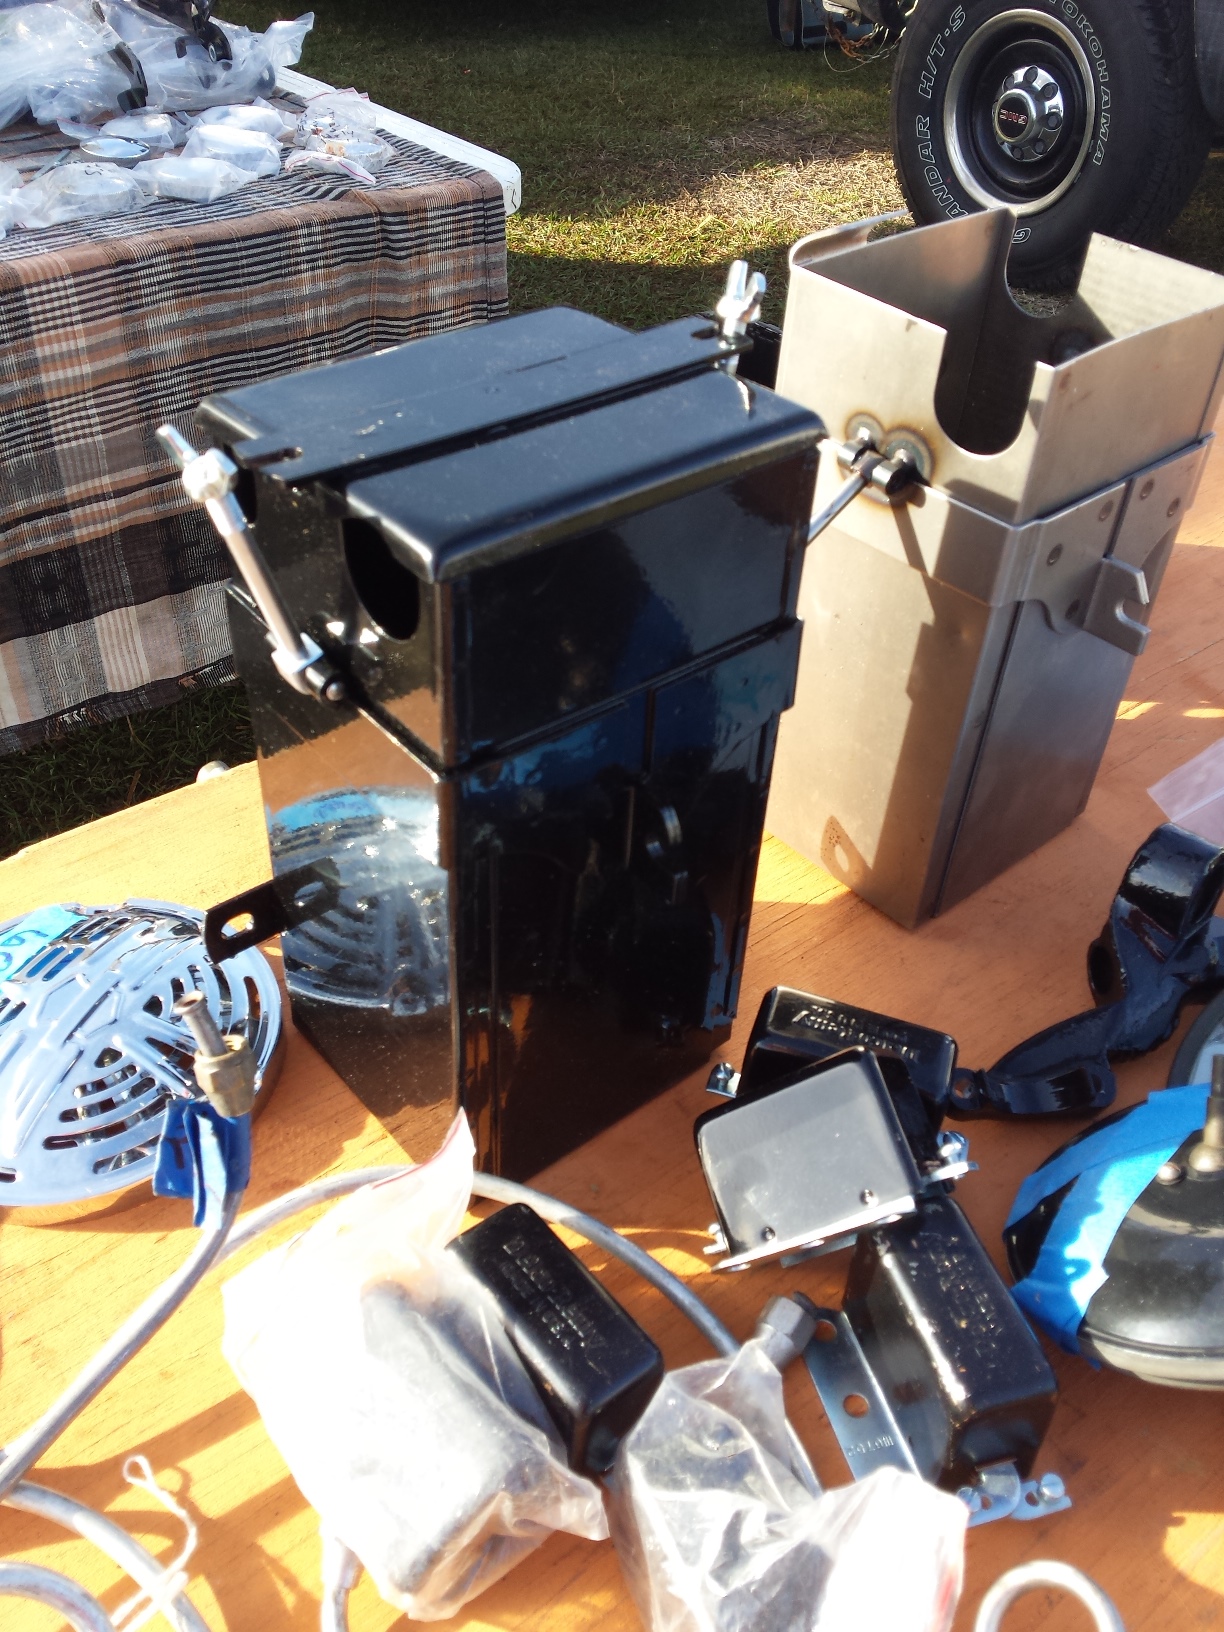
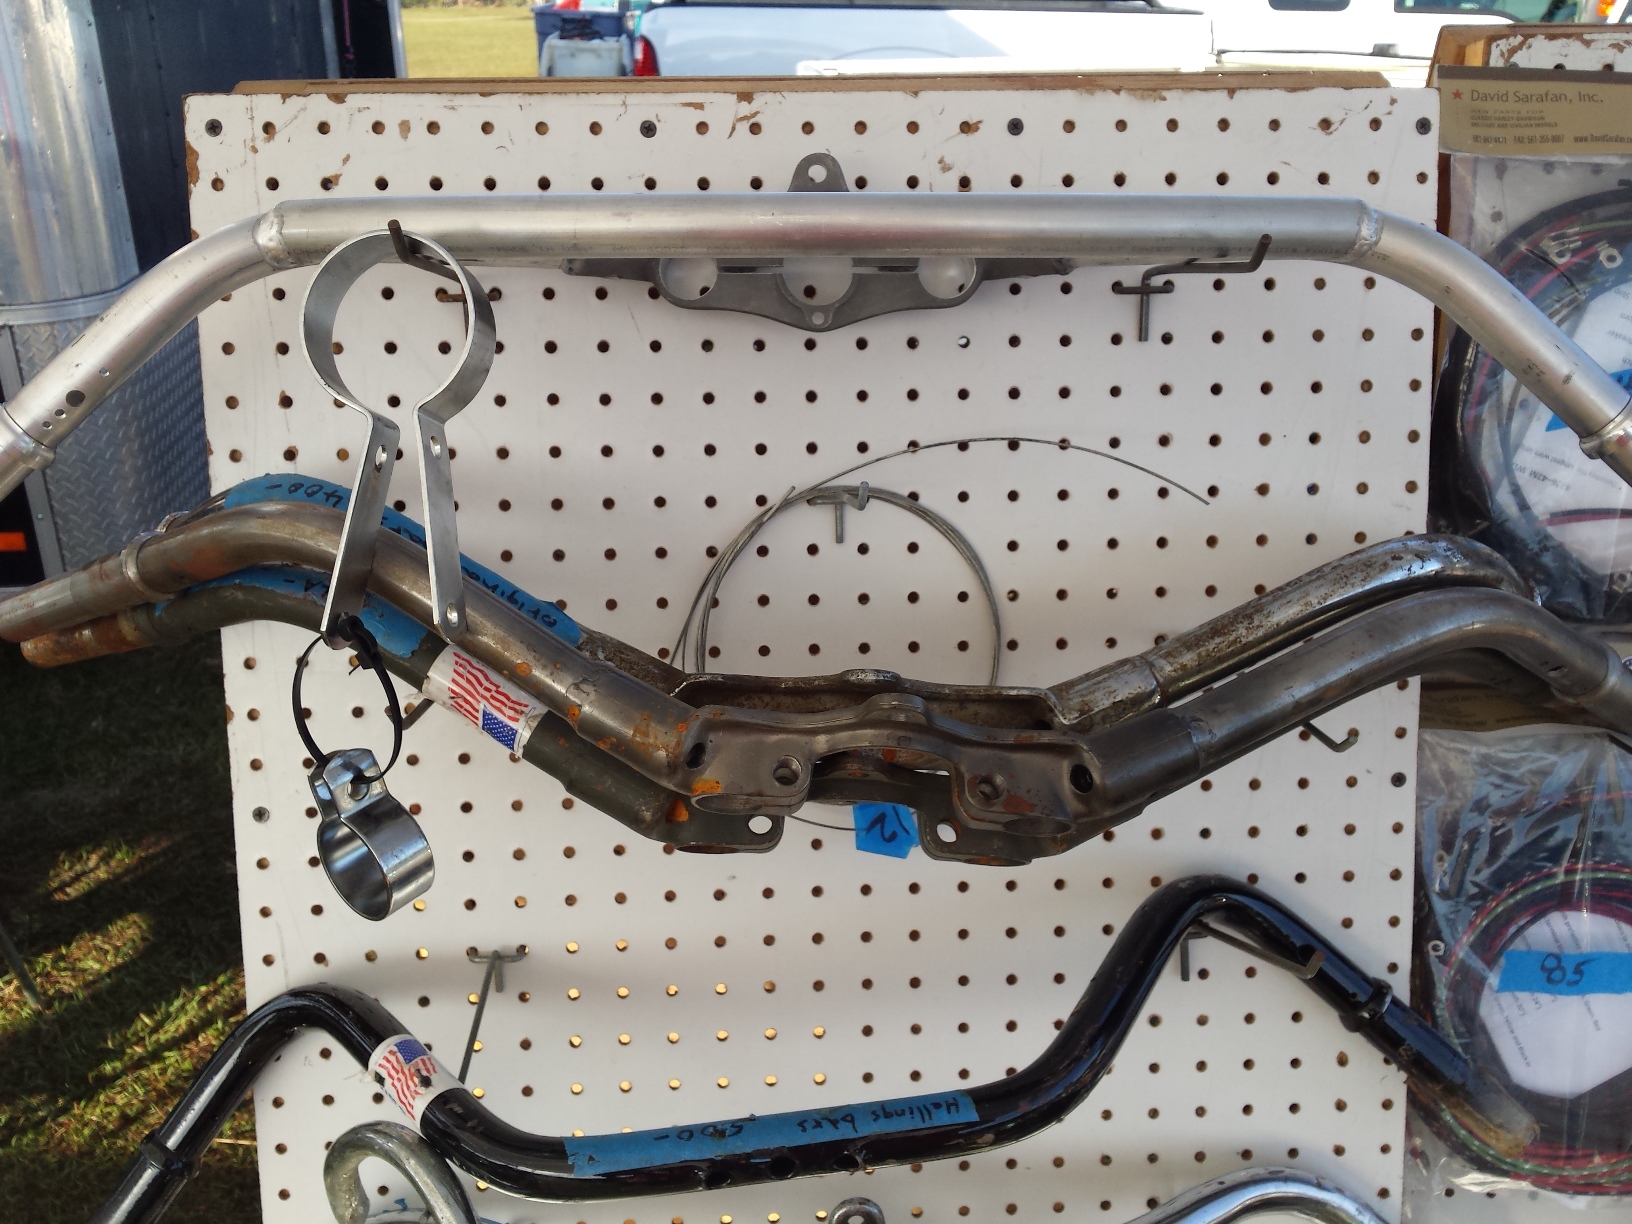
Afterwards I went digging around the swap meet just to see what was there. I didn’t take as many pictures this year because I had an actual shopping list of parts that are needed for two very different bikes, one a 45 cubic inch Flathead Harley and the other a Honda CT70 Mini Trail. Didn’t find much for the mini but there were a couple of vendors that had some good deals on parts for the Flattie.

<harley flathead battery boxes>

<flathead & wla handlebars>

One of the absolute coolest things there was this little Model T replica for sale. The seller drove it around all over the place, and I hope some happy person took it home.

Mini Model T at Destination Eustis 2016 Motorcycle Show

Other than a little shopping I just hung around the main exhibition hall and offered my meager assistance to the really hard working folks in the VJMC who were getting everything ready for the show on Saturday. Once darkness had fallen and supper was over it was time to retire to my little campsite and knock back a brew before turning in.

Saturday at the Destination Eustis 2016 Motorcycle Show

<campfire coffee>

Fresh perked coffee early in the morning, sitting in a chair outside while cooking breakfast over a camp stove. The only way it could have gotten any better would be if my lovely partner had been there with me, but alas she had to work.

<cb450 police & qa50>

After making myself reasonably presentable it was time to head over to the main hall again and watch as the neat old bikes filed in to register for the show. Rather than trying to post them individually I put a few of them in a slideshow for you.

This slideshow requires JavaScript.

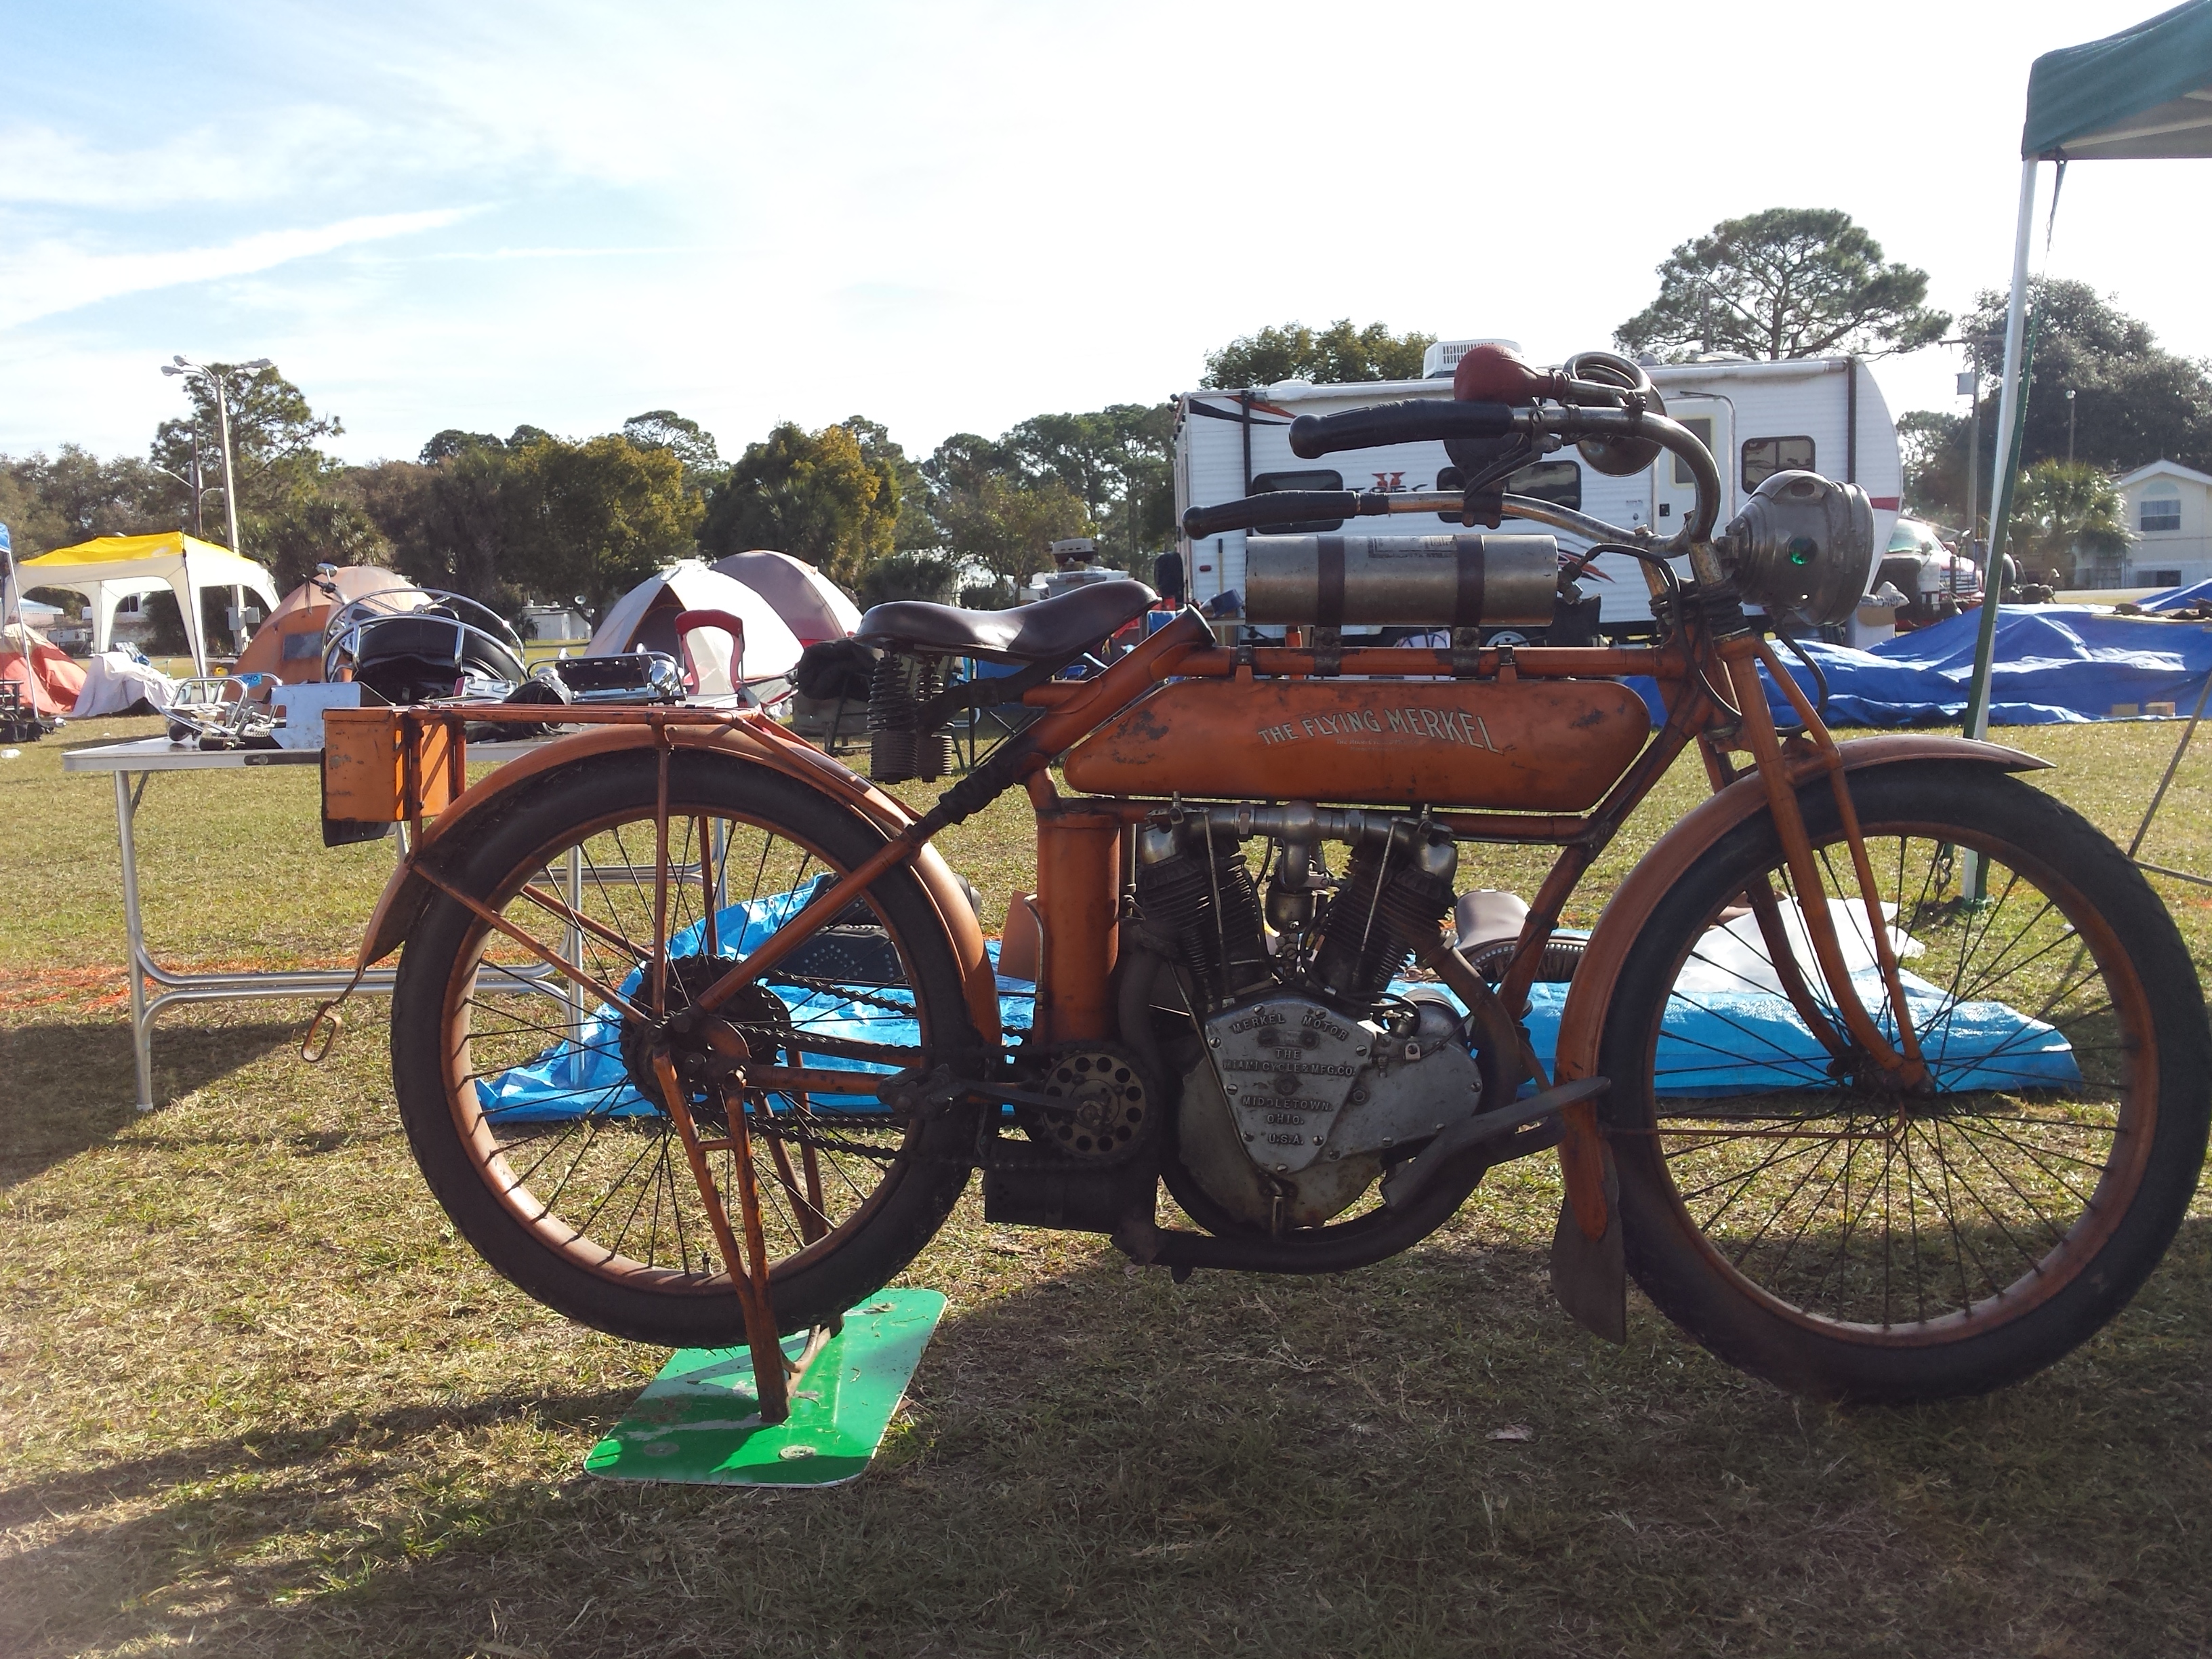
There were of course a few extra special bikes that really stood out and demonstrated that even though this may be one of the smaller “Bike Week” events it attracts some really high caliber machinery.

First up is an ultra rare Flying Merkel, who doesn’t enjoy seeing an old timer like this in good running order?

Flying merkel>

There have been a lot of custom cafe racer or muscle-bike style custom Goldwings showing up on the internet and it was great to see this wild ‘Wing show up to take home 1st place in the custom class.

Custom Goldwing Destination Eustis 2016 Motorcycle Show

No vintage motorcycle show is complete without at least one classic American racer, and the stunning Indian flat tracker fits the bill perfectly.

<antique indian racer>

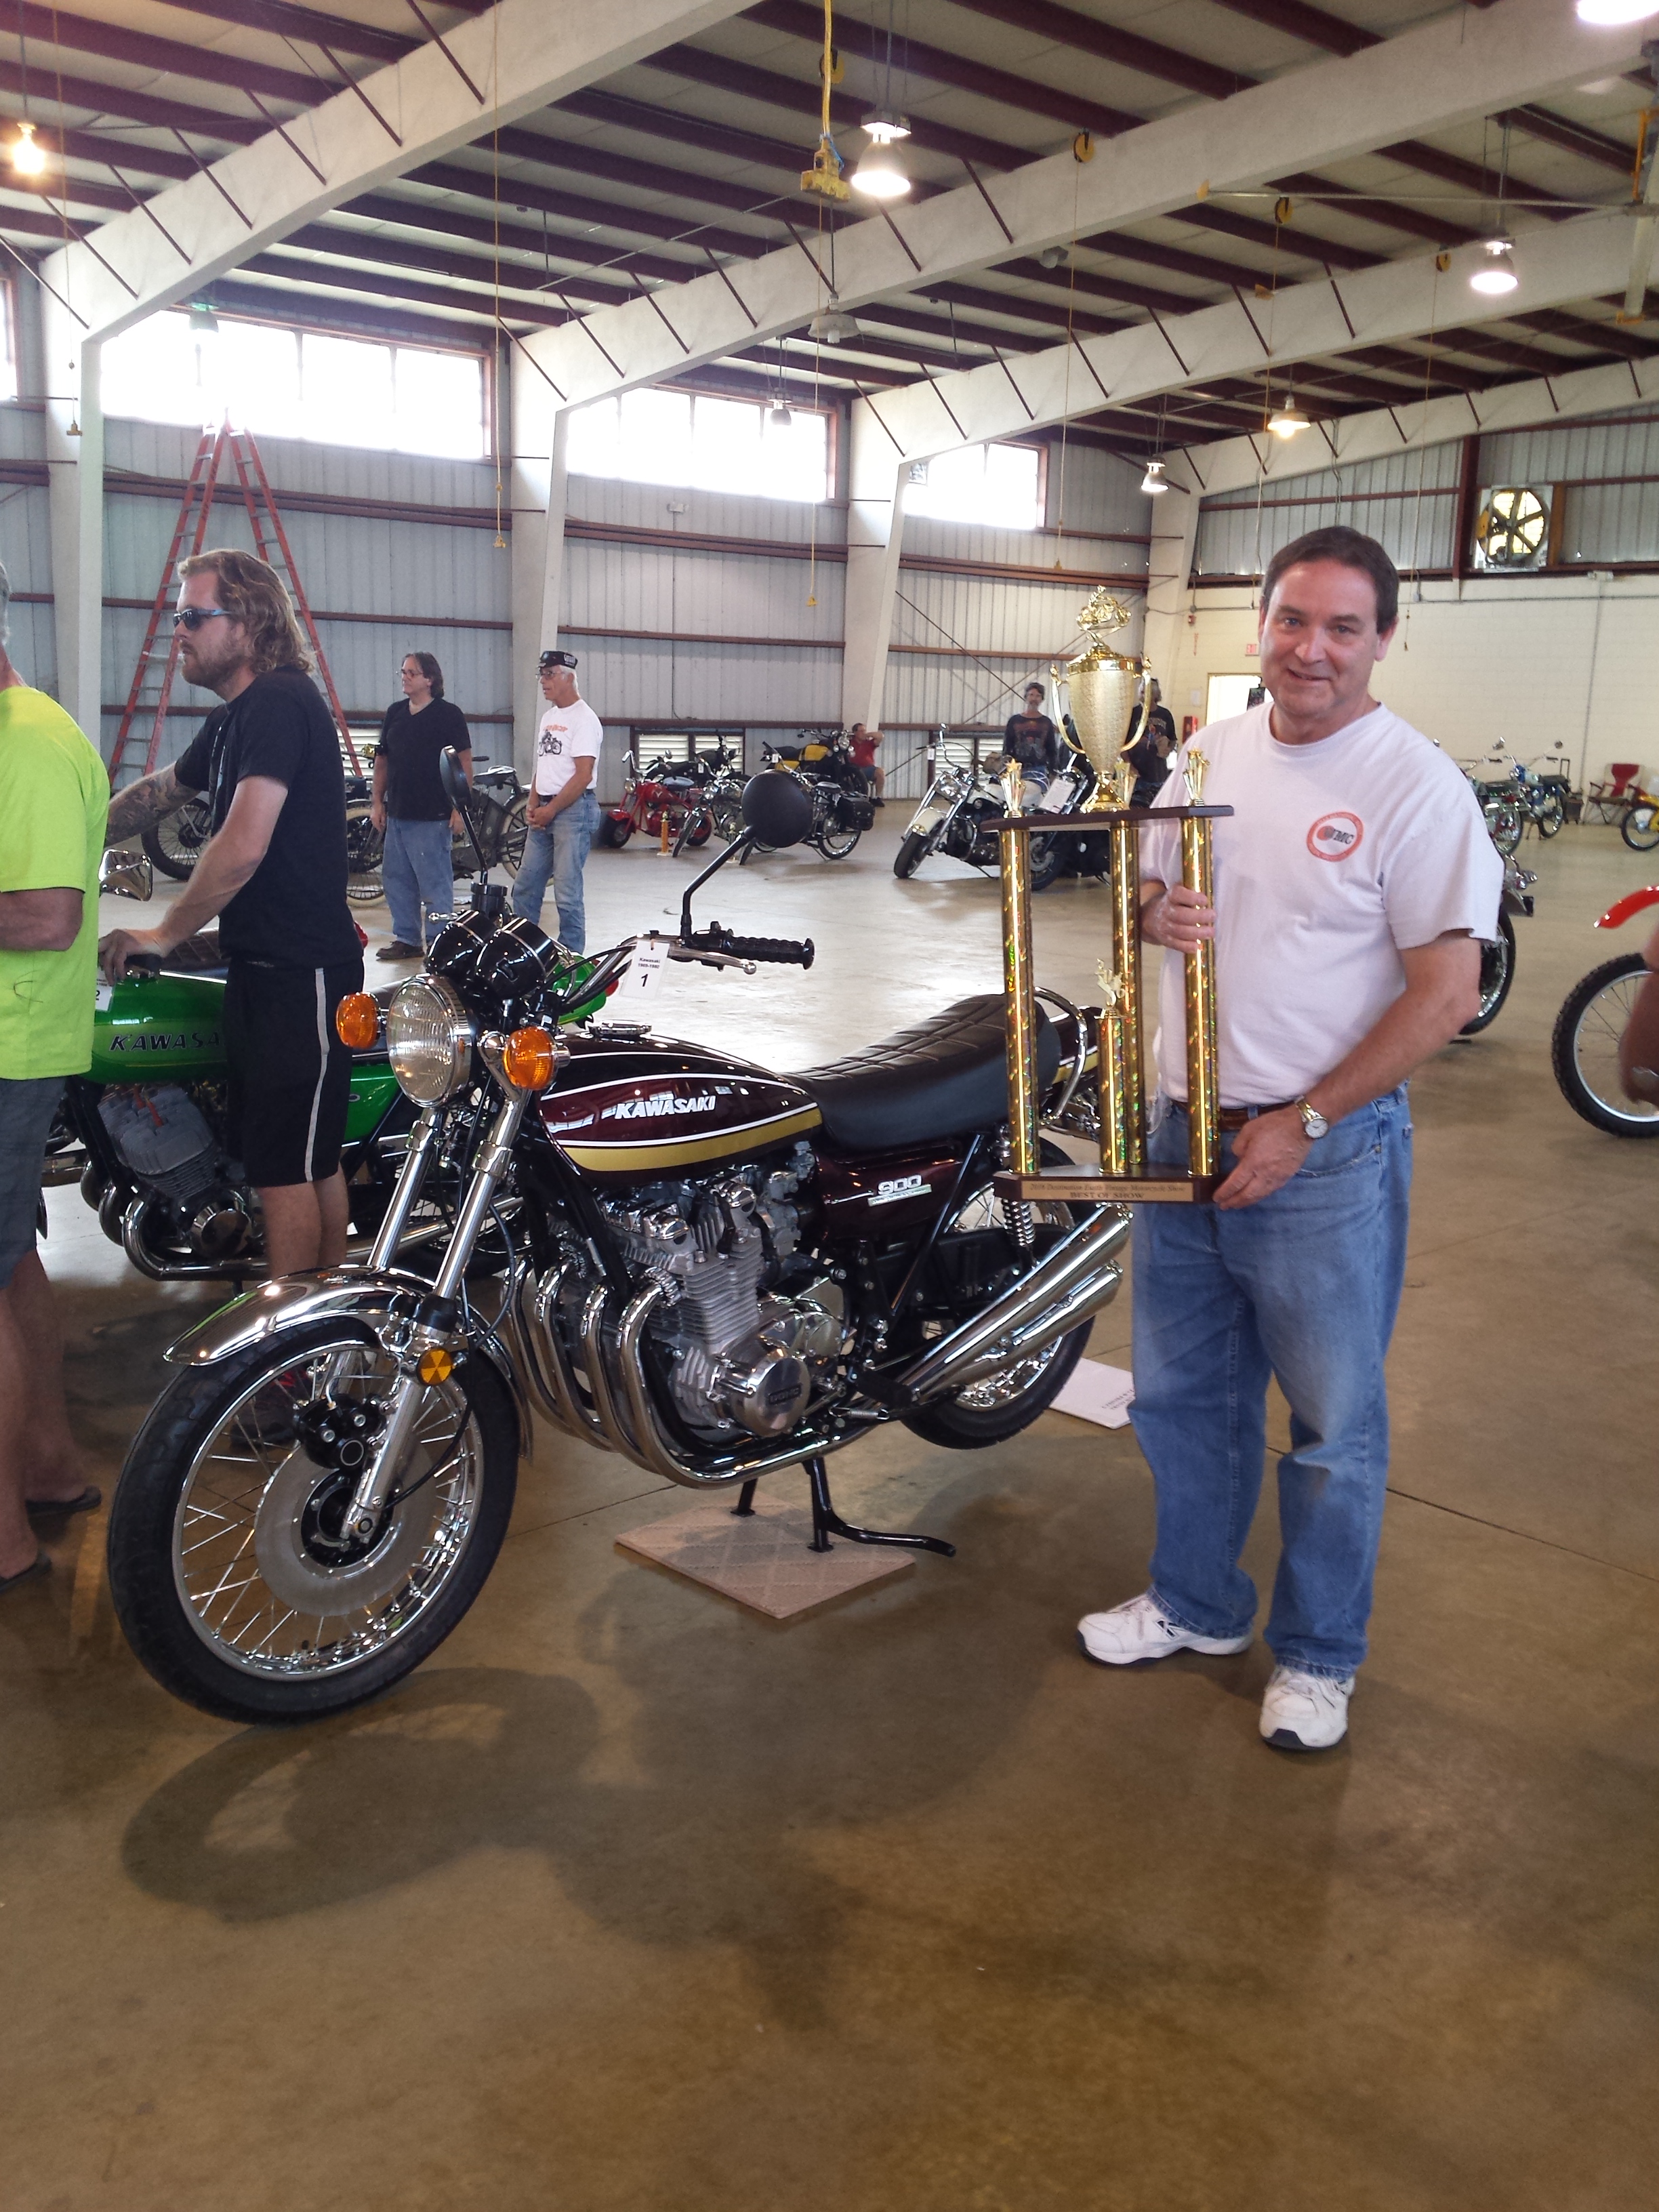
The Best Of Show award went to my friend Mike, who brought this absolutely immaculate 1975 Kawasaki Z1B. He restored this bike himself from a rusty derelict. Look for more pictures of this one in the next week or two.

<1975 Kawasaki Z1B>

One of the best things about going to a VJMC organized show is the fact that the judging is done by audience voting. This makes results almost completely unpredictable, and does away the bullshit & hurt feelings that result from selection by a panel of judges. I’d also like to acknowledge the hard work of the Vintage Motorcycle Alliance, they run the swap meet and set up the vendor areas and without them and the Vintage Japanese Motorcycle Club, this event would not be what it is.

Click here to learn more about the Vintage Motorcycle Alliance

Click here to learn more about the Vintage Japanese Motorcycle Club

Until next time, Peace Y’all


Road Dog Publications WOTM Feb. 2016

Please click here to visit Road Dog Publications

Normally I wouldn’t give you a commercial venture for the website of the month, but Road Dog Publications is much more than just a bookseller. Road Dog is primarily focused toward the adventure riding segment of the market, and features a lot of books about epic trips. Even if you never intend to take such a trip, you’ll still enjoy following along with those who do. The owner/publisher/dishwasher & mechanic is also a dedicated rider. This is not some giant publishing house, but a small businessman who depends on this to feed his family while still being able to fuel his wanderlust. In addition to the books for sale there is a good bit of other useful information, information about the writers and links to other useful sites.

Here I am going to post a disclaimer; the owner of Road Dog Publications is someone who I consider to be a friend. I met him through the Vintage Japanese Motorcycle Club and he is the editor of the clubs fine bi-monthly magazine. He did not ask for this post and I am not getting any type of compensation for this except for the warm fuzzy feeling that comes from being nice to your fellow human being. In addition to being the publisher, Michael Fitterling is also a writer and I have read his book, Thoughts on the Road, and I’m very happy to recommend it to you. Not just because he’s my friend but because it’s a darn good book.

Wrenching Riding Reflecting


He will be at the Destination Eustis Motorcycle Show & Swap Meet in Eustis Florida. So if you’re in the area and would like to get an autographed copy of his book please come on out. This is not just some little bitty motorcycle show either, it is a premiere that you really don’t want to miss.

 Don’t want to wait to read a book from Road Dog Publications?

Of course you can purchase these books for your Kindle. No Kindle? No Problem just get the app.


Here are links to some of the books as well.

Please note that by purchasing from these ads you help me to earn a few cents to keep the lights on here in the swamp.

Peace Y’all


Cheap Fake Cad Plating & ABS Plastic Repair


There are two things that are commonly found when working on old motorcycles, one is cadmium plated parts that are faded, rusted or discolored somehow, and the other is broken or cracked mounting tabs on plastic parts such as air boxes or side covers. Today we’ll learn how to do a reasonably good job of creating cheap fake cad plating with spray paint. Then we will tackle a minor repair of some ABS plastic parts. Most of the black plastic parts on motorcycles are ABS and on some such as early sport bikes such as EX250 or 500 Ninjas the bodywork is also.

Cheap Fake Cad Plating

Passport steering lock to get cheap fake cad plating

Let’s start with this steering lock that goes on my 1982 Honda C70. In the picture it doesn’t look too terrible, but this was after washing it in the parts washer with a Scotchbrite pad to get rid of some light rust.

Duplicolor adhesion promoter

Once it was dry I taped off the key slot and sprayed on a couple of coats of adhesion promoter.

chrome spray paint for cheap fake cad plating

After giving the adhesion promoter about 8-10 minutes to dry I gave the part a couple of coats of metallic “chrome” paint. This paint doesn’t really look like chrome but it really is a very bright silver.

Passport lock with chrome paint

After allowing the chrome paint to dry thoroughly, take a can of the metallic “gold” spray paint and from 18-20 inches away lightly fog the gold paint over the chrome. Just do one or two light coats. the idea is to lightly tint the part with gold but not to completely cover up the chrome.

gold metallic spray paint for cheap fake cad plating

It’s really best to do this in a well lit place so that you can see when there’s enough gold on the part and stop spraying it.

how to cheap fake cad plating

Here you can see my cheap fake cad plating next to one of the well sheltered original cadmium plated brackets from this same motorcycle. Naturally if you plan on having a 100 point national show winning motorcycle, real cad plating is the only way to go, but for your average rider or local bike night hero this is a nice inexpensive way to get a clean authentic look to parts that should look cad plated.

ABS Plastic Repair

A major source of aggravation are cracks in plastic parts and or mounting tabs broken off of them. But since since a lot of these plastic parts are made of the same ABS material as sewer & drain pipe there really is quite a simple solution. Glue them back together with common ABS cement that you can find at any local hardware store. The air box on this little C70 that I’m working on had been reinstalled at some point in the past without the metal spacers that are normally used to secure such parts to the metal frame without damaging it. The result was that one mounting tab was split & the other one was broken completely off.

fix motorcycle abs plastic parts

To repair the cracked side was simple enough, it jut needed cleaning up and having plenty of glue applied. For the other side that was completely broken out I put a standoff with a washer in the hole & gave it a good coat of cement, permanently attaching it to the air box. You can also buy ABS plastic sheet & use that to fabricate repair patches, replacement tabs & even custom parts that can be glued together using ABS pipe cement. Once you are done & the glue is dry it can be filed, sanded or even painted over just like any normal plastic.

Hopefully these two tips about cheap fake cad plating & abs plastic repair will help someone out, until next time.

Peace Y’all


Honda C70 Passport Restoration Part 1

Honda C70 Passport Restoration The Beginning

It all started out innocently enough with me picking up this little diamond in the rough. It obviously hadn’t run in a while and was very weather beaten. Initially I had no plans to do a complete Honda C70 Passport Restoration but you know how these things tend to snowball.

Dilapidated Honda C70

With a little help from my beautiful assistant it was soon running like a top.

Pretty lady spinning wrenches Honda C70 Passport Restoration

Initially I had no plans to do a complete Honda C70 Passport Restoration but you know how these things tend to snowball. Let me go ahead and be perfectly clear from the start, this is not intended to be a 100 point purely stock restoration. The goal here is to produce a very nice looking scooter to use for transportation at larger events like the Barber Vintage Motorsports Festival or the Destination Eustis Motorcycle show & swap meet.

After cleaning the carbs, adjusting the valves, changing the oil etc. I took the little thing out for few a test runs and am very pleased with how it runs & drives despite the fact that it had dry rotted and mismatched tires on it. So I started ordering the pieces it was missing such as the chain cases. Where the original equipment stuff is available for a reasonable price I’ll use that, when not there are plenty of reproduction parts available on the internet from Thailand and other countries. The quality of the reproduction parts is all over the map, so be prepared to ship some things back or tweak them to get everything working and looking good.

C70 reproduction Chain case

Then one evening a few days ago I lit a fire in the heater and started pulling it apart.

In My Happy Place

One of my favorite things to do as I am pulling a bike apart is to take lots of pictures. Thanks to digital photography it is now easily affordable to document every nut & bolt that you remove if you want to. On older bikes like this that use a lot of bullet connectors it is a great idea record every single wiring connection. Sometimes there are different colored wires that attach to each other that you may not remember otherwise. There are also incorrect wiring diagrams in some service manuals for some machines so every bit of extra information helps. Plus when you put it all back together & it works right the first time, your friends will think you’re a genius!

Yes I really do use Shorai batteries for damn near everything, They’re especially great for motorcycle collectors who often let their bikes sit without running and there’s no acid to boil over and ruin your shiny new paint job. Last year I wrote an article for the Vintage Japanese Motorcycle Magazine detailing the pros & cons of using lithium batteries in motorcycles, that article will probably show up here on the blog in the near future.

Motopsyco sandblasting a Honda Passport C70 Restoration

Since there was quite a but of surface rust & some light pitting the frame & forks were taken down to bare metal by sandblasting. Since I did not remove the fork from the frame I very carefully sealed off the bearing cup areas to keep the sand out.

zinc dichromate primer

After it was completely stripped, it received a few coats of zinc phosphate primer for maximum rust protection.

Ford blue engine paint

Since this is to be a parts runner and not a show bike instead of buying an expensive urethane paint in the original Honda Angel Blue I opted for 3 cans of Duplicolor ceramic engine paint in Ford blue. These paints are very durable & hold up quite well to gas and oil spillage.

Honda C70 Passport Restoration Starting the Assembly

Motopsyco Honda Passport C70 restoration

After getting all of the little bits painted it was time to move on to reassembly.

Wiring Honda Passport C70 restoration

All of those pictures I’ve taken are really coming in handy to reroute the wiring harness.

fake cad plate

Figured out how to create a reasonable looking fake cadmium plate using spray paint, will do a step by step post at a later date.

engine kill switch

The switch gear was scrubbed clean and the taped off so the kill switch and starter button could be painted red again. All of the black buttons & switches still looked good so those were left alone.

rebuilding my C70

I had stopped at this point to do some much needed body repairs to my truck and should be getting back to it next week, so be sure to subscribe below to receive regular updates.

Pillioness.com Website of the Month Jan.’16

Pillioness.com Website of the Month for January

I told you I was bringing back the website of the month feature, & here is a great one that is oriented toward motorcycle passengers. Let face it as fuzzy faced, hairy chested biker men we are usually talking about women. Now we all love tough strong independent women who ride their own motorcycles but there is truly a special togetherness in having your significant other sitting behind you as the miles fly by. And for those ladies who prefer to ride with us Dr. Liz Hardy has created a unique website just for them called Pillioness.com.

Among the truly great things Dr. Hardy does is to talk about the comfort aspect of riding pillion, the passenger accommodations on many motorcycles can be less than accommodating. If you’re trying to get your better half into riding with you it is definitely something that needs to be taken into consideration. For more information you should check out this post entitled, ” A Pillion Seat Fit for a Princess”

Another good thing for you to keep in mind is how you behave. Whether breaking in a new passenger, or trying to convince your life long love to try it for the first time, leave your machismo at home, keep both wheels on the ground, speeds reasonable, and control inputs smooth until they feel comfortable with stepping up the pace. If you scare the living shit out of her or make her miserable with an uncomfortable seat, I won’t blame her for not riding with you. In other words just don’t be an asshole.

That’s Pillioness.com Website of the Month for January 2016. Don’t forget to share this with that special someone in your life, Especially if you are still trying to convince her to join you on a motorcycle.

Clean Inside of Sockets & Wrenches

Clean Inside of Sockets & Wrenches

Here’s a quick random tech tip for you. Although this one is mainly aimed at restorers & customizers it will be of benefit to anyone who values a neat and clean appearance on their project vehicle. When it is time to reassemble your motorcycle make sure that you clean the grease out of your sockets and box end wrenches. When appearances count you really don’t want the old grease & dirt that is inside of your tools dirtying up your clean shiny fasteners. Sure on chrome plated or stainless nuts & bolts it’s more of an inconvenience having to go back and clean them but with zinc plated, cad plated or even painted hardware the dirty old crap stuck in the recesses of your tools can stain the surfaces beyond cleaning. Not to mention that grit from dirt or metal shavings can sometimes be suspended in the old grease and scratch even stainless fasteners when you tighten them down.

Clean Inside of Sockets & Wrenches

So even if all you do is just twist up a rag & stuff it through the wrench, it will make a big difference. I think in the future whenever I finish a big greasy dirty project on an engine or an off-road vehicle, I’ll try to remember to run all of the tools used through the parts washer & clean them inside & out.

How I got reminded of this…

<Honda C70 Passport Restoration>
My last big project was the resurrection of an old ATV for use as a hunting & farming vehicle. It was filthy nasty & greasy even after being washed thoroughly. When I was done all of the tools were wiped off and returned to the tool box without a second thought. Then I used them to disassemble my crusty little C70 Passport, but today when I started putting it all back together with everything cleaned & painted the grease & dirt marred a couple of the bolts so I began wiping the wrenches out after that.

Today I’d also like to apologize to my regular readers for my reduced post output over the last few months since my shoulder injury. Things are getting better now and there is a ton of material saved up, so look for a lot more good stuff to come, including some classic four wheeler tutorials, product reviews, and the return of the Website of the Month category to active status. Still with so much going on there’s no way that I can fit every cool random event into this blog so why don’t you join me on Facebook, follow along on Instagram or on Twitter

Don’t forget the Psyco Youtube channel!

Peace Y’all!


Scooter Mania & Other Afflictions

First there was an old 70cc Passport.

It all started out innocently enough, a guy I know just happened to post a picture of a dilapidated 1982 Honda Passport for sale on Facebook, and I thought that would make a great pit bike to putt around on at giant events like the Barber Vintage Motorsports Festival. So we worked out a trade and I dragged it home one night and with the help of my beautiful assistant got it running. Little did I know that it was just the first step to developing Scooter Mania.

We got it going and got all the paperwork straight and made it safe for the road so it could be thoroughly checked out. With my 230 pound self in the saddle it topped out at 41 mph, just a little above moped territory. Once it was determined that it was in great condition for the long haul, this little Honda C70 became a full blown restoration project. Here’s a shot of how it looks right now as I type this.

82 Honda C70 Passport frame

Next step to Scooter Mania came as a Honda Helix 250…

A short time later, the second more serious stage of Scooter Mania snuck up on me without warning. It started out innocently enough, with me listing my Suzuki TS185 for sale on Craigslist. Almost immediately, I got a message from someone offering to trade me a 2001 Honda Helix 250 for it. My initial reply was let me think about it a few days. Another scooter was not what I had in mind, in fact cash was the objective, partially to finance the restoration of the Passport but mainly so that I could purchase this cool 1/8 scale Redcat Racing RC dune buggy and mount my video camera to it for a future project that I have in mind.

After 3 or 4 day of irritating low ball offers and what seemed like a thousand scammers posing as U.S. military personnel, I sent the Helix owner a message & told him that I’d trade & we agreed to meet at a public location between his place & mine. The plan was never to keep the Helix, but to try and flip it on Ebay, but I made two mistakes. Mistake number one was that I rode it. Mistake number two was taking Mrs. Psyco out for a nice long ride on it. When we got back home she said that it is far more comfortable than any of my motorcycles. So I replied, “I guess we should make this one a long term adoption,” to which she replied yes. Now it’s sitting in the shop on brand new tires, and I’m waiting for the Ram mounts for the camera & GPS to get here. In the past it had crossed my mine that a maxi-scooter would make a fine touring rig, but a 650 Burgman or a Silverwing was what I was thinking of, not a Helix. Scooter Mania strikes again!

Hond Helix with a C70 Passport Scooter Mania

I hope this is not the start of another collection.

Of course the only downside is that scooter riders get no respect around here even though the Helix is larger and longer than most motorcycles, the first words out of every idiots mouth is moped. They don’t have a clue that there’s a whole lot more to the world of scooters than 50cc Chinese whiskey cycles. What’s really fun is when you are passing someone on a four lane highway and see the look on their faces as they realize that you are on a scooter. The really great thing about being the age I am now is that I no longer give a shit what anyone else thinks of what I ride, but am still young enough to enjoy it.

Helix compared to a motorcycle

The Helix is bigger than a CB650

This doe not mean that Motopsyco’s Asylum will become a scooter blog, fine vintage motorcycles will always be my first love, late model stuff and ATVs will continue to be covered as well, just think of the scooters as one more cool thing we can have fun with! Just watch out, Scooter Mania can be very contagious.


Motopsyco’s Asylum 2015 year in blogging |

2015 was the best year yet for this little blog, click below to get the full report.

See the fireworks Motopsyco’s Asylum created by blogging on WordPress. Check out their 2015 annual report.

Source: 2015 year in blogging | Motopsyco’s Asylum

Moto Guzzi V9 – The Universal Custom

This looks like an interesting offering from Moto Guzzi this year. I think 2016 will be the year for a great renaissance of classically styled motorcycles

Moto Guzzi introduces the all-new V9; fun, light, painstakingly crafted medium engine capacity custom, heir to more than forty years of custom heritage. Moto Guzzi V9 opens up a new product and engine

Source: Moto Guzzi V9 – The Universal Custom

Install a Trailer Hitch

Almost Anyone Can Install a Trailer Hitch

I have a confession to make; at one time the very thought of putting a perfectly good running motorcycle on a truck or trailer was horrifying to me. But as I’ve gotten older my once hard core has become a soft chewy center. Crash damage, arthritis, and a growing disdain for any kind of suffering will do that to you. The missus & I will still do a bit of long riding from time to time, and I still scratch my head when I see a full dresser riding solo on the back of a tow vehicle. If said Goldwing or ‘Glide is surrounded on the trailer by some fine vintage machinery, choppers or hardcore sportbikes I can understand. Having discovered the joy of vintage motorcycle shows & swap meets it’s not unusual for me to take multiple motorcycles plus miscellaneous trade items, making a tow vehicle necessary. If I’m only taking one motorcycle or scooter capable of making the trip, to the show with no plans to buy or sell anything I usually just ride the darn thing because without riding what’s the point of owning a motorcycle?

<1982 C70 Passport>

One of my trailer queens.

Now let me make an apology to all of you old geezers that I used to pick on about your trailer queens. I am well on my way to becoming one of you and own a couple of motorcycles that I would never even attempt to travel on.

<Westin Trailer Hitch>

Westin trailer hitch

Let’s get on to the meat of this how to, my previous tow vehicle was a Chevy van that served me okay for a while but last year I sold it and acquired a nice low mileage 2010 Toyota Tacoma that was the plain Jane work truck of my dreams that I thought did not exist anymore. So I ordered up a Westin Receiver Hitch
hitch to fit it, along with a Reese T-connector kit for the trailer lights. Now let’s see how it was installed.

<Reese Trailer Hitch Connector>
Open up the package, and read the instructions. Then count all of the hardware supplied to make sure it matches what you are supposed to have. Next gather up all of the tools you need to match the bolts in the kit & on your truck, van, or SUV. While what is shown here is specific to my truck & hitch the vast majority of installations will be very similar to this. Buy your trailer hitch from a reputable manufacturer and read the instructions.

<hitch receiver hardware>

Don’t forget, read the instructions first!

Like most of them this Westin hitch receiver uses the bumper brackets to attach it to the truck. The instructions called for me to remove 2 of them on each side and leave one attached loosely. Work carefully and don’t allow your bumper to drop down suddenly as this could cause damage to your vehicle and or injury to you.

<bumper bolts>


<bumper bolts loosened>

Please make sure you take reasonable safety precautions when you are doing this. You will be handling large heavy awkward items over your head in a cramped space. It’s possible to install a hitch alone but it’s better if you have help. At the very least you need someone nearby in case it falls and beans you in the head.

<install a trailer hitch>
My truck also had the above tapped holes in the frame that were put there for the location of a trailer hitch, make sure that if your vehicle has additional holes like this that your hitch will use, that the holes are clean and the threads are good before putting the hitch in place.

<a good floor jack>
Since I was working alone a floor jack was called into action to support the receiver as it was lifted into place. For most of us a good floor jack is a necessity to install one of these alone.

install a trailer hitch
Line up the bolt holes and start all of the bolts. Do not tighten any of them until you have them all started securely. Once you have every bolt started in its own hole, then you may need to install some shims if supplied and realign your bumper so that it looks right.

use shims as needed

use shims as instructed

After the shims are in place and the bolts are all snug, check your bumper alignment again and adjust if needed.

torque wrench install a trailer hitch
Now it’s time for the final tightening of the bolts, grab your trusty torque wrench and tighten all of the bolts to the specified torque for your application.

<reese t connector toyota tacoma>
Now it’s time to move on to the wiring connections, Old timers will remember the bad old days when hooking up a trailer lighting harness meant cutting and splicing wires. Then came the Scotchlock connectors that made the job quicker but weakened any wire they were attached to and made it more likely that the wire would fail a few years down the road. Now everything is plug and play for most vehicles.

<reese t connector toyota tacoma>
The instructions called for me to remove the right rear tail light so I did.

tee connector install a trailer hitch
Then plug the Reese T-connector wiring harness in between the trucks harness and the tail light.

trailer lighting control box
The only part of the installation that required any drilling was to mount the control box. Be sure to paint the metal inside the hole and let it dry mounting the box with screws & lock nuts. Please note on some applications these boxes can be mounted directly to the receiver hitch without any modifications. One other thing to note, many modern trucks have composite plastic beds that do not conduct electricity well, so make sure that you attach the ground wire to a metal component that is attached to the chassis. Using outdoor rated UV resistant cable ties secure the wiring neatly allowing just enough slack at the end to work with all of your trailers but without dragging the ground.

Toyota Install a trailer hitch Westin
Now slide in your hitch and hook up your trailer & test everything. I have been using this Westin Receiver Hitch
for a year now dragging trailers all over the eastern United State and have absolutely no complaints about it. It was easy to install to. Even if you still don’t feel up to doing it yourself at least now you know what it takes to install a trailer hitch. See you on the road!
Peace Y’all