
If you look at a lot of restored vintage bikes, you may notice that even some very nicely restored bikes have switch gear that looks okay but you can tell that the switches were not fully refurbished to the same level as the rest of the bike. I plead guilty to doing this myself because the switches are full of little tiny springs, detent balls, delicate soldered connections etc. and if a single piece gets lost or broken your switches are ruined. Since I am putting so much effort into my current 1972 Honda SL100 project I could not settle for anything less than a full on handlebar switch restoration to make the whole bike look as new as possible. If something had gone wrong I was prepared to spend the money on a set of new old stock switches to replace them.

Before beginning your handlebar switch restoration clean off your workbench and the floor around it & under it, so that if any of the tiny parts fall out or go flying you at least have a chance of finding them. Keep a magnet close by in case you need it. Also remember that sometimes the old plastic knobs & buttons often become fragile with age so be careful handling them.

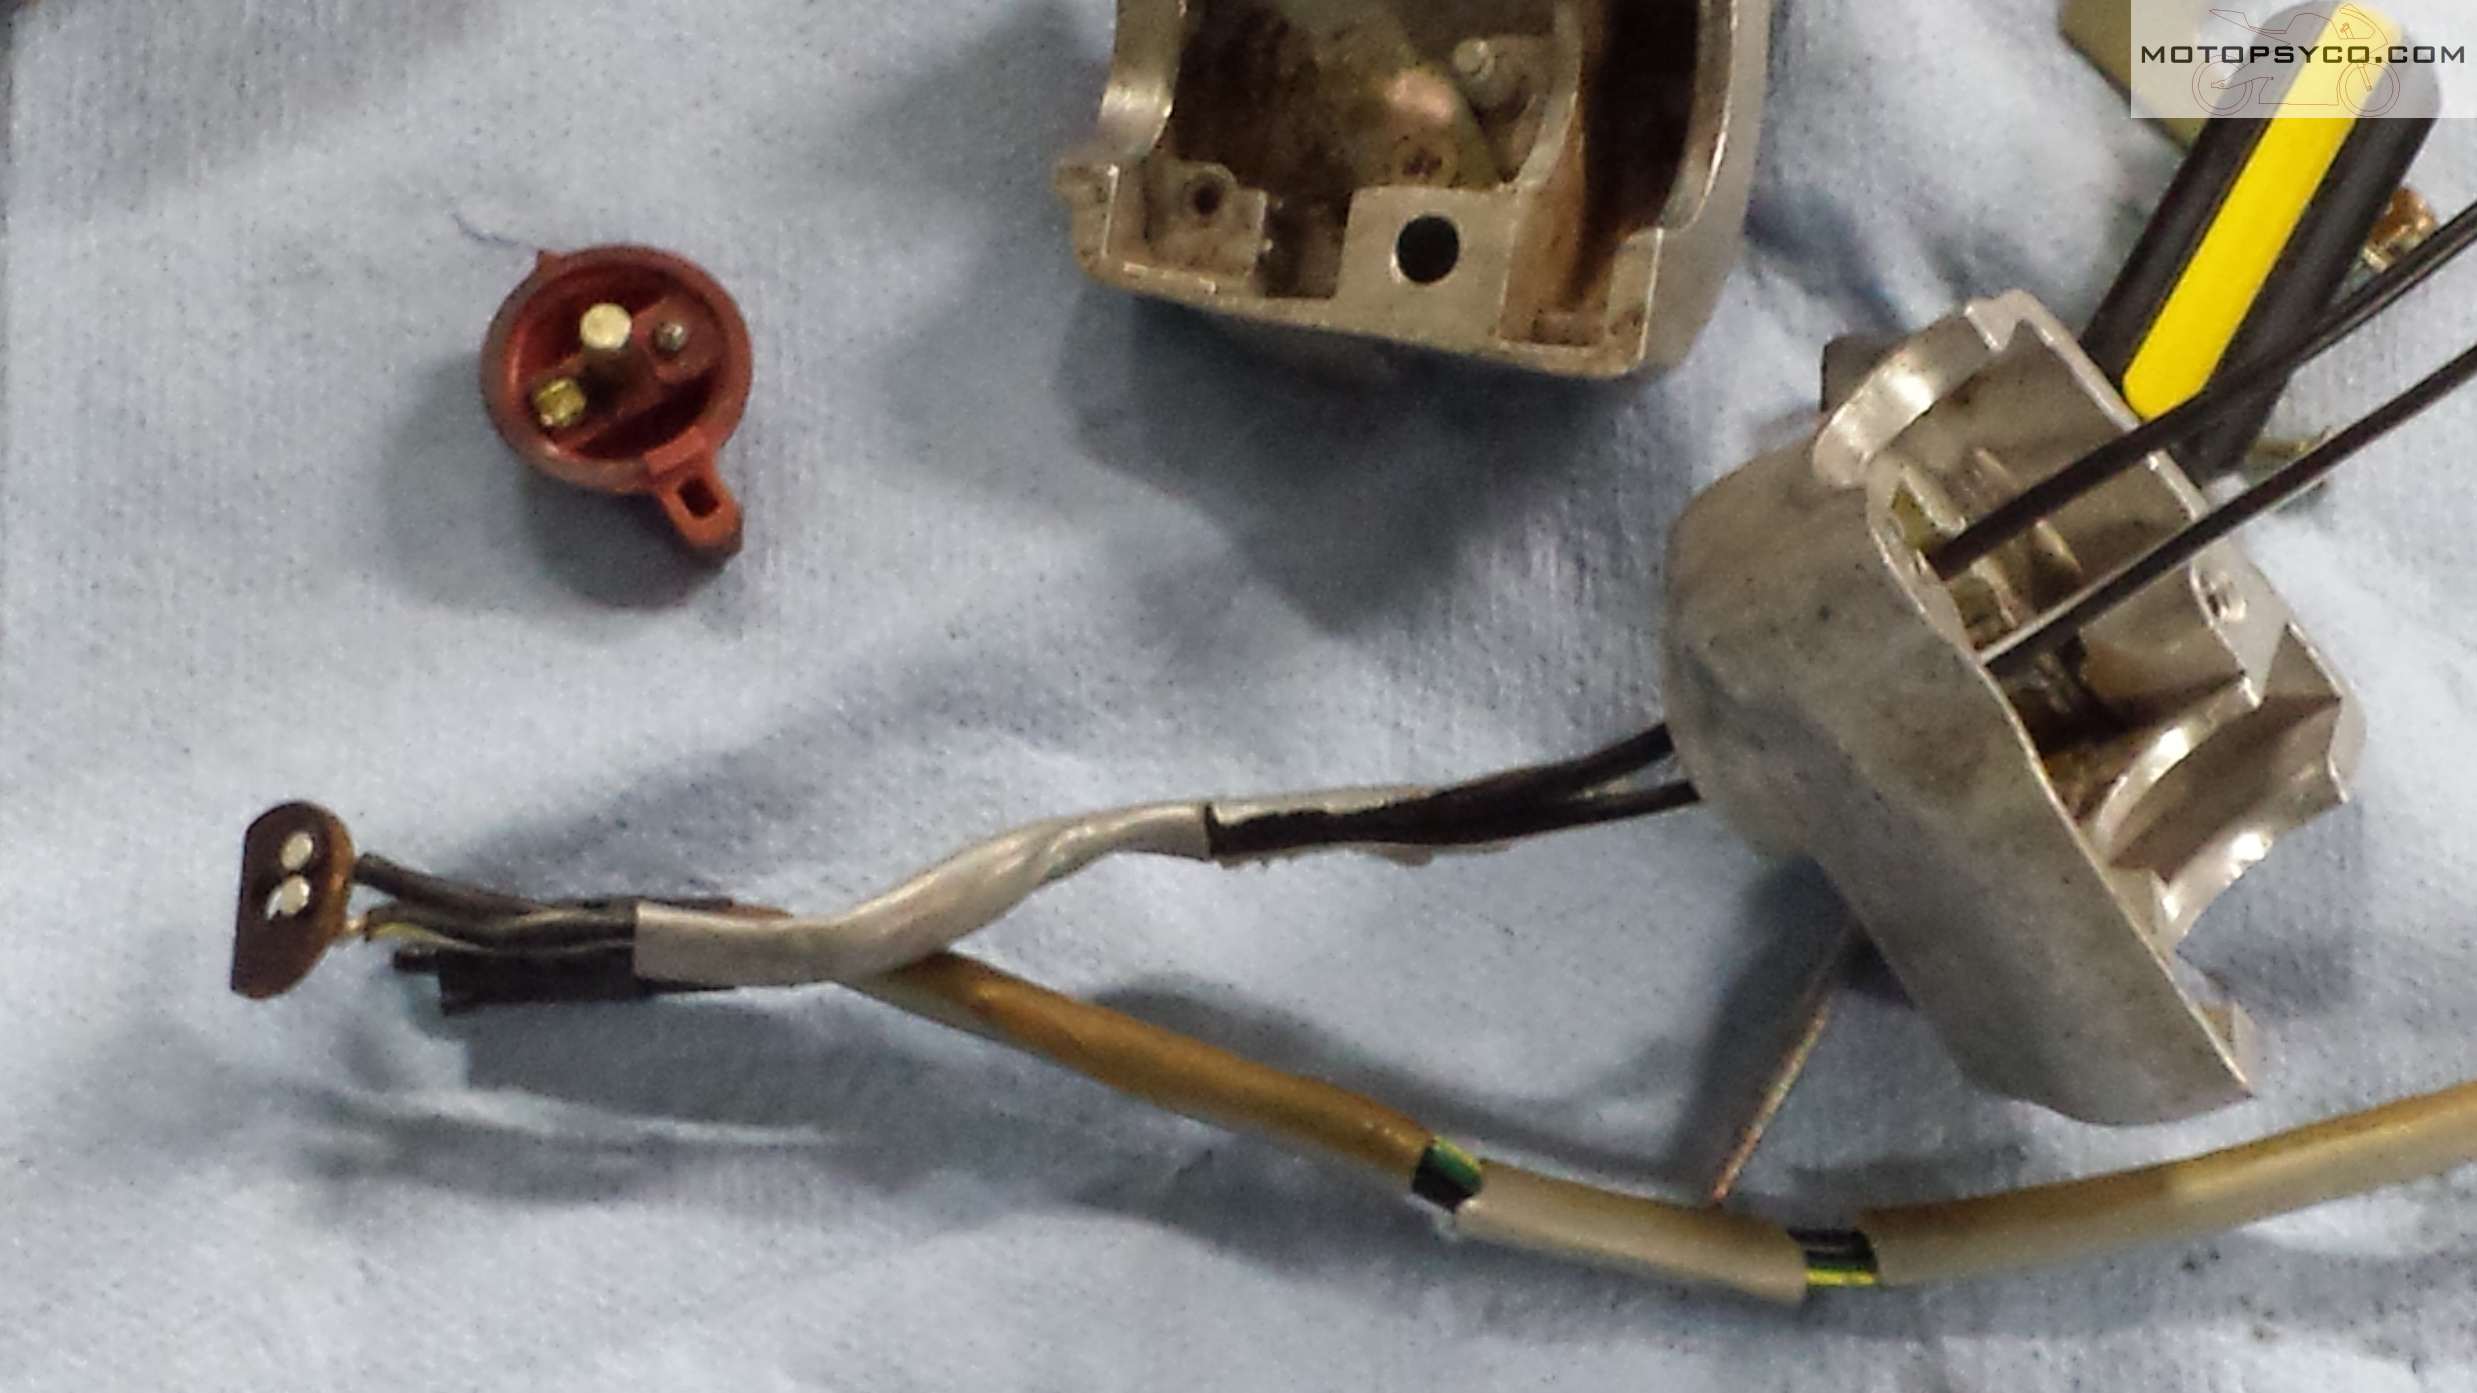
Take a few minutes to study how the wires & switches are placed & secured in the housing, and then remove the retaining screws & plates. You should also look at and remember how any tape or sleeves are applied to the wires in the housing to protect them from chafing.
In the picture below you can see a detent ball sitting on top of the black slider for the headlight controls, there is a spring under this ball that can (and did) send it flying so use caution to be sure you don’t lose any parts.

Once I pulled the e-clip off of it, the engine stop switch and its wiring could be removed through the top of the housing. Go ahead and completely remove all of the switches, wiring, & clips from the housings.
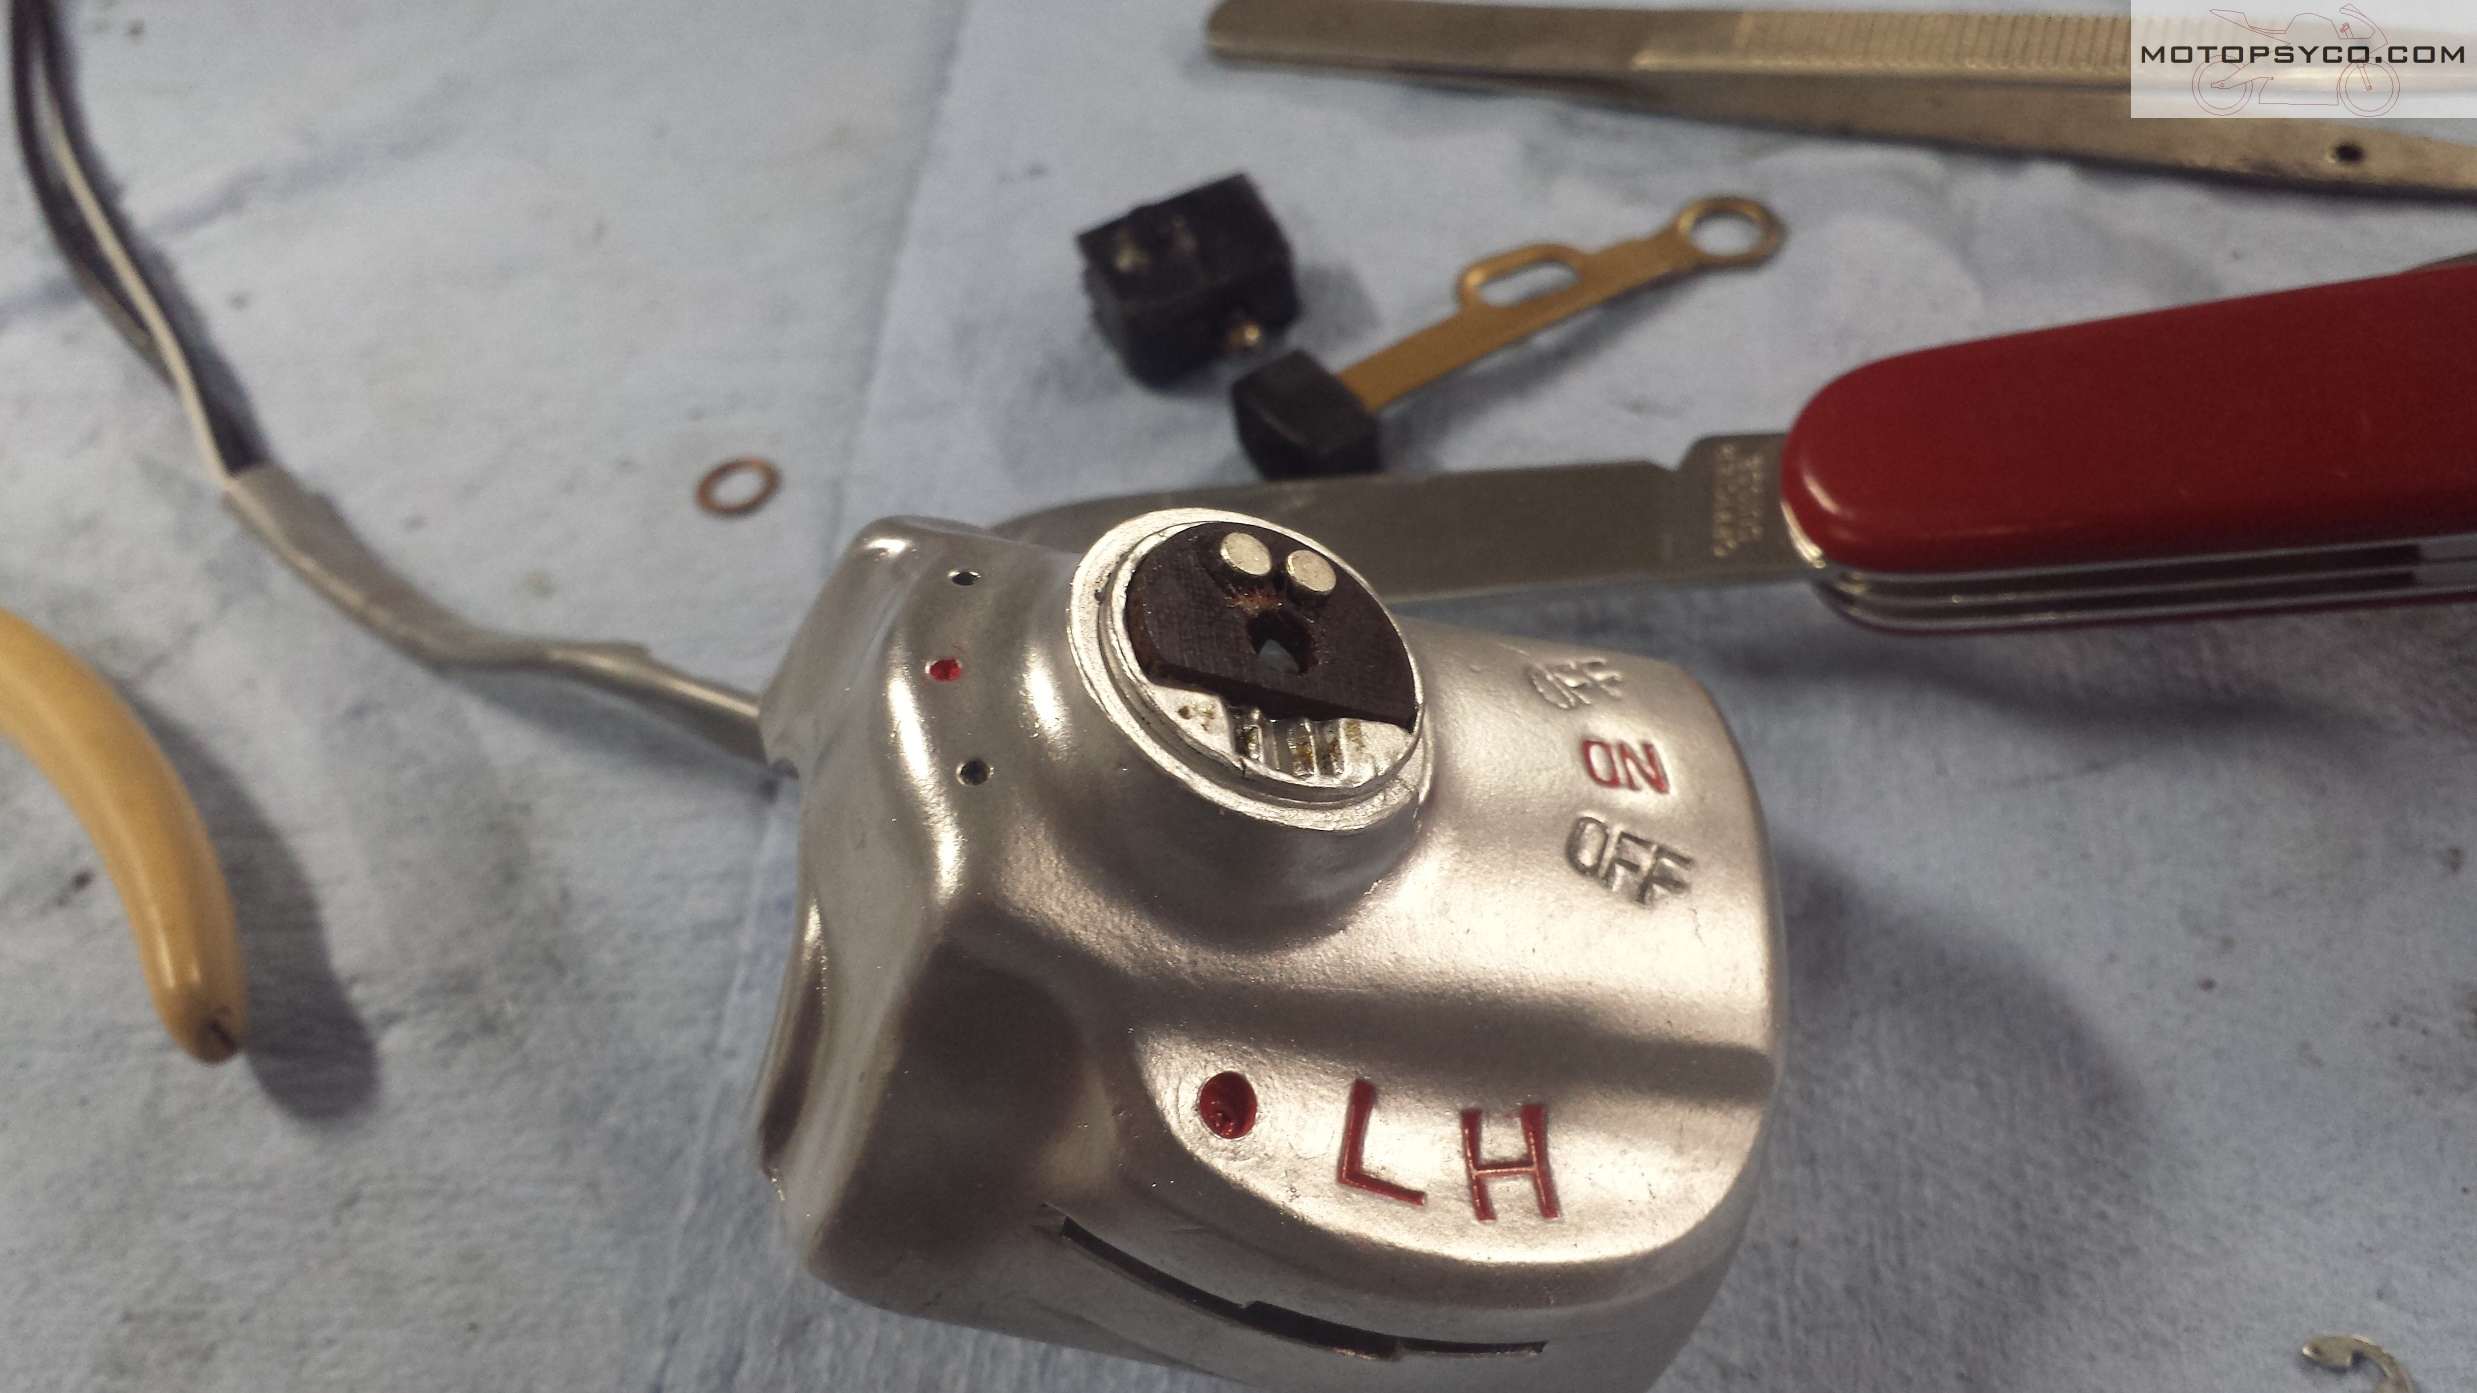
If you have any damaged threads or broken screws in the housings now is the time to deal with that. In this case the throttle stop screw was snapped off in the bottom of the housing so I had to drill it out and tap the hole. You’ll notice that there are magnetic rubber vise jaws attached to my vise. These are an absolute necessity for doing this kind of work without damaging your parts.

With your switch housings stripped bare & all repairs made now is the time to clean them up. I use my vapor blasting machine because no other method I know can restore a factory new appearance to old aluminum the way vapor blasting can. If you don’t have access to a vapor blaster you can send your parts to me & I can do it for you. See my vapor blasting page for rates & information.

After everything was repaired & cleaned I painted the stop switch with a little spray paint and used an oil paint marker to paint the red lettering & dots as you can see below. For more information on this technique click this link to see my previous post on emblem & badge refurbishment.


Now that everything is clean & new looking gather up the supplies & tools you need for reassembly. At the least you’ll need some new wire sleeves, tape to match the sleeve, JIS screwdriver, a small pick, some grease, the finest point needlenose pliers that you own, some tweezers, a sharp knife and a multimeter. Depending on what you are working on you may need more or less tools than these, for example if you have a broken wire connection a soldering iron might be needed.

Carefully reinstall all of the parts in reverse of the order you removed them. Take time to tape & sleeve wires as needed because you might not be able to after everything is back together. Be sure to watch out for flying springs etc. during reassembly, it’d be a shame to get this far and lose a critical part. Work slowly & stay as relaxed as possible when doing delicate work like this.
The final step of handlebar switch restoration is to test the function of all of the switches using either the ohmmeter or diode tester function of your multimeter. If everything is working great you are ready to reinstall the switch gear to your motorcycle. If not, it’s a whole lot easier to fix it now than after putting the bike back together. This is especially if the wires are going to be inside of the handlebars.

I hope that you’ve enjoyed following along while I completed my handlebar switch restoration. The next post that I have planned will show how I measured & drilled the holes in my handlebars for the wiring to pass through.

Until then, Peace Y’all


Nice job!
Thanks Joe