
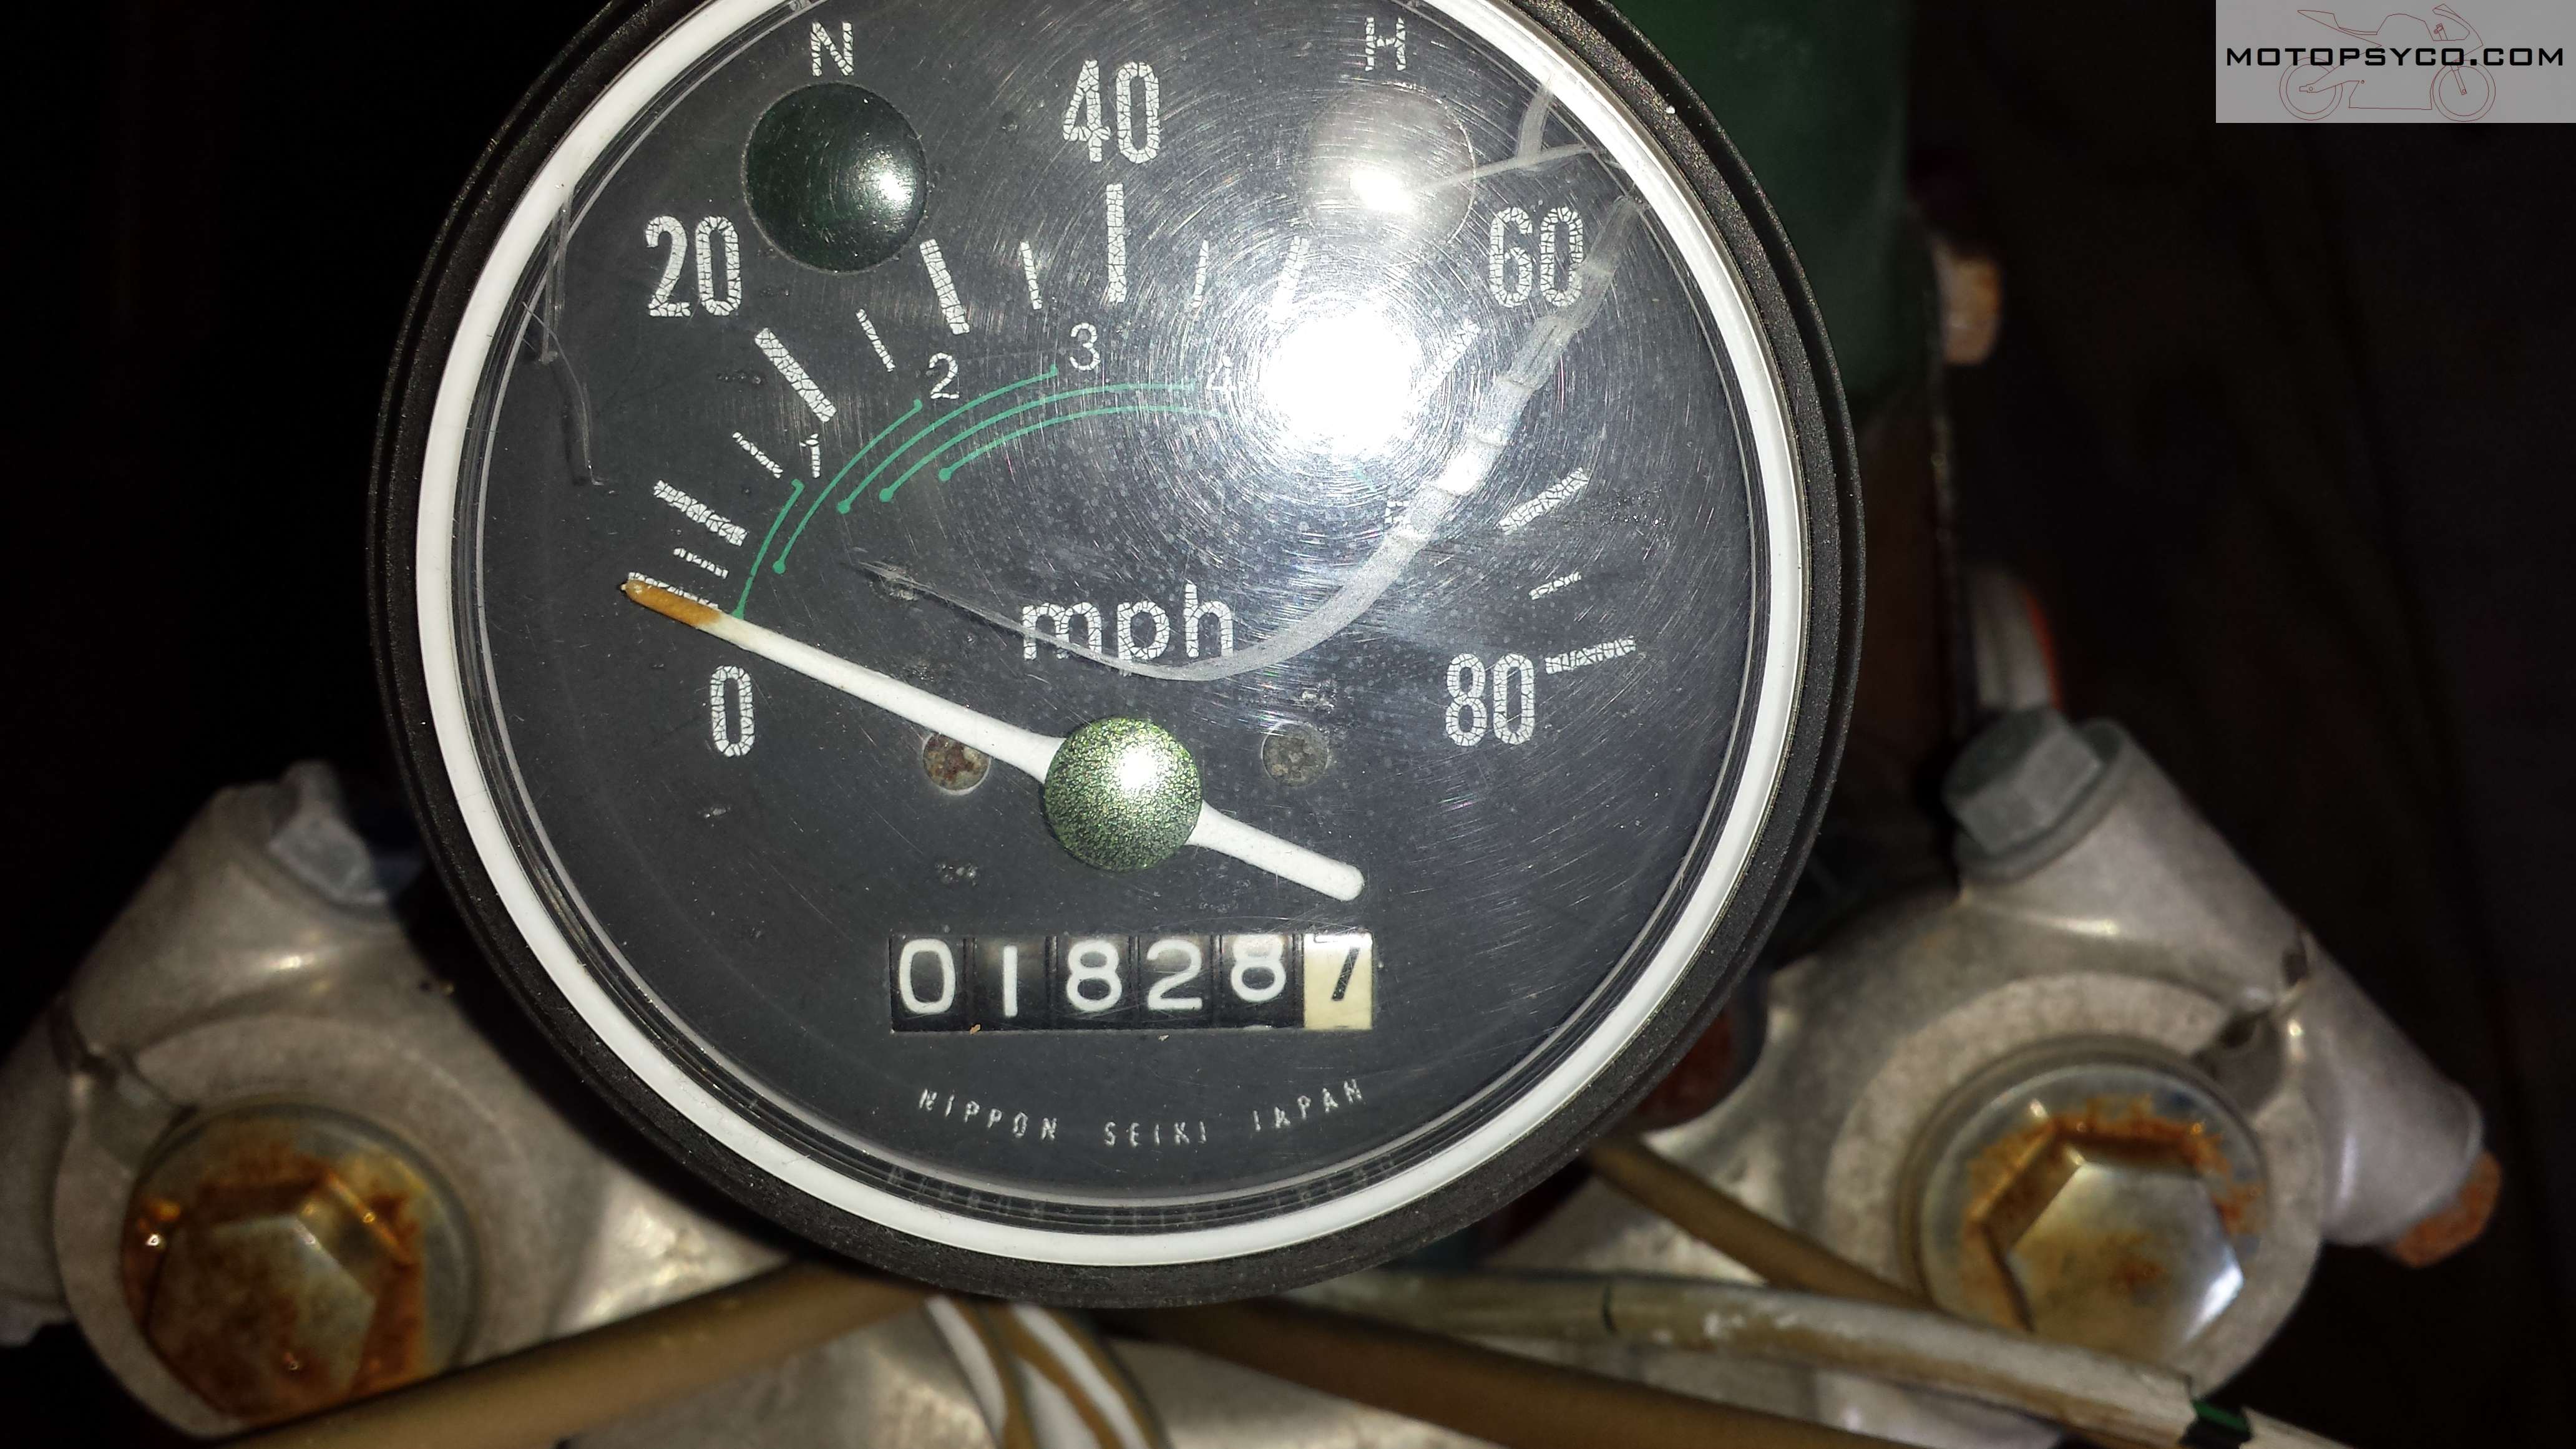
We’ve all seen it before, maybe even on our own bikes, beautiful paint, shiny new chrome, highly polished aluminum and dull faded out hazy looking gauges. Granted for custom bikes it’s pretty easy just to swap in a new speedometer, heck it might even be cheaper than fixing your original. I decided to perform this speedometer restoration for 2 reasons; to keep the original correct low odometer reading on this bike and I had never attempted speedometer restoration before and really wanted to try it. Sure I did make a couple of mistakes along the way but overall I am very pleased with the results. Next time I do this it’ll be even better.
Disassembly
On some instruments the bezel that surrounds the face and mechanism is crimped to the base with a metal ring that has to be carefully removed & re installed to access the inside of the gauge. On this little Honda the bezel was a one piece plastic part that appeared to have been either over-molded onto or permanently glued around the base of the mechanism. The first step after removing the chrome trim on the bottom is to cut away the plastic that is folded over the metal part of the gauge. Cut it all the way around so that you can carefully pull the gauge straight out of the housing. Initially I just tried cutting it part of the way around thinking that it would make it easier to re-seal when I put it back together, big mistake as I bent the thin aluminum gauge face when I tried to pull it out and had to carefully straighten it out. Slice it loose all the way around pull the gauge straight out so you don’t damage it.

After getting it apart, carefully grasp the needle where it’s attached to the shaft & pull it straight up and off then set it aside in a safe place. On this particular bike 2 screws held the face plate on to the speedometer. There are also 2 tubes that the neutral & high beam lights shine through that have little rubber boots that are glued to the back of the face plate, cut these away carefully.
Cosmetic improvements
For some more popular motorcycles speedometer restoration is easier because ready-made gauge faces are available for them, what I did for this one was to visit my local screen printing & graphics shop and had them scan the old face in and print me a new one on a vinyl decal that was stuck into place over my dirty faded speedometer.

Since the speedometer needle was very faded I gave it a quick shot of white paint. After the white paint dried a little bit of red was applied to the tip of the speedometer needle. One very important thing to remember especially with magnetic drive speedometers & tachometers is that too much paint will make the needle heavier causing it to be slower to respond and affect the accuracy of the gauge. Use the absolute bare minimum of paint necessary to make the needle look good again.

The clear plastic lens on this one was a little hazy & had a lot of scratches on it so I spent about 15-20 minutes polishing it with toothpaste & a damp paper towel. This removed the haze & a lot of the scratches. It’s not perfect but it looks really good.
Reassembly
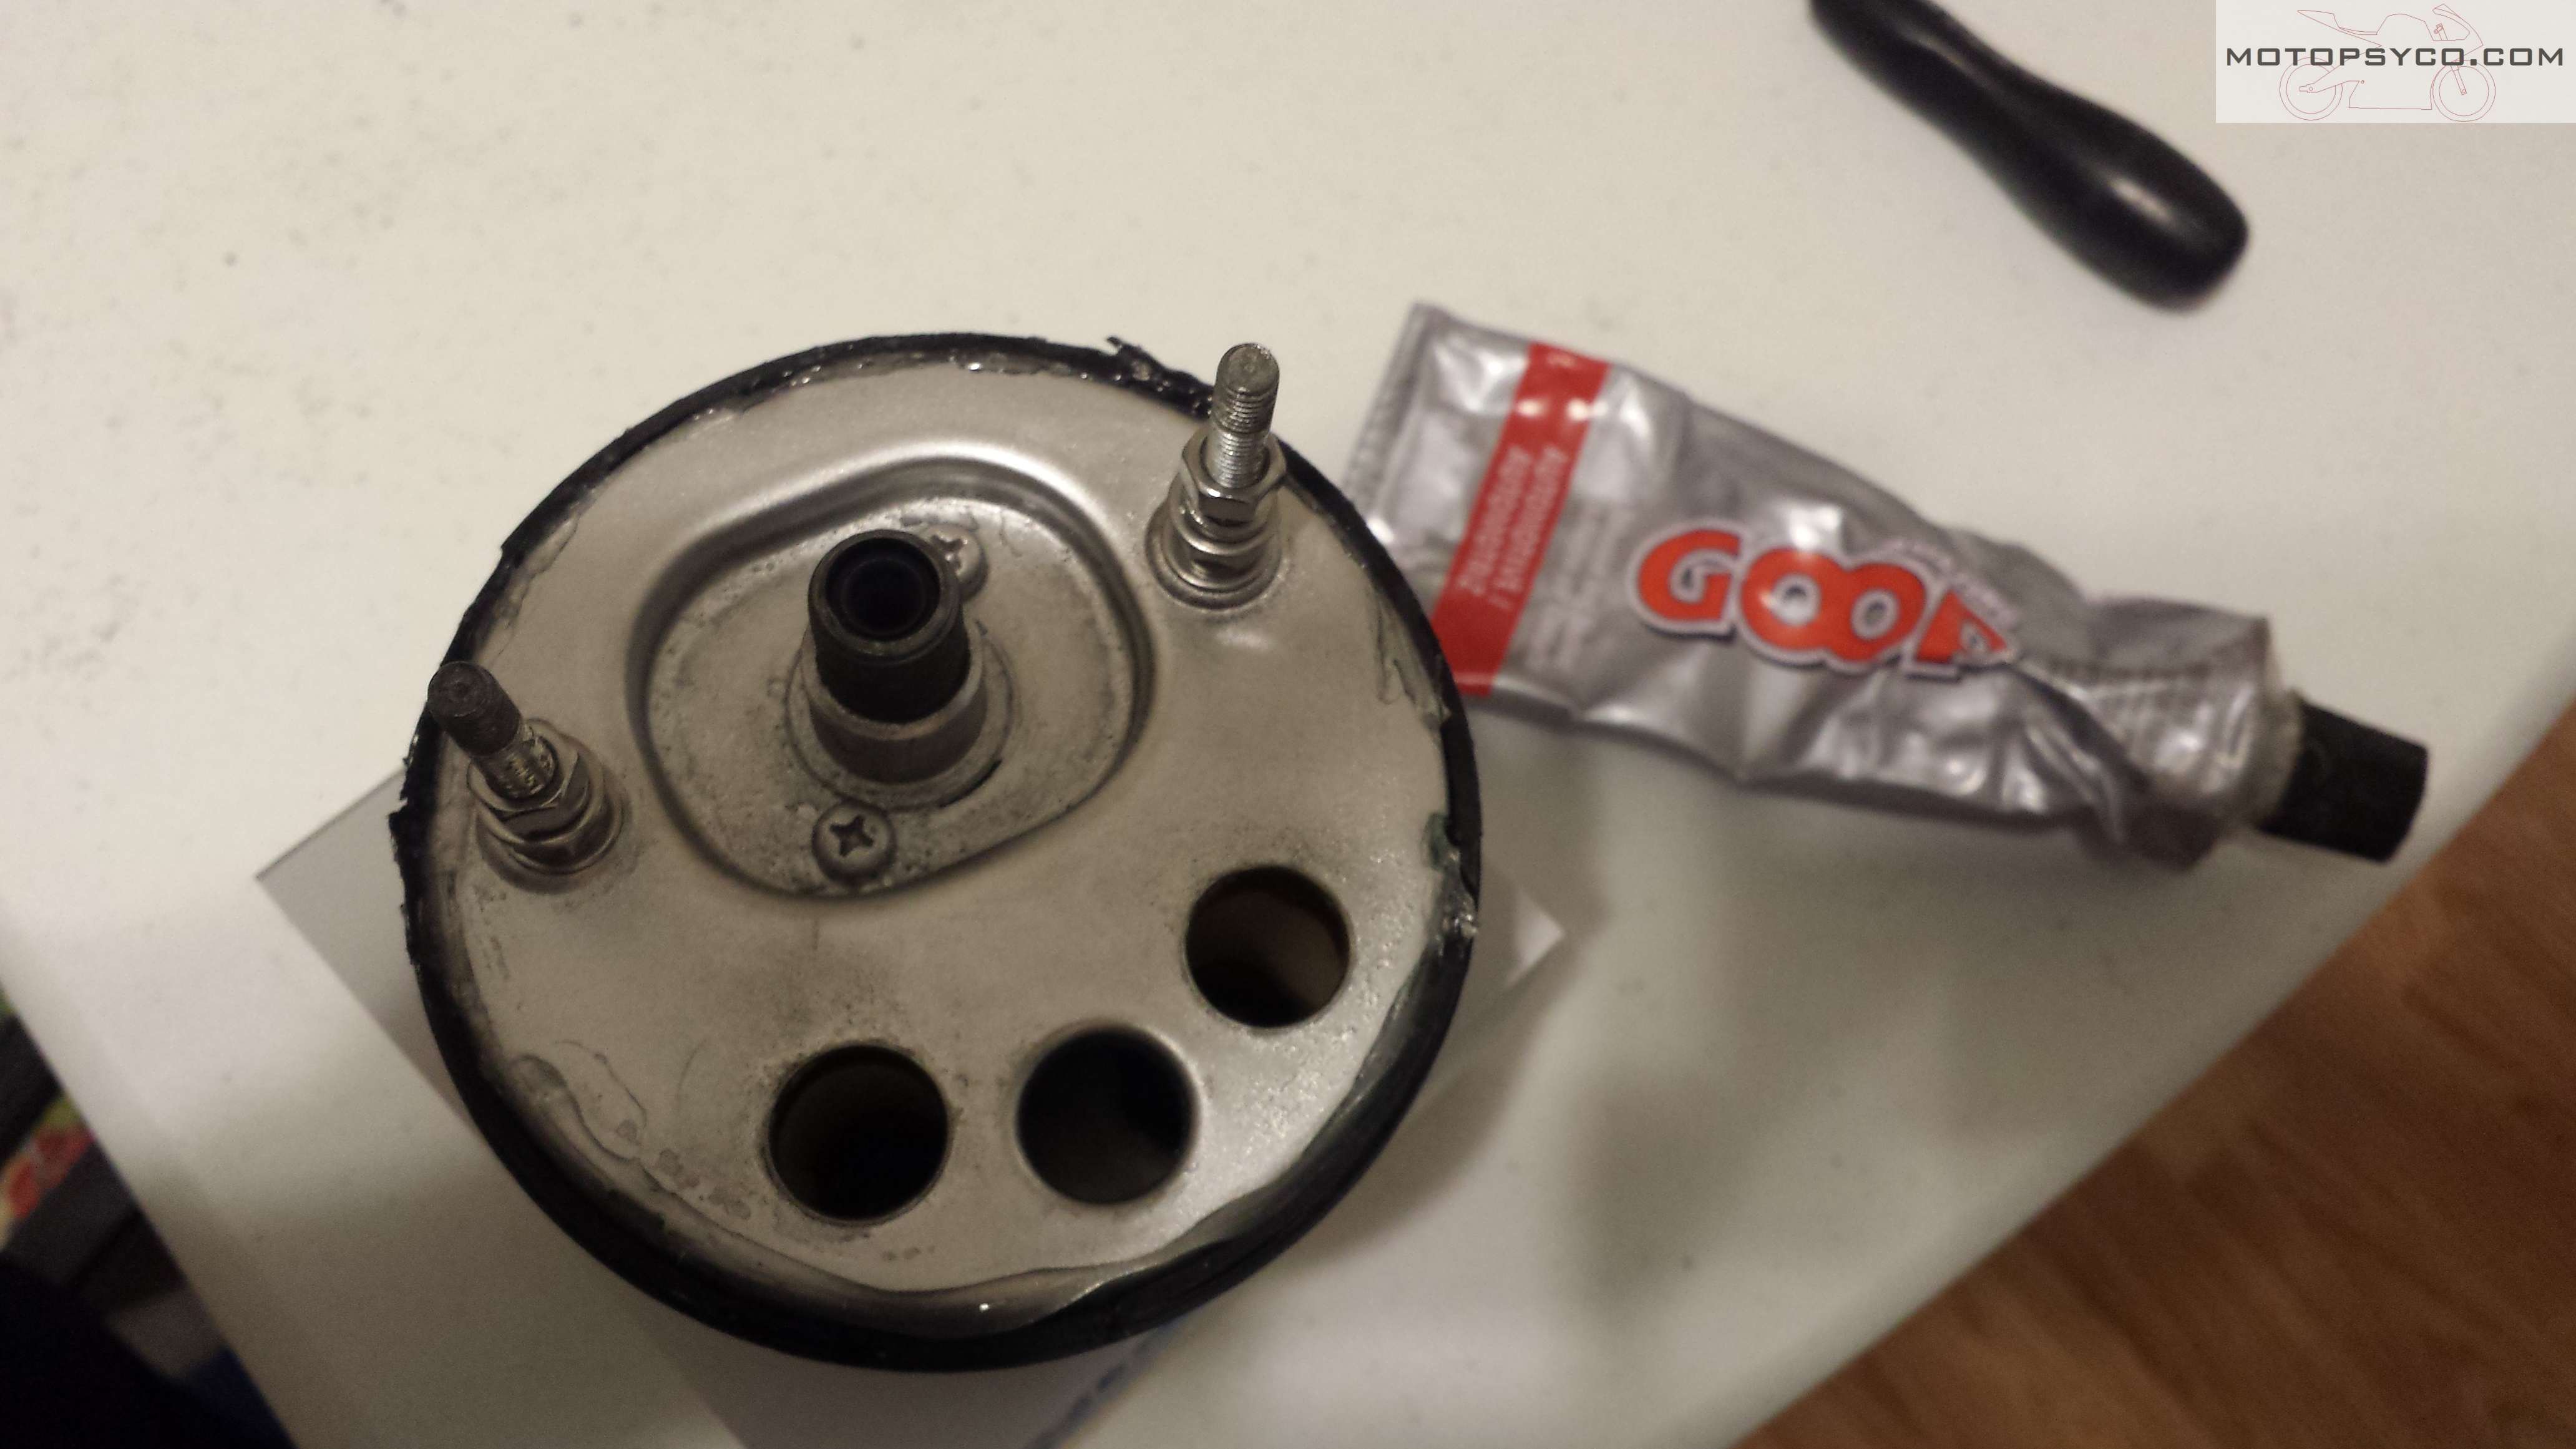
I assembled the face plate to the speedometer carefully lining up the light tubes to the back of their respective lenses sealing them in place with a small amount of my favorite adhesive/sealant, Automotive Goop. Since all of the existing nuts and washers were rusty they were replaced with new hardware at this time.

With a little careful work, on the third try I was able to slide the speedometer needle back into place so that when viewed head on at rest the needle indicated exactly zero miles per hour. Just use a little patience and take your time when doing this and everything will be okay.
Next I made sure everything was as clean & dust free as possible inside & out and dropped the speedometer into the bezel. When I cut it loose I left enough plastic so that it snapped back into place. Then I took a good look at it and since I was satisfied with the way everything looked it was time to pull the gauge back out of the bezel just enough so that I could run a thick bead of the Goop adhesive all the way around it and then snap it back into place for good, then it was time to reinstall the chrome beauty ring on the bottom.

Conclusion
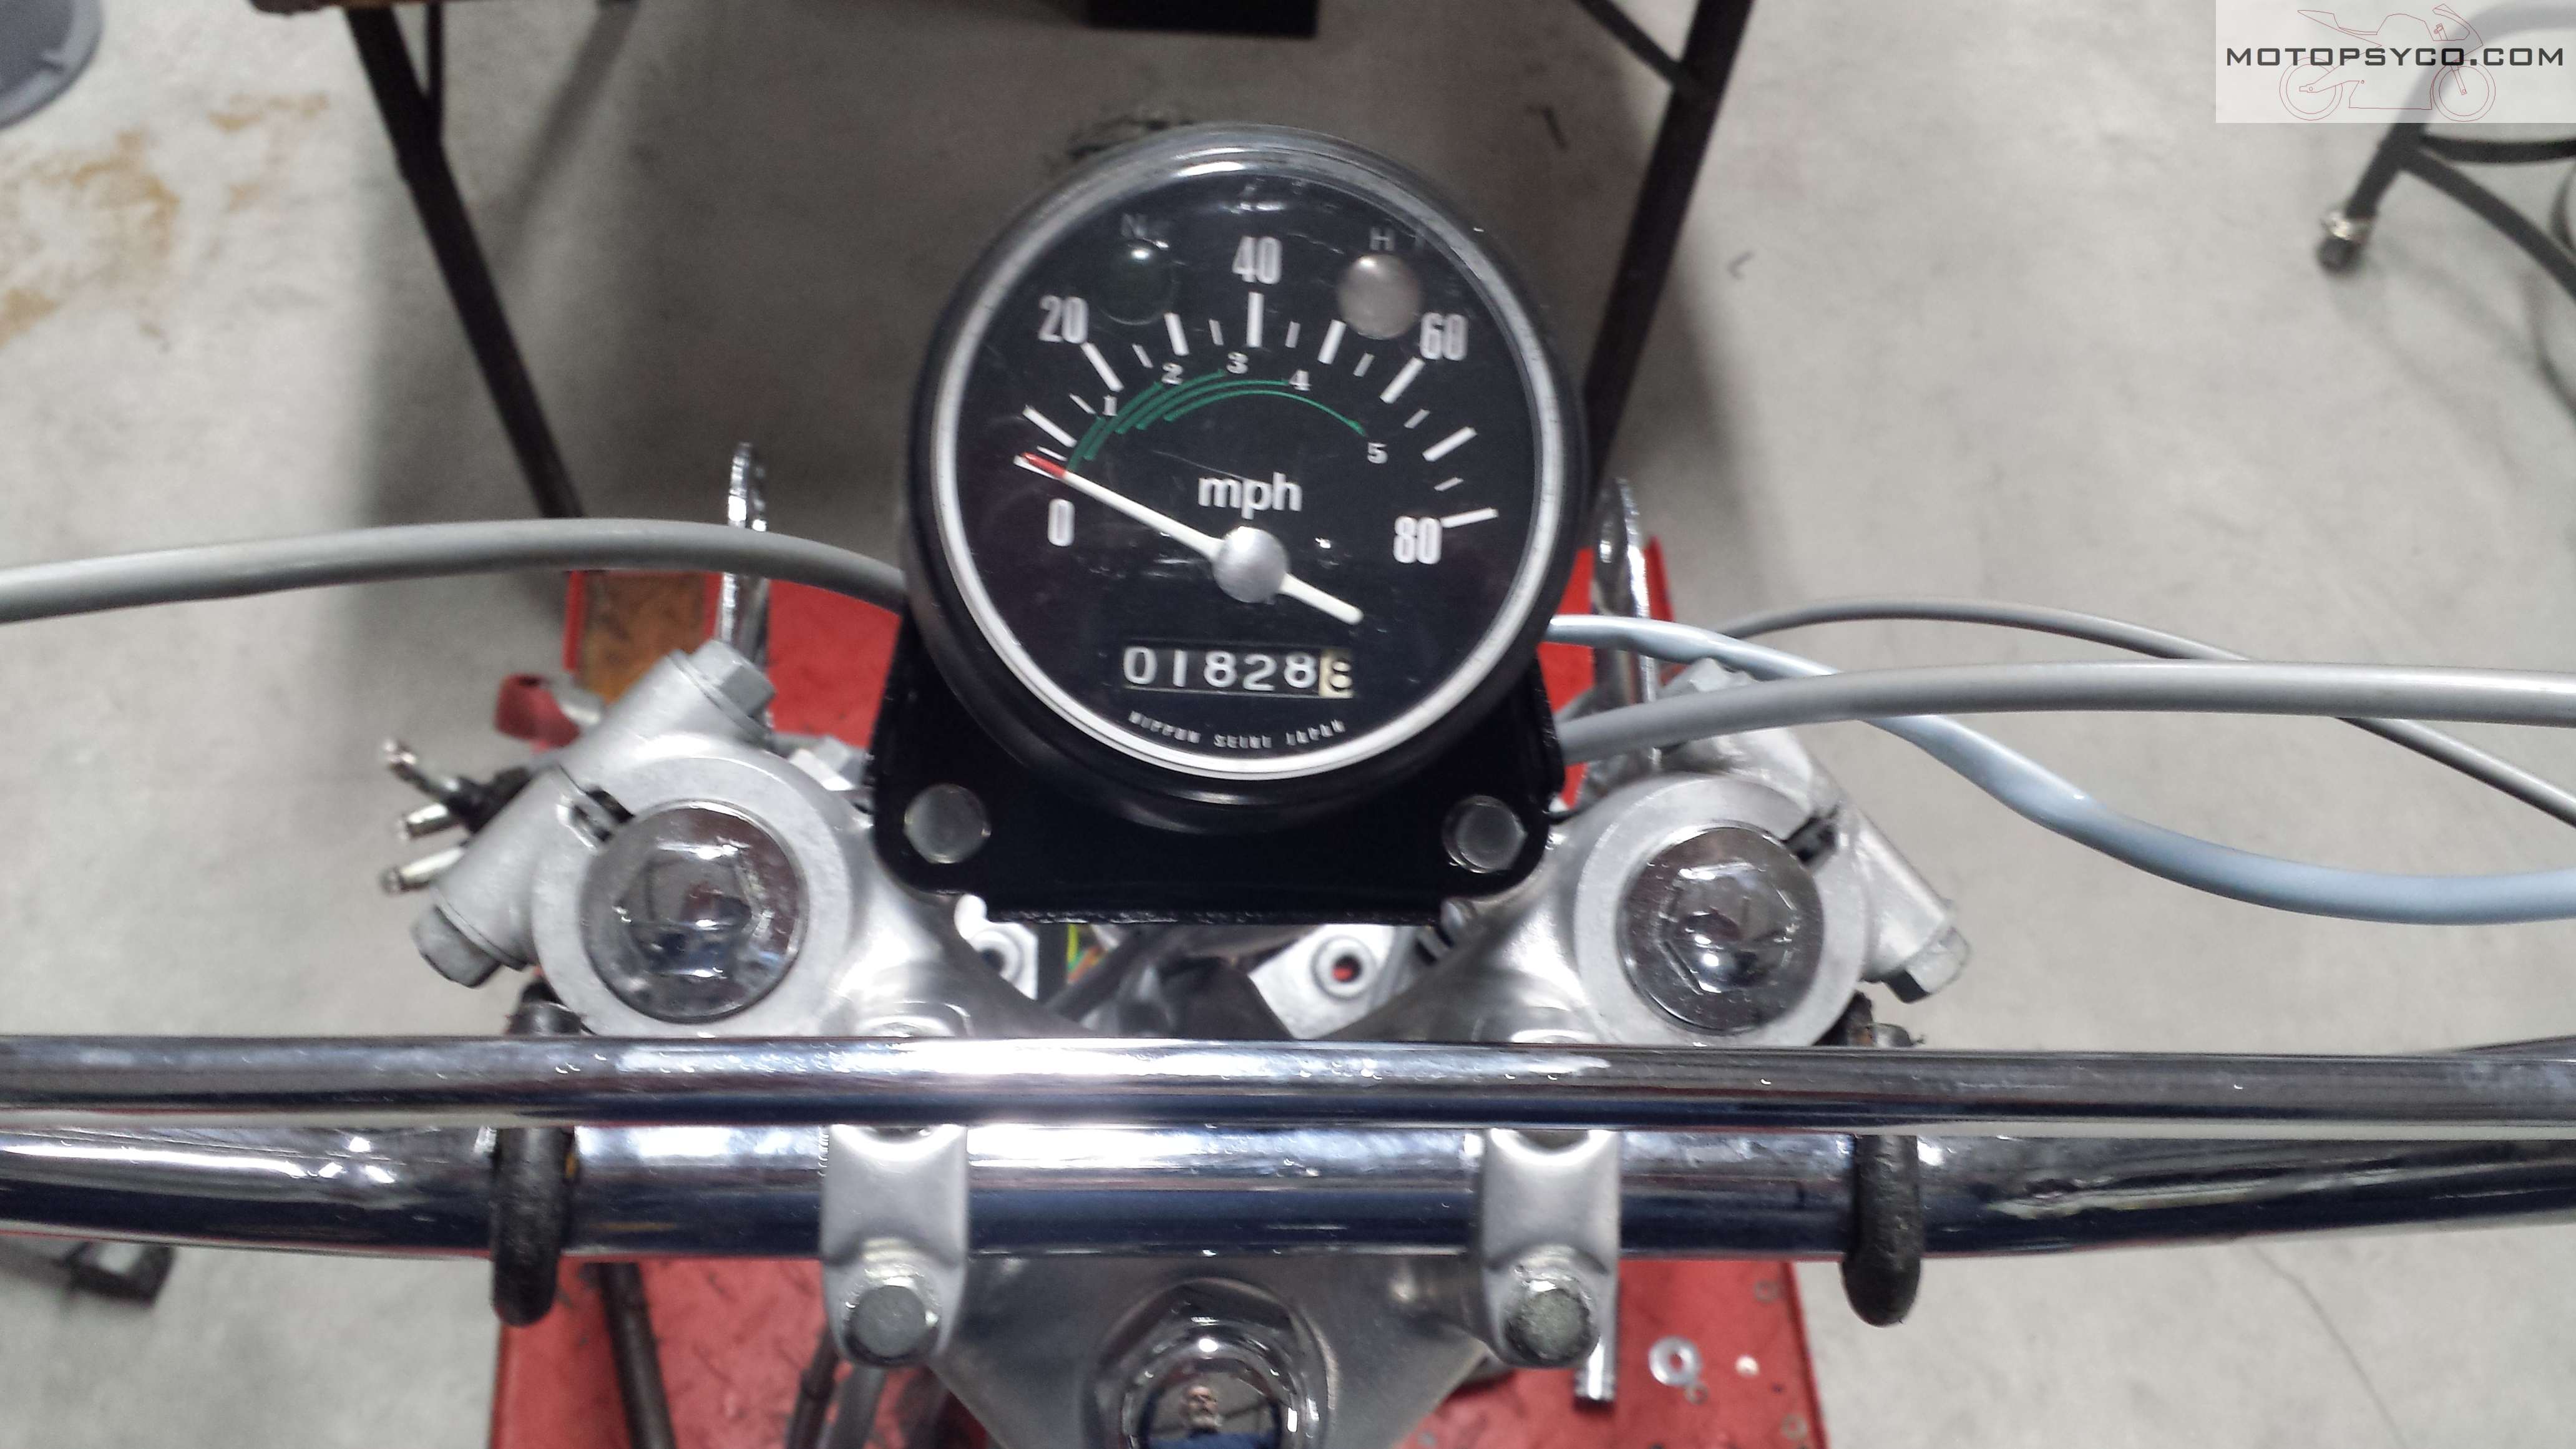
Here’s a picture of the finished assembly mounted on the bike. Even if you never plan to do speedometer restoration yourself at least you know how it can be done. There are a few specialist repair shops out there that do nothing but repair & rebuild gauges. In fact if your gauges are inoperable you should find one of them to do your repair & restoration for you. If they’re just faded & ugly you can do them yourself as I’ve shown here or you can send them to me and I’ll do it for you for a very reasonable price.

