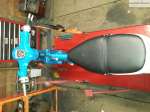
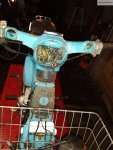
Well I finished The Honda SL100K2. It looks really good and I’m very happy with the way all the cosmetics turned out. It really did wind up making me work much harder that I really wanted too but I wound up with a brand new looking old motorcycle that would start on the first kick.
<The Honda SL100K2 of 1972>
It fought me all the way to the bitter end, I thought I had it running perfectly but then the very last part that I had not replaced yet crapped out on me. The original stator worked well at first but after I let the bike sit for a month or two between the VJMC National Rally and the Vintage Honda Rally at the Copperhead Motorcycle Lodge it quit on me and killed the battery.
<the Honda SL100K2 of 1972>
First I tried a reproduction stator from eBay but the wiring colors didn’t match and the appearance of the wiring plug and sheathing didn’t match the original so I put it on the shelf and ordered a N.O.S. replacement from David Silver Spares & put on it. If anyone in the Continental U.S. would like to buy the reproduction stator from me, I’ll take $50 shipped just to get rid of it.
In the end I accomplished my goal to perform an award winning restoration from one of the biggest turds to ever come into my workshop. This little Honda SL100K2 picked up an Award of Merit at the 2019 VJMC National Rally and another at the 2019 Vintage Honda Rally.
<award wing restored Honda SL100K2>
What’s next for this little machine? Well that’s up to the new owner as I sold it during the Barber Vintage Motorsports Festival in October of 2019. I’ve got several new projects in the works and needed some money for them. So keep your eyes open for the next Motopsycho project bike.
If you look at a lot of restored vintage bikes, you may
notice that even some very nicely restored bikes have switch gear that looks
okay but you can tell that the switches were not fully refurbished to the same
level as the rest of the bike. I plead guilty to doing this myself because the
switches are full of little tiny springs, detent balls, delicate soldered
connections etc. and if a single piece gets lost or broken your switches are
ruined. Since I am putting so much effort into my current 1972 Honda SL100
project I could not settle for anything less than a full on handlebar switch restoration
to make the whole bike look as new as possible. If something had gone wrong I
was prepared to spend the money on a set of new old stock switches to replace
them.
Before beginning your handlebar switch restoration clean off
your workbench and the floor around it & under it, so that if any of the
tiny parts fall out or go flying you at least have a chance of finding
them. Keep a magnet close by in case you
need it. Also remember that sometimes the old plastic knobs & buttons often
become fragile with age so be careful handling them.
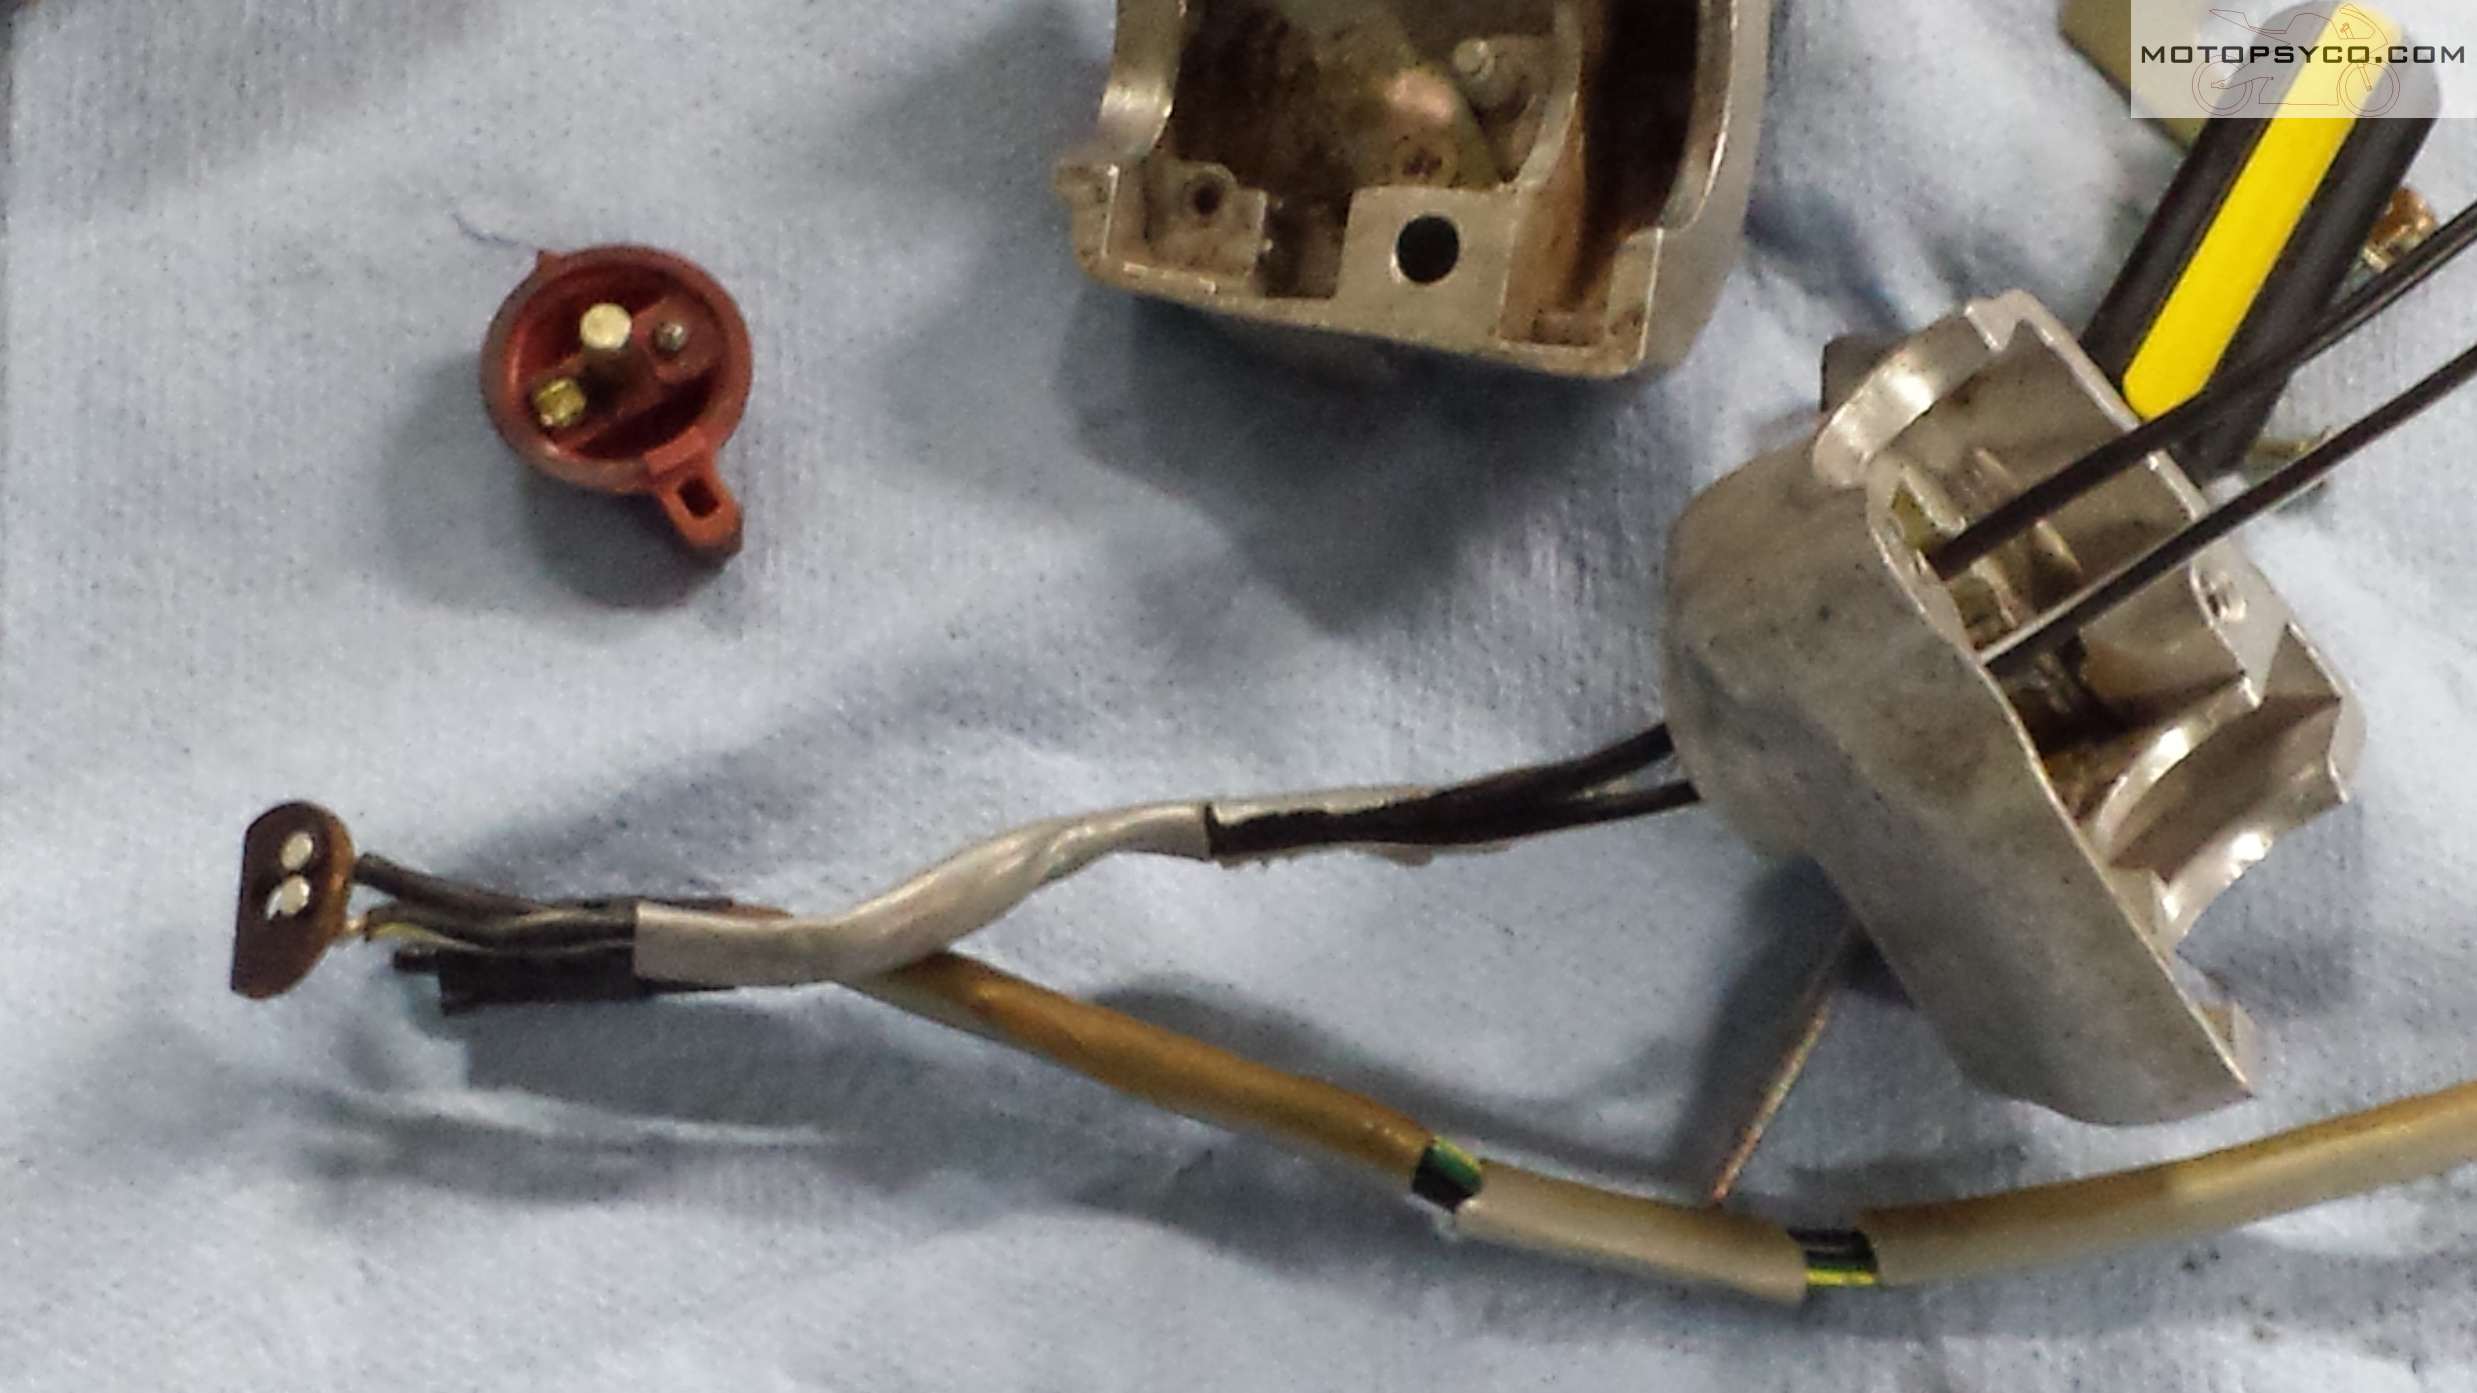
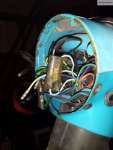
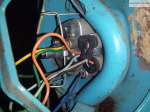
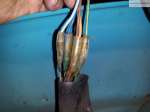
Take a few minutes to study how the wires & switches are
placed & secured in the housing, and then remove the retaining screws &
plates. You should also look at and remember how any tape or sleeves are
applied to the wires in the housing to protect them from chafing.
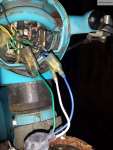
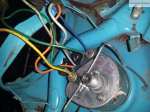
In the picture below you can see a detent ball sitting on top of the black slider for the headlight controls, there is a spring under this ball that can (and did) send it flying so use caution to be sure you don’t lose any parts.
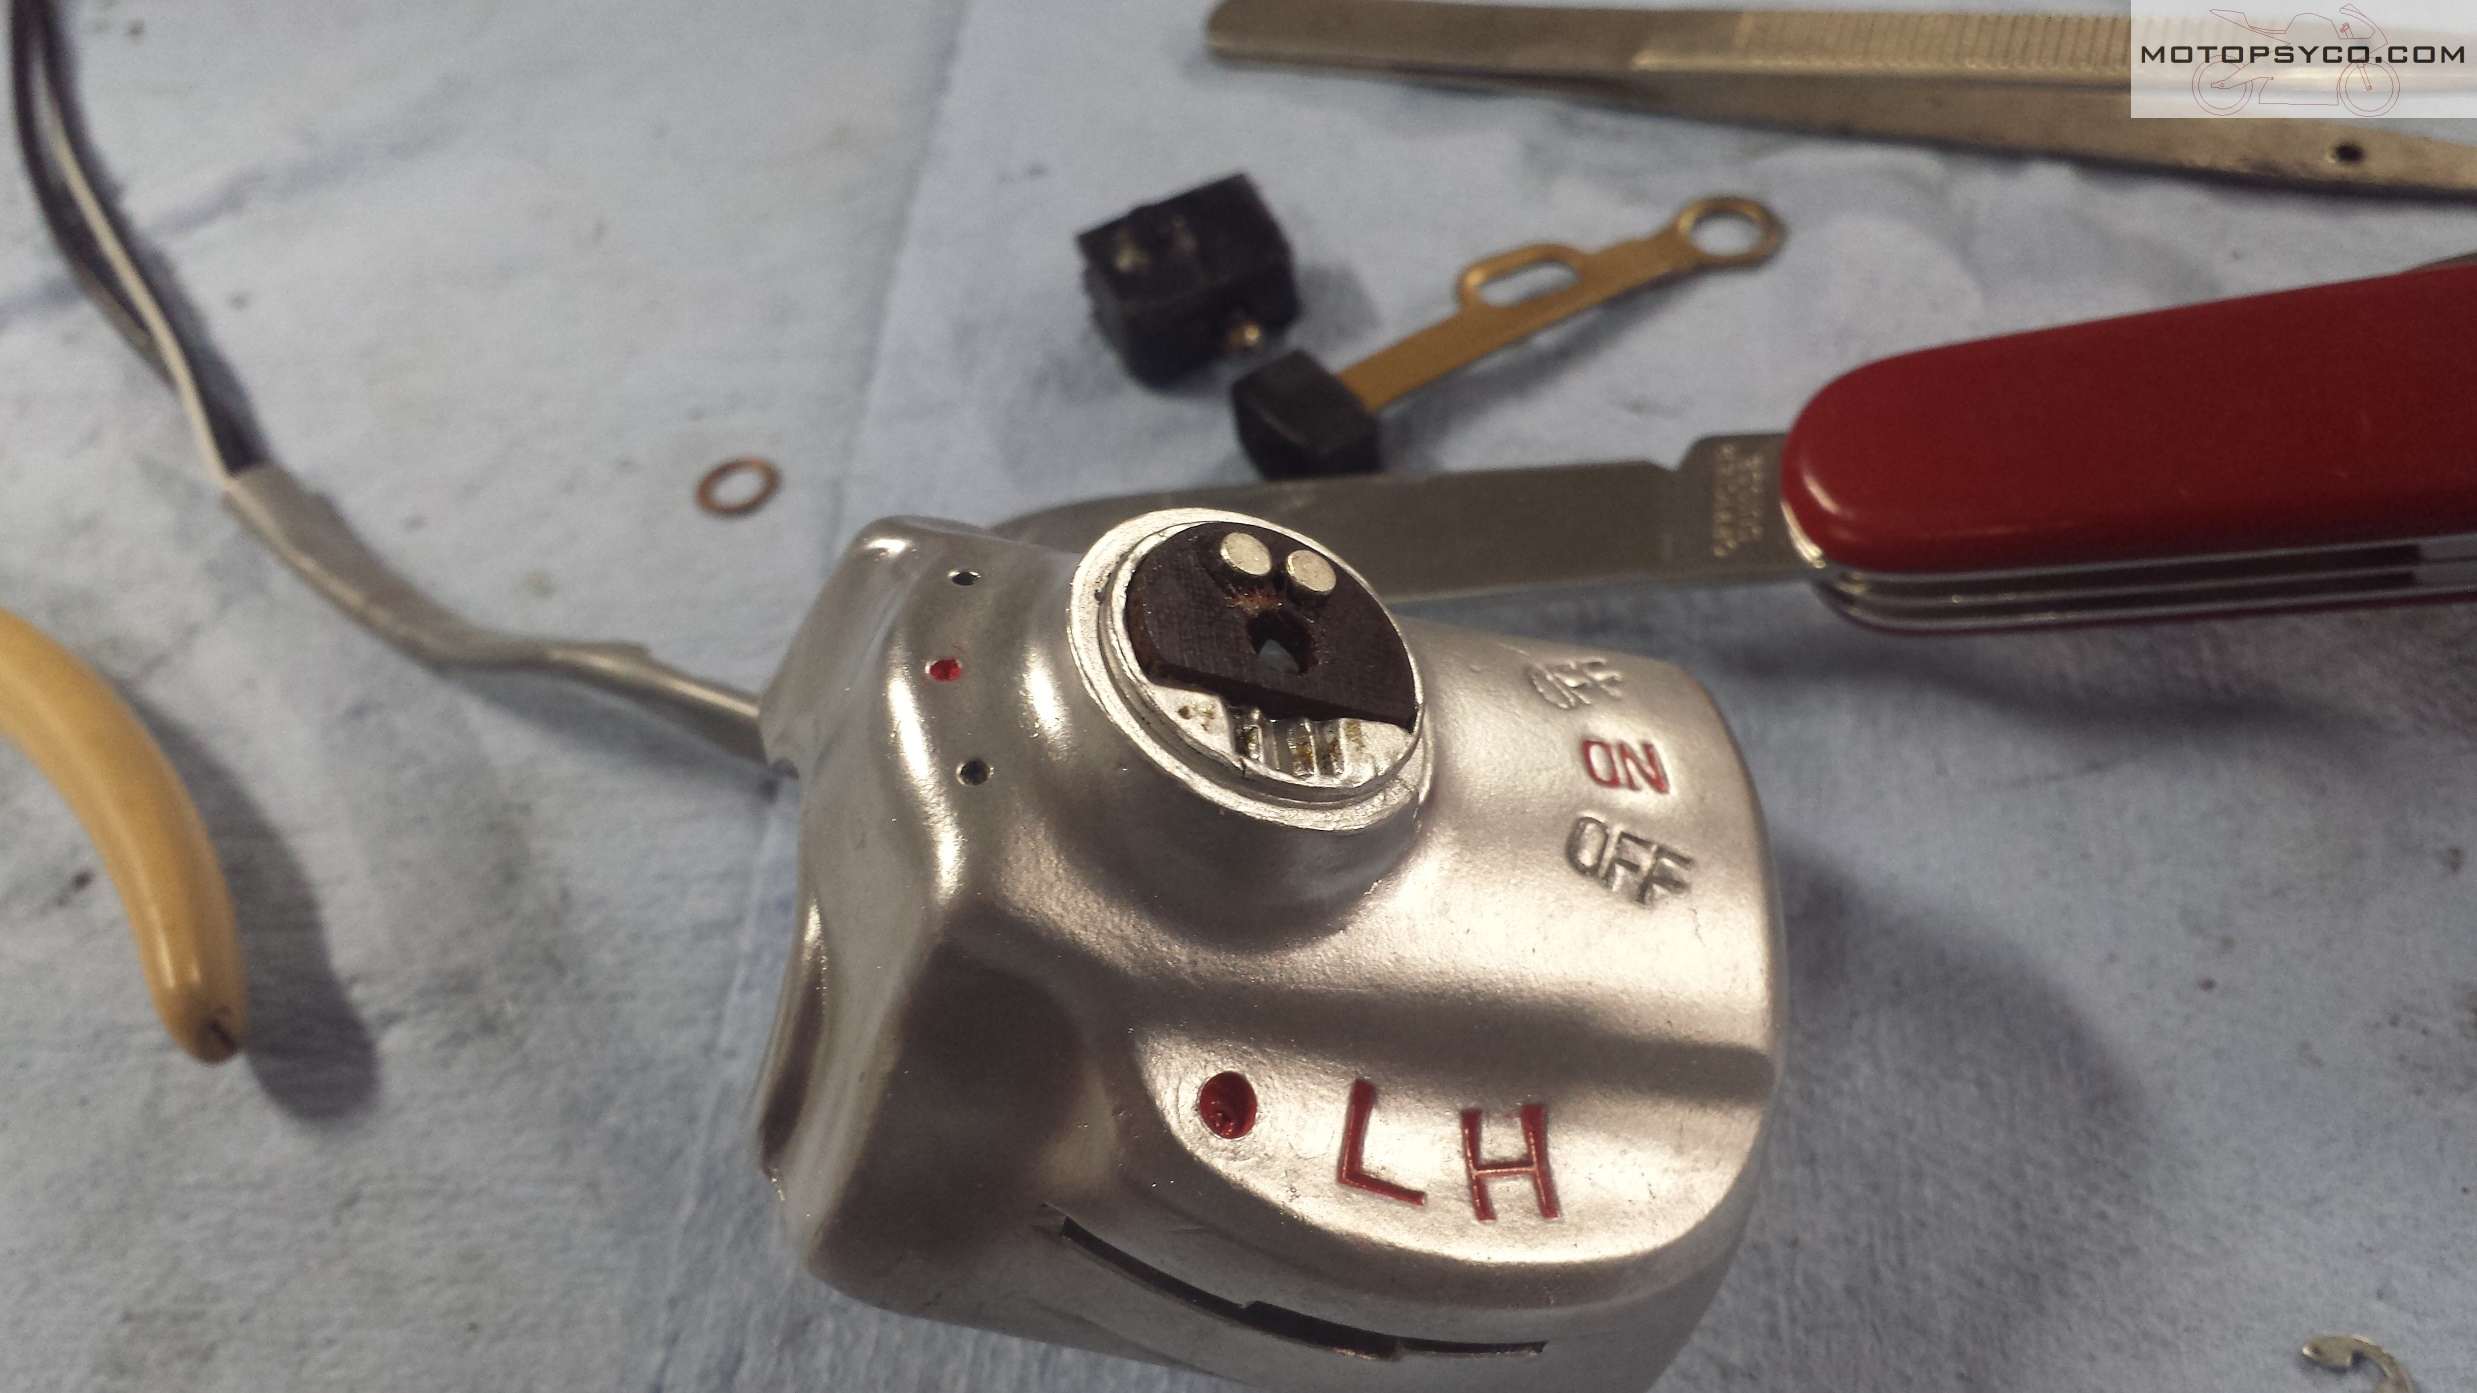
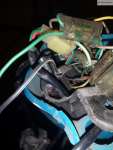
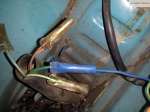
Once I pulled the e-clip off of it, the engine stop switch
and its wiring could be removed through the top of the housing. Go ahead and
completely remove all of the switches, wiring, & clips from the housings.
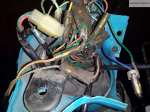
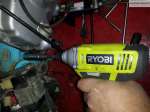
If you have any damaged threads or broken screws in the housings now is the time to deal with that. In this case the throttle stop screw was snapped off in the bottom of the housing so I had to drill it out and tap the hole. You’ll notice that there are magnetic rubber vise jaws attached to my vise. These are an absolute necessity for doing this kind of work without damaging your parts.
With your switch housings stripped bare & all repairs made now is the time to clean them up. I use my vapor blasting machine because no other method I know can restore a factory new appearance to old aluminum the way vapor blasting can. If you don’t have access to a vapor blaster you can send your parts to me & I can do it for you. See my vapor blasting page for rates & information.
After everything was repaired & cleaned I painted the stop switch with a little spray paint and used an oil paint marker to paint the red lettering & dots as you can see below. For more information on this technique click this link to see my previous post on emblem & badge refurbishment.
Now that everything is clean & new looking gather up the
supplies & tools you need for reassembly. At the least you’ll need some new
wire sleeves, tape to match the sleeve, JIS screwdriver, a small pick, some
grease, the finest point needlenose pliers that you own, some tweezers, a sharp
knife and a multimeter. Depending on what you are working on you may need more
or less tools than these, for example if you have a broken wire connection a
soldering iron might be needed.
Carefully reinstall all of the parts in reverse of the order
you removed them. Take time to tape & sleeve wires as needed because you
might not be able to after everything is back together. Be sure to watch out
for flying springs etc. during reassembly, it’d be a shame to get this far and
lose a critical part. Work slowly & stay as relaxed as possible when doing
delicate work like this.
The final step of handlebar switch restoration is to test
the function of all of the switches using either the ohmmeter or diode tester
function of your multimeter. If
everything is working great you are ready to reinstall the switch gear to your
motorcycle. If not, it’s a whole lot easier to fix it now than after putting
the bike back together. This is
especially if the wires are going to be inside of the handlebars.
I hope that you’ve enjoyed following along while I completed
my handlebar switch restoration. The next post that I have planned will show
how I measured & drilled the holes in my handlebars for the wiring to pass
through.
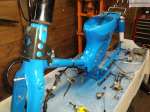
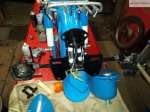
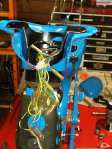
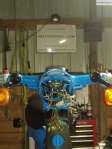
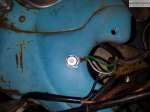
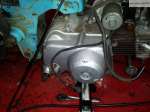
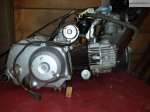
As mentioned before I had a request from a reader to share more of my pictures from my 1982 Honda Passport restoration So here are some of the repainting & reassembly process. Due to all the rust and pitting I sandblasted the entire exterior of the frame and them primed it with a green zinc primer. and refinished a few other small parts by various means. For the cadmium plated parts click here to see how I handled those. Although not shown here I had the front rack redone with chrome powder coat.
<1982 Honda Passport
<1982 Honda Passport
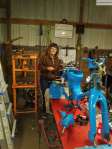
I have the best assistant!
tap bolt holes after painting for better grounds
clean up your bolts too
kept this sticker as is for shits & giggles
At the time I was taking these pictures the rear rack was simply sprayed with that horrible looking chrome paint so that I could get the bike back together and ride it, recently I removed it and had it powder coated chrome also. The wheels are still all original with just the best cleaning that I could give them at the time. Since then they have been thoroughly vapor blasted and clear coated, followed by a careful painting of the hubs & spokes. Some of the pictures may seem kind of random but hopefully this will be of some use to someone out there trying to restore their own 1982 Honda Passport. Sorry but there are no engine rebuild pictures because there was no need for an engine rebuild, just the usual carburetor & crankcase screen cleaning, followed by a valve adjustment and a new spark plug. In the near future I’ll do a post on the trials & tribulations of dealing with aftermarket body parts for these things.
Cody, this post about my 1982 Honda Passport Restoration is for you!
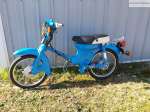
I finally have my 1982 Honda Passport Restoration 99.5% done, at this point all I’m waiting on is some custom made decals. Apparently the tank decals for the blue paint version were a one year only special and are completely unobtainable as N.O.S or reproduction parts. Yes I’ve checked every supplier in North America, Europe, and the Orient, so unless you actually have a set in your hand to sell don’t bother telling me to check with so and so because I already have.
A reader named Cody picked up one of these in boxes and is putting it back together and asked me to share the detailed pile of photos that I took as I disassembled & reassembled this bike so I’m going to put them into a gallery here for all to see. In addition to gleaning all of the free information available on the internet you really should get a service manual. I use the Clymer Repair Manual M310-13 because it covers every small Honda with the horizontal engines up to 1999. Keep in mind as you peruse this gallery of wiring harness connector images that this is a factory 12 volt model with electric start. 1981 and older models are all 6 volt and may be different .
This is all of the pictures that I took as I was tearing it down, I frequently referred to these and the service manual as I was re assembling this little Honda Passport Restoration project. I’ll post the pictures I took when putting it all back together next.
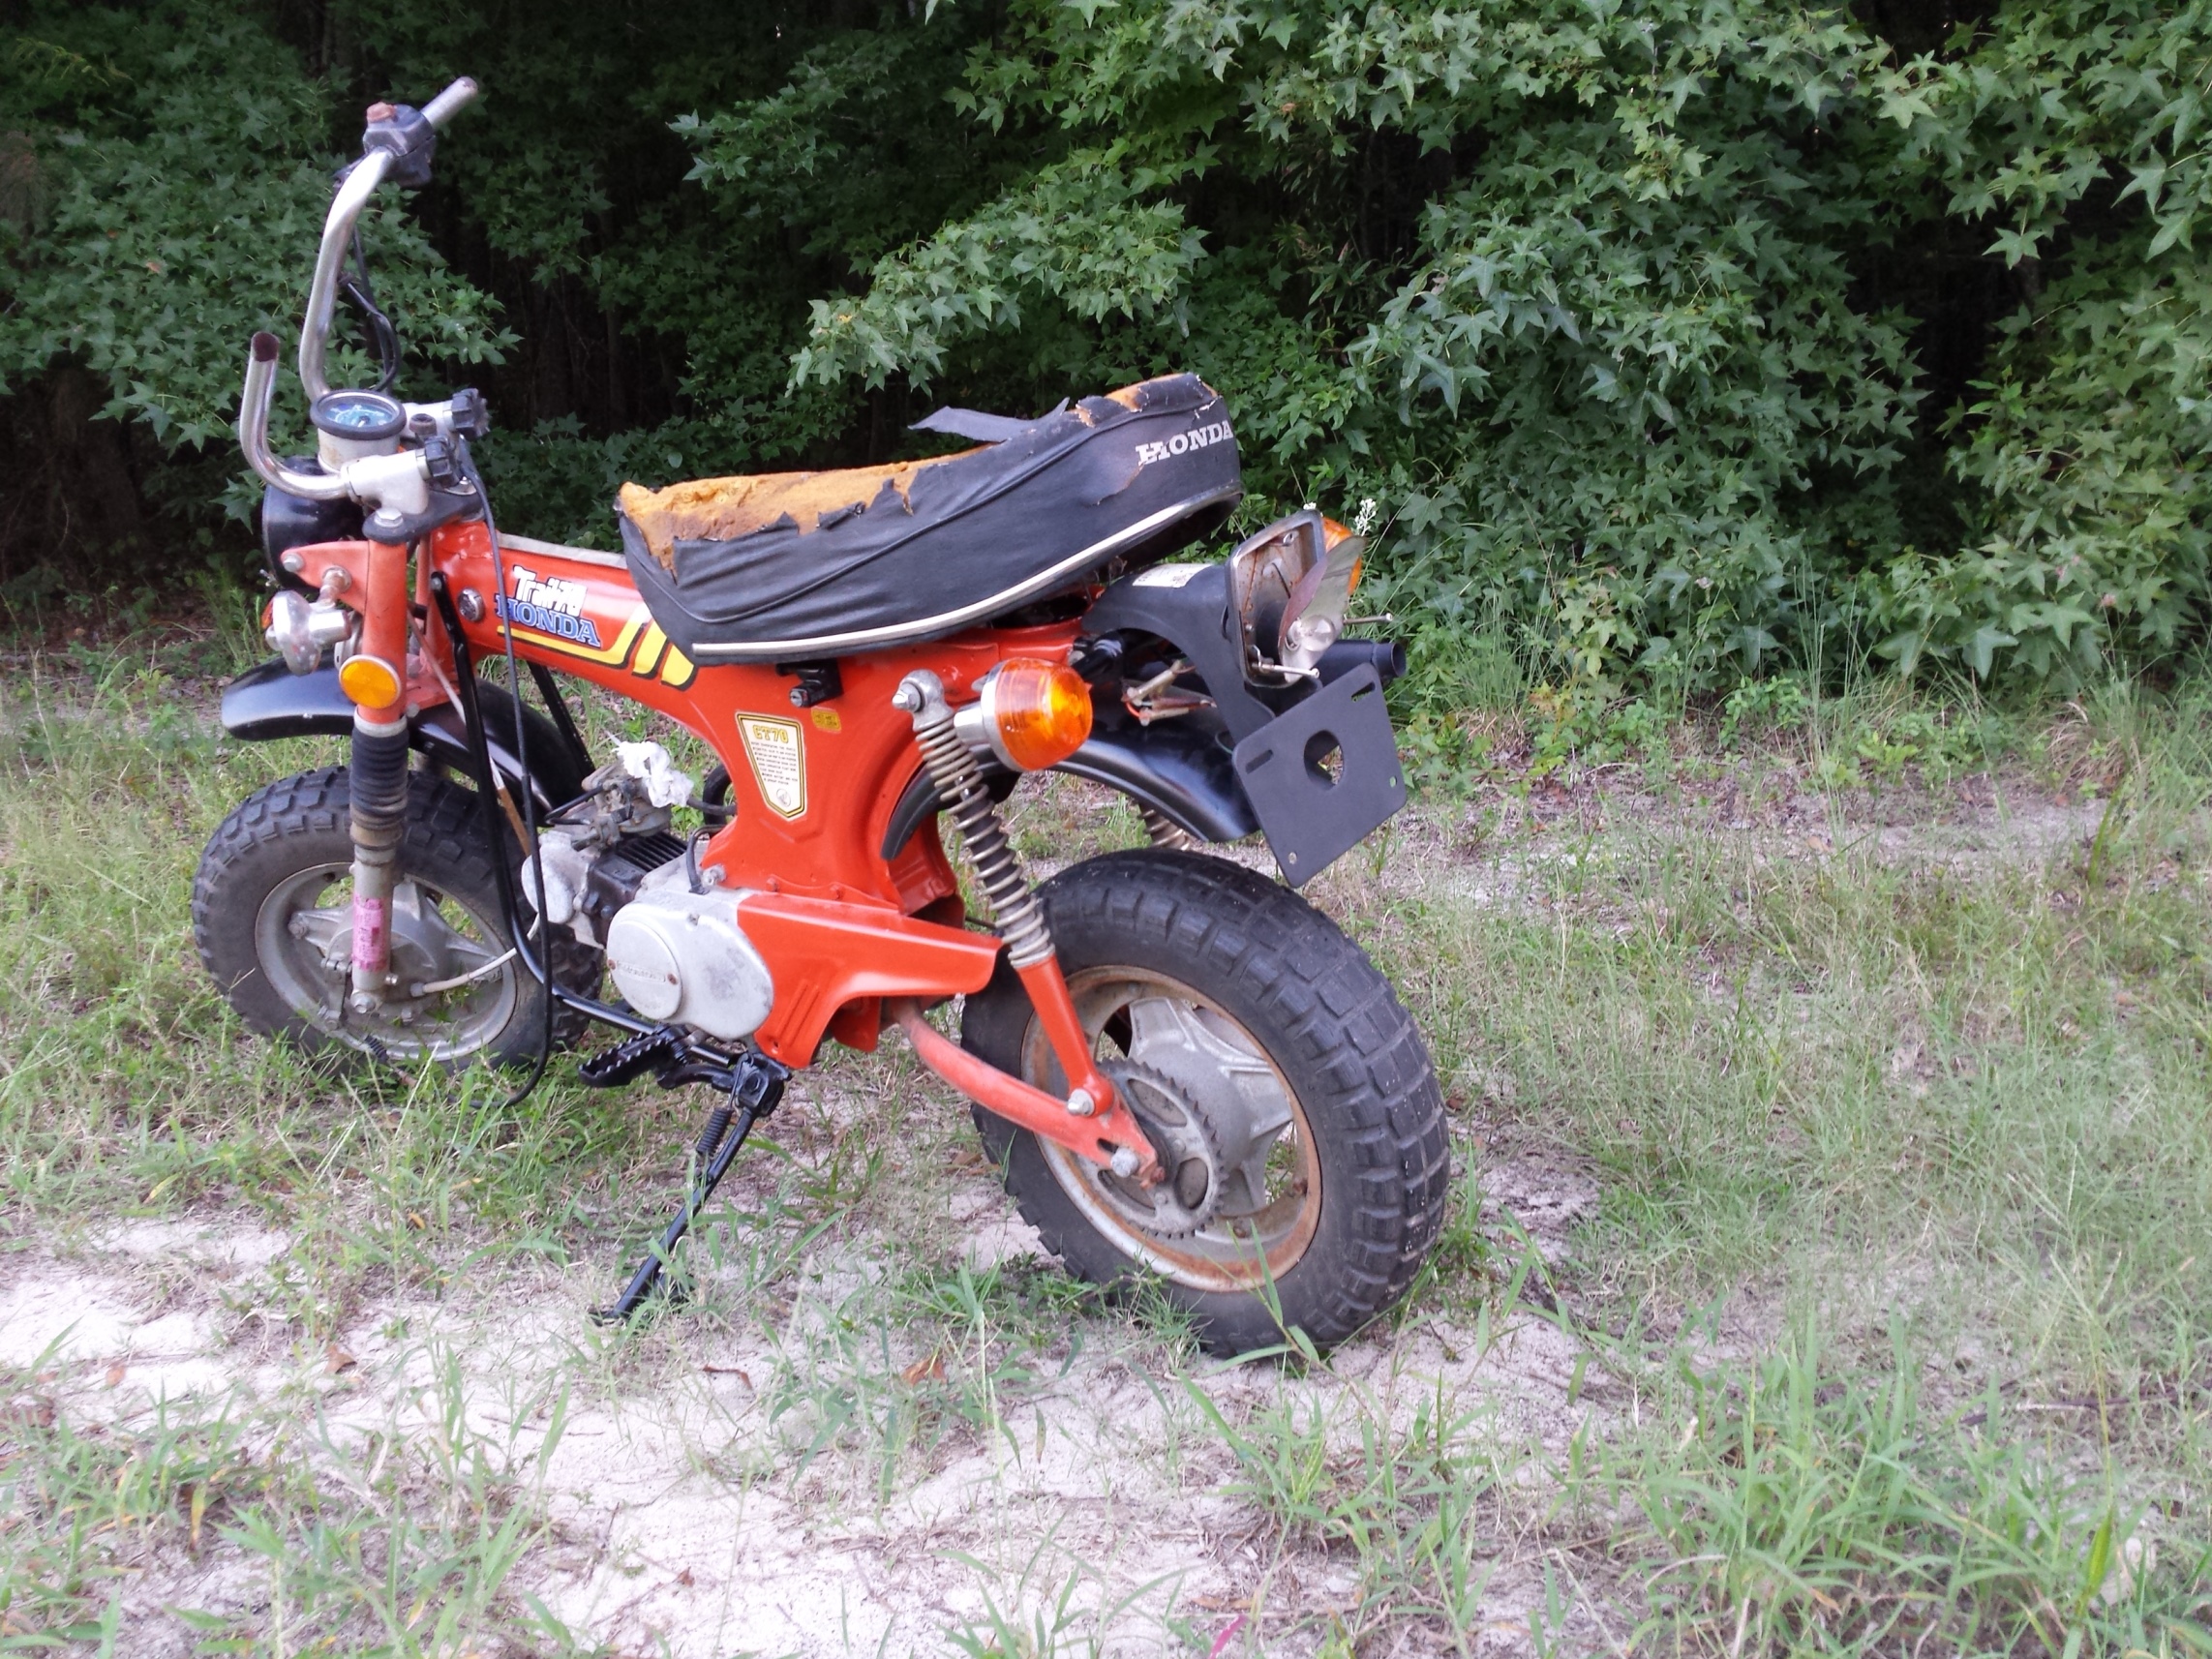
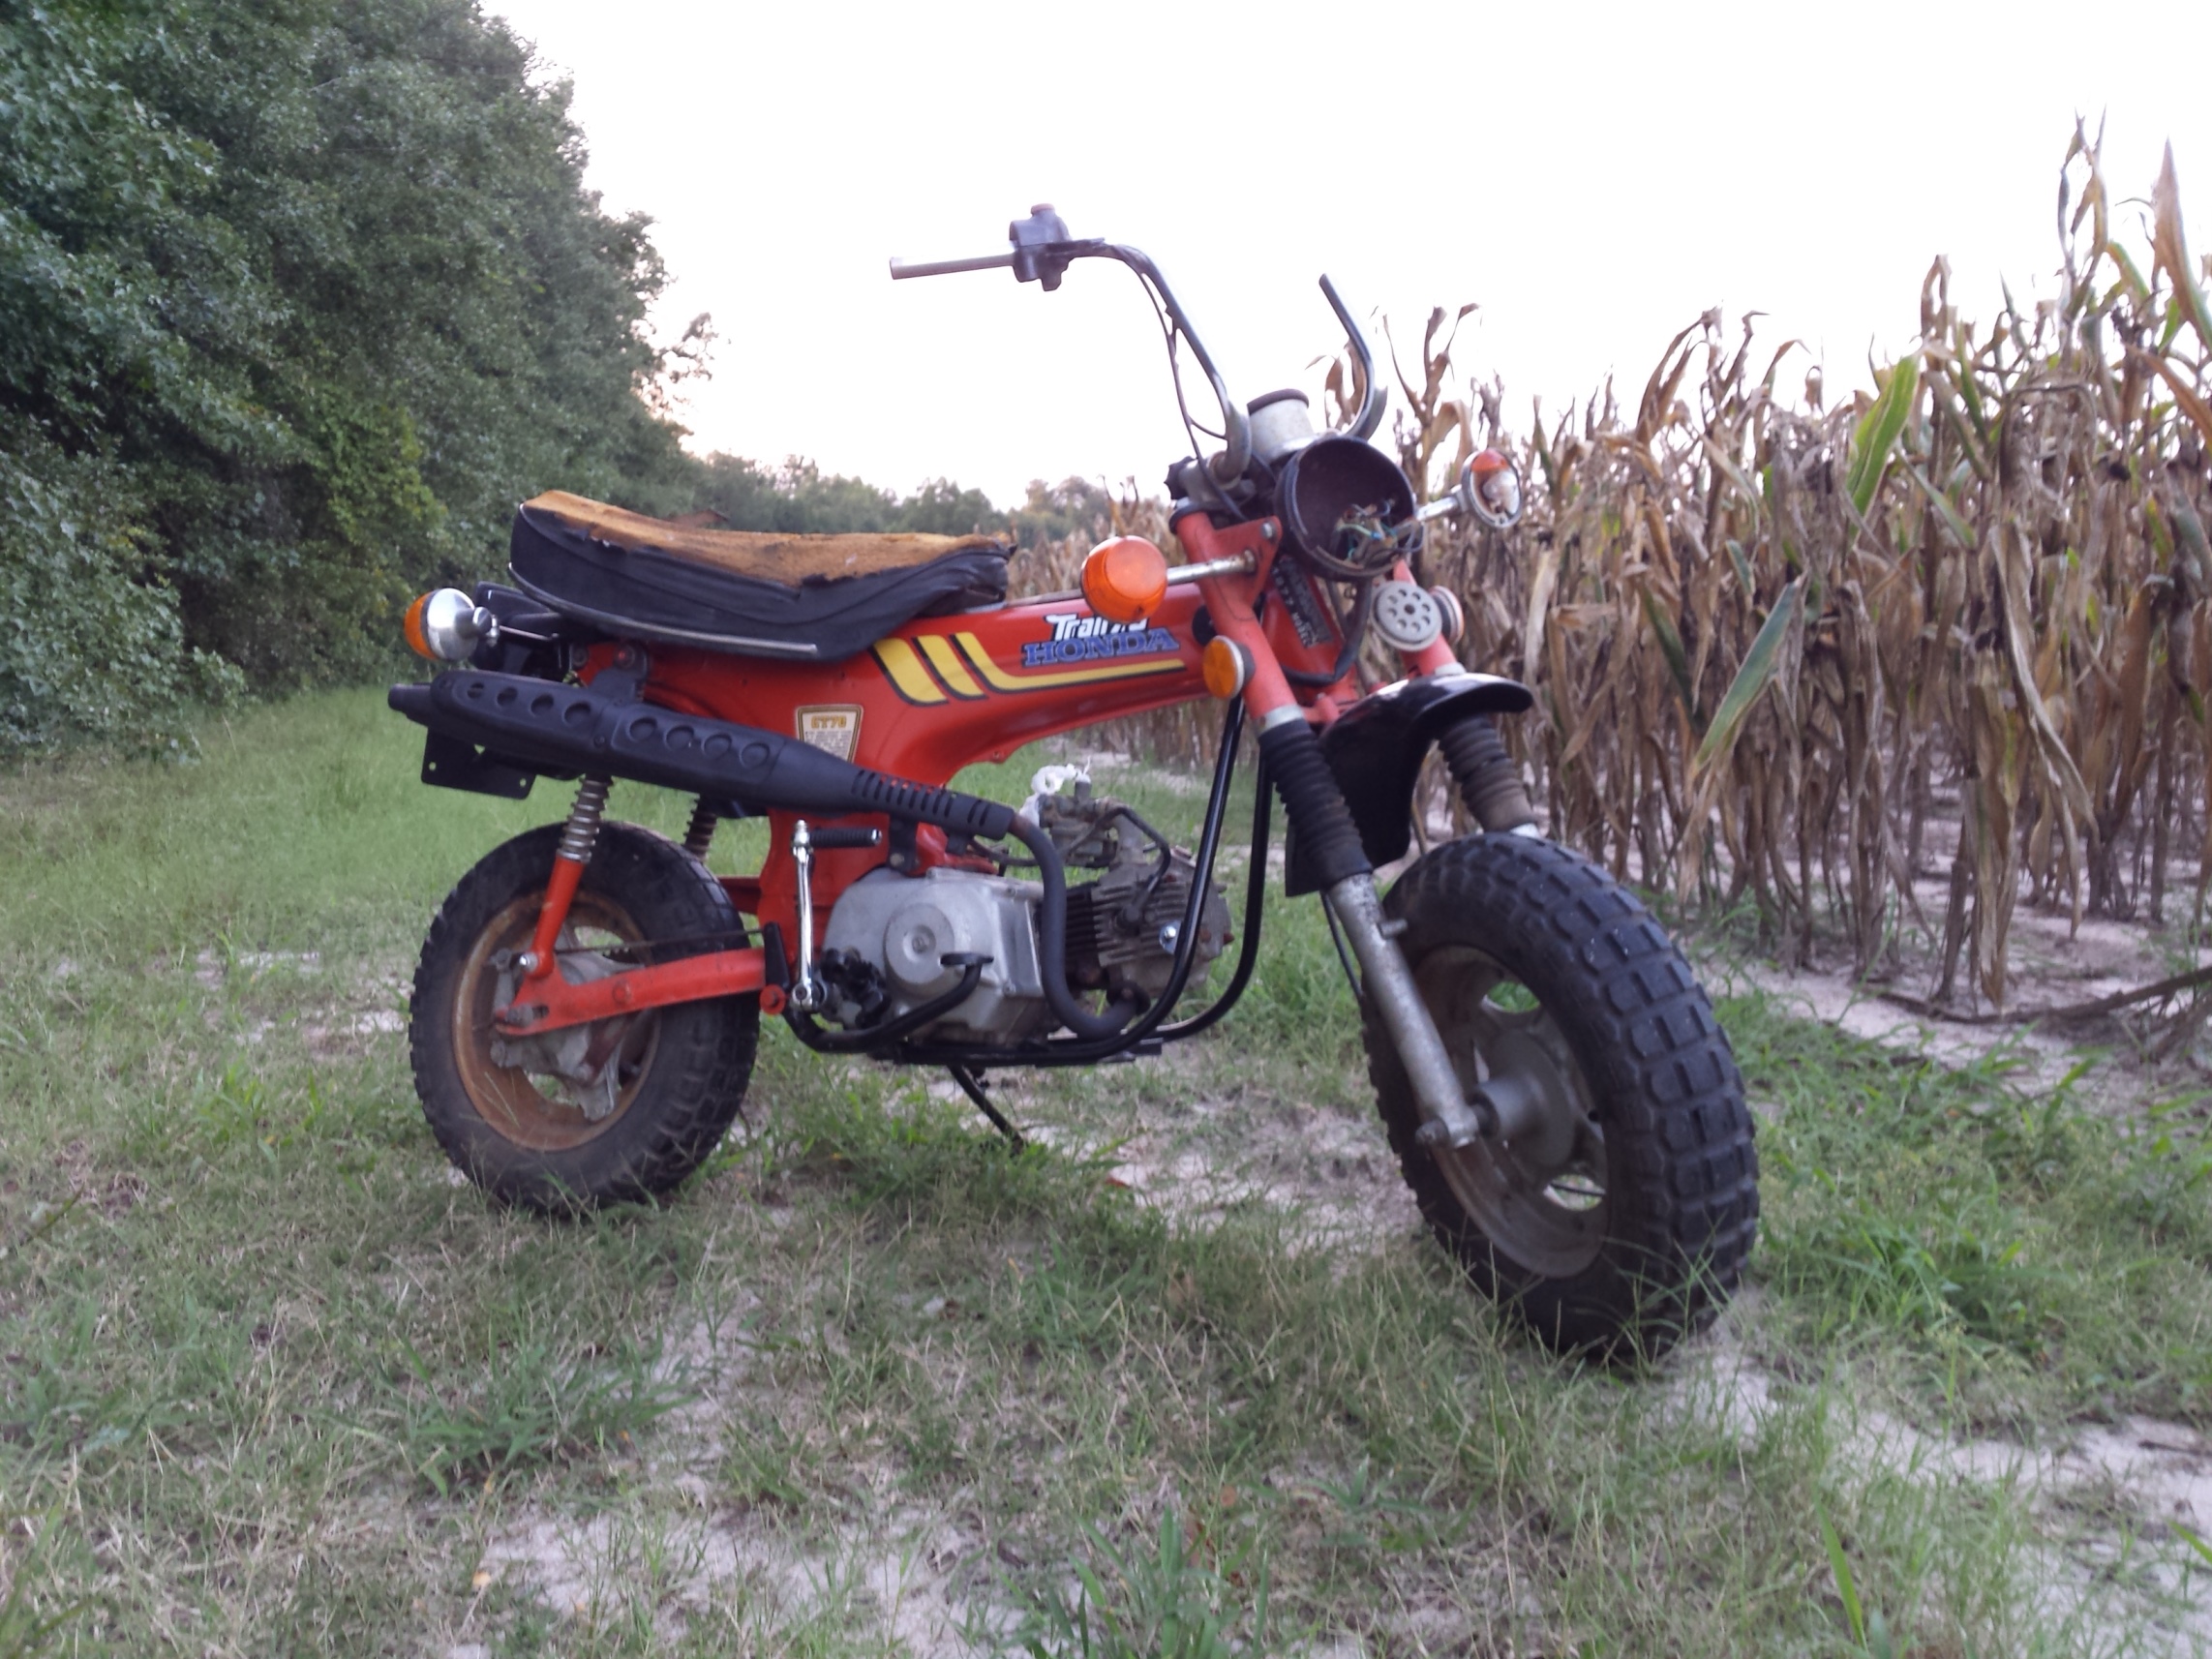
That’s why I’m calling it a puppy. I’ve been searching for a Honda ST or CT motorcycle to restore for a while now, so when this 77 Honda CT70 popped up on the local Craigslist for a bargain basement price I jumped on it asap. When searching for gems like this, if you find one going (relatively) cheap you should be prepared to go see it immediately.
It’s got a lot of neglect but still it should be a very cool project. The person I bought it from had started to restore it somewhat with some fresh Chevy engine orange spray paint & new decals. Then they painted all of the chrome black. Unfortunately, they could never get the engine to run so they just gave up & lost interest in it.
I have no clue how the left handlebar was broken, but that’s okay, it will replaced with a N.O.S. or authentic reproduction. The plans for this one are very simple, it will be as close to a concours quality restoration as I can get it. There will be some internal upgrades to the engine, steering, & suspension but the outward appearance will be 100% box stock.
Mini Trails Rule!
Thankfully there’s still plenty of new old stock parts left out there along with tons of reproduction stuff
If you drink a beer or two, and squint at this picture long enough you can almost see a restored 77 Honda CT70. Can’t wait to get started on it.
Peace Y’all
BTW, if you don’t have time money & space for the real thing, why don’t you try one of these little gems below.
Well, I got it finished! The entire build is chronicled from start to finish in the 23 minute video. I started out with a little bit of step by step video, but quickly realized that with the time constraints, that would not be possible so I morphed it into an overview video. The last few minutes is me taking it out of the yard and down the road for it’s first test ride.
It ran and handled fairly well, but the stock suspension is too light for a big guy like me to do any serious off-roading with it. I just have a couple more little things to tweak, and then if I can’t find reasonably priced suspension upgrades, I’ll probably put it up for sale after I return from the VJMC National Rally.
Hello everyone & welcome back! It’s time for just a few more pictures of this little project TS185 I’ve been working on but first let me talk to you a little about the banner ad above. I have applied for one of these grants and I only have until June the 19th 2015 to reach the required number of votes. If you have a couple of minutes of time & a Facebook account could you please go vote for me? It would be greatly appreciated.
As mentioned last time this motorcycle is more of a restomod than a proper TS185 restoration and one of the things that I have always wanted to try out was putting a set of BMX bicycle platform pedals on a motorcycle. So out came the reciprocating saw some scrap metal & the welder.
As I mentioned the last time I was changing the color so here it is just a plain old machinery gray from a Duplicolor spray can.
Added the shop logo to the number plates
Of course there were some new parts installed, missing bolts replaced & a few leaks stopped while I was at it.
Some hard lessons were learned such as don’t install the clutch release arm upside down and that cheap enamel clear really doesn’t spray well in 100 degree temperatures. There are still a few odds & ends that need doing but it is mostly done. Now I just need the upholstery shop to have my seat ready this week! I also think the new pedals are fantastic looking but I do have to be careful when using the kick starter.
One advantage to doing all of this was having time to sort out the various electrical bodges that previous owners had inflicted on this poor machine. It now has a fully functional key switch, brake & taillights, a battery, fuse etc. Of course it still starts easily & runs like a top!
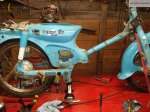
This old motorcycle is finally making it’s way back into one piece. It has new tires, wheel bearings, brake shoes, tapered roller steering head bearings, and anything else it needed to make it safe & reliable. Surprisingly enough even after 34 years of being beaten like a government mule, the engine & transmission are still in very good functional condition. This makes my life a lot easier.
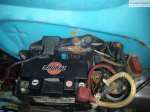
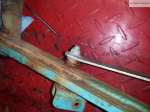
Lets start with a quick look at the rear wheel & brake linkage before I started.
Yes I know I need my head examined for riding it for so long in this condition, but it was still a lot of fun!
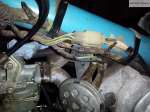
I had to replace the brake rod, adjuster and the lever. The rod & its hardware are new old stock parts, & the lever was simply adapted from a junked motorcycle.
This is the exact same brake pedal that is shown in the picture above. I straightened it with a torch, hammer & anvil, before cutting the end off of an old dirtbike footpeg and welding it to the brake lever.
I had to buy an entire extra used carburetor to get a couple of parts that are no longer available separately, and I’m still waiting on my throttle cable to arrive from England so for now the carb is just sitting here until I receive the cable.
While waiting on some other parts it was time to start some body work.
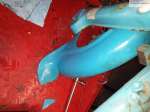
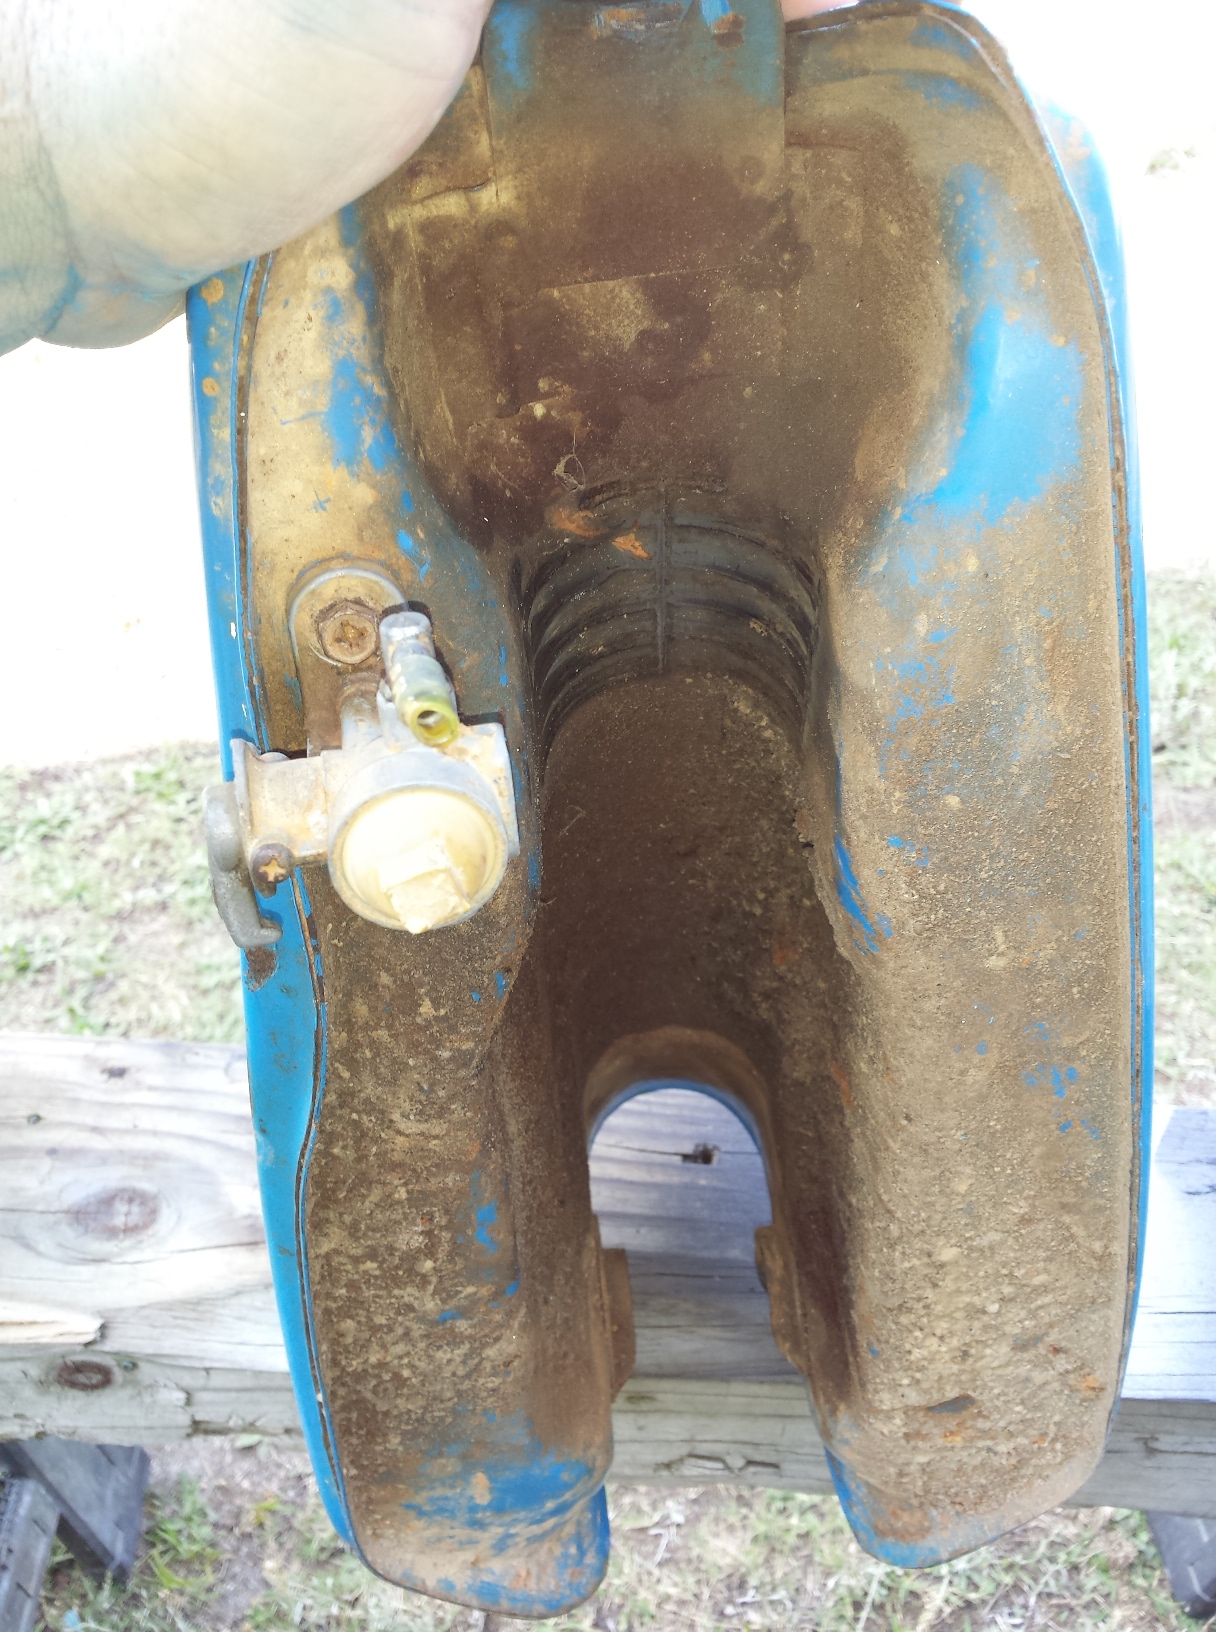
Have I mentioned anywhere in this series just how incredibly nasty this thing was? Check out the red clay mud dried to the bottom of this tank.
The side covers are decent used parts that only required minor work to repair, but the tank itself is actually requiring a fair amount of body work to make look good.
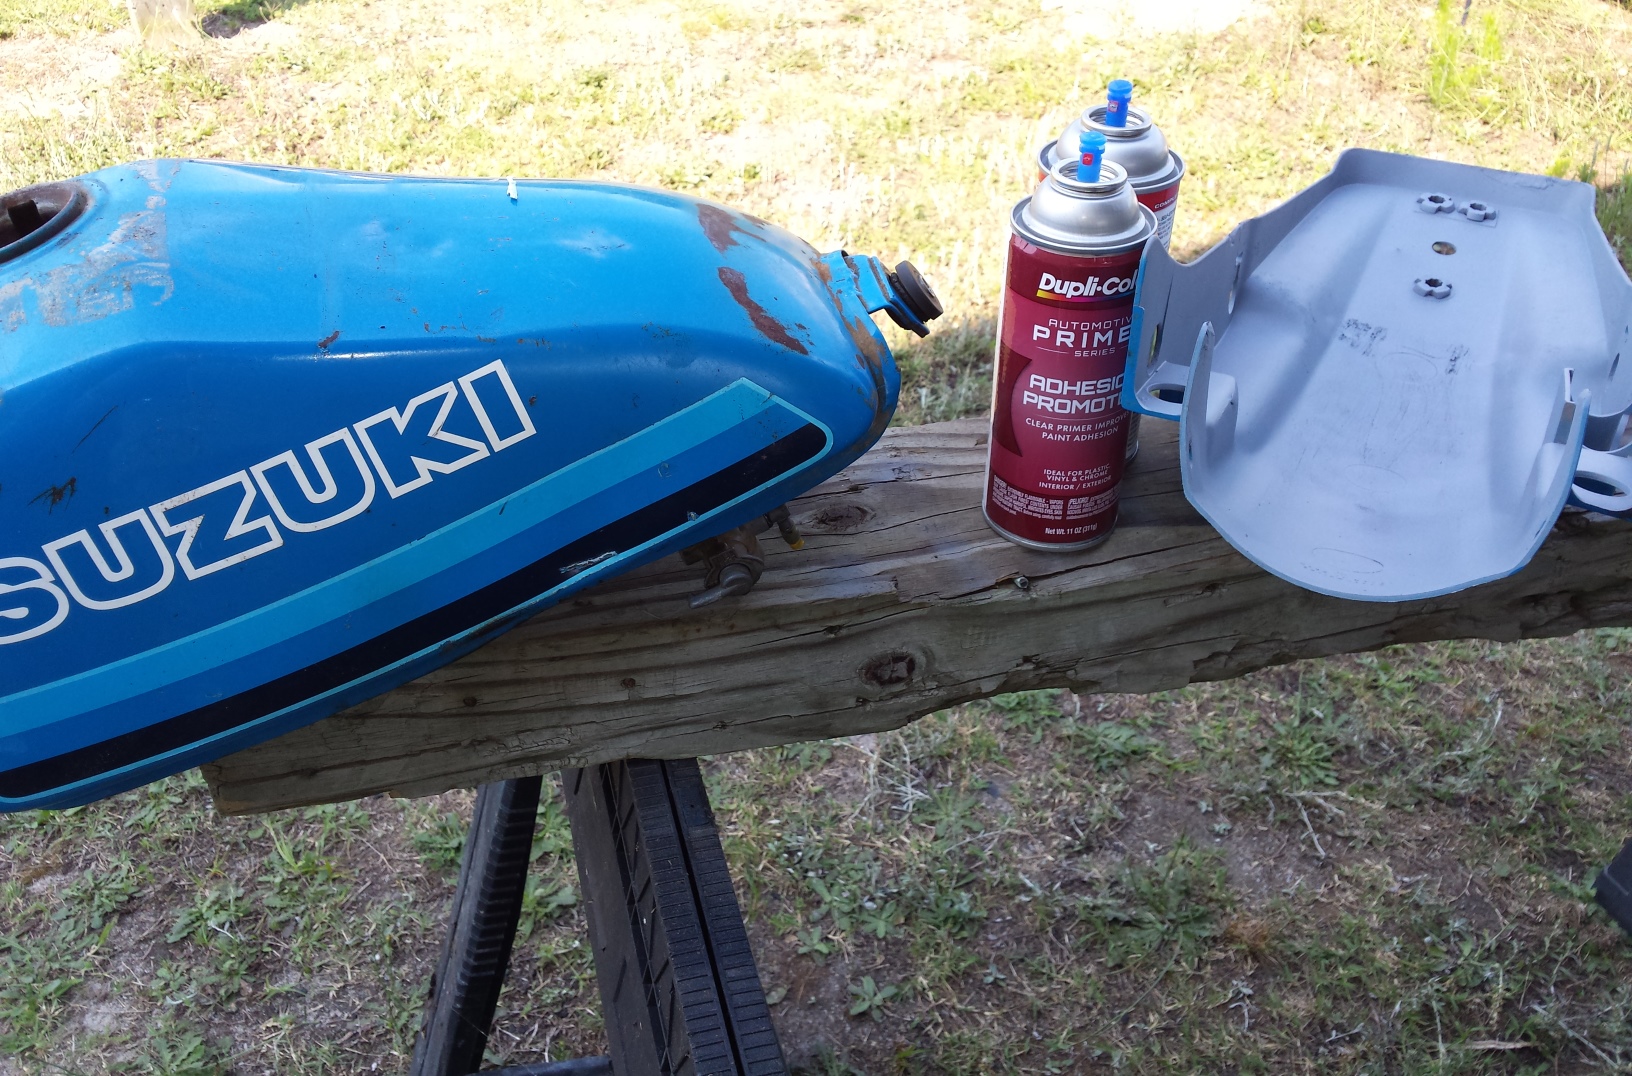
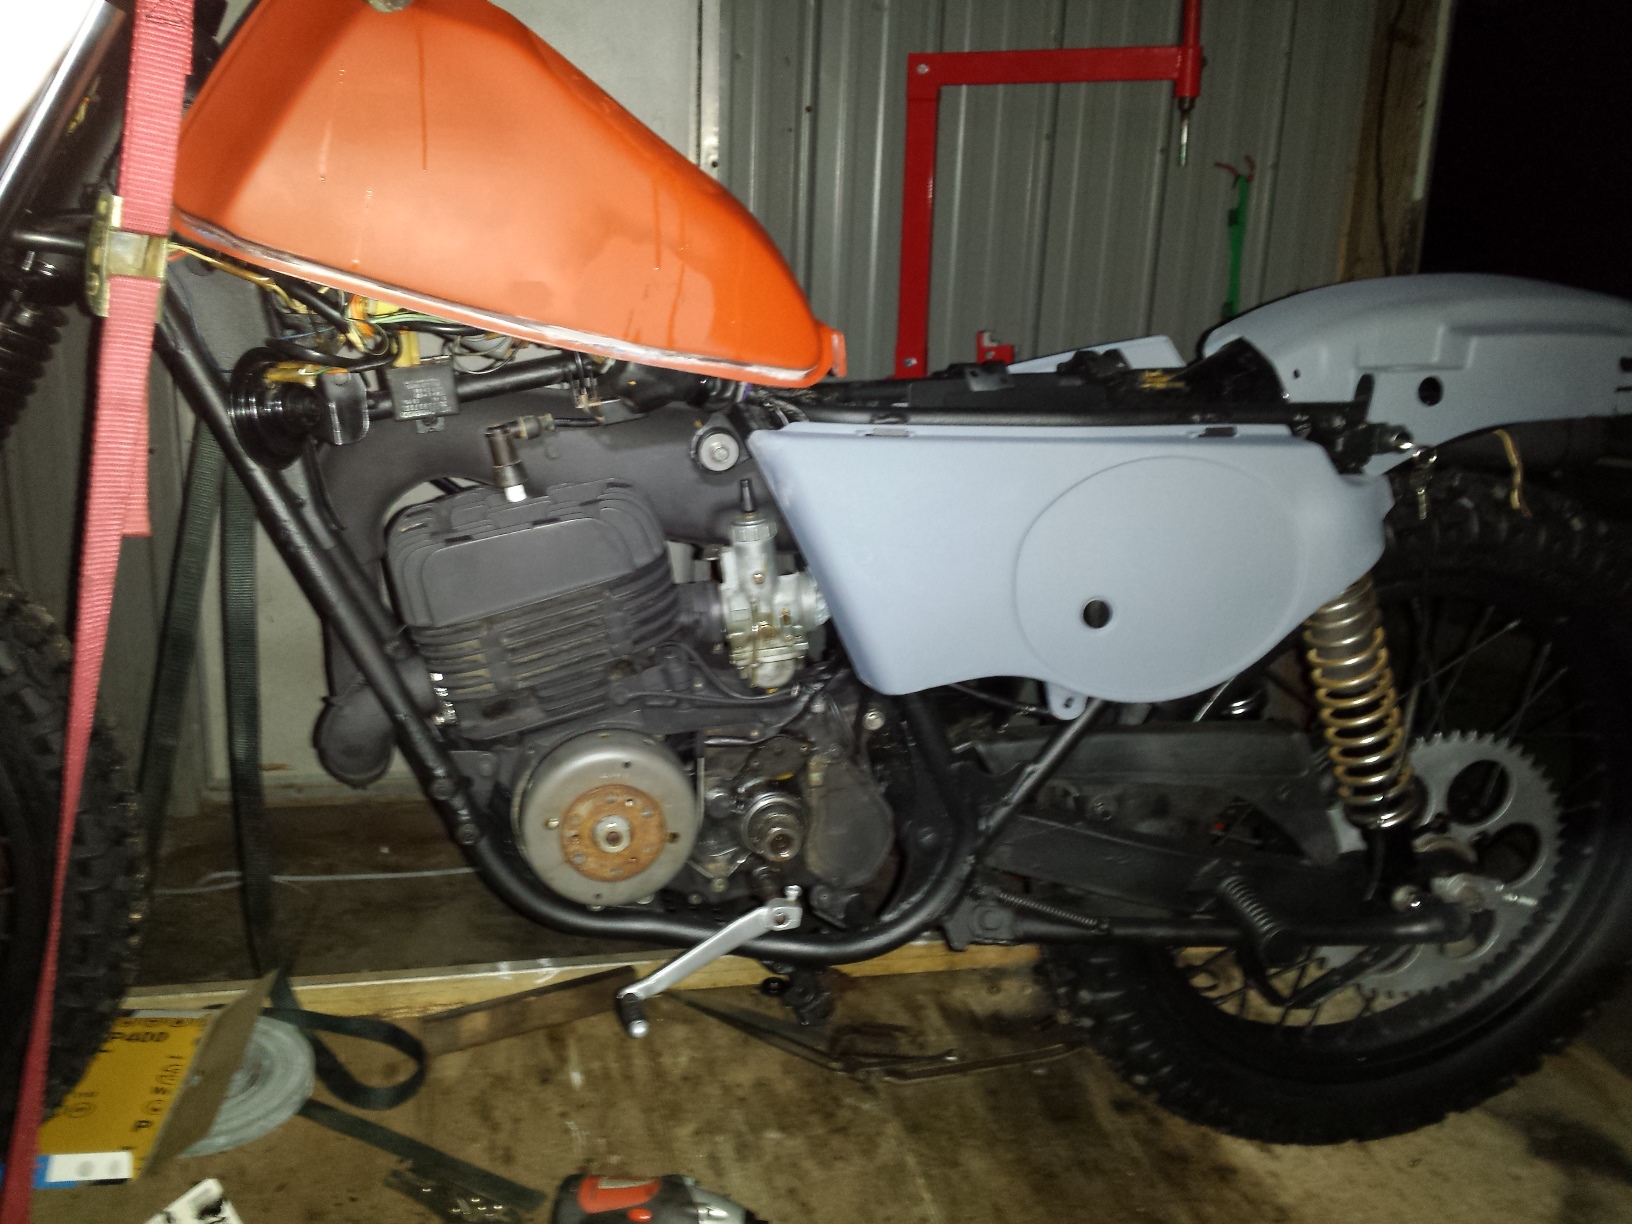
It’s so tempting just to throw money at a project like this, and to a certain extent I have done that with the mechanical & safety bits. Since this is the 2o Foot Restoration the appearance of the machine will be handled in the most economical way possible, with a few cans of Duplicolor spray enamel. So many of the parts needed for this bike are either unavailable or priced beyond what I feel like spending on it, this is actually going to be a resto-mod more than a restoration. Plus the blue has to go, I want a tougher more subdued look for my trail bike so the color will be changed. No I’m not going to tell you yet, keep checking back (or just scroll down & subscribe) o see what it winds up looking like!
Well it was another rough week at that thankless job that I go to everyday of every week to keep the lights on around here until my web store catches fire & I can sell enough products to retire from everything but blogging. (go buy something, click on any ad here and help a brother break free!) My original plan for the evening was to go climb up in a tree & try to shoot Bambi’s father, but it was starting to rain kinda hard when I got home so instead I decided to grab a beer, & carry the forks that the mail carrier just dropped off from the house out to the shop and maybe work on fitting them to the CM400 bobber that I’ve been tinkering with for the last few months, but decided that the shop really needed cleaning up a little before proceeding so I pushed some of the junk bikes out into the rain for more room.
What’s under your desk?
Then I moved the two portable work benches back to the sides of the shop to clear up floor space. Then I decided to go ahead & start soaking my new to me,old pile of junk Suzuki with penetrating oil so that it would come apart easier when I go to replace the rear inner tube and the 40 or 50 other parts it probably needs to be trail worthy. Of course it’s a lot easier for an old fart to work on a motorcycle if he doesn’t have to bend over so I grab the old furniture truck ramp from the yard and dig through my lumber pile for a couple of timbers to set it up on since my motorcycle lift table is loaded down with my CB360T restoration project. For some reason as I was digging through my scrap lumber pile, a misshapen piece of wood that was left over from some long forgotten construction project jumped into my hand and said, “hey look at me, wouldn’t I make the perfect Plains Indian gunstock war club?” But by this time I had enough of a buzz going that there was no way you could ever get me near the bandsaw so I threw it back on the pile, got the timbers and headed back inside to prop up the dirtbike. Hopefully I can find it again when I am sober & have some time on my hands as it would go so well with my Hawken, powder horn etc. In fact it would look really sweet hanging up next to my black powder shotgun if I ever finish building it….
Can you see the pattern here? It’s a serious disease that afflicts middle age men. ADPD Attention Deficit Project Disorder It’s incredibly dangerous, because the problem just gets bigger & bigger. You become an addict scanning Ebay & Craigslist for just the right item at the right bargain basement price. The problem is that you don’t need it, there are a dozen projects, plus your honey-do list ahead of it, and just as sure as hell your boss will start demanding extra overtime on top of what you already work, so your discretionary income is temporarily enlarged while your time to enjoy it is diminished, this leads to more shopping & less doing until your place starts to look like a salvage yard, and your neighbors start calling you Fred G. Of course this is also the time when everything in your house will break down too, so you have to take care of those things first. Sure you could pay someone to fix the plumbing or the light fixture but for two things 1; the guy you call can’t do it any better than you can & maybe not even as good. 2; You just scored the deal of the century on another old piece of shit motorcycle, gun, car, jeep, boat, plane or what ever your addiction is & spent the money already.
At any rate I got the TS185 up on the ramp so I can work on it, but since the weather is supposed to be nearly perfect for riding tomorrow, it was time to give the old CB650 a good going over & adjust the chain so I stopped to do that instead. Hey you got to look after your main squeeze if you want her to look after you! Well it’s been fun blogging with a little buzz going on, but right now I need to find a carb kit & battery for the 1969 CJ5 under the carport & figure out when I’m going to get time to fix my tractor so I can keep the wood lot clean & get the garden ready for next year. Then maybe I can relax, watch a little television while checking out the crack-list on my tablet.
Existential Motorcycles is a different kind of motorcycle website. It’s run by a gentleman in N.C. whom repairs & restores motorcycles for a living. While it is in some ways an advertisement for his business, when you read it you realize that it is so much more. Articles like The Wretched Truth About Restorations, and So You Think You Want a Custom Cafe Racer, tell a kind of truth you may never read anywhere else.
I really like the following quote from his home page.
“My shop is in an over-sized two-car garage attached to my home. My work is a calling, in the theological sense of the word. Ethical and moral questions arise every day – they are hard, sharp, unambiguous and unavoidable.”
There are people who can work on motorcycles, and there are people who can write really well. When we find someone who can do both we should pay attention.