
Tag Archives: motorcycle

The SR500 Chronicles 1
Late in 2023 I picked up an old 1978 Yamaha SR500 and started working on it and chronicling the build over at my YouTube channel. As a result of such extensive posting on YouTube this blog has been kind of ignored to remedy that situation I’m going to start sharing my videos here. I hope you enjoy them as I have a lot of videos in this series to share with you. In addition to the SR500 I have a 1983 Honda Interceptor 750 that I bought cheap and got running extremely well also. As of today 8/7/24, the Interceptor is as done as I want it but work on the Yamaha continues.
Share this:

An American StreetCub
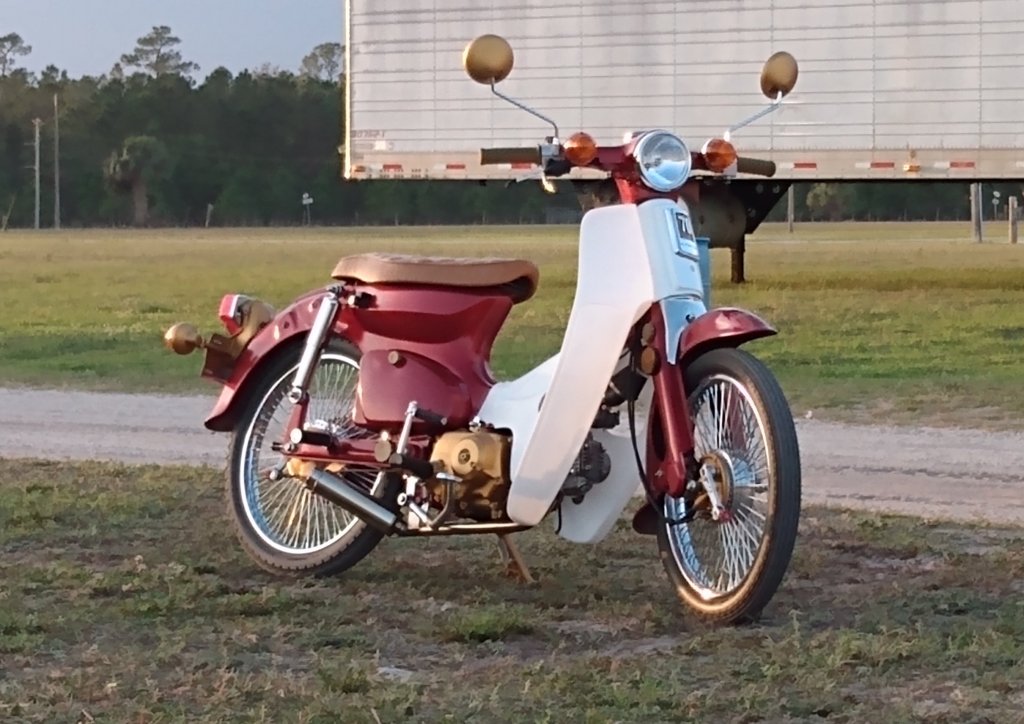
A few years ago I found and restored a 1982 Honda Passport C70 to absolutely pristine condition. The only modification that I did was to change the paint color from Honda’s original Angel Blue to a slightly darker Ford blue. Everything else on it was pure stock and it was an excellent runner. I sold it to pay for my new shop air compressor and while I’m glad to have the compressor I sure did miss that C70 and kept my eyes open for another fixer upper.
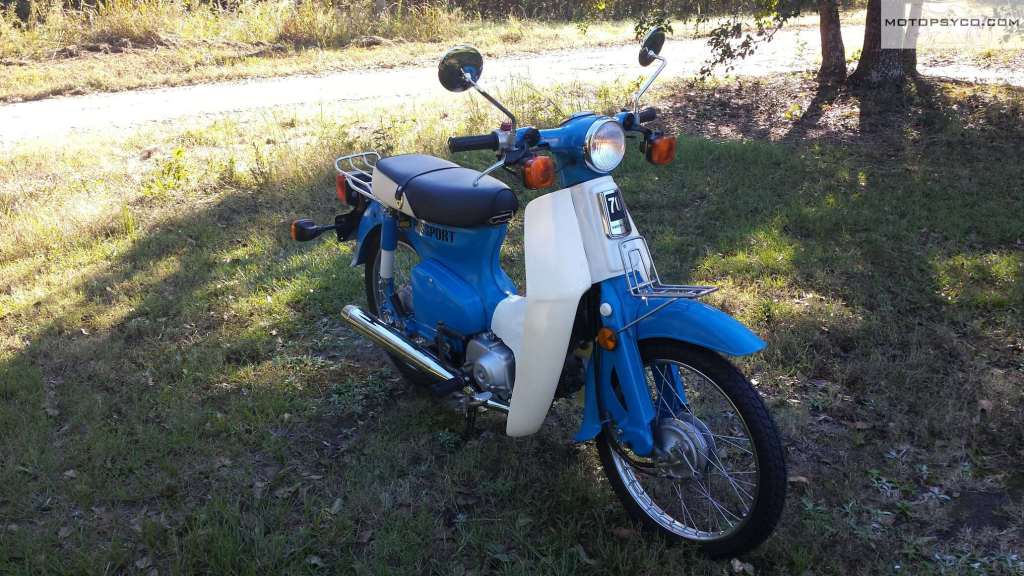
Two or three years ago I caught up with an old friend that I hadn’t seen in a while, like myself he’s a collector of projects and things to tinker with, and he just happened to have this Monza Red 1982 Honda Passport sitting in a shed behind his garage. It was crusty & neglected but the engine turned freely. As a bonus it even came with a title!
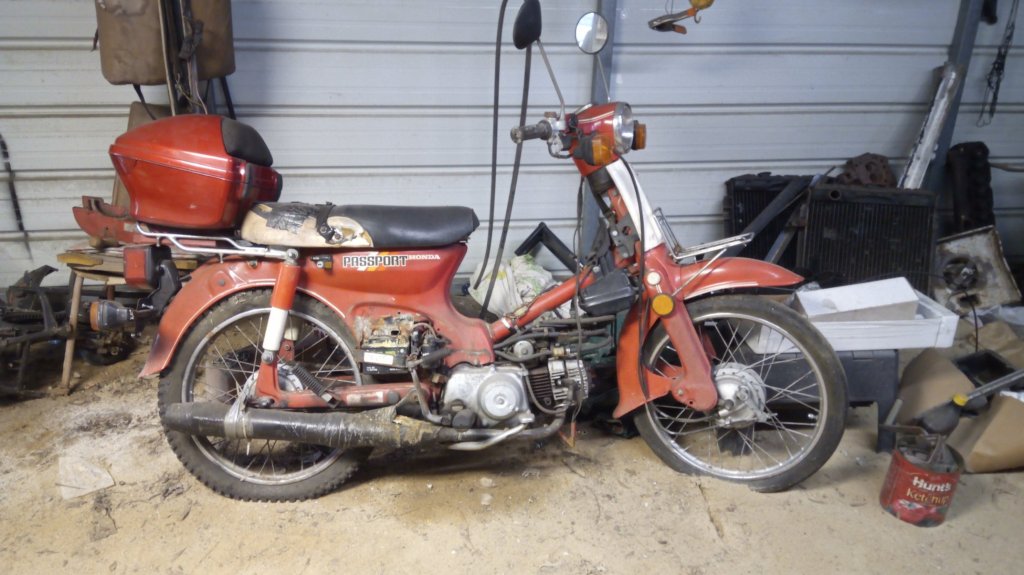
After cleaning the carburetor it would fire up as long as it was sprayed with carb cleaner or starter fluid. It had just enough compression to run and ride but not enough to start without some help. Time to get to work!
I started following several Southeast Asian Instagram accounts promoting the streetcub customs based on the Honda Cub, Super Cub, and Trail models. There’s so much creative craziness going on over there that it was inspiring. The vast majority of custom Cubs in the Orient are stripped down choppers with bobbed rear fenders and minimal bodywork, but there a lot of really cool looking full fender bikes too.
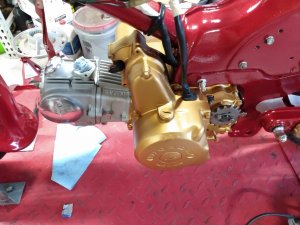
First step was to rebuild the tired old engine, this particular Passport had been abused as a moped for years before my buddy got it and then it spent a few years sitting in his shed. Restoration was not even contemplated for this old machine and I did want more power than could be had from the standard engine so I rebuilt it using an 88cc kit sold by CMS in the Netherlands.
Then using an AFR gauge I re-jetted the carburetor for maximum performance and installed a stainless steel exhaust from a Japanese company called Wirus Win. It has a great look and sound with decent performance now.

Some Paint & Bodywork
It was going to be red, there was never any doubt about that. There was also never any doubt that it would not be the original Monza Red because it just didn’t have the pop that I was looking for. The color chosen was Firethorn Red Pearl from TCP Global in a single stage urethane. I consider myself to be a decent painter but am especially proud of how this bike came out. This paint job has never been buffed and the shine you see here is how it laid down straight out of the gun.
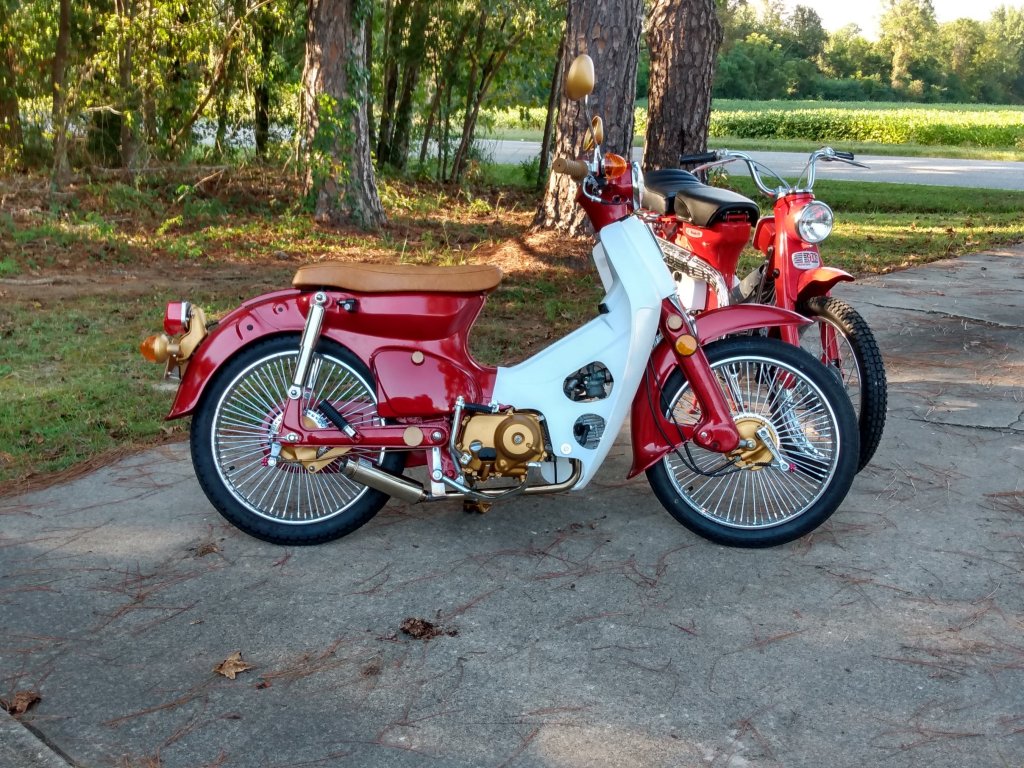
The leg shield is a new aftermarket piece, for it I mixed a couple of spoons full of dry pearls into some urethane clear for a nice sheen to enhance the plain white plastic. A couple of different shades of rattle can gold highlight the engine & a few small parts here and there.
Bought a Few Cool Pieces
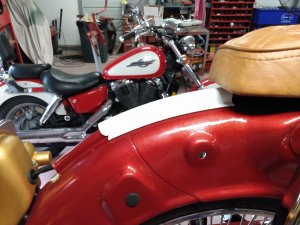
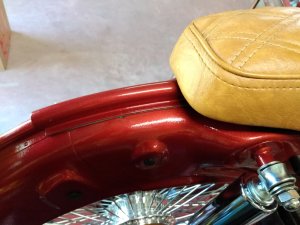
After the paint there are 2 other parts that really stand out; one is the brown custom seat, two are the chrome plated 72 spoke wire wheels, both of which came from Ebay. I also wanted to get rid the dangly eighties style turn signals and have old looking round signal lights mounted on the handlebars not hanging under them on the ungainly looking original stalks which are clearly an afterthought. The rear license plate & light bracket were modified to accept turnsignals from an old CB350 I had laying around. The taillight itself was new but I have no idea what it fit. I did have to 3d print a new gasket for it using a flexible material known as TPU95.
3D Printer Go Brrrr!
At the time I had just gotten my first 3d printer and I really wanted to do some cool stuff for this little motorcycle so I did. Almost all of the black rubber grommets and frame plugs were replaced with parts printed from black TPU95.
All of the fork, frame and swing arm plugs are of my own design and were printed out, painted & installed during final assembly. Side cover knobs were made to match the style of the frame plugs and look really cool. These little frame and for plugs on the original bikes don’t match each other and this has always irked me as it gave them the appearance of having been designed piecemeal.
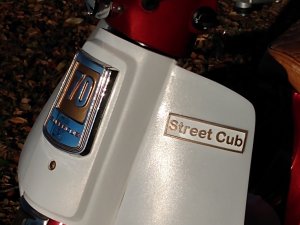
The “StreetCub” emblem on the front was designed and printed in white plastic with the lettering & outlines highlighted with gold paint.
More Than The Sum of Its Parts
Overall the final product makes me very happy and last year it scored a first place trophy as best motorcycle at a large car truck & bike show that happens every year in my home town of Hartsville S.C. I’m convinced that a lot of people don’t realize just how heavily customized it is, but it always attracts favorable attention everywhere I take it even at Daytona Beach Bike Week.

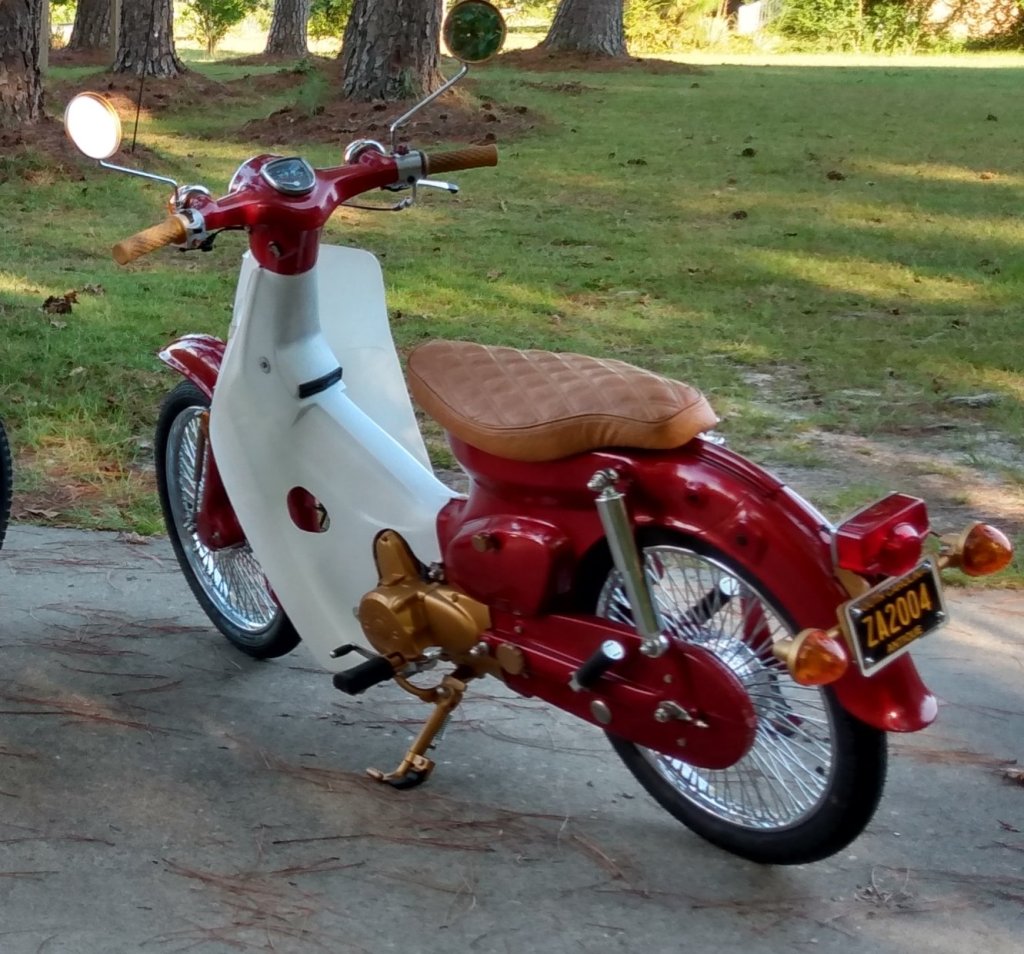
One of the big selling points of Honda Cubs & Passport was their practicality and relative comfort. I think I killed that with that with this one. The seats not very well padded, the exhaust is nearly loud enough to be annoying and without the luggage rack you can’t haul your groceries home with it. But it’s got miles of style and when we were eating supper at the campground in Florida I looked up and saw the evening sun sparkling on the gold pearl in the paint and the chrome gleaming I knew that I had done the right thing with this little 1982 Honda Passport. Originally its form followed its function but now form is the most important thing and its main function is looking good.
Share this:

Royal Enfield Modifications (So Far)
My Interceptor 650 is up to about 2600 miles so far. It has been a very pleasant and reliable motorcycle so far. The only trouble that I’ve encountered has been a nail in the rear tire. Fortunately I was close to home and called my wife to pick me up so I could go get the truck and retrieve it. None of my Royal Enfield modifications have been necessary except maybe for the handlebar change.
The very first modification that was done was adding 1” handlebar risers. On the day I left the dealership after paying my deposit I ordered a case of oil filters and a set of handlebar risers. When I sat on an INT650 for the first time in the showroom I immediately felt like it would be more comfortable if the grips were just a little bit higher. When I did the first service it was just a matter of removing the bolts holding the handlebar mounts, placing the risers under the mounts and bolting everything up with the new extended bolts that came with the risers. Not a difficult mod to do if you feel you’d like to have your handlebars a bit higher.
One actual complaint that I had about this motorcycle was engine vibration felt through the handlebars. The bars are solidly mounted and the grips are made of a thin hard rubber so I purchased a set of Grip Puppies. These are foam rubber sleeves that slip over your existing grips and add a bit more cushion and they did help a good bit. Before you bother to comment that I’m holding on to tightly, I’m not. Over 20 years of mechanics followed by 20 years of CAD work have left me with arthritic hands that are a lot more sensitive than they should be. It is what it is.
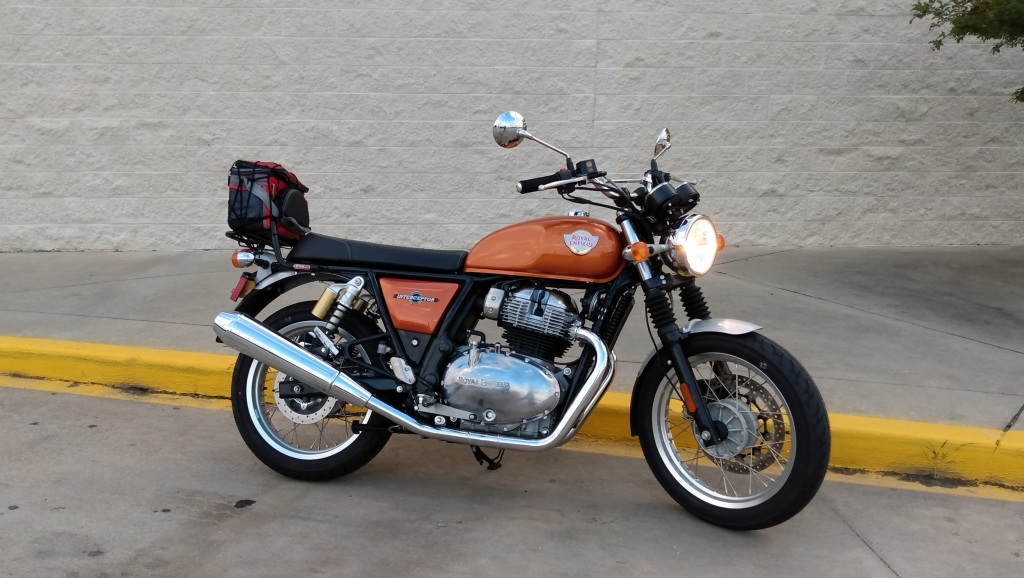
Since I use this bike for commuting and weekend 2 up riding I installed a passenger backrest and luggage rack combo. While this has been a useful and practical modification it doesn’t help the looks of the Interceptor at all and if I were ever to seriously enter it in a show it would be temporarily removed. The rack is handy to have but it’s ugly.
From the crate U.S. models of the Interceptor 650 have black sidecovers with logos designating them as the INT650 to avoid copyright conflict with another motorcycle company. I’ve joined a couple of Royal Enfield Facebook groups and one of the members offered to sell me a set of painted sidecovers with the Interceptor 650 logo for a good price so I got them. Having the sidecovers color matched to the fuel tank is a huge improvement to the appearance of an already fantastic looking bike.
Vibration in the bars was still a problem for me and although the factory cross braced handlebars looked really cool they were not shaped right for me and put my wrists at an angle that wasn’t as comfortable as they could be so I decided it was time to get serious about the handlebars so I bought a set of Emgo flat track style bars. Now the Emgo bars are way too wide to use with the stock cables and wiring so I trimmed 3.75 inches from both ends so that they would fit. Afterwards I put some metal plugs inside them, filled the ends up with lead weights and then capped them off with plastic end plugs.
Next up was a set of ODI Mushroom Grips. The ODI grips are quite a bit shorter than the stockers so I had to shorten the throttle sleeve to fit right. Once that was done it was time to locate the switch gear and drill the holes for the locating pins that keep them from rotating around the handlebars.
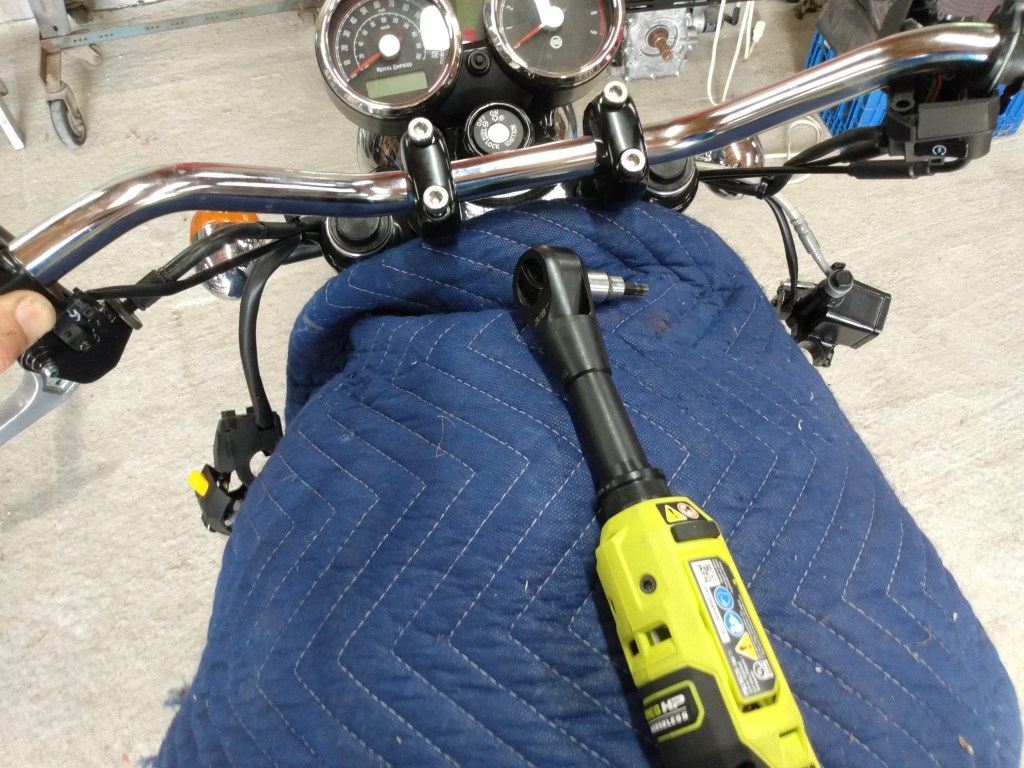
Now when I reach for the grips my hands are in a more natural position and between the weights and the soft thick rubber grips handlebar vibration is greatly reduced. I’m actually thinking of removing the risers now & I like the looks too!

In the beginning I had zero plans to perform any “performance” modifications to this 650 but just couldn’t help myself. I looked at the aftermarket air filters and airbox lids and decided they just were not worth the cost so I fired up my 3d printer and made myself an airbox lid with the large opening that works with the stock air filter. Does it actually help anything? Without a dynamometer to test it who knows, I kind of doubt it makes much difference.


For the exhaust side I went with a set of Powerage stainless mufflers, the reason I chose these muffler is that after watching a bunch of online videos and reading reports in various forums is that they seemed to be the quietest of the aftermarket exhaust if you leave the baffles in. They come with a wrench that allows you to remove the db killer baffle if you want it to be extra loud. With the baffle in you get a nice snarl that’s a little louder than stock. I put a video on my Youtube channel giving you a sound quality and volume comparison.

Am I done with this motorcycle? No, for someone like me a motorcycle like this is a blank canvas, a never ending rolling art project that even if it were to seem finished I reserve the right to start all over and take it in a completely different direction just because I can’t help myself. The next thing to try will be a color matched quarter fairing from MK Designs, the pictures I’ve seen look really good and the price isn’t bad either.
In addition to the Royal Enfield modifications I’ve got a few other projects to tell you about, some of them are in progress but a couple of them are already completed I just haven’t had time to write about them. Until next time, happy wrenching.
Share this:

Project 333 Epilogue
I apologize that I never came back with the finished pictures of Project 333 but I did finish it along with a few others that I haven’t told you about yet. When I started that project at the beginning of 2020 I had no clue of the craziness that was about to overtake the world in a few months.

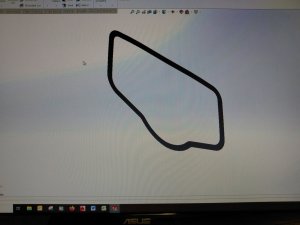
Let me say if you need an engine for a custom project like this I highly recommend the Piranha 140cc engines they’re powerful and reliable. It was very easy to install and wire up. The single biggest issue I had was that I wanted to feed the carburetor from the stock air intake so I had to purchase the correct adapter to orient the carburetor to reach the stock Honda C200 air intake. It wasn’t a perfect fit but it was good.

Here you can see how much I had to move the carb.
Some cheap control switches and a reasonably priced reproduction seat from Ebay worked out great. I just built a complete custom wiring harness and made the whole thing 12 volts dc so that I could run a lithium battery and LED lighting.
A drag pipe was sourced from Beatrice Cycle for a mean and meaty sound!
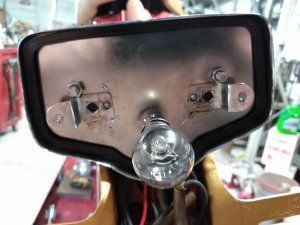
At the rear I added a hot rod “Model A” taillight.

Hot Rod style taillight on 64 Honda Project 333
In the end this build ended up being a ton of fun to ride, and with it’s clean vintage looks really turned heads too. It was a great little neighborhood blaster that accelerated quickly up to it’s maximum speed of 45 mph. Some motorcycles just really do become more than the sum of their parts and this was one of them.
Project 333 next to a pure stock CT70 that I finished,
Too bad that the 2020 Barber Small Bore Festival was canceled. I was just going to save it for 2021 but wound up trading it for a 1998 Triumph Adventurer 900. More on that later.

1998 Triumph Adventurer future custom project.
The whole corona virus episode really threw everyone’s plans for everything for a loop. Unlike a lot of people my employment situation did not change, being employed in an essential industry I never missed a single day of work and was never told to work from home. Between that and working on other peoples motorcycles I’ve been busier than ever before.

Motopsyco World HQ
One great blessing is that we finally sold our previous home and moved into a new place that has a much bigger house and shop. So I’m writing my first blog post of 2022 from my new office in Hartsville, S.C. and look forward to the coming year.
Share this:

Drilling Handlebars for Wiring
A lot of old motorcycles like my old 1972 Honda SL100K2 have their switch gear wiring inside of the handlebars for a nice neat clean appearance. I was actually able to locate a couple of sets of genuine Honda new old stock handlebars but the cheapest set I saw was over $150. Plus a lot of the NOS parts I find tend to have some shelf wear or corrosion on them so I just went ahead & bought a set of nice new reproduction bars without the wiring holes for $50. So this post is going to be about drilling handlebars for wiring. Whether you are try to do an authentic restoration or a sleek custom the basic procedure is the same

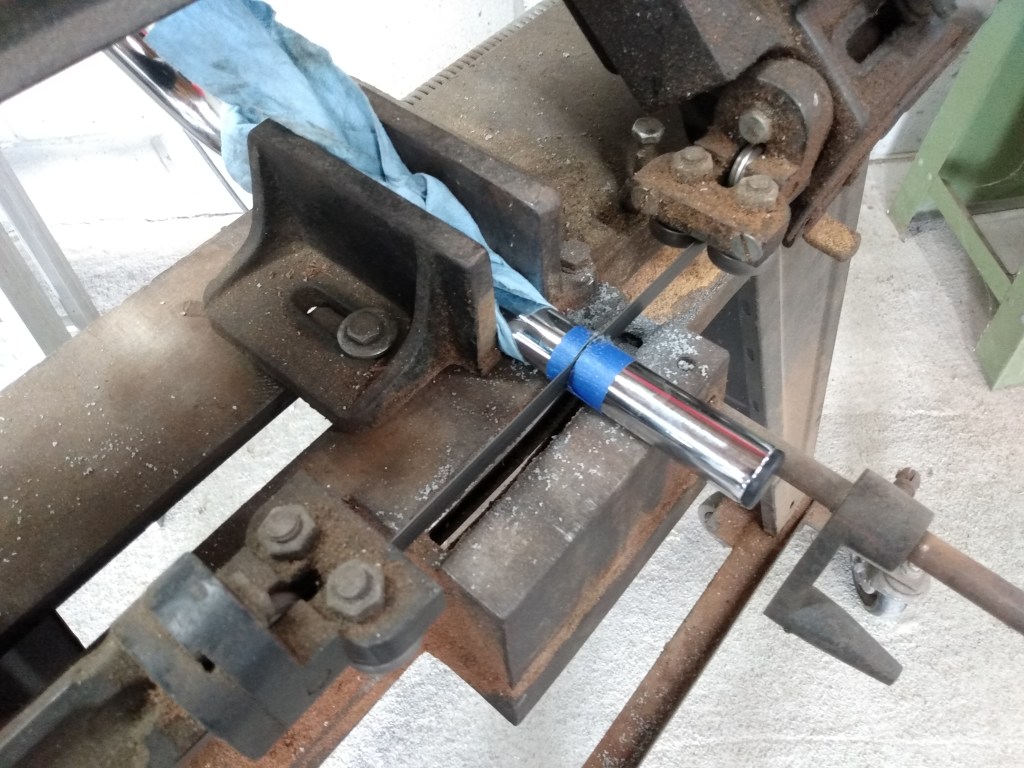
The first step is to determine where the holes & slots should be. These Thailand sourced bars had holes pre-drilled for the switch housing locating pins but they were in the wrong place. Since I was replacing the old but non-original bars I taped them together wile I measured and marked the locations for the new holes and slots. Pay attention to detail while doing this so that you don’t make any mistakes or remove excess metal from your handlebars. A prime example of this is visible on my old handlebars. The left side only needed a hole large enough for the single horn wire but whoever installed them cut a large slot instead. Watch for little things like that.
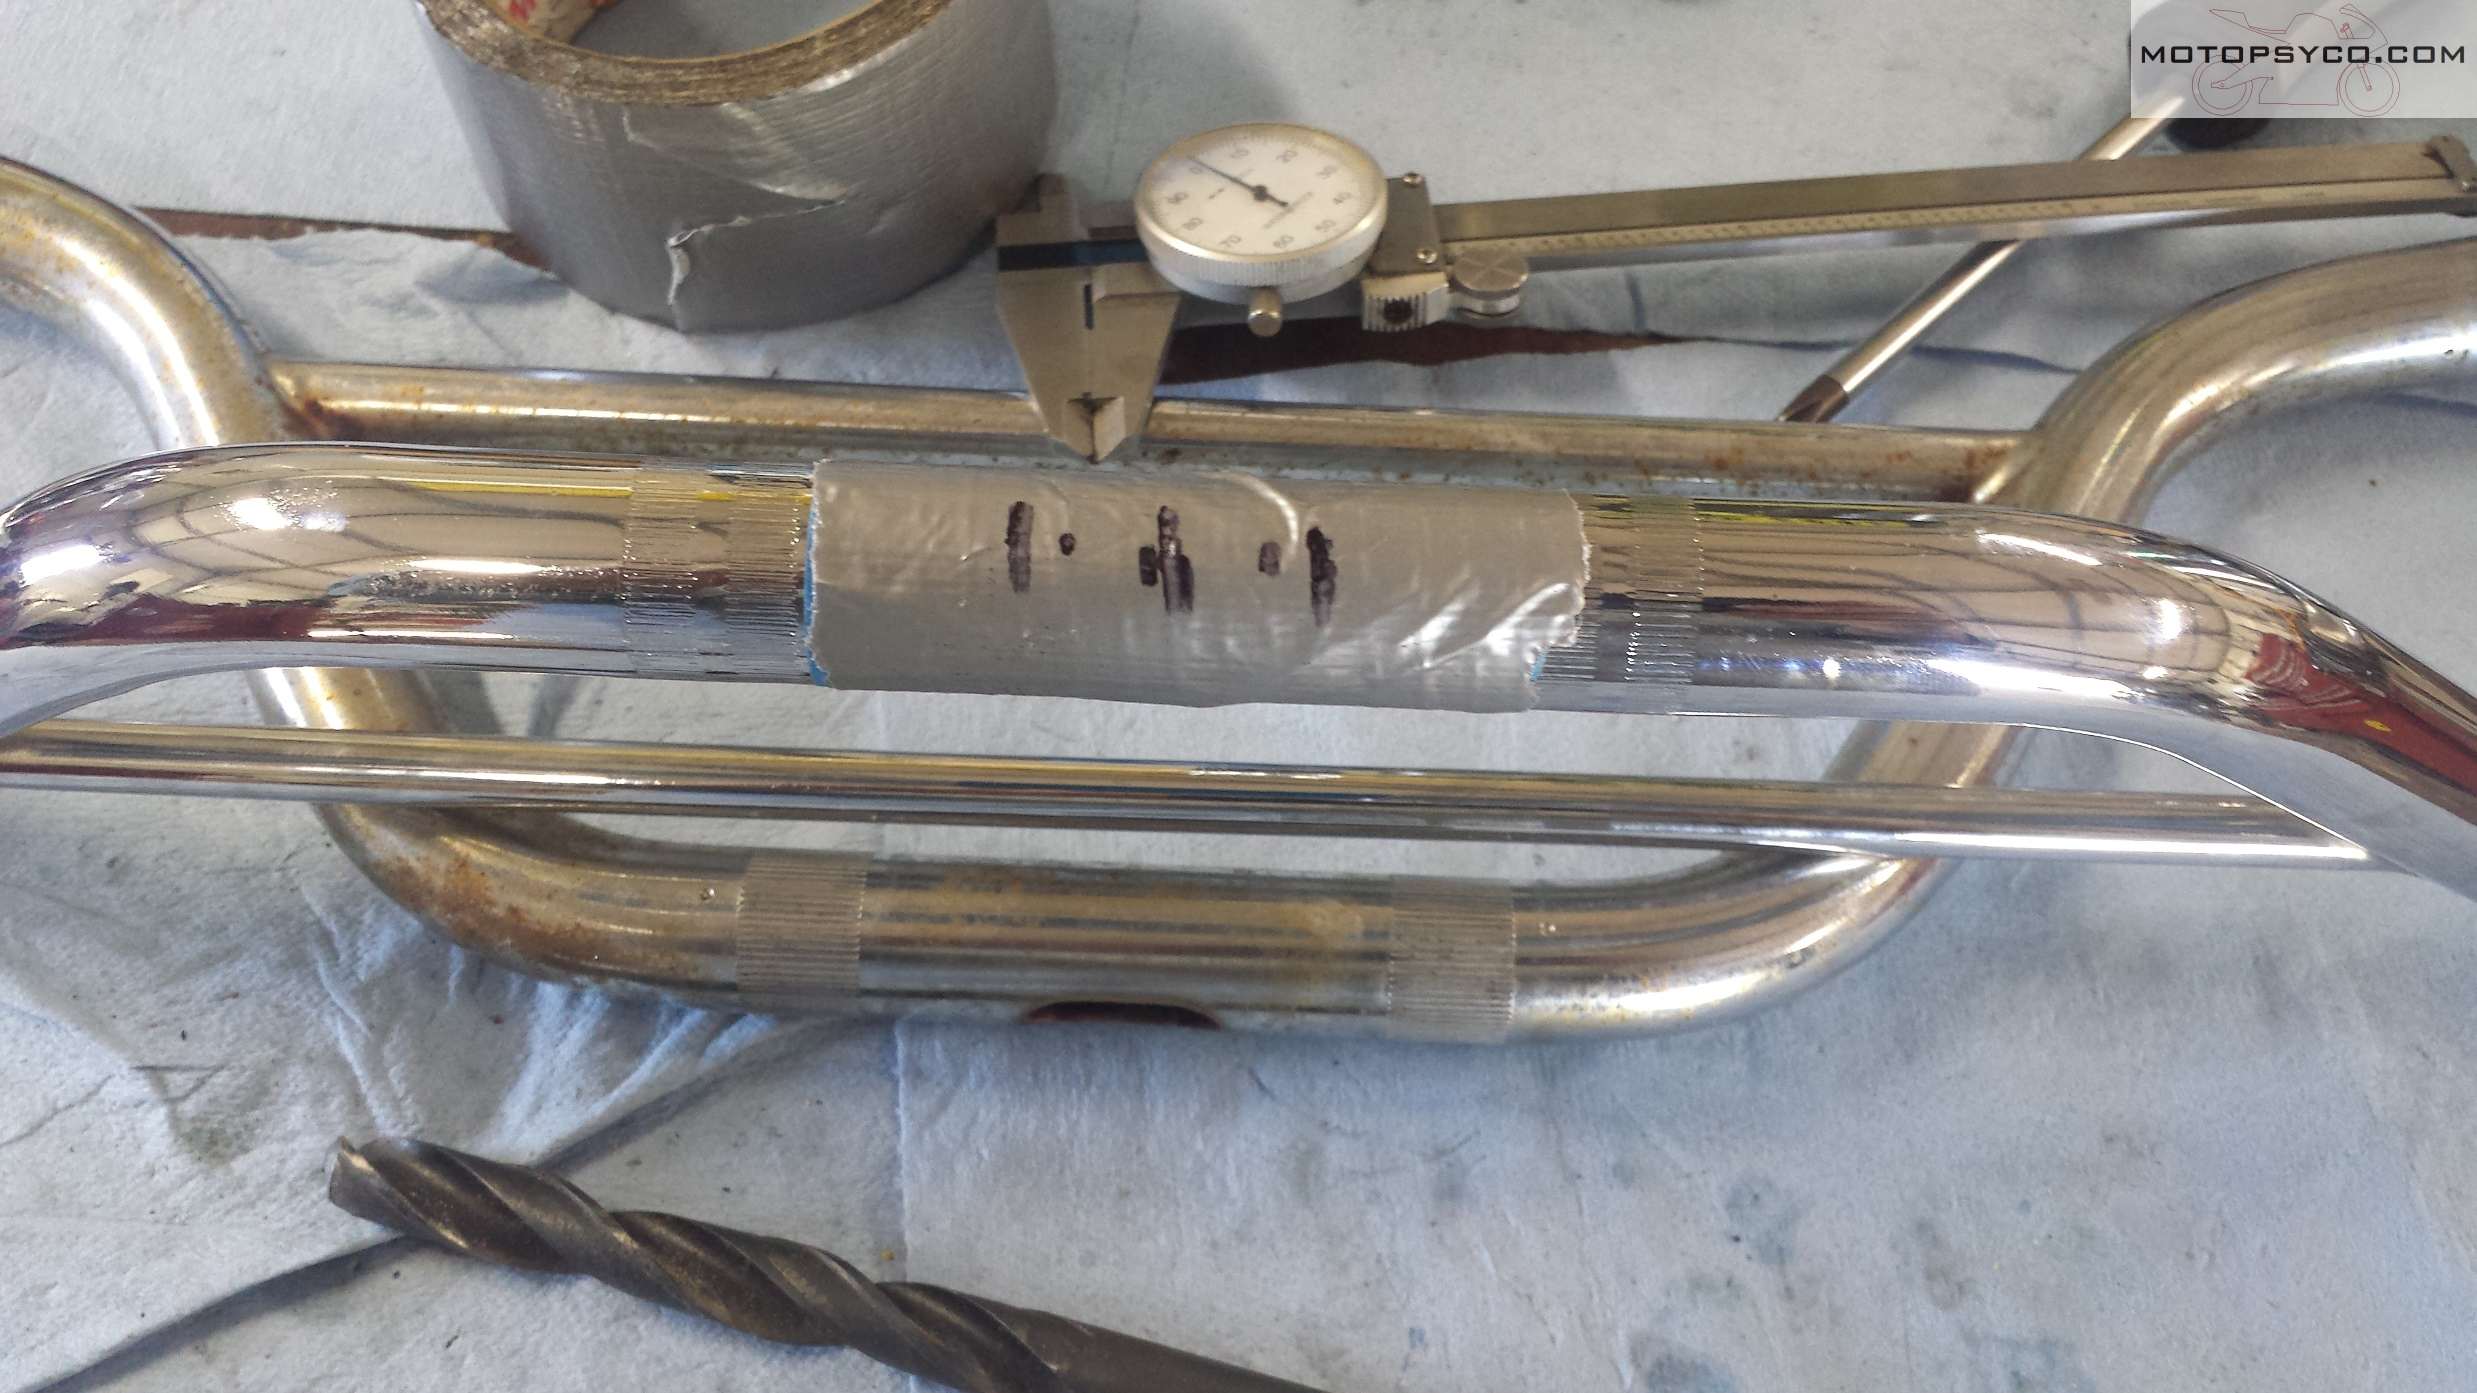
I like to put a couple of layers or masking tape & duct tape on the areas to be slotted out. This does two things, it makes marking the hole & slot locations easier and protects the handlebar from inadvertent tool marks while you are cutting & grinding the slots.

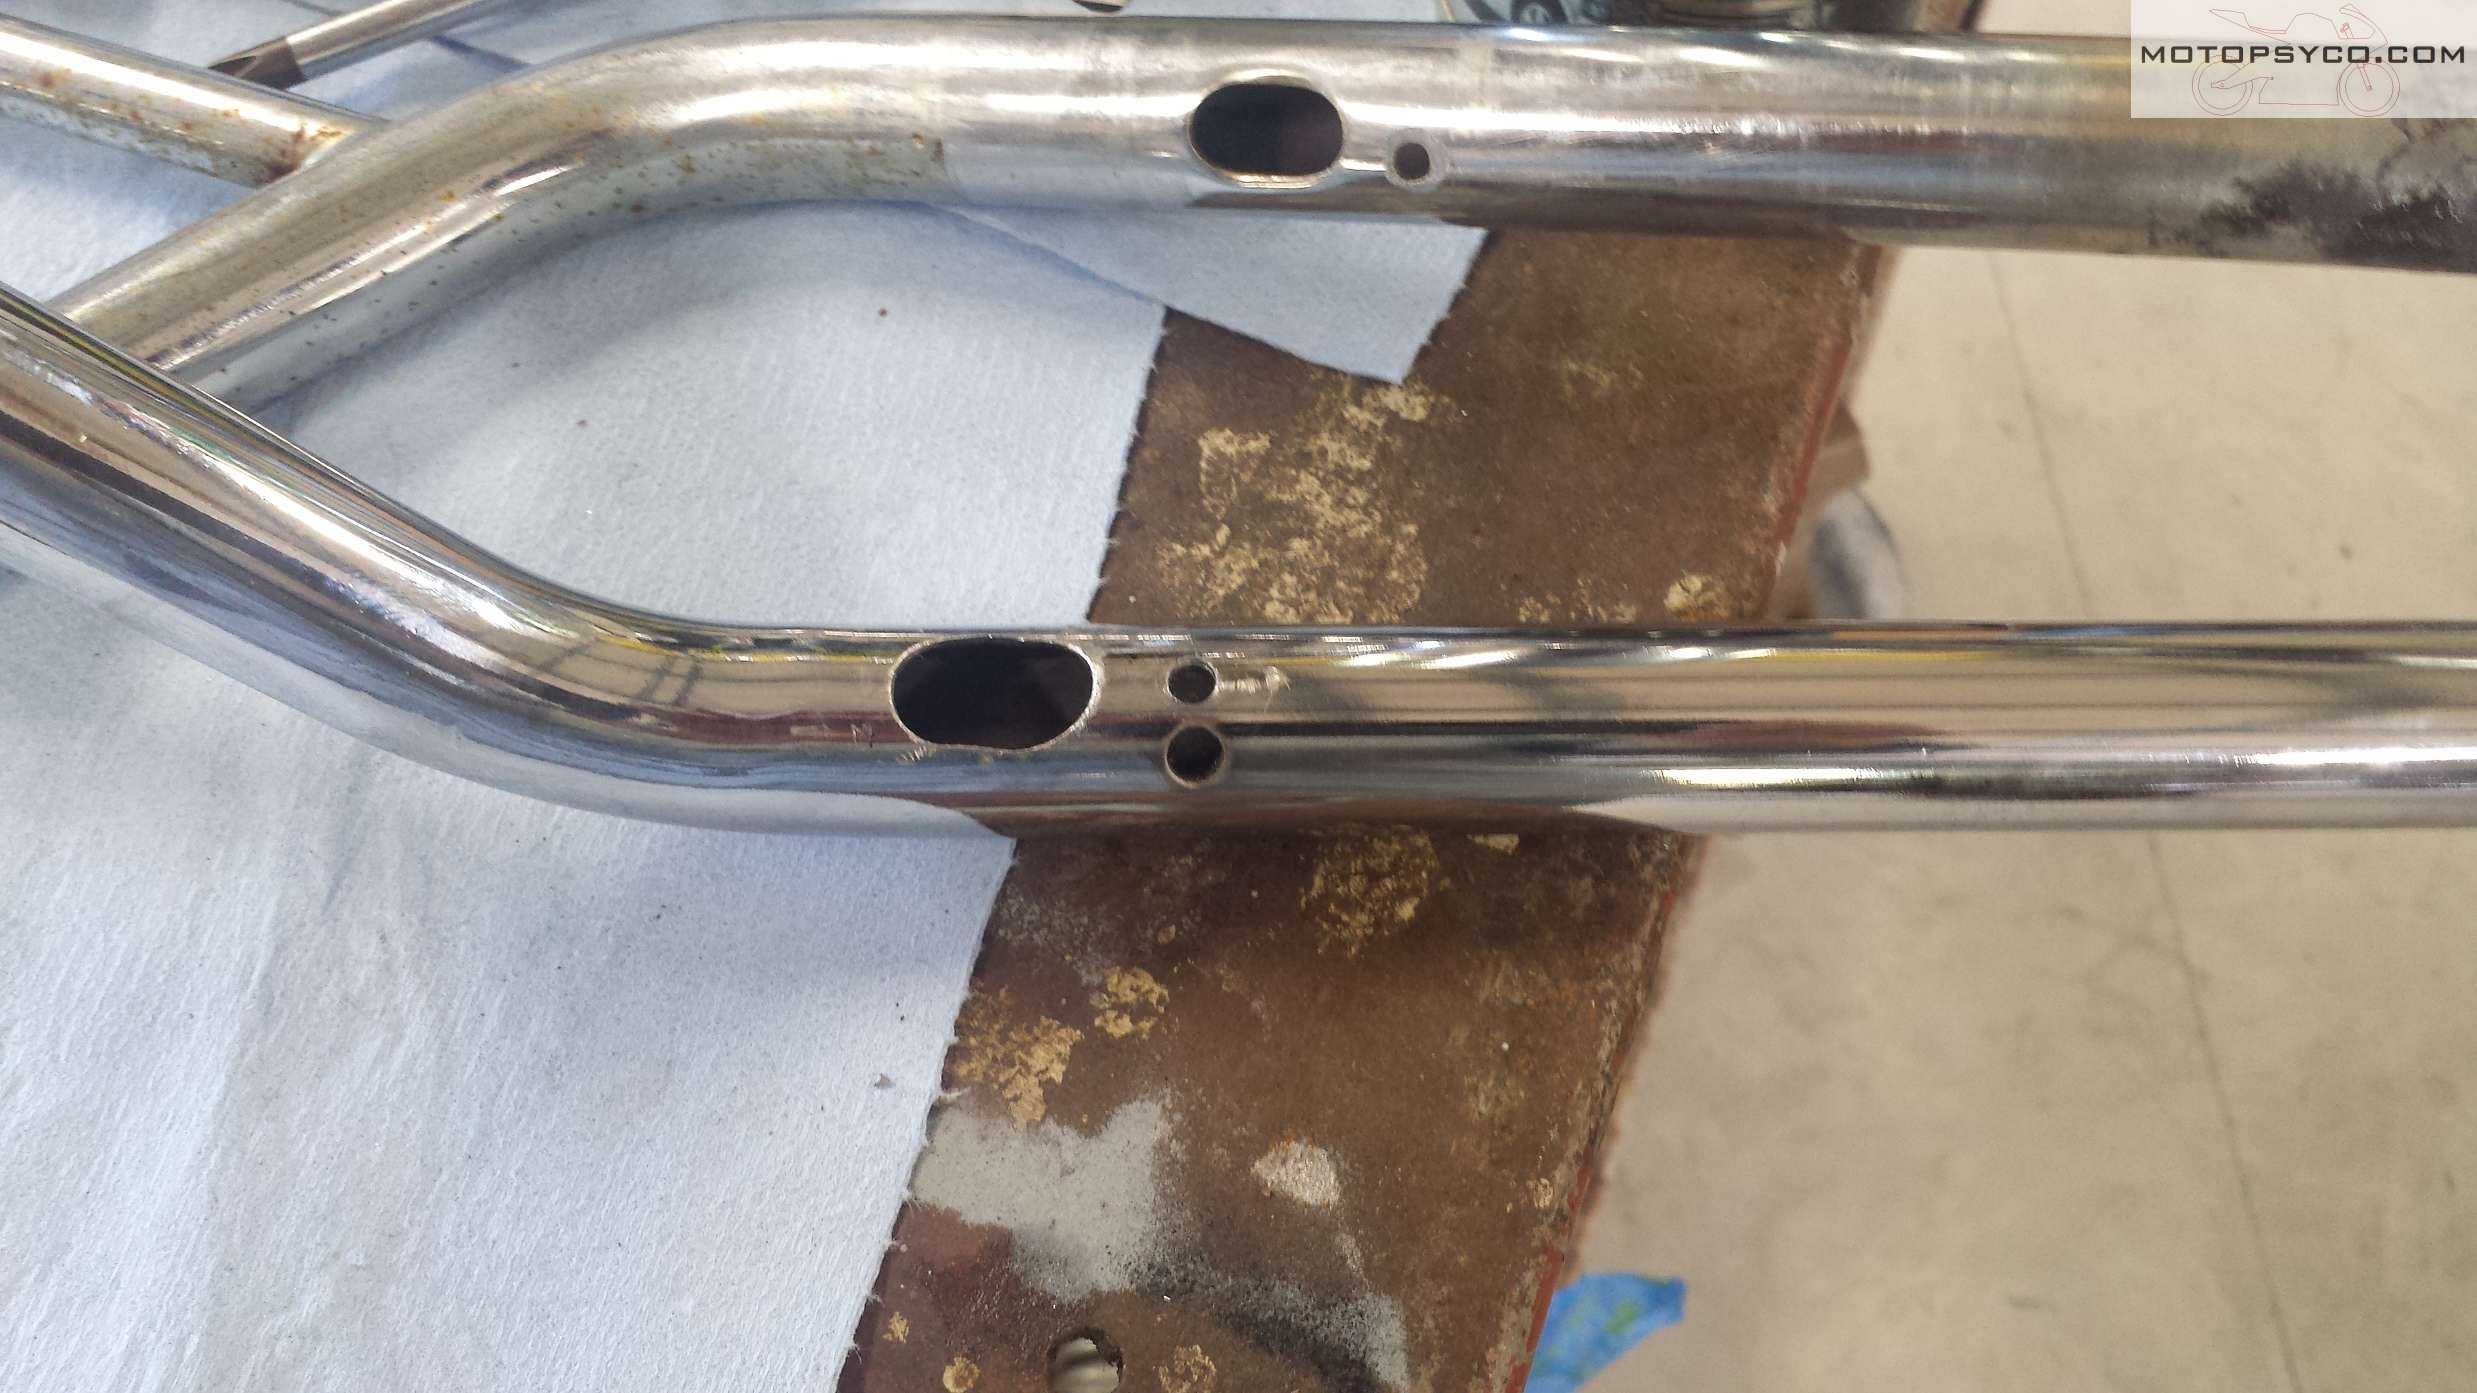
After you get it all laid out & are certain of where you need to drill be sure you use a center punch, otherwise it is nearly impossible to drill a hole straight into a piece of round tubing. For the slots drill a hole of the correct size at each end of the slot & then use a rotary tool or a die grinder with a cut off wheel to cut out the center section. Once that has been done put a small grinding stone or sanding drum on your tool to finish shaping and smoothing the slot. Don’t remove the tape until this step is complete.

Now it’s time to remove the tape, clean up the tape residue & get all of the shavings out of the handlebar. Grab a small file that will fit into your cut outs and go over them one more time to be sure that all burrs & sharp edges that could damage the wires are removed.
In these next two pictures you can see how I slotted & drilled the left and right ends of the bars.

Before you pull the wiring through, if you have one piece clutch & brake lever perches be sure to put them back on first. I like to put a piece of string through the bars & tape the wire to it as it is much easier to feed the wiring through if you pull it and push it at the same time. Nonabrasive hand cleaner makes a great lubricant for pulling a thick bundle of wires through a small tube with multiple bends in it. The hand cleaner wipes off easily when you get done.

Once you have it a done, reinstall the bars on your bike and admire your handiwork for a minute or two before you get back to work on the rest of your build. If you have ever thought about drilling handlebars for wiring now you have an idea of what is involved. Just work slowly and carefully so that when you finish it will be a job that you’re proud to say, “I did that myself.”

Share this:

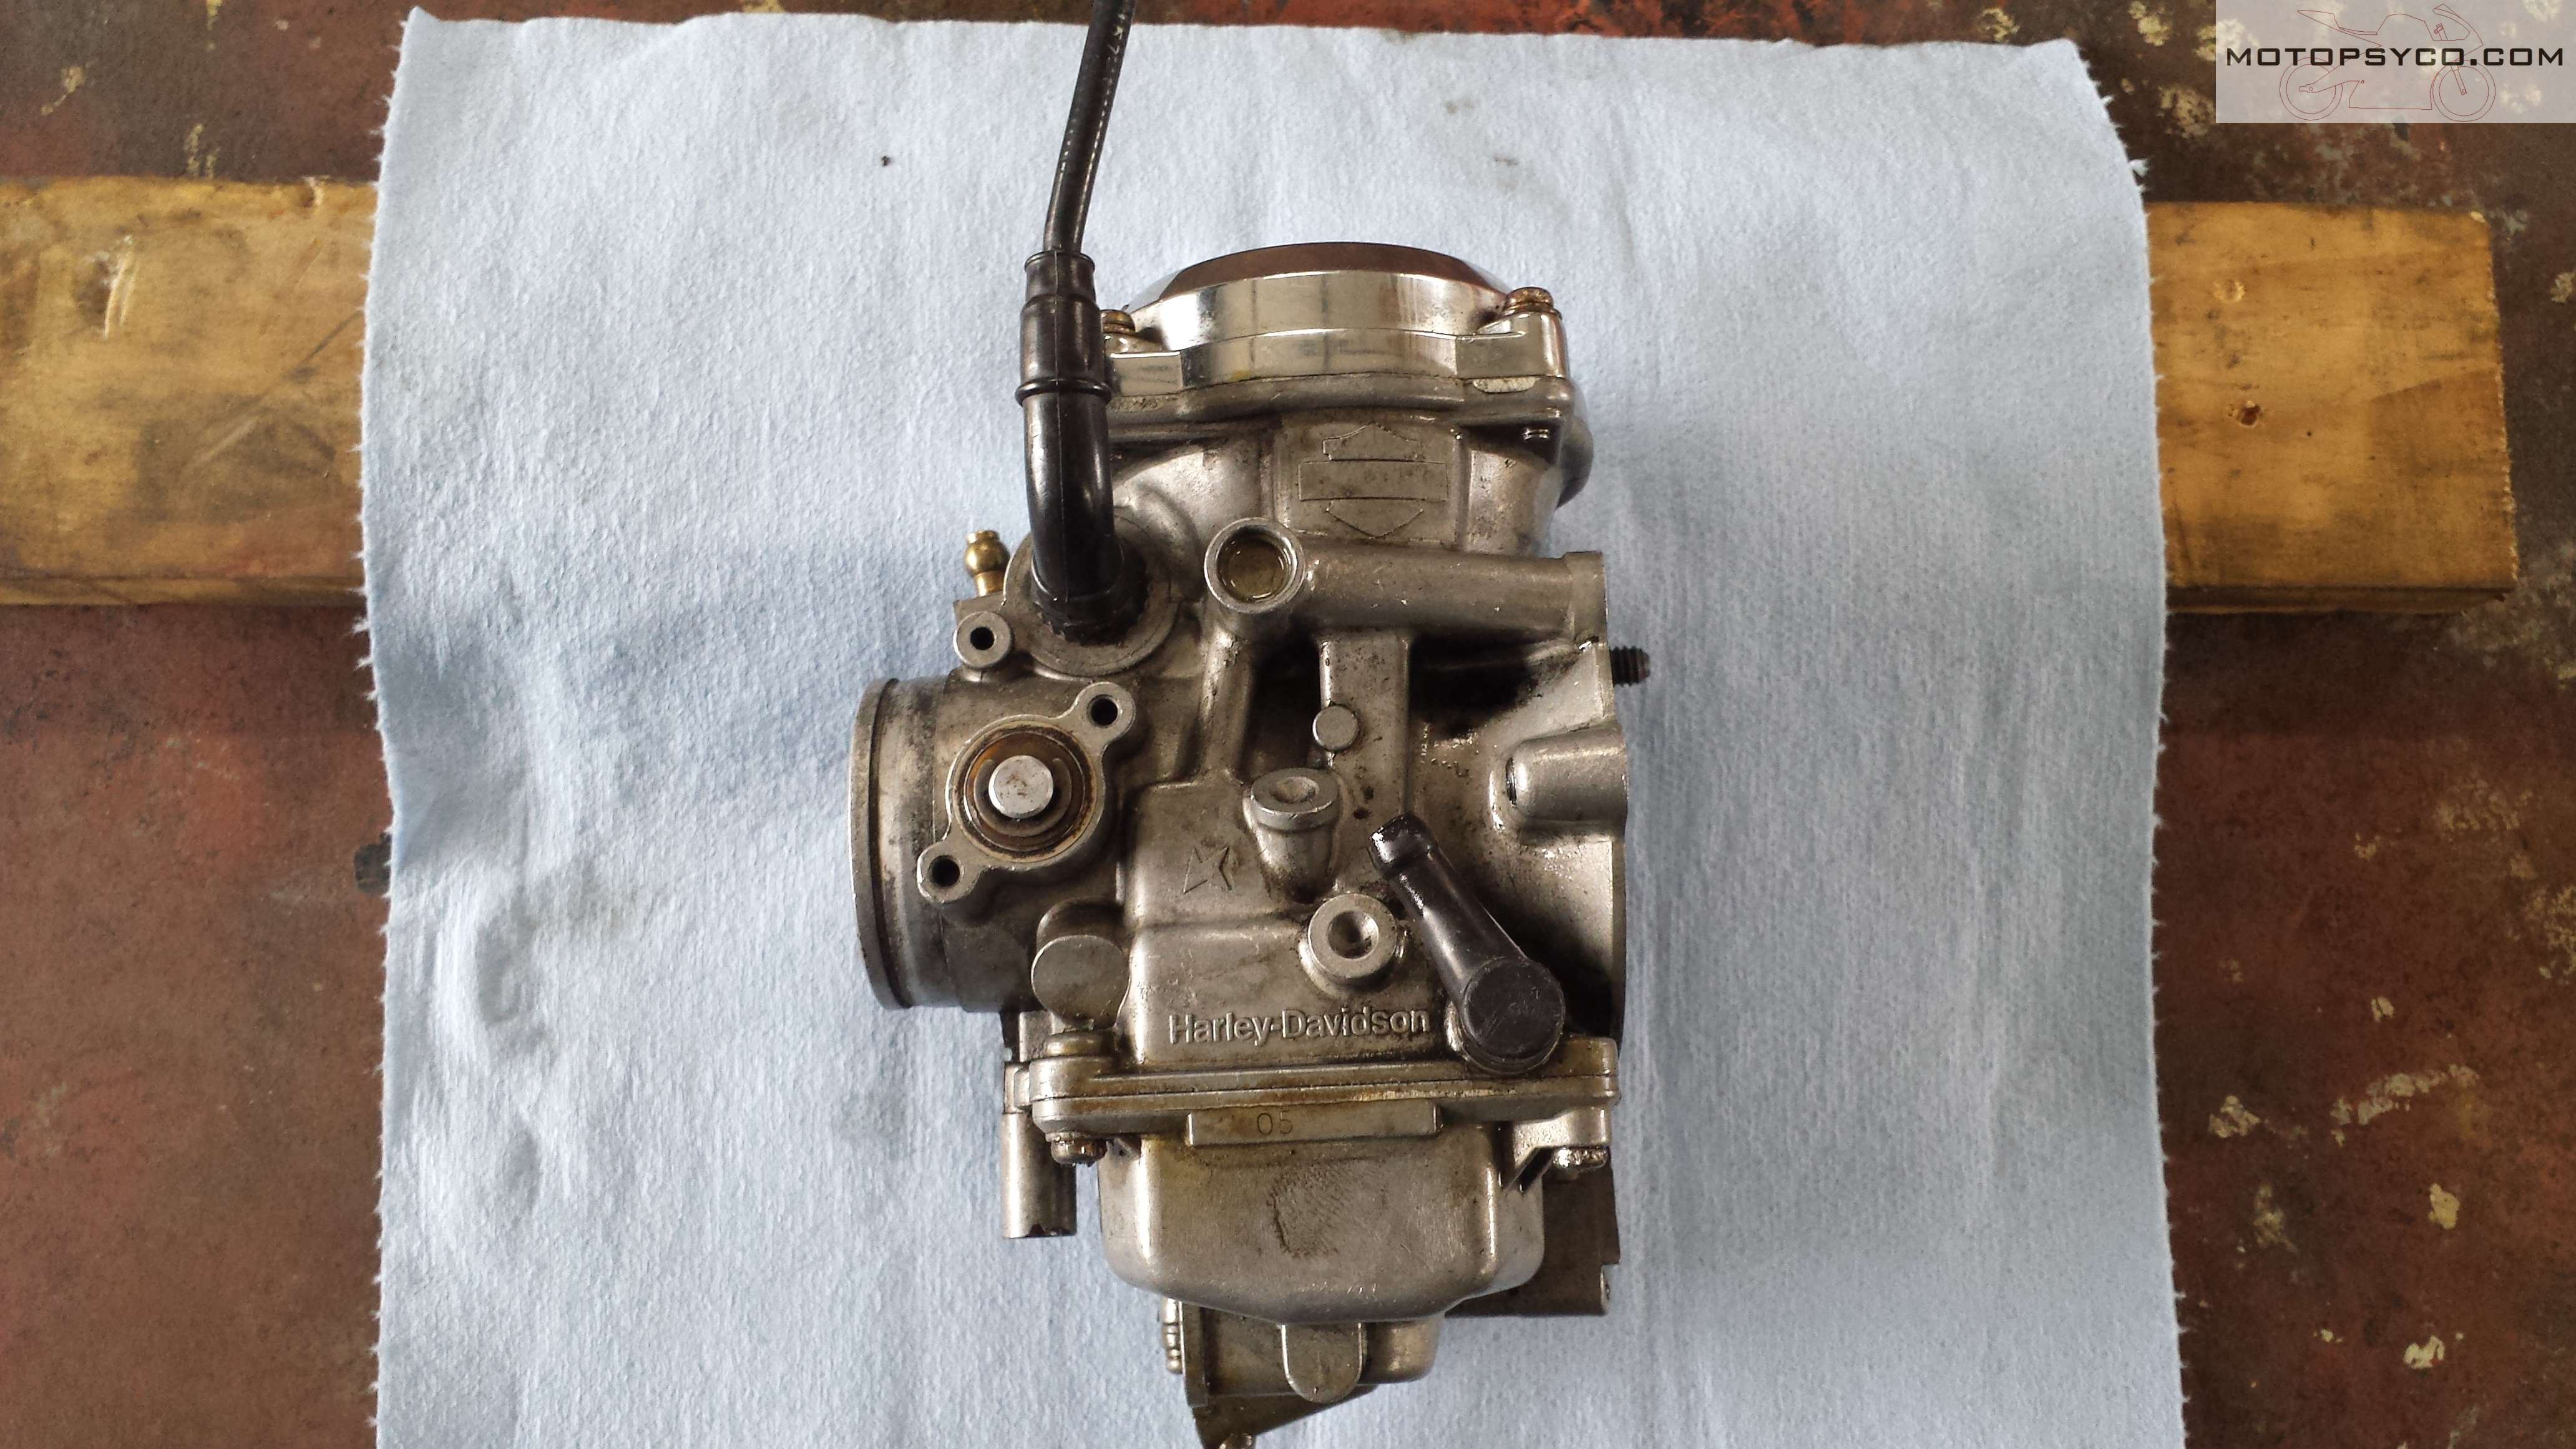
Harley Keihin Carb clean
Another bike left to die
This patient is a 2000 Harley Davidson FXST Softail standard. I realize this isn’t really vintage but it is 19 years old. Picked up not running, coated with a quarter of an inch of dust, 2 flat tires, and a tank full of stale gas it is in dire need of some attention before it’s too late. After making sure it had compression and spark I was ready to tear into the Harley Keihin carb.

First thing was to remove the air cleaner than go to the other side of the bike to loosen the enrichment(or choke) knob so you remove it cable and all with the carburetor. After this pop the carburetor out of its spigot.

Once you have the carb loose unhook the fuel line and throttle cables.
Take the Harley Keihin carb to a work bench where you have plenty of room to spread out the parts as it is disassembled.
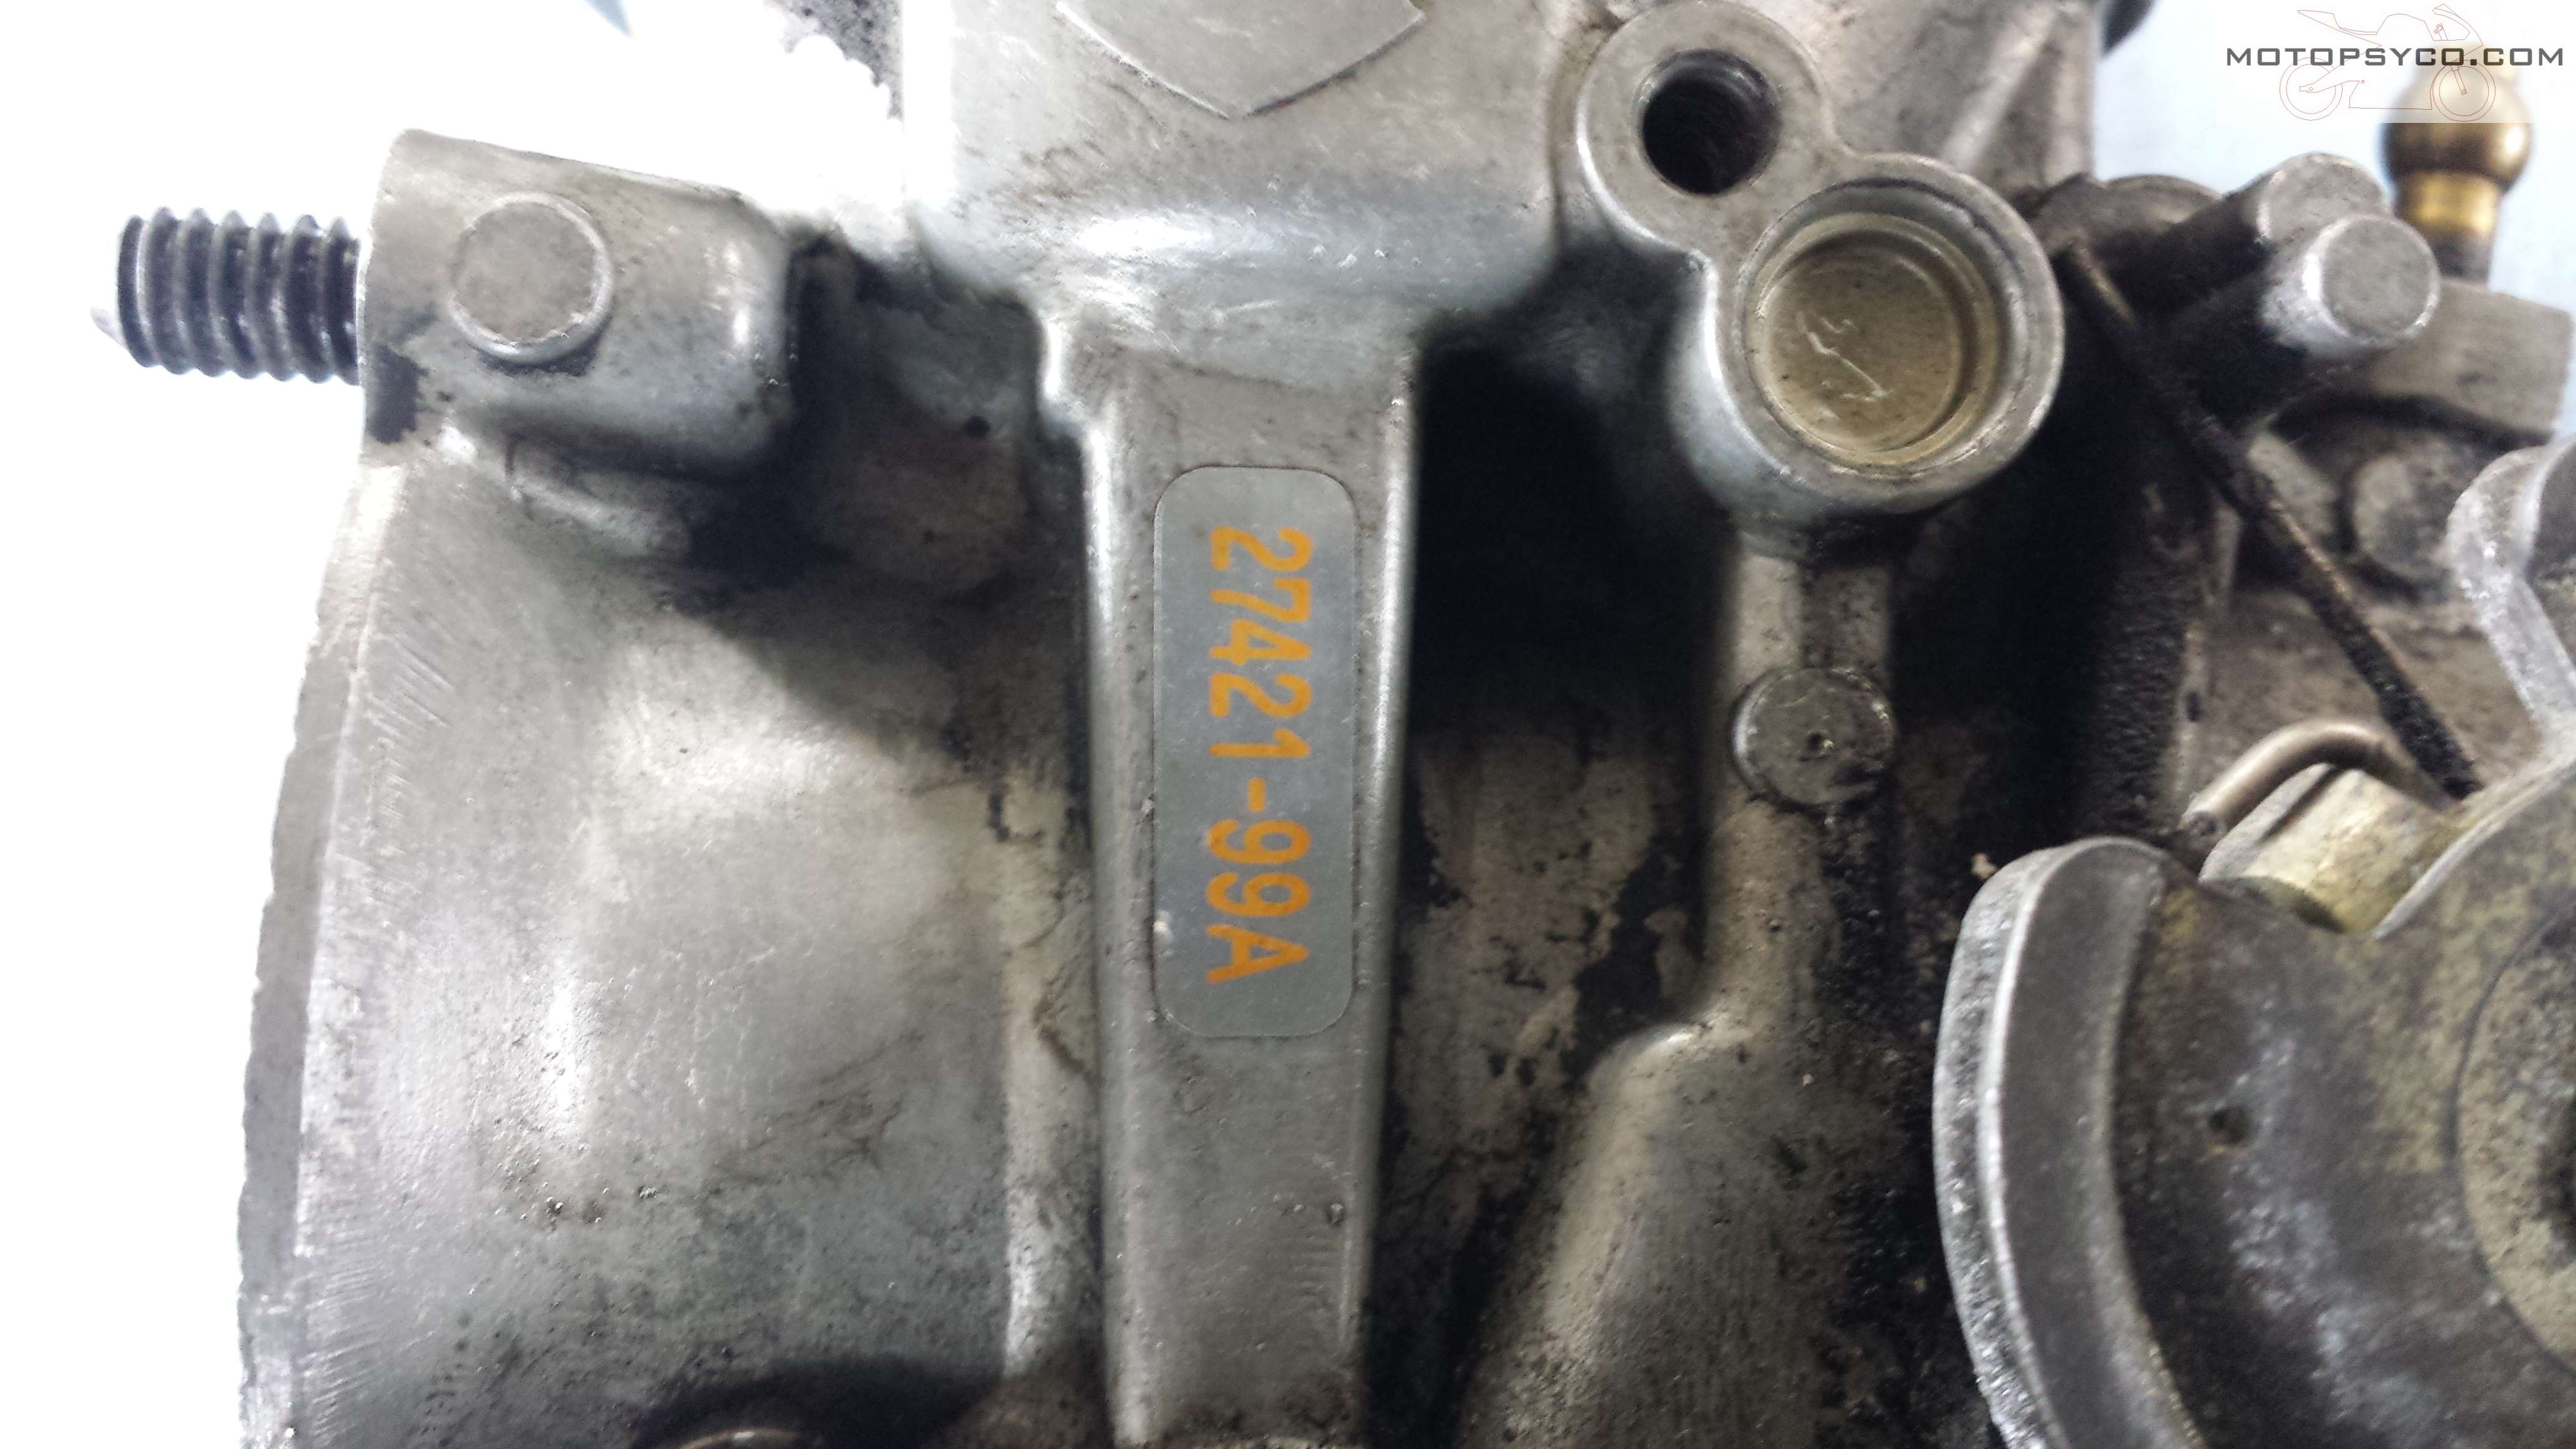
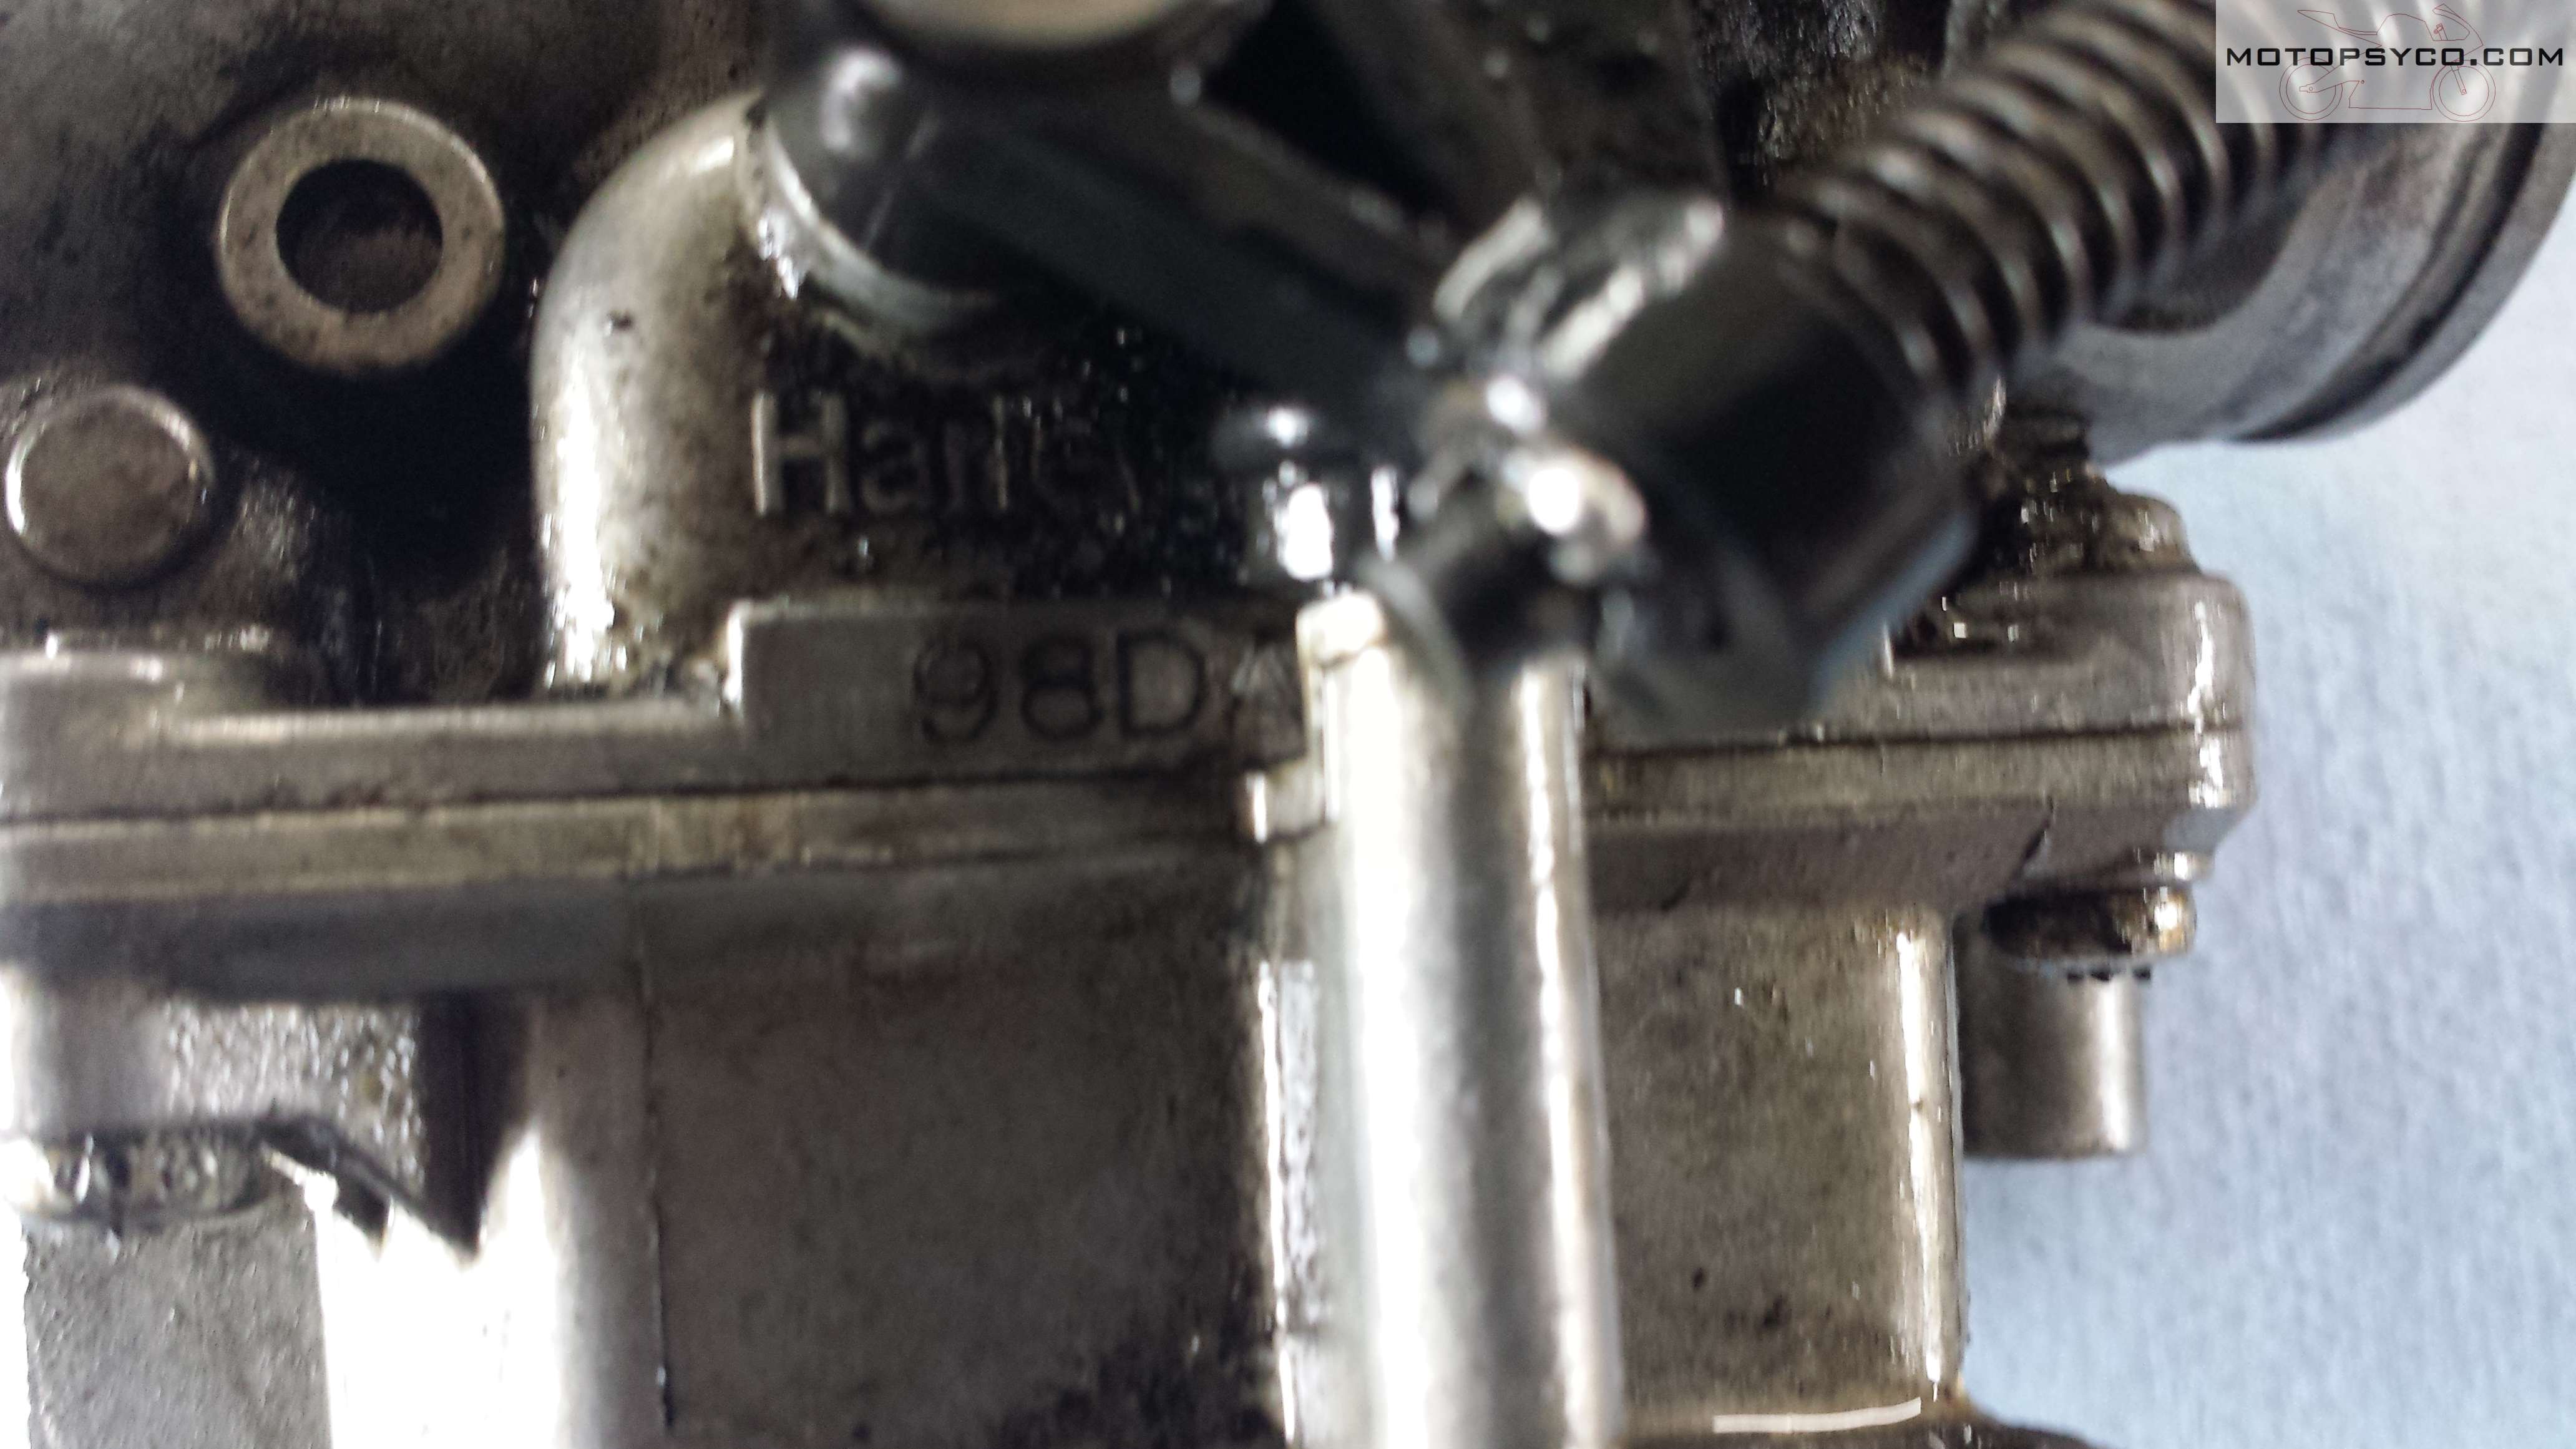
Make note of the numbers on the carburetor as they might come in handy when you need to get parts. Then pull the enrichment plunger out and set it aside.

Take the accelerator pump housing, diaphragm & spring off the bottom of the float bowl.
If the previous mechanic would have used a top shelf screwdriver like this Vessel Impacta shown here I wouldn’t have had to replace so many of the screws.

With the float bowl off inspect everything well and make note of what parts are where.

There was a little damage on the mixture screw tower from the plug being removed. Normally there’s a cap over this that you have to drill a hole in & use a wood screw to pop it out. If you live in an emissions inspection state the cap has to be replaced with a new one. If I lived in an emissions inspection state this carb body would have to be replaced.

first remove the float & float valve, followed by the main jet & emulsion tube.

then take out the pilot (idle) jet.

Next up is the idle mixture screw, first screw it all the way in slowly & count how many turns it takes to bottom out, and make a note of it. Then remove the screw completely.

There are four parts to the mixture screw assembly on a Harley Keihin carb. 1. the screw itself 2. the spring 3. a small washer & 4 the o-ring. Chances are that the o-ring & washer will remain in the carburetor body & you’ll have to use a small pick to carefully fish them out.

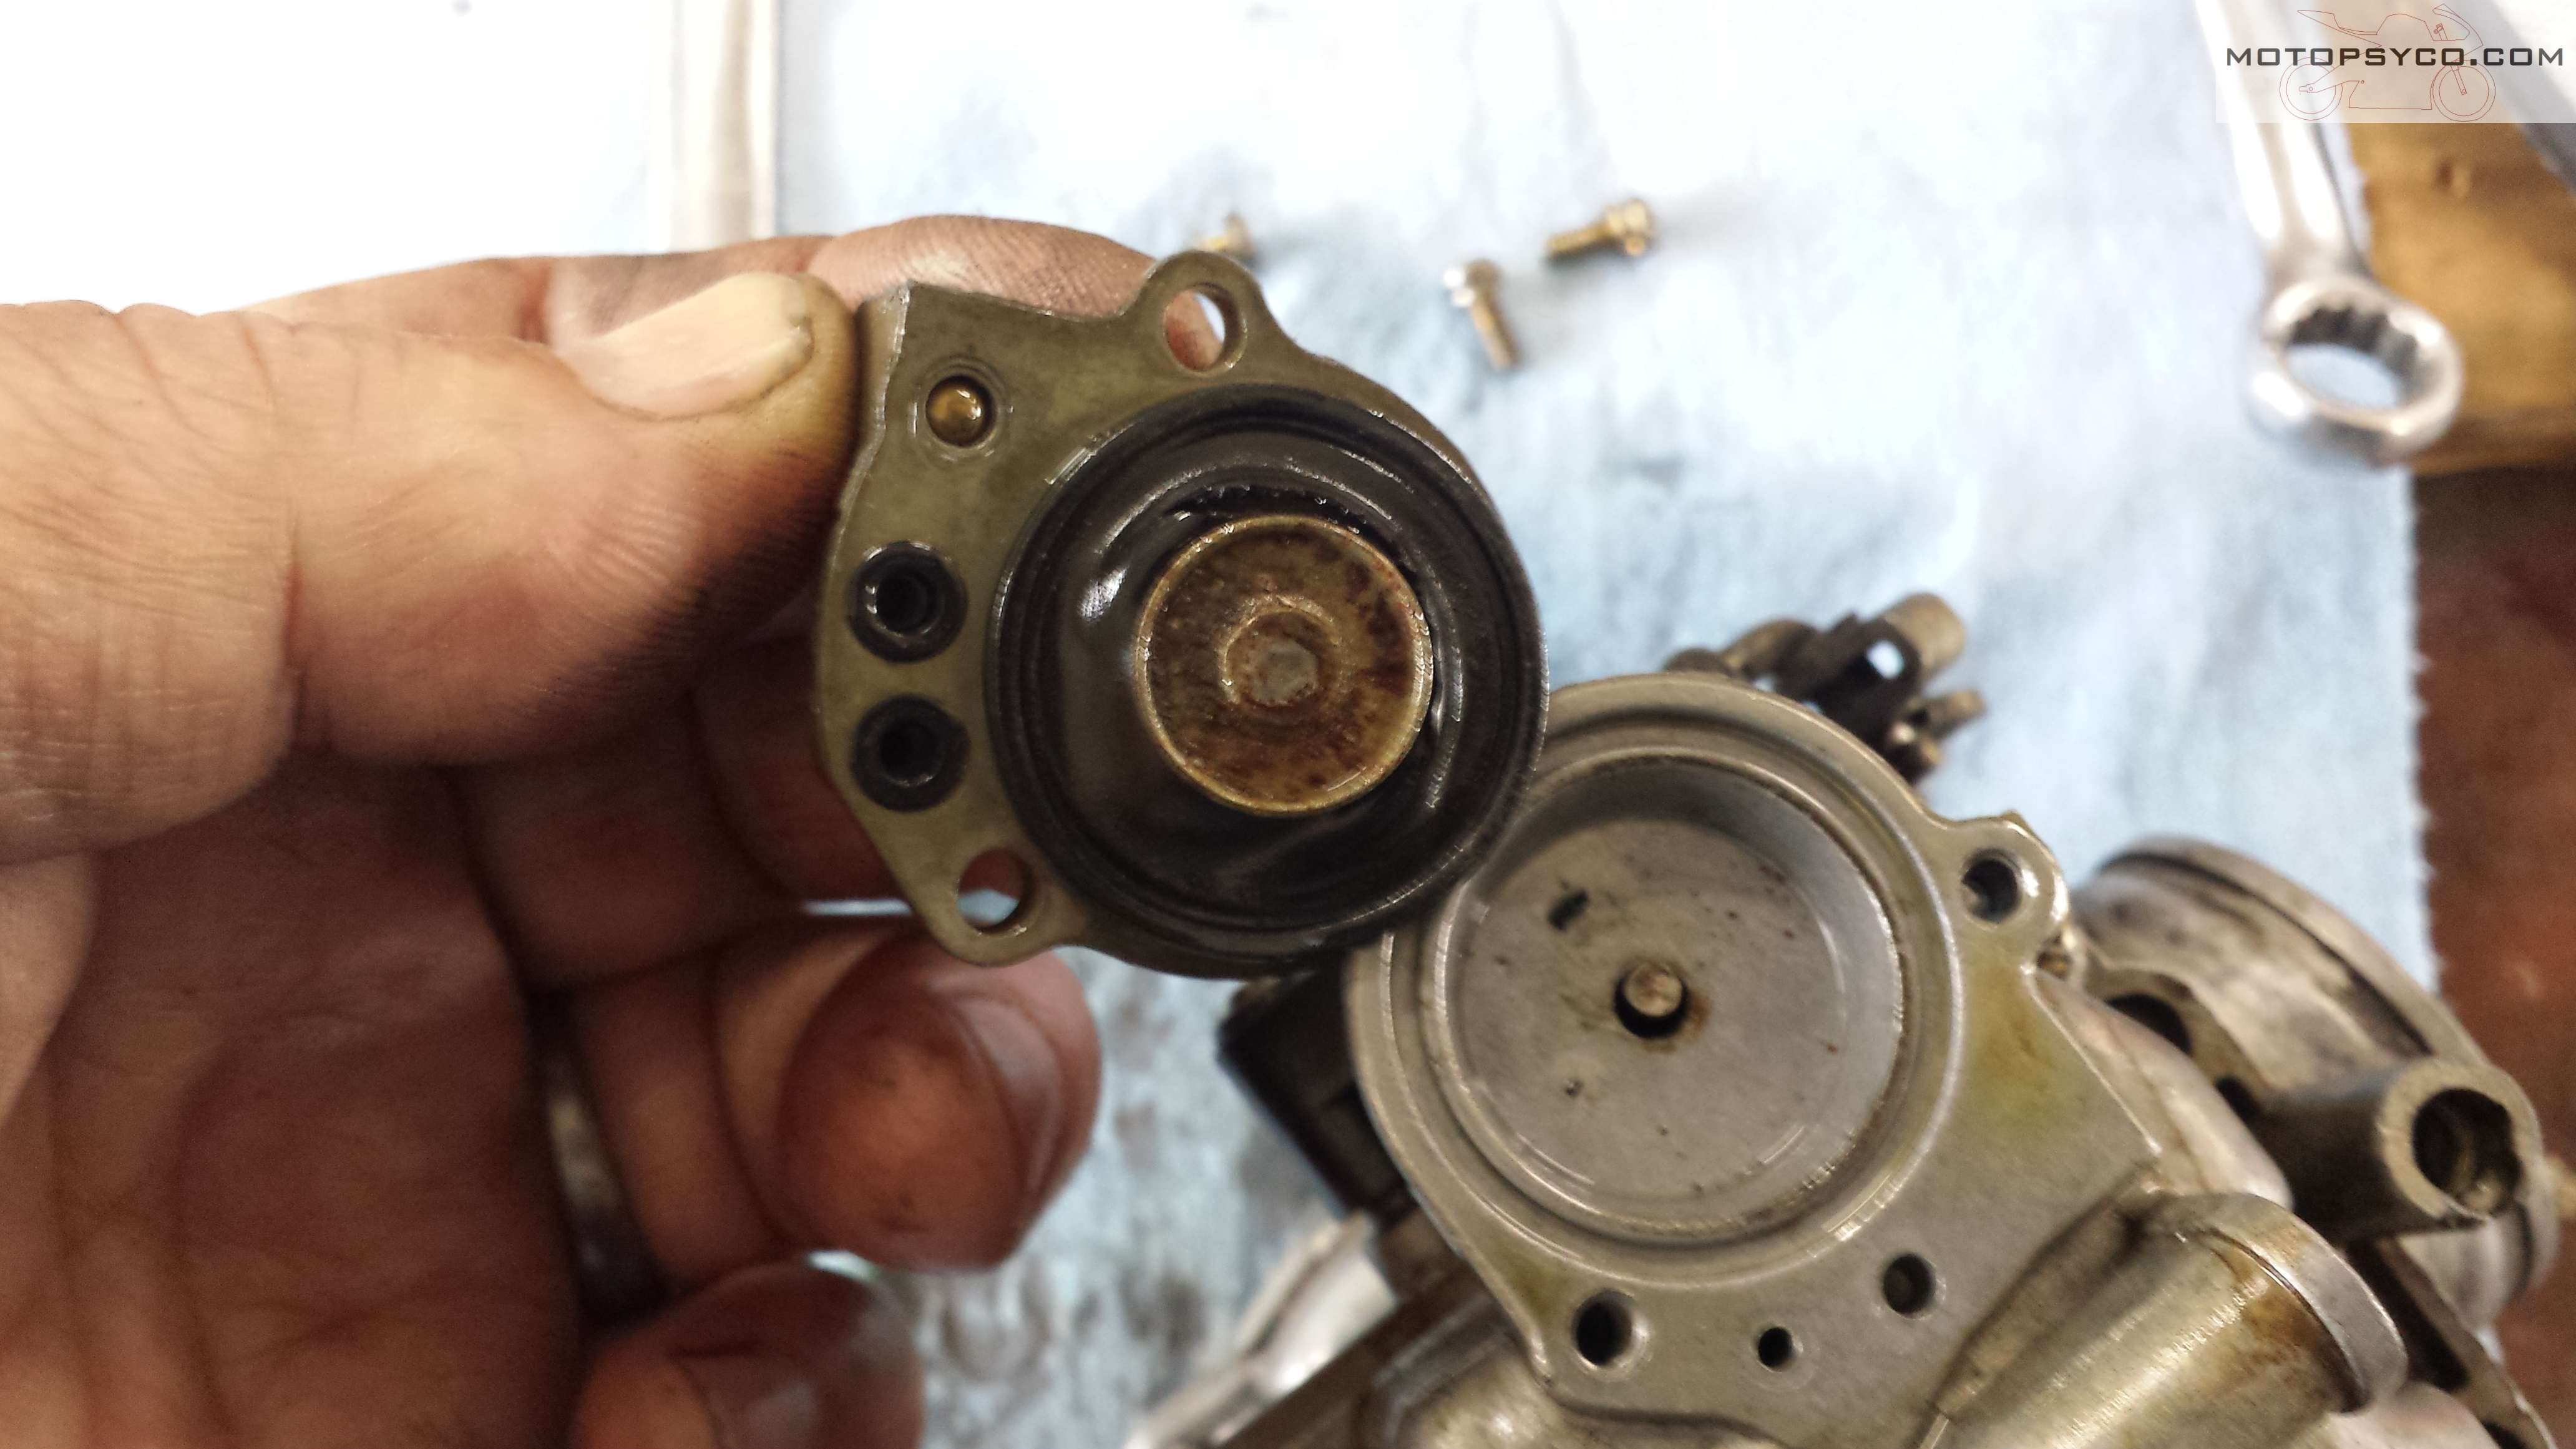
Moving on to the top cover remove it,

and then set it & the spring off to one side.

Pull the slide out, inspect the needle (metering rod) for wear & check the diaphragm for holes.

I always push the needle jet that the metering rod passes through out of the body so I can inspect it too. Since I clean carbs in a heated ultrasonic cleaner if I don’t push it out and keep track of it, it’ll probably fall out any & I’ll have to go fishing for it.

Here’s a shot of the float chamber with all of the removable parts out.
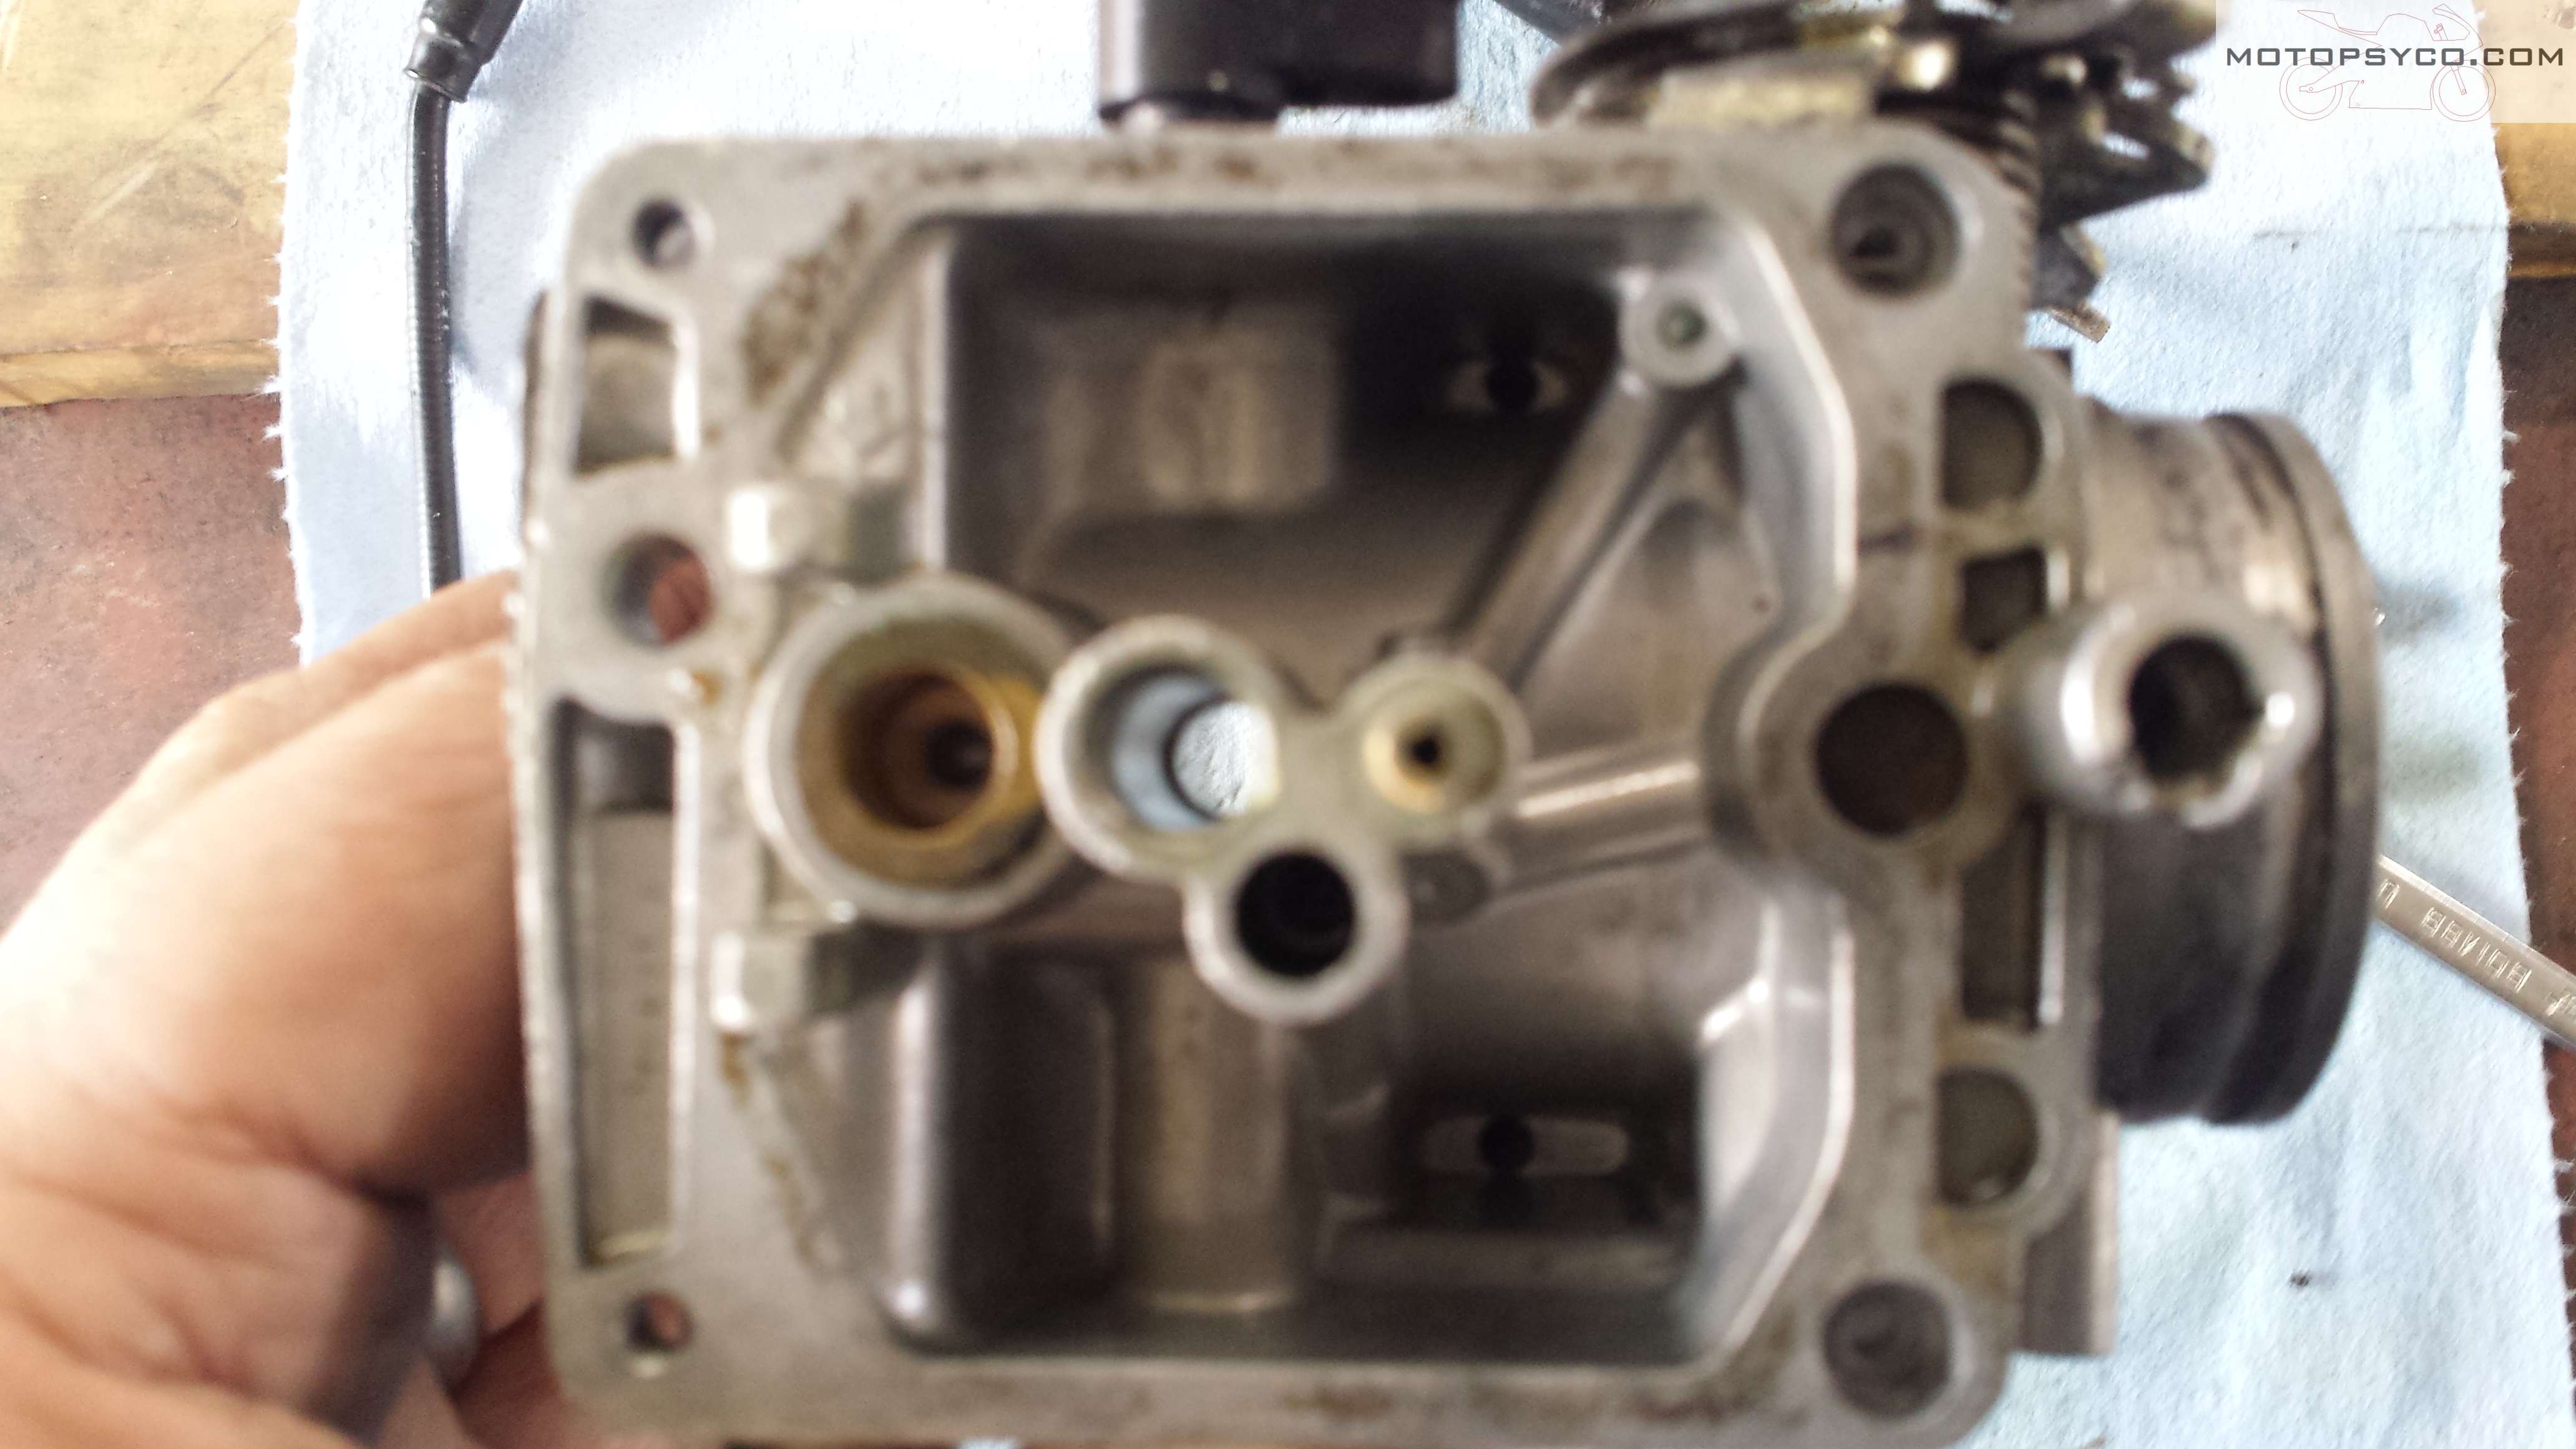
Since this is only a repair job & not a restoration this carburetor only got a cleaning, no vaporblasting. This body was in nice shape & looks decent with only cleaning. If you’re working on a crusty old pile of junk and want your parts to look good again please see my vaporbasting page.
The next few pictures show this carburetor’s parts laid out in the order that that they go back in. Make sure you carefully inspect all parts and replace any that are not usable especially the rubber pieces.
Re-install all of the internal parts,

and the mixture screw being sure to set it as it was before. If you think it was wrong verify the setting with a good service manual.

Then set the float height.


Carefully line up the accelerator pump rod through it’s hole in the float bowl & reinstall the bowl. Don’t forget to put the bellows on as shown before the float bowl.

The rest of the accelerator pump arts should be reassembled to the carb now.

The last couple of steps are reassembling the needle to the slide making sure to put any spacers that may be present back where they were to start with and then putting the slide back in the body, with the spring & then re-installing the cap.

Once this is all done it’s time to put the carburetor back on the bike, fire it up and make any needed adjustments. I hope you have found this pictorial overview of a Harley Keihin carb helpful & interesting.

Peace Y’all ‘Psycho
Share this:

Auxiliary Fuel Tank by Pit Posse
While I was in the process of moving I managed to break the end off of my old auxiliary fuel tank that had served me well for over 20 years. When I went looking for a replacement most of the top name brands were rather expensive starting at $45.99 and going up. At the other extreme were a bunch of smaller unknown brand ones from China or India with decent prices but some long shipping times & unknown quality. As a compromise I settled on this one sold by Pit Posse for 39.99 It came with a decent length of hose & a good quality brass shutoff valve. Let’s be honest here, all of these plastic auxiliary tanks cost more than what they are really worth but comparatively speaking this one is a good deal coming from a U.S. based company. The actual product is still made in China though. I’ve been using this one since June 8th 2018 and am very happy with it.

You might notice that in the picture above that I have my vacuum gauges and auxiliary fuel tank hanging from an I.V. pole. If you’re serious about doing carb work on motorcycles & four wheelers you need to get yourself an I.V. pole. It turns out that you can get one pretty dang cheap too, click here to see them starting as low as $23 with free shipping. Well worth every penny.
My sychronizer gauges actually come from Honda and were purchased from the inventory of a shop that went out of business. If you don’t have a set and are thinking of buying some do yourself a favor and get a set vacuum gauges, not the mercury sticks. Of course if you have the money you could go for a Carbtune Pro setup. If my gauges ever quit that’s the one I plan to get.
That’s all for today just thought I’d post a quickie product review and share a couple of tips that you might find useful. Until next time,
Peace Y’all
Share this:

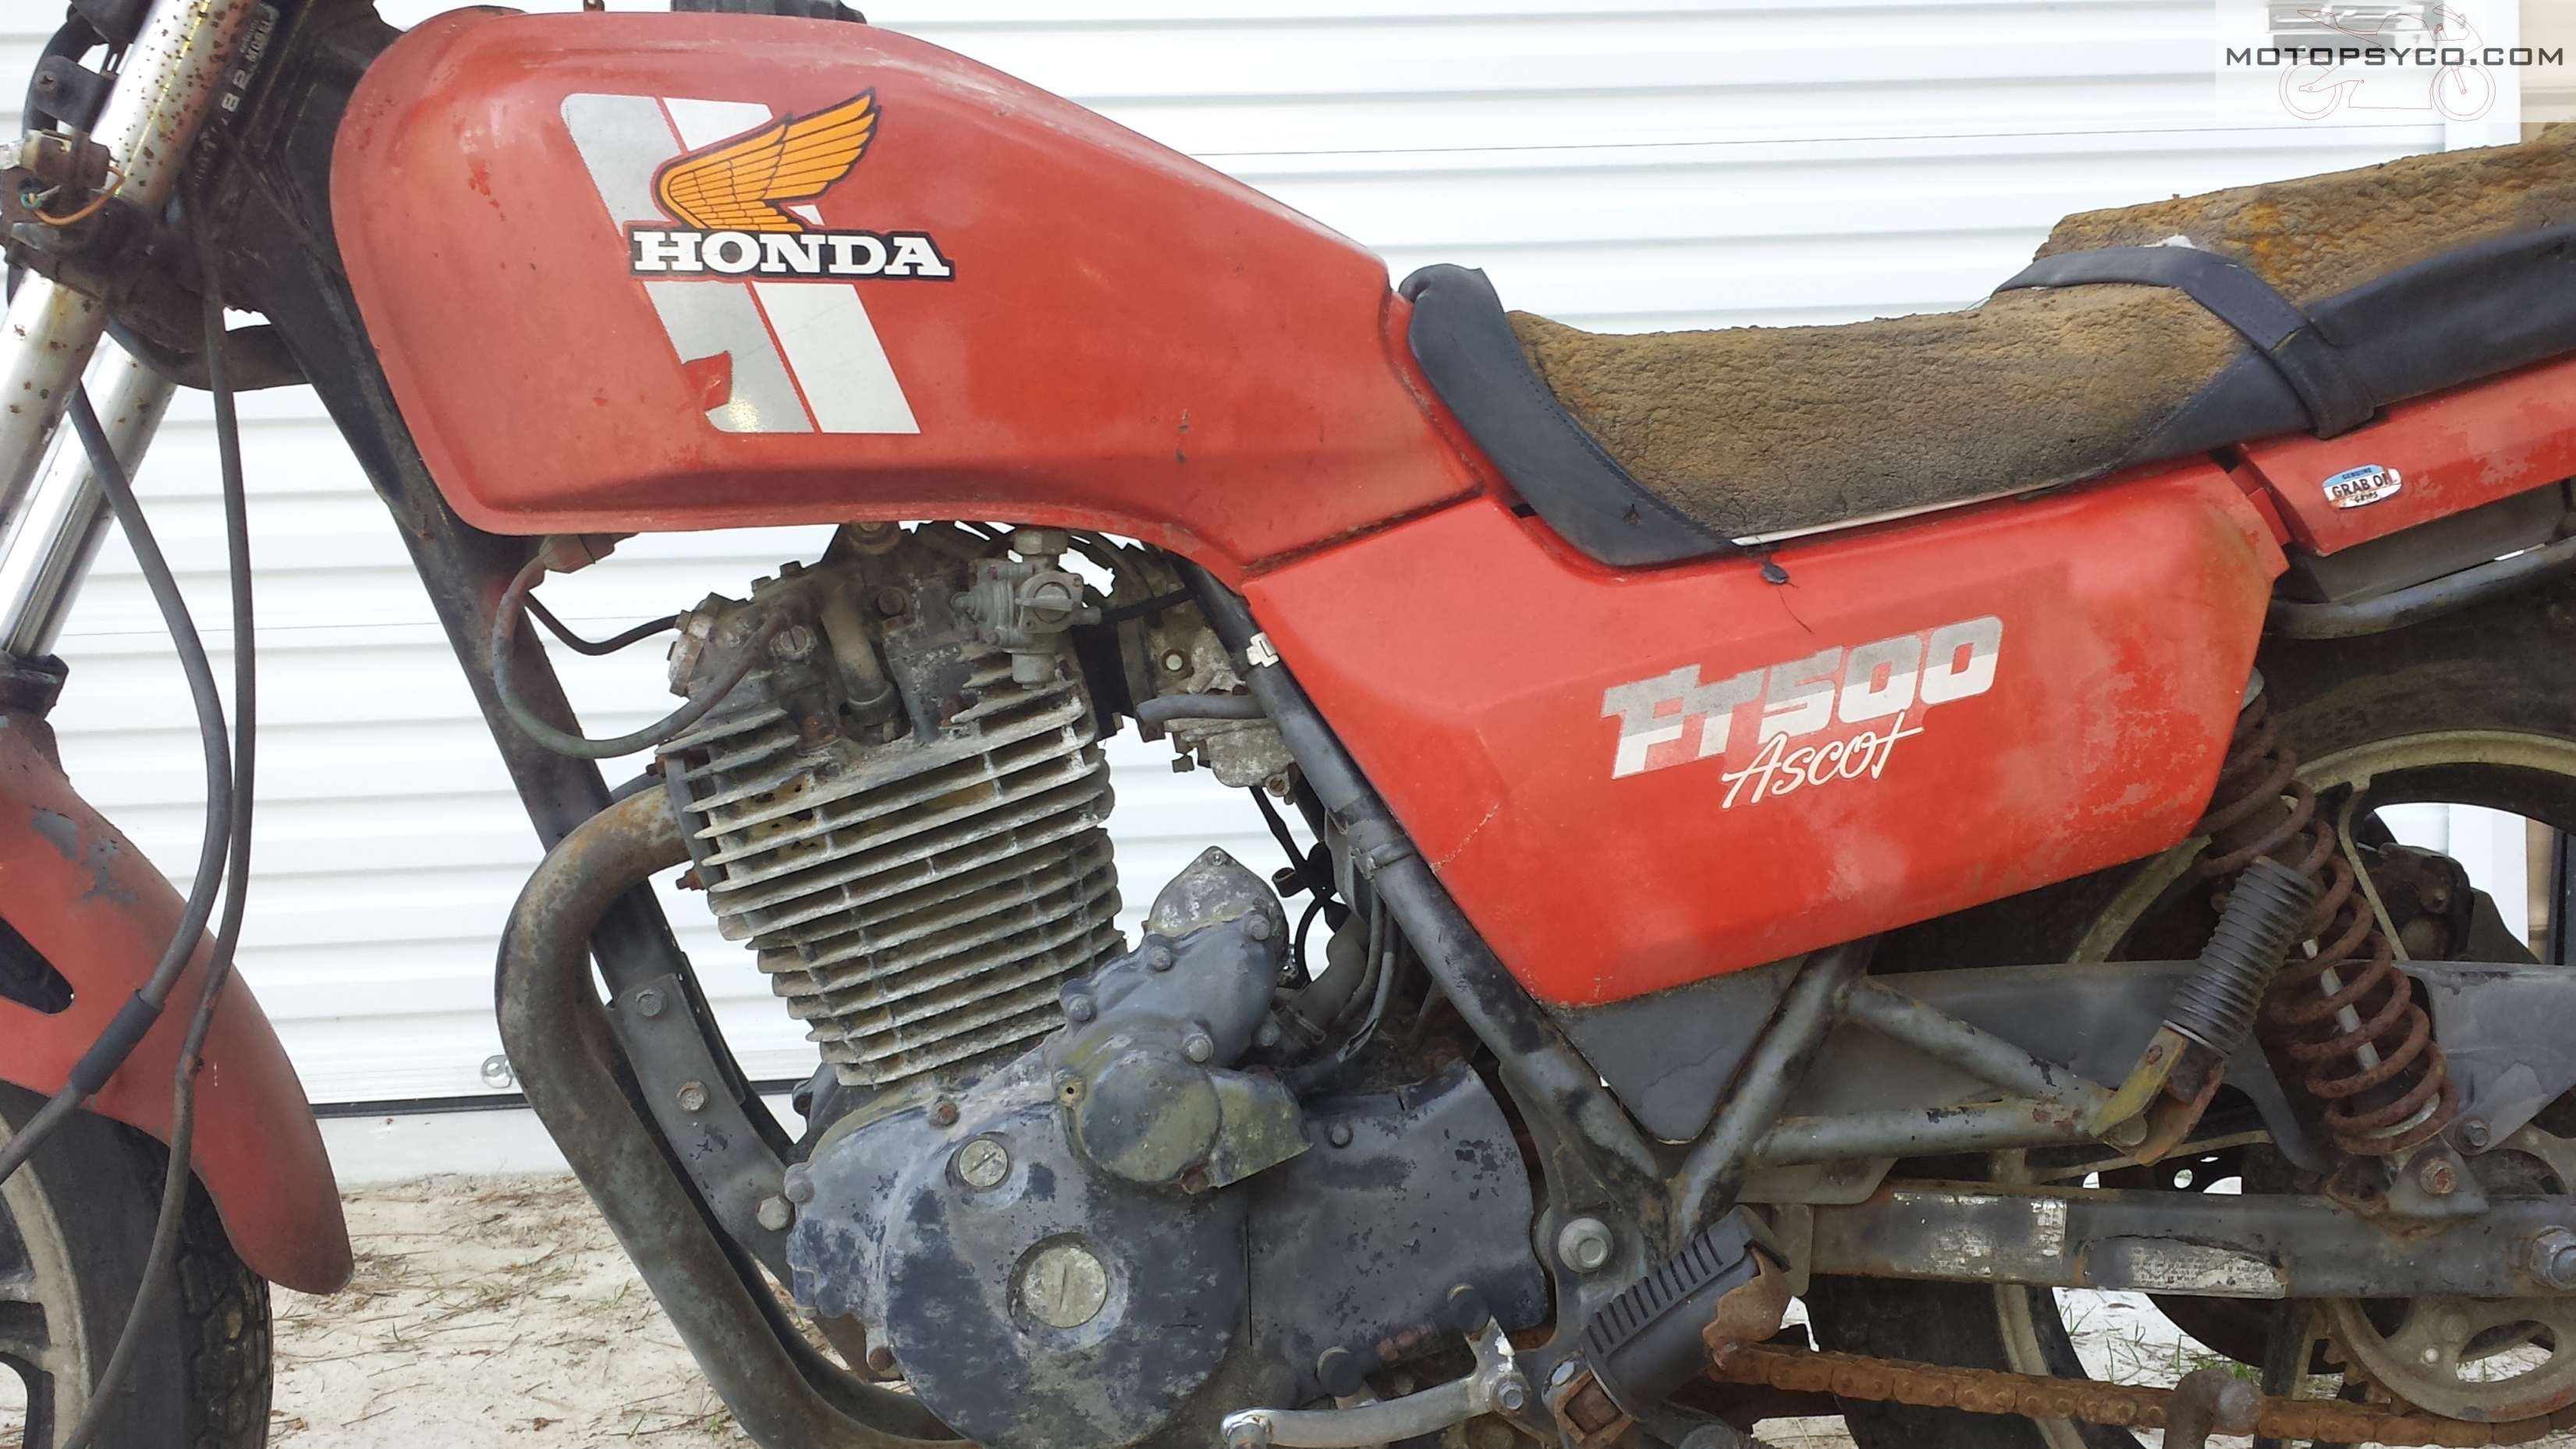
Honda Ascot FT500 Junkyard Dog

Honda Ascot FT500 coming home with me.
I had sworn that I wasn’t going to do this anymore. It’s been several months since I had a hit & experienced that euphoria. It’s tough being an addict but I was keeping clean and was even beginning to straighten out my life & get my act together. We all know the first rule to overcoming an addiction is to stay away from temptation.

Then yesterday I ran into my dealer, and he’s got the best stuff on the east coast. Next thing I know money & merchandise were exchanging places. If you’re a collector & restorer there is no better feeling than buying a new old pile of junk motorcycle. Especially when it’s a fairly desirable model like the Honda Ascot FT500 that you actually really wanted but couldn’t get when you were younger. Oh man it felt so good! I’m still riding that high today as I type this.

The price on this old Honda Ascot FT500 was righteous enough that the condition really didn’t matter. With dirt cheap motorcycles you just need to go ahead & assume that you need to replace or repair everything. That way you avoid the disappointment that comes with having high hopes.

I love it when they have fuzz growing in the cylinder fins.
Last night after supper I grabbed a beer, & removed the timing plugs so I could try to turn the engine and it’s seized but that’s okay as the plan is to strip it all the way down & build it back as a fire breathing hot rod.

This one is a 1982 model. One of the best things about the Honda Ascot FT500 is the funky flat track styling, it’s the closest thing ever built to a factory street tracker. I’m not a fan of the rectangular headlight that instantly dates what is an otherwise timeless design. Beside it’s rusted out & will be tossed in garbage anyway.

One of the best things about this bike is that it has cast aluminum wheels that are not Comstars. All of my other bikes except for my Helix scooter have wire wheels and quite frankly they are a pain in the rear to restore & maintain

it’s so 1980s
So how did a motorcycle with less than 3500 miles wind up in such horrible condition? My guess is the the original owner thought that it needed a new starter, so he took the old one off & went to his local dealer for a replacement. Once they learned the price of a new starter they either swore off motorcycles altogether or went & bought another bike, leaving this poor old thing to die out behind the barn.
If the engine had not been seized I’d go ahead & start working on it but since it needs a full overhaul it will wind up in the corner of the shop with the other “ladies in waiting” where I’ll walk by occasionally and marinade it with penetrating oil until I complete my 2 current restorations. This one definitely will not be restored but will end up being a fairly nice restomod instead.
<1982 Honda Ascot FT500 >
Until next time
Peace Y’all
UPDATE 2023 I never finished this one and passed it on to someone else who wanted it.
Share this:

Emblem & Badge Refurbishment
Author’s Note; Emblem & Badge Refurbishment originally appeared in the Vintage Japanese Motorcycle magazine earlier in 2017.
There are quite a few different methods you can use to restore motorcycle emblems that have paint that needs refinishing. You can repaint them by hand using small artist’s brushes. I have even spray painted tank badges using a solvent soaked rag on a sanding block to remove the paint from the high points of the lettering after spraying on the paint. Of course masking off the different colored areas was a pain.
Recently I learned of a much easier way to quickly and inexpensively refresh your tired looking motorcycle emblems & badges. To give credit where credit is due, I learned of this technique in a post to the Vintage Japanese Motorcycle Club’s Facebook page by Toby Jones in which he spoke of using paint markers from a welding supply house and posted a couple of examples that looked really good. I’d like to say thank you Toby for sharing.
For this article I’m using the front cover badge of my C70 Passport as a Guinea pig to try this technique. The chrome on this part stilled looked good, but the long exposure to the elements had resulted in the paint flaking out of the lettering and accent lines.

C70 badges before
Start by gathering up your supplies, you’ll need oil paint markers, a couple of shop towels, and little bit of odorless paint thinner. For this job I used artist paint markers but you can also get them from welding supply houses. My reason for using odorless paint thinner is that I did this in the house but if you’re working outside you can use whatever paint thinner you have.

Open up the marker and color in the areas that need paint just as if you were a kid playing with a coloring book. Have a shop towel handy with a small amount of thinner on it, not soaking wet, and every minute or so stop and wipe off any paint that has stuck to the chrome outside of the lettering. Be sure to wipe frequently because it will make the paint harder to remove from the wrong places if you let it dry.
When completed, let it dry, and them wipe over the whole thing with a clean shop rag and reinstall it on your bike and enjoy the vast improvement in its looks.

After emblem & badge refurbishment
Prime Day – Prime Membership $3 bounty
