
Tag Archives: custom

The SR500 Chronicles 1
Late in 2023 I picked up an old 1978 Yamaha SR500 and started working on it and chronicling the build over at my YouTube channel. As a result of such extensive posting on YouTube this blog has been kind of ignored to remedy that situation I’m going to start sharing my videos here. I hope you enjoy them as I have a lot of videos in this series to share with you. In addition to the SR500 I have a 1983 Honda Interceptor 750 that I bought cheap and got running extremely well also. As of today 8/7/24, the Interceptor is as done as I want it but work on the Yamaha continues.
Share this:

An American StreetCub
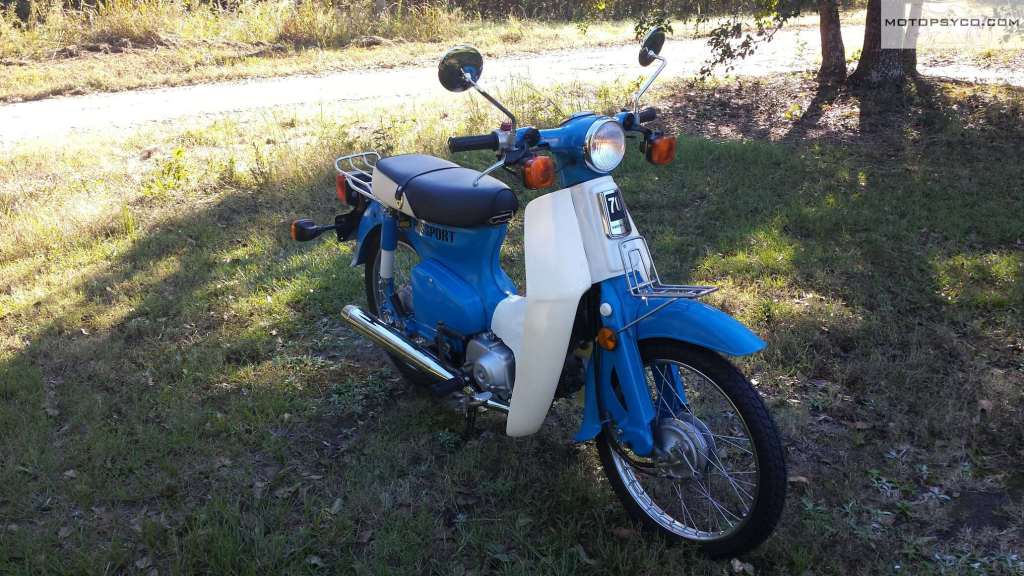
A few years ago I found and restored a 1982 Honda Passport C70 to absolutely pristine condition. The only modification that I did was to change the paint color from Honda’s original Angel Blue to a slightly darker Ford blue. Everything else on it was pure stock and it was an excellent runner. I sold it to pay for my new shop air compressor and while I’m glad to have the compressor I sure did miss that C70 and kept my eyes open for another fixer upper.
Two or three years ago I caught up with an old friend that I hadn’t seen in a while, like myself he’s a collector of projects and things to tinker with, and he just happened to have this Monza Red 1982 Honda Passport sitting in a shed behind his garage. It was crusty & neglected but the engine turned freely. As a bonus it even came with a title!
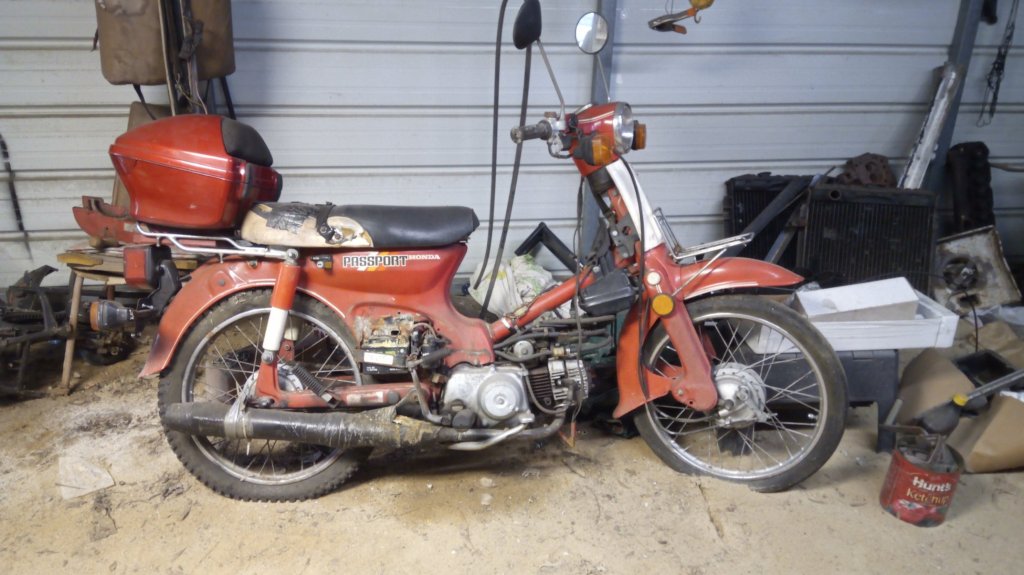
After cleaning the carburetor it would fire up as long as it was sprayed with carb cleaner or starter fluid. It had just enough compression to run and ride but not enough to start without some help. Time to get to work!
I started following several Southeast Asian Instagram accounts promoting the streetcub customs based on the Honda Cub, Super Cub, and Trail models. There’s so much creative craziness going on over there that it was inspiring. The vast majority of custom Cubs in the Orient are stripped down choppers with bobbed rear fenders and minimal bodywork, but there a lot of really cool looking full fender bikes too.
First step was to rebuild the tired old engine, this particular Passport had been abused as a moped for years before my buddy got it and then it spent a few years sitting in his shed. Restoration was not even contemplated for this old machine and I did want more power than could be had from the standard engine so I rebuilt it using an 88cc kit sold by CMS in the Netherlands.
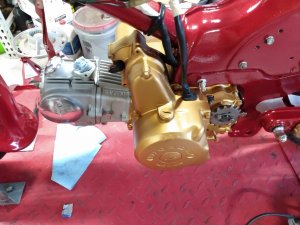
Then using an AFR gauge I re-jetted the carburetor for maximum performance and installed a stainless steel exhaust from a Japanese company called Wirus Win. It has a great look and sound with decent performance now.

Some Paint & Bodywork
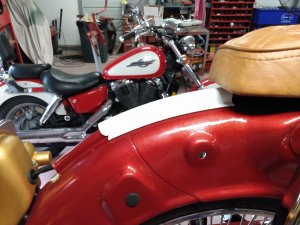
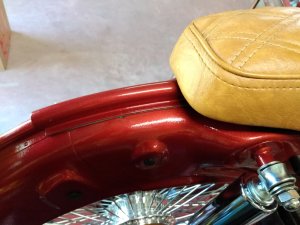
It was going to be red, there was never any doubt about that. There was also never any doubt that it would not be the original Monza Red because it just didn’t have the pop that I was looking for. The color chosen was Firethorn Red Pearl from TCP Global in a single stage urethane. I consider myself to be a decent painter but am especially proud of how this bike came out. This paint job has never been buffed and the shine you see here is how it laid down straight out of the gun.
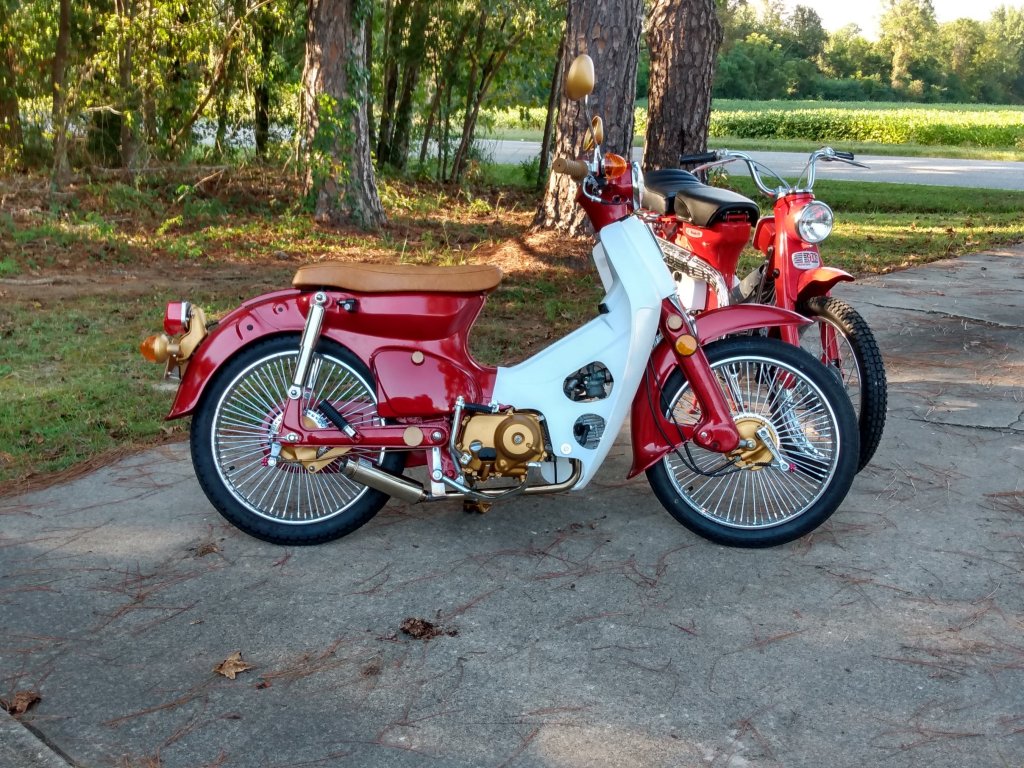
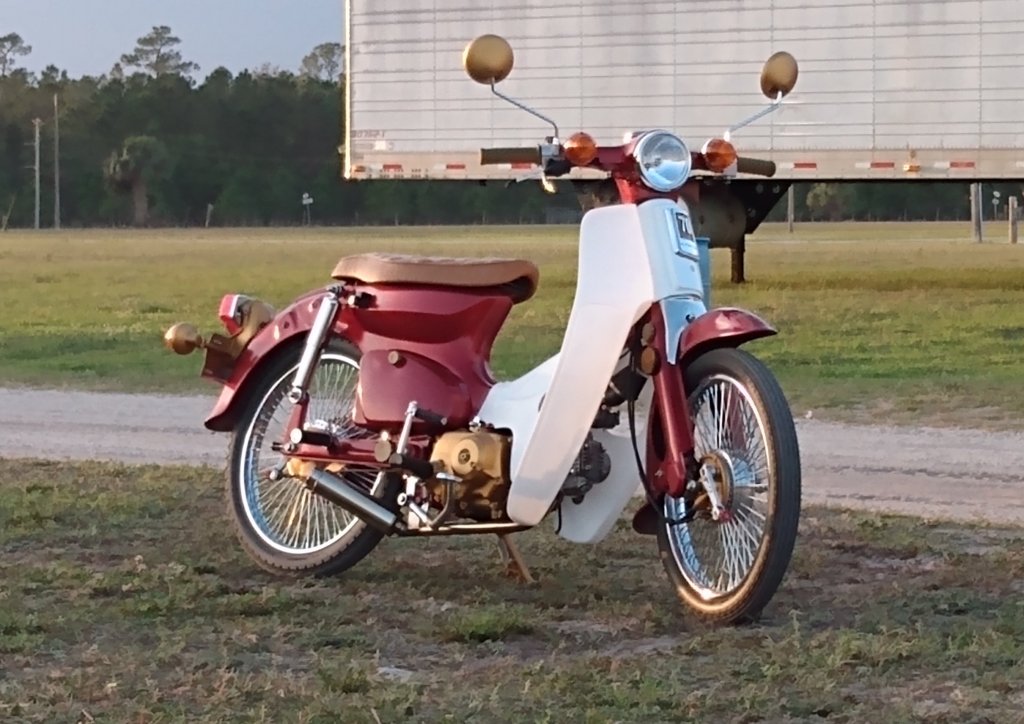
The leg shield is a new aftermarket piece, for it I mixed a couple of spoons full of dry pearls into some urethane clear for a nice sheen to enhance the plain white plastic. A couple of different shades of rattle can gold highlight the engine & a few small parts here and there.
Bought a Few Cool Pieces
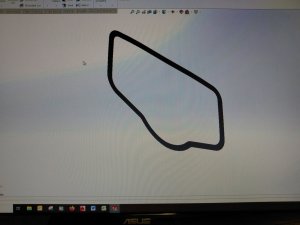
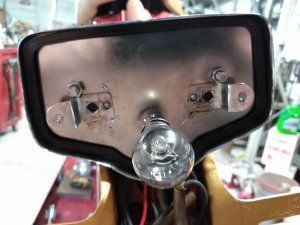
After the paint there are 2 other parts that really stand out; one is the brown custom seat, two are the chrome plated 72 spoke wire wheels, both of which came from Ebay. I also wanted to get rid the dangly eighties style turn signals and have old looking round signal lights mounted on the handlebars not hanging under them on the ungainly looking original stalks which are clearly an afterthought. The rear license plate & light bracket were modified to accept turnsignals from an old CB350 I had laying around. The taillight itself was new but I have no idea what it fit. I did have to 3d print a new gasket for it using a flexible material known as TPU95.
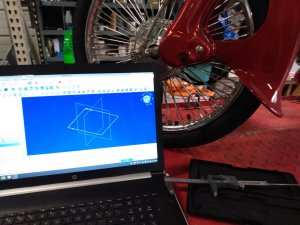
3D Printer Go Brrrr!
At the time I had just gotten my first 3d printer and I really wanted to do some cool stuff for this little motorcycle so I did. Almost all of the black rubber grommets and frame plugs were replaced with parts printed from black TPU95.
All of the fork, frame and swing arm plugs are of my own design and were printed out, painted & installed during final assembly. Side cover knobs were made to match the style of the frame plugs and look really cool. These little frame and for plugs on the original bikes don’t match each other and this has always irked me as it gave them the appearance of having been designed piecemeal.
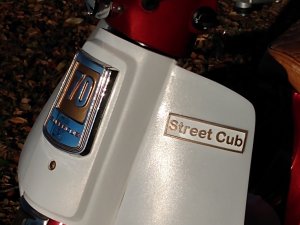
The “StreetCub” emblem on the front was designed and printed in white plastic with the lettering & outlines highlighted with gold paint.
More Than The Sum of Its Parts
Overall the final product makes me very happy and last year it scored a first place trophy as best motorcycle at a large car truck & bike show that happens every year in my home town of Hartsville S.C. I’m convinced that a lot of people don’t realize just how heavily customized it is, but it always attracts favorable attention everywhere I take it even at Daytona Beach Bike Week.

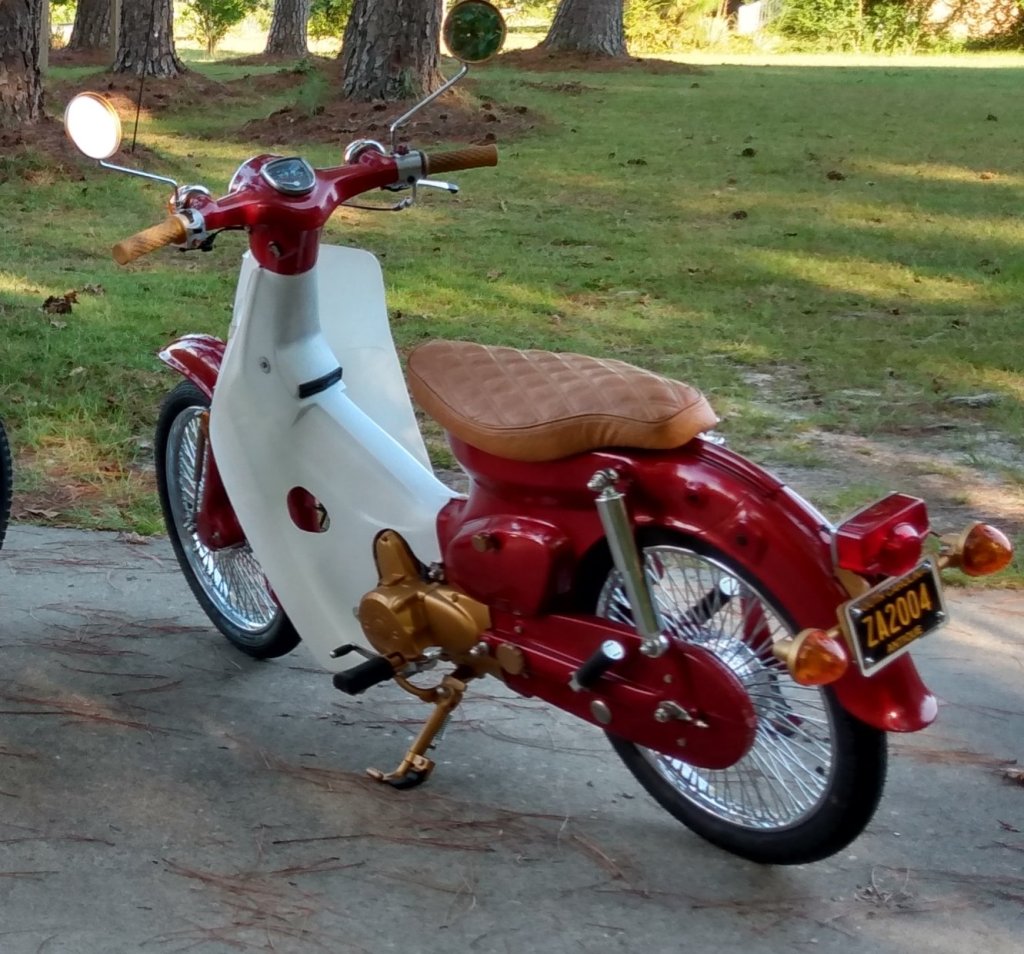
One of the big selling points of Honda Cubs & Passport was their practicality and relative comfort. I think I killed that with that with this one. The seats not very well padded, the exhaust is nearly loud enough to be annoying and without the luggage rack you can’t haul your groceries home with it. But it’s got miles of style and when we were eating supper at the campground in Florida I looked up and saw the evening sun sparkling on the gold pearl in the paint and the chrome gleaming I knew that I had done the right thing with this little 1982 Honda Passport. Originally its form followed its function but now form is the most important thing and its main function is looking good.
Share this:

Old Bikes & Shop Updates
It’s another Fourth of July, and while we’re celebrating the signing of the Declaration of Independence, I thought it was a good time to post an update on what’s been going on around here. Things are kind of hectic but I’m finally getting the shop back together and working on old bikes again.

old bikes 1964 Honda CA78
Originally my plan after moving to the new location was to close my shop to the public and concentrate strictly on restoring my stock pile of personal projects that have been gathering dust for some time now.

old bikes Cushman Eagle basket case
At this point I have no plans to offer any more services to the public, I currently have a large backlog of promised restorations that have been delayed so I’m not accepting any new commissions at this time. If I have already agreed to do a motorcycle for you, it will be done and it will be a show winning beauty. Once all of the other peoples motorcycles that are already in the pipeline are done, the plan is to restore the accumulation of cool old bikes that are gathering dust in the corners of my shop and other buildings on the property.

old bikes 1968 Honda CL90
Earlier this year I became very sick and was out of work for 2 months. While this was somewhat of a financial hardship especially after buying a new house and moving, it also led me to the realization that I’m now closer to the end of my life than to the beginning of it. The phrase “I have the rest of my life to finish things,” has become “I only have the rest of my life to finish things.” A sobering reality especially when combined with diminished physical strength and endurance.
Four and one half weeks ago I got approval from the county code inspector to get power connected to the shop so I could have sufficient electrical service to run the equipment and get back to work. As of today (7/4/2022) I’m still waiting on the electric company to come and connect the power. They’re probably waiting on the transformer that will be needed for the installation. Unfortunately all of American industry is designed and set up for a “just in time” delivery and manufacturing model that is no longer viable. We all have to be patient, adapt to our new reality and find away to work around the problem. Once my power is connected I’ll announce it here and open the shop back up.

old bikes 1982 Honda C70 & 1964 Honda ct200
Even though new blog posts have been scarce, (my apologies for that) before moving I was incredibly busy and turned out several very nice projects that Ill share with you in the coming months. Hopefully you’ll enjoy seeing them when I get them posted. In addition to restoring some more of the old bikes, I’ve purchased yet another new motorcycle and will be doing a brutally honest review of it very soon.
Peace, love and hope to everyone out there, the future may seem a bit murky right now but we’ll all get through it somehow and continue to be prosperous and happy.
Share this:

Is A Lithium Motorcycle Battery For You
Lithium Motorcycle Battery Pros & Cons
If you have not heard the buzz about lithium batteries for motorcycles then you have probably been hiding under a rock somewhere. There are many different brands available, and although prices have dropped some you may have noticed that they command a premium price. The question for most people is lithium motorcycle battery worth it? Most of the time yes, but sometimes the answer is no.
Of course there are a number of advantages and some disadvantages of lithium batteries in general. The single biggest advantage they have for the motorcycle restorer or customizer is that they contain no acid. There’s nothing worse than to have your battery burp a little acid out through the overflow tube and dribble it all over you freshly restored paint & chrome. Even if you carefully route the vent tube the acid still seems to corrode the battery box, frame etc.
Figure 1 Battery acid damage to a Gold Wing
For the collector & show bike enthusiast who does not ride their motorcycles very often, a lithium battery has a very slow self-discharge rate. Especially on older motorcycles that have zero current draw when the key is switched off a fully charged lithium ion battery will usually maintain enough current to start the motorcycle for up to a year. Please note that it is recommended by all manufacturers that you disconnect and remove the battery for storage. If your motorcycle has any current drawing accessories such as a clock or an alarm system the battery must be checked & charged on a regular basis if you plan to leave it connected to your motorcycle.
In racing or other high performance applications lithium ion batteries have the advantage of weighing much less any other currently available battery configuration with equivalent specifications. I cannot recommend them for total loss ignition systems on race machines unless you are willing to be extremely diligent about checking and recharging them, and you accept the fact that this is basically a non-warrantied experimental use in the eyes of the manufacturers. If your racer has a charging system that meets the minimum charging requirements of your battery then you should not continue to handicap yourself by running a heavy lead acid battery.
Customizers love these batteries because they can be installed in any position even upside down. There are a few different from factors, most appear similar to a standard battery, but there are a few oddly shaped batteries available. Li-ion batteries are much smaller & lighter making them much easier to hide in café racer bum stops or under seat trays.
Figure 2 Conventional and Shorai Lithium Gold Wing batteries for comparison

Warranties are usually better on these batteries running on average 3 years from most suppliers if they are installed in a factory recommended vehicle with a good functional charging system.
This leads to the biggest caveat of them all. Your motorcycle or other powersports vehicle must have a charging system capable of maintaining a steady charging rate of 13.6-14.4 volts during operation. If you have an older motorcycle that has a marginal charging system that is not capable of maintaining this charging rate and you want to run this type of battery some charging system upgrades will be needed. If yours is a fully functional mint condition classic motorcycle with all original parts, I personally would not change it just to run a li-ion battery. For one that is a frequent driver, or just needs a new charging system, look at some of the aftermarket upgrades available, it might be worth your while upgrade your charging system even if you don’t choose a Li-ion battery.
With proper precautions (see the manufacturer’s instructions) these batteries can handle some water spray or a very brief dunking, if you frequently run long deep water crossings on your dirt bike or take your atv and drive it around in the water with nothing but the snorkel sticking up above the water then these batteries are not for you.
Another factor to consider for some is that if something goes wrong & your battery goes dead away from home it can’t be jump started. Once discharged below a certain point these batteries have to be charged back up with the manufacture’s recommended charger, or you risk damaging the battery. So if you’re the life of the party & plan to use the stereo system in your Gold Wing to provide music for the whole campground until late at night & then get your buddy to give you jump start the following morning so you can get home then you shouldn’t even consider a lithium battery.
Since this was published in the Vintage Japanese Motorcycle magazine I must note that if you need a six volt battery, at this time the only manufacturer offering a six volt lithium motorcycle battery is Shorai.
Cold weather operation is a little different & takes some getting used to. When the temperature drops below freezing a li-ion has very different operational characteristics. They actually require a bit of a warming up period to deliver full voltage. For my own personal driver, a 1980 Honda CB650, when the temperatures are at or below freezing I will switch the key on and make sure the headlight is on high beam for about 30 seconds before hitting the starter button. If the engine turns too slowly to start I let go of the button and wait a few more seconds at which point the battery is fully warmed up and will spin the starter normally. It’s just a little thing & I realize most people are not masochist enough to ride a motorcycle in the freezing cold if they have a car, but it is a difference in the behavior of lithium & lead acid batteries that you should be aware of.
To me the advantages of the lithium motorcycle battery outweigh the disadvantages and I hope that this gives you enough information to help you make an informed decision about whether or not you want to purchase one.
This article originally appeared in the Vintage Japanese Motorcycle Magazine in 2015. To learn how to join the club and receive this fine publication 6 times a year visit http://www.vjmc.org
Disclaimer; Motopsyco is an authorized Shorai battery dealer and will be more than happy to help you with selection of your new battery, so if you can’t figure out which one you need from this battery finder link, feel free to contact me by email at motopsyco@motopsyco.com.
Share this:

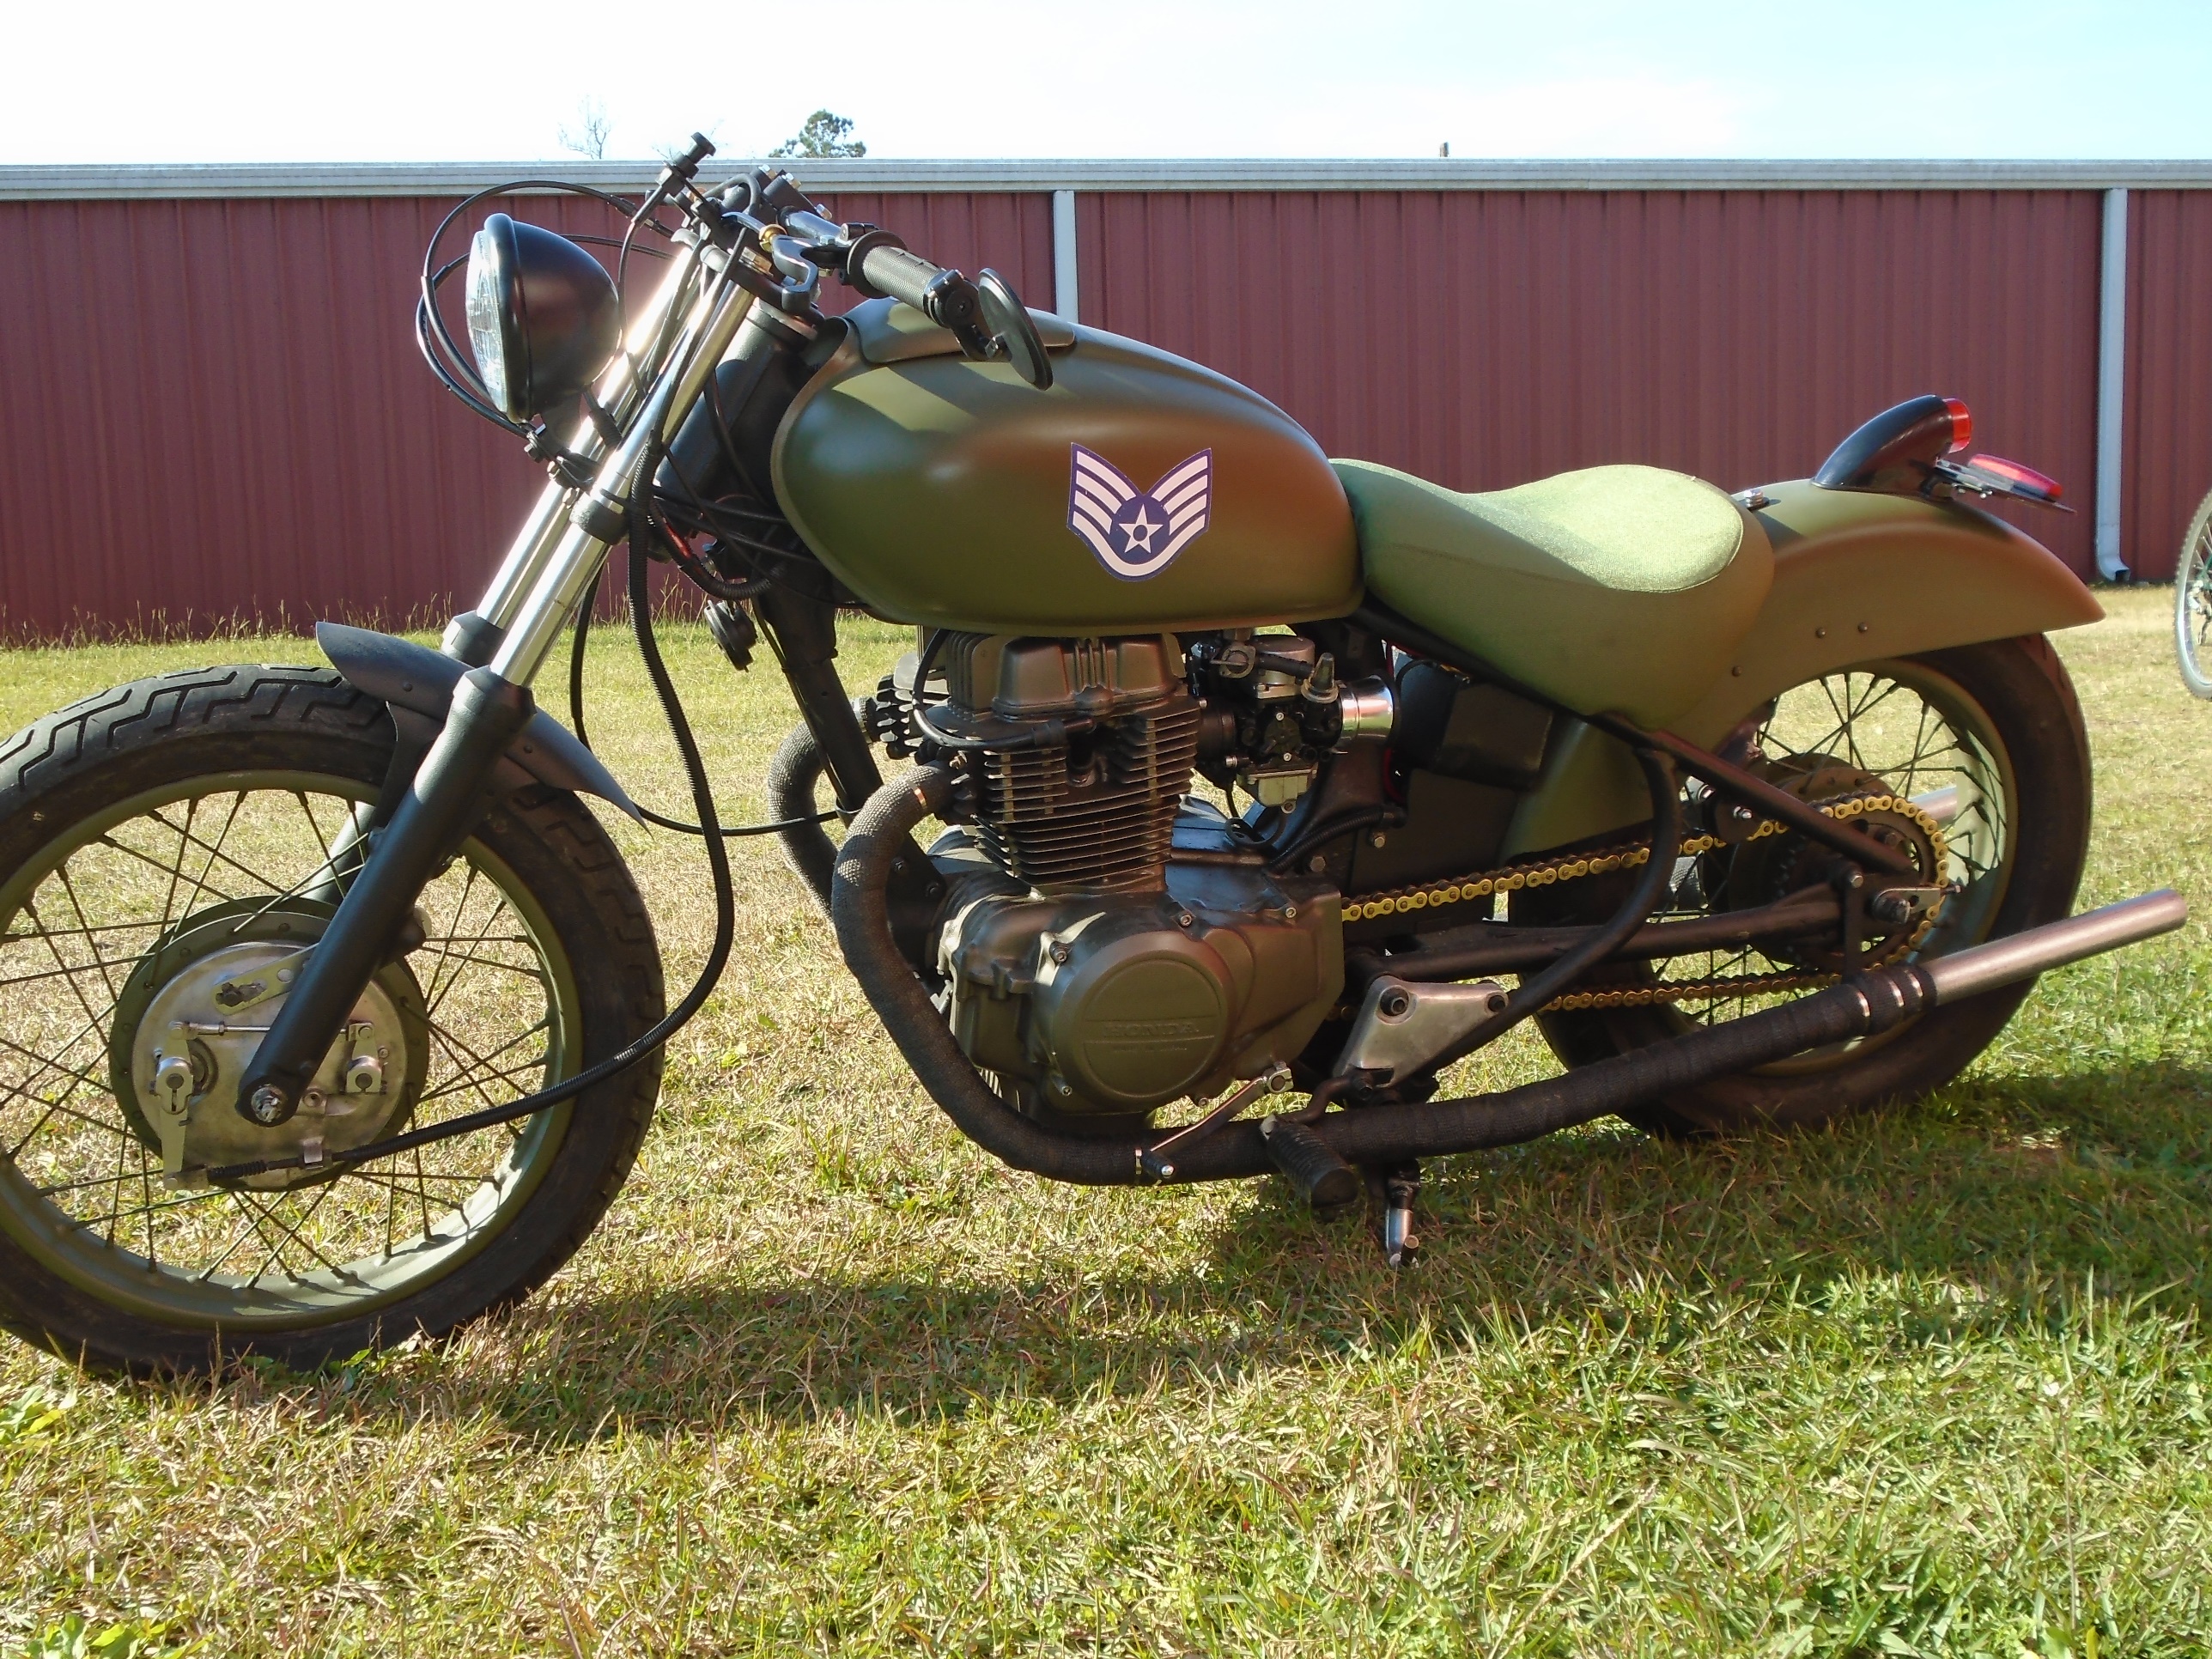
Honda CM400 Custom Project wAmmo Finished
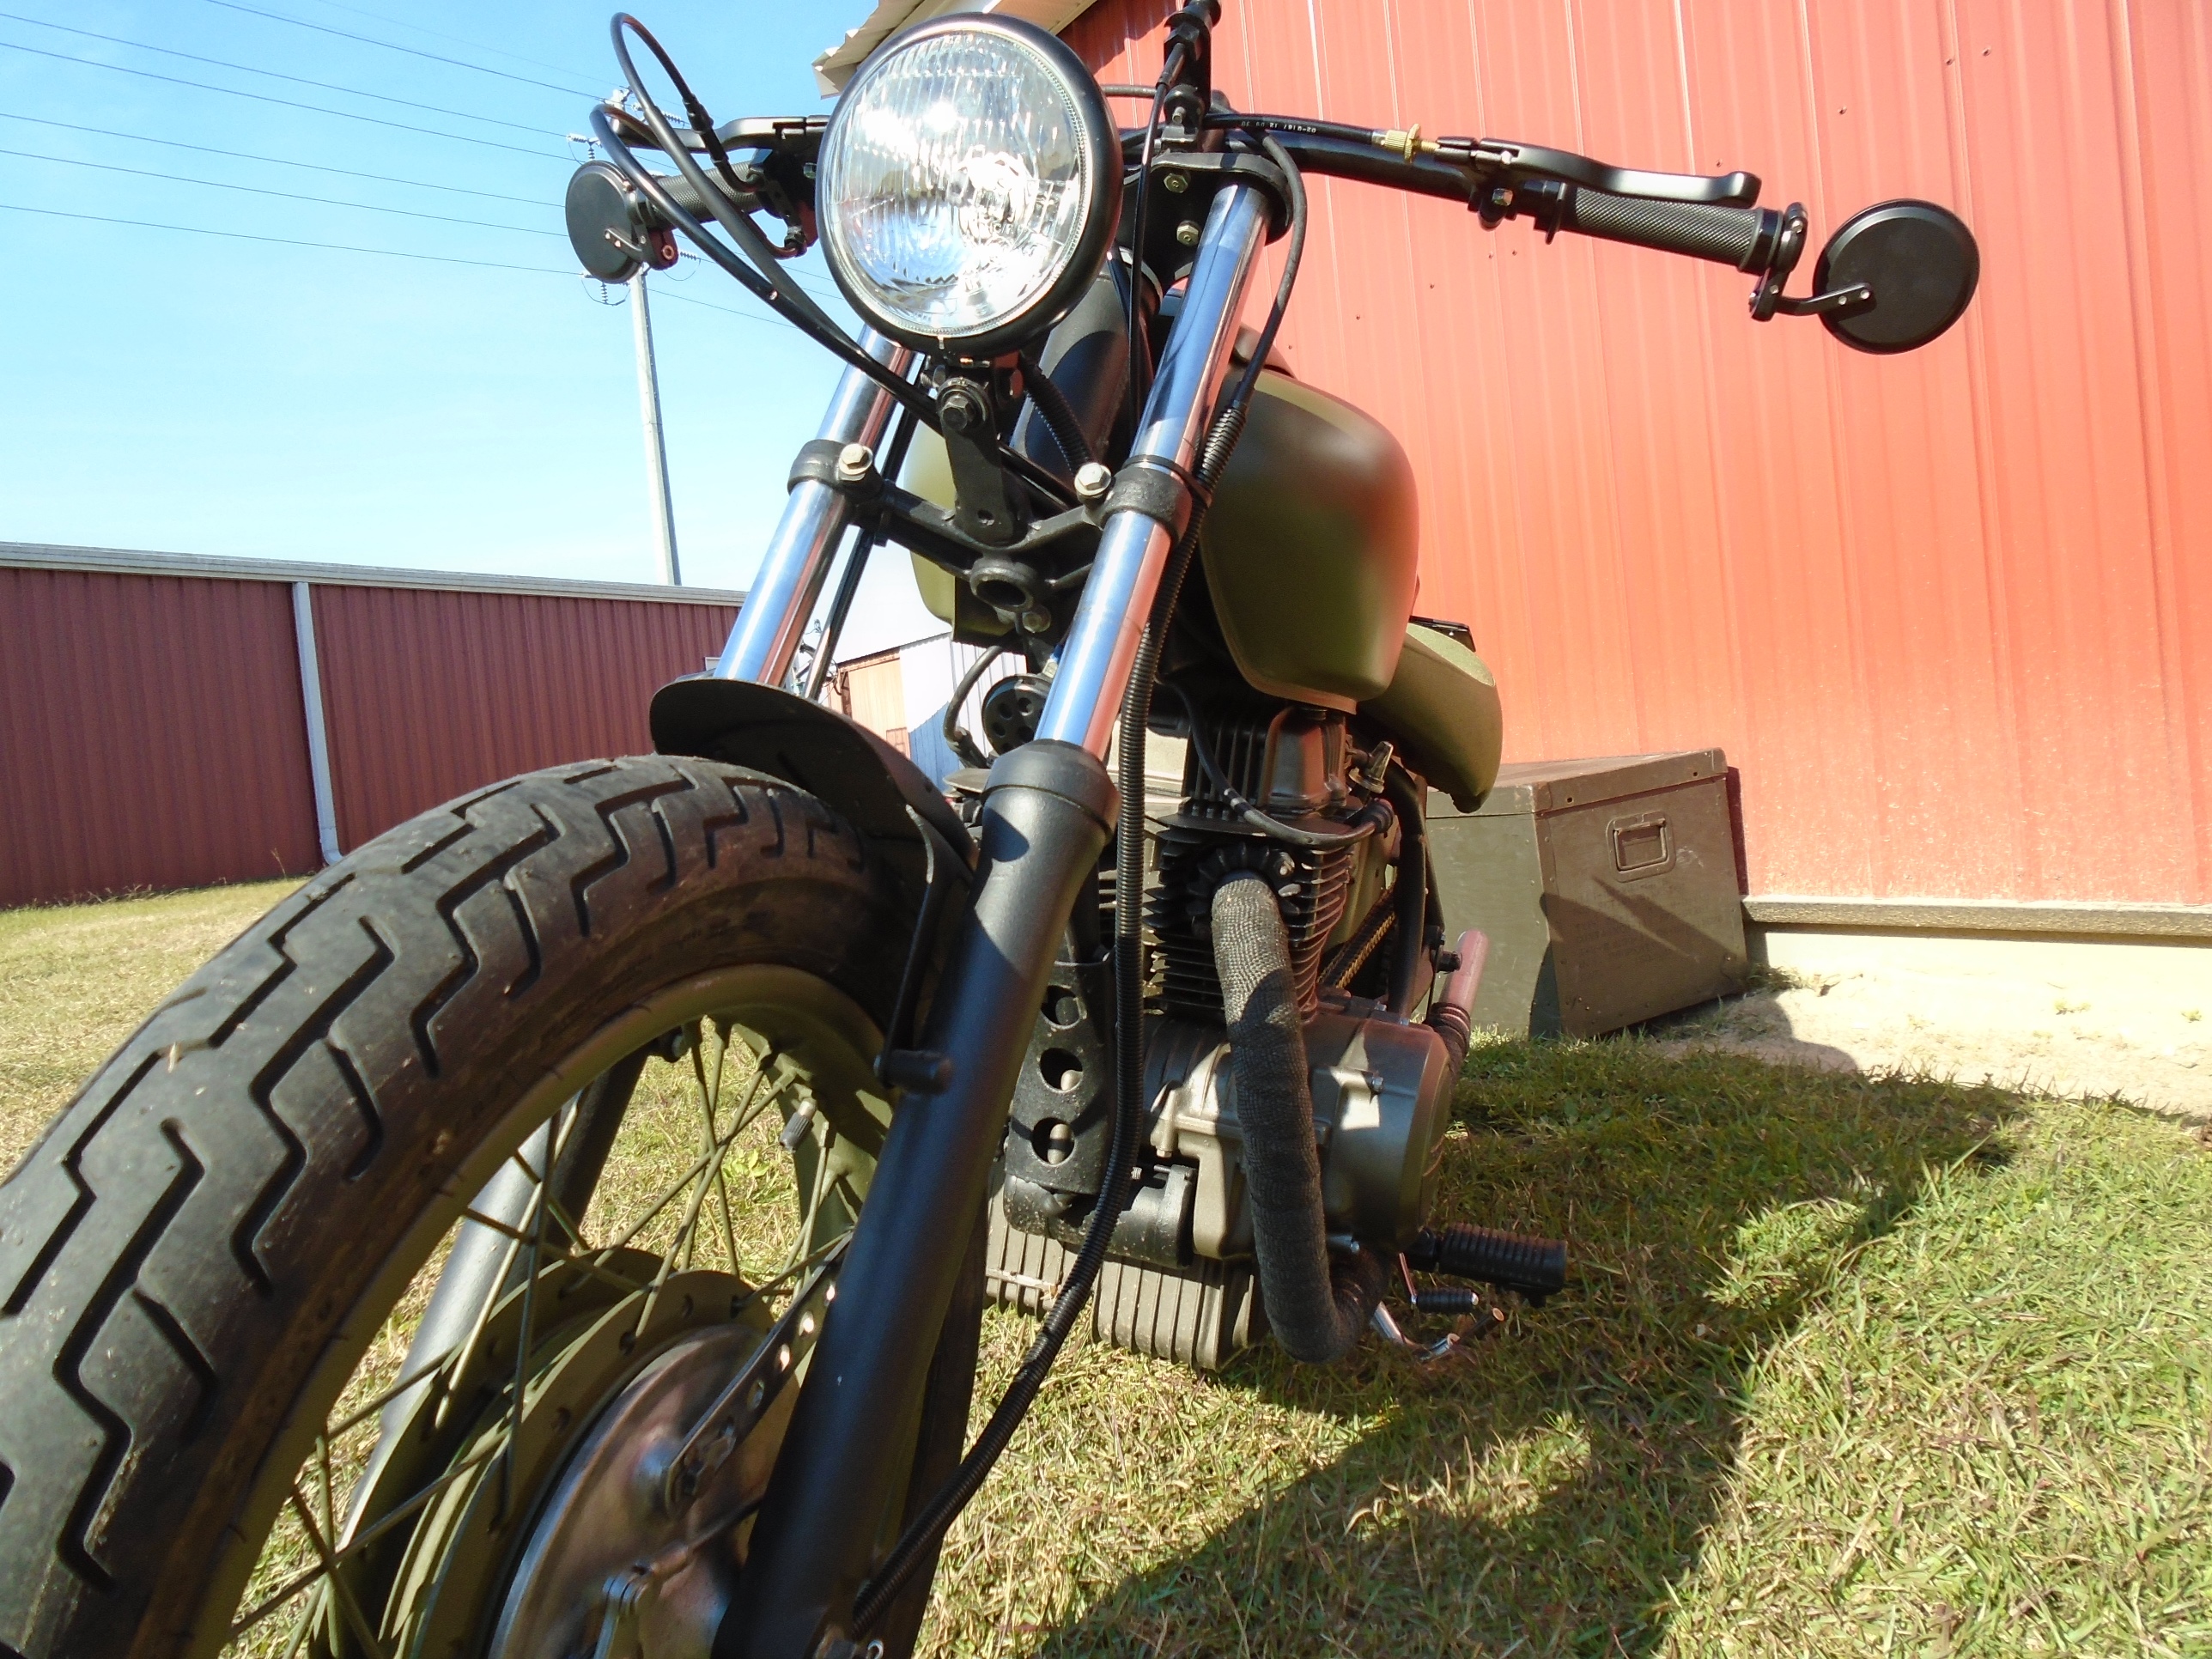
The day I originally brought this Honda CM400 home it was sold and the new owner almost immediately asked me to rebuild it as a tribute to his days as an ordnance technician during the first gulf war. He wanted a rat bike simple and rough edged with his rank and an Ammo Corp logo on it. Olive drab paint was necessary, wrapped exhaust & low bars were part of his specification. He also did not want a side mount tail light, a rather unusual request on this type of bike. The rest was up to me

The hand painted logo is not necessarily authentic to his unit but is based on a generic amalgamation of such insignia as I found online.

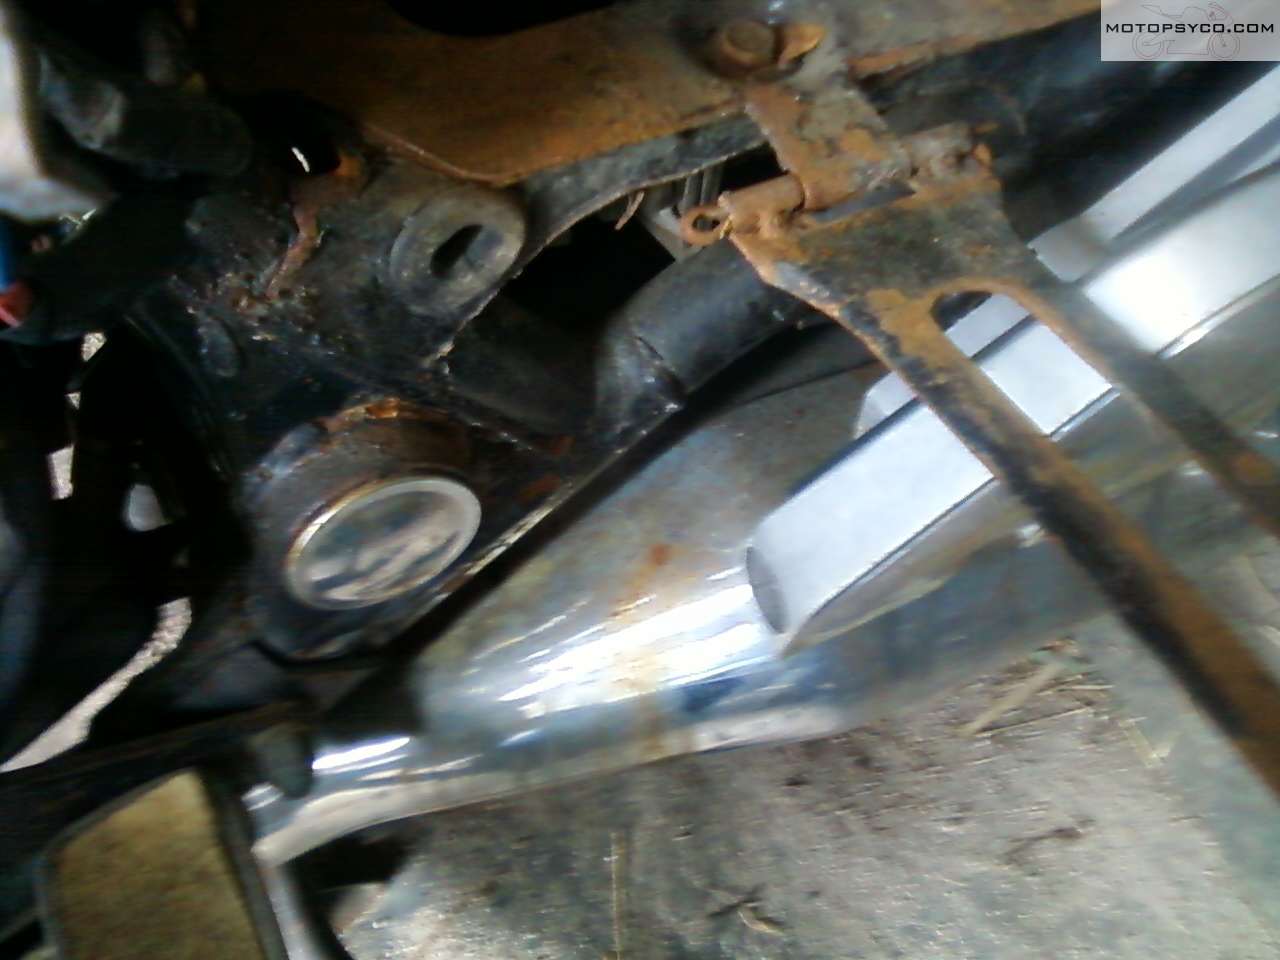
The long exhaust pipes were made from small chain link fence posts bent & brazed to the stubs of the original head pipes. The exhaust wrap makes everything look cool and it has a mean sound, just listen to this video.
The rear fender started life as a brand new aftermarket front fender for a Harley Electraglide, that I cut down & installed backwards to make a fantastic custom rear fender. The voltage regulator was bolted to the side and a good old fashioned Sparto tail light was mounted on top.

A little while back I did a post on twin leading shoe brakes and here they are installed and working just fine on the front of this little Honda CM400

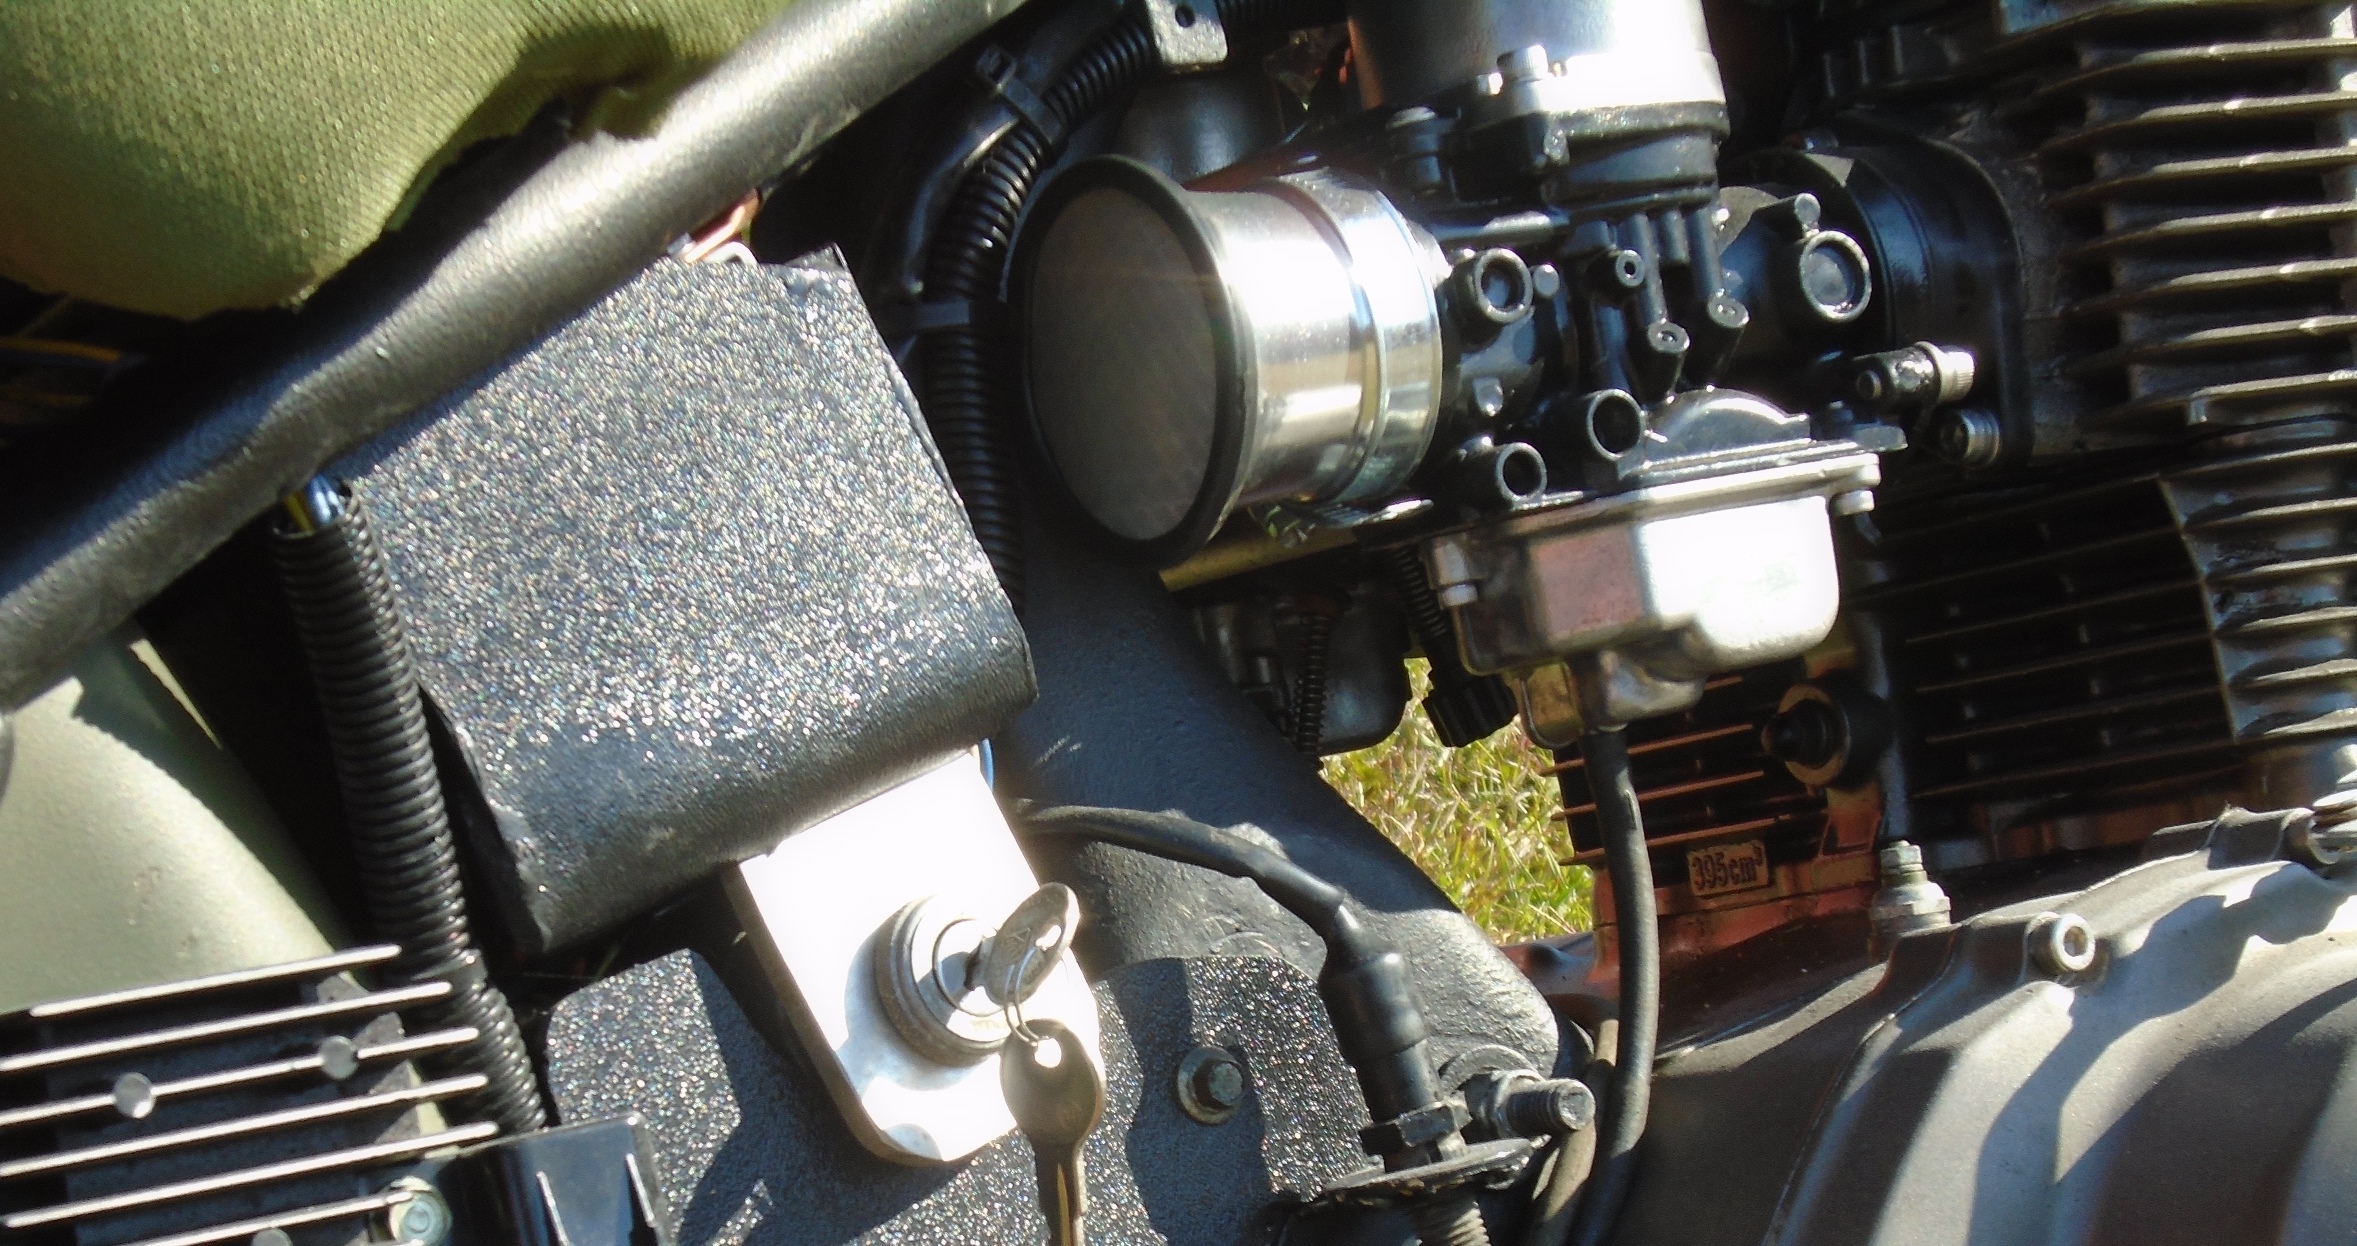
The factory carbs got a serious overhaul and were re-jetted to work with the 54 mm velocity stacks & open exhaust with a Six Sigma
jet kit. The fine people at Six Sigma
really know their stuff and can usually set you up with a jet kit custom matched to your application. The key switch is your basis auto parts store universal hot rod part but the alloy bracket and the ABS plastic battery box & side covers are my work.
The solo seat was a swap meet find that was reworked to fit and the covered in olive drab Cordura fabric.

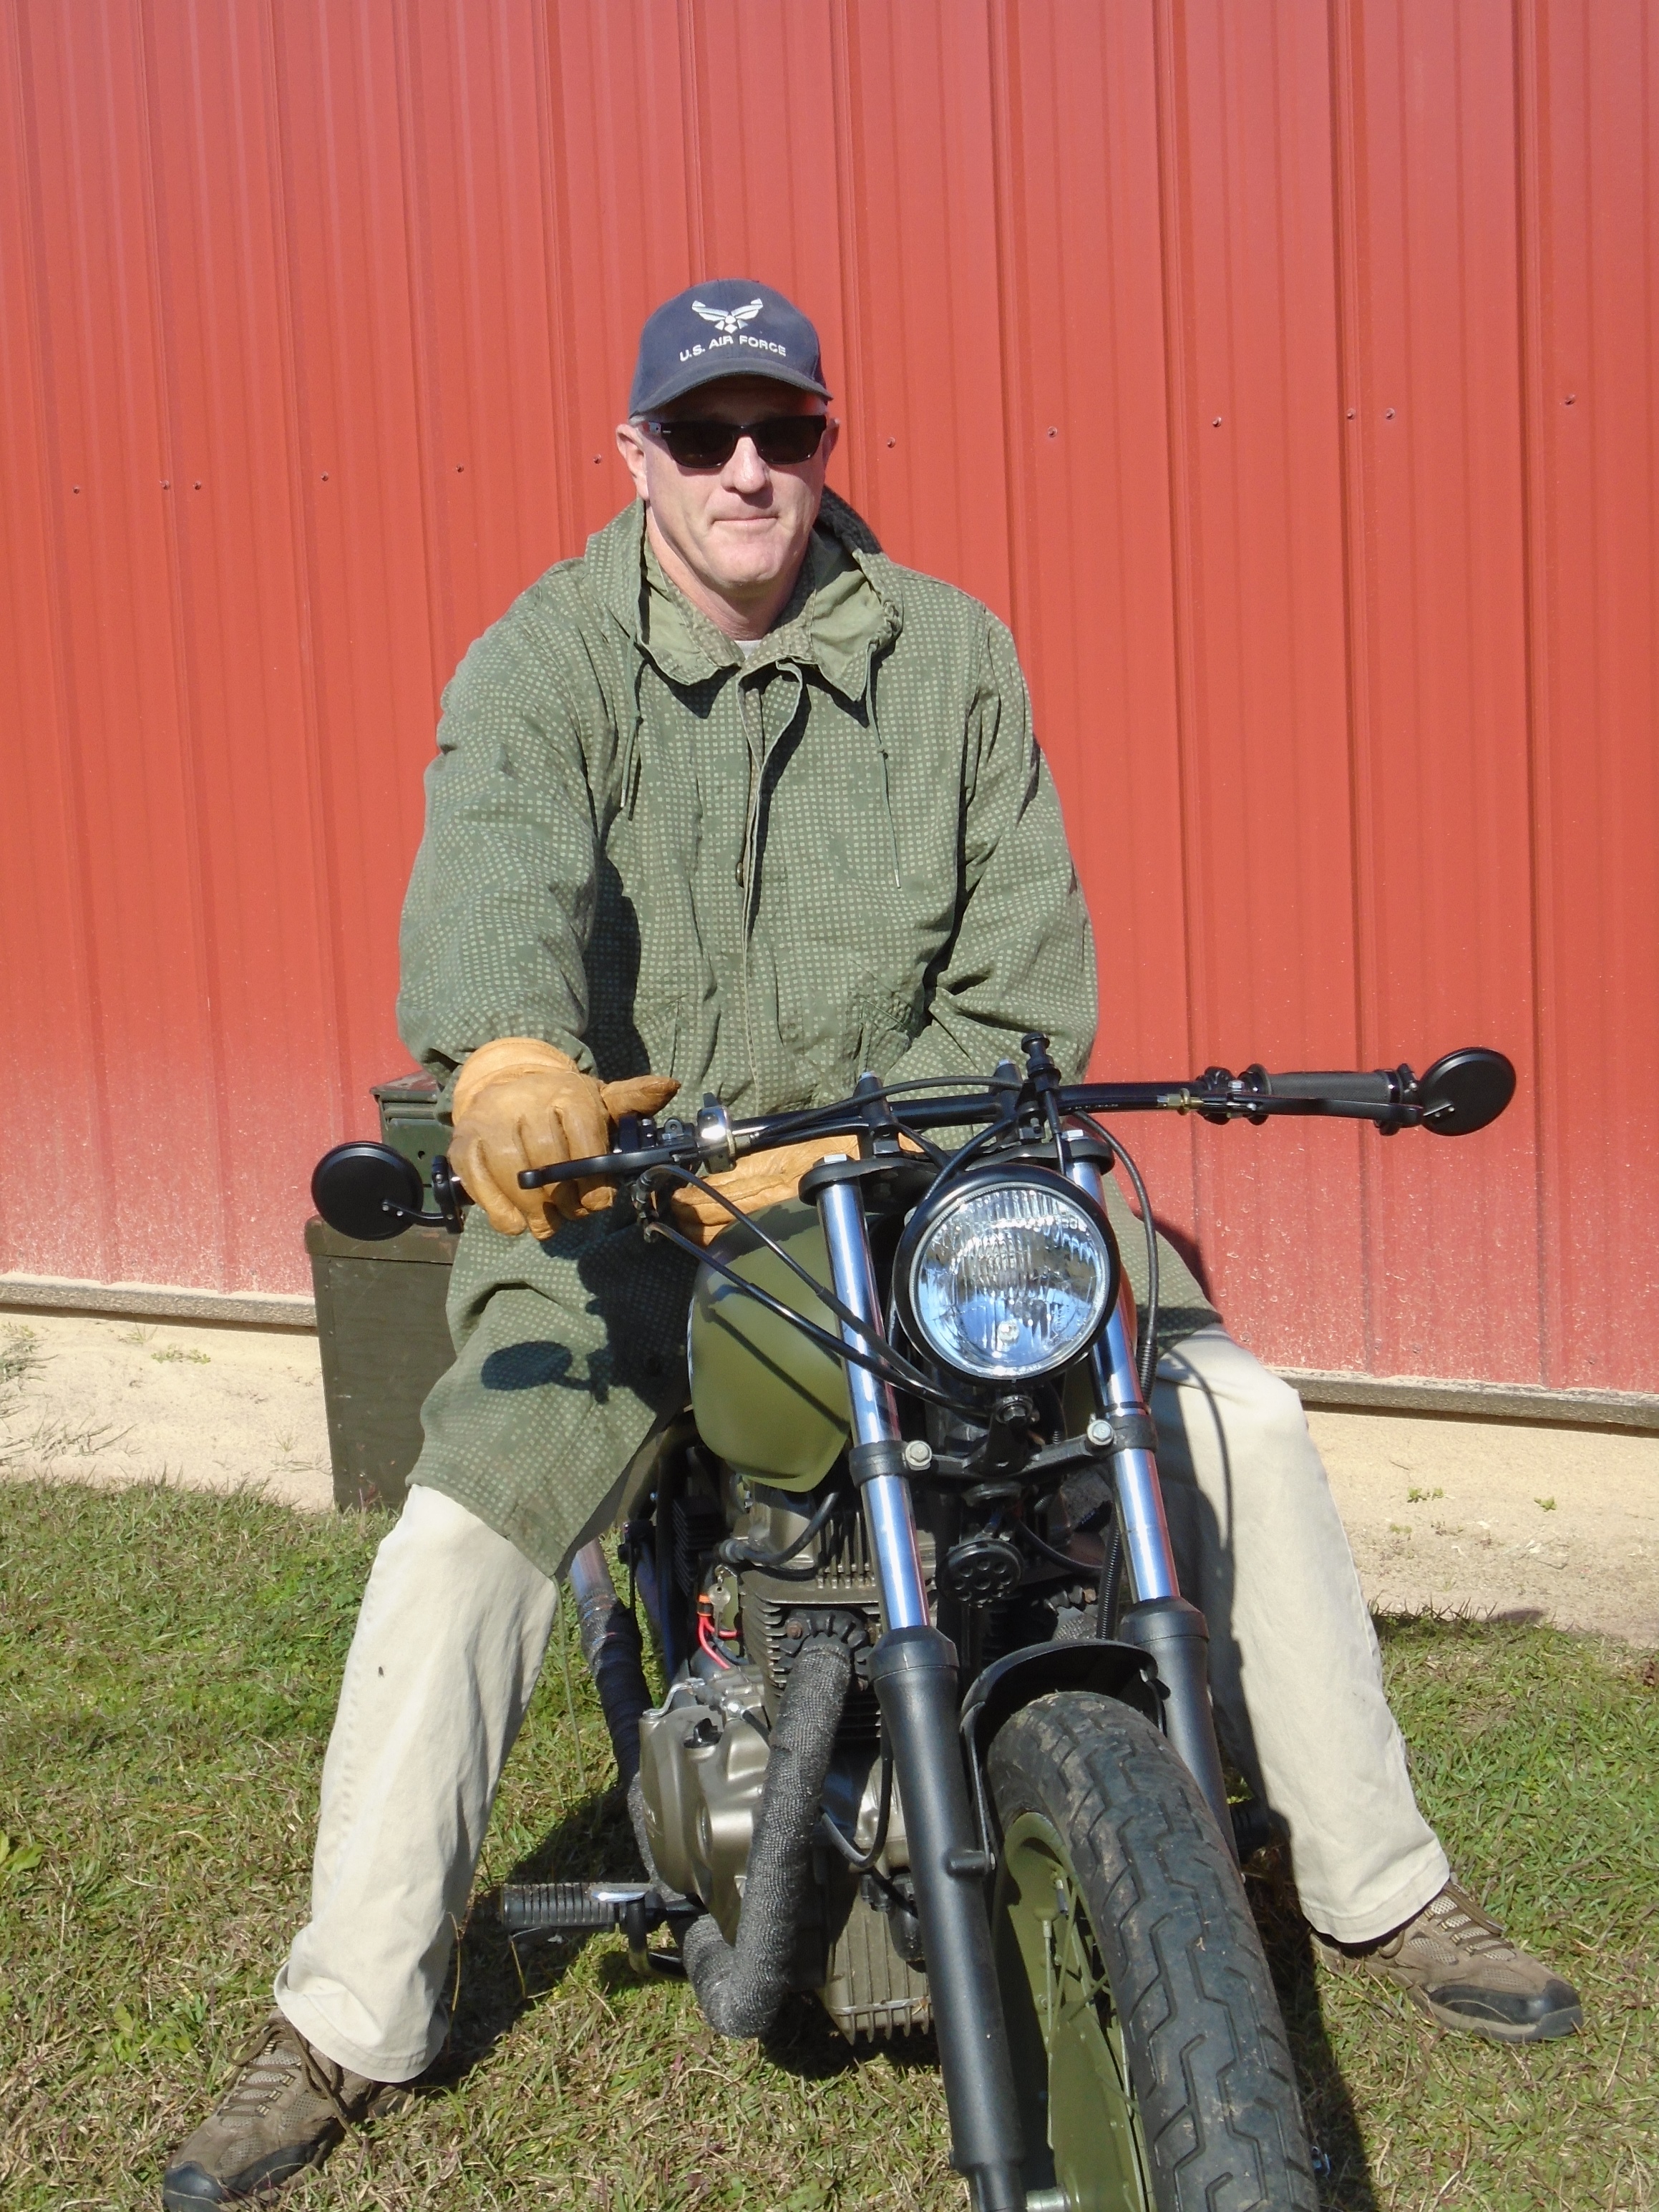
Here’s a shot of my buddy trying to look all serious and tough when he really wants to smile
The bar end mirrors actually work very well on this bike.

That’s enough words from me, here’s a little 1 3/4 minute video showing various excerpts from the build and the proud owner taking it for his first spin around the parking lot, and a couple big pictures further down on this page.


Peace Y’all!
Share this:

Loving the Reader Feedback on This Blog
It’s always great to hear from readers about the various things that I’ve written through the years, for example a little over three years ago I wrote a post underscoring the importance of always using a new cotter pin every time you need one. Just a few weeks ago I received an email from a reader who had a near tragic ending and these next few words will be his.
Comment: I just wanted to share a story about why you should always check those cotter pins.
I had just rebuilt a 200cc bike, and after riding 50 miles, the back wheel came off. I broke my clavicle, went to the ER in an ambulance, destroyed my helmet, broke my crankcase, and scraped up fairings and the frame. The towing & impound were expensive too. In the end, this cost me thousands, and I was out for 6 weeks w/ a hurt shoulder.
All this because I rode the bike without a cotter pin.
I’d torqued up the rear nut to spec, and it only took 50 miles for the nut to back out. I never thought it would happen…but it did.
Now you’ve heard from a man who really knows and yes he still rides motorcycles. He asked me to keep his identity completely private so I will, and thank you very much kind sir for sharing this with us. If the rest of you don’t already have one stop right now & get yourself a cotter pin assortment.
Another post that has generated a lot of comments & feedback was the one entitled Vintage Piston Valve Keihin Carburetor Overhaul. If you look at this post without reading the commentary you’re only getting half of the story. Check out the whole page, I learned as much from my readers as they learned from my meager do it yourself post. Of course this leads into my other series of posts Dirt Bike Carburetor 101.
Those of you with CV carbs don’t fret, I have several dozen detailed close up pictures of 2 different style of CV carburetors that I have worked on recently & will be getting a couple of detailed posts going for you about those.
Some of you may be wondering about the Project wAmmo bobber that I had started on. It’s probably the main reason that I have not posted as steadily this month as I should have because the darn thing needs to be finished. But it’s up on it’s wheels and actually went to it’s first show despite needing a few more details to finish it up. I hope to have it all wrapped up in the next 2 weeks for final pictures in the meantime give a listen to this video.
That’s about it for this post if you haven’t already signed up for email notifications please do so using the box below. There’s a lot of great stuff coming up & you don’t want to miss a thing.
Most of all thanks for the reader feedback on this blog.
Share this:

The 2015 Bull City Rumble
The 2015 Bull City Rumble
Every year for the last 11 years during the Labor Day weekend holiday the club Ton Up North Carolina has been hosting a great multiday event for vintage motorcycle enthusiasts in Durham North Carolina. The main focus is on vintage café racer styled customs, restorations, competition bikes, and vintage scooters. Ever since I discovered this event three years ago the Saturday bike show has been permanently added to my calendar.

One of the great things I love about this event is the fact that every year at least one really oddball custom will show up. The top motor freak at this year’s show was a diamond plate covered Goldwing that had everyone scratching their heads.

This being a café racer club there was plenty of fine British & European iron on display including an original unrestored 1983 Triumph TSS with electric start.

Numerous Moto Guzzi motorcycles were on hand such as this T3 and this old Ambassador

I can’t tell you exactly which one of the two it was but one of these immaculate AJS machines that won best of show, both look so pristine I don’t think it matters

Fellow VJMC member Mike McSween was showing his terrific pair of restored vintage Kawasaki road racers with his 1971 H1R 500, number 56 in the picture taking home first place. The other green jewel in the picture is his 1972 H2 750 triple.

Anytime I get within a mile of a Vincent I have to take its picture. Even though I am normally a Japanese bike fanatic, Vincents like this 1952 model really are my ultimate dream machine. Perhaps one day…

The award for the best Japanese motorcycle went to this highly detailed & wonderfully conceived CX500 Honda.
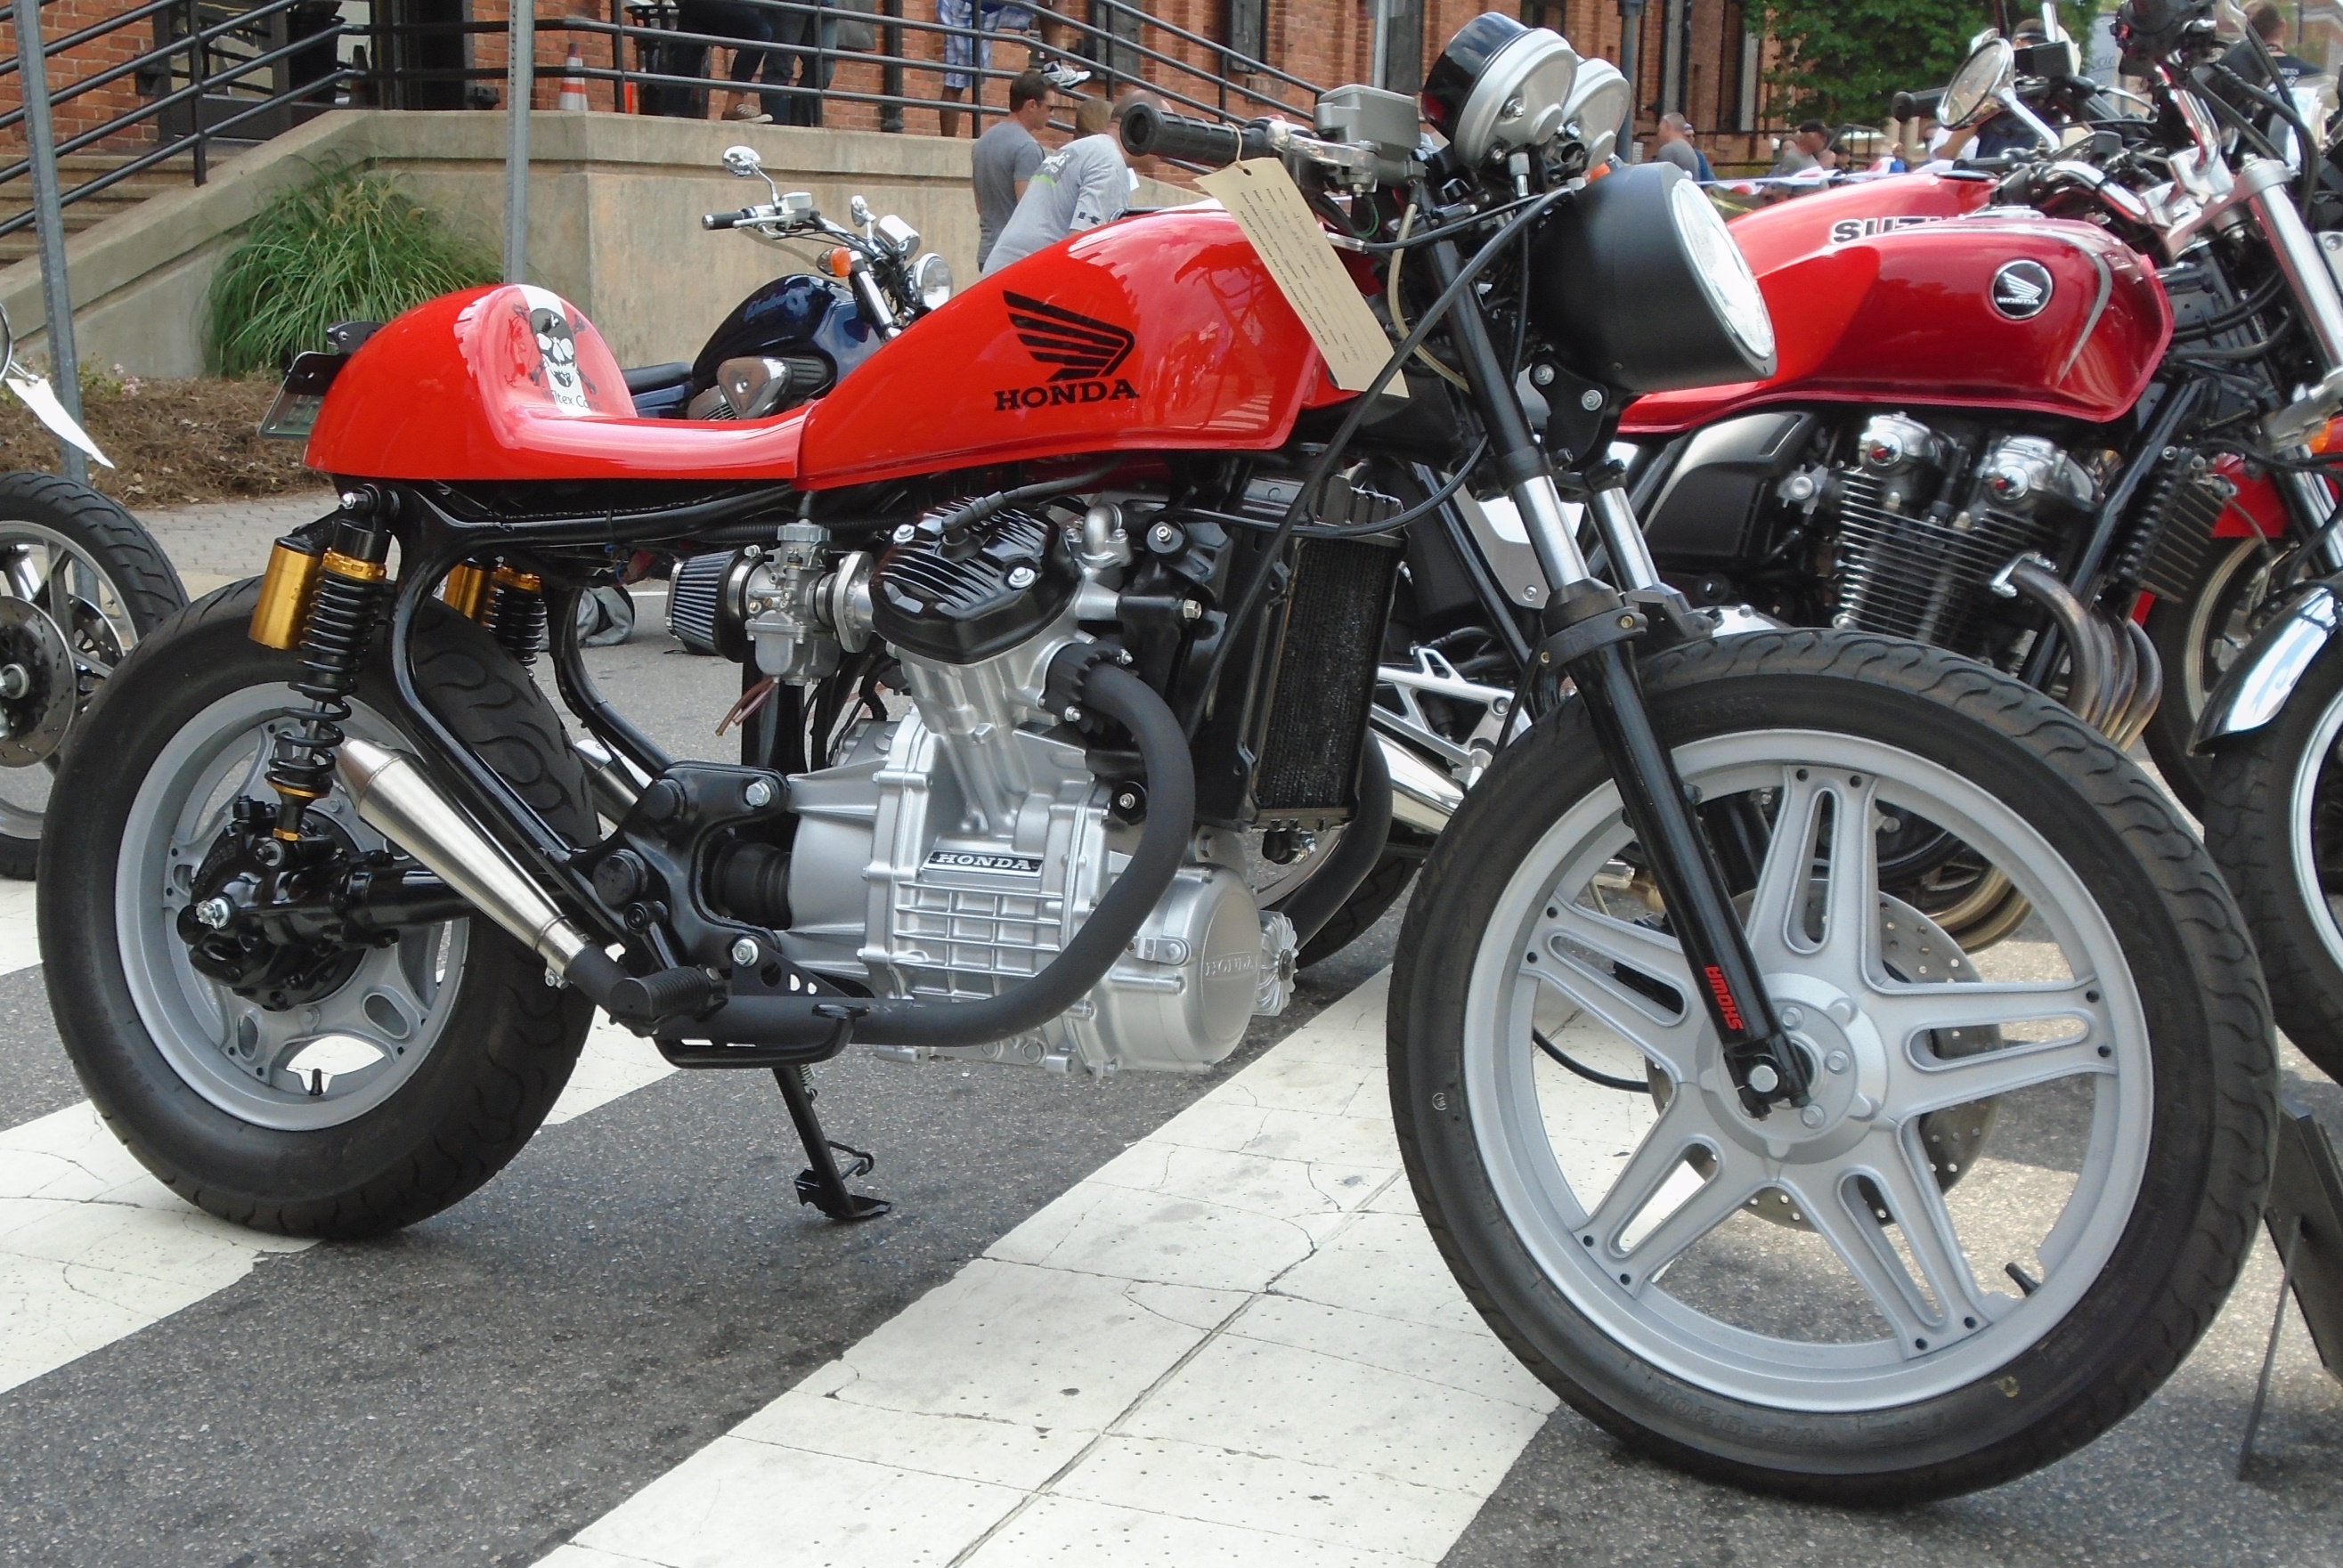
No matter what angle it is viewed from the artistry & talent of the builder is just amazing.

Until 2014 there was no class for American motorcycles and while this was still the smallest class it did attract some high quality equipment including a 1950’s vintage Indian and this fine looking Harley Davidson J model.

I must confess that when the American class was first introduced that I and a couple of others had mixed feelings about it. We feared that an influx of the so called American bikers would destroy the character of this event and make it into yet another chrome, mullet, & tattoo show for us (and our fat wallets) to stay away from. Fortunately this has not happened so far. I was there for nine hours this year and only heard one person make a disparaging remark about the motorcycles with superior engineering, handling & reliability. Since she was blonde I’ll forgive her for not having the intellectual acumen to understand that some of us view our motorcycles as something more than just a two wheeled “Members Only” jacket.
It was great having Rommel Harley Davidson there as a sponsor and I really enjoyed checking out the new Street 750 demo trailer that they had set up. Check it out on the video below at the bottom of the page.
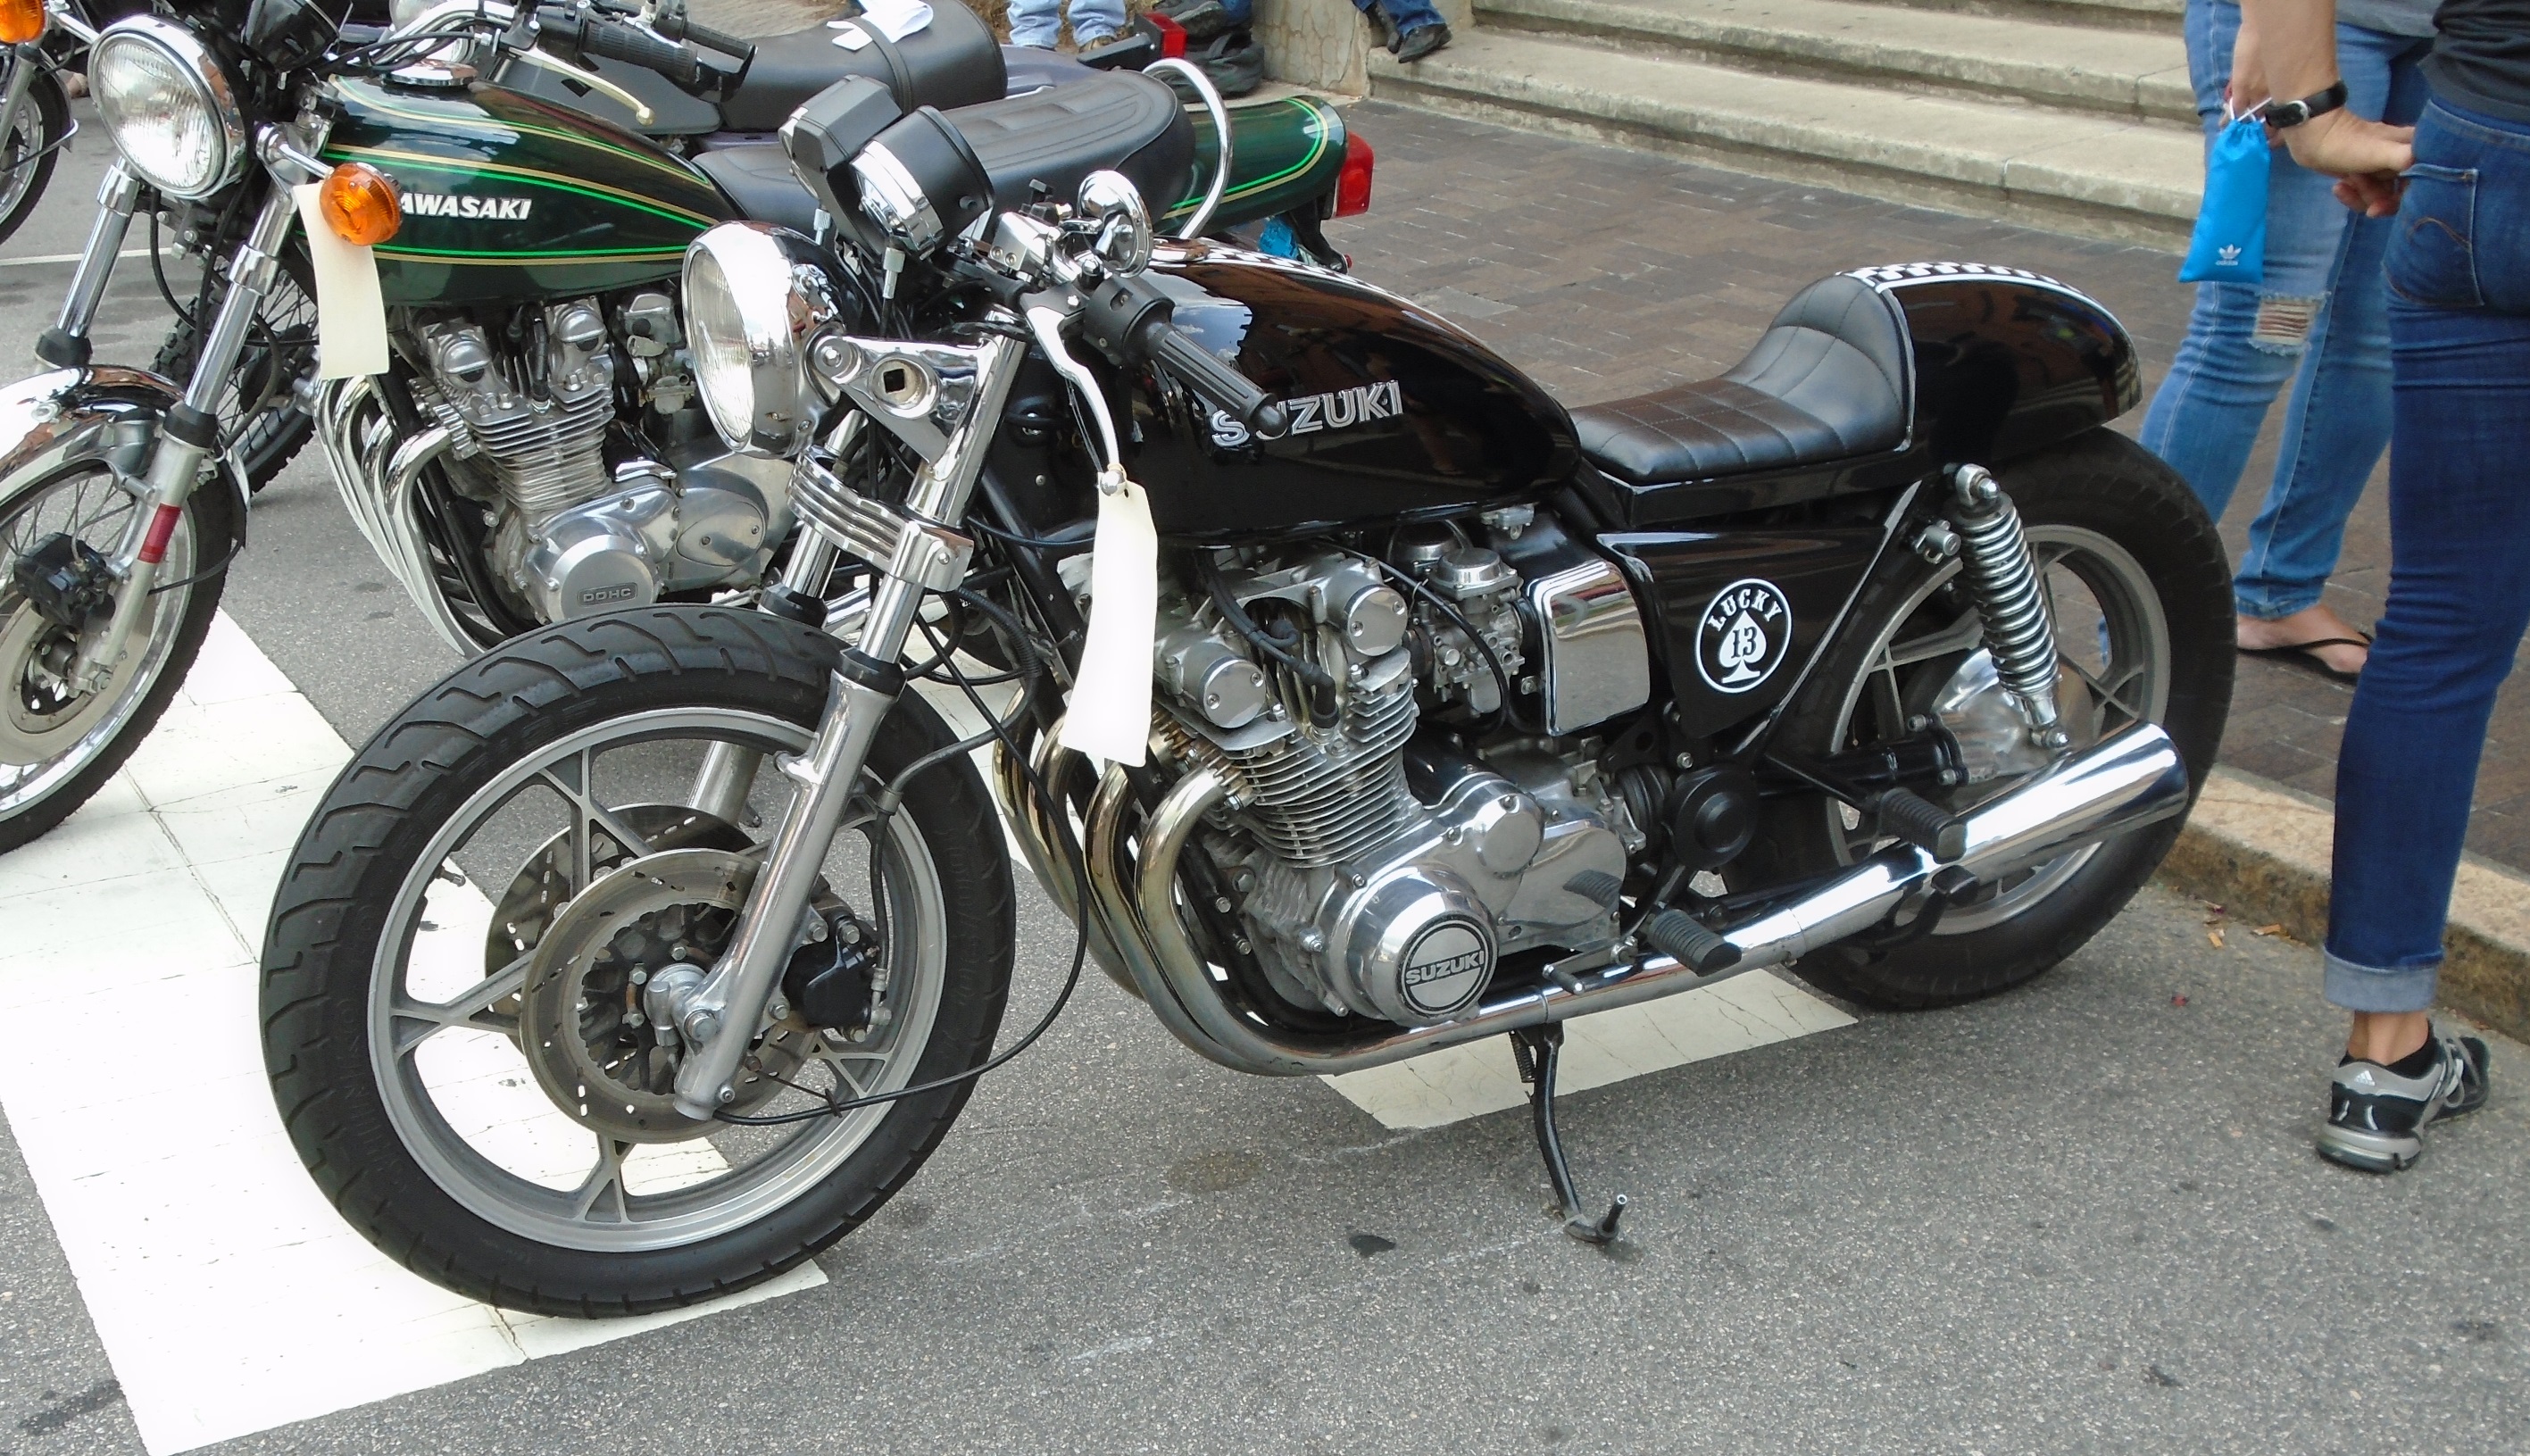
Other motorcycles at the show that I really liked included this very tasteful black Suzuki café racer. These late 70’s & early ‘80s Suzuki cycles don’t get nearly the love from restorers or customizers that they should, even though they were probably the best all-around motorcycles of that time period.
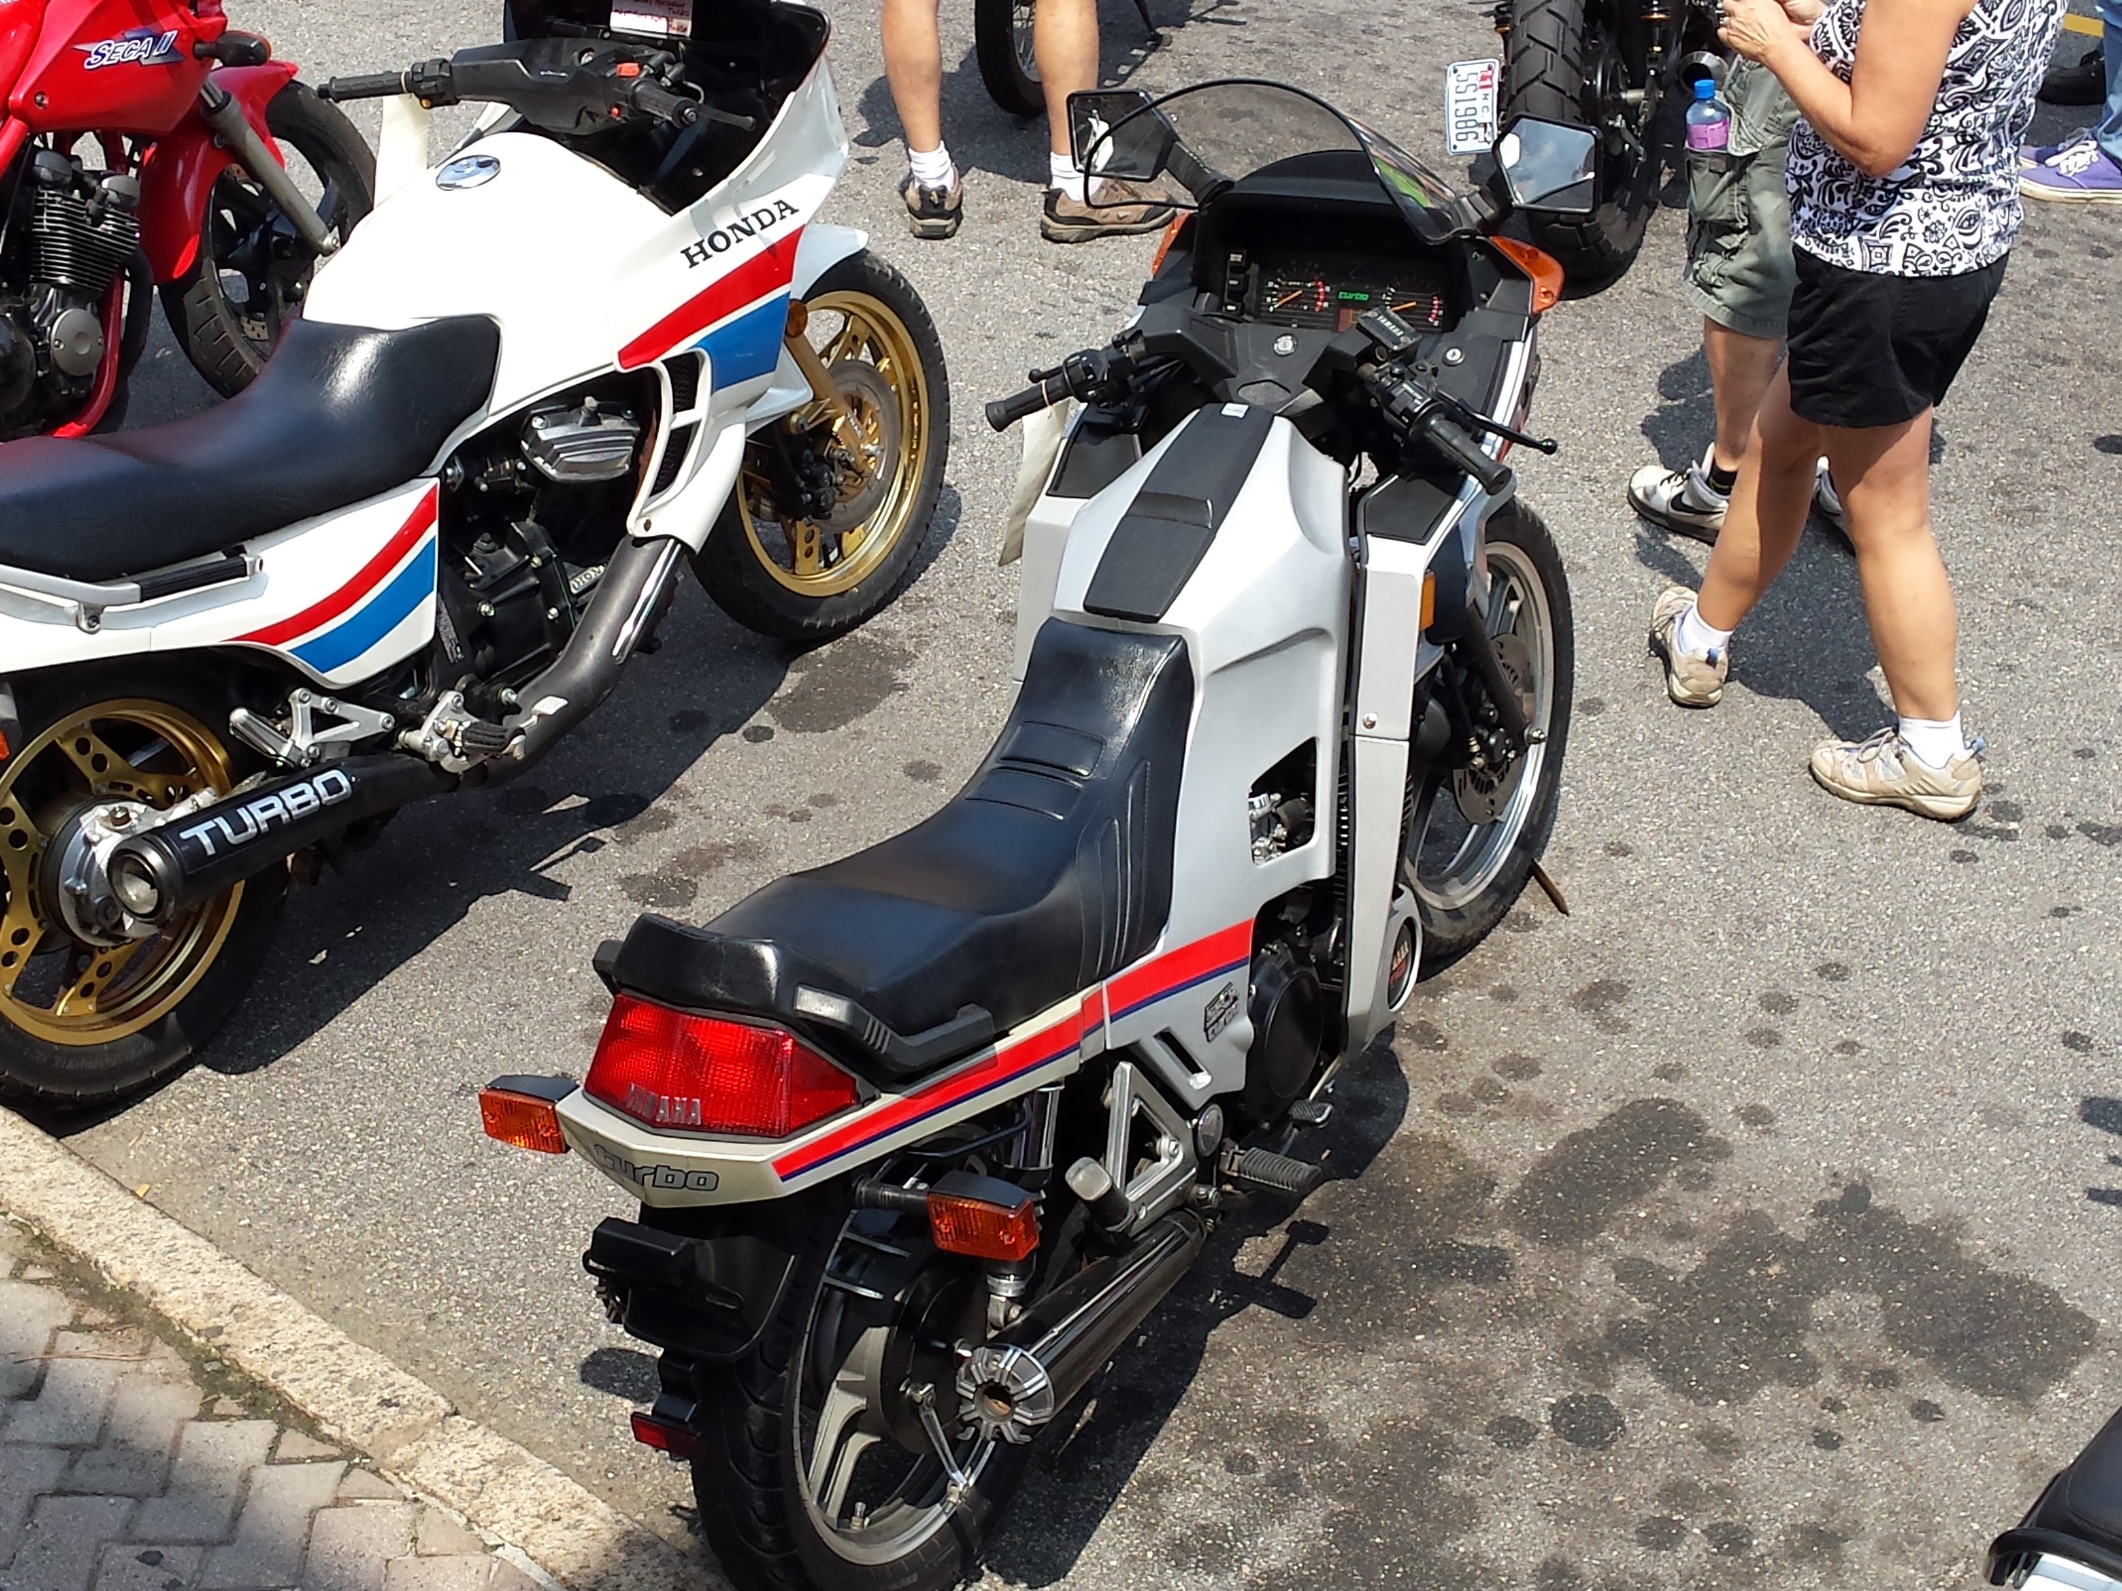
If you love vintage turbo bikes there were a Yamaha Seca & a Honda CX parked side by side on the street.
Everywhere you looked there was a good selection of vintage & retro machines, fine people, good eats, and plenty of excitement, and I am already planning to return next year. Check out the Ton Up NC website at http://tonup-nc.blogspot.com/ for more information.

I took so many pictures at the 2015 Bull City Rumble that I decided to put the best of the rest into a slide show.
Here’s the youtube video that I made of the event. Watching this is probably the best way to get an idea of the scope of this event.
Share this:

The 20 Foot TS185 Restoration Part 4!

Hello everyone & welcome back! It’s time for just a few more pictures of this little project TS185 I’ve been working on but first let me talk to you a little about the banner ad above. I have applied for one of these grants and I only have until June the 19th 2015 to reach the required number of votes. If you have a couple of minutes of time & a Facebook account could you please go vote for me? It would be greatly appreciated.

As mentioned last time this motorcycle is more of a restomod than a proper TS185 restoration and one of the things that I have always wanted to try out was putting a set of BMX bicycle platform pedals on a motorcycle. So out came the reciprocating saw some scrap metal & the welder.
As I mentioned the last time I was changing the color so here it is just a plain old machinery gray from a Duplicolor spray can.

Added the shop logo to the number plates

Of course there were some new parts installed, missing bolts replaced & a few leaks stopped while I was at it.

Some hard lessons were learned such as don’t install the clutch release arm upside down and that cheap enamel clear really doesn’t spray well in 100 degree temperatures. There are still a few odds & ends that need doing but it is mostly done. Now I just need the upholstery shop to have my seat ready this week! I also think the new pedals are fantastic looking but I do have to be careful when using the kick starter.

One advantage to doing all of this was having time to sort out the various electrical bodges that previous owners had inflicted on this poor machine. It now has a fully functional key switch, brake & taillights, a battery, fuse etc. Of course it still starts easily & runs like a top!

Peace Y’all
Share this:

A Truly Unique Dirty Chopper
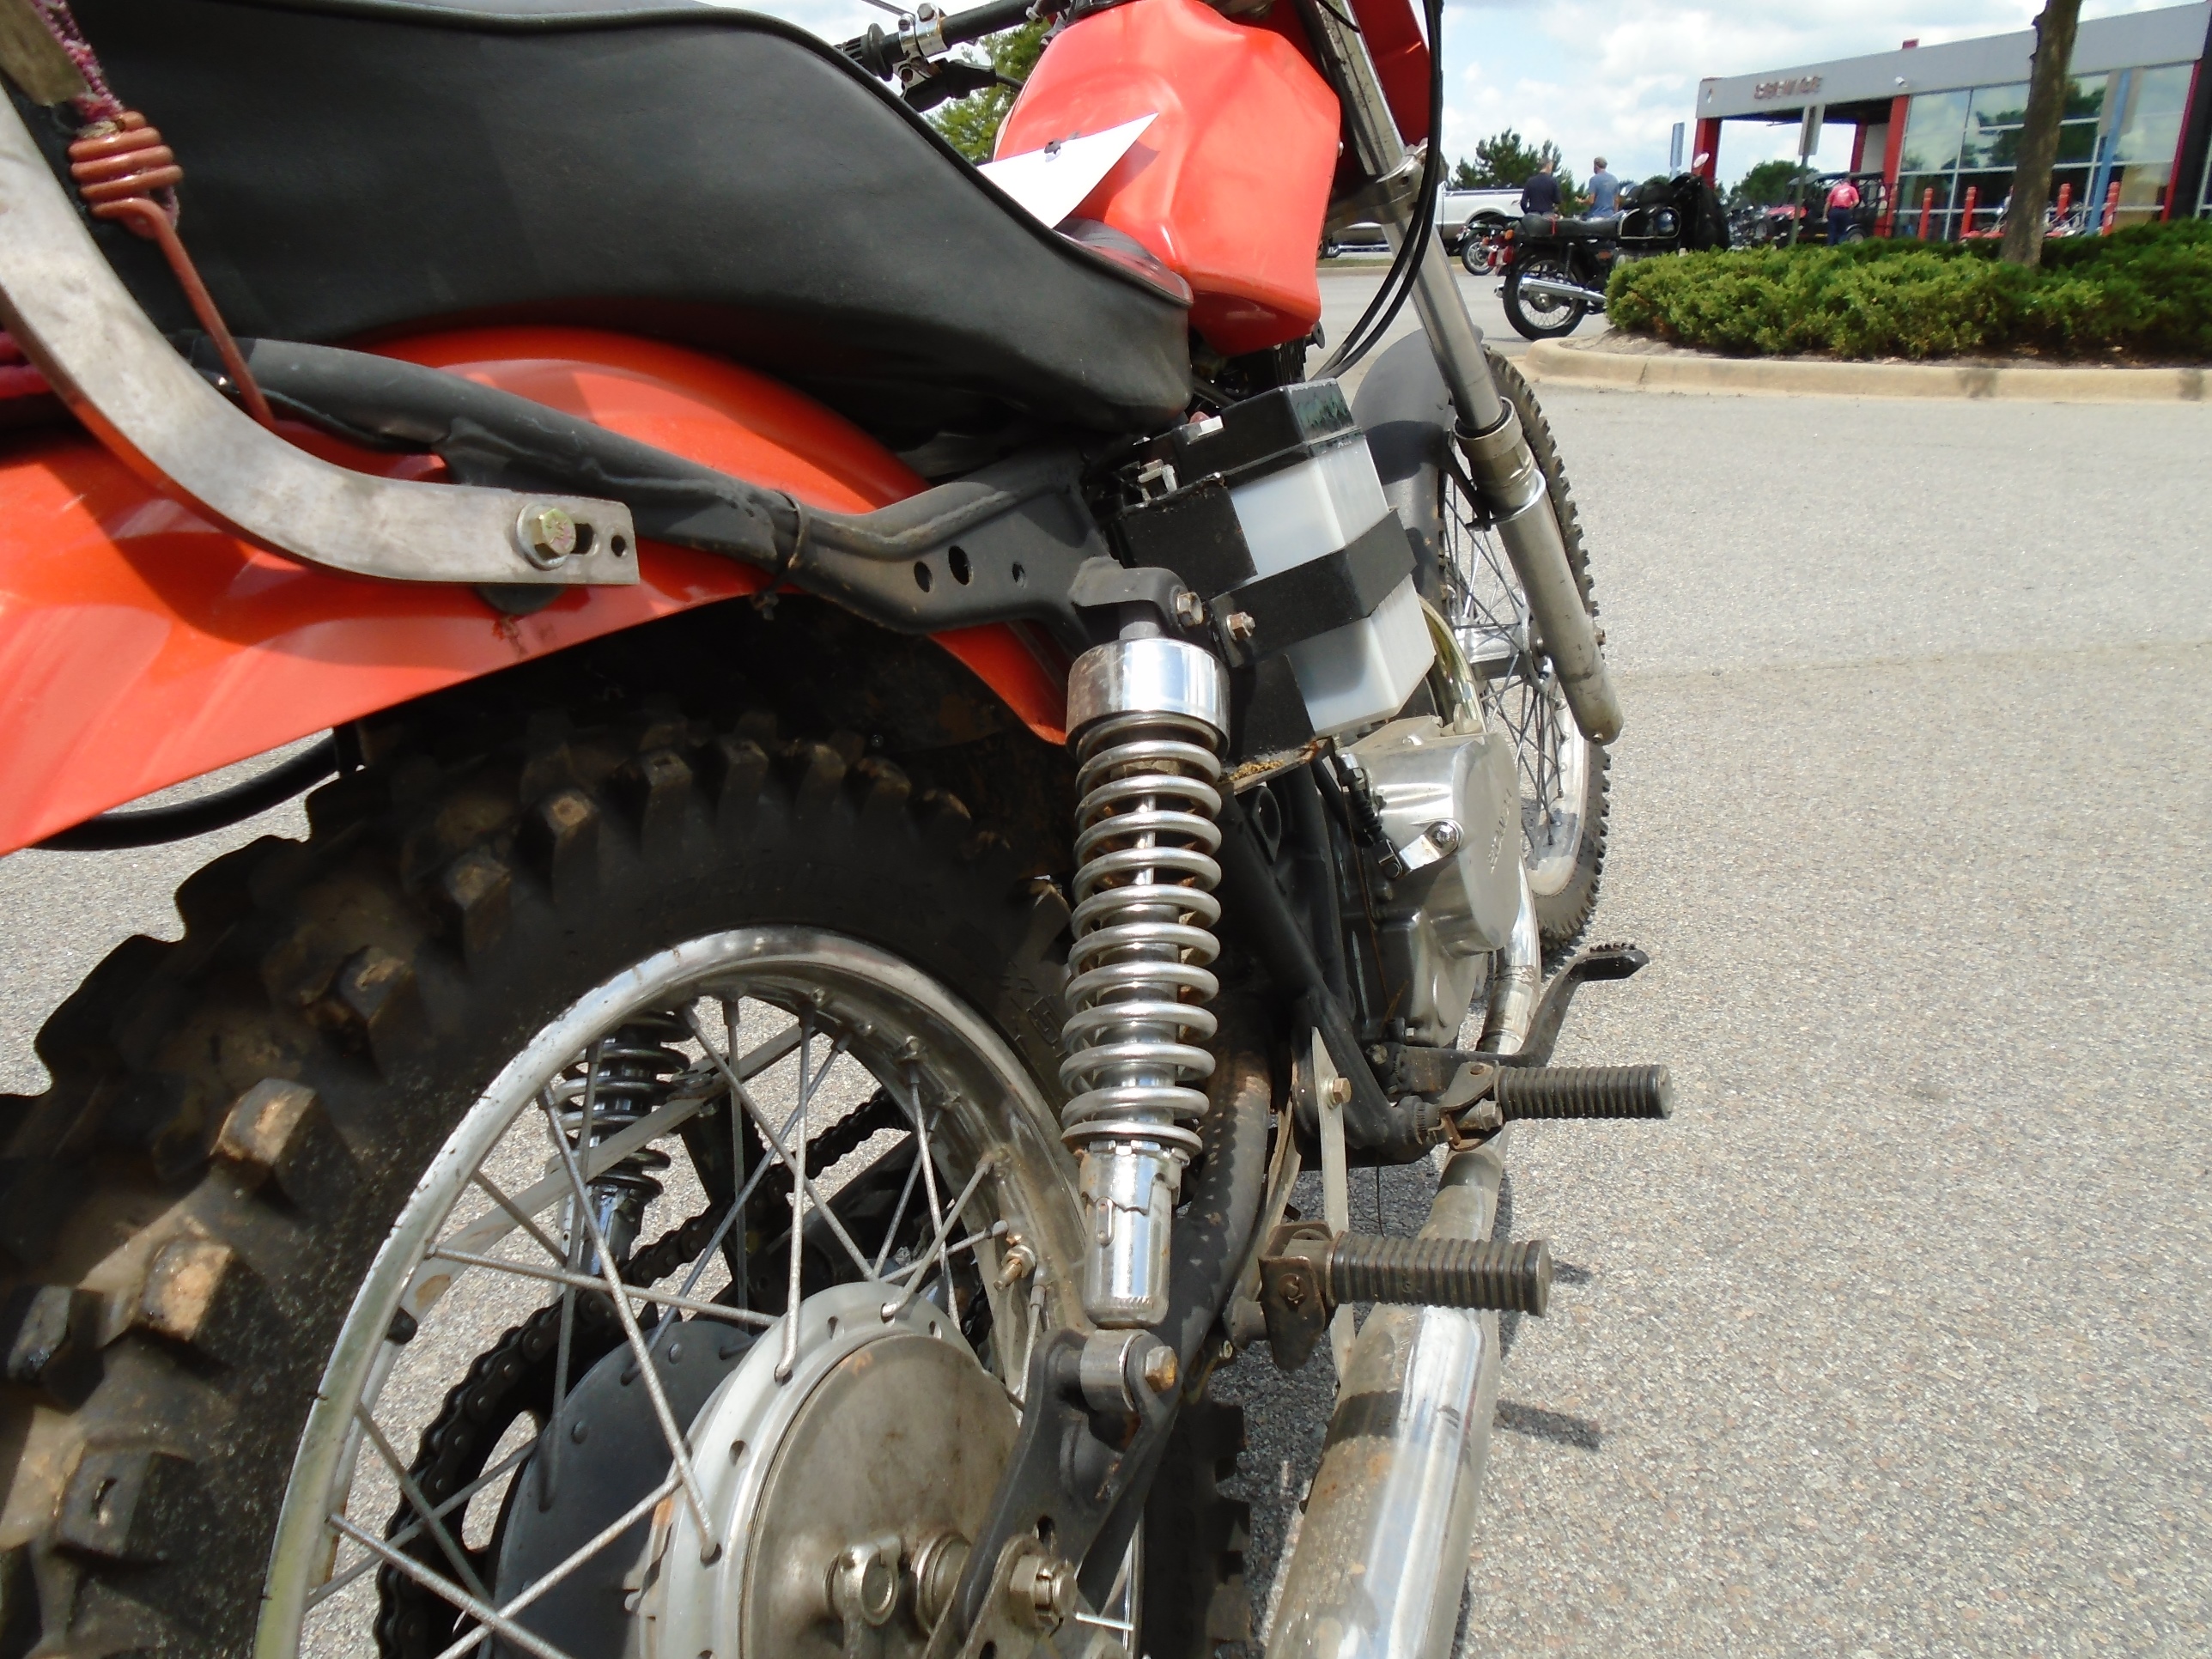
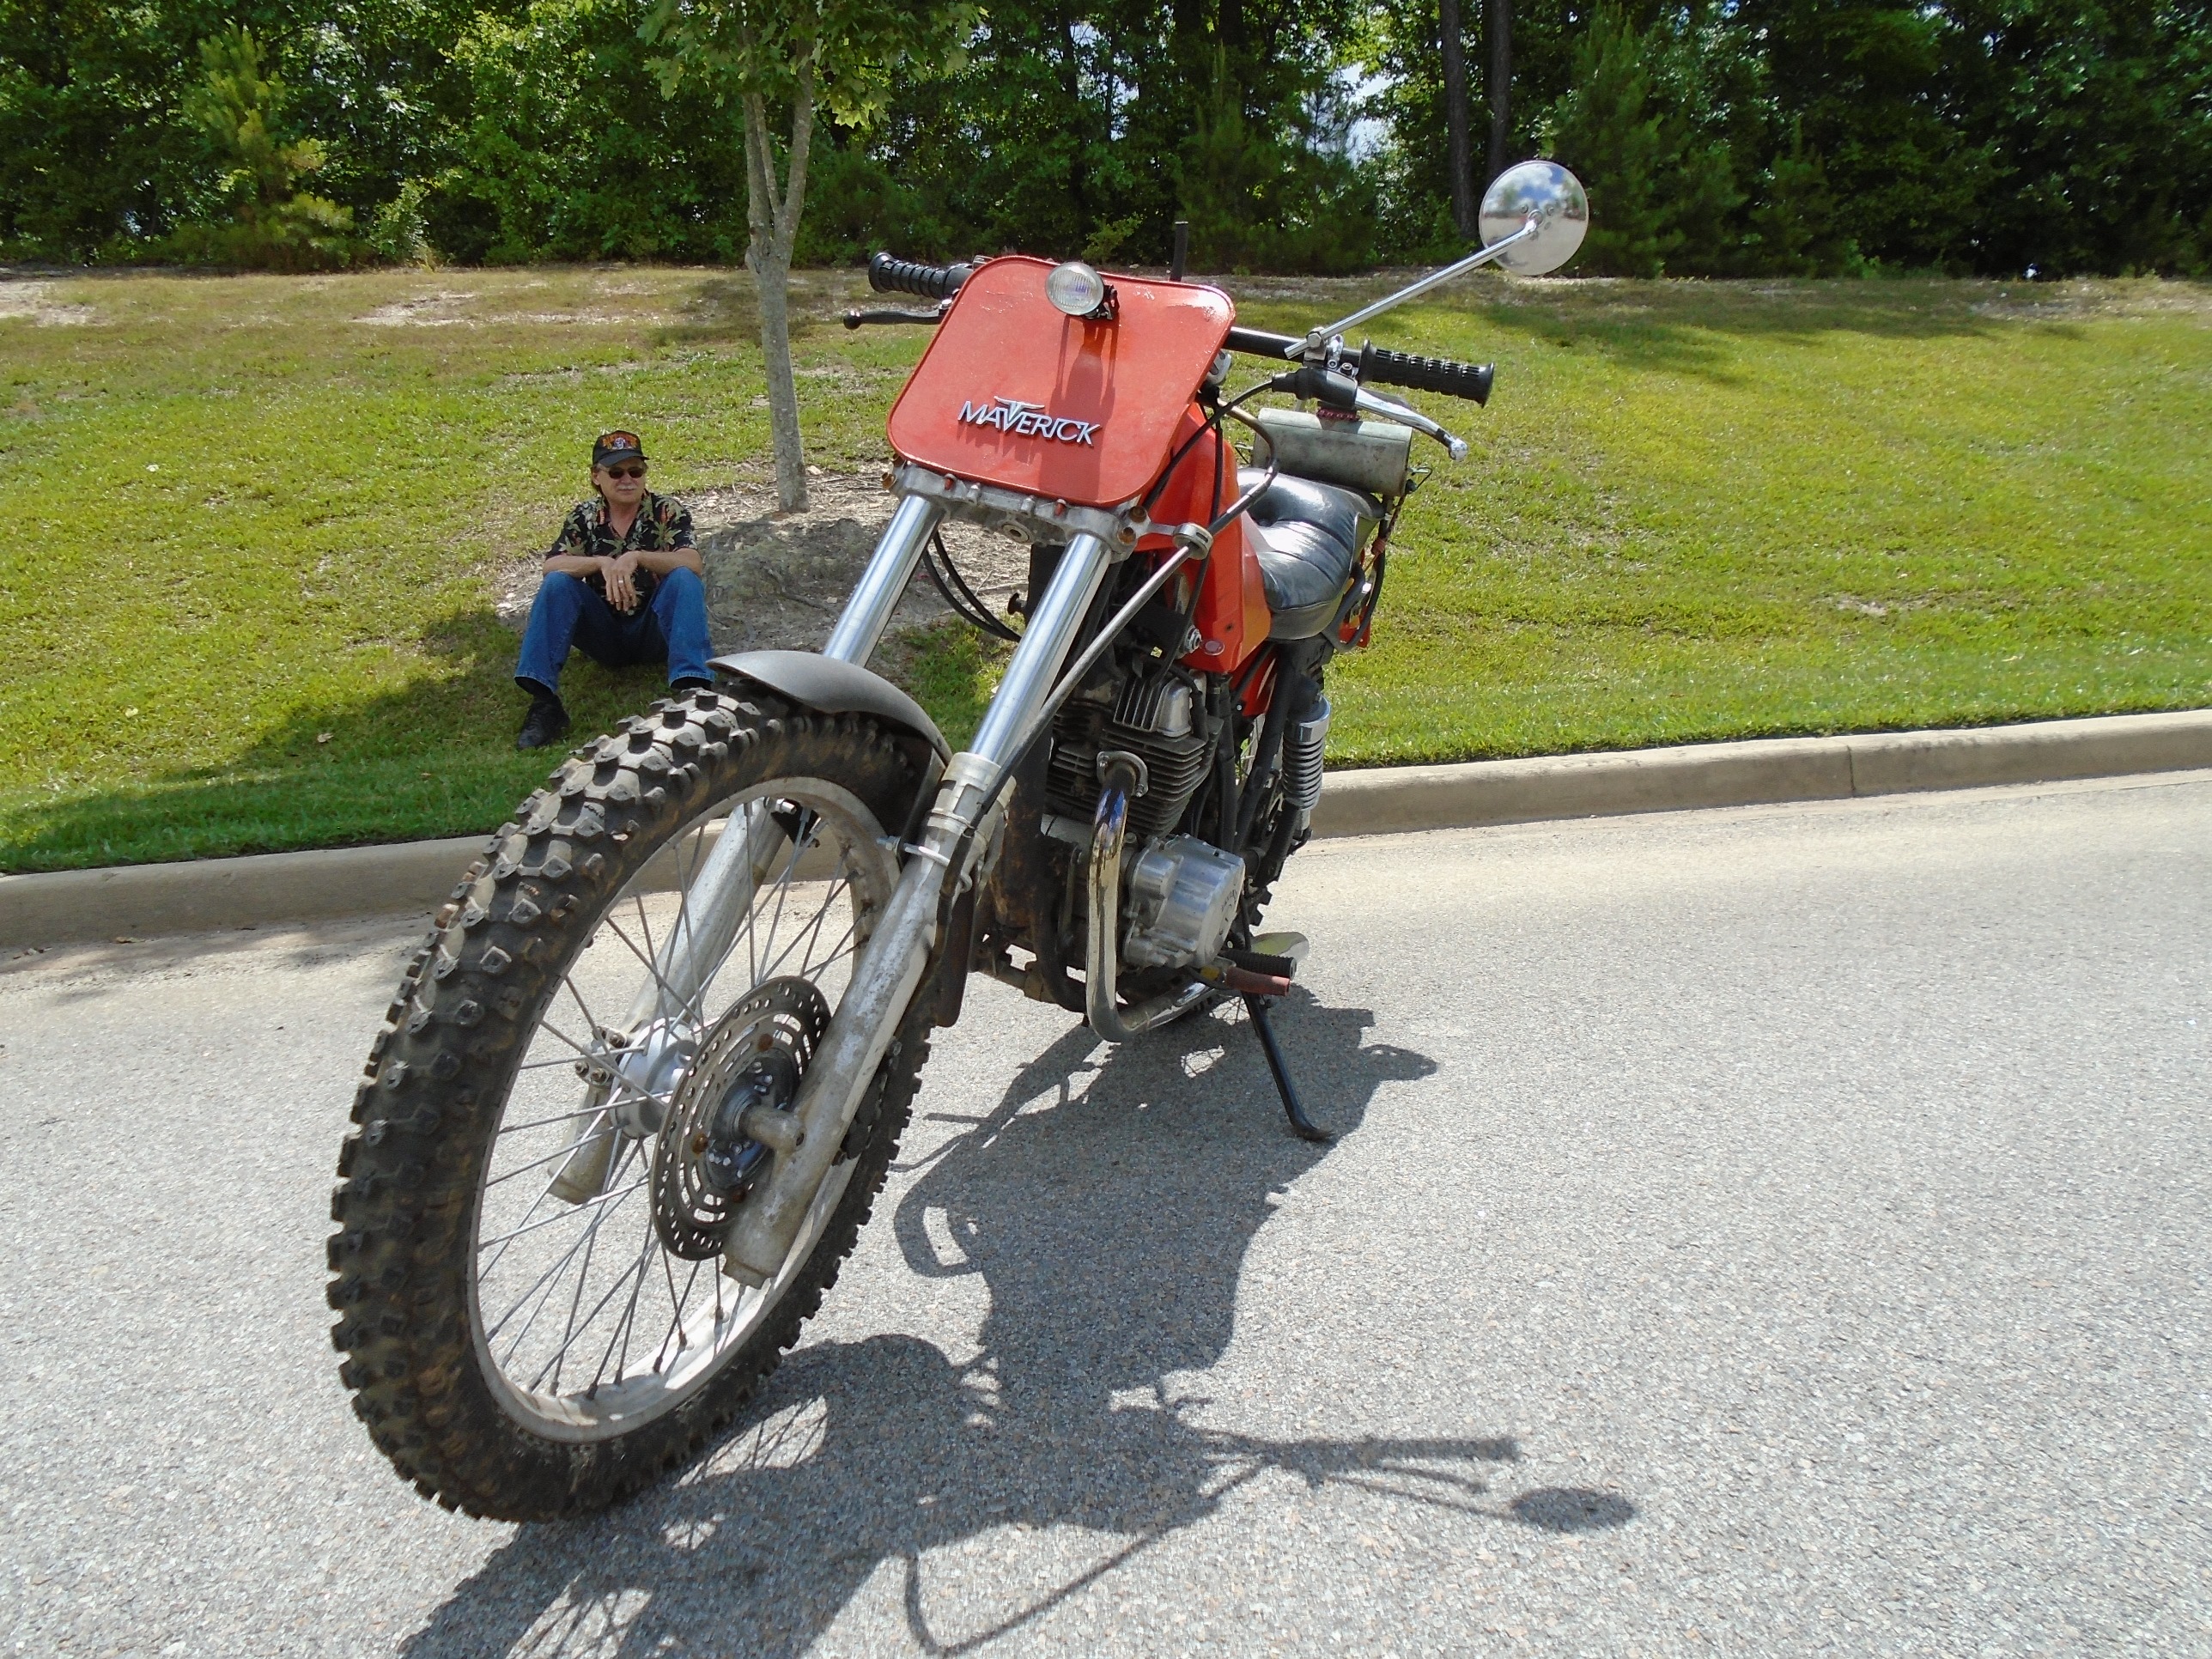
Carolina Honda Powerhouse, hosted a really nice vintage motorcycle rally today (Saturday May 30th, 2015). While I plan to post a few pictures from that at a later time right now I am overwhelmed with the desire to share this fantastic custom. The owner shall remain nameless here, but he was willing to pose for a couple of pictures with his creation. First just let me give you the list of parts that make up this unique dirty chopper custom bitsa. (You know a few bits of this and a few bits of that, none of it matching but it all works together.)

1978 Yamaha XT500; frame
2000 something Honda Rebel; engine
1969 Yamaha DT-1; rear wheel, brake, sprocket & sidestand
1984 Honda CR125; gas tank, forks, front wheel & brakes
1980 something Harley Sportster; shocks, seat, front & rear fenders
1972 Honda CB500-4; footpegs
1960 something Triumph clutch lever,
It also had a utility trailer tailight, cheap driving lamp headlight, a bicycle handlebar and a bunch of homemade small parts!
Yes I would ride it, would you?


I forgot to mention this awesome auxiliary fuel tank sourced from some unknown ancient lawnmower.


How about a view from the cockpit?

Amazingly enough despite it’s ratty origins & seemingly haphazard design when you view it from the side the proportions are nearly perfect.

a Unique Dirty Chopper
The final flourish to set off this masterpiece of junkyard art is this emblem added to the numberplate!

Peace Y’all!

