The Fog Thief A Psyco Product Review!

<Fog Thief brochure outer>

Hello Everyone,

I was contacted and asked to review a rather unique device designed to prevent face shield fogging. Since cold weather riding is the best test of anything that claims to prevent fogging inside of a helmet, I told the maker to ship me one to test and in their generosity they also sent me one to give away to a lucky reader. I’ll tell you how you can win a Fog Thief of your very own at the end of this review.

<Fog Thief brochure inner>

We start out on a chilly Good Friday morning, according to my local weather babe on t.v. my hometown was supposed to be at 34 degrees Fahrenheit, but I think whomever keeps that particular thermometer must keep it under a heat lamp. Here is a shot of my car’s rear windshield at 6:30 a.m. 34 degrees my ass.

the weather girl lied

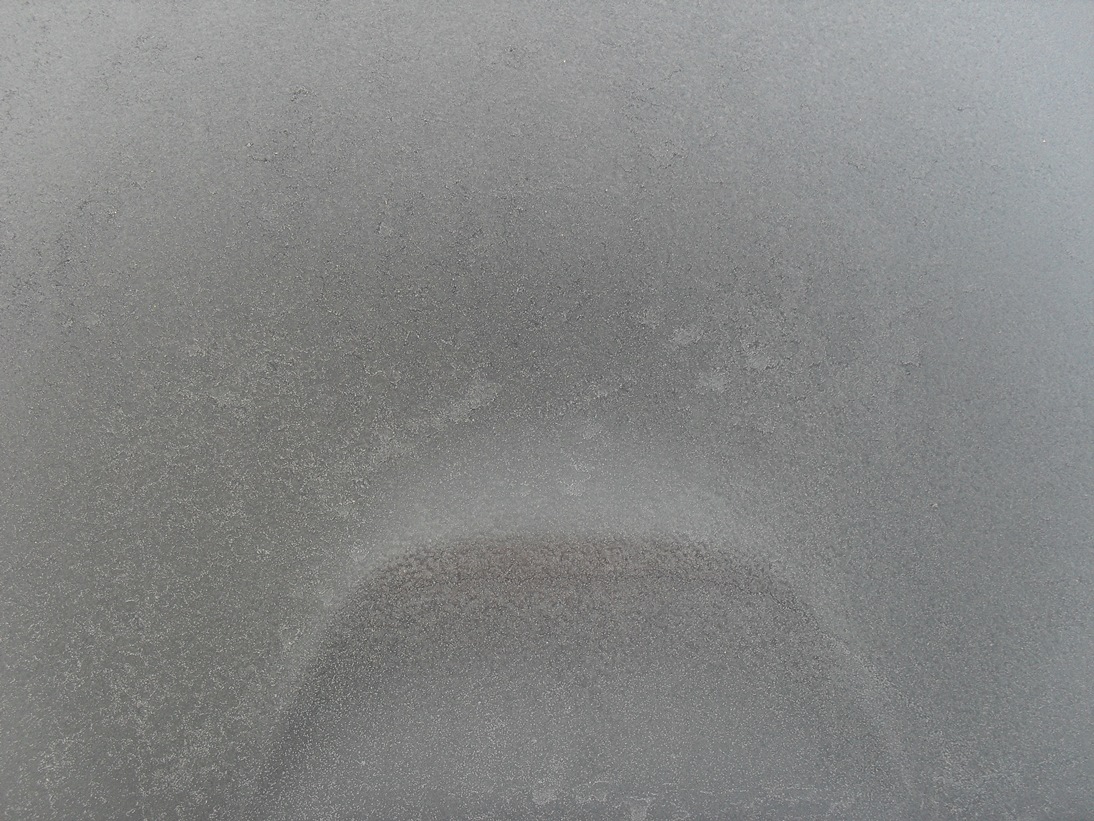
thick frost on my car windshield this morning.

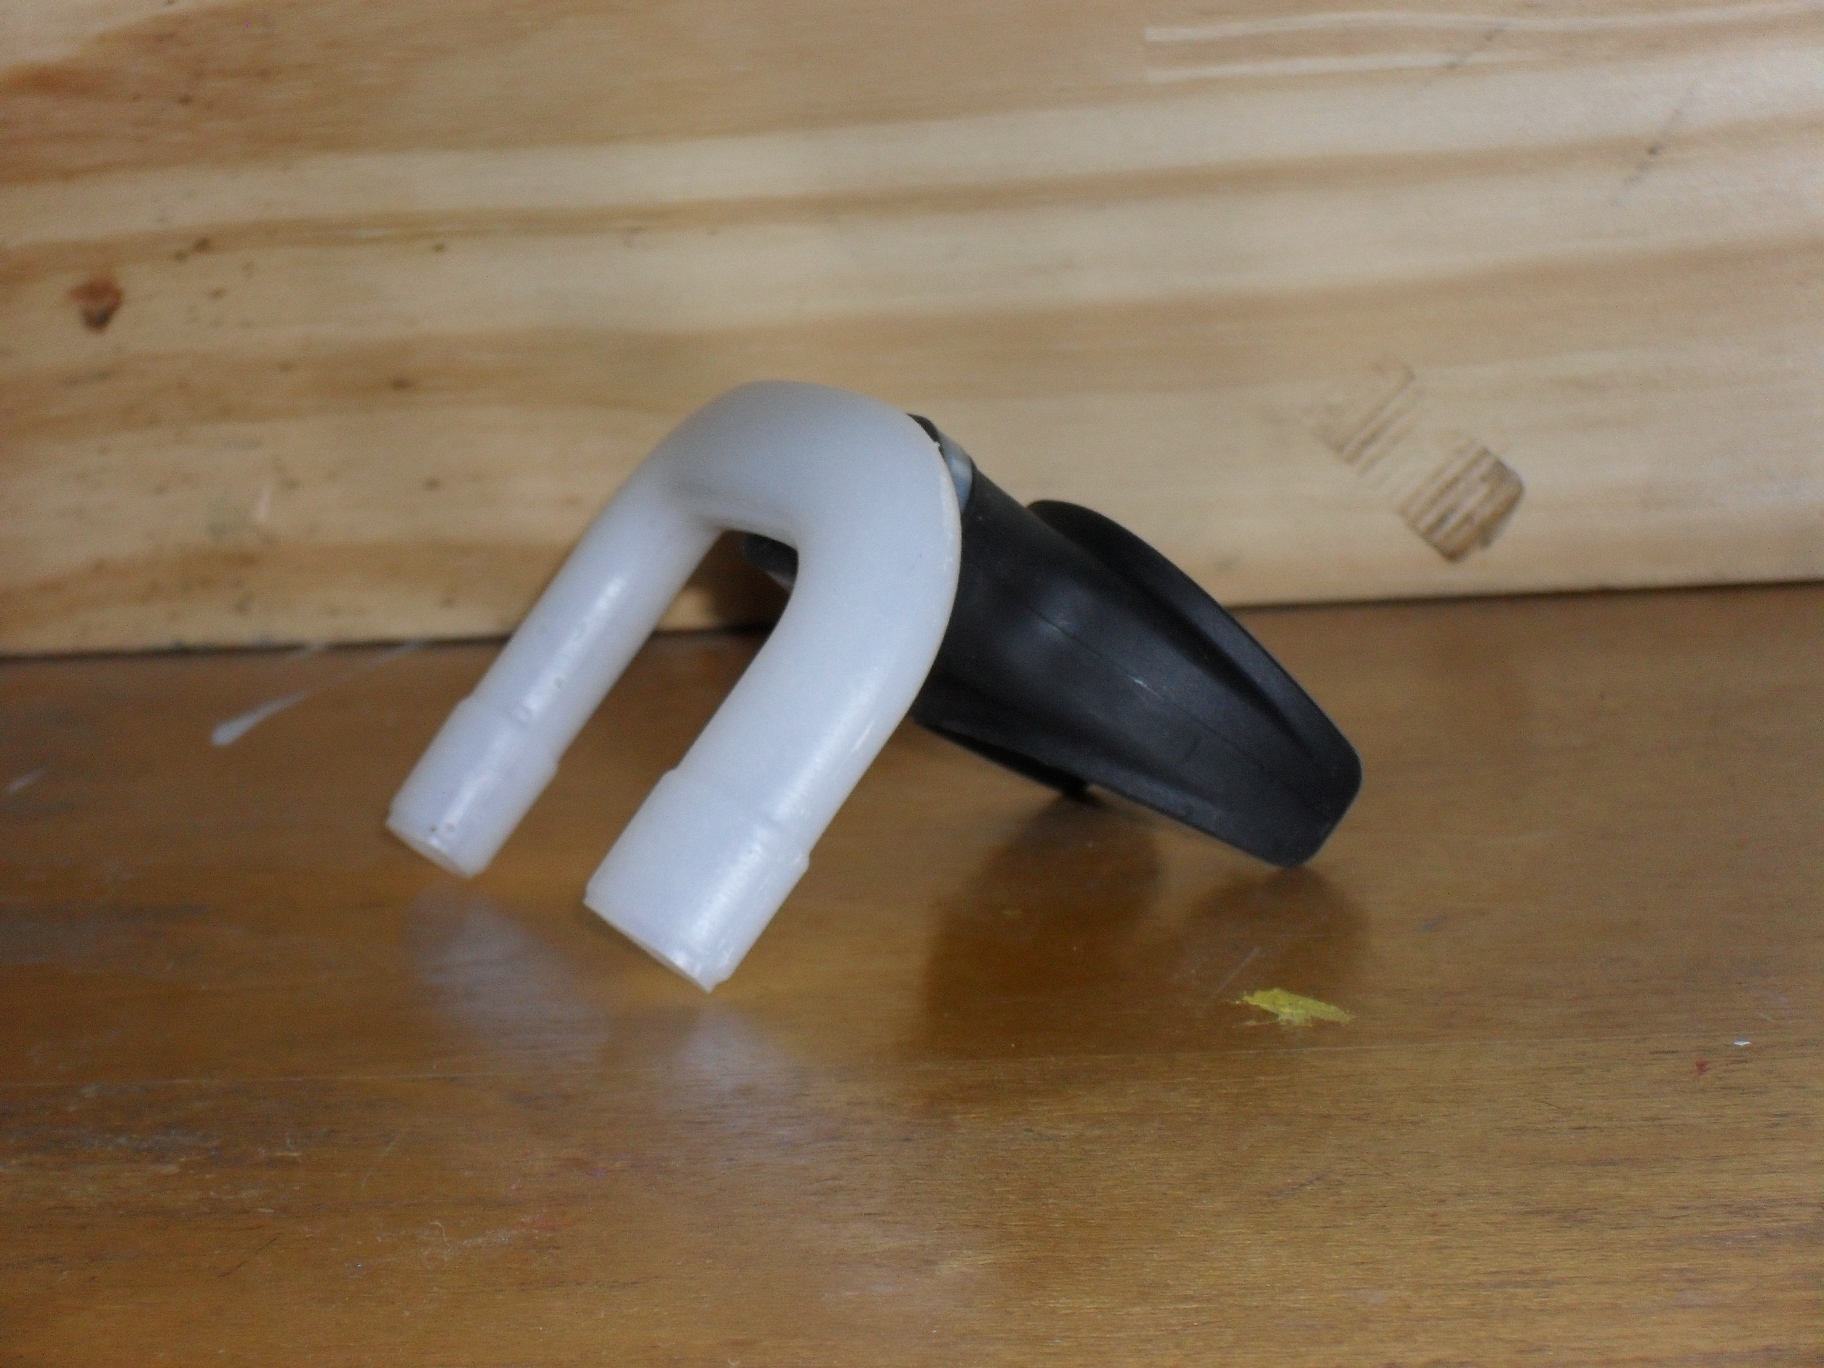
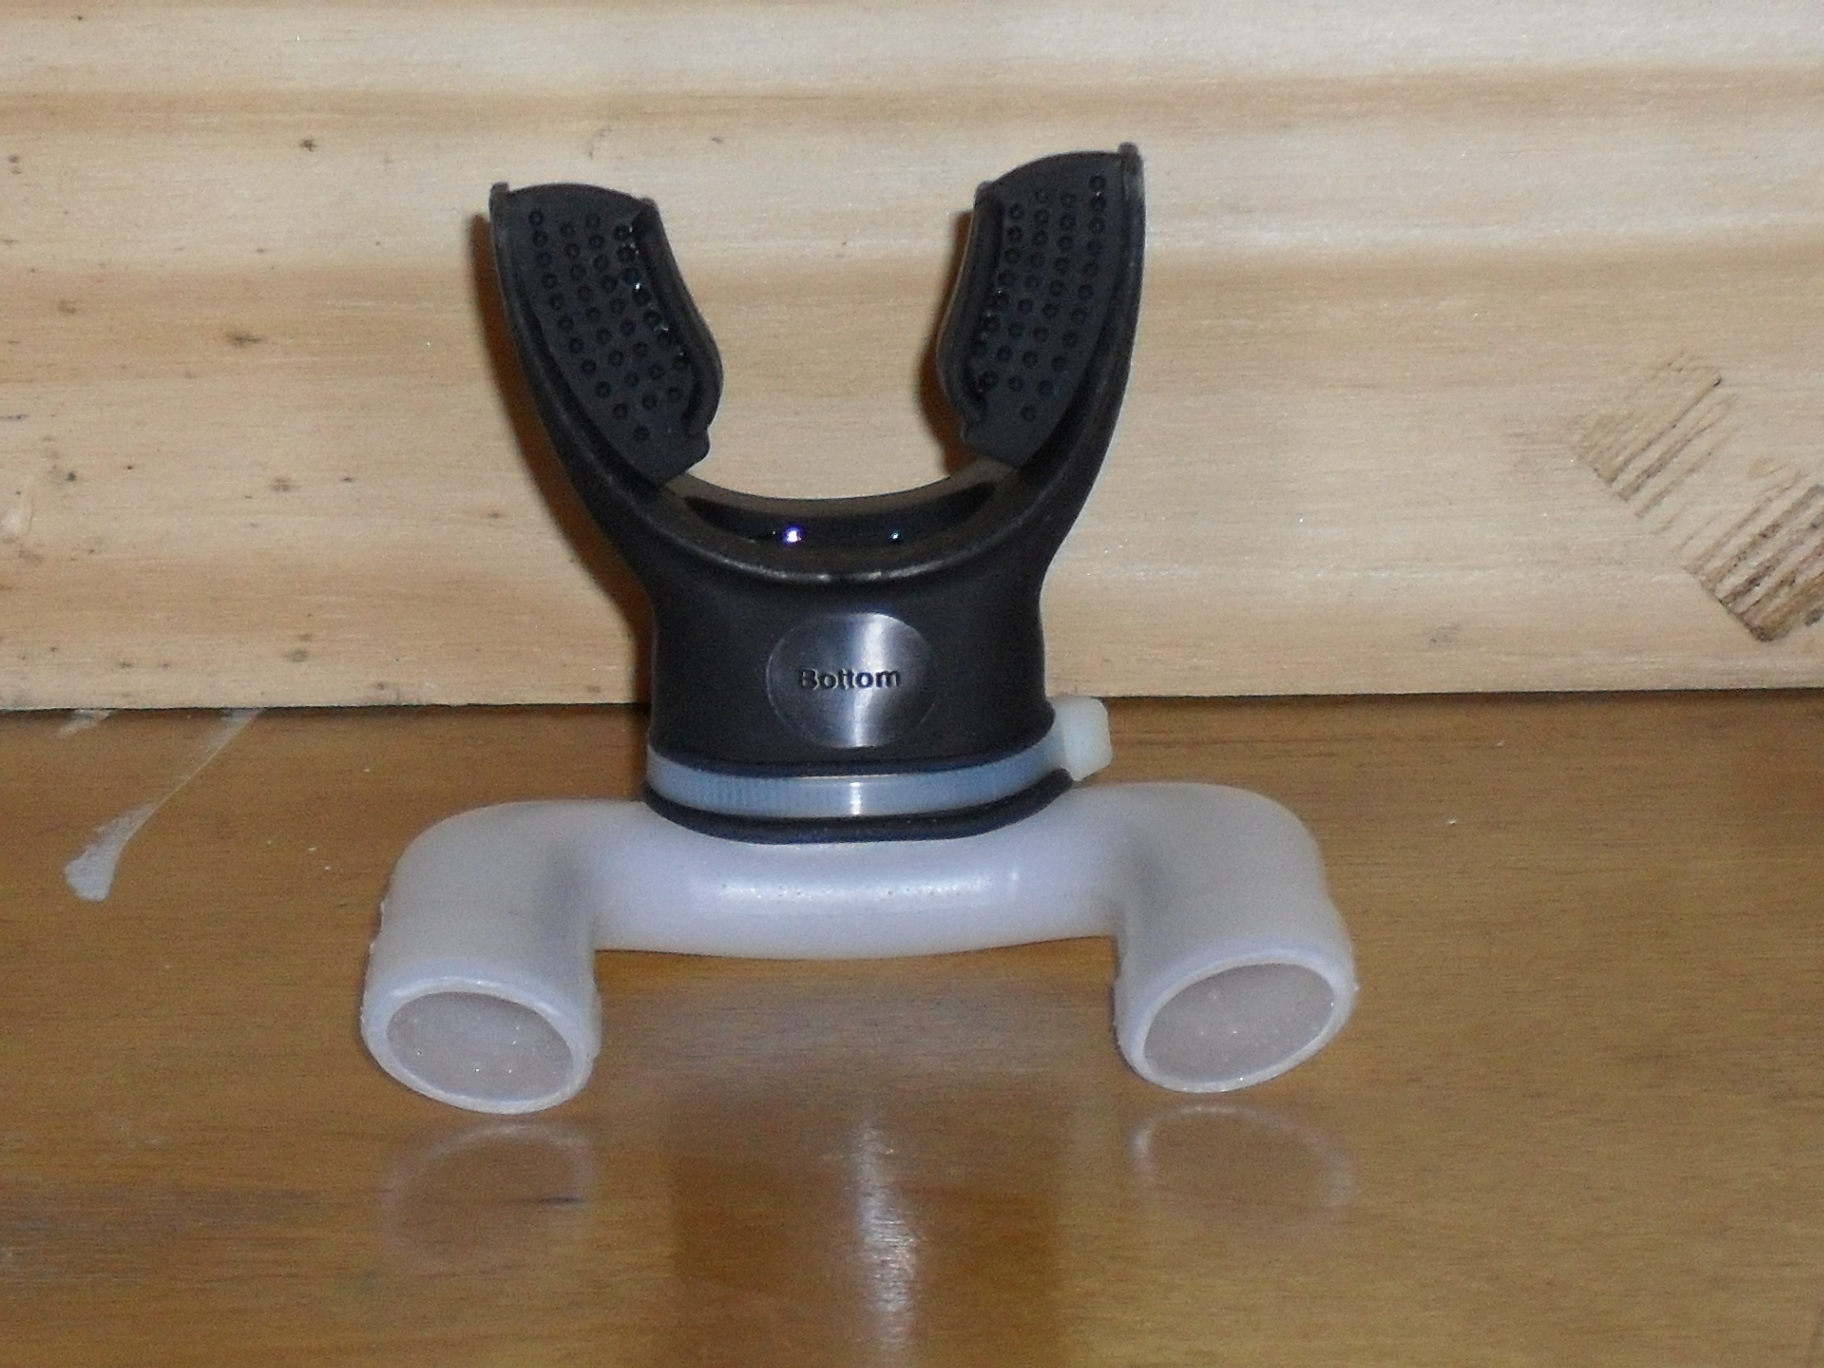
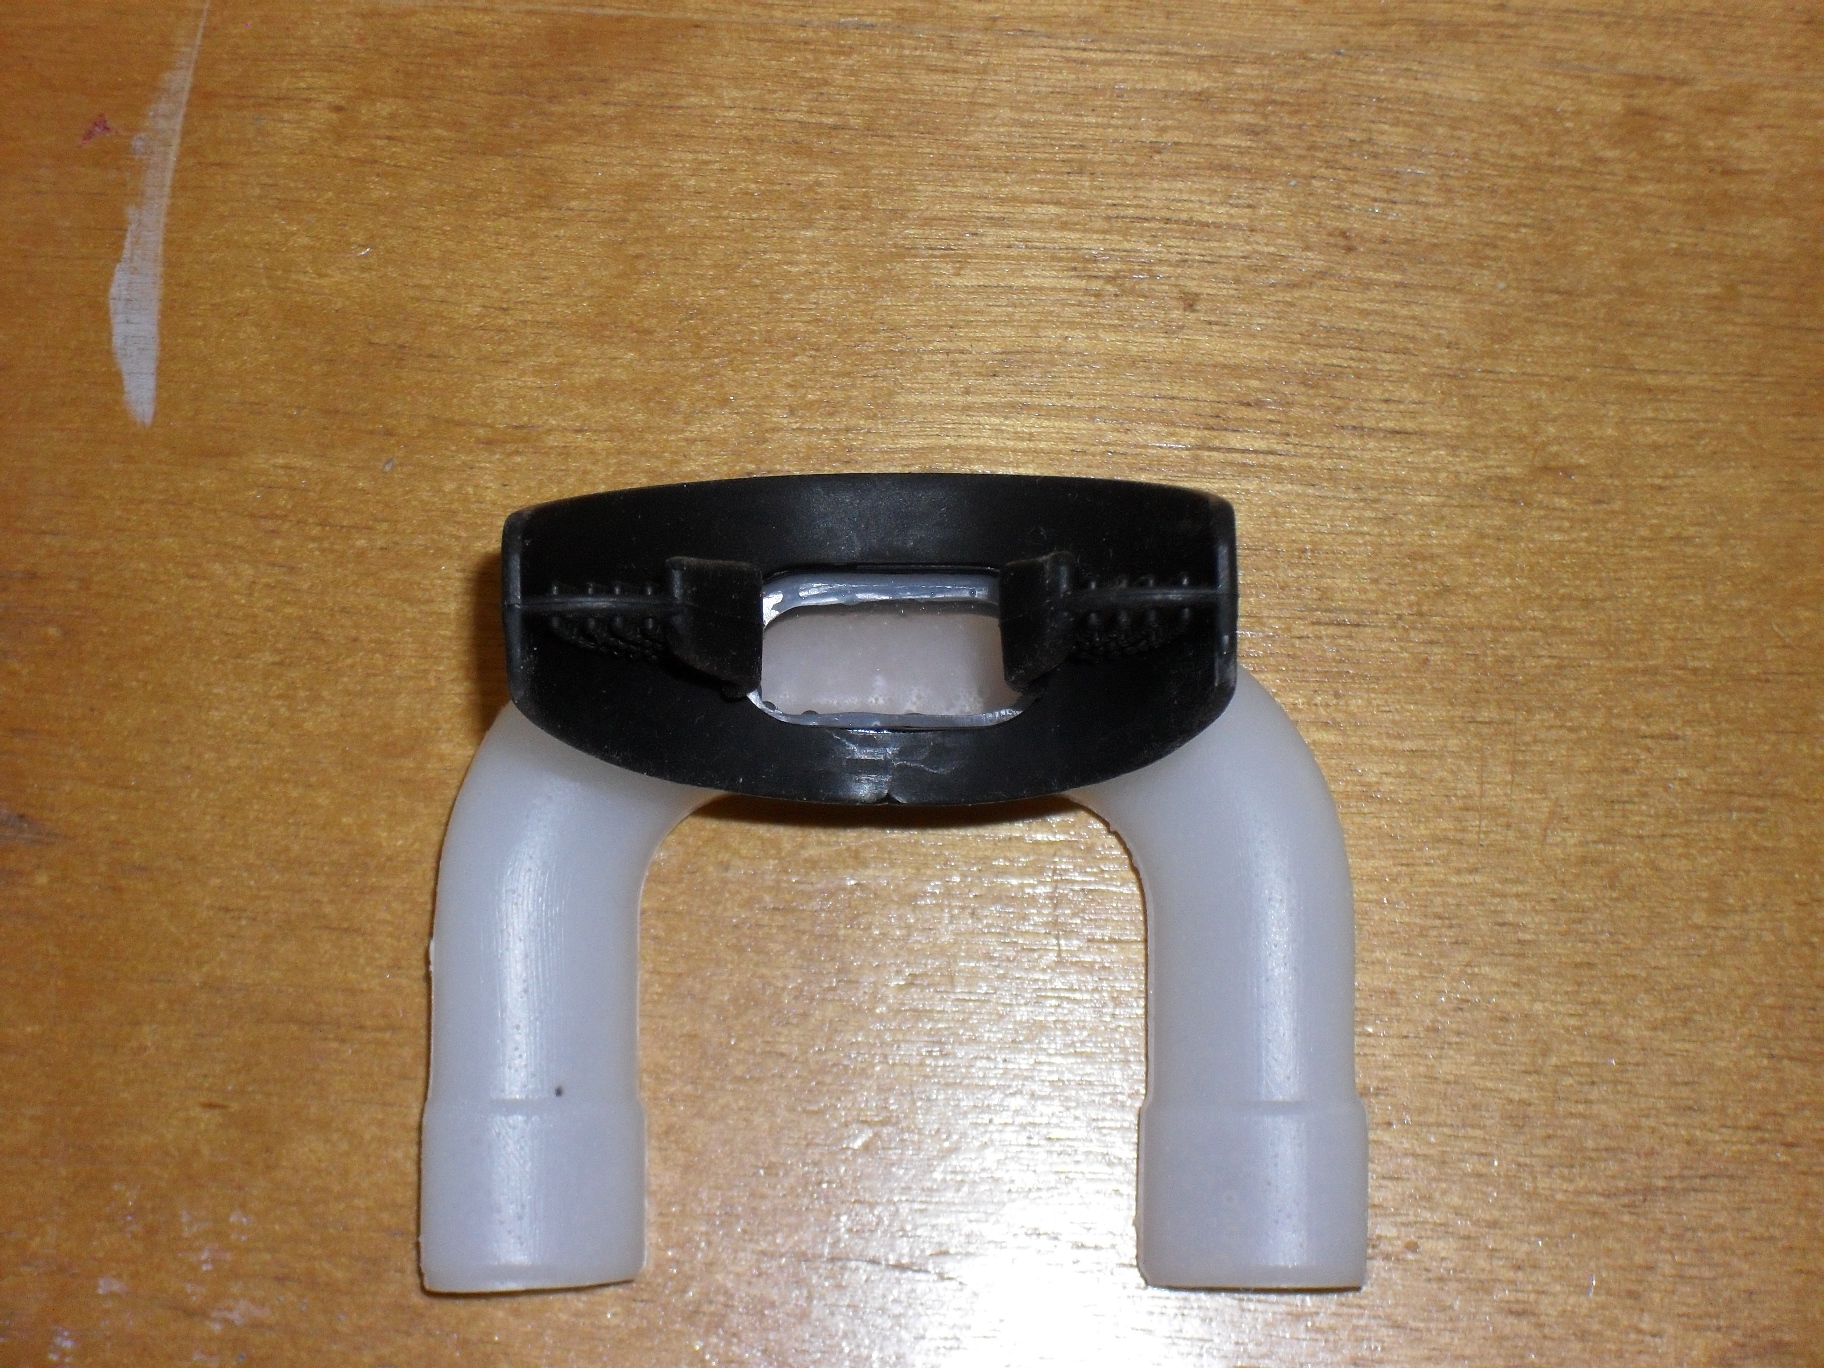
Yesterday when I got home from the office a fedex package from Montie Design the firm that is helping to develop and market this product, was waiting for me with two samples of the Fog Thief. It is a very simple design, imagine if you will an upside down snorkel. The mouth piece seems to be directly modeled from a scuba mouth piece, but instead of a hose leading to a tank there is a u shaped plastic snorkel that simply points down and out of`the bottom of your lid. Such a simple seeming idea you wonder why you have never seen it before.

<the fog thief>

Now if you are not used to using a snorkel or scuba gear this will take some getting used to. Initially it would trigger my gag reflex after a few minutes, but I got used to it. The mouth piece is top grade neoprene rubber and very tough, I am sure you could eventually chew through it, but you can really clench your teeth on it without any damage to the mouth piece or your teeth.

<fog thief bottom view>

The company brochure claims that it will work with all helmet designs and it worked with mine but it was a very tight fit, that shifted the position of the Fog Thief in my mouth. On the plus side the tight fit meant that it was not necessary for me to keep my teeth clenched to keep it in place.

<fog thief mouthpiece>
A product of FunProjex!
For this test I decided to try a different approach and go offroading instead , this mint condition ’99 Arctic Cat 300 4X4 just happened to be sitting in my shop this week. This is as fine a utility atv as you can find on the planet and makes a great trail crawler.
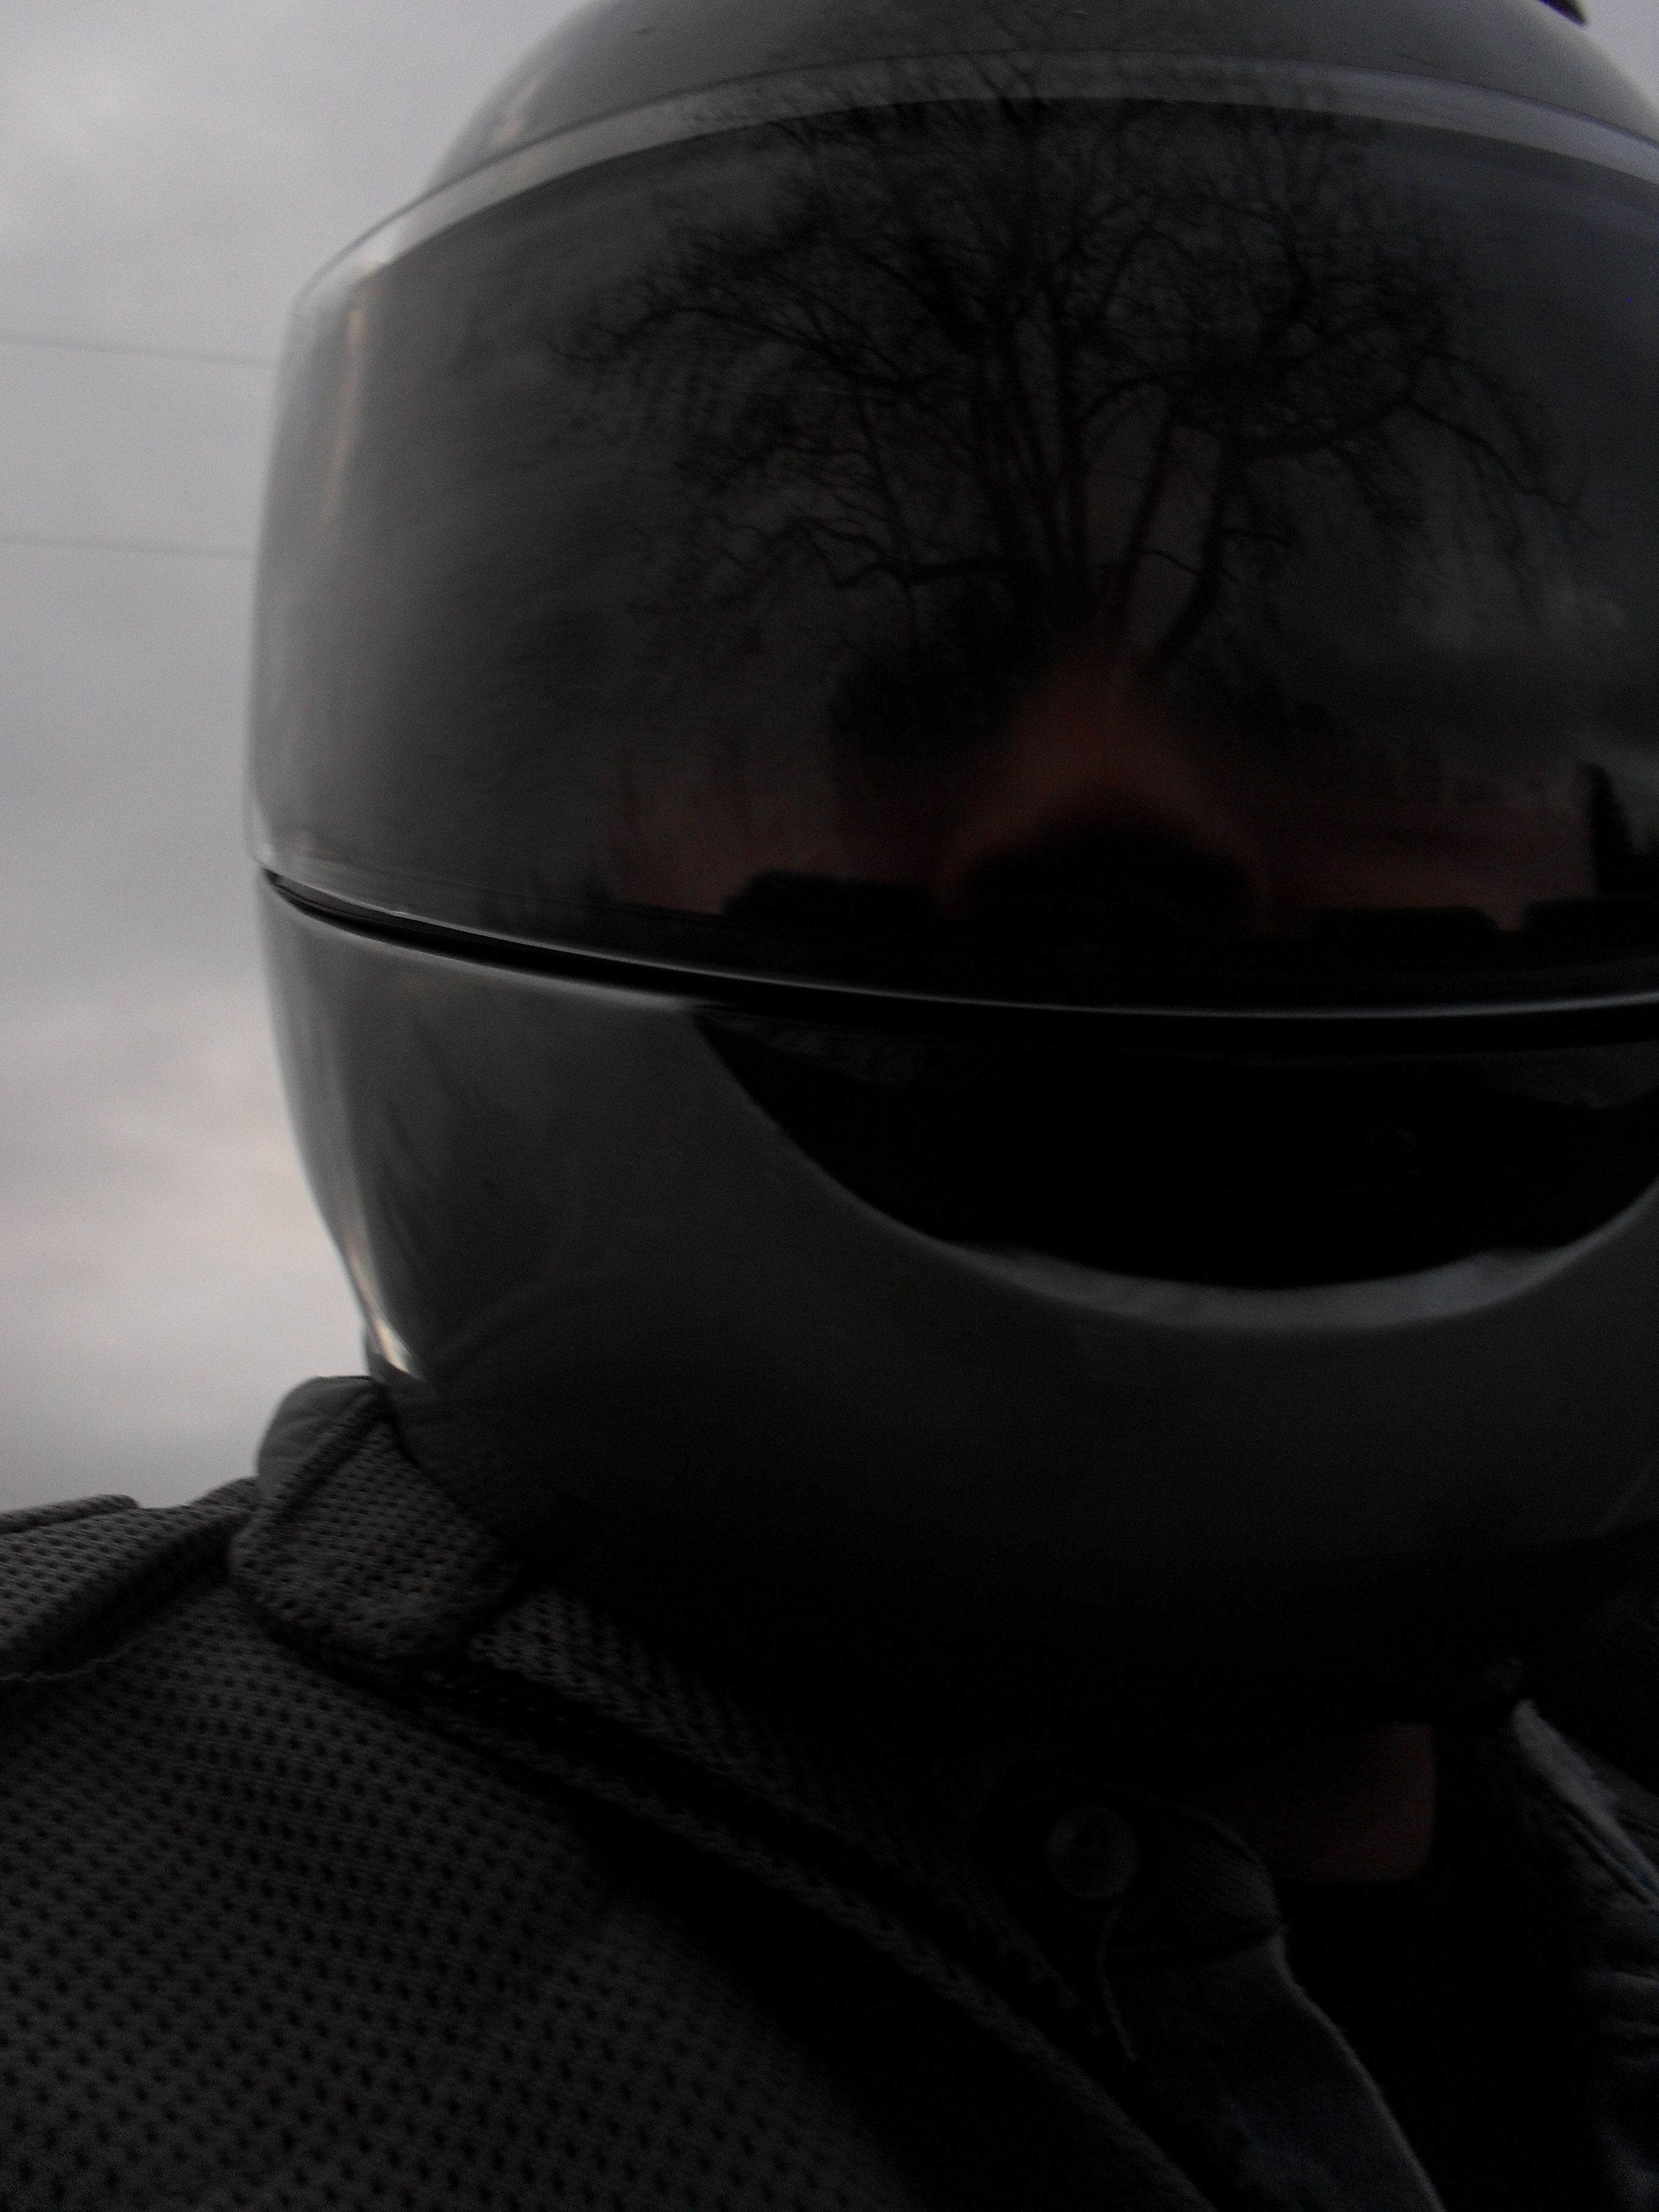
With your helmet on the Fog thief is barely visible.
99 Arctic Cat 4X4

the Motopsyco on a 300 4×4 Arctic Cat

With your helmet off or open the Fog Thief looks kinda ridiculous.

fog thief close up

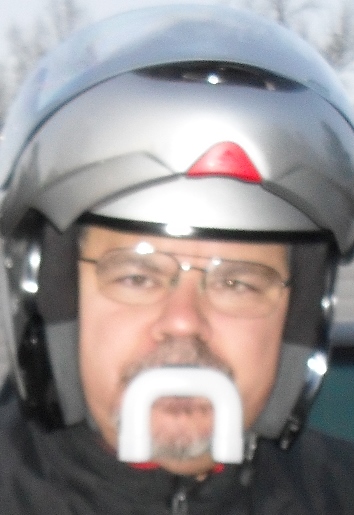
Can you spot the walrus in this picture?

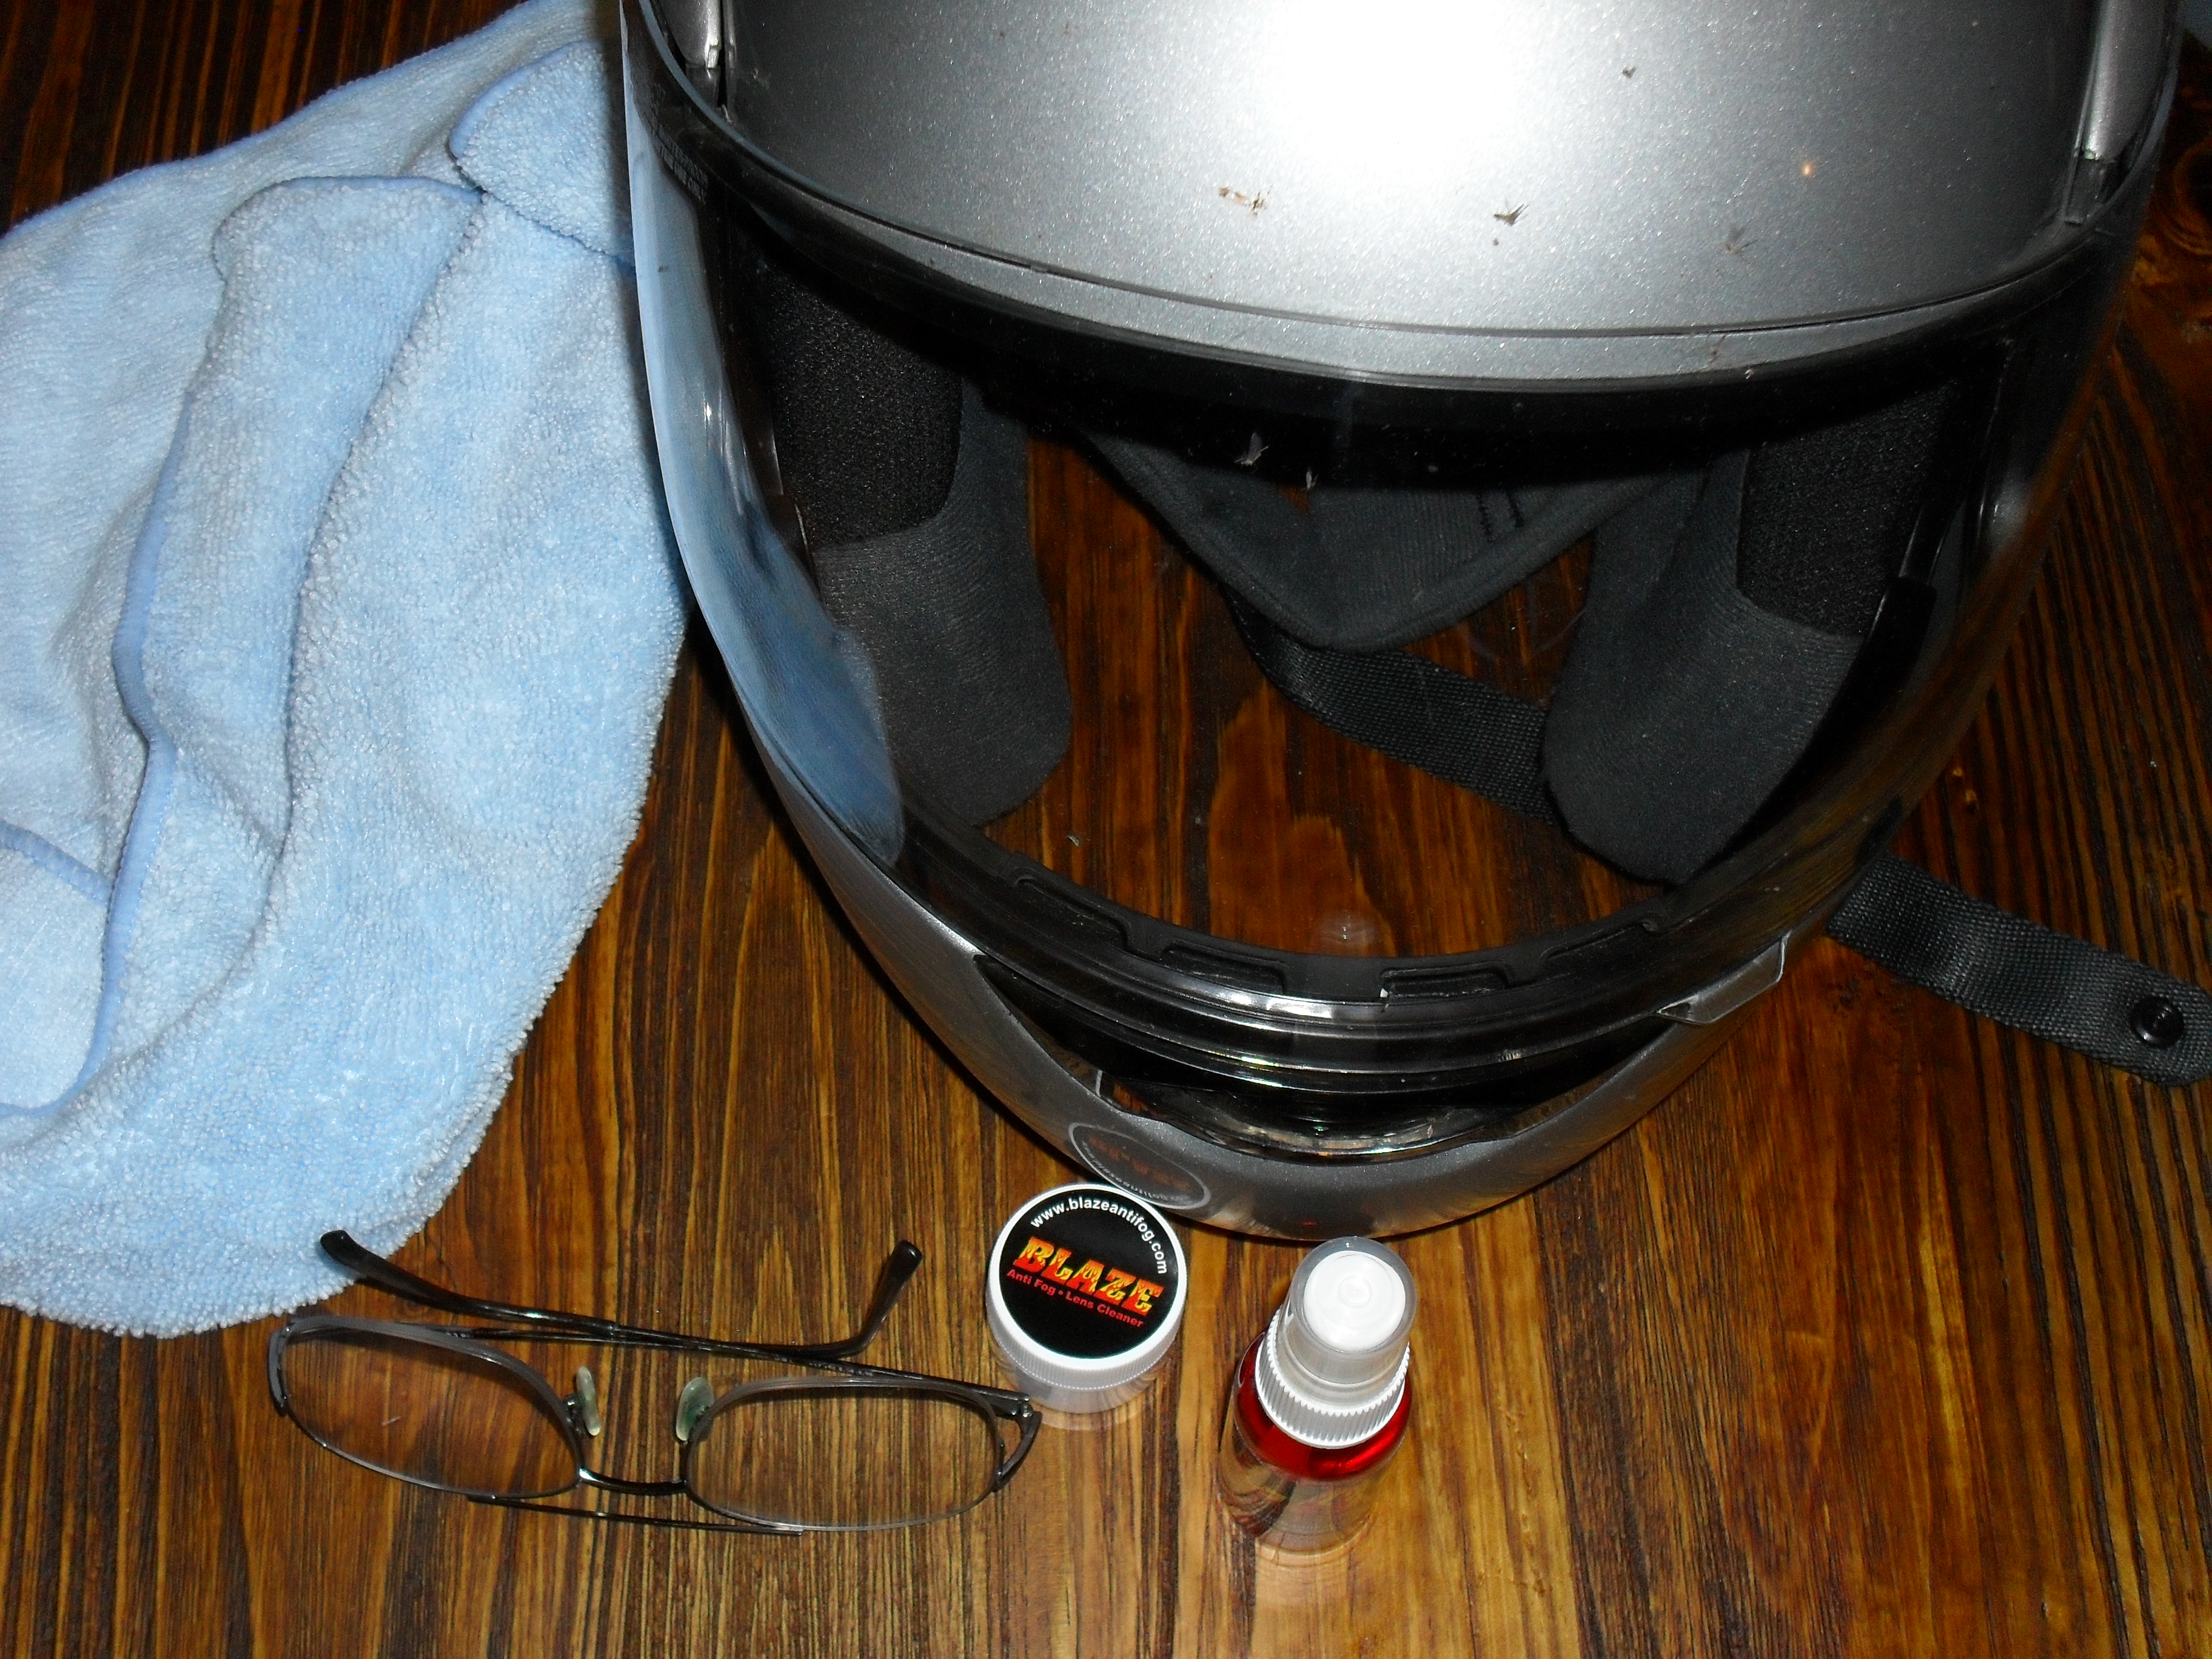
Does it work as advertised? Yes it does, as long as you remember to breathe through your mouth. A couple of time I got excited and forgot to do this & fogged up my shield. Readers with a sharp memory will remember that I used this helmet to test an anti-fog spray a few weeks ago, but to make this test fair I cleaned the shield with plain soap & water to remove the anti-fog spray. After about twenty minutes or so I was able to relax & get used to it but occasionally did have to stop and wipe away some saliva that leaked out around it. Chances are that if you use an open face helmet with a shield, or any other helmet that has enough room for the Fog Thief to sit squarely in your teeth this probably will not be a problem for you. I really think the fitment and usability will be different for each individual and the only way to find out is to try it for yourself.

It worked well for me but I did not always remember to breathe correctly, every now and then I’d have these little moments and forget. You know how it goes, you spot a little hill & get a little air, Yeehaa! Then you forget and exhale through you nose, oops fogged up again. Oh well you can’t do too much playing like that on this kind of atv anyway.

coming home on Arctic Cat ATV

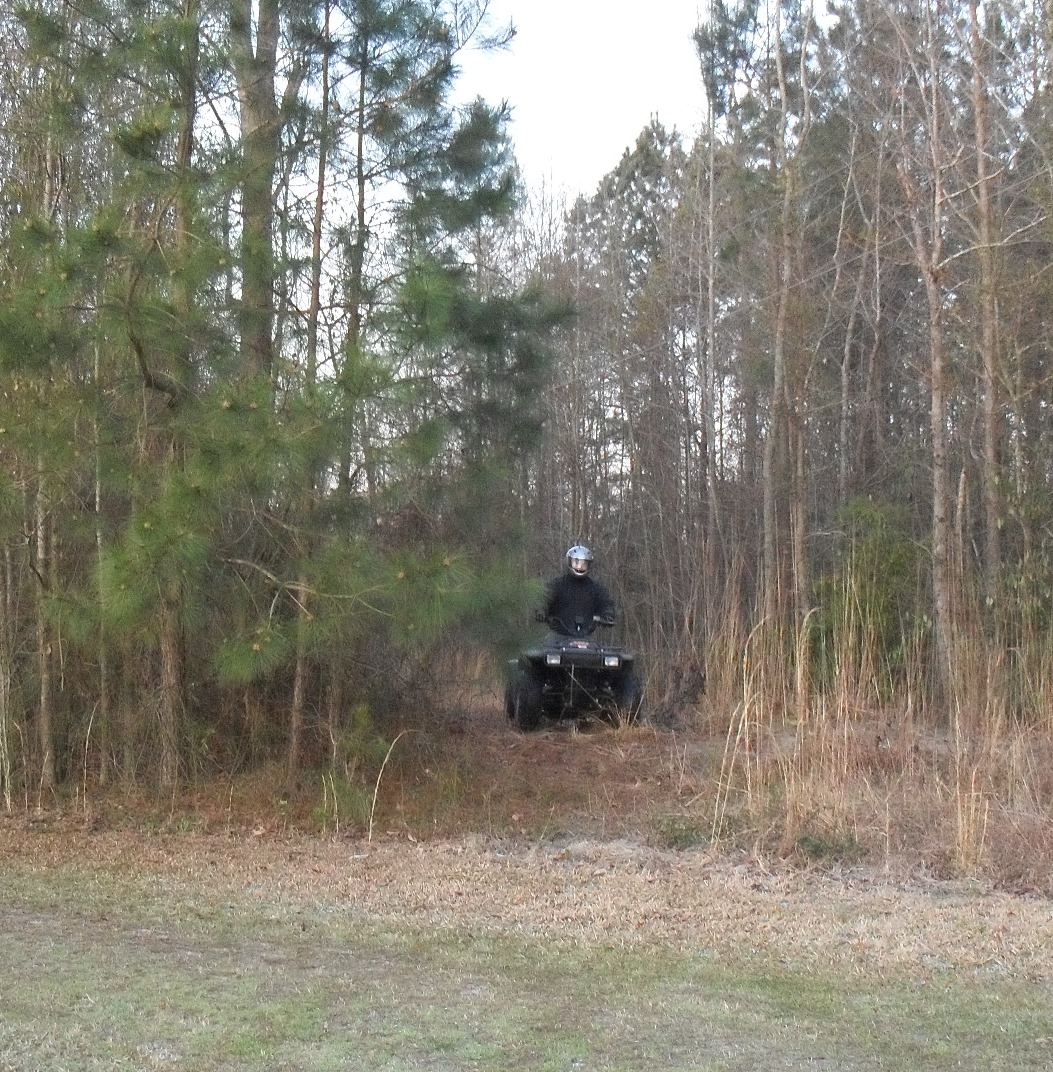
coming home on the Arctic Cat ATV

Every new item has it pros and cons, let’s start with the cons;

1. Definitely requires some getting used to especially if you have never used scuba or snorkel gear.

2. Fits better under some helmets than others

3. Requires a certain amount of self discipline or nose plugs to use successfully

Now let’s go with the pros;

1. If you do your part it works as advertised!

2. Top quality materials

3. Made in the U.S.

If you are a serious cold weather rider, snowmobiler, or or any kind of racer and you have trouble with the face shield fogging this just might be the solution you are looking for. For more information or to purchase one to try see the Fun Projex website

Now for the give away; I have here a brand new never used Fog Thief that I will be giving away on April 20th 2013. All you have to do is click the Facebook link at the upper right hand corner of this page and like the motopsyco.com Facebook page and leave a comment with the words Fog Thief in it. Alternatively if you do not have a Facebook account or don’t want to use it you may leave me a comment below, but please remember that comments are moderated and may take a day or two to appear. If you have already liked my FB page & would like to enter the drawing, you can just leave a comment as described above.

On April 30th my lovely assistant will draw one lucky winners name from a hat and I will send that person a Fog Thief of their own to try out!

Peace Y’all

‘Psyco

Peace Y’all

the moon Good Friday 2013

I took this shot while out test riding the Fog Thief & wanted to share it with you.

The 2013 Charlotte International Motorcycle Show Part 2!

Nicky Hayden #69 Ducati Corse 1000cc

Nicky Hayden #69 Ducati Corse 1000cc

Welcome to the second installment of my pictorial review of the Charlotte International Motorcycle Show.  For the second post I have actually decided to treat this as a product review, because in a sense that is exactly what the IMS series is, a product produced to entertain and inform motorcycle enthusiasts.

I thought Mahindra made tractors

I thought Mahindra made tractors

Danny Webb #99 Mahindra 250cc

Danny Webb #99 Mahindra 250cc

There were displays from all of the major manufactures except for Kawasaki & Yamaha. This did lead to a lot of Facebook grumbling from fans of these two marques. Yes I wish they had arranged to be there, but in this economy it is understandable that some companies have had to curtail such activities. Still there was plenty to see. Harley Davidson even brought in their “demo bike on a treadmill” setup for people to try. The Polaris Corporation set up a display for their recently acquired Indian brand. Of course the first one I made a beeline for was the Ducati display!

One of those stunning Ducati Girls

One of those stunning Ducati Girls

The boys from Ton Up N.C. had a fantastic club display with a couple of Tritons and some other fine vintage iron, for everyone to admire. On the other side of the hall were the Antique Motorcycle Club of America, and the Vintage Japanese Motorcycle Club.

Moto Guzzi V7 Racer

Moto Guzzi V7 Racer

Moto Guzzi V7 Racer

Moto Guzzi V7 Racer

Honda CB1100

Honda CB1100

Two of the vendors there were for the new lithium technology batteries. I was so impressed with this technology that I have actually become a dealer for the Shorai LFX line so be sure check back here soon as I will be setting up an online store to sell them and will have a link and review posted here.

There were some leather & t-shirt vendors, & of course lots of insurance companies. We got to check out a lot of new lids jackets etc.

Honda CB1100

Finally the retro bike we’ve all been waiting for!

The XDL Street Jam show was worth the price of admission all by itself. I greatly enjoyed trying the “Pit Stop Challenge” contest which involved changing the rear tire on a Grand Prix race bike, my time was 24 seconds by the way. And of course as you can tell from my pictures the custom bike show was awesome.

Whiskey Tango 650 Yamaha Chopper

Whiskey Tango 650 Yamaha Chopper

Tennesee Rose 650 Yamaha Chopper

Tennessee Rose 650 Yamaha Chopper

Tennesee Rose 650 Yamaha Chopper

Details,details, details!

Arlen Ness Digger

Arlen Ness Digger

another Whiskey Tango XS650

another Whiskey Tango XS650

a bad ass BSA

So many super cool details on this BSA.

Joe Hunt Magneto

When was the last time you saw one of these?

And now for my favorite group the custom crotch rockets.

JDA Custom Suzuki Hayabusa

one of 2 Suzuki Hayabusa Sweepstakes bikes!

Garwood Customs Suzuki Hayabusa

The other Suzuki sweepstakes prize.

Speedworx Enterprize 2009 Honda CBR1000

Speedworx Enterprize 2009 Honda CBR1000

Speedworx Enterprize 2009 Honda CBR1000

Fantastic from any angle

Black Widow Suzuki Hayabusa

Black Widow Suzuki Hayabusa

Black Widow Suzuki Hayabusa

Black Widow Suzuki Hayabusa

95 Suzuki Katana

Now this is a Kan-o-tuna. The 1100cc motor turns it into a shark.

Out of all the Harleys there my favorite was this give away Sportster built by Roland Sands.

RSD Sporty

I’ll take mine in flat black please…

Regardless of what a few whiners on the net have said it was well worth 15 bucks. Hell earlier this year I paid $20 to go to local show that was so dead I left after 20 minutes so to me this one was fantastic. Yes it could have been better; I personally would have liked to have seen more club or custom shop displays, and since there was plenty of space left in the Convention Center an open custom & vintage motorcycle show in addition to the invitation only J&P Cycles Ultimate Custom Builder show.

<Charlotte IMS>

Mrs. Psyco & I actually sprang for the VIP tickets. It worked out great for us since we are early risers anyway. We got in early & had a little guided tour & got a preview of the XDL show so to me it was definitely worth the extra money, especially since I was pushing my lovely wife around in a wheelchair due to a very badly sprained ankle. We’ll be going back next year.

Even with the giant insurance commercial that dominated a large area of the floor (don’t bitch if Progressive didn’t sponsor this event it probably wouldn’t happen at all), this was still a great way to kill a few hours & meet lots of interesting people and learn about new motorcycles and accessories. So it was worth the few bucks to get in & I am happy to recommend that you try to attend one near you next year.

Blaze Anti Fog Spray & Wax Another Psyco Product Review!

twas a dark & cloudy morn

twas a dark & cloudy morn

Good morning everyone, it is 8:05 a.m. on a cold grey morning here in the hinterlands of Hartsville, South Cackalacky. The temperature is just above freezing (mid 30s) with the occasional light spitting of sleet & rain. I just got back from a motorcycle ride and have a report for you. Everyone knows the best way to keep your motorcycles carburetors clean and ready to go is to ride the damn thing all year round whenever possible. I am not as hard core as I used to be but even in the bleak midwinter I try to keep it on the road enough to keep it running. Besides when the engine is sucking in really dense cold air it seems to scream at me with a whole new level of ferocity that makes me want to twist the throttle harder & harder, damn the frostbite to fingers it feels gooood!

Where I live the winters are generally mild and most of the time the midday temperatures range from 40-60 degrees Fahrenheit But to take advantage of the afternoon temps on my commute home I sometimes have to leave the house while the thermometer hovers around the freezing mark and the frost is thick on the ground. and most of the time this means I have to ride with my face shield up because it fogs up so much. So picture this, a 30 mile commute, in 30 degree weather, with your face shield up and old Jack Frost gnawing on your nose like a puppy on an expensive pair of handmade leather shoes. Even I am not enough of a masochist to say I enjoy this.

This story starts off innocently enough last week at the International Motorcycle Show in Charlotte when I heard this natural born snake oil salesman calling out offering to clean my glasses for me. He did the little routine where he cleaned one lens and put them on a humidifier to show how great the stuff was at preventing fogging. Normally I ignore these people but all of these cold mornings have affected my brain so I decided to listen to him and actually purchase a kit to try.

Blaze Antifog Kit

The Blaze Antifog cleaner kit with microfiber cloth with my glasses & helmet.

To be totally honest my glasses have never actually fogged up during my morning commute. The helmet I use is an HJC CL-Max modular helmet that I have owned for several years now. I have been very happy with it so far, but I did cheap out & get the plain Jane face shield with no tinting or antifog properties.

<HJC CL-Max & Blaze Antifog>

Following the manufacture’s instructions which can be found here

I cleaned my glasses first

<clean glasses with Blaze wax>

Then did the exterior of the helmet with the spray. In the past I have always used Pro Honda Spray Cleaner on my helmets. It definitely is the best thing I have ever found for dried bug removal and is safe on polycarbonate plastics unlike most household glass cleaner. But it has no antifog capacity at all and is actually meant to be uses as a cleaner/detailer product for your bike not your lid.

<cleaning face shield>

The Blaze spray worked really well for cleaning the optics, but it took a little more work to scrub away the dried on bugs than I am used to.

removed face shield for thorough cleaning

removed face shield for thorough cleaning

After all of my lenses were nice & shiny I put it all back together to wait for morning.

Then today I got up nice and early put on my riding gear, went out to the barn and coaxed the Minimum Ninja into life. While walking to the shop I was able to fog the shield by deliberately blowing air upward toward it. Not perfect but hey normally time I step out the back door on a cold morning it is completely fogged over.

a little foggy but not bad

a little foggy but not bad

Riding out the long dirt road that I live on to get to the nearest asphalt I was able to leave the shield closed and was not blinded by the fog.

This is not a fun curve for a sportbike

This is not a fun curve for a sportbike when it’s the least bit wet.

When riding very slow or stopped for more than a few seconds I had to crack the shield open to keep it completely clear, but never had to raise it up more than a smidgen.

further down the road

further down the road

Here’s a shot of that gloomy overcast sky. Normally I would have preferred to try this out for you on a super bright sunshine filled, but freezing cold clear morning, when the glare from the low hanging sun reveals every flaw in your shield but it didn’t happen that way.

<a gloomy morning at the crossroads>

a gloomy morning at the crossroads

My final verdict on the Blaze Antifog cleaner products? Well it’s actually positive but mixed. I really need to check it out in a variety of more conditions, but normally this morning I would have been riding around with my faceshield open just to be able to see, so that alone is a great thing. It’s not perfect, I still had a little fogging when stopped or at very low speed but as soon as I began moving it went away. Perhaps with continued use it will improve more, at this time I only have applied it to my shield once. At 25-30 bucks a pop for the kit, it is rather expensive, & I would like to see it around $19.99 or so myself, but it does work. It’s up to you, if you were blind what would you pay to see? I do recommend removing the face-shield and using something made for painted surfaces to clean the rest of the helmet. Not because this stuff will hurt it, but because it is expensive and there are other products such as the Honda cleaner, that do a better job of removing thick caked on bug guts.

If you are a year round rider and do not have a factory anti-fog coating on your face-shield or goggles you might want to try it out.

Let’s Ride Y’all

the Minimum Ninja!

I had to include a picture of the Minimum Ninja!

The 2012 Royal Enfield Bullet Classic 500 A Psyco Road Test and Review!

a real1956 Royal Enfield Bullet!

a real1956 Royal Enfield Bullet

a real 2012 Royal Enfield Bullet

a real 2012 Royal Enfield Bullet

Let’s take an adventure, a time machine trip of sorts if you will. Imagine if you could take a trip back to 50’s, the golden age of the British motorcycle industry, snag yourself a snazzy new 500cc sporting machine and bring it back to your garage. Since we are dreaming big, now pretend that you have your hand crafted real steel motorcycle back in your fully equipped garage with all the latest and best machine shop equipment you could want. Then while your “friends” in the gasket industry make you a set of the finest modern gaskets and seals, you tear down the engine and re-machine and re-assemble it using modern tolerances and technology. While you are in there update the valve train to hydraulic lifters, so you don’t have to spend any time adjusting valve lash ever again.

A genuine 1954 Royal Enfield Clipper

A genuine 1954 Royal Enfield Clipper

A genuine 2012 Royal Enfield Classic 500

A genuine 2012 Royal Enfield Classic 500

Next load it into your private jet & fly it to Japan for an electronic ignition. While you are there have Kehin to custom build you a fuel injection system and calibrate for your engine. No more tickling the carbs, or cleaning them, or gas dribbling all over your garage from a 1950’s Amal trying to cope with  our 21st century imitation gasoline.

How 'bout a fuel injected thumper?

How ’bout a fuel injected thumper?

Oh well it is a nice fantasy, but one part of it is true. You can get a brand new hand built “British” (in name and style anyway) motorcycle that looks like it fell out of a time capsule from 1955. The first Royal Enfield motorcycles were produced in 1901. In 1967 the factory in England closed but the Indian made Enfield Bullets soldiered on and have evolved into the reliable, oil tight and modern emissions compliant machines we have today. While these are not fantastically powerful machines compared to our modern machinery they are much better in so many ways than an actual antique motorcycle.
Immediately when approaching the Classic or Bullet 500 you are struck by its relatively compact looking dimensions. Today so many “retro” styled machines have turned into larger than life caricatures of the machines they are trying to imitate. This is one of the reasons I dislike so many of them, being a fan of 50’s-70’s bikes such as the CB400, XS650, or old Triumphs and Enfields, to me the new “retro bikes” look tacky compared to the real thing. The 2012 Royal Enfields are not retro replicas; they are still the real deal. An upgraded genuine vintage motorcycle that is available right now with a 2 year warranty, imagine that.

See what I mean about the size of modern bikes?

See what I mean about the size of modern bikes?

When I threw my leg over the Classic 500 and hoisted it off the kickstand the first though that went through my mind is whoa this thing feels substantial. Not overweight & porky but definitely dense, solid, and hefty feeling. You can feel the steel in this one. With my 29 inch inseam I can sit on the saddle with both boots firmly on the ground.

motopsyco on Enfield Classic 500 with Desert Storm paint

Just hit the magic button and you’re ready to go!

2012 tan Royal Enfield Classic 500

Rolling it round a little bit.

Bike; 2012 Royal Enfield Classic. Rider; motopsyco

Bike; 2012 Royal Enfield Classic. Rider; Motopsyco

Hit the starter button and the fuel injected single starts up with a nice thump-thump-thump idle note that is a characteristic of a big slow revving single. Yes it vibrates a little but it’s a pleasant soothing feeling not annoying. Pull in the clutch, snick it into first gear, and ease out on the lever. Just remember that you are working with authentic 1950s horsepower (27.5hp @ 5250 rpm) so don’t pull out too closely in front of that sports car that is barreling down the street at twice the speed limit. Even 1950s horsepower is more than enough to stay ahead of most traffic from stoplights around town. Plus people look. These are good looking motorcycles that are different from the mundane and commonplace Hogs and crotch rockets that litter the streets around here.
In addition to thanking LA Motorsports for allowing me to borrow a couple of their motorcycles I really want to thank general manager John for pointing me towards Jamison Road in Summerville. While it had too much traffic to really cut loose it is the kind of road that is perfectly matched to the feel and great handling of these bikes. It was just a couple of miles of nice sweeping turns that let me roll the bike from side to side in a most enjoyable fashion while the engine played a slow bass drum beat as I rolled the power on through each curve, and slowed back down just so I could do it again & again. This is the kind of handling that comes only from classic British motorcycle architecture. No high tech suspension and wheels, just good frame design and a nice wide handlebar. Sure I could probably run that same road at 3 times the speed of the Enfield on any late model plastic covered crotch rocket, but to be honest with you, I would not have been any happier, nor had a better time doing so.

leaving LA Motorsports in Summerville S.C

leaving LA Motorsports in Summerville S.C. for a ride on an accessorized Enfield

A red Classic Royal Enfield 500

The Accessory exhaust sure sounds good on a Royal Enfield 500

I did not try any interstate trolling or top speed runs, and quite frankly as the top speed is around 85 or so I would not be afraid to, but this is a bike that really belongs on twisty country roads. The suspension is basic stuff but competent. The single disc front brake & rear drum brake are well up to the task of handling what this bike can dish out.
One selling point of this machine is its 85 mpg fuel economy. Folks, that is getting close to moped territory, but on a real solid steel motorcycle that can haul 2 people around with aplomb and looks damn good doing it.
As India becomes more and more of a manufacturing powerhouse the fit and finish of these motorcycles is now much better than when they were first reintroduced to the western world back in the early ‘80s. They have always had the right look, but now they have the polish and refinement to go with it. Plus this is probably the most comfortable motorcycle I have ridden in the last ten years.

one good looking classic motorcycle

one good looking classic motorcycle

The Royal Enfield 500 engine is the epitome of classic style

The Royal Enfield 500 engine is the epitome of classic style

<the 2012 Royal Enfield Classic in red>
the 2012 Royal Enfield Classic in red

If you want to turn curves at reasonable speeds in the country and turn heads like a rock star in town, and you don’t care about being able to run 150 mph, or looking like a rich yuppie poser, then this is the bike for you. My road tests are not about outright performance, but about how a motorcycle makes me feel, and this bike makes me feel damn good. It’s not badass, does not have exotic cachet, power, and is not a status symbol, it is just a motorcycle without all that extra bullshit. Plus you can get a brand new one out the door tax, title, tags & all for around 7 grand.
And I can see myself owing one….

Peace Y’all

Review of the Harbor Freight Motorcycle Lift Table

I’ve been wanting one of these for a long time. For years I used a wooden table or a chain hoist to lift motorcycles up for repairs when I just could not bear to get down on the floor to work on them. As I’ve gotten older the combination of a weaker back and a fatter wallet has made this purchase a lot easier to justify. So when the September issue of my favorite motorcycle magazine arrived on my Kindle with a coupon to purchase this lift for $299 I bought a print copy ASAP & clipped the coupon.

Ironically enough it took me 2 weeks to purchase this from either of the 2 nearby Harbor Freight stores. Unfortunately this led to my first real negative experience with a company that I have enjoyed doing business with for years. Last Saturday I went to my closest store in Florence S.C. and they were out of stock, so I called the store in Dillon an hour drive from here and they were also out, but told me they were expecting a shipment on Thursday. Yesterday, I was in Florence and they were still out, so I called the Dillon store and gave them the item number and was informed they had some in stock. So I gassed up my van and rolled up the interstate to that store, imagine my shock when I handed the clerk my coupon and was told that they were out of stock. When I mentioned that I had just called and had been informed that they were in stock. Then she went back to the computer and “found” one for me. Probably just a human error but if you are using a coupon to buy one I would verify stock in your nearest store before driving very far to pick one up. Don’t mention the coupon until you get there.

The shipping guys helped me load it in my van with the forklift. This worked out for me okay but if I had to do it again I would have taken a trailer for easier loading and unloading. If you have a long bed pickup truck that’s the best thing to use.

lift in crate in my Astro van

lift in crate in my Astro van

Since the completed crate was far too large and heavy for my beautiful assistant and I to remove from the van I simply opened where it was and slid the contents out into the door of my barn.

motorcycle lift crate open

motorcycle lift crate open

I am not going to do a step by step walk through of the assembly because in all honesty the instructions that come with it are perfectly adequate to help you get it together. I will touch on a couple of things that I think you should know about. First I got all of the parts laid out and read the instructions from beginning to end.

Harbor Freight Motorcycle Lift Table w/ parts & instructions

Harbor Freight Motorcycle Lift Table w/ parts & instructions

Harbor Freight Motorcycle Lift Table oil fill plug

Harbor Freight Motorcycle Lift Table oil fill plug

One of the things that you are instructed to do is to check the level of oil in the lift cylinder. The fill plug is in the location shown in the picture below.

Be sure to use a decent grade of jack oil. If you do not have some at home go ahead and pick some up at Harbor Freight while you are there. The best way to fill a jack cylinder like this is with a squirt can. Mine turned out to need a pint of oil to fill it.

oil I used for my Harbor Freight Motorcycle Lift Table

oil I used for my Harbor Freight Motorcycle Lift Table

The instructions seem to want you to install all of the parts and accessories before you check the oil and raise the lift. I personally installed the wheels, then filled up the jack and raised the table all the way up to install the wheel vise, tie downs, & the ramp. You should do whatever seems safest to you.

Installing accessories on my Harbor Freight Motorcycle Lift Table

Installing accessories on my Harbor Freight Motorcycle Lift Table

Here it is altogether.

my fully assembled Harbor Freight Motorcycle Lift Table

my fully assembled Harbor Freight Motorcycle Lift Table

  After double checking the assembly of the table I lowered it back down and drove the Minimum Ninja up on it so that it could receive some long overdue TLC.

Look Y'all it's the Minimum Ninja!

Look Y’all it’s the Minimum Ninja!

Yesterday after strapping the bike down I raised the table to its maximum height and left the motorcycle sitting on it with the safety bar properly installed. When I went back this afternoon it was still all the way up. A lot of people criticize the design of the wheel vise but I think that it is okay. Unlike the larger vises I am certain that one can perform most fork and front wheel service without removing it. When I was a dealership mechanic most of the time the wheel vises from our heavy duty air lifts spent most of their time lying under the workbenches because they got in the way. Plus my bike still has a centerstand 🙂

Kawasaki Ninja 250 on my Harbor Freight Motorcycle Lift Table

Kawasaki Ninja 250 on my Harbor Freight Motorcycle Lift Table

Don’t forget to recycle the crate! It actually has a couple of large pieces of usable plywood, I know that you can always find a use for a good piece of wood around the house or shop.

Recycle this crate you know you want to.

Recycle this crate you know you want to.

This will be a long term review. Over time I will publish new updates or simply update this post as I get some miles and years put on this thing.

As for the Minimum Ninja, it will receive its own pages here covering the updates and repairs as I make them.

Peace Y’all

Installing an Arrow Metal utility building

Yep I went and moved into town, to make matters worse the town was 2 and a half hours away from home. Couldn’t help it, it had to be done, opportunity was knocking too loudly for me to ignore, sometimes you just gotta go for it etc. ad nauseum….
The problem was leaving behind one of the better equipped workshops on the planet, and moving to a rented house without so much as a storage shed in the yard. So I did a little research into my choices and after weighing all the social, political, and economic consequences went to my local Lowes store to pick up a 10′ x 14′ Arrow brand metal storage building, of the model designated Lindale.
Interestingly enough this model had very mixed reviews, but having put a similar building up before it is my opinion that most of the bad reviews were due to excessively high expectations. This is one of the least expensive buildings you can get in this size so you should be realistic. The steel panels are thin and can be damaged easily, but this is not the result of poor quality, it is the result of engineering it to a price point that can be sold readily.
I already had an existing concrete slab in the yard that was left behind by a previous resident so my site prep was nil. You really need a reasonably level spot to install these buildings. But that’s beyond the scope of this article.
You need to get the building a day ahead of time before you plan to start it. Take the model number and go to the Arrow Sheds website and download and print the instructions for your shed. Yes I know there should be a set in the box already but a. you should not open the box until ready to begin, and b. the instructions for mine had a page missing so I’m really glad that I did. After you print the instructions spend a couple of hours studying them. Then check your weather forecast. You will need 2 full days (8-10 hours each) of light or no wind to install construct this building. If all of these conditions are met charge up all of your electric screwdrivers and plan to get up early on the first day. Be sure you have a good helper and a ladder also. This is not a job for one person.
Get up early in the morning and open up your box, and lay out all of the parts, grouping them together by part number and checking to make sure you have everything you need to build it. I am not going to repeat the instructions, just some observations. Remember when using power tools to install this use a very light touch as the screw holes in the thin sheet metal will strip very easily. Do not use a full powered electric drill. I recommend a battery screwdriver, or a battery drill with a slip clutch set to the lowest possible setting that will drive the screws in. You should at least be able to get the walls up the first day.
Arrow Lindale 10 x 14 walls up
Here you can see the sheet metal roof trusses better.
Arrow Lindale 10 x 14 roof supports
Now you can eat supper and recharge your battery powered tools and get some rest because you and your helper are going to put the roof on in the morning. Be prepared to lean on walls or to gently push and pull on the building as needed to get the screw holes to line up properly at times, and don’t worry if you ding a panel or to just pop it back out after you finish attaching it. Just remember this building is not capable of supporting your weight so do not try to climb on top of it. If you do, be prepared to be nominated for the Darwin Awards
If everything is done just right you should be able to install the last roof panel without much trouble.

Arrow Lindale final roof panel

We'll know in a minute if this building is square :0


After this it’s just a matter of installing the doors and trim work.

The final verdict is that I have a decent shed for my bikes and tools that does not leak and keeps things out of sight. Even when locked it is not high security storage but with the little bit of cheap stuff I keep in it it does not have to be. This is a good value for the $550 price (November 2011) but if you expect super fast, easy construction, or stout lockable security you should be prepared to spend at least 4 times that amount. Like I said at the beginning if your expectations are realistic this is the most bang you can get for your buck.