Dirt Bike Carburetor 101 Part 1 (how to clean a single cylinder motorcycle or atv carb)

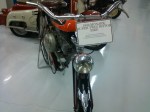
Hello everyone and welcome to this multi-part lesson on the basics of carburetor  cleaning for single cylinder motorcycles. The cadaver we will be resuscitating in this lab is an 02 Honda XR100.

“barn fresh” xr100

Believe it or not this bike would still run with the choke on even with the dead gas and clogged jets, gotta love a Honda! This will be a general step by step guide to repairing carbs, so I will not be giving you the actual specifications as they vary so much from year to year on some bikes. As I’ve said before you need to obtain the specific information for your exact bike from a reputable source like say a service manual. For this first post let me show you how to remove the carburetor from this bike.

First let me say that it is possible to pull the carb from an XR100 without removing the bodywork, but A; you need to clean or replace the air filter and B; if it’s been sitting long enough to need the carburetor cleaned you need dispose of any fuel in the tank and clean it out before re-starting the bike after you finish the carb.

Now take off the side covers. This picture shows the location of the air filter cover on the XR100

Next look under the rear fender and remove the 2 nuts holding the seat on. Then pull it up and rearward to remove it.

I like to put the nuts and any spacers back on the studs like this so they will not get lost. In fact whenever possible I do this for all nuts and bolts as it keeps them from disappearing.

Now go the the fuel switch, valve or petcock, whichever terminology you use for it and turn off the flow of gas to the carburetor and disconnect the fuel line. Be prepared to cut it off with a knife and replace it if necessary.

Remove the rubber strap that holds down on the rear of the fuel tank and the two bolts at the front of the tank.

It is not required that you remove the shrouds like I did for this photo, I simply removed them so that I could show you the location of the bolts at the front of the gas tank.

After setting the gas tank aside in a safe location it is time to disconnect the throttle cable. On some models it attaches to an arm on the side of the carb but on simpler ones like this it is attached directly to the carb slide. Unscrew the cap as indicated by the screwdriver and pull the slide out.

This next shot is a little fuzzy but it indicates how the throttle cable is retained in the slide, and the following picture shows the slot in the side of the slide that allows you to remove it from the cable.

Now all you have to do is to compress the spring and push the end of the cable out of its hole, past the end of the slide, pull it out through the slot and then through the big hole at the top.

Here’s the removed and disassembled slide, jet needle, and return spring laid out for you to see.

Loosen the clamp holding the rubber hose from the air box to the carb and then remove the bolts attaching it to the engine and pull it out.

Yes I’m using the obstruction wrenches again. Two tools that I feel are must haves for any serious cycle mechanic are obstruction wrenches of decent quality and some extra long screwdrivers of the finest quality money can buy (i.e. Snap On etc.) Inexpensive wrenches are often okay but cheap screwdrivers will drive you bleeping crazy, by stripping out the soft metal heads on Japanese motorcycle screws.

Here’s a shot of the carburetor on the workbench. I like to use the red toolbox tray shown to help me organize the parts as I disassemble the carb, and to keep the parts from disappearing into the wormhole that exists behind my workbench. No part that falls back there is ever seen again, so I try to keep them from rolling of of the back edge. No dear reader I am not going to move the bench to look for them either. In my shop I coexist peacefully with all matter of snakes and spiders both harmless and venomous, and that is their territory and I stay out of it.

Don’t’ forget to protect the engine by plugging the intake hole while the carburetor is off.

I’ll show you the rest later, don’t forget to bookmark this page or to sign up for the email notification of updates on the right side of this page. Click here for part two!

Peace Y’all

Seriously Y’all, Replace Those Cotter Pins

ATV wheel with brand new cotter pin


The slightly dark picture above shows an ATV that I recently re-installed the hub on. With a new cotter pin in the castle nut. Do yourself a big favor, and no matter what never ever re-use a cotter pin on any thing. Whether is a motorcycle, ATV, automobile, or any other application. They are there to prevent the sudden disastrous failure that could result from a nut coming loose on a critical component. If you really must perform an emergency road or trail side repair and re-use one to get home do not forget to change it ASAP before using the vehicle again. Isn’t your ass worth the small amount of pocket change these things cost?

Yes I practice what I preach, here is the cotter pin assortment that I keep on hand, a couple of sizes need refilling but that’s okay the piece of mind is worth it.


Motorcycling and ATV riding is risky business anyway, but if you insist on having a gnarly bone grinding crash, at least let it be because you were doing something stupid and fun, and not that the wheel fell of because you were too cheap to replace a 39 cent cotter pin.

Peace Y’all
‘Psyco

2006 V-Star 650 Basic oil and plug change.

Hello Everyone!

Yes I have been having lots of fun lately, but every now and then you gotta do some work. Let’s turn our attention back to the motorcycling world a bit and I’ll give you a nice meaty maintenance how to for the 2006 Yamaha V-Star 650 pictured above. This is a low mileage bike that is in for a basic oil & spark plug change. I am going to do this down on the ground without using a lift, just like the majority of you who do this yourself will.

First lie down on the left side of the bike and identify the oil drain plug on the side of the block.

This 17mm plug will be a lot easier to remove if you have an obstruction wrench like this, but might be able to be done with a normal box end. (I didn’t try sorry)

These 2 shots show the wrench on the plug for removal to give you a better idea of where it is.

Next to get to the oil filter you have to remove this fake “derby” cover.

Now you can access all 5 of the bolts holding the oil filter cover on.

This long handled ball end Allen wrench is optional but I am glad to have it for jobs like this.

Here’s the back side of the cover showing the location of the long bolt in the center.

Be sure you pay close attention to how the oil filter sits in the crankcase so that you put the new one back in the same way.

Here’s the other end of the filter.

Be sure to clean this hole out well with a CLEAN lint free shop rag.

When you are cleaning the oil filter cover inspect the o-ring thoroughly and if you have any doubt about its condition replace it. Absolutely, under no circumstances should you use any type of sealer here.

The new oil filter is sitting in place.

This shot shows the location of the long bolt on the front of the oil filter cover.

While you are putting the drain plug back in make note of the oil sight glass. For reasons I will explain later I despise these archaic things, especially on bikes without a centerstand. But this engine is actually a detuned and over decorated direct descendant of the best air cooled 1980’s Japanese cruiser to ever exist the Virago, so I understand why this engine has one.

On top of the left crankcase you will find the oil filler cap, take it off, insert a good clean funnel and pour in 2 ½ quarts of any good brand of oil the meets the minimum API standards for the engine. Put the cap back on and get your lovely assistant straddle the bike and hold it straight up and check the oil level in the sight glass. It should be over the top of the glass at this point.

Start the engine and let it run at idle for just a minute and then shut it off.  Once again have your stunning, ravishing, gorgeous, assistant hold the bike in a vertical position and verify the level of oil in the sight glass and if needed add more until it is at least halfway up the sight glass as shown here.

Let me add a slight disclaimer, when checking the oil level resist the urge to nibble on you beautiful assistants ankle, she might be ticklish and drop the motorcycle on your head.

At this point I am ready to replace the spark plugs, first gather your tools and parts. Because the plugs are recessed so deeply into the heads I recommend the use of either a locking extension as shown here or a factory plug wrench.

If you tend to be ham fisted, I am going to urge you to get a service manual and use a torque wrench to tighten the plugs to their specified torque values, because aluminum heads are easy to strip out. I warned you so be careful not to over-tighten your spark plugs.

Here’s a shot of an original plug next to an new plug.

Once you get the first head done, it is time repeat the process on the other cylinder.

Put the wires back on, hit the starter button and go for a ride!

Don’t forget to properly dispose of the old filter and recycle your oil!

Peace Y’all

More Bikes from Concord Rare Stuff Here!

This post will be almost all pictures there is some really cool stuff that I have never seen anywhere else. Check em out and leave a comment telling us your favorite(s).

(comments are moderated so please be patient, and once again please excuse the low res pictures)

Peace Y’all

Vintage Motorcycles New in the Crate!

Would you like to have a brand new vintage Triumph or a first year Gold Wing? I know where some are, but I don’t know if you can buy them. They are part of the Carpenter Museum collection along with the 2 MZs that I showed to you in my last post. Take a peek at these pictures!

1976 gl100 new old stock

A Honda collectors dream come true!

Brand new Meridian Triumph

Read it and weep.

N.O.S. Classic Triumph

It would destroy the value but I would take this one out & ride it if I could!

A hidden gem in Concord N.C. Dennis Carpenter’s Bike Collection!

I’ve been traveling a lot for work lately and have not posted as much. While in Concord N.C. I stopped by Dennis Carpenter Ford Reproductions  to look at a beautiful old Falcon that was sitting out front for sale. The gentleman who owned the car worked there, and came out to greet me and we talked for a while. I used to own a 66 Falcon and if I ever find another one at the right price. This one was a beautiful powder blue with the original engine and less than 70,000 miles on it!

classic Ford Falcon

classic Ford Falcon

Ford Falcon all original engine

Ford Falcon all original engine

Of course the focus of this blog is all things 2 wheeled and we know that if you need Cushman scooter parts Carpenters is the best game in town. While I was talking to the guy about the Falcon he told me about the museum out back and where to go in the showroom to get to see it. I like old Fords (I’ve owned a few) and Cushmans are cool so it was definitely worth a look. The cars and the scooters did not disappoint but what blew me away was the large and diverse collection of classic motorcycles and bicycles of all kinds from every continent! Please keep in mind that I was totally unprepared for this and all the pics you are about to see are crappy low resolution cell phone pics.

Badass old lawnmower

Badass old lawnmower!

Before we get to the bikes when was the last time you saw a lawnmower like this?

Here is a view down the front aisle. Its a little fuzzy but you get the idea.

Honda CTs etc.

Honda CTs etc.

twin Trumpet twins!

twin Trumpet twins!

Check out this twin engine Triumph dragster!

a bunch of mint vintage bikes

a bunch of mint vintage bikes

seriously cool old bicycles

seriously cool old bicycles

Did I mention bicycle? Here are some samples.

a row of classic Triumph motorcycles

a row of classic Triumph motorcycles

A Triumph lovers dream many with zero miles on them!

bsa moto guzzi antique tricycles

Beezer!

Triumph X 75 Hurricane

Triumph X-75 Hurricane

Don’t forget BSA. Do you see the white Guzzi?

Got Hurricane?

Brand new MZ motorcycles

Brand new MZ motorcycles

This is just a teaser for now I’ll post more pics at a later date. There where several large boxes like this sitting around too….

Peace Y’all

Brew Racing Frames of Boone N.C.

I know that I’m not the only one that love both bicycles and motorcycles check out this website; BREW Bikes LLC

Normally I prefer my motorcycles to be rockets and my bikes to be laid back cruisers. This shop prefers things the other way around. Although my taste in bikes is different I can dig an old school chopper especially since these guys really seem to be able to dig the performance out of old flathead Hogs.
Plus they build some of the best looking custom mountain and bmx bicycles I’ve seen on the web. Go check’em out you’ll be glad you did.

Wow Is it November already?

Haven’t posted in a while. I’ve been busy relocating the motopsyco.com world headquarters to Wilmington N.C. I will be posting the Recon re-assembly pictures soon and doing a little work on my Ninja, and will let you follow along. I have permanently closed my backyard cycle shop (at least for as long as I am gainfully employed). Motorcycles are supposed to be about fun! Of course I’ll do a lot more posting about bicycle stuff too. This is a serious bicycling town and home to the best damn bicycle shop I have ever been in in my life. Who knows? one day I might visit the other 5 or 6 bicycle shops in town too.
I have befriended a couple of other cyclists of both motorbike and pedal bike varieties. I’ll try not to leave you hanging so long next time!
Peace Y’all

Visiting Blue Moon Cycles

Some motorcycle dealerships are truly different.
This past weekend I traveled to Georgia for the 1st annual Coasters Kustom Bicycle Club show and swap meet. Since I have wanting to look at and swing a leg over one of the new Royal Enfields ( and they have a vintage motorcycle museum.) I added this as a side trip on my way to Powder Springs.
From the outside the building looks ordinary, industrial looking even, but once you step inside and look around the showroom you begin to realize that this is a special place for motorcyclists and gear heads. I’ll just let the pictures do most of the talking…

Showroom at Blue Moon Cycles

The picture above was taken from a corner of the museum. The combination of model airplanes, new BMW’s, and exotic vintage motorcycles and bicycles is amazing.
It turns out that the museum by itself is worth the trip. The first motorcycle that I saw at the top of the stairs was this Munch Mammutt which at the time it was built was the largest production motorcycle in the world.

The Mammoth!

In today’s world 1200cc is a mid-size cruiser, the difference is this bike was an attempt at higher performance. Most of the 1200cc plus bikes built today have only half the power of your average early 90’s 600cc sportbike.
Being a vintage bicycle nut it was a pleasant surprise to see a couple of bicycles in the place as well. Here my beautiful traveling companion poses next to a vintage tandem.

vintage tandem

There was also this.

Smiths Motor Wheel

the Ultimate Period Bicycle Accessory

Of course the museum had a wide range of vintage Beemers including a gorgeous silver R90S, and a number of military motorcycles. They also have a wide range of vintage cycles and scooters from all around the globe. Present at this place you’ll find; NSU, Moto Guzzi, Harley, Jawa, Norton, Triumph, and many other brands on display.
The other great thing about this place is the staff. They were helpful, but not intrusive. It was a great experience to be able to gawk at motorcycles both in the museum and on the sales floor without being hassled by a salesman the whole time, yet they were always ready to answer any questions that I asked.
My main motivation for stopping was to check out the new Enfield, but after my wife and I tried out one of the Ural side car outfits, well let’s just say now it’s time to find a demo ride somewhere to see if I could enjoy flying low and slow.
Until next time,
Peace Y’all

skeleton on bmw motorcycle

fun dude to hang out with!

History of the Mighty VFR at Cycle World WOTM

The Interceptor

1984 VFR 1000


Repeat after me INTERCEPTOR The original VFR was one of the greatest motorcycles ever produced. I have thoroughly enjoyed the ride every time I threw my leg across on. But you have to be a serious masochist to enjoy working on them. The complexity of these engines is both intimidating and awe inspiring at the same time. Sure the GSXRs, Ninjas, and Honda’s own CBR soon left the VFR behind, (but not far behind). All too soon the maximum rocket-ship of the eighties became the competent sport tourer/sport commuter of the nineties and beyond. Even so it stayed at the head of the sportbike class technology wise and always seemed to have the power and handling needed to get the respect of all the local “Ricky Racer” boys, while being cerebral and practical enough for the older guys to try to pretend that they were not trying to pretend to be young again.
Apparently John Burns over at Cycle World must be a fan too because he compiled a nice multi-part history of this bike that you can read here.
History of the VFR Part 1

History of the VFR Part 2

Should you happen to have one the old 80s 700-1100cc VFRs lying around taking up space in your garage and you really need to get rid of it let me know. I’m exactly the kind of masochist who would enjoy restoring one.