Do you really want to know how fast you can go with a 250cc four stroke engine? Then go check out Dark Horse Racing 9623. This is the internet home to the Worlds Fastest 250 Ninja, as certified by the East Coast Timing Association. Be sure to watch the video of his 123 mph run. Go check it out here at this link!
This is for all of my friends in colder places. It is my lunch break, it is 73 degrees farenheit in January, and this is my motorcycle parked outside of my office. I’m not trying to rub it in, just wanted to share a little joy with you today!
Hello everyone and welcome to this multi-part lesson on the basics of carburetor cleaning for single cylinder motorcycles. The cadaver we will be resuscitating in this lab is an 02 Honda XR100.
“barn fresh” xr100
Believe it or not this bike would still run with the choke on even with the dead gas and clogged jets, gotta love a Honda! This will be a general step by step guide to repairing carbs, so I will not be giving you the actual specifications as they vary so much from year to year on some bikes. As I’ve said before you need to obtain the specific information for your exact bike from a reputable source like say a service manual. For this first post let me show you how to remove the carburetor from this bike.
First let me say that it is possible to pull the carb from an XR100 without removing the bodywork, but A; you need to clean or replace the air filter and B; if it’s been sitting long enough to need the carburetor cleaned you need dispose of any fuel in the tank and clean it out before re-starting the bike after you finish the carb.
Now take off the side covers. This picture shows the location of the air filter cover on the XR100
Next look under the rear fender and remove the 2 nuts holding the seat on. Then pull it up and rearward to remove it.
I like to put the nuts and any spacers back on the studs like this so they will not get lost. In fact whenever possible I do this for all nuts and bolts as it keeps them from disappearing.
Now go the the fuel switch, valve or petcock, whichever terminology you use for it and turn off the flow of gas to the carburetor and disconnect the fuel line. Be prepared to cut it off with a knife and replace it if necessary.
Remove the rubber strap that holds down on the rear of the fuel tank and the two bolts at the front of the tank.
It is not required that you remove the shrouds like I did for this photo, I simply removed them so that I could show you the location of the bolts at the front of the gas tank.
After setting the gas tank aside in a safe location it is time to disconnect the throttle cable. On some models it attaches to an arm on the side of the carb but on simpler ones like this it is attached directly to the carb slide. Unscrew the cap as indicated by the screwdriver and pull the slide out.
This next shot is a little fuzzy but it indicates how the throttle cable is retained in the slide, and the following picture shows the slot in the side of the slide that allows you to remove it from the cable.
Now all you have to do is to compress the spring and push the end of the cable out of its hole, past the end of the slide, pull it out through the slot and then through the big hole at the top.
Here’s the removed and disassembled slide, jet needle, and return spring laid out for you to see.
Loosen the clamp holding the rubber hose from the air box to the carb and then remove the bolts attaching it to the engine and pull it out.
Yes I’m using the obstruction wrenches again. Two tools that I feel are must haves for any serious cycle mechanic are obstruction wrenches of decent quality and some extra long screwdrivers of the finest quality money can buy (i.e. Snap On etc.) Inexpensive wrenches are often okay but cheap screwdrivers will drive you bleeping crazy, by stripping out the soft metal heads on Japanese motorcycle screws.
Here’s a shot of the carburetor on the workbench. I like to use the red toolbox tray shown to help me organize the parts as I disassemble the carb, and to keep the parts from disappearing into the wormhole that exists behind my workbench. No part that falls back there is ever seen again, so I try to keep them from rolling of of the back edge. No dear reader I am not going to move the bench to look for them either. In my shop I coexist peacefully with all matter of snakes and spiders both harmless and venomous, and that is their territory and I stay out of it.
Don’t’ forget to protect the engine by plugging the intake hole while the carburetor is off.
I’ll show you the rest later, don’t forget to bookmark this page or to sign up for the email notification of updates on the right side of this page. Click here for part two!
At the end of my last post about this the engine was sitting on the bench, so let’s pull it apart now. Start with the external accessories such as the starter motor, rope starter, etc.
On a full tear down like this I prefer to remove the clutches from the engine before removing the cylinder and head. That way there’s not any damage to the connecting rod or piston should I accidentally spin the crankshaft around too fast.
Of course the best way to remove the clutch nuts is with an impact wrench, but if you do not have one wedge something good and solid in the clutch gears to hold it still, and don’t forget the centrifugal clutch nut is reverse threaded.
You’ll need a steering wheel puller to get the centrifugal clutch out. It’s possible you could get lucky and break it loose with a rubber hammer, but I doubt it. Don’t try it because you can damage either the clutch, the crankshaft or both by hammering on the clutch.
Now you can see the timing and oil pump drive chain, along with the shifter meachnism in the front of the shifter drum.
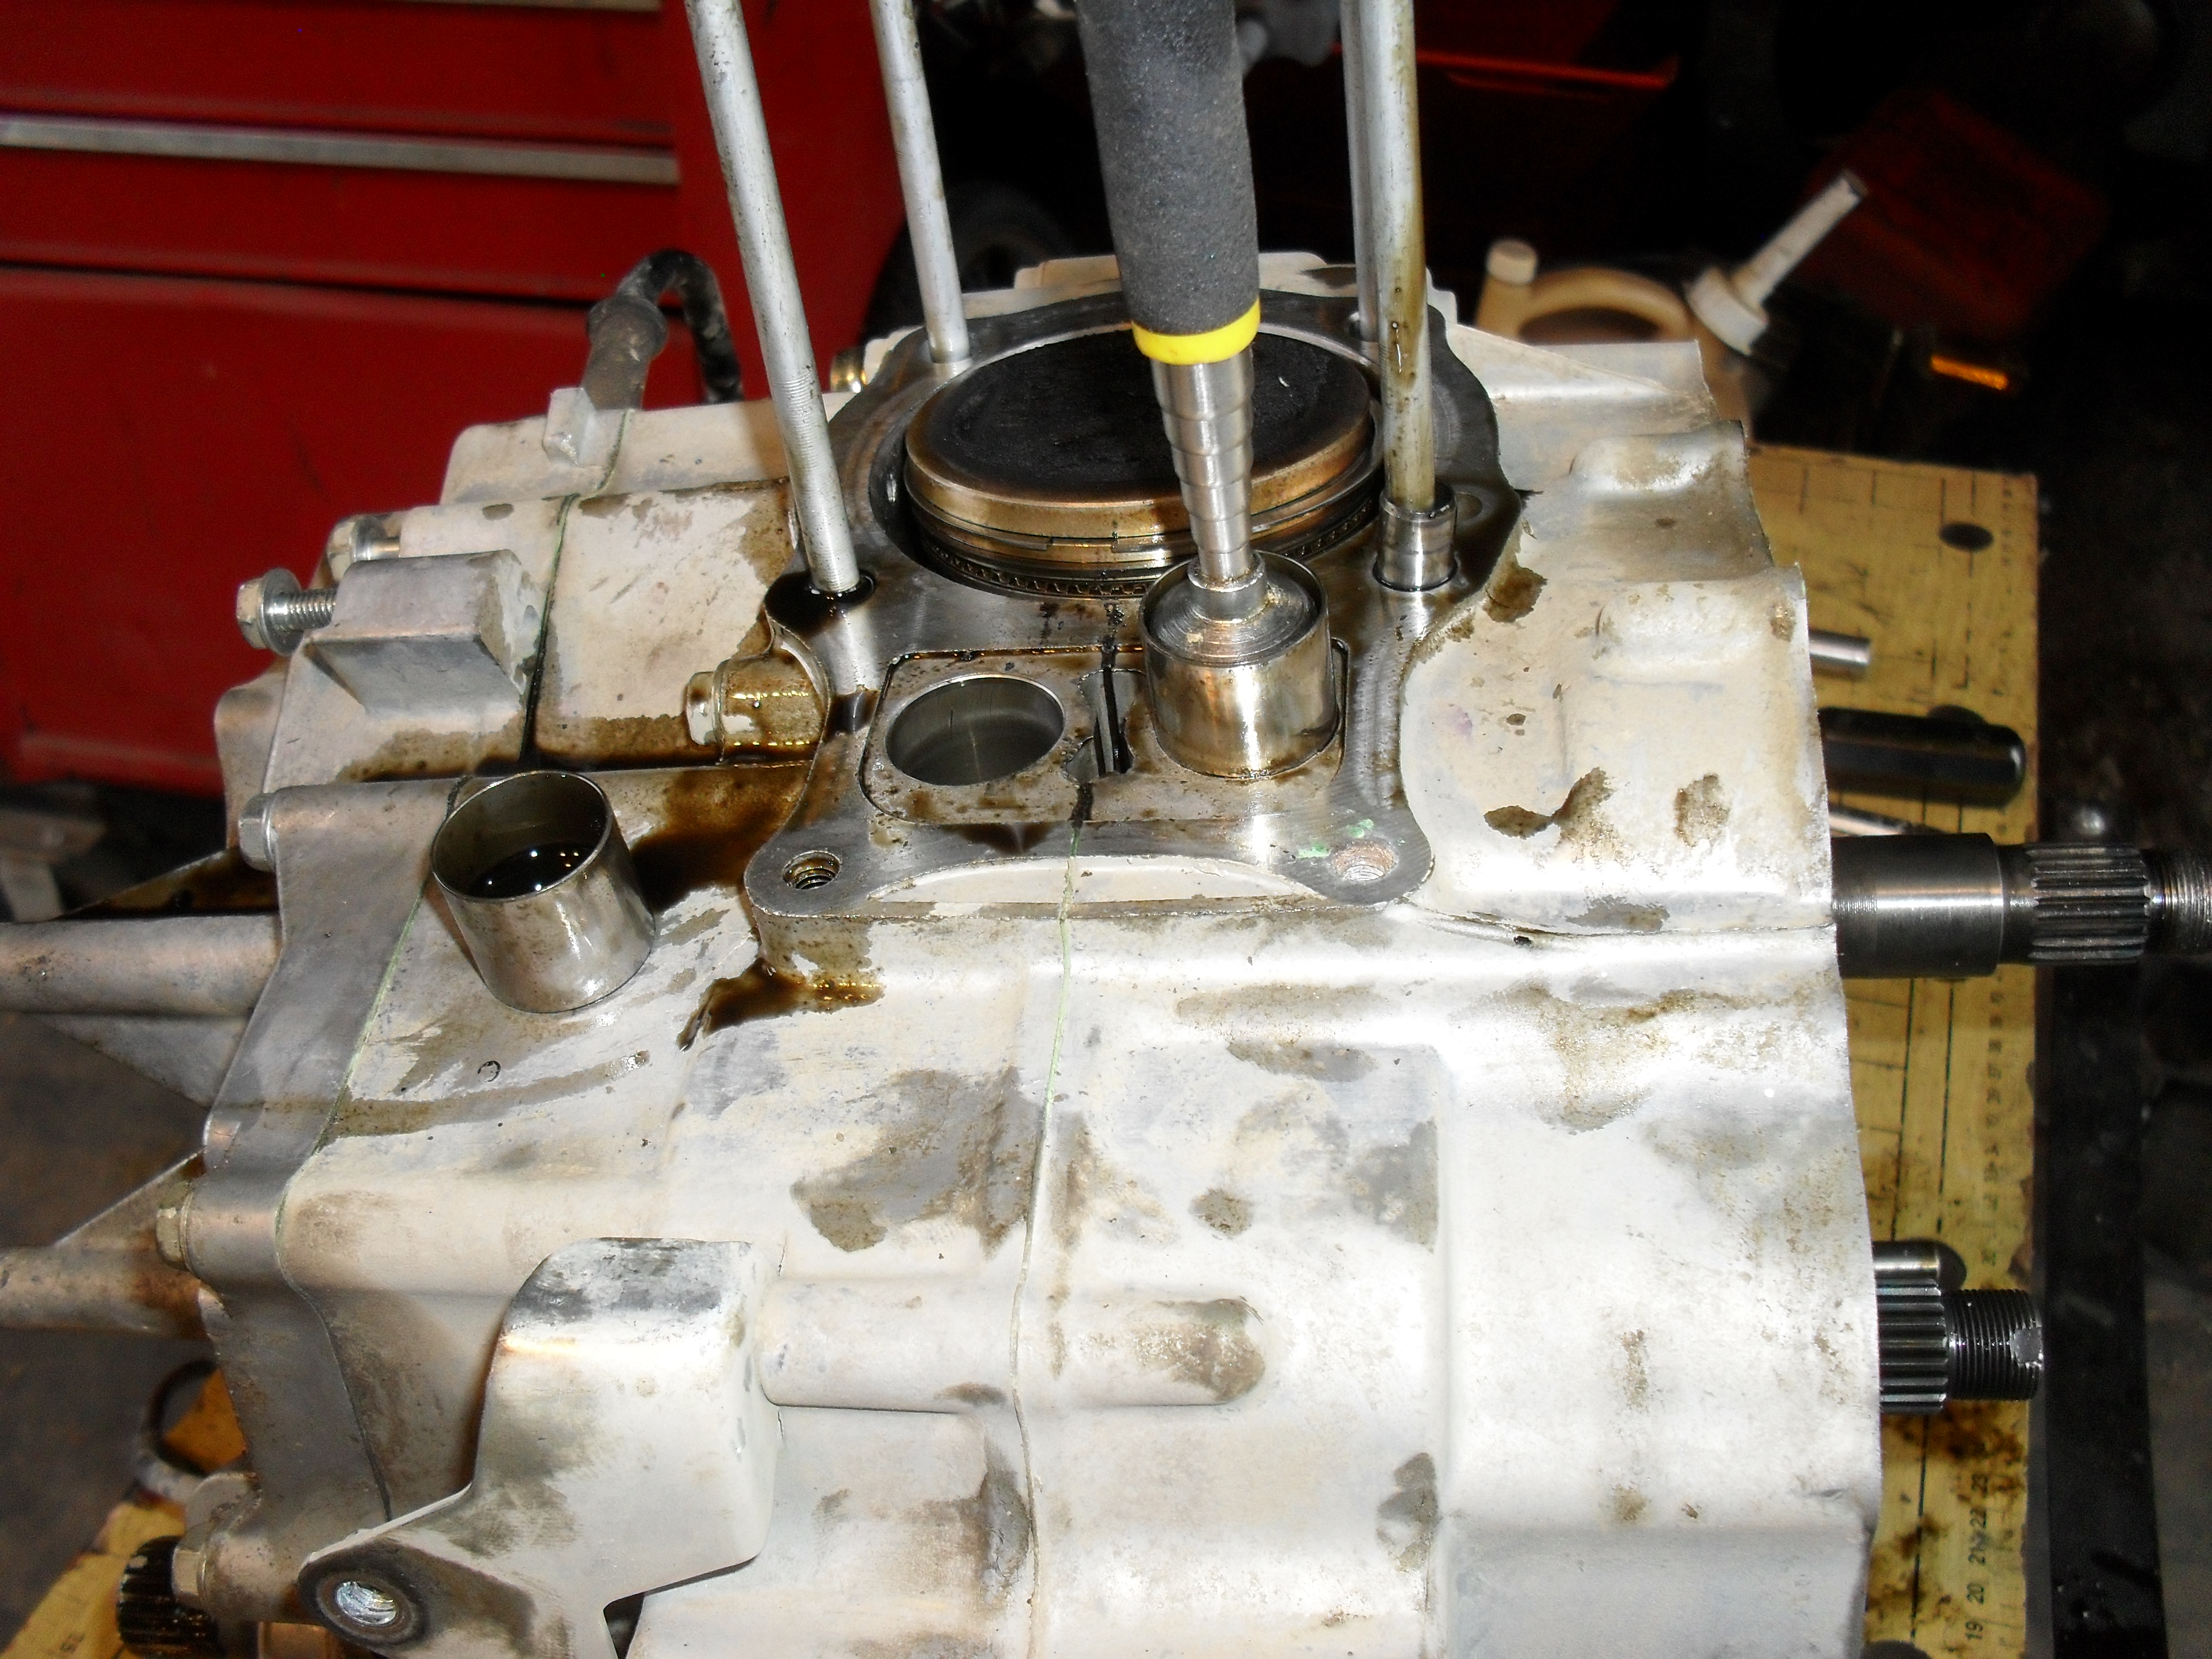
After pulling all the little parts off the front making sure to not exactly where all of the thrust washers go, it’s now time to move up top and unbolt the rocker box.
Now set the pushrods off to one side and unbolt the head an pull it straight up to remove and then do the same thing with the cylinder
Here you can see me using the magnet to remove the lifters from their holes.
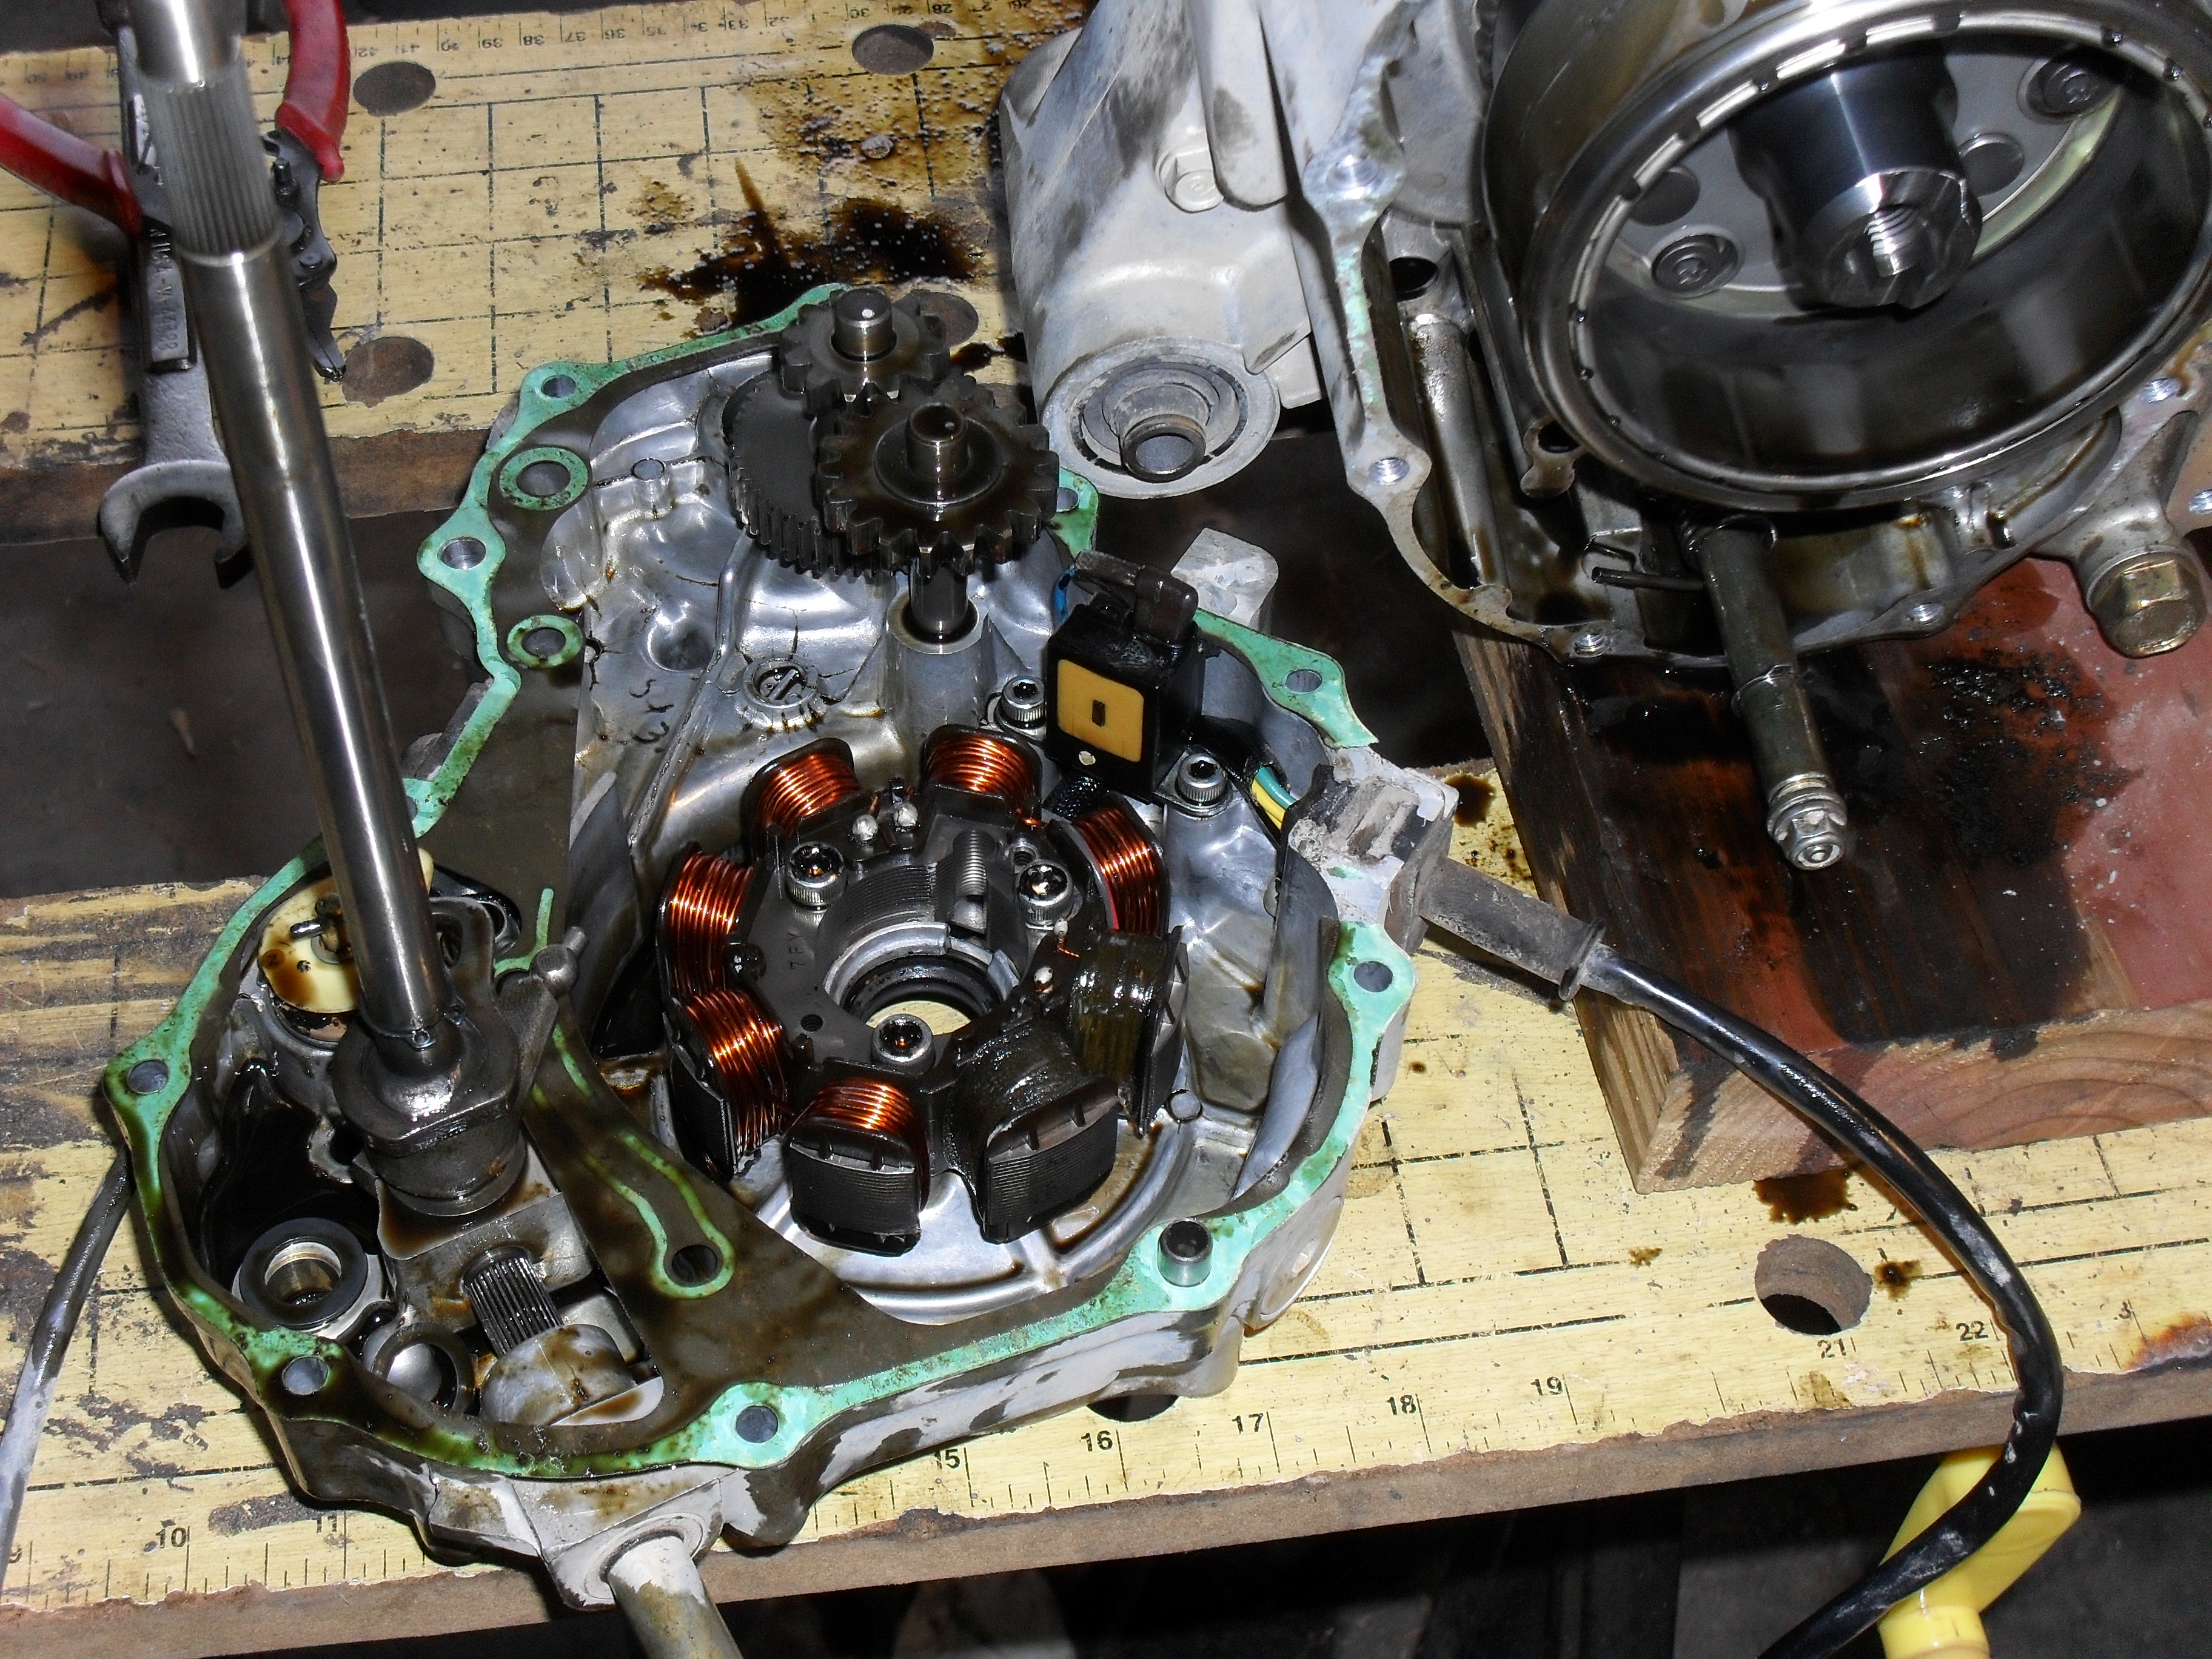
Next I popped the rear cover off after unbolting it. The magnets in the alternator will make it feel like it is sticking together so be careful.
In these lat 2 pics for the day you can see the alternator parts, the stator is in the top one and the rotor is in the bottom picture. Next time we’ll split the cases!
Peace Y’all
This is the best forum that I never joined. I wanted to & I still may if there is ever time to add another distraction to my life. Even so the Ninja 250 wiki was all the information that I needed to make the upgrades to my favorite little motorcycle, so that it hauls my big old butt around at reasonable speeds with superior handling. If you are even thinking of getting a Ninja 250 you should visit this page. Sure I would have had no problems restoring mine from the cheap hunk of junk it was to the beauty you see in the picture above, but it was nice to find that someone else had done all of the homework and sorted out the sensible modifications that can be done to these little gems.
Sorry Hyosung and CBR250 fans but the little Ninja is THE 250!