Category Archives: Motopsyco’s Project Bikes

The SR500 Chronicles 1
Late in 2023 I picked up an old 1978 Yamaha SR500 and started working on it and chronicling the build over at my YouTube channel. As a result of such extensive posting on YouTube this blog has been kind of ignored to remedy that situation I’m going to start sharing my videos here. I hope you enjoy them as I have a lot of videos in this series to share with you. In addition to the SR500 I have a 1983 Honda Interceptor 750 that I bought cheap and got running extremely well also. As of today 8/7/24, the Interceptor is as done as I want it but work on the Yamaha continues.
Share this:

May 2023 Motorcycle Updates
Just thought I’d post a line or two about what’s happening with the bikes around here.

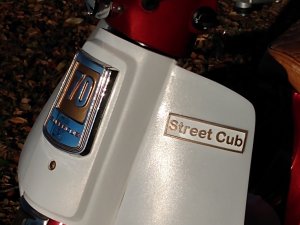
On Saturday May 20th my little Street Cub project from my last post took a best in class award at the 2023 VJMC National Rally. We had a great time at the rally which was held in Eufuala Alabama this year.
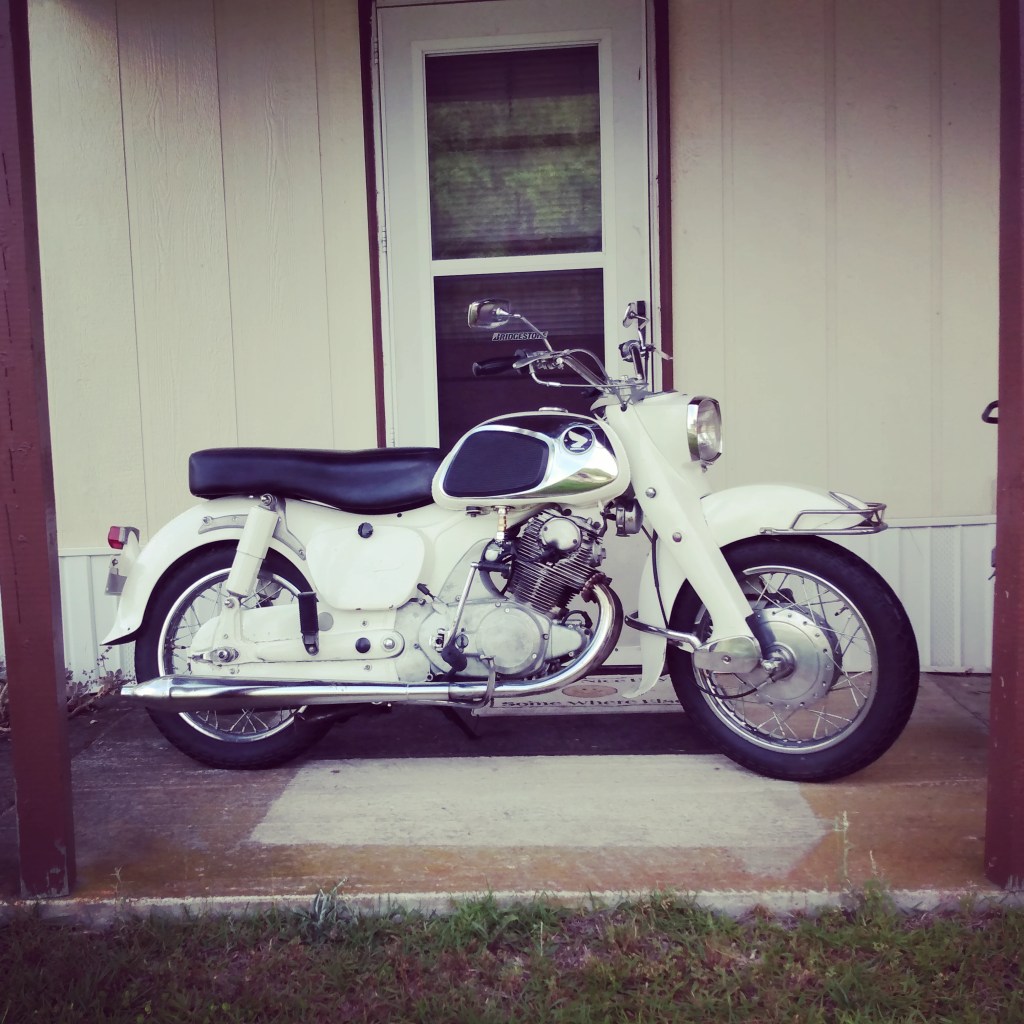
A few months ago I finally got my hands on a nice early Honda Dream. This is a 1962 model CA77 It would actually start but wouldn’t idle or charge a battery. I went ahead and installed a VM22 Mikuni carburetor on it and got it running well. The original ignition switch fell apart so I rewired it with a modem switch and a solid state regulator – rectifier and now it’s extremely reliable. One day I plan to take care of the cosmetics but it’s fun to ride like it is. It’ll never be purely stock again but it will be very nice one day. I’ll tell you more when the time comes.

At the Fast Lane swap meet during Daytona bike week this year I snagged this ratty old Honda Interceptor to keep my Royal Enfield Interceptor company. It was dirt cheap because it had no title but after a thorough carburetor overhaul and a new fuel pump it ran good enough that it was worth it to go through the “barn find” title process. The paperwork finally came through this week so it’s time to get it safe and ready for the road.
That’s it for the day, thanks for reading!
Share this:

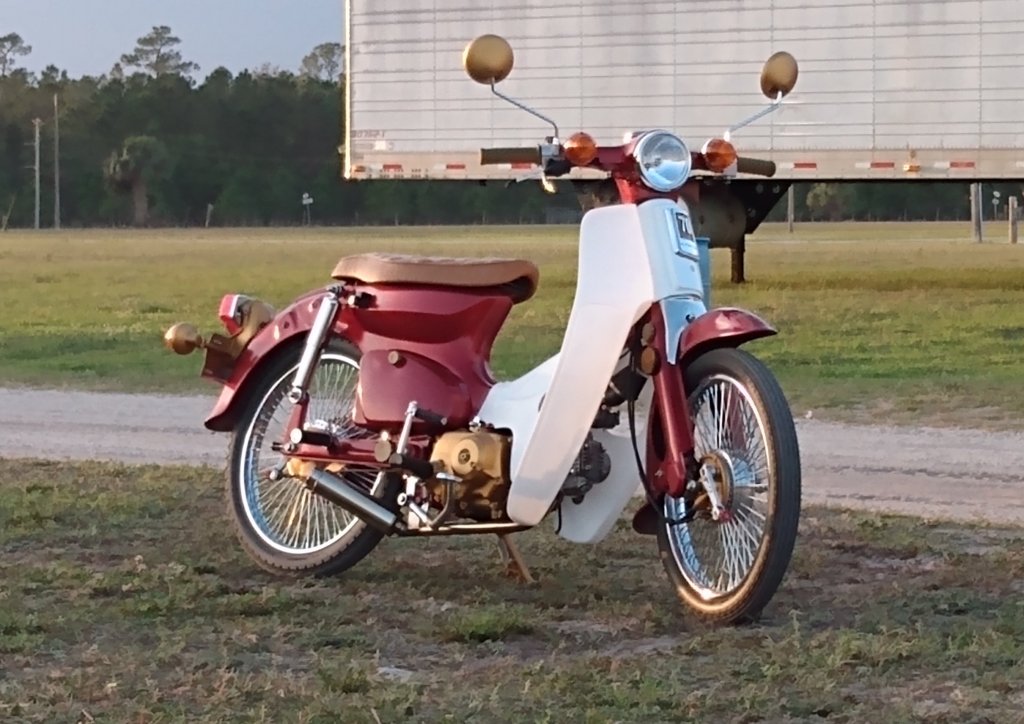
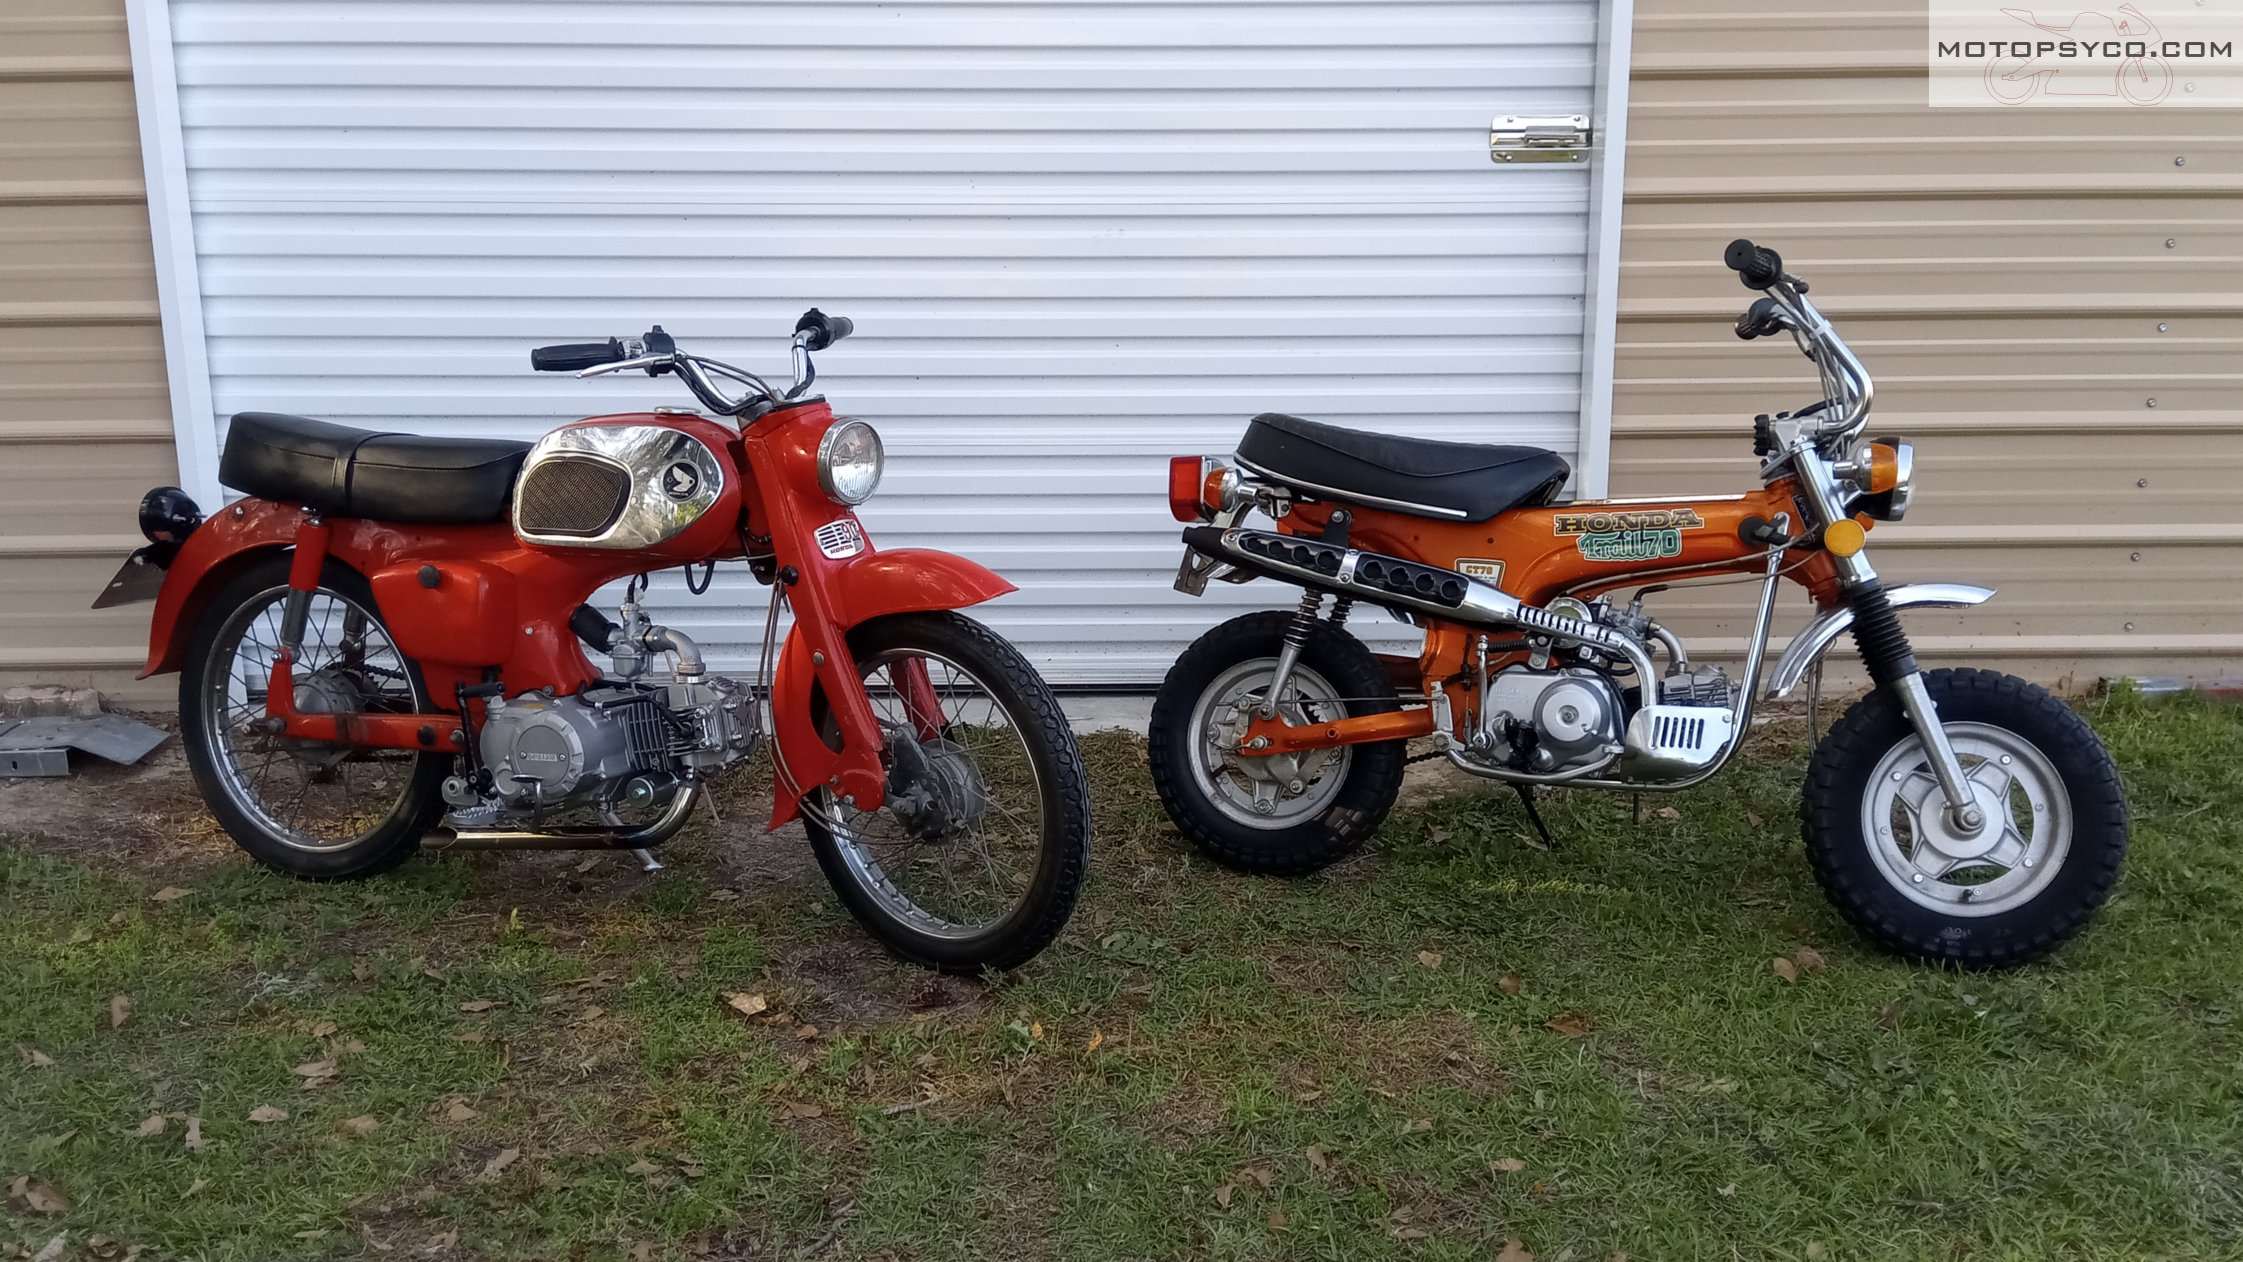
An American StreetCub
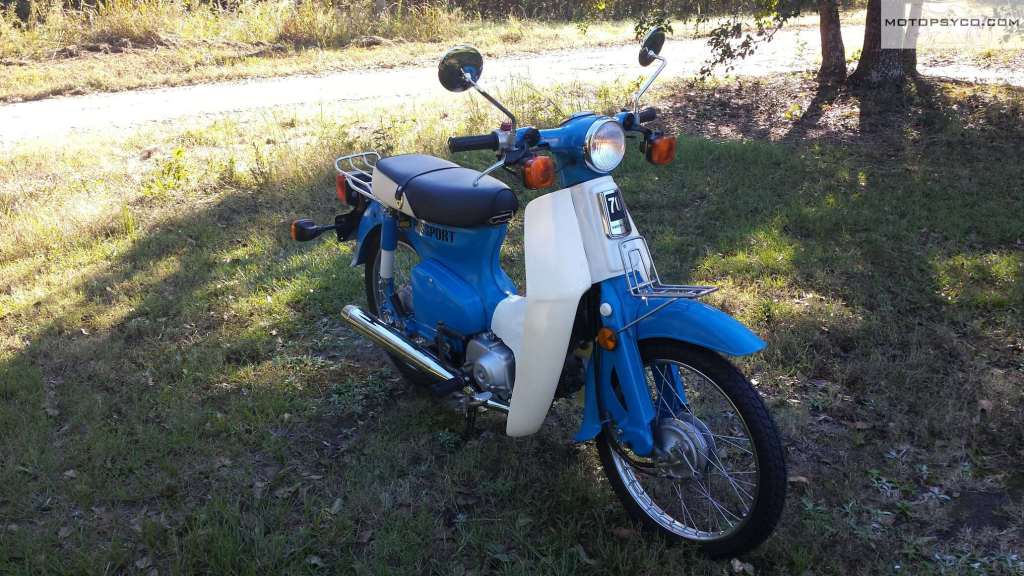
A few years ago I found and restored a 1982 Honda Passport C70 to absolutely pristine condition. The only modification that I did was to change the paint color from Honda’s original Angel Blue to a slightly darker Ford blue. Everything else on it was pure stock and it was an excellent runner. I sold it to pay for my new shop air compressor and while I’m glad to have the compressor I sure did miss that C70 and kept my eyes open for another fixer upper.
Two or three years ago I caught up with an old friend that I hadn’t seen in a while, like myself he’s a collector of projects and things to tinker with, and he just happened to have this Monza Red 1982 Honda Passport sitting in a shed behind his garage. It was crusty & neglected but the engine turned freely. As a bonus it even came with a title!
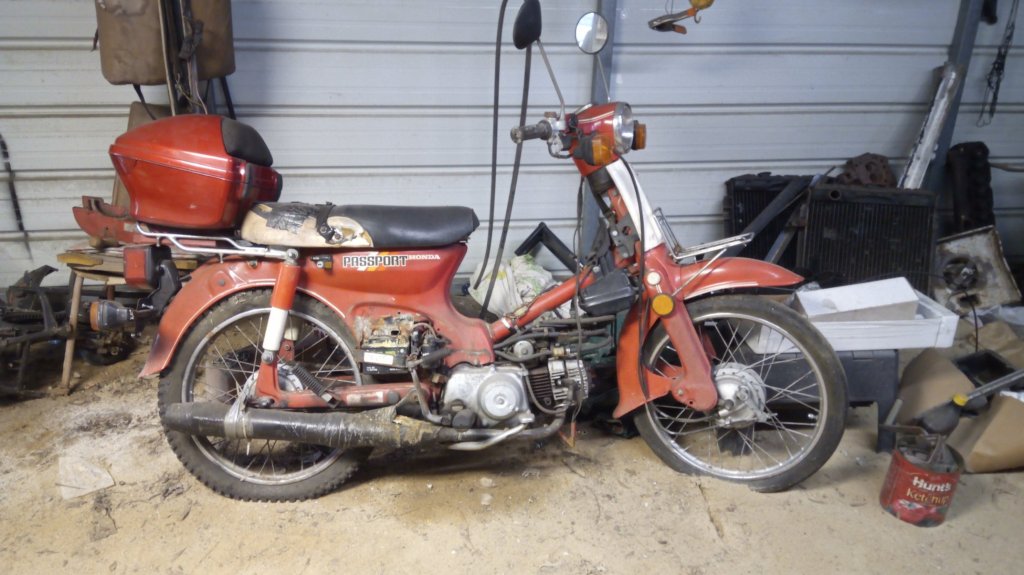
After cleaning the carburetor it would fire up as long as it was sprayed with carb cleaner or starter fluid. It had just enough compression to run and ride but not enough to start without some help. Time to get to work!
I started following several Southeast Asian Instagram accounts promoting the streetcub customs based on the Honda Cub, Super Cub, and Trail models. There’s so much creative craziness going on over there that it was inspiring. The vast majority of custom Cubs in the Orient are stripped down choppers with bobbed rear fenders and minimal bodywork, but there a lot of really cool looking full fender bikes too.
First step was to rebuild the tired old engine, this particular Passport had been abused as a moped for years before my buddy got it and then it spent a few years sitting in his shed. Restoration was not even contemplated for this old machine and I did want more power than could be had from the standard engine so I rebuilt it using an 88cc kit sold by CMS in the Netherlands.
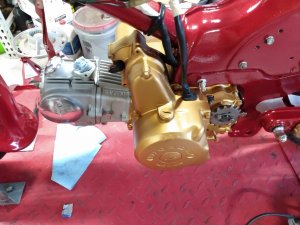
Then using an AFR gauge I re-jetted the carburetor for maximum performance and installed a stainless steel exhaust from a Japanese company called Wirus Win. It has a great look and sound with decent performance now.

Some Paint & Bodywork
It was going to be red, there was never any doubt about that. There was also never any doubt that it would not be the original Monza Red because it just didn’t have the pop that I was looking for. The color chosen was Firethorn Red Pearl from TCP Global in a single stage urethane. I consider myself to be a decent painter but am especially proud of how this bike came out. This paint job has never been buffed and the shine you see here is how it laid down straight out of the gun.
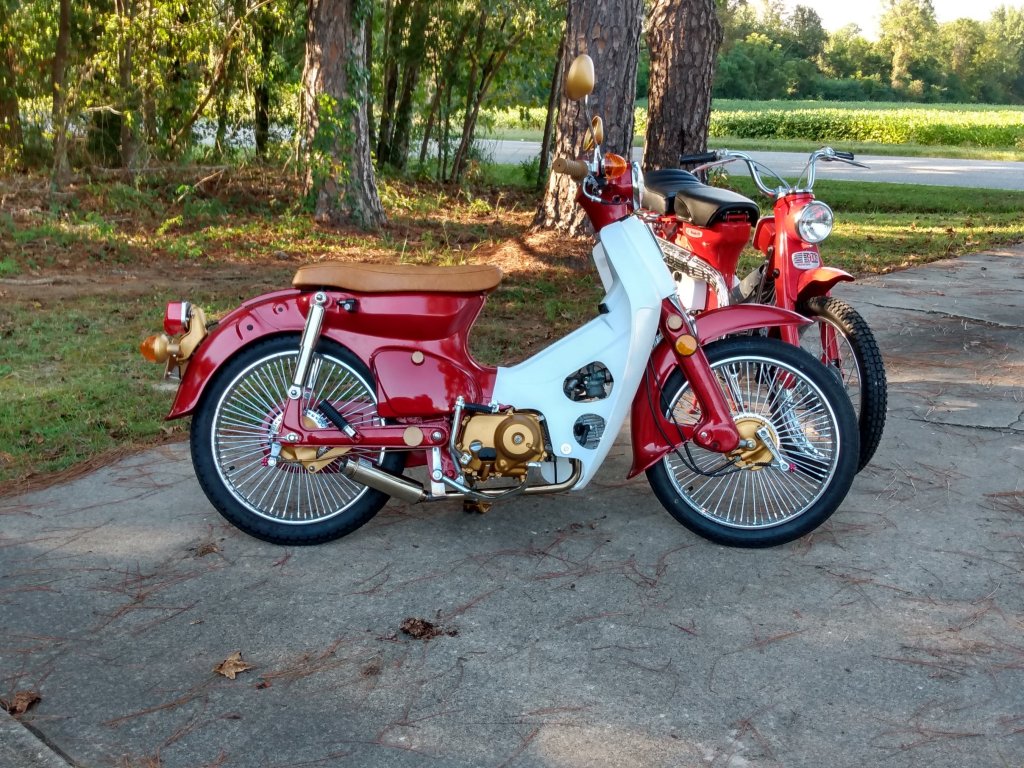
The leg shield is a new aftermarket piece, for it I mixed a couple of spoons full of dry pearls into some urethane clear for a nice sheen to enhance the plain white plastic. A couple of different shades of rattle can gold highlight the engine & a few small parts here and there.
Bought a Few Cool Pieces
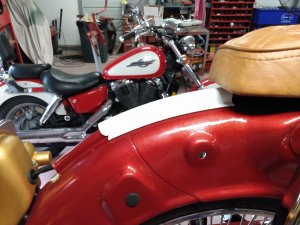
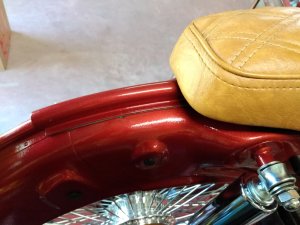
After the paint there are 2 other parts that really stand out; one is the brown custom seat, two are the chrome plated 72 spoke wire wheels, both of which came from Ebay. I also wanted to get rid the dangly eighties style turn signals and have old looking round signal lights mounted on the handlebars not hanging under them on the ungainly looking original stalks which are clearly an afterthought. The rear license plate & light bracket were modified to accept turnsignals from an old CB350 I had laying around. The taillight itself was new but I have no idea what it fit. I did have to 3d print a new gasket for it using a flexible material known as TPU95.
3D Printer Go Brrrr!
At the time I had just gotten my first 3d printer and I really wanted to do some cool stuff for this little motorcycle so I did. Almost all of the black rubber grommets and frame plugs were replaced with parts printed from black TPU95.
All of the fork, frame and swing arm plugs are of my own design and were printed out, painted & installed during final assembly. Side cover knobs were made to match the style of the frame plugs and look really cool. These little frame and for plugs on the original bikes don’t match each other and this has always irked me as it gave them the appearance of having been designed piecemeal.
The “StreetCub” emblem on the front was designed and printed in white plastic with the lettering & outlines highlighted with gold paint.
More Than The Sum of Its Parts
Overall the final product makes me very happy and last year it scored a first place trophy as best motorcycle at a large car truck & bike show that happens every year in my home town of Hartsville S.C. I’m convinced that a lot of people don’t realize just how heavily customized it is, but it always attracts favorable attention everywhere I take it even at Daytona Beach Bike Week.

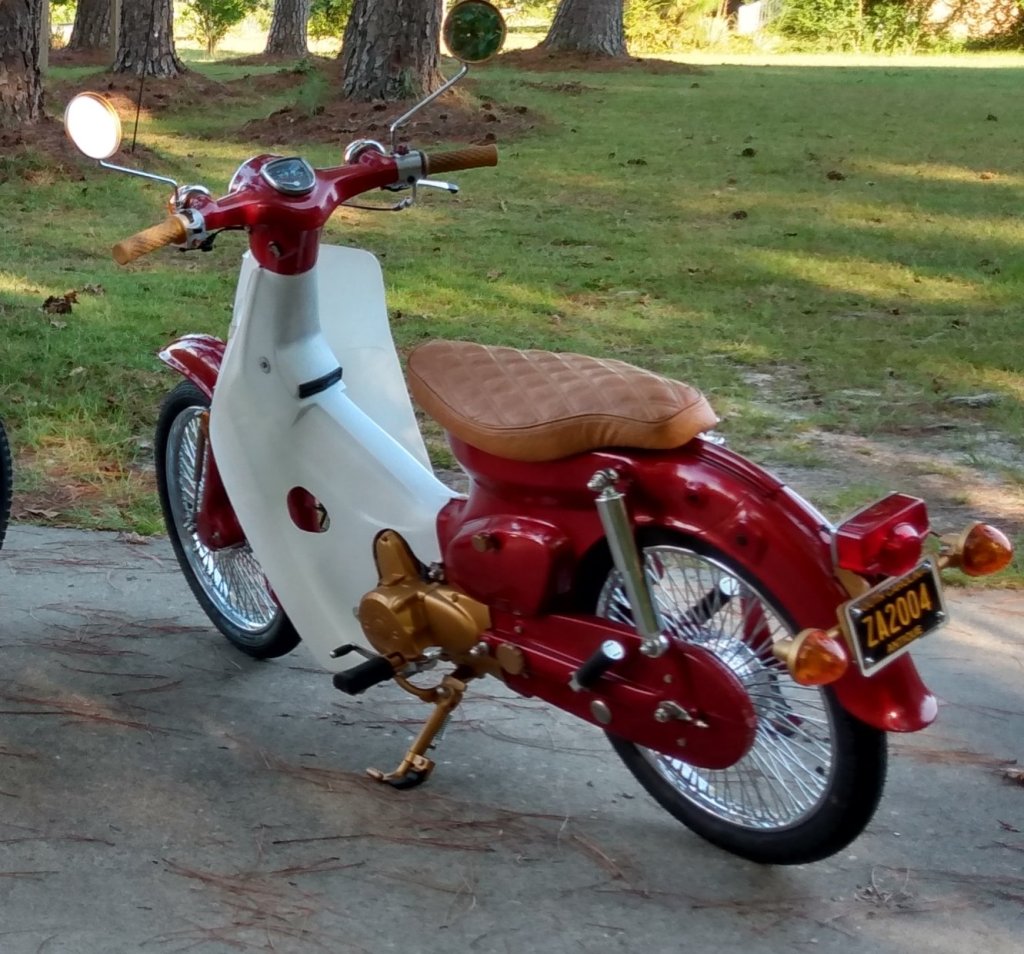
One of the big selling points of Honda Cubs & Passport was their practicality and relative comfort. I think I killed that with that with this one. The seats not very well padded, the exhaust is nearly loud enough to be annoying and without the luggage rack you can’t haul your groceries home with it. But it’s got miles of style and when we were eating supper at the campground in Florida I looked up and saw the evening sun sparkling on the gold pearl in the paint and the chrome gleaming I knew that I had done the right thing with this little 1982 Honda Passport. Originally its form followed its function but now form is the most important thing and its main function is looking good.
Share this:

Royal Enfield Modifications (So Far)
My Interceptor 650 is up to about 2600 miles so far. It has been a very pleasant and reliable motorcycle so far. The only trouble that I’ve encountered has been a nail in the rear tire. Fortunately I was close to home and called my wife to pick me up so I could go get the truck and retrieve it. None of my Royal Enfield modifications have been necessary except maybe for the handlebar change.
The very first modification that was done was adding 1” handlebar risers. On the day I left the dealership after paying my deposit I ordered a case of oil filters and a set of handlebar risers. When I sat on an INT650 for the first time in the showroom I immediately felt like it would be more comfortable if the grips were just a little bit higher. When I did the first service it was just a matter of removing the bolts holding the handlebar mounts, placing the risers under the mounts and bolting everything up with the new extended bolts that came with the risers. Not a difficult mod to do if you feel you’d like to have your handlebars a bit higher.
One actual complaint that I had about this motorcycle was engine vibration felt through the handlebars. The bars are solidly mounted and the grips are made of a thin hard rubber so I purchased a set of Grip Puppies. These are foam rubber sleeves that slip over your existing grips and add a bit more cushion and they did help a good bit. Before you bother to comment that I’m holding on to tightly, I’m not. Over 20 years of mechanics followed by 20 years of CAD work have left me with arthritic hands that are a lot more sensitive than they should be. It is what it is.
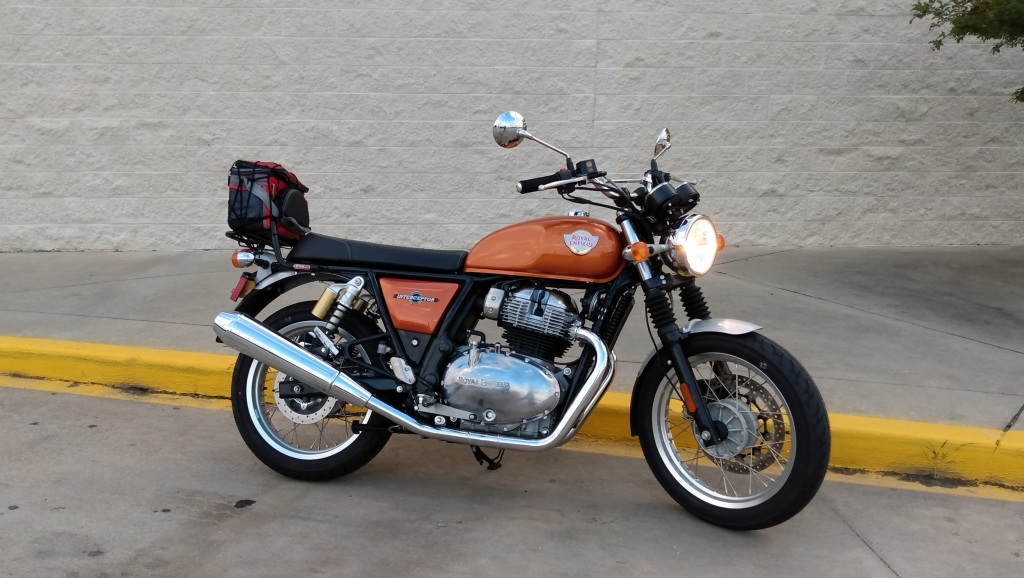
Since I use this bike for commuting and weekend 2 up riding I installed a passenger backrest and luggage rack combo. While this has been a useful and practical modification it doesn’t help the looks of the Interceptor at all and if I were ever to seriously enter it in a show it would be temporarily removed. The rack is handy to have but it’s ugly.
From the crate U.S. models of the Interceptor 650 have black sidecovers with logos designating them as the INT650 to avoid copyright conflict with another motorcycle company. I’ve joined a couple of Royal Enfield Facebook groups and one of the members offered to sell me a set of painted sidecovers with the Interceptor 650 logo for a good price so I got them. Having the sidecovers color matched to the fuel tank is a huge improvement to the appearance of an already fantastic looking bike.
Vibration in the bars was still a problem for me and although the factory cross braced handlebars looked really cool they were not shaped right for me and put my wrists at an angle that wasn’t as comfortable as they could be so I decided it was time to get serious about the handlebars so I bought a set of Emgo flat track style bars. Now the Emgo bars are way too wide to use with the stock cables and wiring so I trimmed 3.75 inches from both ends so that they would fit. Afterwards I put some metal plugs inside them, filled the ends up with lead weights and then capped them off with plastic end plugs.
Next up was a set of ODI Mushroom Grips. The ODI grips are quite a bit shorter than the stockers so I had to shorten the throttle sleeve to fit right. Once that was done it was time to locate the switch gear and drill the holes for the locating pins that keep them from rotating around the handlebars.
Now when I reach for the grips my hands are in a more natural position and between the weights and the soft thick rubber grips handlebar vibration is greatly reduced. I’m actually thinking of removing the risers now & I like the looks too!

In the beginning I had zero plans to perform any “performance” modifications to this 650 but just couldn’t help myself. I looked at the aftermarket air filters and airbox lids and decided they just were not worth the cost so I fired up my 3d printer and made myself an airbox lid with the large opening that works with the stock air filter. Does it actually help anything? Without a dynamometer to test it who knows, I kind of doubt it makes much difference.


For the exhaust side I went with a set of Powerage stainless mufflers, the reason I chose these muffler is that after watching a bunch of online videos and reading reports in various forums is that they seemed to be the quietest of the aftermarket exhaust if you leave the baffles in. They come with a wrench that allows you to remove the db killer baffle if you want it to be extra loud. With the baffle in you get a nice snarl that’s a little louder than stock. I put a video on my Youtube channel giving you a sound quality and volume comparison.

Am I done with this motorcycle? No, for someone like me a motorcycle like this is a blank canvas, a never ending rolling art project that even if it were to seem finished I reserve the right to start all over and take it in a completely different direction just because I can’t help myself. The next thing to try will be a color matched quarter fairing from MK Designs, the pictures I’ve seen look really good and the price isn’t bad either.
In addition to the Royal Enfield modifications I’ve got a few other projects to tell you about, some of them are in progress but a couple of them are already completed I just haven’t had time to write about them. Until next time, happy wrenching.
Share this:

Project 333 Epilogue
I apologize that I never came back with the finished pictures of Project 333 but I did finish it along with a few others that I haven’t told you about yet. When I started that project at the beginning of 2020 I had no clue of the craziness that was about to overtake the world in a few months.

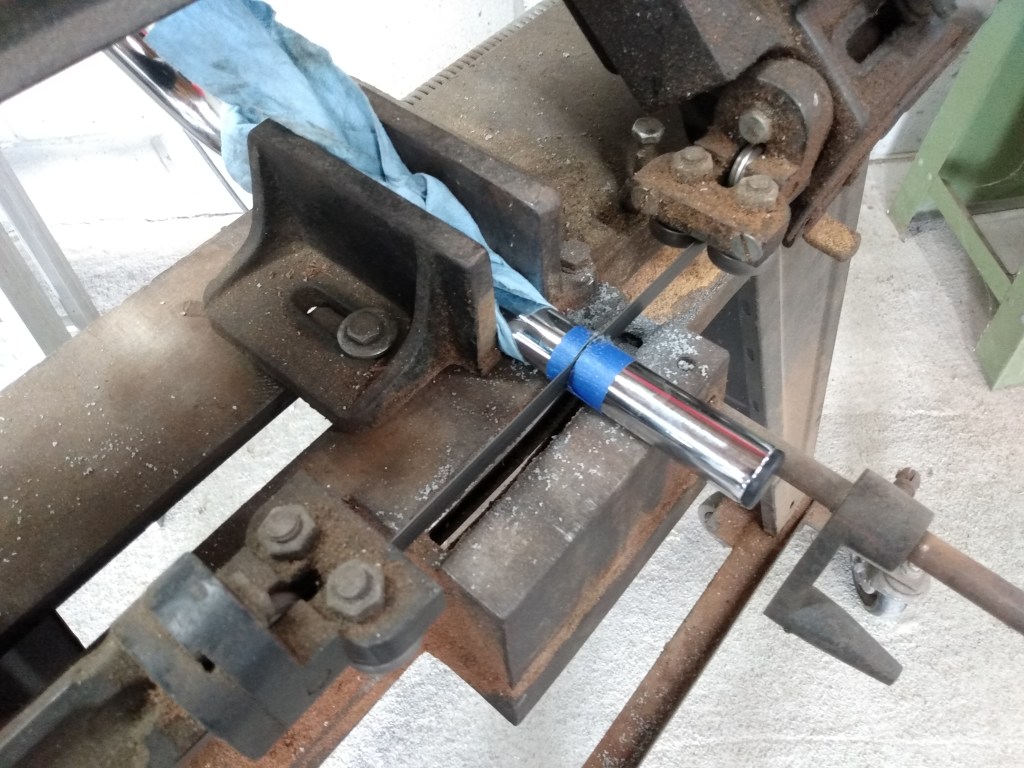
Let me say if you need an engine for a custom project like this I highly recommend the Piranha 140cc engines they’re powerful and reliable. It was very easy to install and wire up. The single biggest issue I had was that I wanted to feed the carburetor from the stock air intake so I had to purchase the correct adapter to orient the carburetor to reach the stock Honda C200 air intake. It wasn’t a perfect fit but it was good.

Here you can see how much I had to move the carb.
Some cheap control switches and a reasonably priced reproduction seat from Ebay worked out great. I just built a complete custom wiring harness and made the whole thing 12 volts dc so that I could run a lithium battery and LED lighting.
A drag pipe was sourced from Beatrice Cycle for a mean and meaty sound!
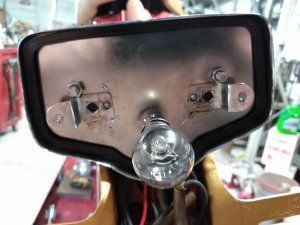
At the rear I added a hot rod “Model A” taillight.

Hot Rod style taillight on 64 Honda Project 333
In the end this build ended up being a ton of fun to ride, and with it’s clean vintage looks really turned heads too. It was a great little neighborhood blaster that accelerated quickly up to it’s maximum speed of 45 mph. Some motorcycles just really do become more than the sum of their parts and this was one of them.
Project 333 next to a pure stock CT70 that I finished,
Too bad that the 2020 Barber Small Bore Festival was canceled. I was just going to save it for 2021 but wound up trading it for a 1998 Triumph Adventurer 900. More on that later.

1998 Triumph Adventurer future custom project.
The whole corona virus episode really threw everyone’s plans for everything for a loop. Unlike a lot of people my employment situation did not change, being employed in an essential industry I never missed a single day of work and was never told to work from home. Between that and working on other peoples motorcycles I’ve been busier than ever before.

Motopsyco World HQ
One great blessing is that we finally sold our previous home and moved into a new place that has a much bigger house and shop. So I’m writing my first blog post of 2022 from my new office in Hartsville, S.C. and look forward to the coming year.
Share this:

Moto Guzzi V9 Roamer
The three thousand mile good, bad & ugly review

Just got home from the very first ride!
In March of 2019 I took delivery of my Moto Guzzi V9 Roamer a leftover 2017 model in the color dubbed “Giallo Solare” (solar yellow) for years now I’ve wanted a Guzzi but have never bought one. Truth be told I really wanted an old Eldorado, Ambassador or even one of the old 850T models, but for some reasons the stars never aligned correctly for that to happen.
It started with a Honda CTX1300
That is correct, my path to owning a Moto Guzzi V9 Roamer began with me drooling over a used Honda CTX1300. To be honest with you there are times when I wish I had the Honda but this is not due to quality or reliability issues. For some reason my wife who is usually an agreeable soul put her foot down and insisted that I was not going to spend that much money on a used motorcycle, especially one she had never heard me mention before. Her words were, “if you’re going to do this why don’t you get something you’ve always wanted.”
Triumph Street Twin vs Moto Guzzi V9 Roamer
These were the two bikes that I was considering and in all honesty the choice really came down which one was the most unusual. Both the Triumph Street Twin and the Guzzi V9 were well regarded by most reviewers. The engine sizes are similar, both are considered retro standards and both of them are “tuned for torque.” I’ve always regarded the tuned for torque statement as bullshit marketing doublespeak for we cut the horsepower and we hope you don’t notice, but now that I’ve ridden the Guzzi I really like it. Peak torque comes in way down low in the rpm range and it literally pulls like a freight train up to the redline. It’s really not fast like the screaming Japanese fours that I was used to, but it feels a lot more powerful than it is. Why would I pick the Roamer over the V9 Bobber? Because I like the bright colors and chrome look. It screams 1970’s whereas the Bobber with its fat tires on both ends and matte paint say modern day hipster. Nothing wrong with that if you like it but I’m an eccentric old fart and this is an eccentric gentleman’s motorcycle. Lots of people think it’s a restoration and are shocked to find out that it is nearly new.
Pitfalls of purchasing online from out of state
There were no dealers in my home state of South Carolina at the time when I purchased this one on Ebay, from a dealer in Wisconsin. Shipping was handled by Haulbikes.com and rates were reasonable. One thing I will mention is that shipping companies like this cannot come down to the cul de sac in your neighborhood you’ll need to make arrangements to meet them somewhere with a large enough parking lot to get the tractor trailer parked off the road so that your bike can be unloaded safely.
What turned out to be the biggest problem is the fact that I decided, instead of paying cash for it, that I’d let the dealer do financing for me. Unfortunately their home state of Wisconsin requires the dealerships to send all titles directly to the bank. Unfortunately the bank turned out to be incredibly incompetent and would not help me to get the bike registered for the road in S.C. Finally after 2 months of not being able to register my new bike I went ahead & paid off the loan, even then it took a complaint to the BBB to finally get my title sent to me. If you decide to go online to purchase a vehicle I suggest paying cash up front, or if you really need financing that you obtain it in your home state to avoid registration problems.
Let us praise the good (looks &handling)
Among Guzzista the looks of the V9 series are polarizing with the vast majority preferring the sportier looks of the V7 lineup. The general public on the other hand thinks this bike is gorgeous, especially the non-riding people or even those who have ridden motorcycle but have never heard of Moto Guzzi. The styling is what I would call cruising standard. The shape of the tank sort of resembles the old 850 T3 of the 70s but is smaller in proportion to the rest of the motorcycle than the T3 tank is. The quality of the fit and finish of the visible parts is stunning. The yellow paint has a heavy orange tint to it that appears golden in dim light.
The size and weight of this bike are perfect to me with a wet weight of approximately 440 lbs (200 kg) the Moto Guzzi V9 Roamer is very easy to handle at low speeds in parking lots and garages. Despite its relatively light weight for a midsize modern motorcycle the Roamer is very resistant to the effects of crosswinds and rainstorms. My experience with new bikes is extremely limited but compared to all the old stuff I’ve ridden the V9 is very confidence inspiring when the rain starts. It is a very mild mannered motorcycle this combined with traction control and Brembo anti-lock brakes provide you with a stable planted feel when the road gets a little wet.

The Guzzi with my 64 Honda Dream
All the Ricky racer boys who write for the magazines were not enamored with the handling and I understand, if I were riding around on all the latest crotch rockets I would probably feel the same way. I was using a modified 1980 Honda CB650 as my main daily rider and the handling and braking of the Roamer are much better than any vintage bike or cruiser that I’ve ever ridden. That being said the little Japanese 650cc 4 banger will smoke the 850cc V-twin easily in both acceleration and top speed, it’s not even close. Speed is not what this bike is about though, it’s about having a vintage motorcycle experience without the vintage motorcycle headaches. A lot of people on the various Guzzi forums recommended dropping the triple clamps down on the forks by 20mm to quicken up the steering so I tried it at it did seem to help once I put some decent shocks on the rear & lifted the rear back up. One very impressive specification of the Moto Guzzi V9 Roamer is that in the owner’s manual, maximum carrying load is listed at 925.94 lbs (420 kg) for rider passenger & luggage. This was partially responsible for me choosing this motorcycle and for my delusion that I could at least modify it into a usable middleweight touring machine. Don’t laugh my wife & I routinely ride 2-300 miles a day on our Honda Helix CN250 scooter, so surely it should be possible on an 850cc motorcycle right?
Let’s get down to the bad
The handling was really good to me even with the 100% stock suspension as long as you were on smooth pavement that is. The front end seemed okay with decent travel & rebound but the rear suspension was incredibly harsh. I finally set the preload at the lowest setting possible but all this did was to lower the rear of the bike enough to negate the benefits of lowering the front end for quicker steering. It would still beat the living shit out of you even over mild bumps. I do not know about the latest models but if you buy an earlier model like I did you should go ahead & budget for a new set of shocks immediately. I purchased a set of Ikon shock absorbers and I am very happy with them. This smoothed out the ride over bumps and actually improved the handling and allowed me to set the preload back to its maximum setting, raising the rear of the bike back up to where I like it. Before I changed the shocks my wife actually refused to ride on the Roamer at all due to the intense pain she felt even over seemingly small bumps and potholes.

Ikon shocks work really well.
If you need dealer support for basic maintenance this might not be the bike for you unless you happen to live near a dealer. I’d have to drive 3 or 4 hours to reach a dealer, but I can do all of my own oil changes, valve adjustments and repairs myself. Other than needing some software & a set of cables to connect your laptop to diagnose the fuel injection this is an extremely easy motorcycle to work on. The fuel injection isn’t that complicated either just join the Wild Goose Chase forum and search for Guzzidiag software, it’s simple enough an old fart like me can use it. If worst comes to worst custom builder Craig Rodsmith has proven that you can make it run with carburetors.
I wish the fuel tank were a little bigger but that’s a minor niggle, the low fuel light comes on when you’ve used 2.5 gallons out of the 4 gallon tank. This is roughly 150 miles and you’ll probably be ready for a break by then.
The effin ugly

The original factory seats on these motorcycles are instruments of torture. It’s almost like when they were finalizing the design someone plopped a cheap old plastic 1980s skateboard deck on top of the frame and said that looks cool, we’ll just add 6mm worth of padding and cover it with Naugahyde and we have us a seat. It really does look cool but it’s an awful place to sit for more than 10 minutes and it’s way too short for two up riding even if your passenger is a tiny 108 lb. wisp of a person like mine is. My pre-purchase research had warned me about the seat before I bought the bike but I was still caught off guard by how bad it was in real life. I’m now running the Moto Guzzi two piece, two up comfort seat which is much more comfortable. Too bad that is not really good enough, even the accessory seat is only a 150 mile seat at best as our last 300 mile in one day trip proved to us. If I keep this bike much longer I’ll try a Corbin seat. Corbin doesn’t really list a seat for the Roamer but they do have one for the V9 Bobber and the factory seats are interchangeable so I don’t see why an aftermarket seat for one wouldn’t work on the other.
I love / hate this motorcycle
It looks good, it sounds good too, and even with the stock pipes I could sit in the garage and listen to it idle for hours. The small gas tank that so many complain about, allows the engine to take its place as the rightful star of the show. A guy at a gas station once commented, “it looks like its all motor!” I agree it does have a very muscular look and sound for a 55 hp v-twin. Now that I’ve got the suspension sorted out to my liking nothing beats riding around on the back roads with it. The engine really is the greatest thing about this motorcycle. The six speed gear box is very smooth also and well matched to the engine. If you’re putting around in town between 30-45 mph just put it in fourth and leave it there, bombing around out in the country between 45 and 60 fifth gear is the one to be in. I won’t even put it in sixth gear at less than 60 mph. You don’t gain anything but a little more vibration on the handlebars, fuel mileage stays the same and you’re not in the meat of the engines torque curve if you need sudden acceleration for some reason. Torque is massive and acceleration is much better than the spec sheets would indicate.
Unfortunately I bought the wrong motorcycle. As far as I can tell this will never be a comfortable 2 -300 miles a day motorcycle without some major modifications. We just ride the Helix if our destination is more than an hour away. I guess I should have bought a touring bike but I really hate big heavy motorcycles and would give up riding if that was all that was available. Plus I know from experience that you can do very long rides on smaller motorcycles.

A fantastic commuter!
So what do I do with it now? With the previously mentioned seat & shock mods the Moto Guzzi V9 Roamer is a top notch commuter bike. You want a bike night attention getter that handles decently on the back roads, a bar hopper or just something to ride around locally? This is the bike for you and I’m enjoying it in all of these roles except for bar hopping because I don’t go to bars.

Going out for a long ride on the Moto Guzzi V9 Roamer
Back in March of 2020 Mrs. Psyco & I took the Roamer on a 300 mile one day trip. The first half wasn’t too bad but even though we had a break for a couple of hours the ride home took its toll on us. Around the 225 mile mark my lower extremities were numb and I knew that neither one of us would be able to move when we got home. At this point I decided that this pile of shit was going on Ebay the minute I got home but then it saved our life.
We were buzzing down S.C. Highway 34 between Newberry and Camden S.C. at 6o mph or so, following behind a big black bro-dozer Chevy pickup, when suddenly the driver made a sudden right turn into a driveway and then without warning threw it into reverse and backed out in front of me without looking. There was no time to stop before hitting the huge four door mall terrain vehicle that had suddenly blocked both lanes of the 2 lane road we were on. Fortunately there was no oncoming traffic, road signs or mail boxes in the area so I twisted the throttle some more, banked hard to the left and was able to safely pass the rear bumper of this truck on the shoulder on the opposite side of the road from where I started. Thankfully no nasty surprises were lurking in the grass on the shoulder & I was able to slow down and safely merge back onto the road. When we stopped to steady our nerves my wife swore that she could feel the trailer hitch brush her pants leg as we went by. Thanks be to God that we didn’t get hurt that day. That was also when I decided to keep the Guzzi a little while longer. If we had been on any other bike in my collection, especially the scooter we would have been hamburger stuck to the side of that bro-dozer.

Filthy motorcycle at the end of a long day.
Even so it was about 2 weeks before I got back on it or even washed it (we ran through a few miles of red clay mud in the rain). It took a while after that for the sensitivity to the vibration through the seat to go away but eventually it did.
Where do we go from here?
Once the nation and my finances recover from the coronavirus pandemic and the stupid senseless outbreak of violence that is occurring, I’ll throw a few more dollars at it and try to make it more comfortable so that I can do with it what I bought it for which is to be able to ride 3-6 hours a day. If that fails I’ll get some loud pipes, an upgraded fuel injection map and customize the hell out of it. If it can’t be a road bike I’ll turn it into a show bike.
Would I sell it? Maybe but cash is not really what I want, barter is more of my style there are 2 very specific trades that I’d make for it and both would need to be straight up barter with no cash changing hands;
UPDATE 2022 I wound up selling this motorcycle & used the cash to buy something else.
1: a 1995-1996 Jaguar XJS 2+2 convertible in good driving condition. 4.0 6 cylinder engine. Color is unimportant and needing some cosmetic work is okay as long as all electrical and top components are functional and I can drive it home from wherever you are.
2: I’d definitely be willing to trade for a nice looking ready to ride Honda CTX1300 preferably with a passenger backrest or top trunk installed.
Hope you all have a great day!
Share this:

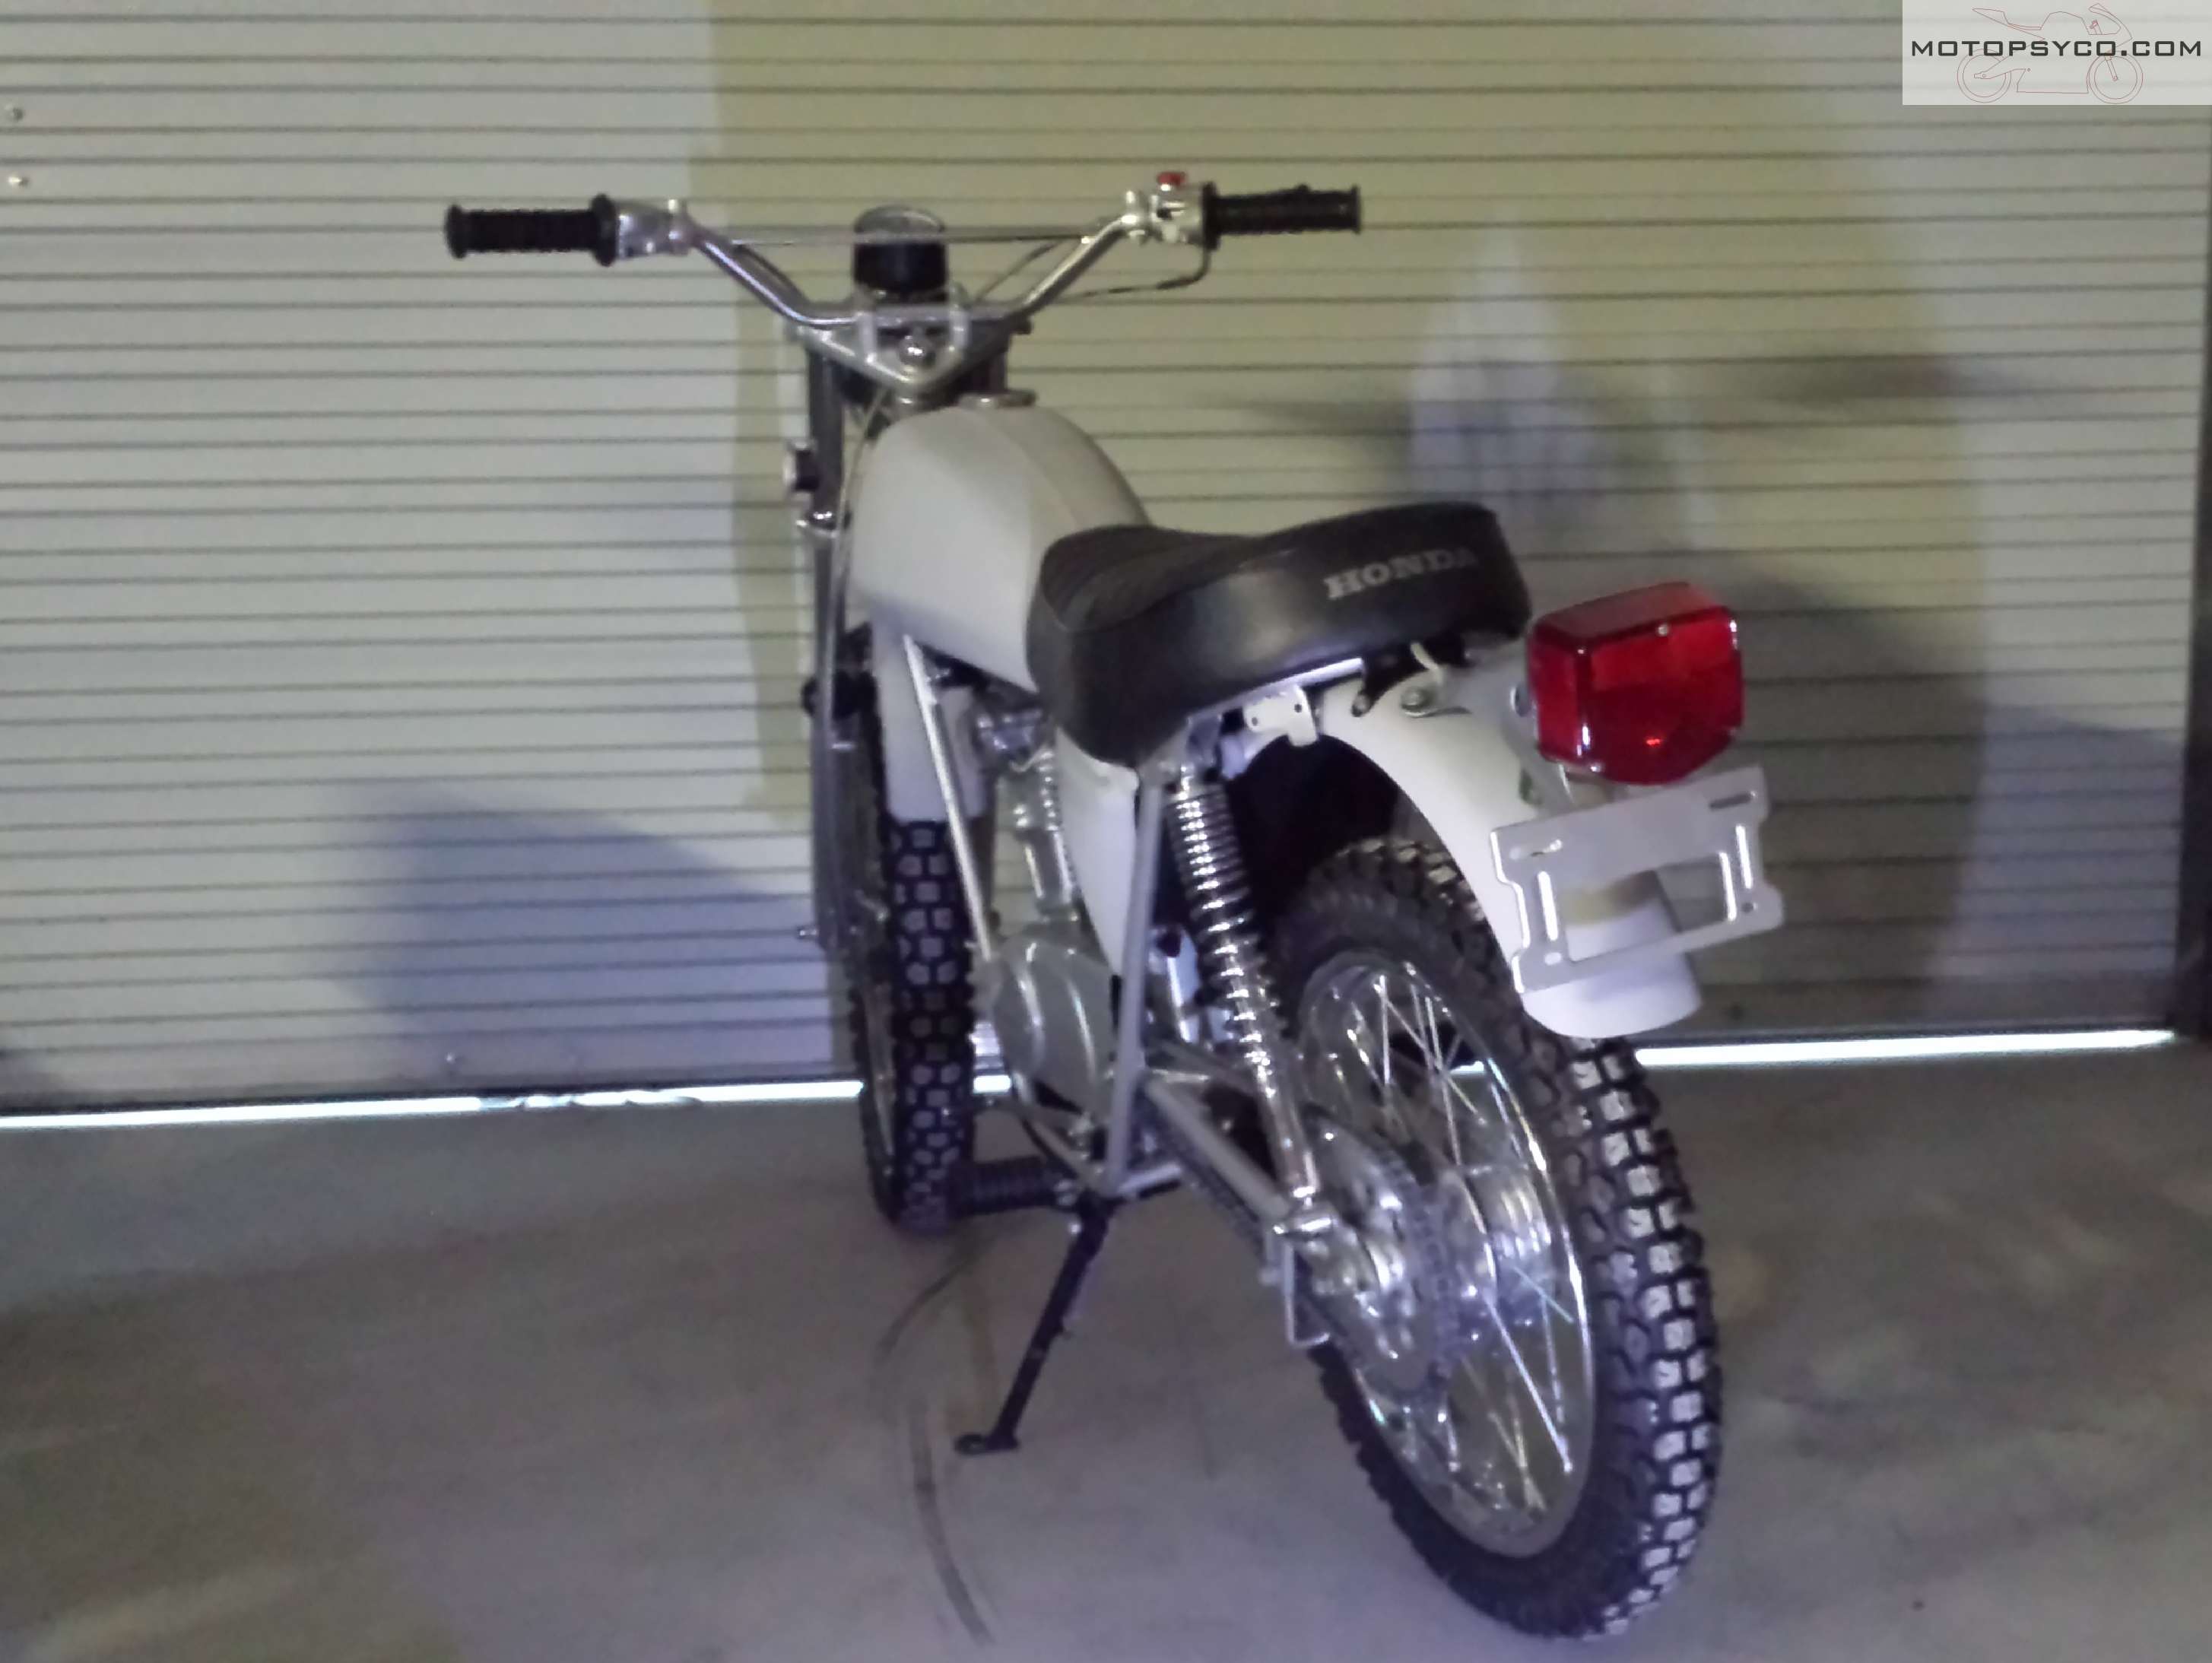
Project 333 Honda C200
It’s just a little evil.

In case you’re wondering dear reader, I have not stopped working on bikes but have been steadily cranking them out. Between my day job & a shop full of projects both mine & other peoples, there just hasn’t been time to sit down at the keyboard & document everything. That is about to change with this little Honda C200 . A lot of cool things have happened; including me purchasing the second brand new motorcycle I’ve ever owned a Moto Guzzi V9. On a sadder note the Suburban Assault Scrambler CB650 has gone on to its next owner but not before proving itself on the dyno by putting out the most horsepower per cc at a show last March. In case you’re wondering it cranked out an honest 50 rear wheel horsepower.

Sometime in all this there’s been a bare crankcases up rebuild on a CB400F Honda, a complete mechanical refurbishment of a Suzuki DR350 and a few others too numerous to write about. It’s all been a blast and there are plenty more on deck waiting for me to get started on them.

This particular Honda C200 is one that I acquired from a friend; it’s in fair condition with nothing but light surface rust & dings but is missing a few parts and hasn’t been run in several years. Most importantly of all it came with a title. I generally don’t have much trouble getting titles for old bikes without one but it is an extra bit of expense & time.

Restoration is not in the cards for this particular 1964 Honda C200. I’ve proven that I can do a show winning 100% stock restorations and I will do a few more later but this build is going to be about me getting back to my rat bike roots. The goal for this one is to have it done & ready in time to cruise around at the Barber Small Bore Festival organized by MNNTHBX the first weekend in June.

The stock 90cc Honda C200 engine has been placed into my parts stash to make room for a Piranha YX140 engine. In addition to being much more powerful than the original pushrod engine it also has an electric start and a semi-auto clutch on the 4 speed transmission. This engine is available with a manual clutch if you want it but I didn’t for this build. You can probably go faster with the manual but I know how to build up the revs and launch a semi-auto so I’m not too concerned with that. There’s a lot more to this little bikes new purpose in life than just blasting down the 1/32 mile drag strip.

I’ll tell you more about YX140 engine in my next post. The pushrod engines in the Honda C200, CA200, & CT200 engines have the same mounting bolt pattern as the later CT70s, Z50s, and other common pit bikes so you don’t need any special adapters & spacers to put them in like on a later overhead cam 90cc Honda. That being said you still have to modify your frame by grinding some clearance for the protrusions on the rear corners of the engine before it will bolt in.

Goodbye for now, I’ve got to get my wiring run and fire this thing up. Once that is done I’ll come back and tell you all about it.

Share this:

The Honda SL100K2
Well I finished The Honda SL100K2. It looks really good and I’m very happy with the way all the cosmetics turned out. It really did wind up making me work much harder that I really wanted too but I wound up with a brand new looking old motorcycle that would start on the first kick.

It fought me all the way to the bitter end, I thought I had it running perfectly but then the very last part that I had not replaced yet crapped out on me. The original stator worked well at first but after I let the bike sit for a month or two between the VJMC National Rally and the Vintage Honda Rally at the Copperhead Motorcycle Lodge it quit on me and killed the battery.

First I tried a reproduction stator from eBay but the wiring colors didn’t match and the appearance of the wiring plug and sheathing didn’t match the original so I put it on the shelf and ordered a N.O.S. replacement from David Silver Spares & put on it. If anyone in the Continental U.S. would like to buy the reproduction stator from me, I’ll take $50 shipped just to get rid of it.
In the end I accomplished my goal to perform an award winning restoration from one of the biggest turds to ever come into my workshop. This little Honda SL100K2 picked up an Award of Merit at the 2019 VJMC National Rally and another at the 2019 Vintage Honda Rally.

What’s next for this little machine? Well that’s up to the new owner as I sold it during the Barber Vintage Motorsports Festival in October of 2019. I’ve got several new projects in the works and needed some money for them. So keep your eyes open for the next Motopsycho project bike.
Share this:

Project Honda SL100K2 Update
Honda Sl100K2
This little Honda is perhaps the ultimate junker to jewel story that I’ve ever been a character in. When I first brought it home it didn’t seem that bad, a rolling frame, couple of boxes of parts and an engine that I assumed was stuck from sitting but should’ve been easy to get freed up with a new set of rings. Initially I planned to do a top end job, reassemble it and flip it to someone else as a running restoration project. I still don’t know what the hell happened. Now my quick and easy 1972 Honda SL100K2 flip has become a full on high level restoration that I can never hope to ever sell for enough money to recuperate the dough that I have in it.

It started with the fuel tank which looked really great until I started sanding the paint off of it and discovered that although there was no rust visible rust that I could see through the filler neck, the entire lower rear end of the tank was full of pinholes that took a few hours and a couple of brazing rods to fix. Oh well the stupid gas tank looks okay now and I’ll be putting the paint on it soon.
The engine was another complete nightmare. What I had hoped was a simple case of an old engine stuck from sitting turned out to be a case of one left out in the weather for decades with no sparkplug in the head to keep the water out. To make matters even worse the piston was at exactly top dead center. Finally I turned the entire engine upside down on top of a bucket of Evaporust with the cylinder submerged for about a week before it loosened up enough that I could beat it out of the bore with my big fucking hammer. Thankfully I didn’t bust the connecting rod or ruin the crankshaft in the process.


At this point I was already spending a fortune so the decision was made to keep this motorcycle and turn it into a full on restoration project that looked as good as possible. The engine has a lot of new old stock parts including a new cylinder & piston, valves etc.

Not going full into all details here but this has been one of the most frustrating projects I have ever done. It seems like every other bolt either broke or rounded out & had to be drilled out & replaced. Several replica replacement parts were sourced from overseas that turned out to be such crap that I threw them away and ponied up the cash for real Honda NOS parts. As many original parts as possible have been refurbished and are the subjects of several previous posts here. I’ve even fired up the engine and it runs like a new one.


Last week I put it all together so that I could see what parts and hardware still needed to be ordered. This week I took it back apart so that I can block sand all the sheet metal again and finally get around to spraying the metallic green paint. You’ll see it here first when it’s done.