Harley Keihin Carb clean

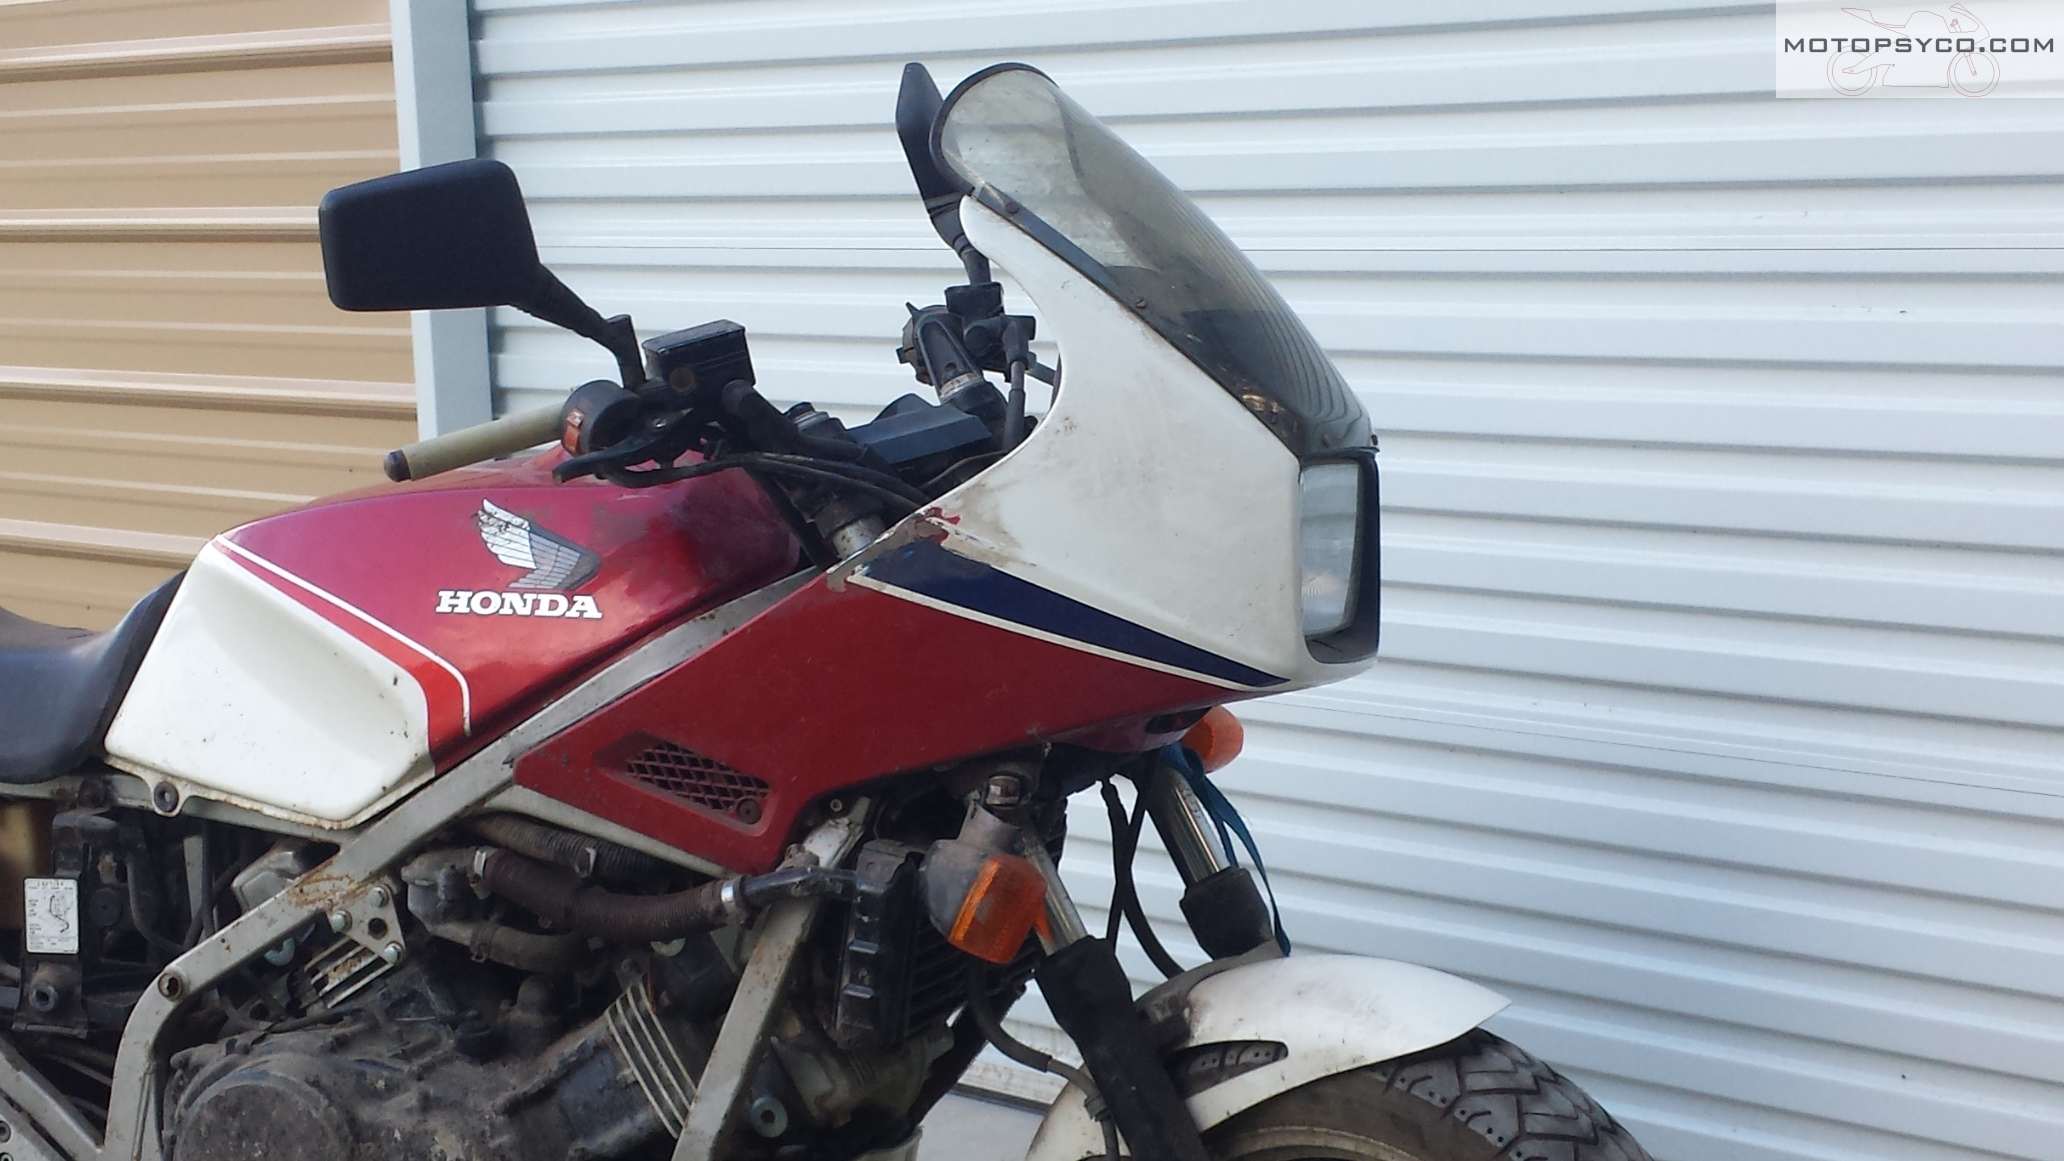
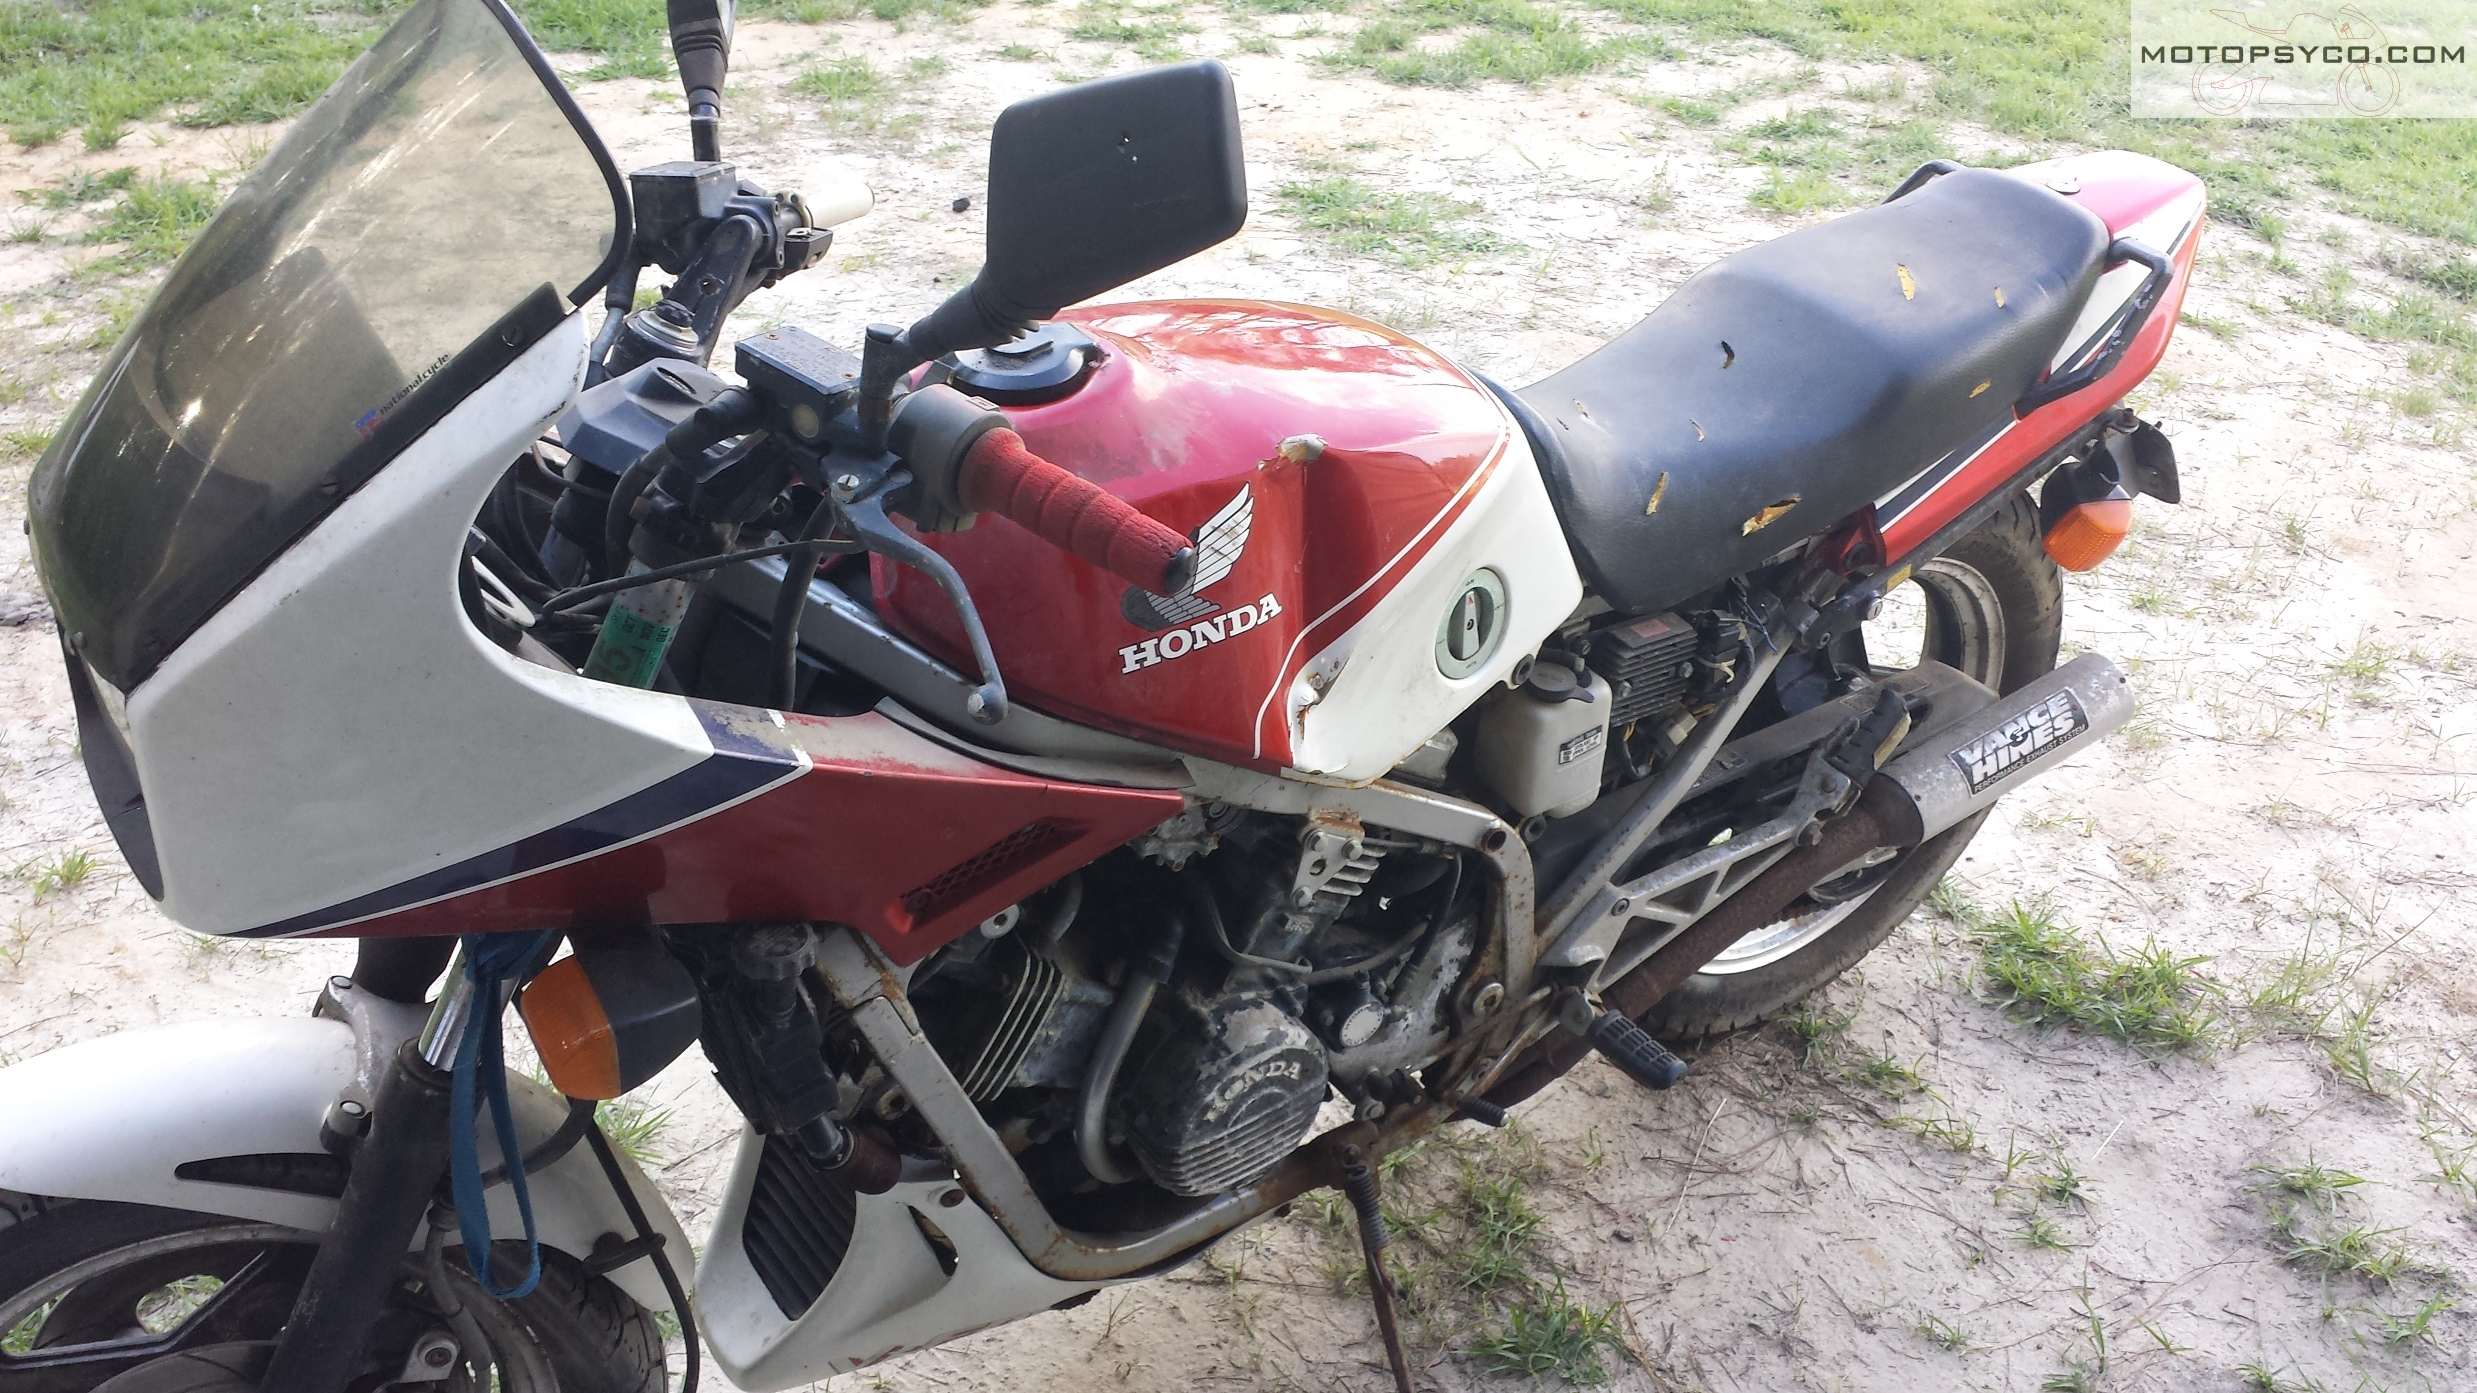
Another bike left to die


This patient is a 2000 Harley Davidson FXST Softail standard. I realize this isn’t really vintage but it is 19 years old. Picked up not running, coated with a quarter of an inch of dust, 2 flat tires, and a tank full of stale gas it is in dire need of some attention before it’s too late. After making sure it had compression and spark I was ready to tear into the Harley Keihin carb.

Harley Keihin Carb on 2000 Twin Cam Softtail

First thing was to remove the air cleaner than go to the other side of the bike to loosen the enrichment(or choke) knob so you remove it cable and all with the carburetor. After this pop the carburetor out of its spigot.

Harley Keihin Carb on 2000 Twin Cam Softtail

Once you have the carb loose unhook the fuel line and throttle cables.

Harley Keihin Carb

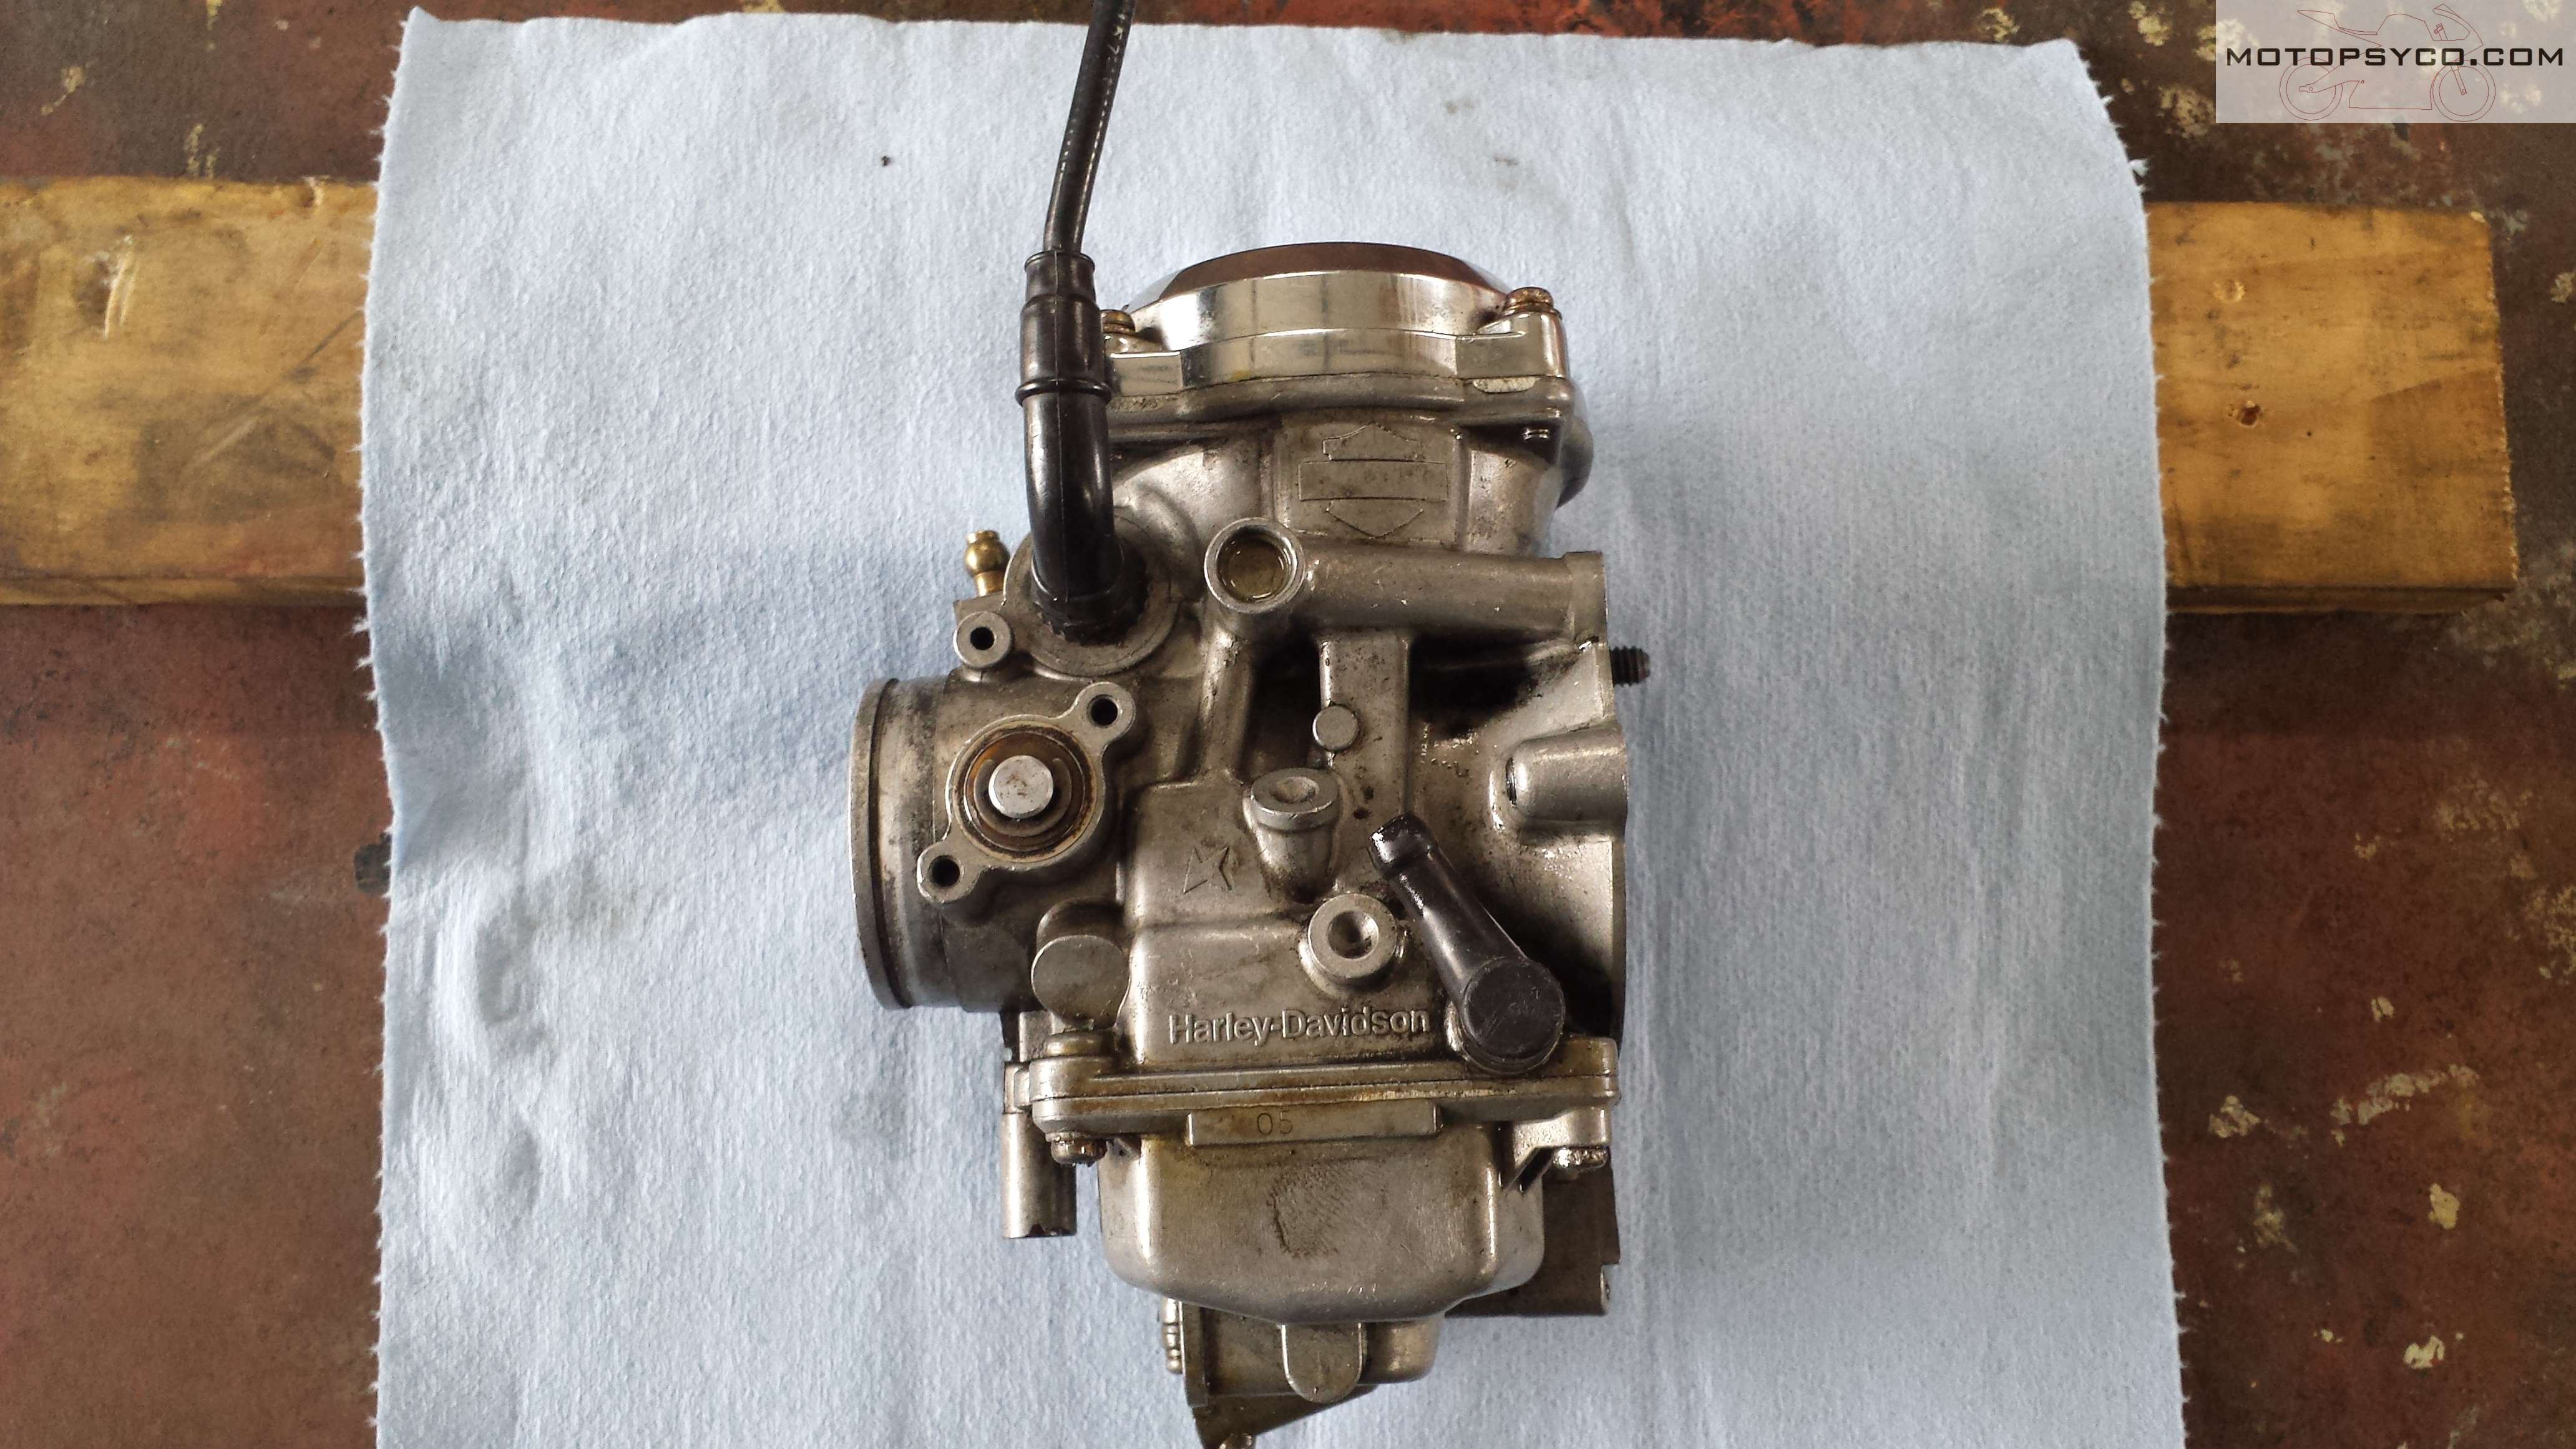
Take the Harley Keihin carb to a work bench where you have plenty of room to spread out the parts as it is disassembled.

Harley Keihin Carb

Harley Keihin Carb

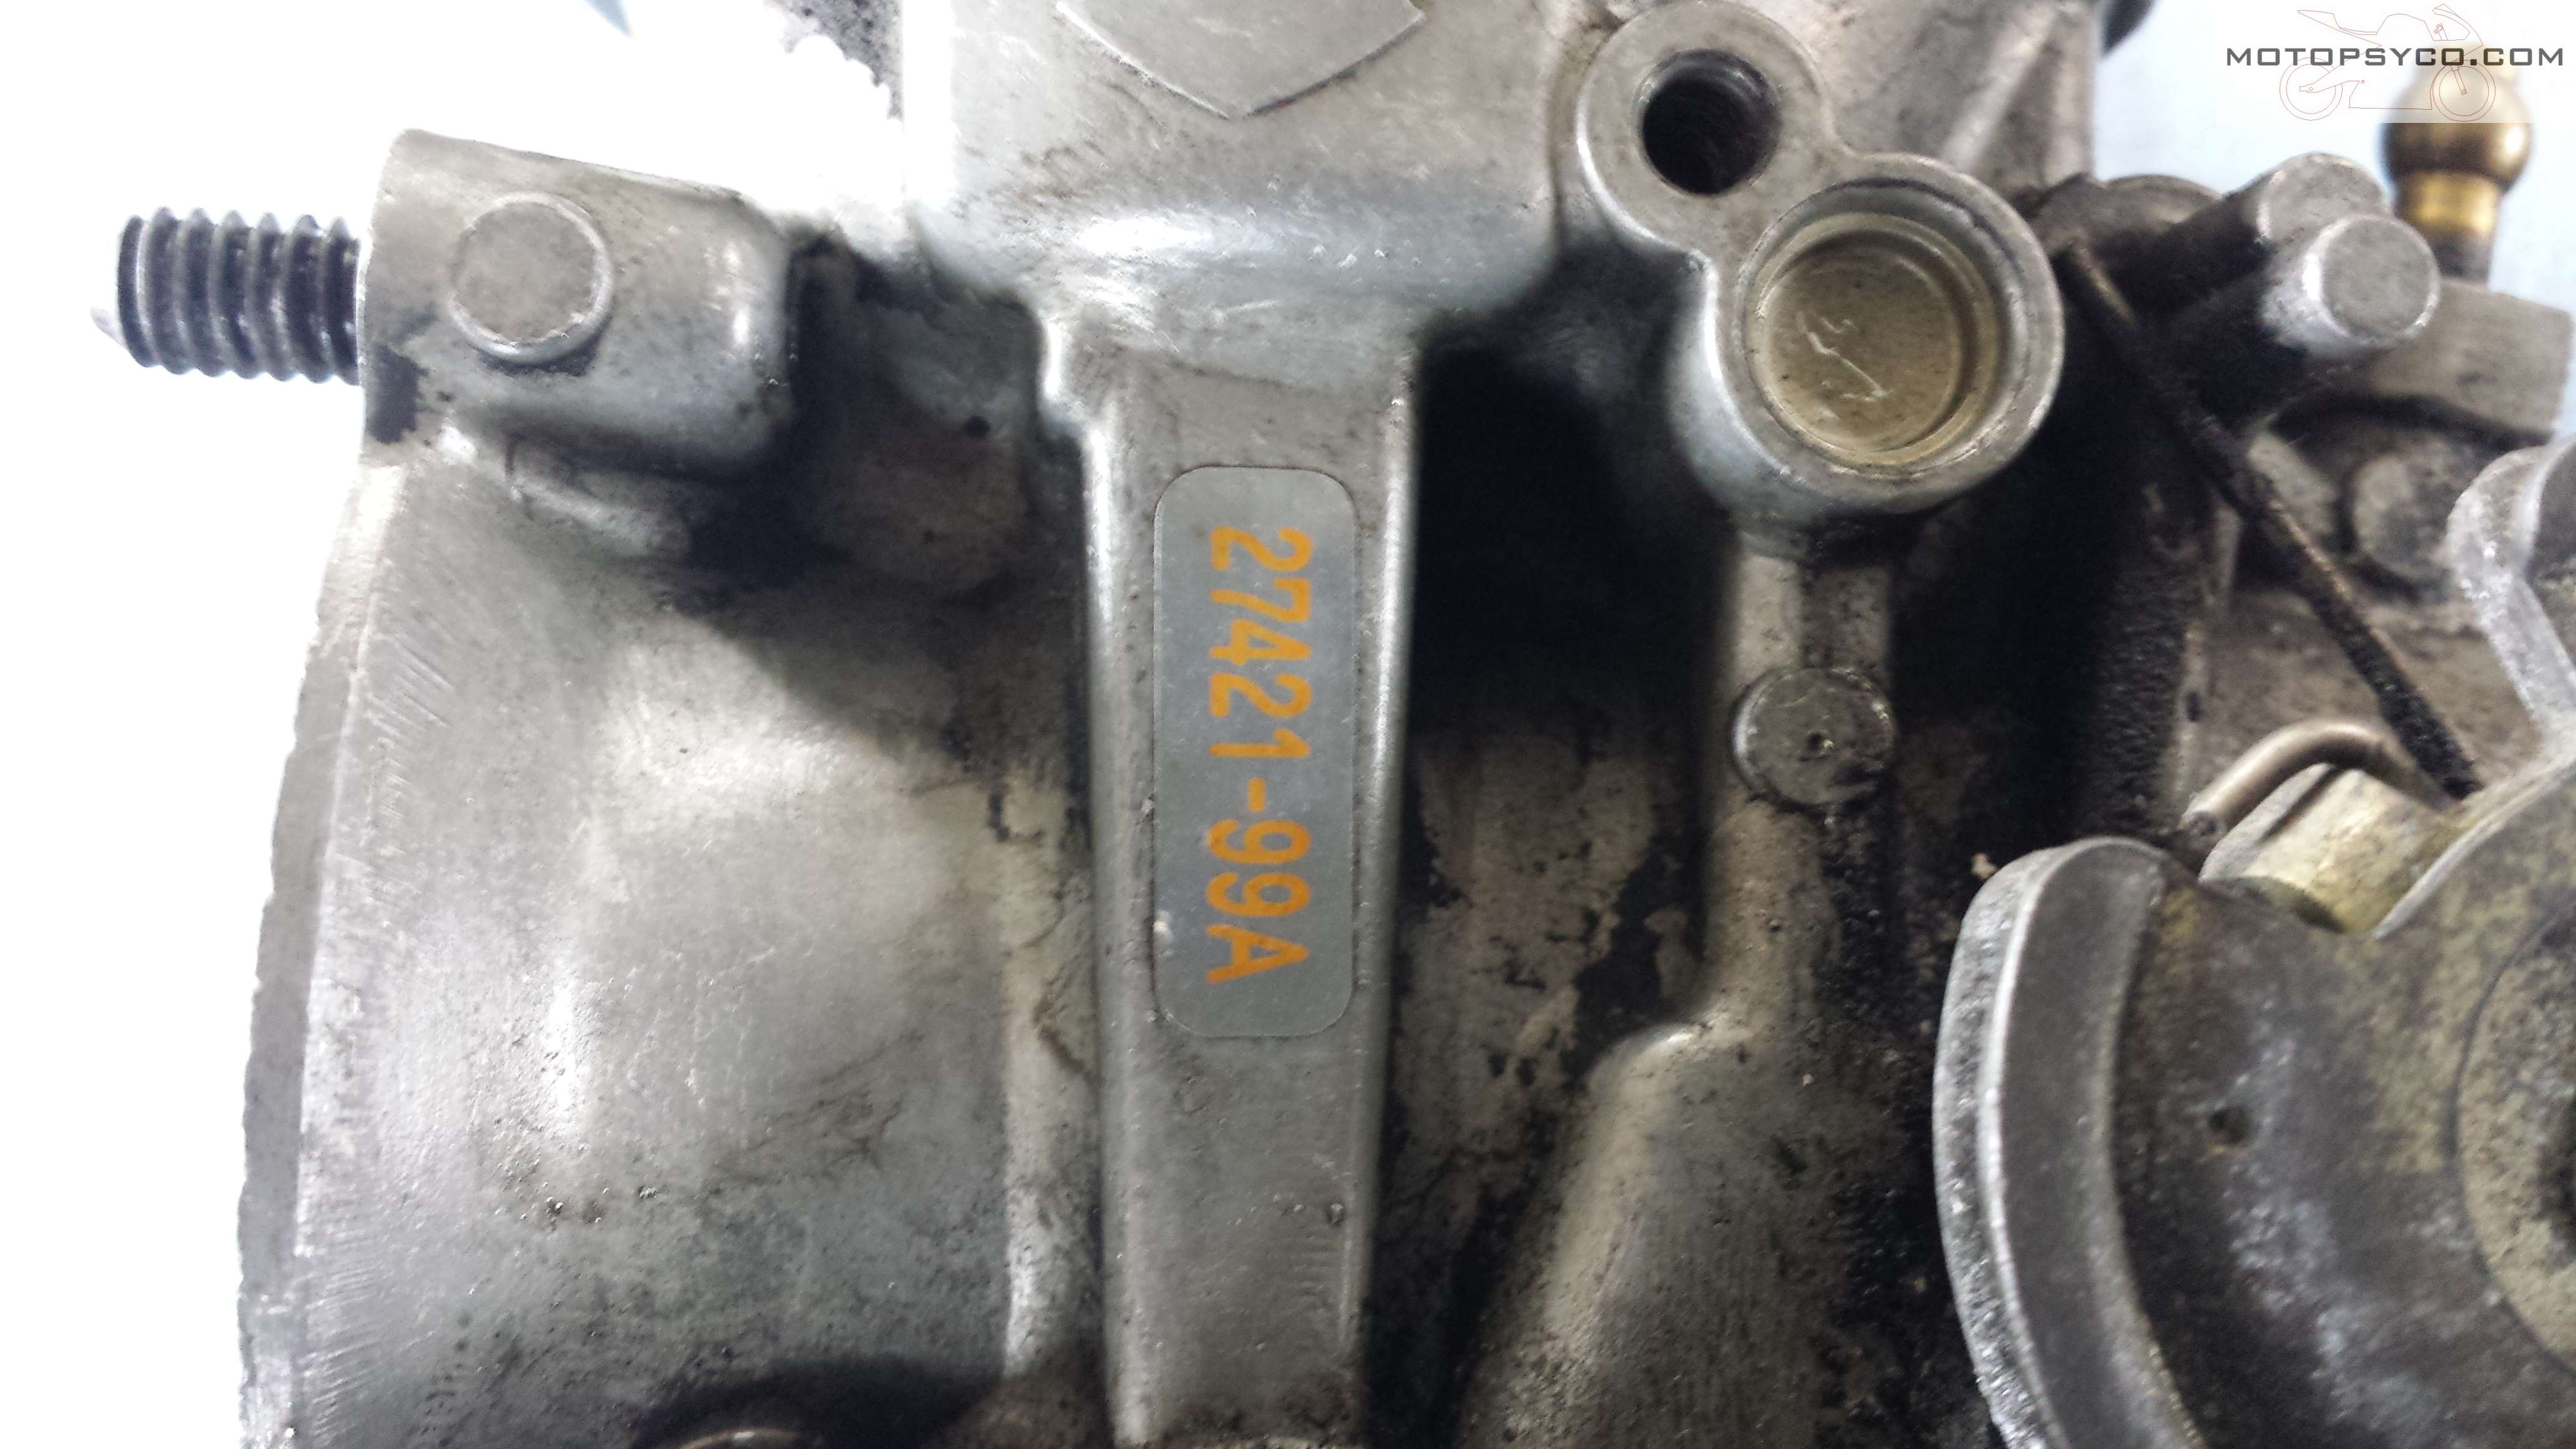
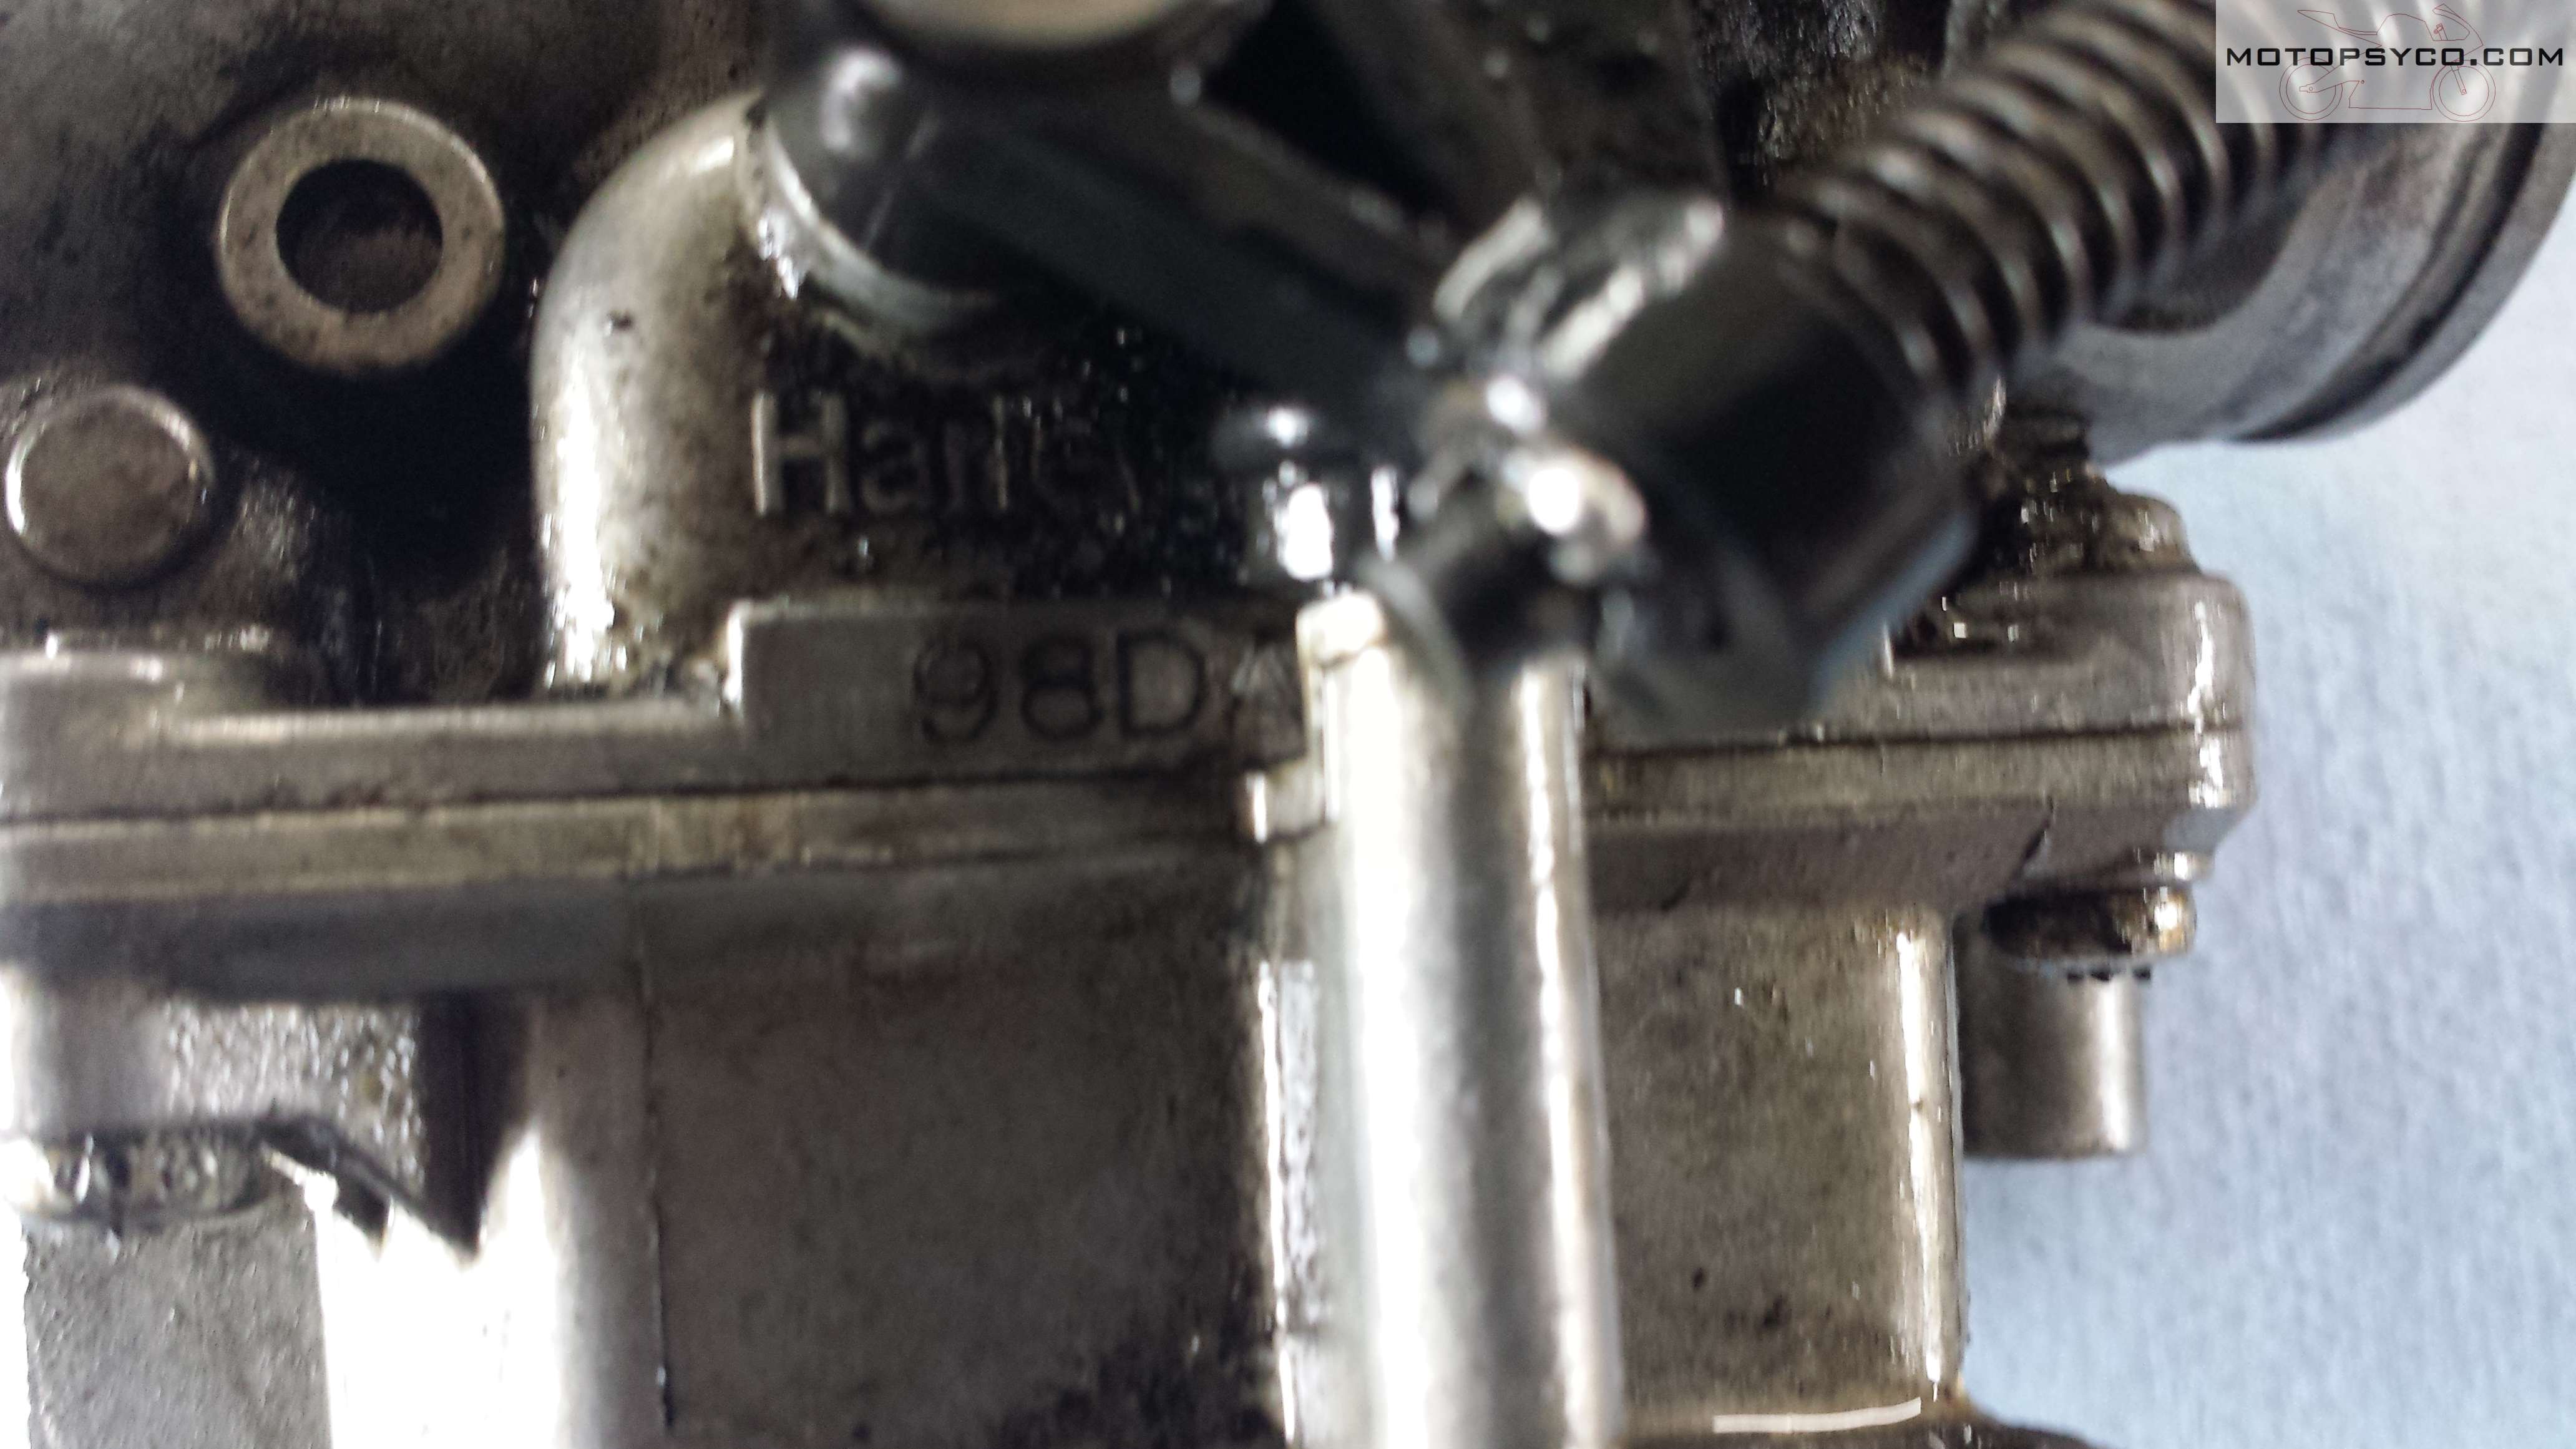
Make note of the numbers on the carburetor as they might come in handy when you need to get parts. Then pull the enrichment plunger out and set it aside.

Harley Keihin Carb

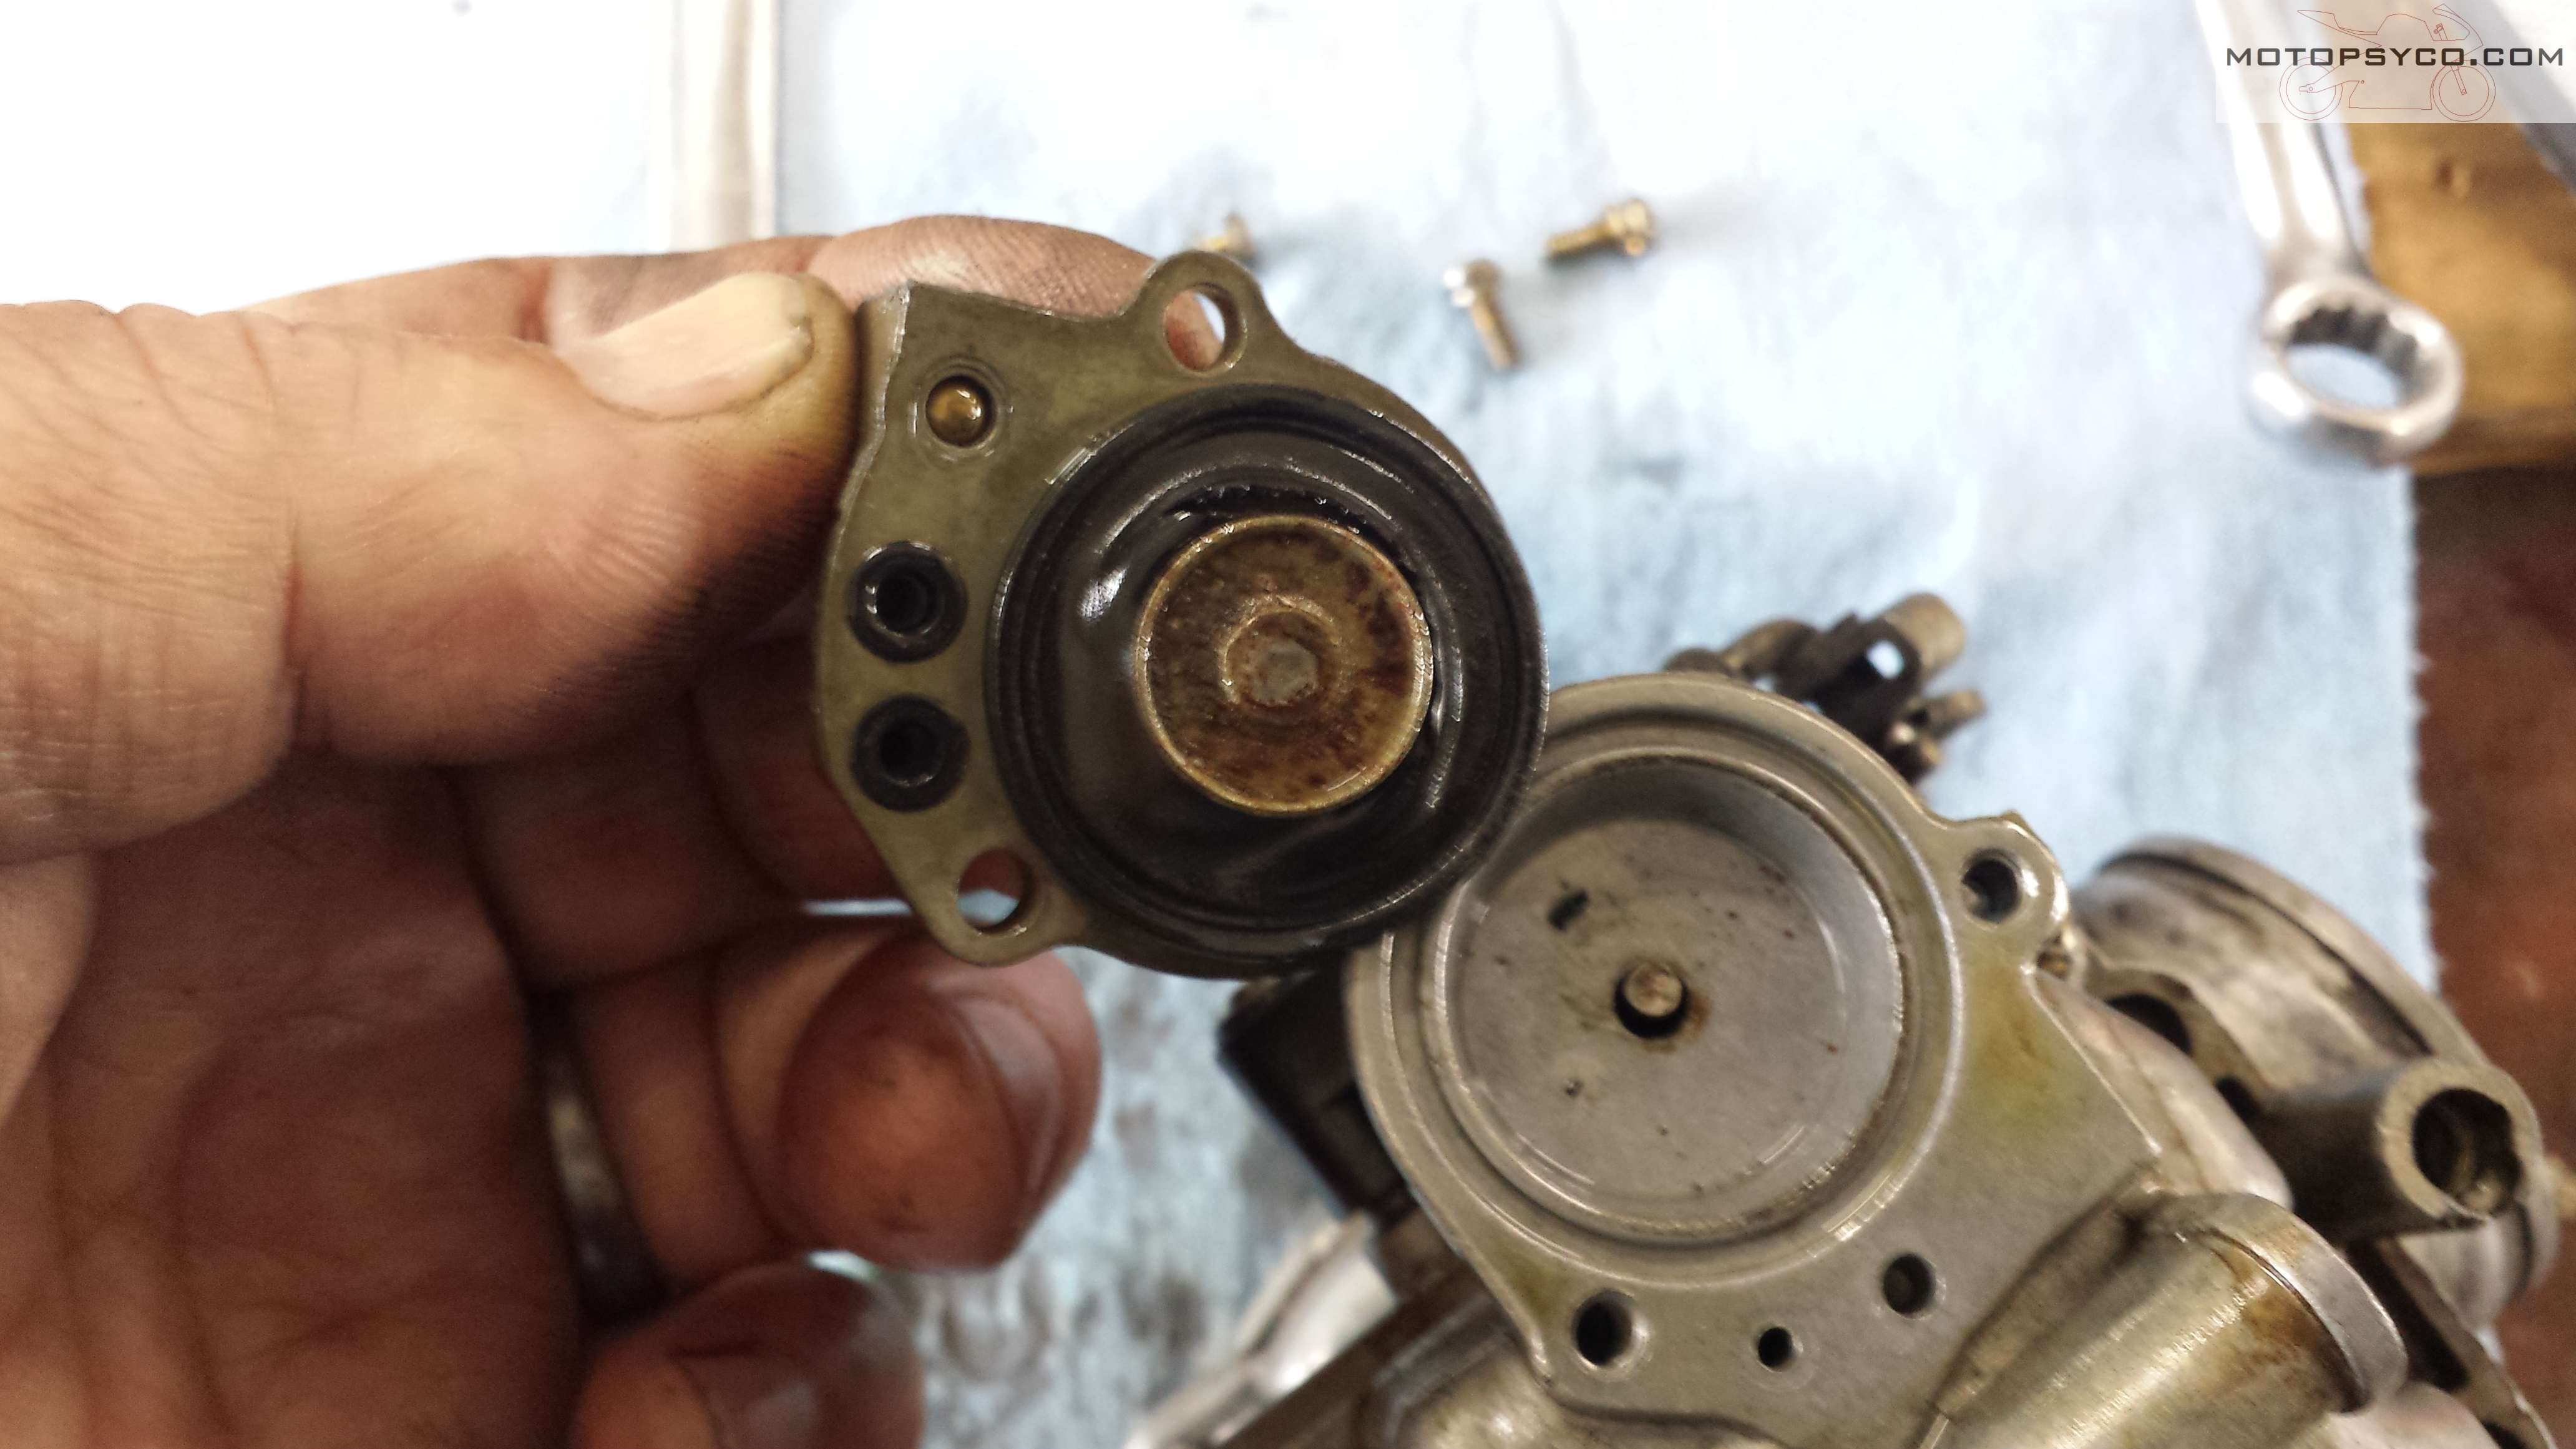
Take the accelerator pump housing, diaphragm & spring off the bottom of the float bowl.

Harley Keihin Carb accelerator pump

If the previous mechanic would have used a top shelf screwdriver like this Vessel Impacta shown here I wouldn’t have had to replace so many of the screws.

Harley Keihin Carb float bowl screw
Yes these are JIS screw

With the float bowl off inspect everything well and make note of what parts are where.

Harley Keihin Carb inside float bowl

There was a little damage on the mixture screw tower from the plug being removed. Normally there’s a cap over this that you have to drill a hole in & use a wood screw to pop it out. If you live in an emissions inspection state the cap has to be replaced with a new one. If I lived in an emissions inspection state this carb body would have to be replaced.

Harley Keihin Carb pilot mixture screw
someones been in here before

first remove the float & float valve, followed by the main jet & emulsion tube.

Harley Keihin Carb

then take out the pilot (idle) jet.

Harley Keihin Carb idle jet

Next up is the idle mixture screw, first screw it all the way in slowly & count how many turns it takes to bottom out, and make a note of it. Then remove the screw completely.

Harley Keihin Carb mixture screw

There are four parts to the mixture screw assembly on a Harley Keihin carb. 1. the screw itself 2. the spring 3. a small washer & 4 the o-ring. Chances are that the o-ring & washer will remain in the carburetor body & you’ll have to use a small pick to carefully fish them out.

Harley Keihin Carb pilot mixture screw parts

Moving on to the top cover remove it,

Harley Keihin Carb top removal

and then set it & the spring off to one side.

Harley Keihin Carb CV diaphragm

Pull the slide out, inspect the needle (metering rod) for wear & check the diaphragm for holes.

Harley Keihin Carb

I always push the needle jet that the metering rod passes through out of the body so I can inspect it too. Since I clean carbs in a heated ultrasonic cleaner if I don’t push it out and keep track of it, it’ll probably fall out any & I’ll have to go fishing for it.

Harley Keihin Carb

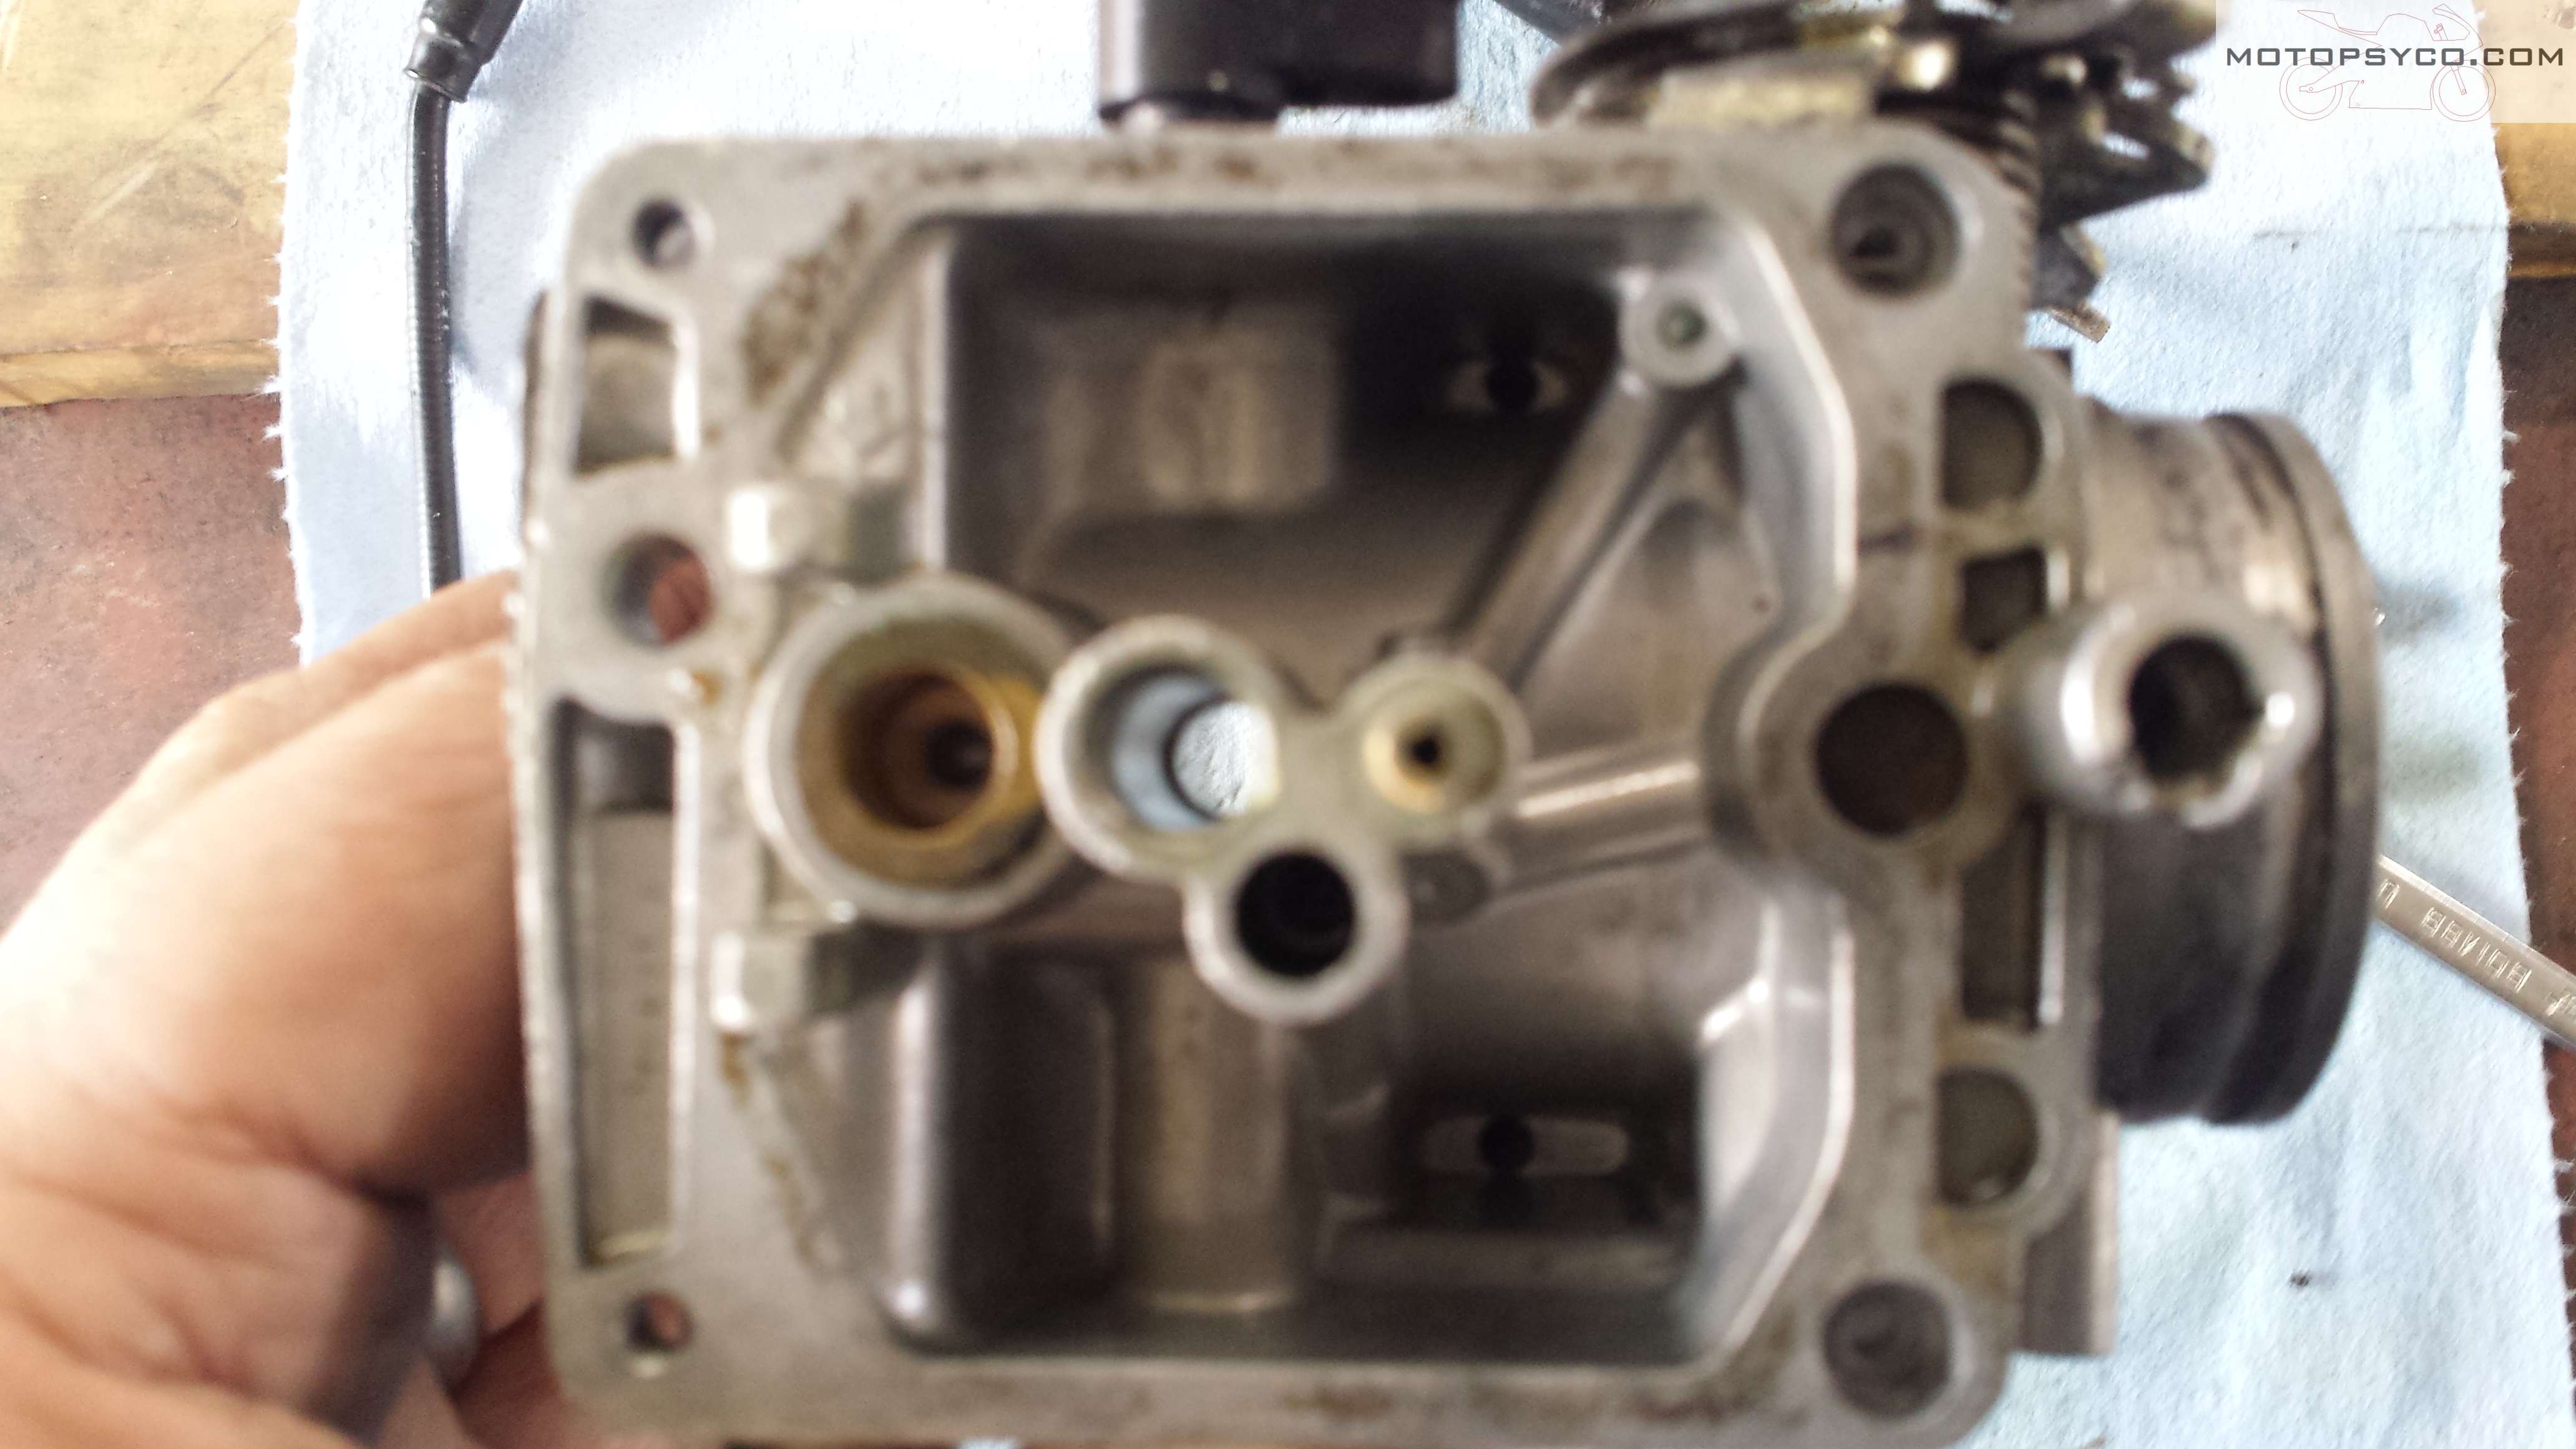
Here’s a shot of the float chamber with all of the removable parts out.

Harley Keihin Carb

Since this is only a repair job & not a restoration this carburetor only got a cleaning, no vaporblasting. This body was in nice shape & looks decent with only cleaning. If you’re working on a crusty old pile of junk and want your parts to look good again please see my vaporbasting page.

The next few pictures show this carburetor’s parts laid out in the order that that they go back in. Make sure you carefully inspect all parts and replace any that are not usable especially the rubber pieces.

Re-install all of the internal parts,

Harley Keihin Carb jets, float mixture screw & enrichner

and the mixture screw being sure to set it as it was before. If you think it was wrong verify the setting with a good service manual.

Harley Keihin Carb pilot mixture screw assembly

Then set the float height.

Harley Keihin Carb float height

Harley Keihin Carb

Carefully line up the accelerator pump rod through it’s hole in the float bowl & reinstall the bowl. Don’t forget to put the bellows on as shown before the float bowl.

Harley Keihin Carb accel pump linkage

The rest of the accelerator pump arts should be reassembled to the carb now.

Harley Keihin Carb

The last couple of steps are reassembling the needle to the slide making sure to put any spacers that may be present back where they were to start with and then putting the slide back in the body, with the spring & then re-installing the cap.

Harley Keihin Carburetor

Once this is all done it’s time to put the carburetor back on the bike, fire it up and make any needed adjustments. I hope you have found this pictorial overview of a Harley Keihin carb helpful & interesting.

Harley Keihin Carb ready to install

Peace Y’all ‘Psycho

Restoration tech tips

Easy Rubber Parts Cleaning

Restoration Tech Tips 1 1/1/19

Restoration Tech Tips #1

A good way to clean your dirty old rubber & even some black plastic parts is to grab a can of your favorite foaming tire cleaner and soak them down with it and let it sit until all the foam has evaporated and them wipe away the excess. Easy !

Humidity Will Humiliate You

Restoration Tech Tips 2 1/1/19
Honda SL100K2 switch bracket

`Restoration Tech Tips #2

Avoid painting during times of high humidity unless you have a fully dehumidified climate controlled spray booth in your shop . Seriously don’t even do rattle can paint. I had to repaint this dadgum little bracket 3 times to get it right without any runs or with out the gloss black paint becoming chalky. Of course the third time I painted it was the next day after the humidity had dropped back down. If it’s really humid just wait until another day to paint.

Rust Removers Don’t Work Cold

Restoration Tech Tips 3 1/1/19
For the best deal on Evapo-Rust click here!

Restoration Tech Tips #3 No matter what your favorite rust remover is, none of them work well when it is really cold. If you’re planning to soak some parts in something like Evapo-Rust during the winter months you really should put it in a warm place to get good results.

The CARGO CAMPER EPILOGUE

In my last post I showed you how I added the all of the modifications to my cargo camper to make it suitable for sleeping in along with being a useful cheap toy hauler. Today I’ll just point out a few finishing touches that were needed to make it even more useful & comfortable.

The Cargo Camper / Cheap Toy Hauler in use on a happy day!
at Umstead State Park in N.C.

While not like having all the advantages of a full featured RV, this trailer is still a great place to sleep for the night. We still do some tent camping once or twice a year but as I’ve gotten older sleeping on the ground has lost a lot of it’s appeal to me. This way I have a warm (or cool) dry place to sleep, a way to brush my teeth, wash dishes, while still maintaining a little of that primitive camping experience.

Looking out the back door of the cargo camper
Looking out my back door!

One thing you will notice as you look at all of these pictures is that I’ve mounted a number of small d- ring tie downs to the walls and a couple of spots in the floor. This gives me multiple options for cargo control. there’s even a couple of them up close to the ceiling at the front that I put a clothesline on to dry towels & washcloths on. Later on I added a couple of them to the outside to be anchor points for my shade canopy.

cargo camper cheap toy hauler interior
A decent place to spend the night.

Now if you are the kind of person who want’s to be able to lounge around all day in luxurious comfort, then a cargo camper is not for you. For those of us who just want a place to lay our head at night after a days adventure exploring the world around our base camp it makes perfect sense.

cargo camper couch bed

Let’s talk a little bit about the equipment added to this trailer, in addition to the extra tie downs already mentioned. At first we slept on an air mattress for a couple of trips and it was nice until one trip where it went flat on the first night of a 4 day motorcycle rally. After that I did a bit of research and bought this Milliard Tri-Fold foam folding mattress. It’s far more comfortable than an air mattress, and when folded up and slid up to a wall makes a usable albeit low to the ground sofa. In fact it is so comfortable that my wife & I slept on it for a couple of months while we were stuck in the process of moving from one house to another for a long period of time. I highly recommend the Milliard Tri-Fold over any air mattress for an application like this.

cargo camper cheap toy hauler

Some places we camp have power hook ups & some don’t, so we always carry an extension cord and a couple of RV electrical adapters just in case we run into a situation where there is not a standard 15 or 20 amp receptacle to plug into. Of course if you really want to you could always carry a small super quiet generator with you. Later this year I am thinking of adding solar power to keep phone & computer batteries charged up as our off grid trips seem to get longer & more frequent.

Another thing you have to consider is what to do about using the bathroom. So far everywhere we’ve camped at has at least had porta-johns for us to use. Even so I bought one of the Reliance Products Luggable Loo portable toilets just so that my wife & I could have a place to go pee in the middle of the night without having to leave the trailer. On an extended trip in an area without toilet facilities I’d probably keep it outside in a small bath tent, but just to take a leak once a night for 3 or 4 nights it’s perfectly fine in the trailer. Being the cheap bastard that I am instead of buying the expensive odor neutralizing products the sell for it I just use kitty litter and heavy duty kitchen trash bags to control the odor and facilitate easy clean up.

Cheap fire pit carried in Cargo Camper
an inexpensive portable fire pit

In addition the the requisite camp stove, cooler, coffee percolator, folding tables & chairs etc. I grabbed this relatively inexpensive portable folding fire pit for when visiting places that do not have permanently installed fire rings. It’s cheaply made & kind of flimsy but as long as you remember this and use it within it’s limitations it’ll be just fine. One great advantage to this style of camping is that you can bring along your sturdier, more comfortable, less expensive, but much heavier folding table & chairs . Whereas when tent camping (especial on a motorcycle & when back packing) may require you to bring along lighter weight specialized equipment or to do without some things.

This cargo camper trailer has been serving me well for a couple of years now and some of information contained in these posts reflects updates that I’ve made to it over the years. Should you decide to build one of your own plan it out carefully and decide what you can & cannot do without in your cargo camper. If you are just joining us you may wish to check out part one of this series here; and then part two at this link.

Cargo Camper Part 2

Design & Building of the Cargo Camper

In my last post I spoke of the purchase & special order specifications of my new cheap toy hauler / cargo camper. My plans were simple, no fancy fold out beds or anything like that just a good place to throw an air mattress, with a way to brush my teeth, wash my face and fix coffee & breakfast in the morning. Part of my goal was to keep the modifications as light as possible since I’m pulling this with a four cylinder Tacoma that only has a 3500 pound tow rating. I deliberately got a v nose trailer so that I could have my storage space & sink in the nose without losing any of the 6 x 10 cargo space.

Cargo Camper v nose shelving & cabinets
Framing in the shelf & counter

To keep it light I framed the counter in with 2″ x 2″ lumber and covered it with 1/4″ lauan plywood. Since all I am using for water is this Shelf Reliance water jug I built the top shelf out of heavier wood and the afterwards set my big water jug on it so that I could center the sink under the spigot. Although I wont show it here for my grey water tank there’s a 6 gallon bucket, under the counter that connects to the sink with a piece of flex hose connected to the trap on the sink. The sink was a cheap little RV lavatory sink I bought online.

cargo camper folding table & sink

I wanted to be able to put my camp stove at the window for ventilation purposes but didn’t want to give up any floor space for hauling bikes & gear so I came up with a nifty little folding extension for the counter. A short piece of 2″ x 2″ wood along the wall supports the back side. To save weight I used a 1′ x 2″ piece for the leg. to keep it rigid when folded down I added this block wit a locating pin at the bottom of the folding leg.

cargo camper folding table

Then I marked the location where it would be straight & drilled a matching hole halfway through the floor.

cargo camper folding table locating pin

Then I added this double ended snap hook and some screw in eyelets hols the folding counter in both the up and down positions. Although it’s very lightweight & inexpensive it can handle any of my camp stoves without any worries

cargo camper folding table

“Shore power” is a nice thing to have even though I don’t need full on RV style electrical functionality it’s nice to be able to plug up at a campground or use a small generator occasionally so I added a couple of 20 amp 120 volt receptacles to the front of the counter. I decided against trying to install any type of breaker box in the trailer itself and simply used the appropriate size wiring and a matching electrical inlet box. Most campgrounds have a 20 amp receptacle with a 20 amp breaker for it anyway. I almost always have a volt meter in my truck in case I need to check the outlet before plugging my trailer into it.

cargo camper electrics
cutting a hole in my brand new trailer

Installing the electrical inlet meant cutting into the exterior sheet metal of my trailer. This was actually done using a Dremel tool. After removing the insulation a drill and a reciprocating saw were used to finish the opening. Be sure to use a good high quality sealant around the hole any time you go through the wall of your trailer for any reason.

cargo camper electrics
Make sure to seal around the inlet well.

Here are a couple of pics of front of trailer with the wood work done but before staining & sealing. Any surfaces that may get wet need to be thoroughly sealed with a good waterproof polyurethane before use.

cargo camper v-nose extras
folding counter down
cargo camper v nose sink counter
folding counter surface up

Now it’s time for wheel chocks! I used the Pit Posse recessed wheel chocks. These come in two sizes 16″ & 24″ I ordered one of each size just in case the smaller wheels on my scooter did not clear the longer (taller) chock. The 24″ chock fit perfectly between two of the steel cross members of the trailer

cargo camper wheel chocks

After laying out the location of the wheel chocks I cut a couple of great big holes in the bottom of my brand new trailer. As mentioned earlier the 24 inch chock fit perfectly between the floor cross members but for the 16 inch I had to compromise and only bolt 1 end through the steel of the trailer frame

cargo camper wheel chocks
More holes in my brand new trailer.
cargo camper wheel chocks
locating the tie downs

Above you can see how the chocks and tie downs are located.  I used 6 recessed heavy duty tie down ring with backing plates. These are stout pieces that are well worth the money. When your tie down rings are anchored to wood like this you really need the backing plates to spread the load & prevent them from pulling out

The next couple of pictures show you how the chocks & tie downs look from underneath the cargo camper. Before you ask yes I did consider using e-track for this trailer but decided against it just for the sheer ease of being able to fold everything into the floor and unfold my bed. No need to stow anything away or reassemble it to leave, just fold it down & then pull it back up to load bikes & go home.


cargo camper wheel chocks
Wheel chocks attached to frame cross members

cargo camper wheel chocks
Heavy duty backing plates for tie downs

The basic construction is done, I bought myself a cheap indoor outdoor carpet to put under my bed, with the recessed chocks & tie downs the floor is almost perfectly flat.

cargo camper details
Chocks down & carpet rolled out
cargo camper wheel chocks
Ready to load bikes & travel

I still have a few finishing touches to show you in the next installment of Motopsyco’s Cheap Toy Hauling Cargo Camper!

YOU CAN READ THE NEXT INSTALLMENT BY CLICKING HERE!

Motopsyco’s Cheap Toy Hauler

 It all started out innocently enough,a couple of years ago I was headed down to Eustis Florida to participate in the Destination Eustis Motorcycle Show & Swap Meet. Since I was going alone to this event, I borrowed a 5 X 8 enclosed trailer to pull a single bike for the show. My beloved wife didn’t accompany for this one & I didn’t feel like paying for a hotel room so I packed an air mattress & a sleeping bag so that I could sleep in the trailer. You could say that this was the inspiration for the Cheap Toy Hauler.

This particular trailer was a completely uninsulated cargo trailer and that weekend it was freezing cold down in Florida at night & I was freezing so about 2in the morning I got up and fired up my butane cook stove just to warm the place up a little bit. Once I did this sleep was possible. Overall the experience wasn’t terrible but it could have been better. I learned three very important things on this trip, one is that an uninsulated cargo trailer is miserable during anything but ideal weather; two was that a 5’ x 8’ enclosed trailer is a 1 bike trailer for full size motorcycles. The third lesson was that if you’re hauling motorcycles, atvs or other wheeled toys is that a ramp door is also essential. It was okay for one time but hauling ramps around all the time is just silly.

motorcycle in 5 x 8 trailer
One motorcycle in a 5 x 8 trailer

After discussing this with my wife who was wholeheartedly behind the idea of converting a cargo trailer to a camper, after looking at mini-campers, teardrop campers, & travel trailers, we visited a couple of local trailer dealers to see what they had in stock. This was a bit disheartening due to the high prices and lack of selection available. My local dealers stock was mostly 5’ X 8’trailers with no options, and the prices were equal to or greater than what I eventually bought my fully insulated 6’ X 10’ cargo trailer for. The other problem was that my local dealer was closed during the hours I had available for shopping so there was no way I could talk to them about special ordering a trailer to my specifications.

I came home& got on the web to research custom ordering a new cargo trailer built to my specifications. There are regional distributors and manufacturers all around the country so look them up and find one near you. For me the choice was plainoltrailers.com out of Georgia. Their current base price on a 6’ X 10’ v nose trailer is $1925 (November 2018) picked up at the factory in Georgia. The reason that I chose this size was due to the weight limitations of my tow vehicle. I called the phone number on the website to get the weight of a couple of different trailers & the 6’ x 10’ was just over 1100 pounds empty, leaving me a little over 2000 pounds for add-ons & cargo. So I got back online I speced the trailer out with all the options I wanted including full insulation, RV style side door, a window directly opposite the RV door & electric brakes on the 3500 pound axle. And it still came in less than the local name brand dealer wanted for a plain 5’ x 8’. The only catch was it was a 10 hour round trip from Darlington S.C. to Pearson Ga. to pick it up, but I saved enough money to make it worth every mile.

Cargo Camper Cheap Toy Hauler
The Cheap Toy Hauler!

After getting it home I put my 2 biggest bikes in it, took a bunch of measurements,figured out what all equipment we wanted in it and of course how to do it all as cheaply as possible without compromising quality. In the next installment of this series of articles we’ll look at how I installed a little sink, electrical outlets etc. in the v nose of the cheap toy hauler.

If you really like this idea & want to follow along please sign up for email notifications in the upper left hand corner.

CLICK HERE TO READ PART TWO OF THIS BUILD.

1928 BSA Sloper “Ameila”

Every now & then you get the pleasure of seeing a truly rare old bike that is unusual even amongst pre-WWII antiques. This 1928 BSA Sloper is such a motorcycle. First built in 1927 the BSA Sloper features an overhead valve 493cc four stroke single engine with approximately 20 horsepower.

BSA Sloper at Rails & Roads
1928 BSA Sloper

It’s amazing how elegant these old bikes look and it’s hard to believe that this was considered to be a utility machine when it was introduced. Top speed is a reasonable 75 mph, with front and rear drum brakes to bring it to a stop. The rigid frame is fairly typical of the time with steel tube construction.

28 BSA Sloper green
28 BSA Sloper left side

Leading the way up is a sprung girder front end, the seat is generously sprung to compensate for the lack of rear suspension. I really love the small details on the old bikes like this one. Here (below) you can see the exposed intake valve spring visible over the top of the AMAL carburetor that has a side mounted fuel bowl.

BSA Sloper
AMAL carb on BSA Sloper

This next shot gives you a close up of the fuel tank and gear shifter The green paint with gold striping is gorgeous and of course I really like the BSA logo with the 3 rifles.

BSA Sloper

I’d like to thank the owners for making the trek to South Carolina to bring this bike to the Rails & Roads Show and allowing me to feature it here. This machine was restored in Europe and imported to the U.S. in 2017. I even have a link to the video giving the start up procedure to show.

 I sincerely hope you have enjoyed seeing this 1928 BSA Sloper, let me know what you think in the comments and remember if you appreciate what I do here and you like to shop on Amazon you can click on the ad links to help support this site.                                                                                                             Peace Y’all

Auxiliary Fuel Tank by Pit Posse

While I was in the process of moving I managed to break the end off of my old auxiliary fuel tank that had served me well for over 20 years. When I went looking for a replacement most of the top name brands were rather expensive starting at $45.99 and going up. At the other extreme were a bunch of smaller unknown brand ones from China or India with decent prices but some long shipping times & unknown quality. As a compromise I settled on this one sold by Pit Posse for 39.99  It came with a decent length of hose & a good quality brass shutoff valve. Let’s be honest here, all of these plastic auxiliary tanks cost more than what they are really worth but comparatively speaking this one is a good deal coming from a U.S. based company. The actual product is still made in China though. I’ve been using this one since June 8th 2018 and am very happy with it.

Auxiliary fuel tank & carburetor synchronization guages on an I.V. Pole
My setup for adjusting carburetors.

You might notice that in the picture above that I have my vacuum gauges and auxiliary fuel tank hanging from an I.V. pole.  If you’re serious about doing carb work on motorcycles & four wheelers you need to get yourself an I.V. pole. It turns out that you can get one pretty dang cheap too, click here to see them starting as low as $23 with free shipping. Well worth every penny.

My sychronizer gauges actually come from Honda and were purchased from the inventory of a shop that went out of business. If you don’t have a set and are thinking of buying some do yourself a favor and get a set vacuum gauges, not the mercury sticks. Of course if you have the money you could go for a Carbtune Pro setup. If my gauges ever quit that’s the one I plan to get.

That’s all for today just thought I’d post a quickie product review and share a couple of tips that you might find useful. Until next time,

Peace Y’all

2nd Annual Rails & Roads Show Results!

Now that the 2nd Annual Rails & Roads Show is in the history books it’s time for me to let those of you who weren’t able to make it or stay to the end what happened.

Rails & Roads Show Honda TL250

Last year we didn’t have any Kawasaki motorcycles at all but this year Team Green was well represented by some fantastic machinery including an H1R road racer

H1R Rails & Roads Show

First I’d like to thank everyone who came out & brought a bike. Second I’d like to thank our generous sponsors & door prize donors;

1. The Motorcycle Law Group      
2. Carolina Honda    
3. T&T Distributing
4. Grainger    
5. Bryan Bentley (Swamp Fox Motorcycle Restoration)

Over 300 people cast ballots for their favorite motorcycles in each category this time. Thank to all of you as well. Some of you may have noticed that on show day I was a little bit sick as I’m suffering from a sinus infection that made speaking and thinking difficult so I apologize if I made a mistake or 2 . Without any further ado let’s get to the results of this years show.

Rails & Roads Show Harley Davidson

Class 1; American

In the right of the photo above is our third place winner, the 1989 Harley Davidson FLHTCU of Glenn Black. On the left side of the photo is the Second place winning 1977 Harley Davidson XLCR owned by Keith Seymour. First place went to the stunning red 1952 Harley Davidson K model that belonged to Carl Senne shown in the center above. Unfortunately no Indians ,Popes or Excelsior Hendersons made the show this year.

Rails & Roads Show BSA Sloper

Class 2; British/European

Last year this class had a good mix of iron from across the pond, but this year only 1 Moto Guzzi showed up to stave off the British domination of the class. Third went to Ben Doar’s 1966 BSA Thunderbolt. In second place was the 1969 BSA Thunderbolt of Scott & Robin Dials. First place went to the bike featured above, an immaculate 1928 BSA Sloper owned by Robin & Scott Dials.

Rails & Roads Show Honda

Class 3; Japanese 1-200cc

This tends to be my favorite class probably because I own at least 4 or 5 small displacement machines. Third place went to Gene Morgan and his 1983 Yamaha MX100. Everybody loves a Honda CT70 and Dan Mcqueen took 2nd place with his very nice 1973. First place went to bike pictured above, the exquisitely restored 1965 Honda CB160 belonging to Bryan Bently

Rails & Roads Show Hercules

Rails & Roads Show H1 Cafe Racer

Class 4; Japanese 201-600cc

Folks I have a confession to make, I really screwed up this class & that’s why you see 2 pictures above. It was hot that day, and if you were there you know that I was sick but there really was no one that I could hand my responsibilities off to. A serious clerical error was made while I was in a fog of antihistamines & borderline heat stroke. I was so excited to see the Hercules & it’s Wankel engine that when I asked the displacement the owner said it was 300cc, so my fevered brain stuck it into the Japanese medium size class. Hercules is an orphan brand but it’s a German brand not Japanese. Even so the results of the voting will stand & I’m not going to change a thing, just wanted you to know how a German built motorcycle wound up winning a Japanese class. My apologies to anyone who is upset with me & I shall endeavor to do a better job in the future.

At any rate class 4 finished up like this third place went to the fantastic Kawasaki H1 of Chip Tucker. In second place was the fantastic 1971 Kawasaki H1 of Mike Mcsween, (see above) In first place was the 1975 Hercules of Ryan McKeitham

Rails & Roads Show Kawasaki

Class 5; Japanese 601cc & up

These are the big boys, and there were some truly heavy hitters at the Rails & Roads Show this year.  No Kawasakis were present last year but this year they made up for it with a vengeance.

3rd place in this class went to Kent Mangold’s 1979 CB750. 2nd place went to Chip Tucker and his gorgeous 1975 Kawasaki Z1B. Chip also took home the first place trophy with his 1983 Kawasaki KZ1000 Eddie Lawson Replica.

Rails & Roads Show custom cb350

Class 6; The Motorcycle Freak Show

Open to any truly custom motorcycle from anywhere this years class had winners from 3 different countries. From China was the Hardknock Kikker of Mike Krenger in 3rd place. From England came the 1969 Triumph TR6 of Steve Pope and the 1st place trophy went to well done Bratstyle 1972 Honda CB350 owned by Dave Mims

Last years best of show winner was a highly customized Honda but this year it went to the beautiful old 1928 BSA that won the British /European class. I’d like to thank the Dials for bringing it to the Rails & Roads Show, and we hope to see you again next year.

Rails & Roads Show Fundraiser

Let’s not forget the important part, we were able to present the South Carolina Railroad Museum with $501 in donations to go towards their operational expenses. And we are making plans for 2019 but are planning to move the event a little deeper into the fall to hopefully avoid the scorching hot temperatures next year.

SC Railroad Museum

Restoration in progress at the SC Railroad Museum


Dear American Flat Track, I Dare You

Dear American Flat Track.

I have a dare for you, in fact I double dog dare you.  Invite owners of original 1980s vintage Honda RS750s to pull them out of mothballs, remove the damn restrictor  plates and race mano-mano against the Indians.

Honda RS750 Flat Tracker

Honda RS750 Flat Tracker

Harley couldn’t beat them without the AMA crippling them. Guess why I’m not an AMA member & never will be. Damn straight I hold a grudge forever. I had actually quit following flat track racing after I realized that I really wasn’t the Harley fan boy that I was pretending to be, and realized just how harshly & unfairly the Honda teams were being treated so I kind of just said, “fuck this bullshit,” and walked away. Apparently I wasn’t the only one because the series ratings tanked and it changed hands a few times, and quite frankly became minor league single brand racing.

Then I think it was in 2010 when I opened up a copy of Cycle World & read that Joe Kopp had won a major flat track race on a Ducati of all things. Digging into the story it turns out the new owners of the series were allowing motorcycles built around street bikes to compete against the ancient but well developed XR750 Harleys. And even better than that the competition was fairly equal, well as equal as it could be with street based motorcycle engines & frames racing against purpose built factory racers. Even Bill Werner the famous Harley racing tuner was running the Monster Energy Kawasaki team tuning a Ninja 650R. Flat track was worth following again! I actually have to give Harley Davidson credit for moving to the Street based XG750 race bikes and retiring the outdated old XR750.

But then along came Indian and now Harley like all of the other manufacturers is stuck using a true production based engine to compete against what is a completely custom built factory racing only machine. For a while I enjoyed their misery but I still have to give them credit for using XG engine.

Now let me stick the cold hard knife of truth deep into the back of the entire motorcycling press and the American Flat Track advertising staff. Everyone of you keep pushing this whole thing as an Indian versus Harley rivalry. Not really. This is an Indian walkover and in the majority of races the first bike behind the Polaris single purpose factory built racer is usually a Kawasaki Ninja 650, with the occasional KTM LC8, Ducati or Yamaha FZ07 taking it’s place.

I realize you guys think playing up this ancient history will help your rating and magazine sales. How’s that working out for you? We watch Fans Choice or read the results on the web or in the magazines. We see the truth. You keep writing headlines like Harley & Indian are running neck & neck when nothing could be further from the truth. All the other bikes are just competing to see who has the fastest production bike based racer behind the Polaris Indian factory race bikes. All of you have lost credibility with us because the race records never match your stories.

A perfect example of this is in Cycle World issue 1 2018. Kevin Cameron interviewed Bill Werner about his time as a flat track tuner & never once mentioned his time tuning the Kawasaki 650 Ninja. No wonder the rag has morphed into a quarterly hipster art rag like Iron and Air. Same for the rest of the once great publications, no loyalty to their fan base and a marketing strategy stuck firmly in 1994.

Here’s a hint for you, the Boomers are checking out and Gen X is taking over. In high school we didn’t drool over Harleys, for us it Interceptors, GSXRs, and Ninjas that we dreamed of. We expected our Jap bike magazines to be Jap bike magazines. We didn’t mind you reporting on the heavy cruisers but leave the serious “Murican Motorsickle” propaganda to publications like American Iron & Easyrider. Also no more headlines about Indian Versus Harley where you don’t even mention the Kawis, KTMs, & Yamahas that usually come in between the two. It just makes you into liars plain & simple.

Here’s my final statement; I’d pay good money to see an old Honda RS750 pulled out of mothballs, the restrictor plates removed, tuned by the best mechanics & ridden by the best riders the Honda Racing Corporation can provide, running a few races just to show the world how it’s really done. I bet you a hundred bucks it would win.

The Mighty RS750

American Flat Track meet the The Mighty RS750

PS Dear American Flat Track, I don’t want you to make the Indians slower, you just need to let the other teams make their bikes faster. Oh yeah the Fans Choice TV broadcasts are terrific. Thank you for them. Please don’t let it get too boring again.


Brotherly Hate Machine

I got this old VF700 from the original owner. Hang out with me for a bit and let me tell you about my latest Junkyard Dog the Brotherly Hate Machine.

Brotherly hate machin

In the beginning there was a young gentleman from S.C. who loved motorcycles & drag racing. So he decided to combine the two using a machine that really was an odd choice for quarter mile sprints. A 1985 Honda Interceptor VF700. This bike was a true street & strip warrior, with just a few minor mods to perk it up so that it was equally at home on the street or the track.

Brotherly Hate Machine

This is how it looks now.

At one point this motorcycle was stolen, so the owner bought himself a new 1987 VFR700 to replace it. As fate would have it over a year later the police recovered this machine in wrecked non running condition and somehow it wound up back home with its owner. Who rebuilt it and got it running & looking fantastic again.

vf700 Brotherly hate machine engine

At some point he bought himself a parts bike, an 83 VF750 Interceptor, but apparently didn’t need too many parts off of it because it’s sitting in my shop right now with a struts replacing the rear shock and what looks like an old M&H Racemaster drag slick on the back.

vf700 Brotherly hate machine

Unfortunately life takes its toll on a working mans body sometimes & as the owner aged, work related back injuries forced him switch to easier riding cruiser motorcycles and then finally to a trike, the old Interceptors wound up sitting in the pole barn on the family property, un-ridden & rotting.

Honda vf700 Brotherly hate machine 85

You may be wondering why I call this particular bike the Brotherly Hate Machine? Well I had known about & been interested in acquiring these bikes for a while. When I first saw pictures of it, this motorcycle was unmolested, undented & had a complete & unripped seat. But the owner and his younger brother had a falling out a few years ago, and I’m not getting into that here. Unfortunately it negatively affected my motorcycle.

Honda vf700 Brotherly hate machine seat

After we made our deal the guy had went to the shed where the bikes were stored and began to pull them out and get them ready for me to load. Unfortunately his destructive psychopathic brother saw him messing with the bikes and came over before I got there and worked this poor bike over. We still don’t know what he did with the sidecovers. After some compromises were made I picked the bikes up anyway & brought them home. Now you know why I call it the brotherly hate machine. I’m afraid I just don’t understand the evil childish mentality of people who perform this kind of vandalism. Especially when it’s an old man that does it.

Honda vf700 Brotherly hate machine quarter

The original plan was to restore this bike & the 87 VFR700 that came with it. I’ve already started on the 87 but now I’m not sure what the fate of this one will be but I do have the paperwork for it & to be honest I’ve refurbished a lot worse motorcycles in the past.

Honda vf700 Brotherly hate machine left

But I do know one thing, if I restore it the Brotherly Hate Machine will be taken back to Rockingham Dragway to fly down the quarter mile another time or two.