
Since I first posted this a couple of days ago it was pointed out to me that this article was not quite as beginner friendly as my normal do it yourself articles about explaining WHY you do some things. So if you don’t know the difference between a single leading shoe brake & a twin leading shoe brake or even how to identify which one you have or just to learn how they work please go to More About Vintage Motorcycle Drum Brakes and then come back to this page.
Twin leading shoe drum brakes are the ultimate development of motorcycle drum brakes. By using two lever arms and two cams to raise the leading edge of the brake shoes into the rotating drum they were able to generate a greater stopping force than a standard drum brake which pushes the leading edge of one brake shoe & the trailing edge of the other shoe into the drum. It was discovered early on that the shoe with the leading edge being forced into the drum generated much more friction than the trailing shoe. So until the development of powerful reliable disc brakes in the 1970s the twin leading shoe motorcycle brakes were pretty much the ultimate performance set up. Even after their performance was eclipsed by hydraulic disc brakes they were still considered adequate for small & medium sized machines right up into the early 1980s. Today there are still a few low end bikes fitted with drum brakes on the rear, but they are of the standard type, as even the low buck machines rely on powerful front discs for most of their stopping power. As far as I know today twin leading shoe motorcycle brakes are only found on antique, vintage, and custom bikes.
As always don’t forget that you can enlarge any picture on this blog by clicking on it.

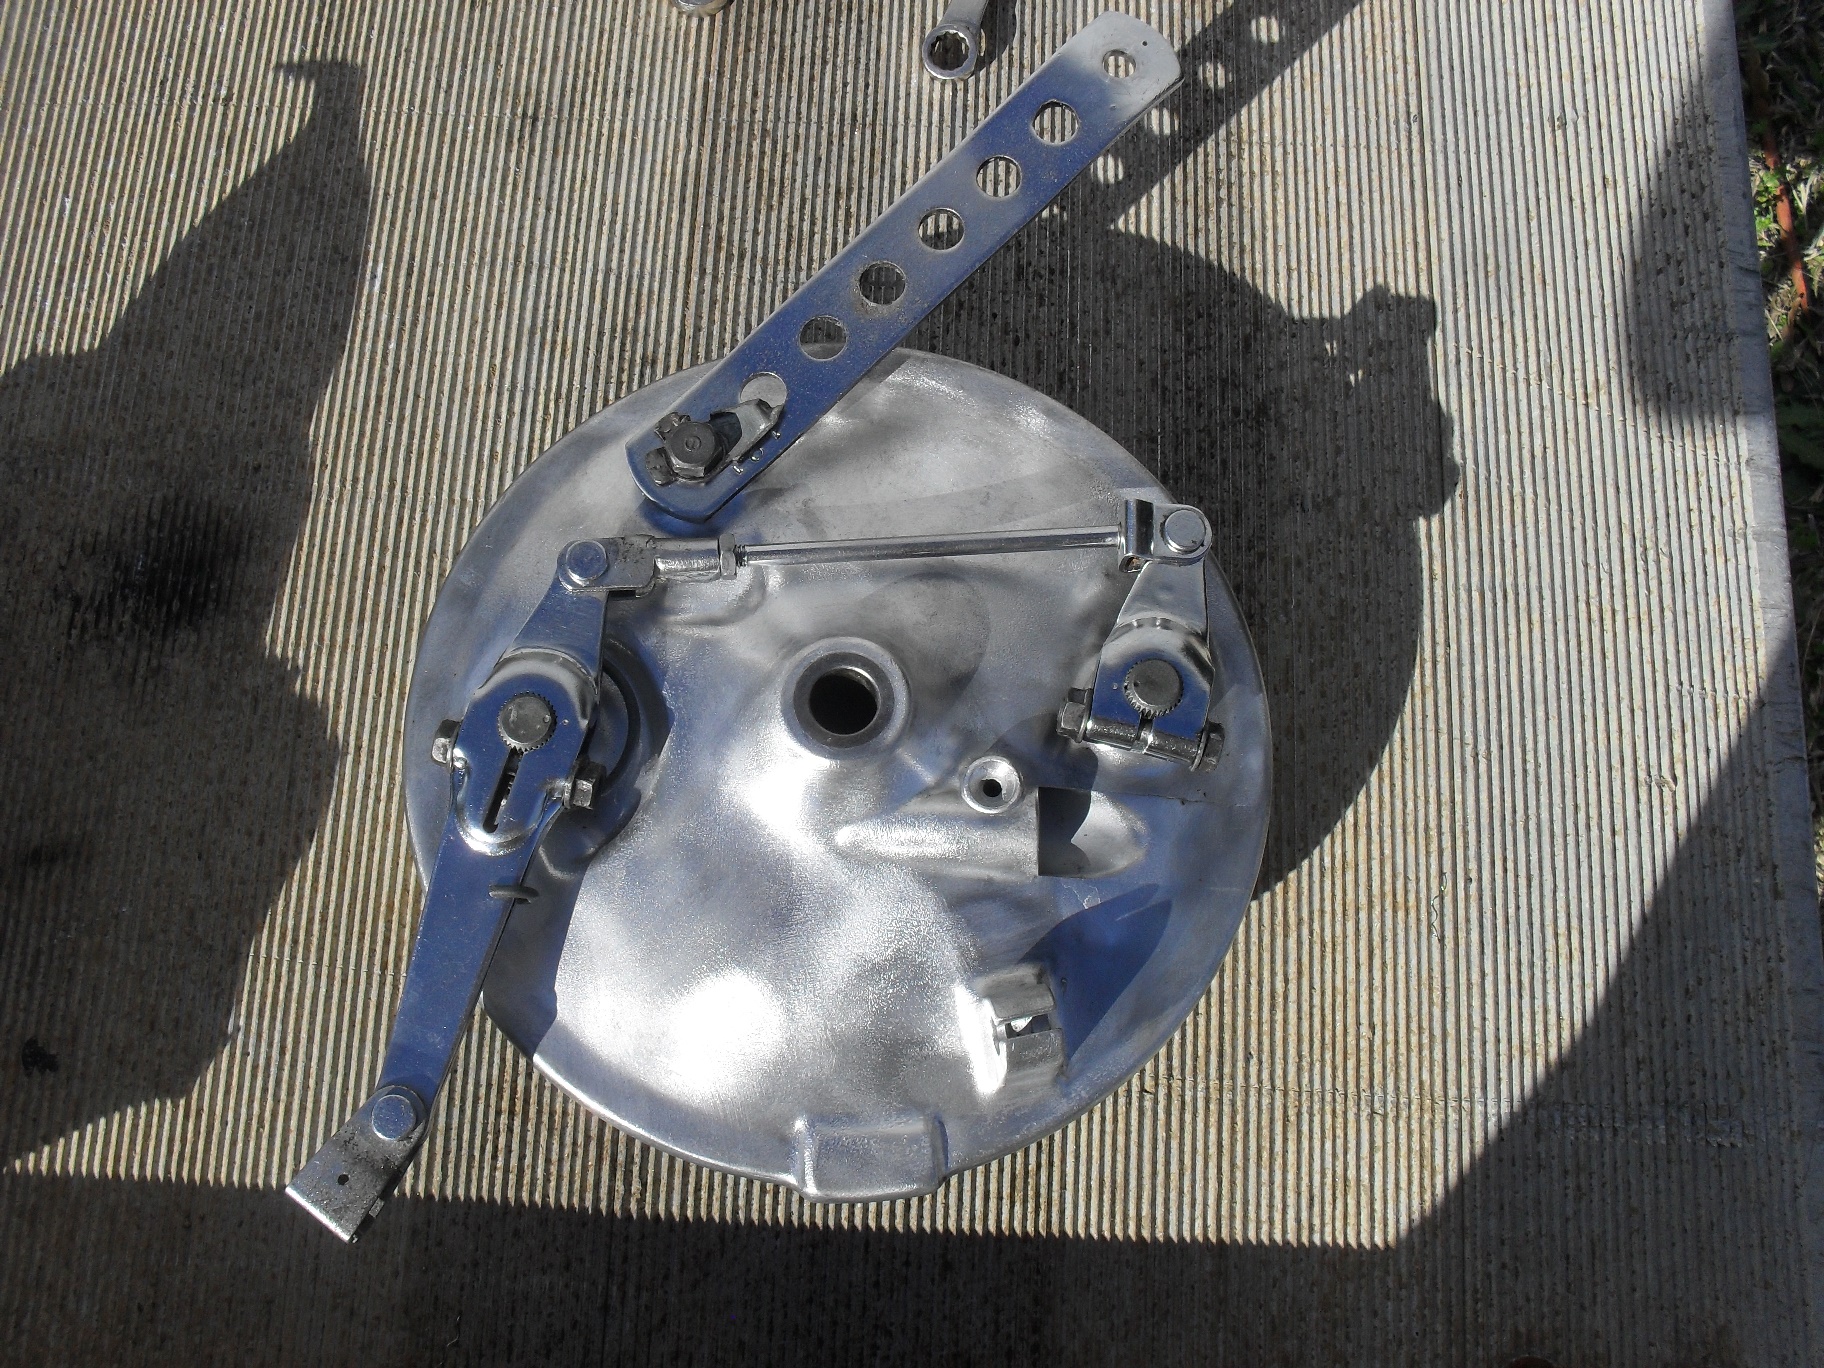
What we are going to look at today is an example of what may be the last of the of the factory installed twin leading shoe motorcycle brakes. The nasty cruddy looking part you see above is from an 81 Honda CM400E. The “E” stood for economy. The CB & CM variants of this bike got disc brakes on the front. By 1981 these were considered obsolete and were used on this model as a bit of parts bin engineering to meet a price point. This particular front wheel & brake backing plate had been painted at least 3 times in different colors What you see in the picture above is after using some aircraft peeler & some light soda blasting to clean it off a bit. Then I disassembled it and and dropped all of the chrome bits in the Metal Rescue tub and put the rest of it in the parts washer before wire brushing the backing plate. Please note, if you are doing a restoration you do not want to wire brush aluminum parts like this but this one is going on a rough edged custom and the brushed finish will be perfect for it.
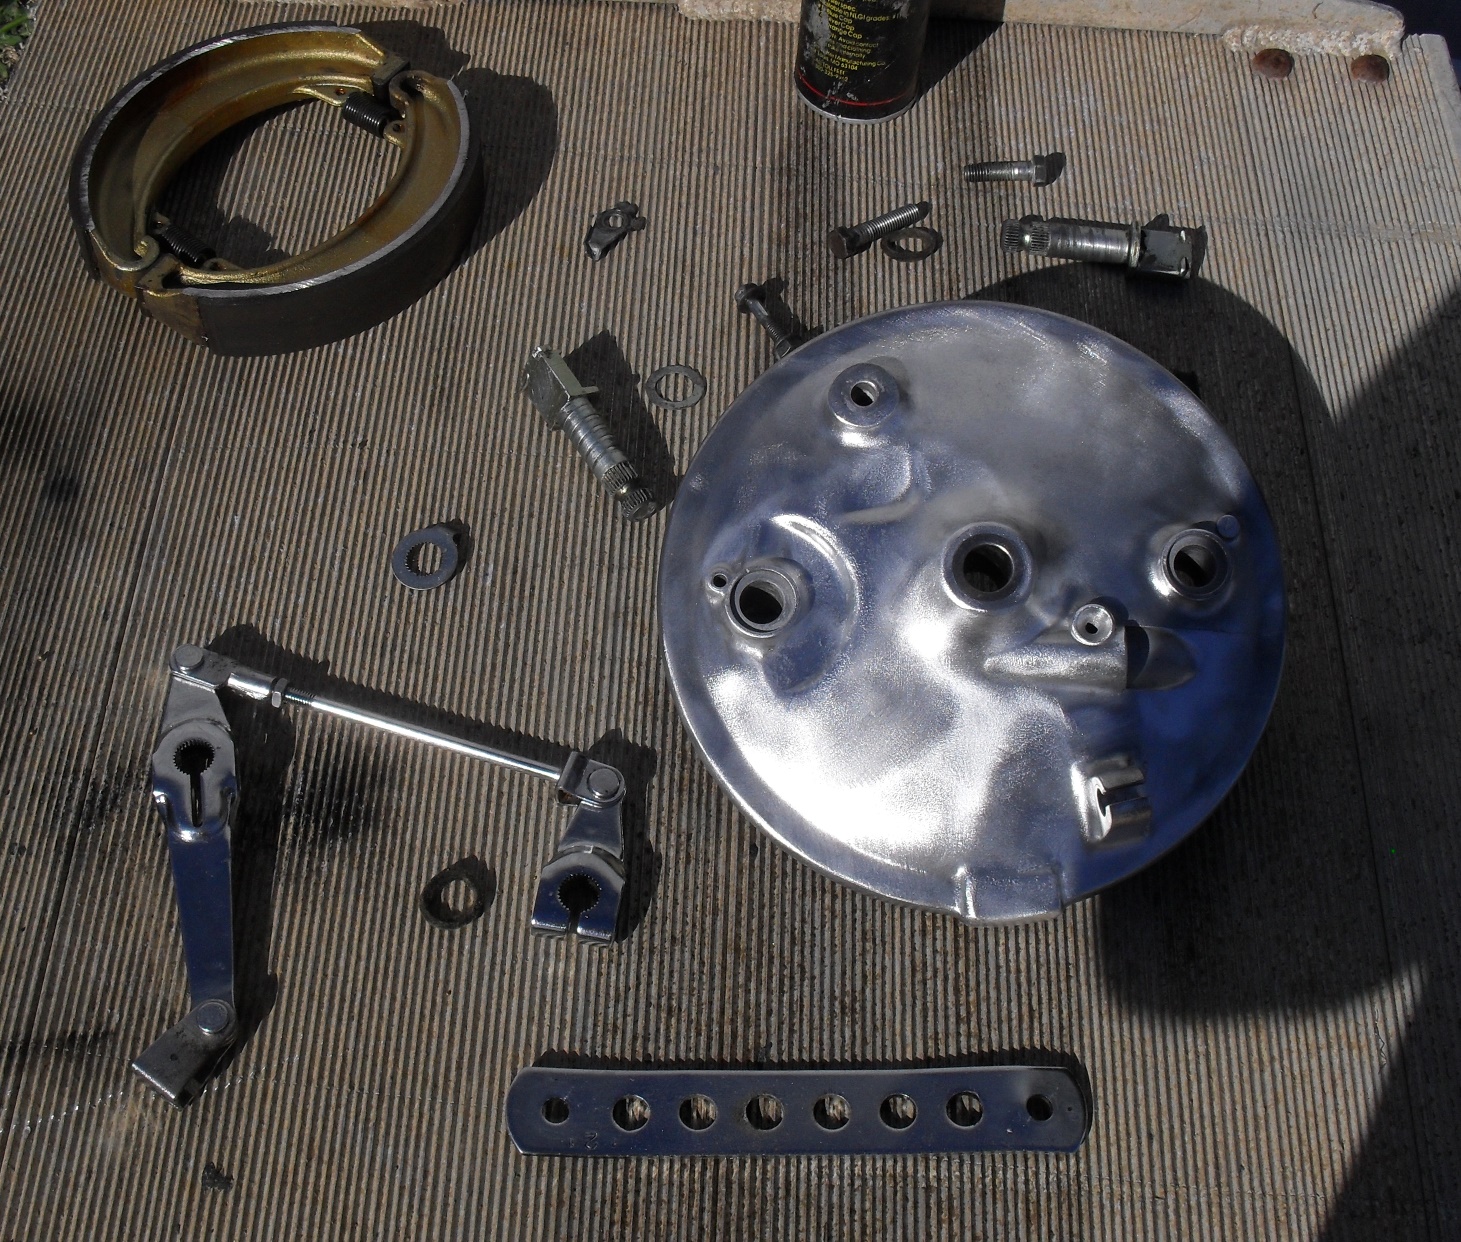
This is an exploded view giving you a look at the typical parts of a front hub using this style of brake.

On this one I will not be reinstalling the speedometer gear as my plans call for a custom electronic speedometer. The first thing to do is apply a light coating of high quality grease to the shafts of the brake cams and push them into the backing plates.

Second part is to put the clean, lightly oiled felt seals into place as illustrated below. While I am sure there is probably a specified oil for this I’ve always just used whatever was handy in my oil can and have never had any trouble. That being said I am not responsible for any trouble you may have if you do not research and use the factory recommended oil.
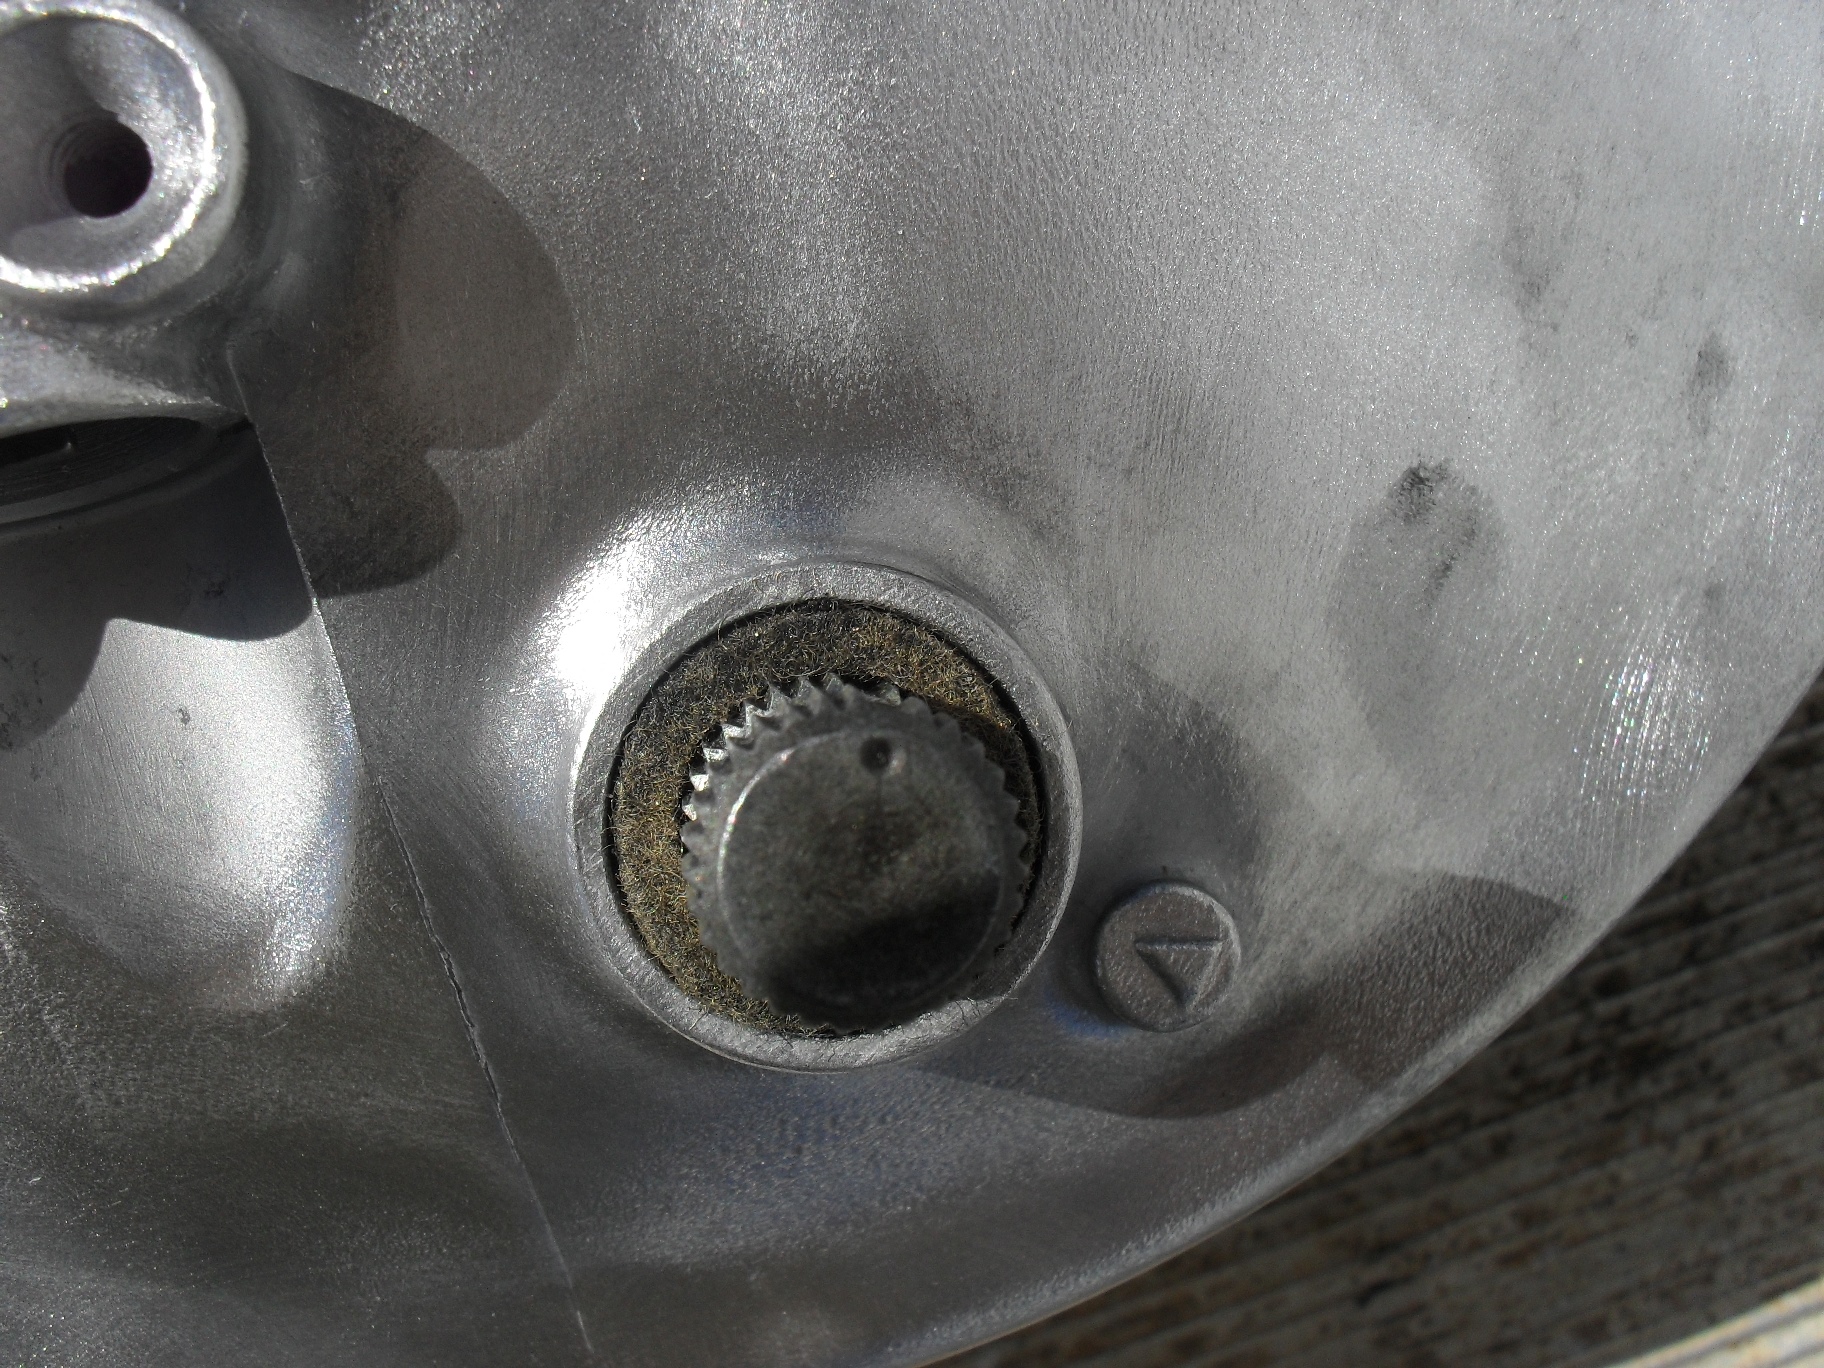
Third step here is to slide the washer with the wear indicator tab back down onto the brake cam over the felt on the side that you removed it from which should have a pointer cast into it like in the picture below. This little part has splines and has an alignment groove so that it will only fit one way. It it doesn’t just just slide back on you have it turned the wrong way and need to move it around the until the wide spline lines up with the wide groove.

A plain thin washer slides down to cover the felt on the other side of the axle hole.

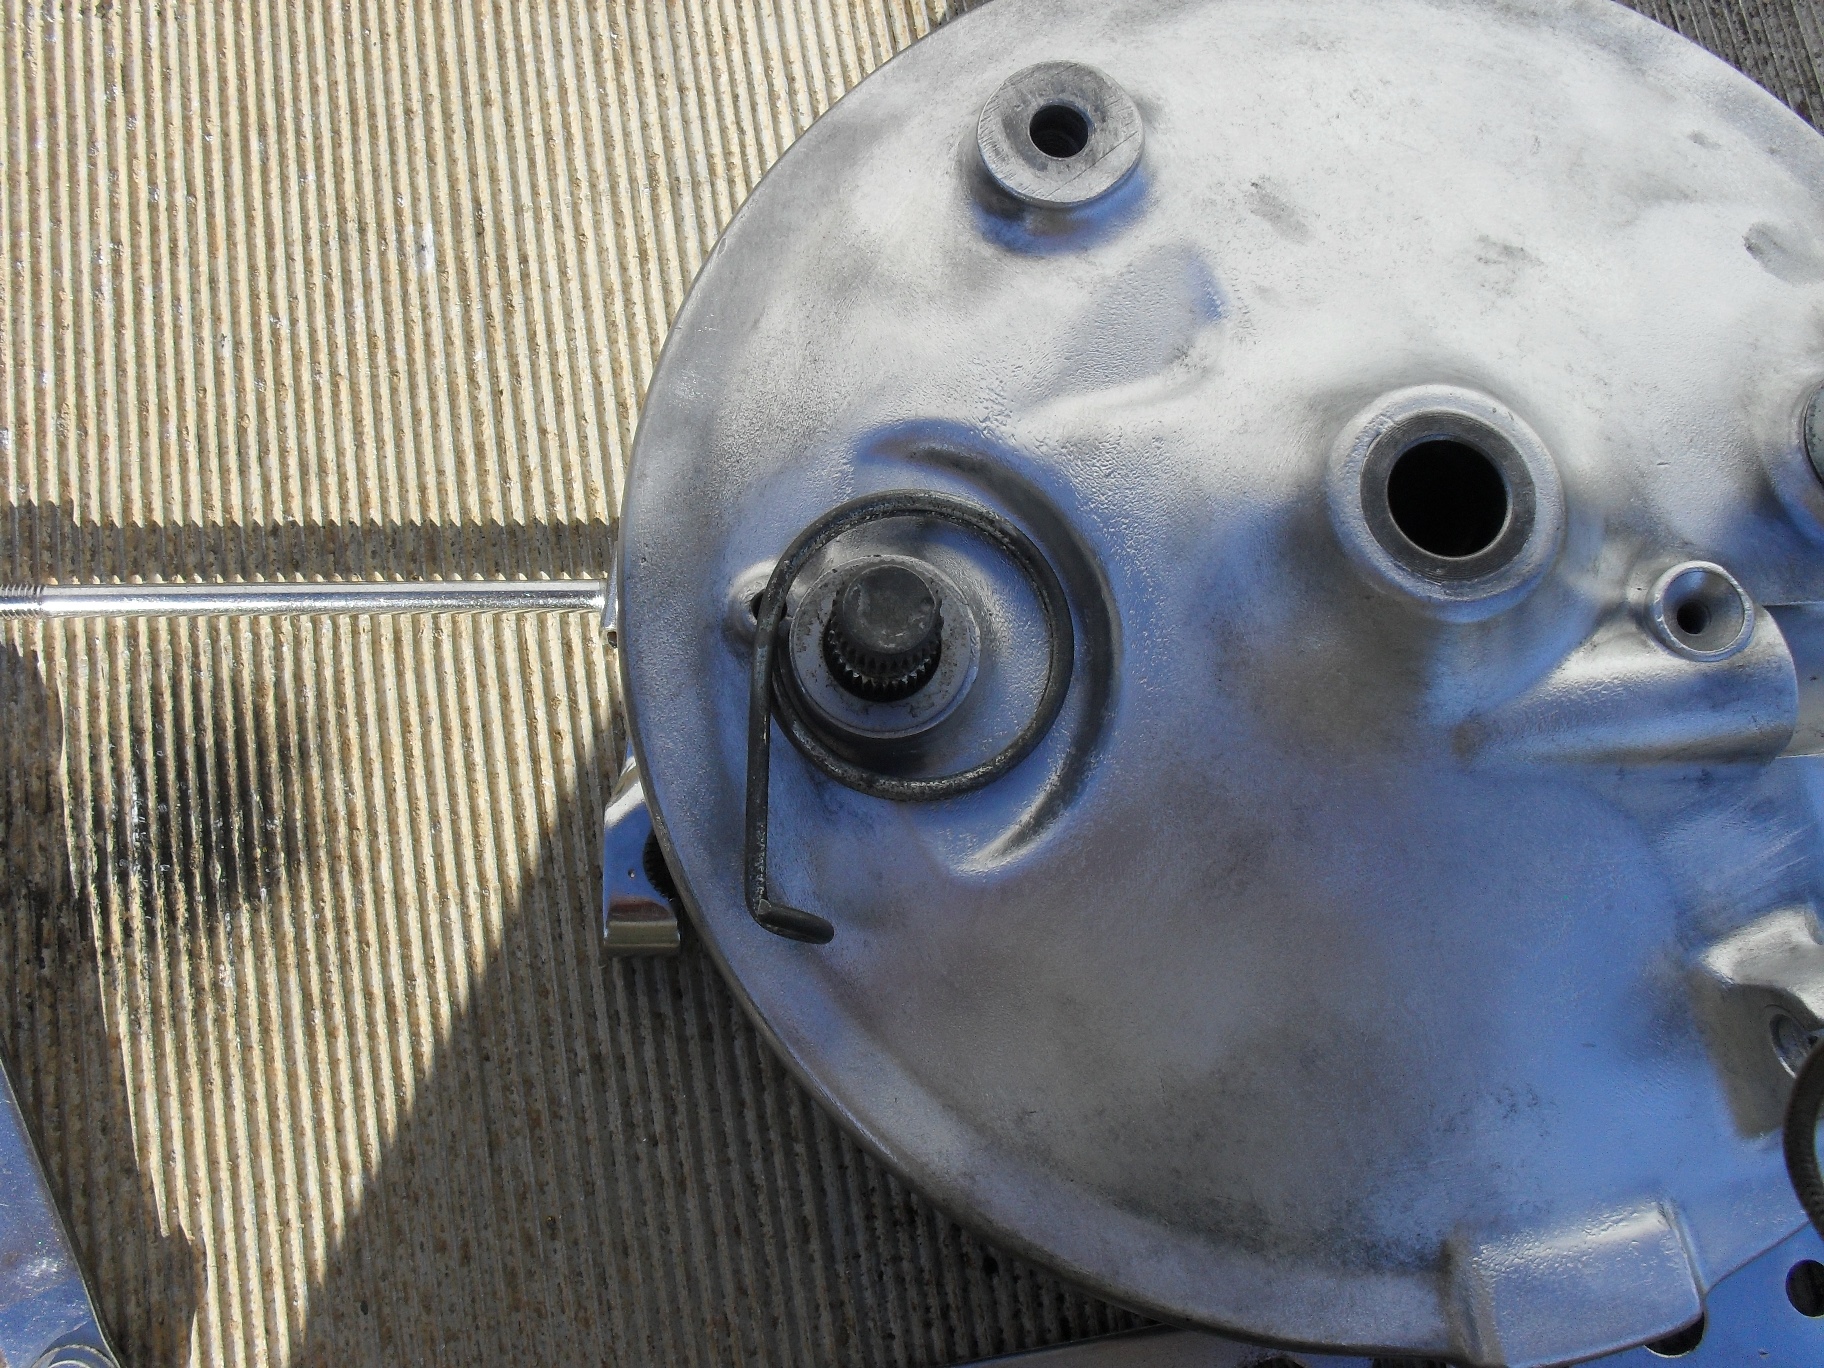
The external return spring is dropped into place next.
On of the really nice thing about most old Japanese bikes are the presence of dots on the brake cams & arms to help you line them up correctly the first time.
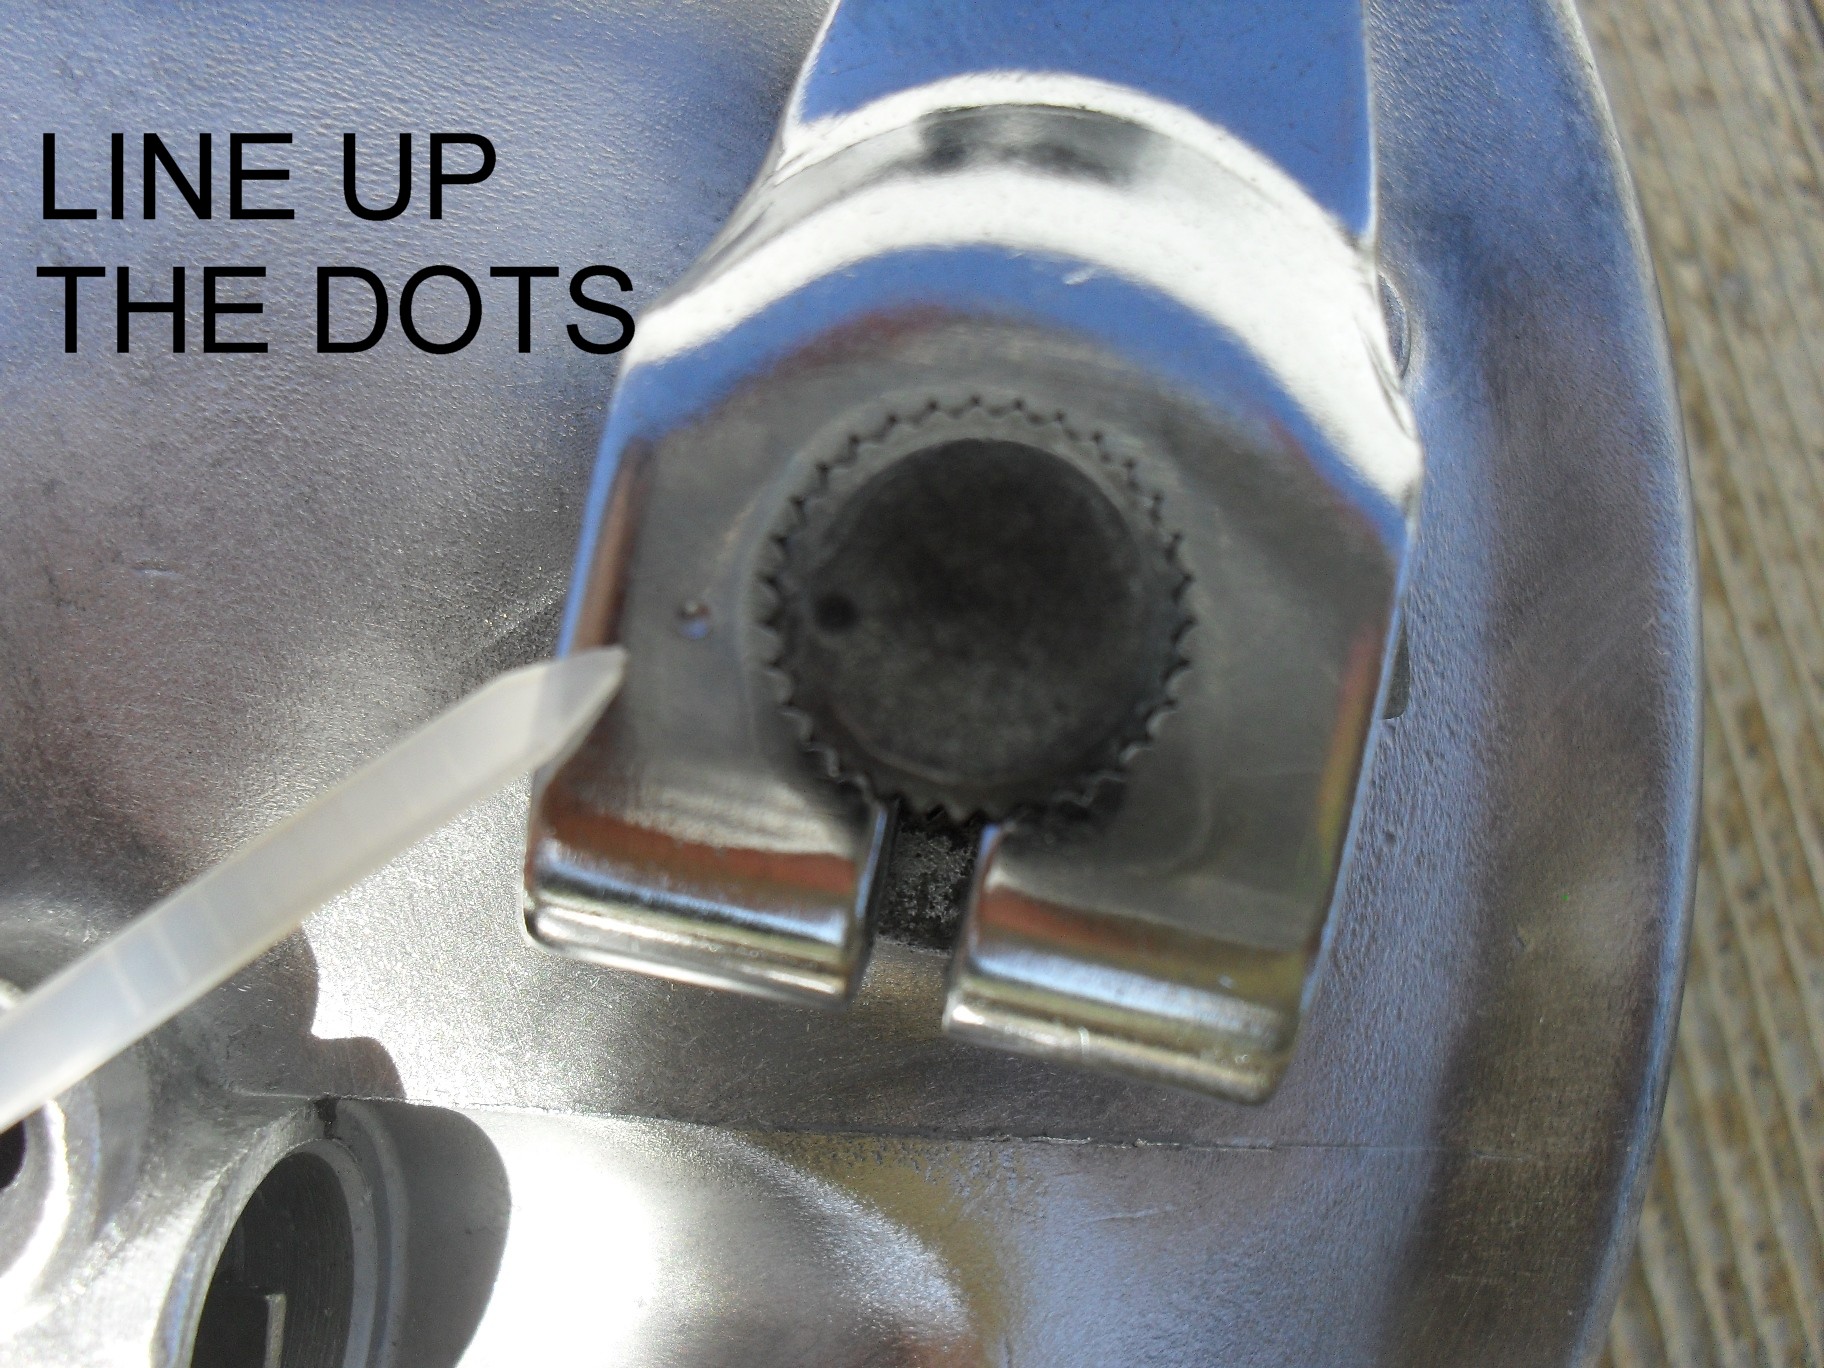
Put the arms on one at the time aligning the dots. I normally have brake rod loosely installed between the two arms before assembly just because I think it is easier than connecting the two brake arms afterward. If it is easier for you to do it the other way then that is fine too.

Do not tighten the lock nut on the brake arm yet! Install the brake shoes first!

Adjust the brake rod as necessary to get both shoes to move at as close to the exact same time as possible. If you are a real demanding performance nut build yourself a jig and use a couple of dial indicators to ensure that the pads are moving together exactly. For the vast majority of us eye-balling it will work fine and any teeny little mismatch that occurs will be wiped out within a couple of stops

Now you can tighten down that lock nut. Here’s a little video to show you how the cams move the shoes when the brakes are actuated.
Now its time to get to work on the rest of the front wheel so that it can be installed on the front of Project wAmmo!
Peace Y’all


Pingback: More About Vintage Motorcycle Drum Brakes - Life on 2 Wheels (& other stuff)