An Enjoyable Compilation of Bad Ideas (a Custom Baja Minibike)

compilation :

[kom-puhley-shuh n]

noun

1. the act of compiling      2. something compiled

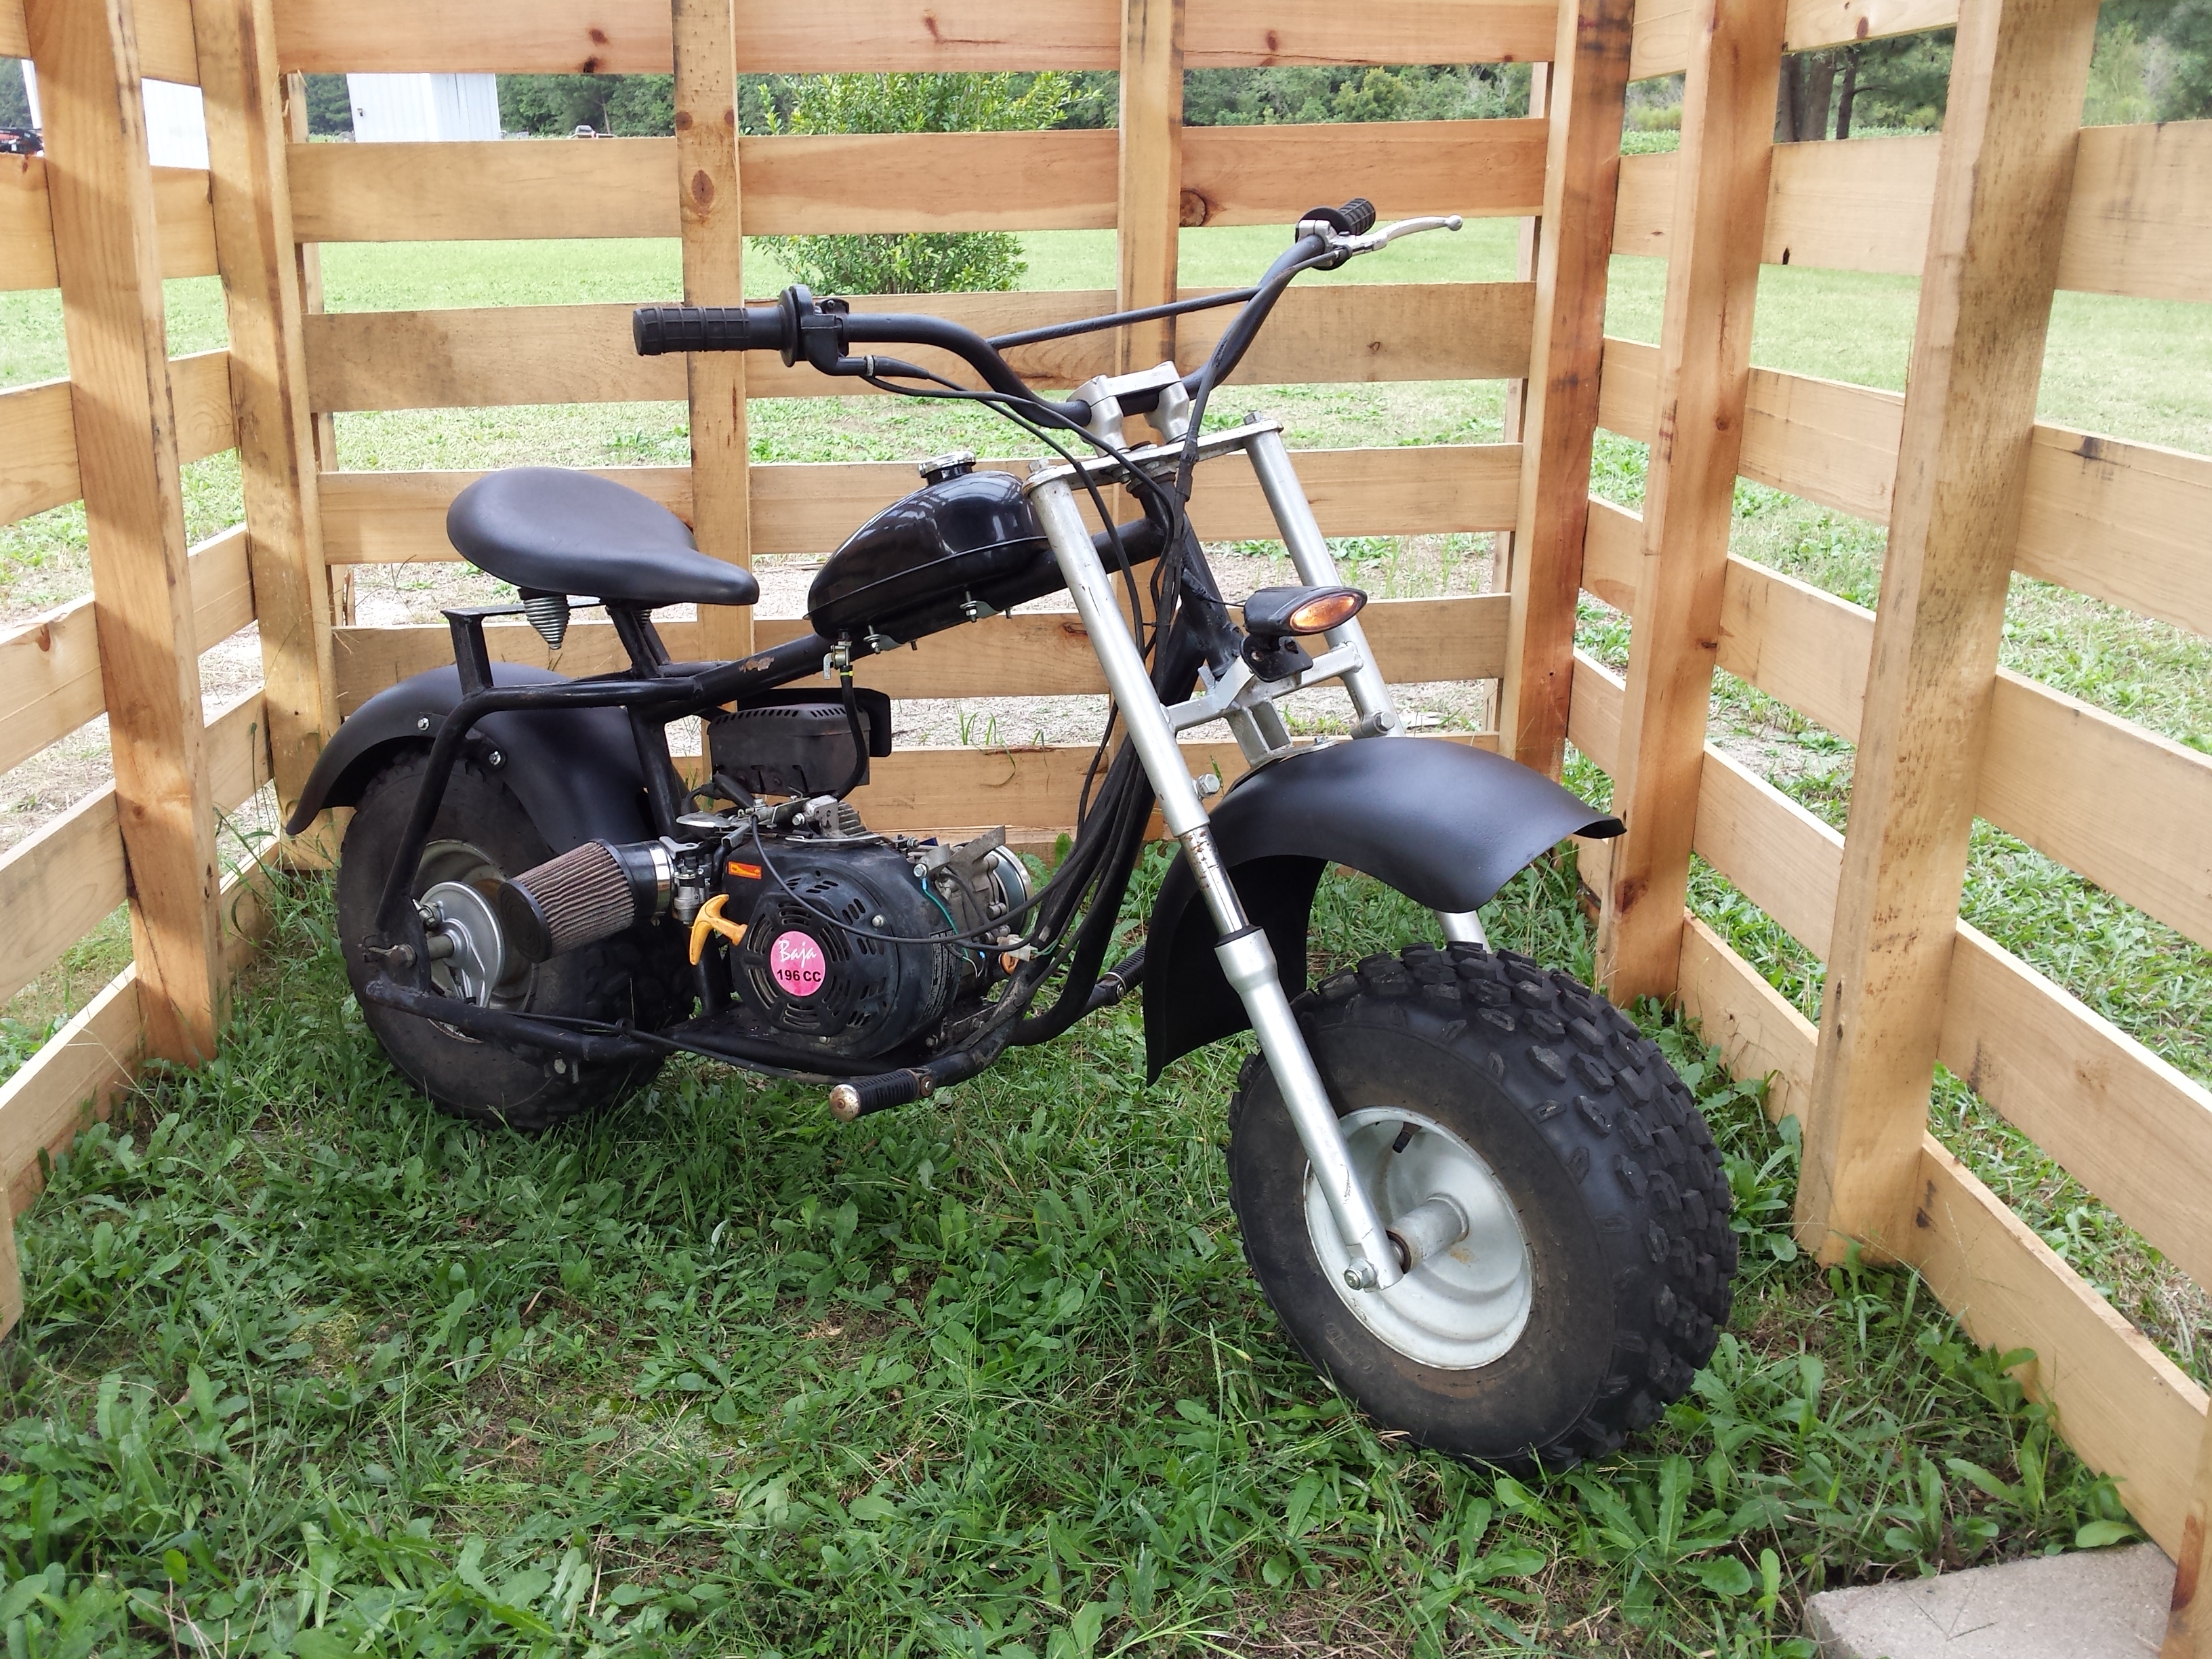
Yes that sounds like the perfect definition for this little project, it was a compilation, and now it is a compilation. It started out as a little extra sweetener thrown in on a deal when I purchased an old motorcycle to part out. Originally I planned to see if it would run and do the bare minimum to get it rideable and flip it. One of the great things about the Baja MB165 & MB200 minibikes is the fact that they are actually big enough for a grown man to ride comfortably. The bad thing for a full grown idiot like myself is that they are slooow. This is great when your kid is riding it but kind of dull for daddio. Plus there was no dirtbike in my stable so I decided to keep it and have some fun with it!

The original gas tank was full of rust and the carburetor was gummed up but the engine was otherwise sound. It turned out to be so inexpensive to replace the Honda clone carburetor that was on it, that there was no point in overhauling it. The rusted original engine mounted fuel tank has been removed and tossed in favor of a motorized bicycle gas tank
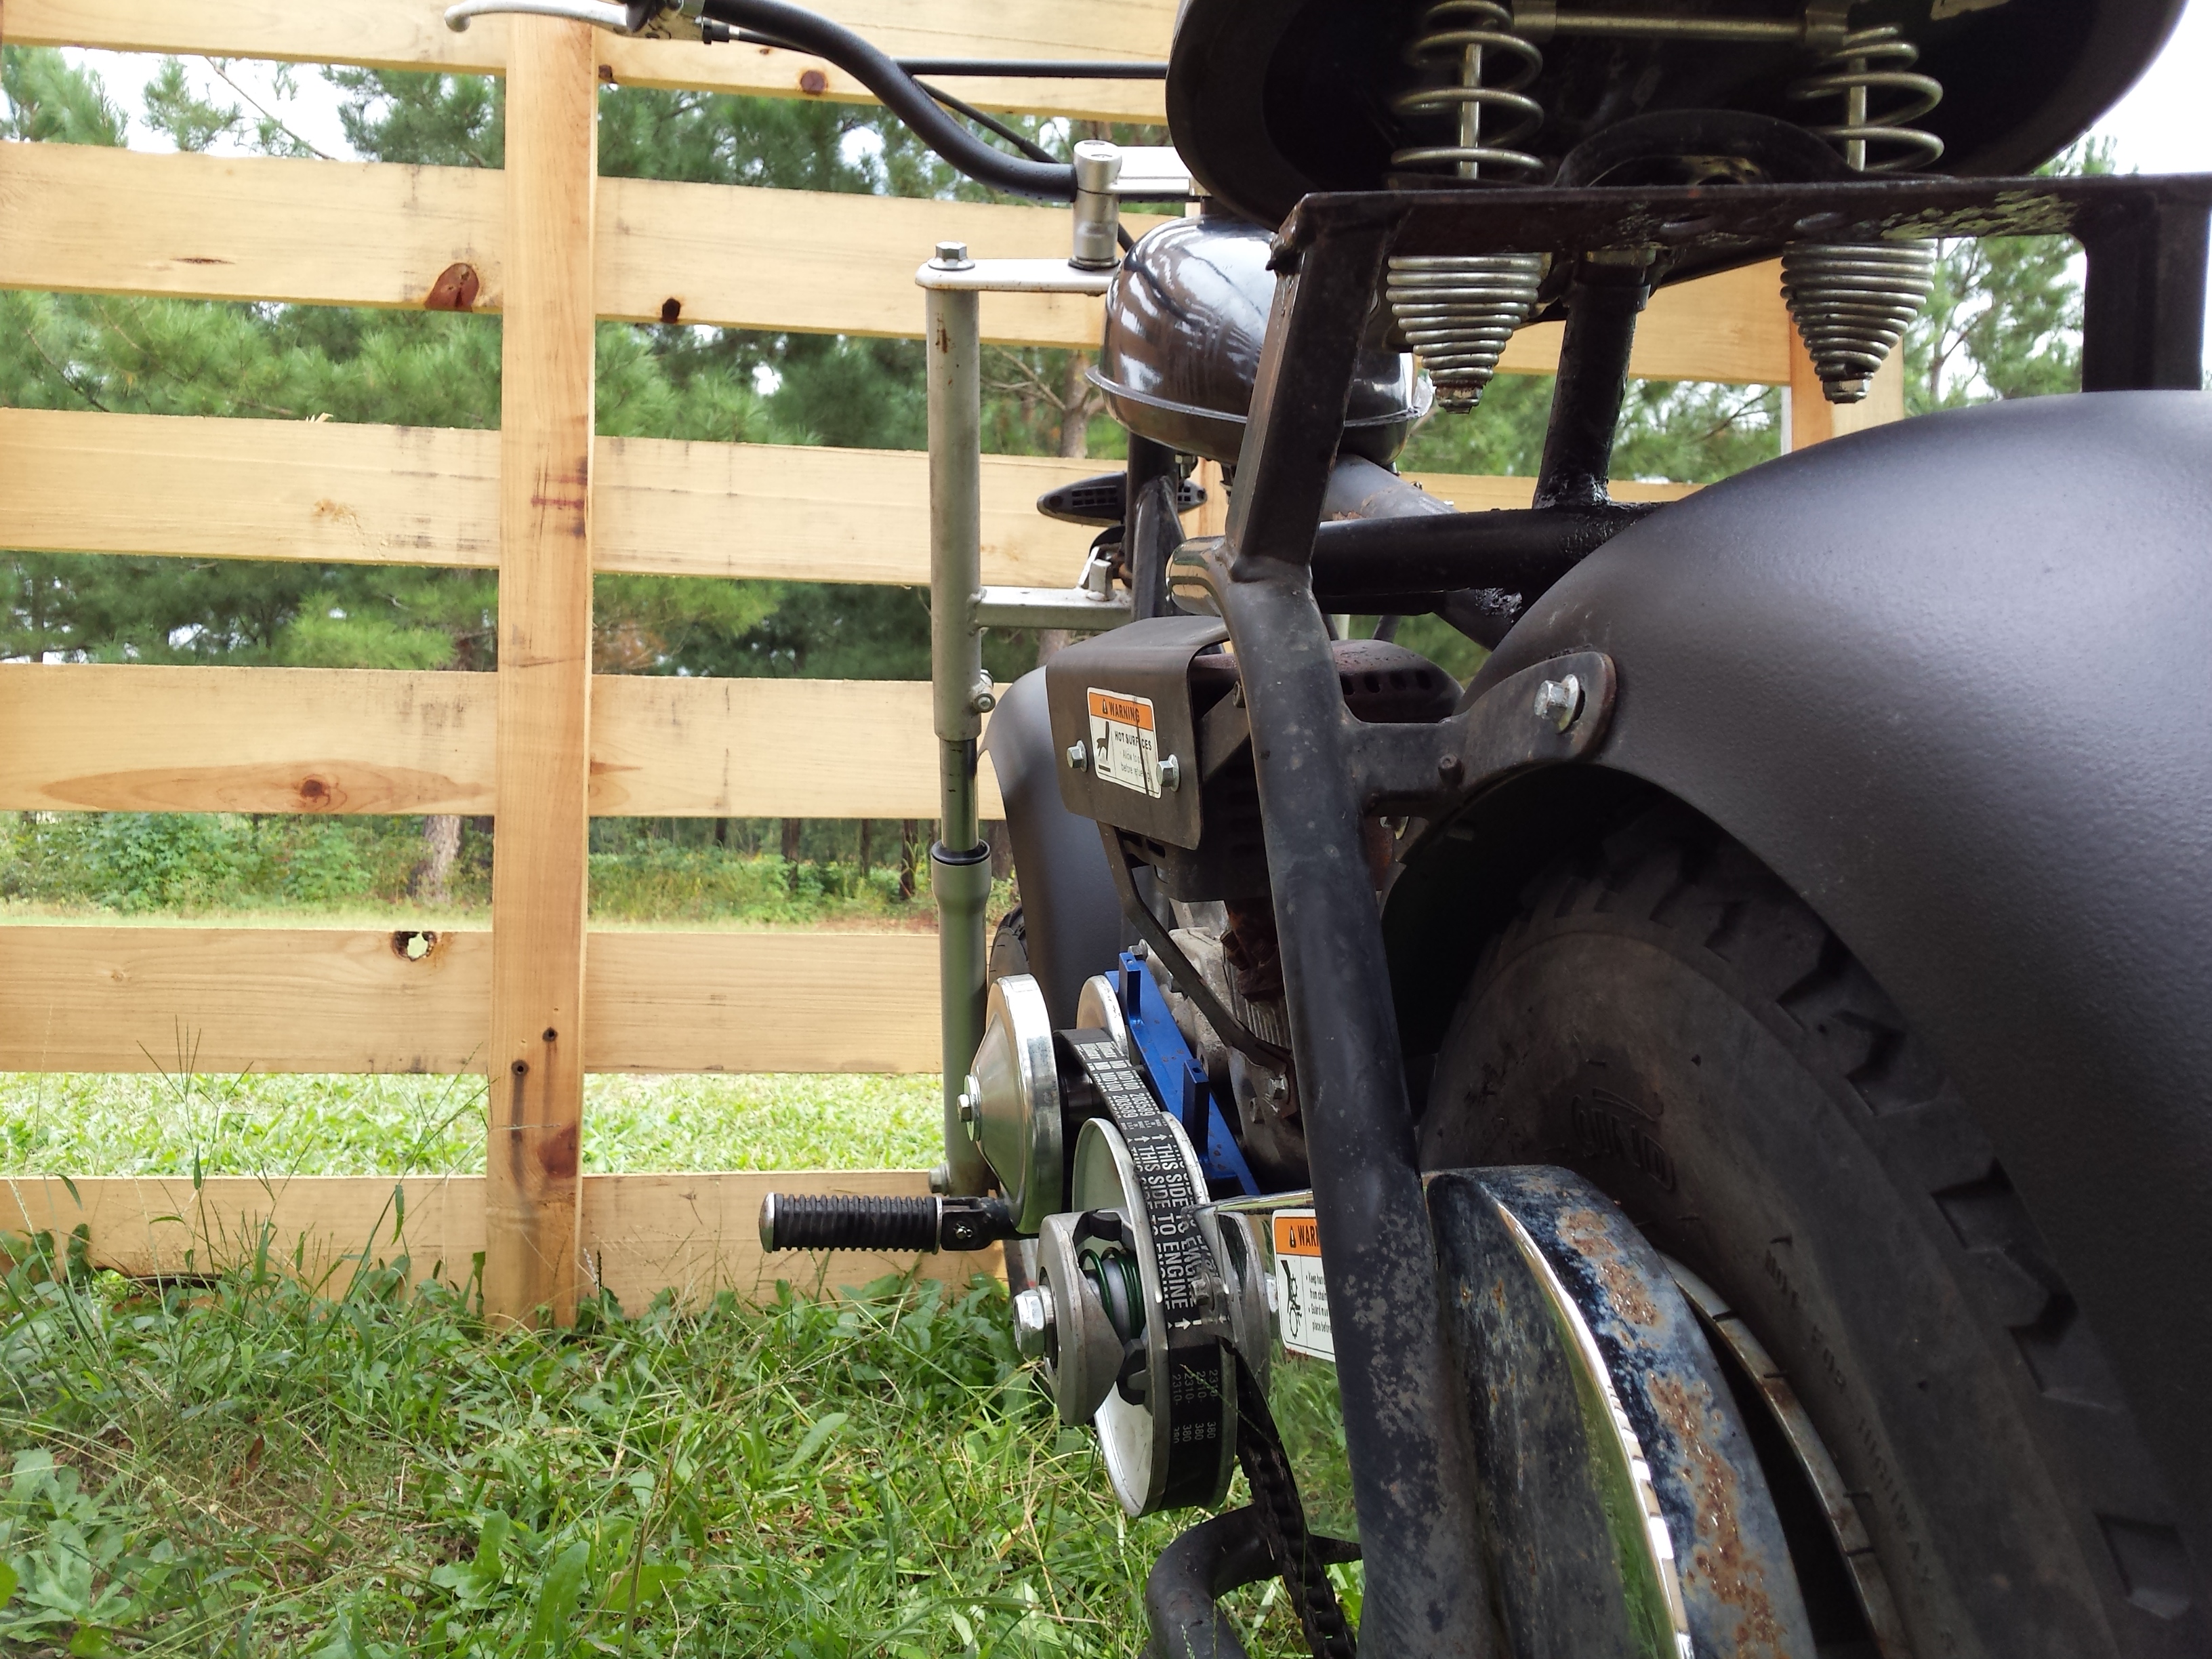
. Plus I decided to use an aftermarket air filter as much for the looks of it as anything else. The stock muffler was retained so that I could use it for driving to my deer stand without disturbing every creature for miles around.

<custom headlight baja minibike>

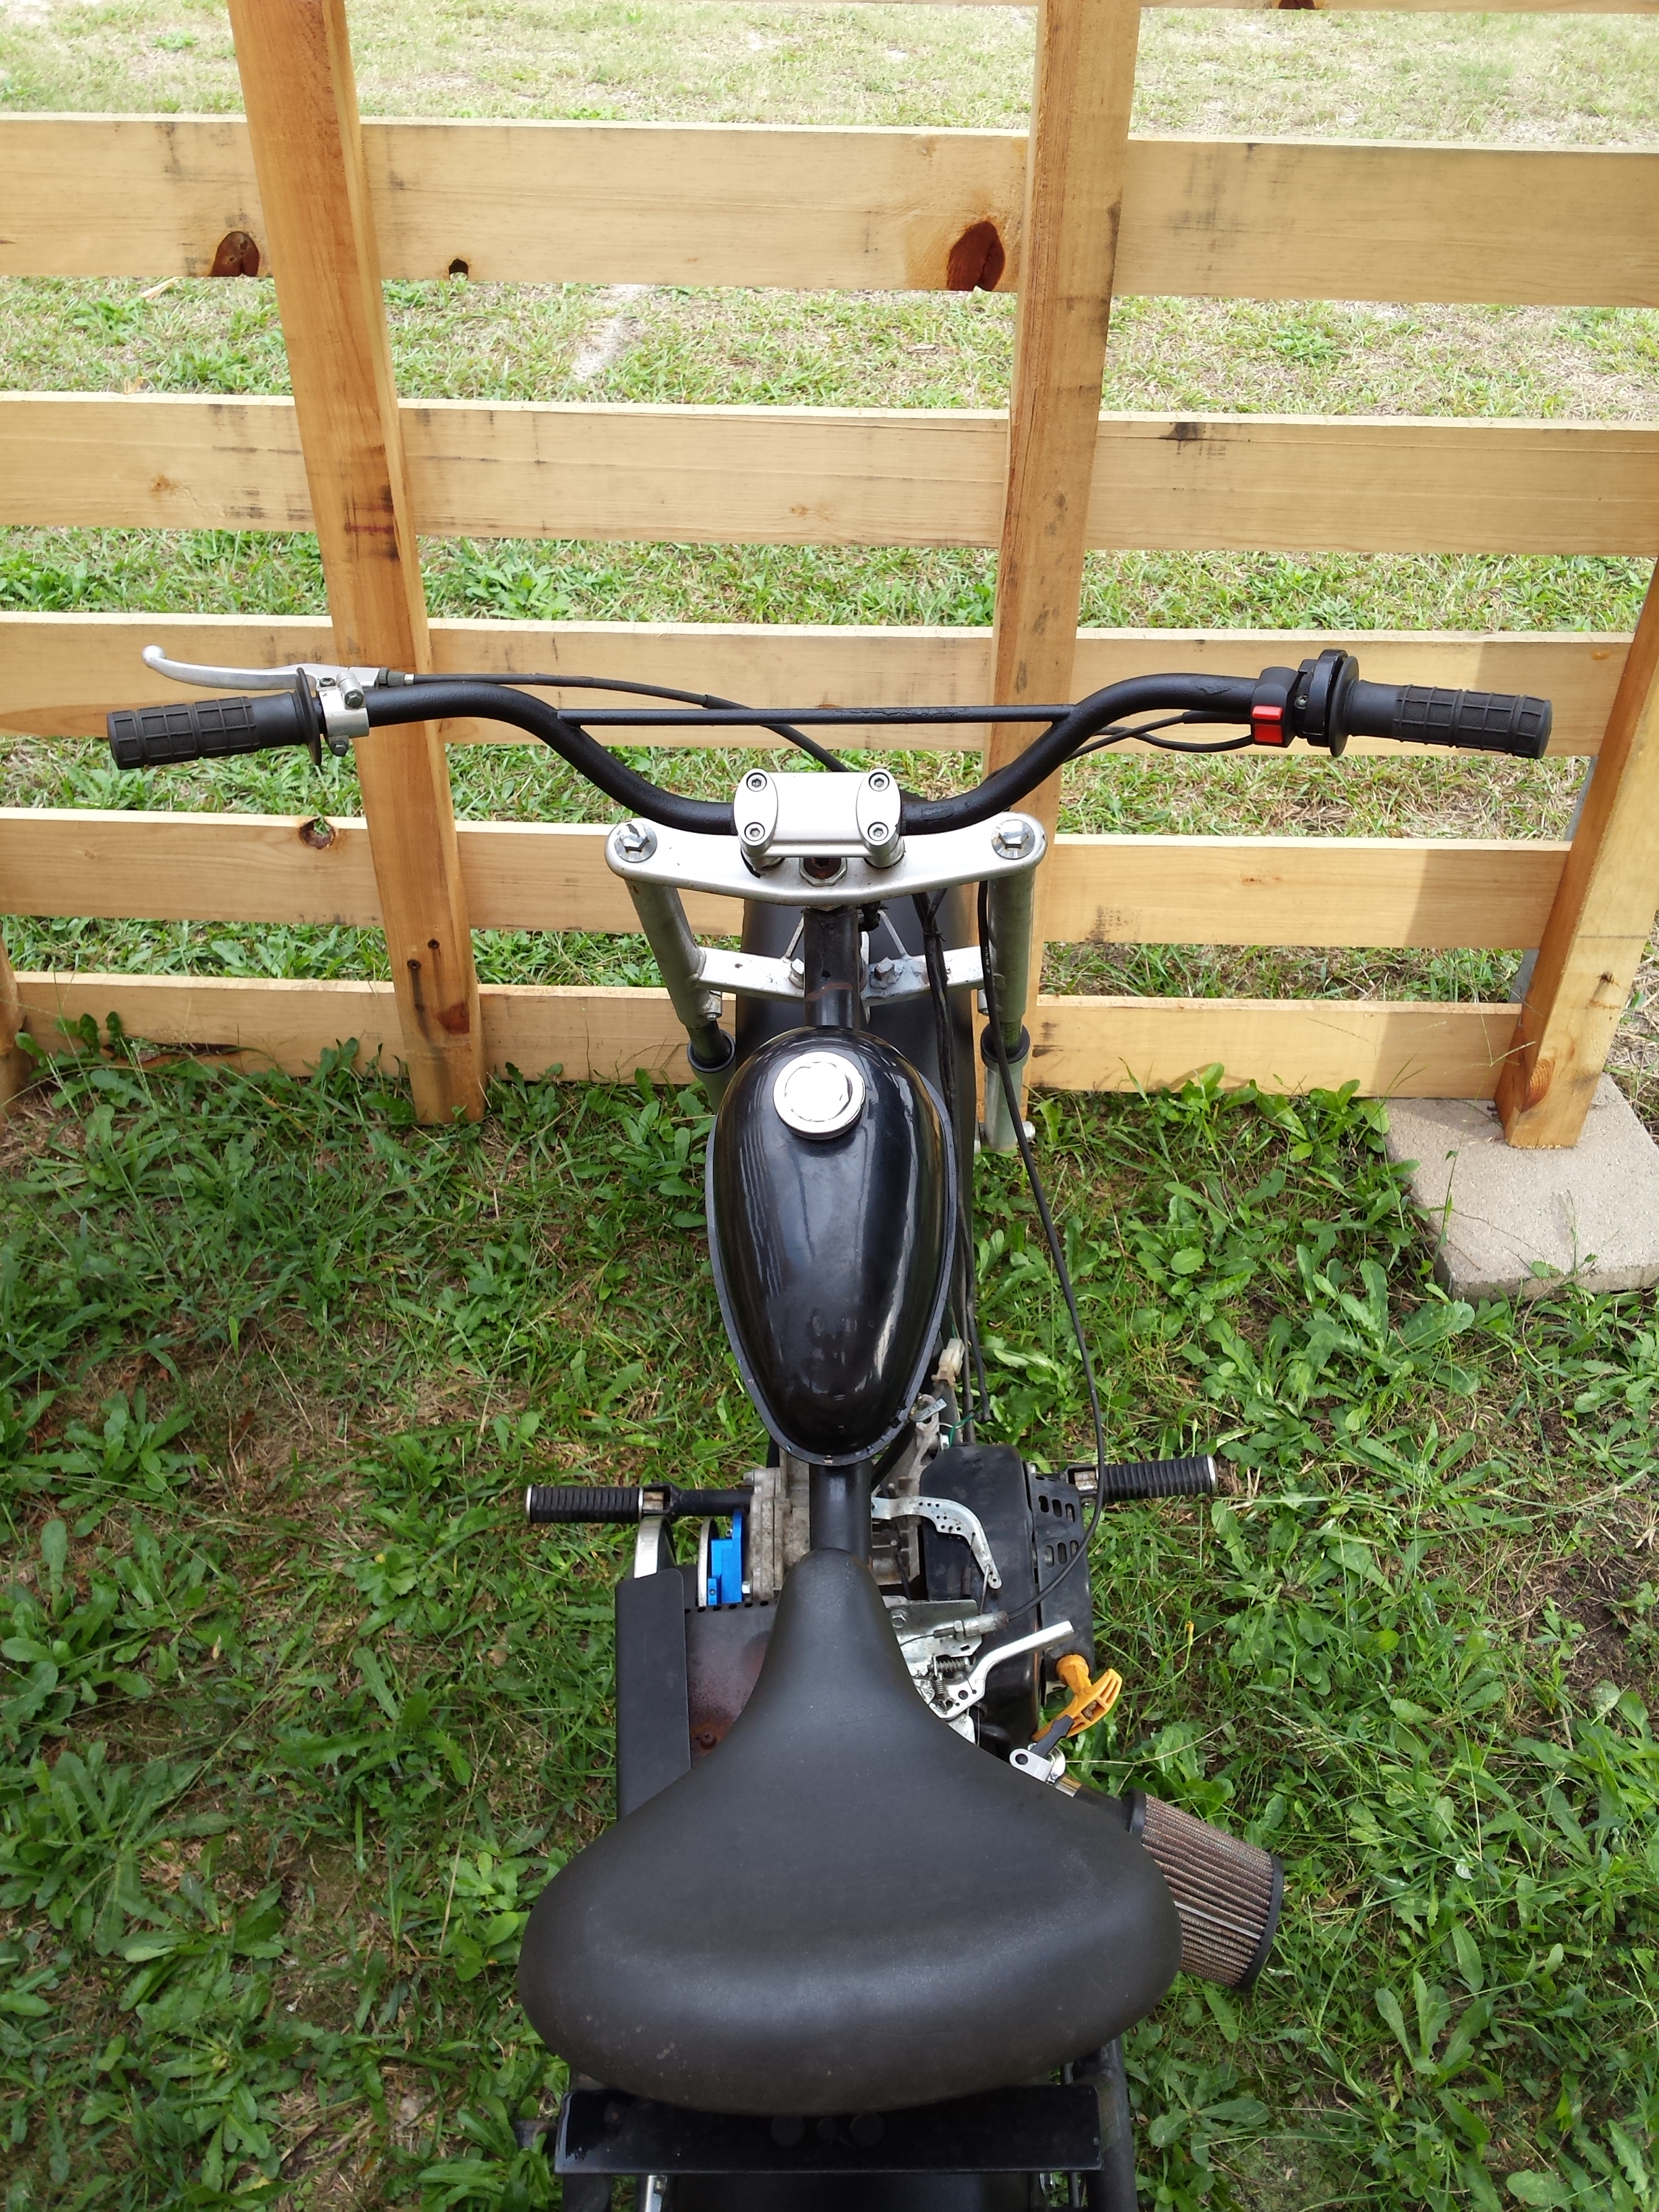
The other really noticeable bad idea you see here is the addition of a large heavy duty sprung bicycle seat. This was accomplished by cutting up an old jack handle and welding it to the frame. The seat has been kind of a mixed blessing. the extra height gives an even more comfortable riding position and the springs do help a teeny tiny little bit on small bumps, but the padding is so thin on this particular seat, that the engine vibration will buzz your taint if you slide too far forward on it. No it’s not an enjoyable feeling either, sorry.

<mini rat bike patina>

Of course, being me I kept as much of the crustiness as I could only covering the fenders and the crappy looking dirtbike handlebar with a thick coat of do it yourself truck bed liner.

<custom baja mb165>

The handlebar came from an eighties Honda XR250. It had a fair amount of surface rust that I knocked off with a wire brush before coating it with the bed liner. I am sure the rust will eventually come back through but that’s okay with me for now. Changing out the handlebar was the single best comfort & control improvement to this minibike. From the factory Baja installs what looks like a “beach cruiser motorcycle” handlebar on it. Very good for little people with short arms, not so good for long armed gorillas like myself. The foot pegs are a set of passenger pegs from another old Honda motorcycle and are much bigger & sturdier than the oem items that came with it.

<xr250 handlebar on minibike>

Also missing was the original big round chrome chopper style headlight, but in all honesty it would have been ditched in favor of the evil eye shaped driving lamp you see below. Like the original this light’s a bit dim at idle, but give it some gas and it keeps getting brighter & brighter.

<the evil eye>

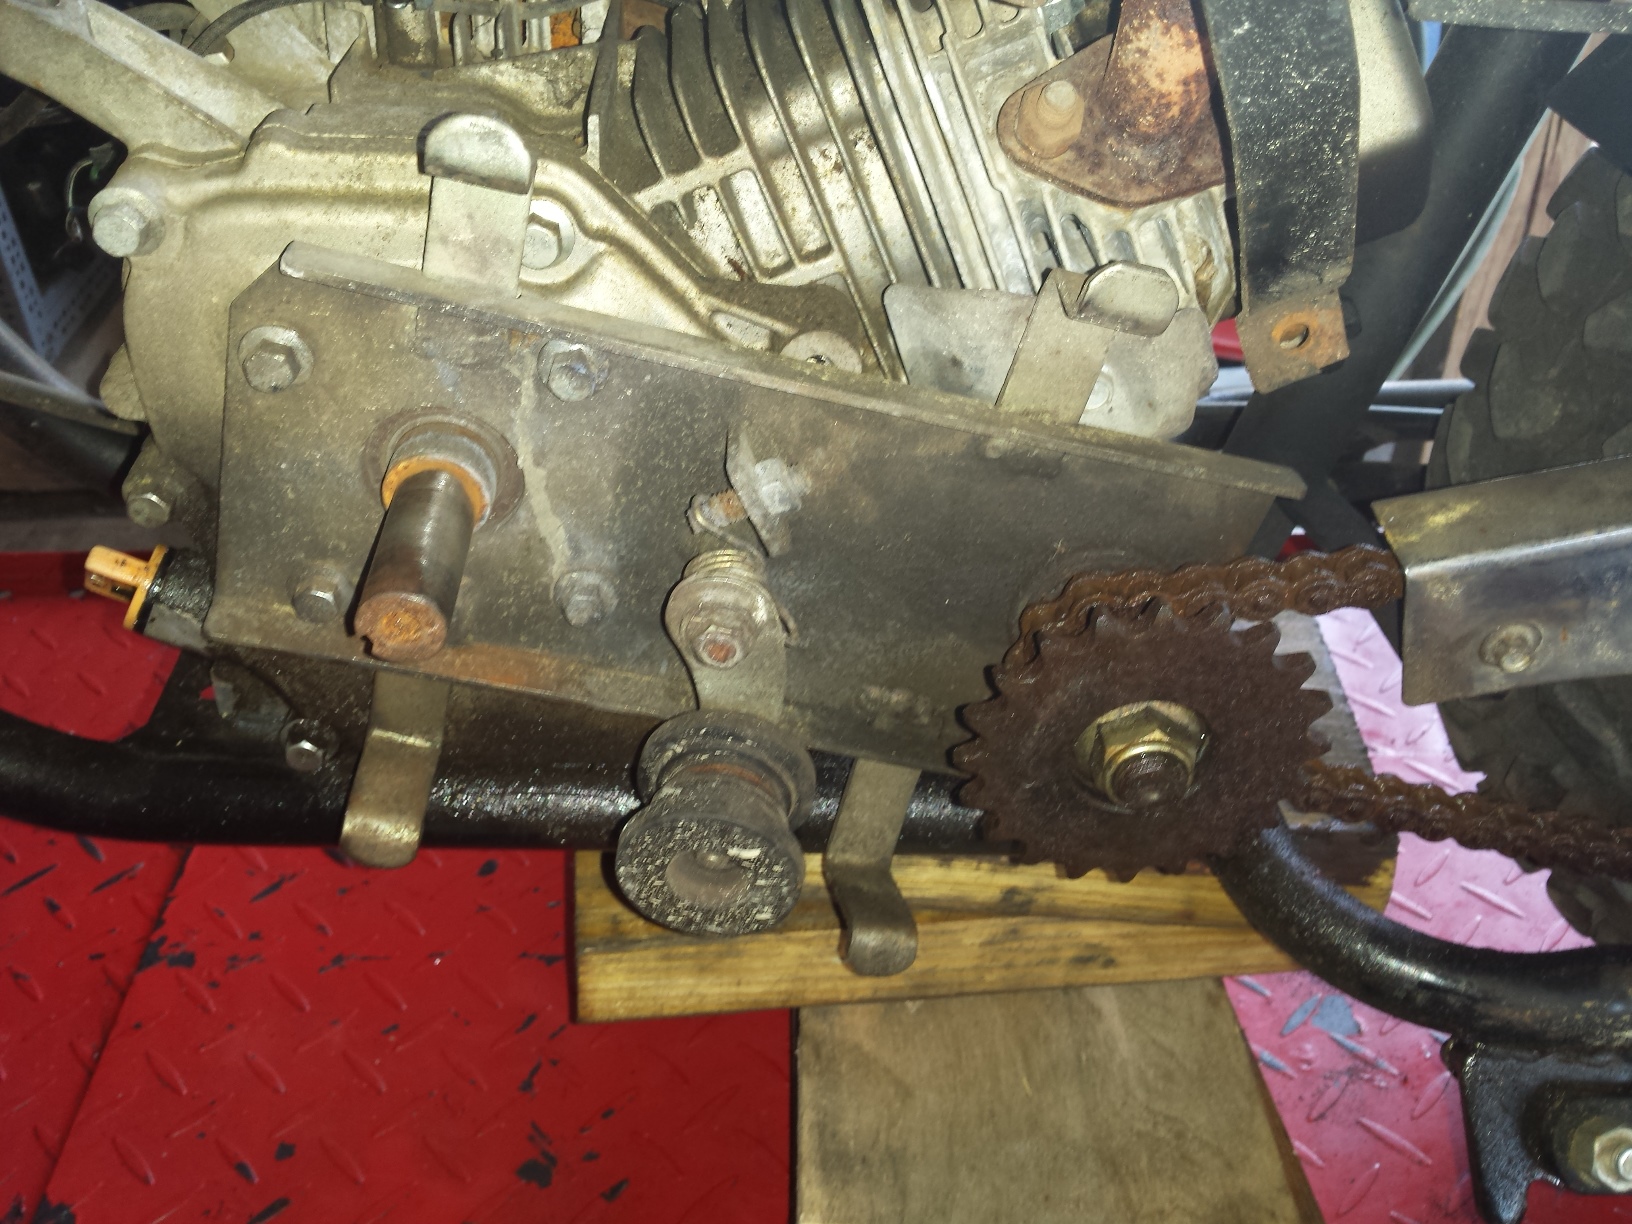
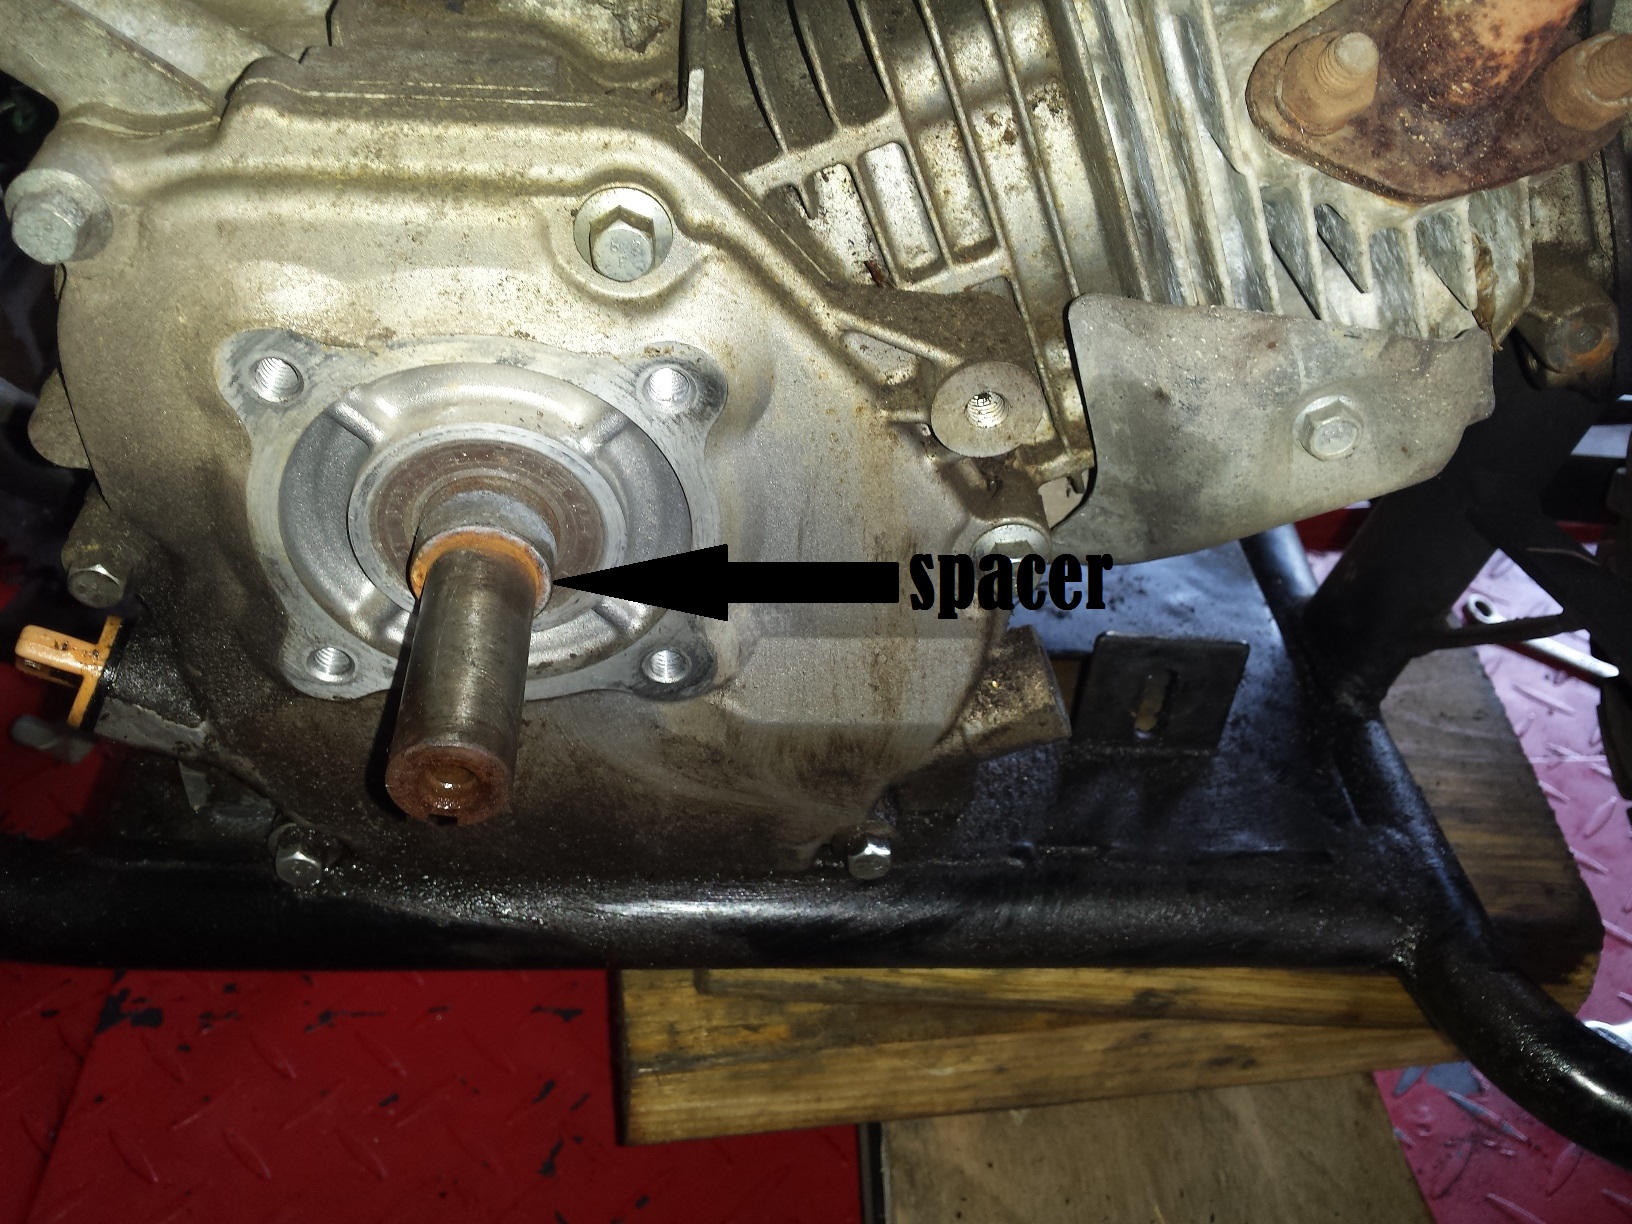
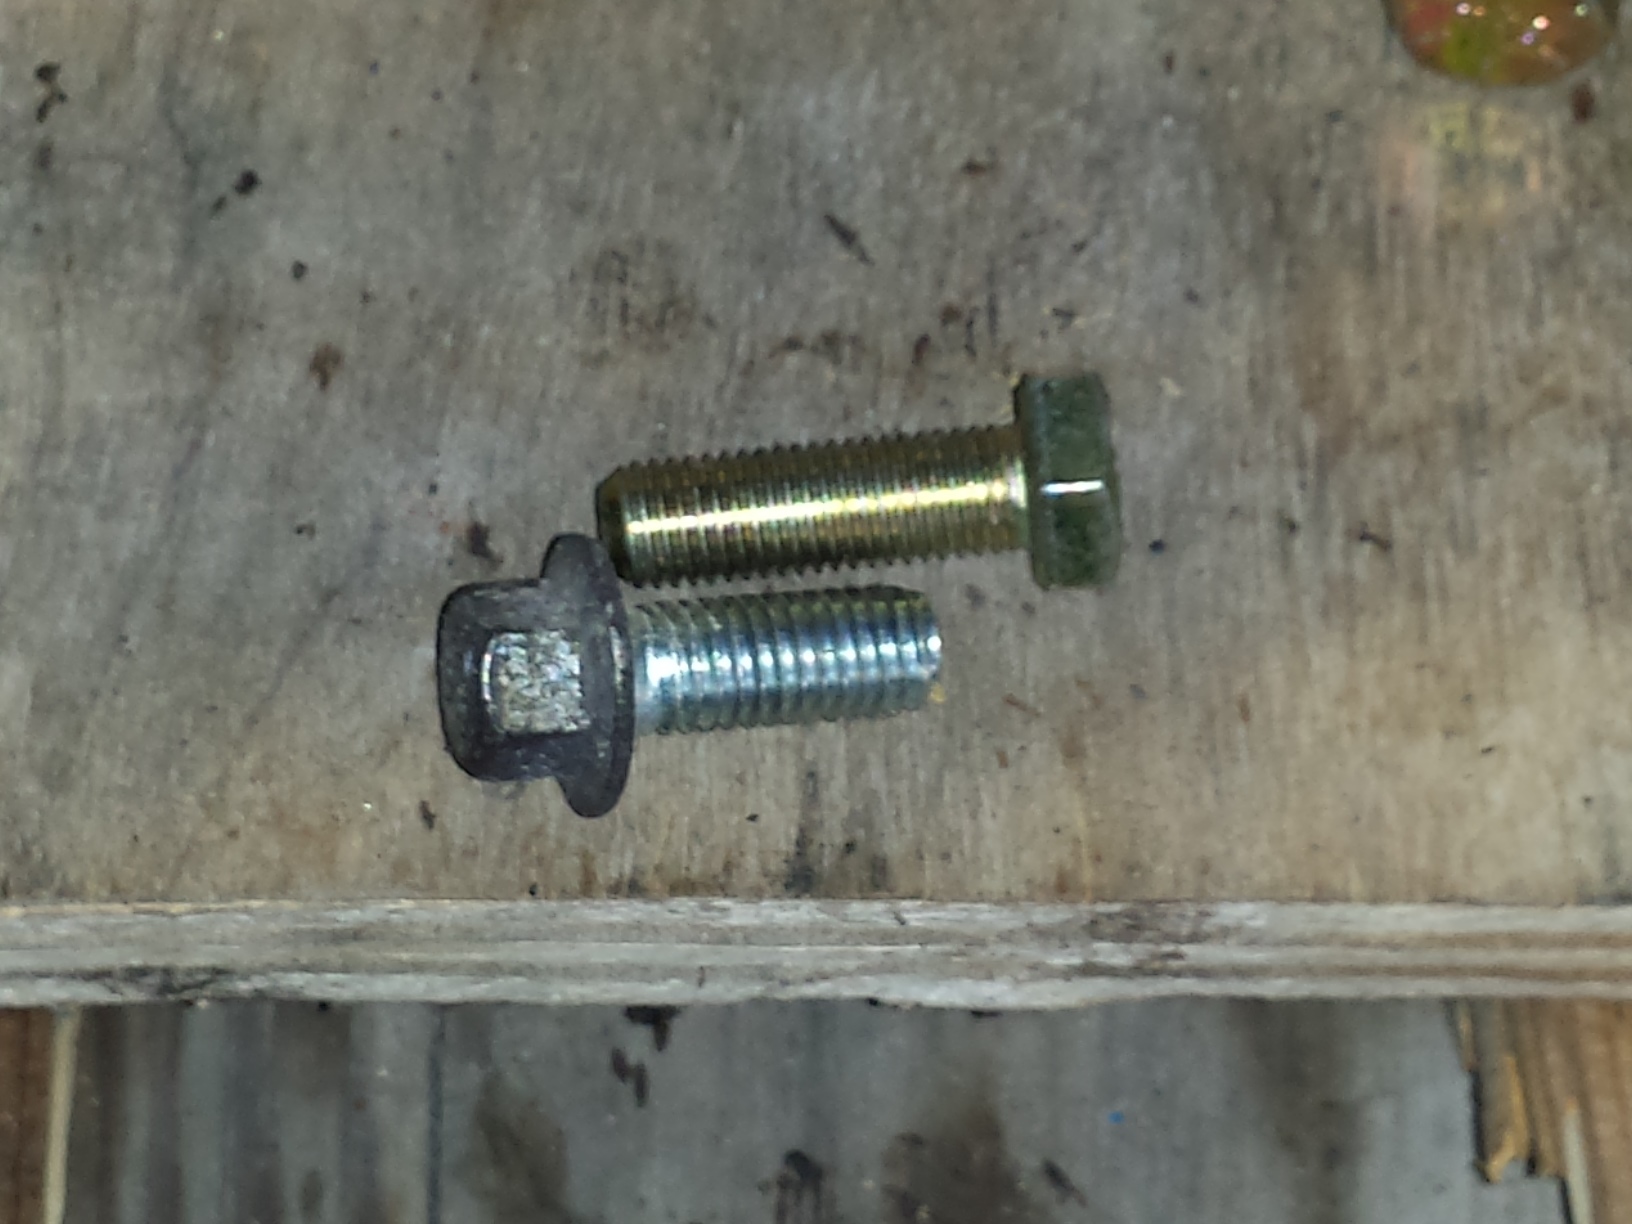
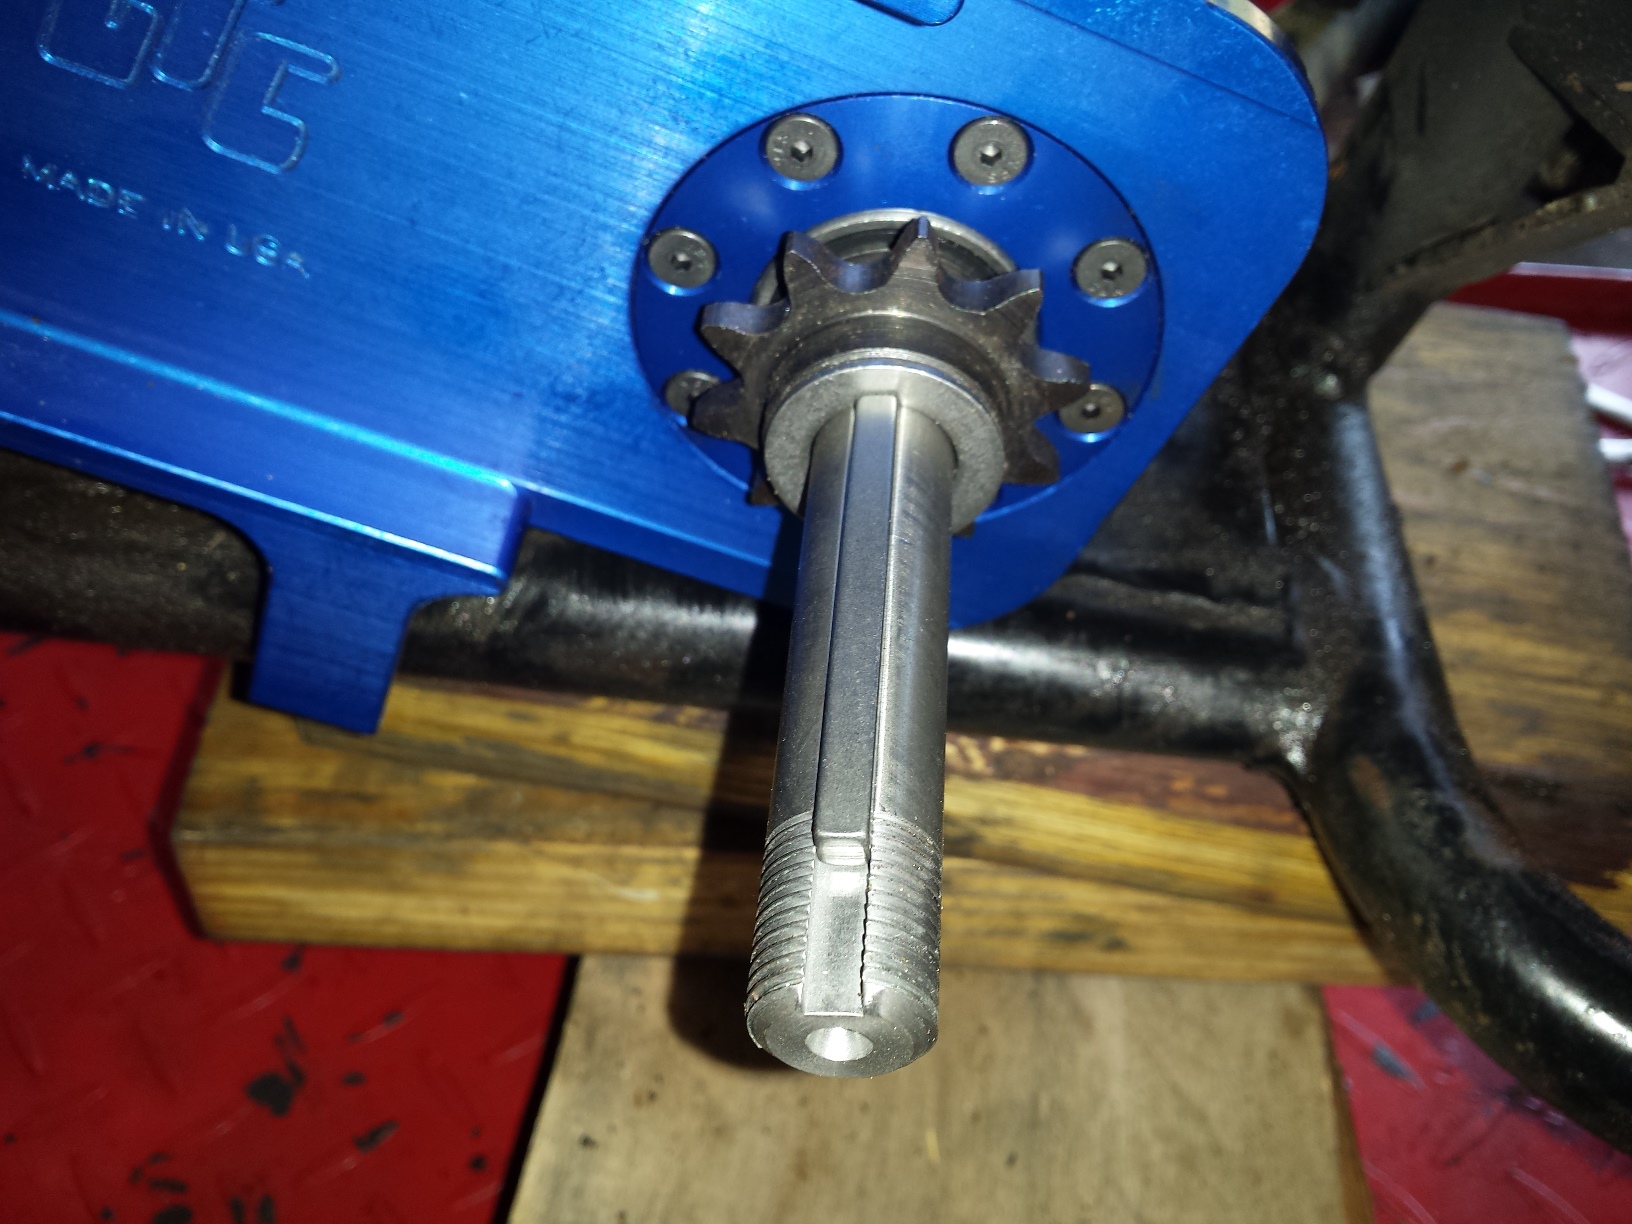
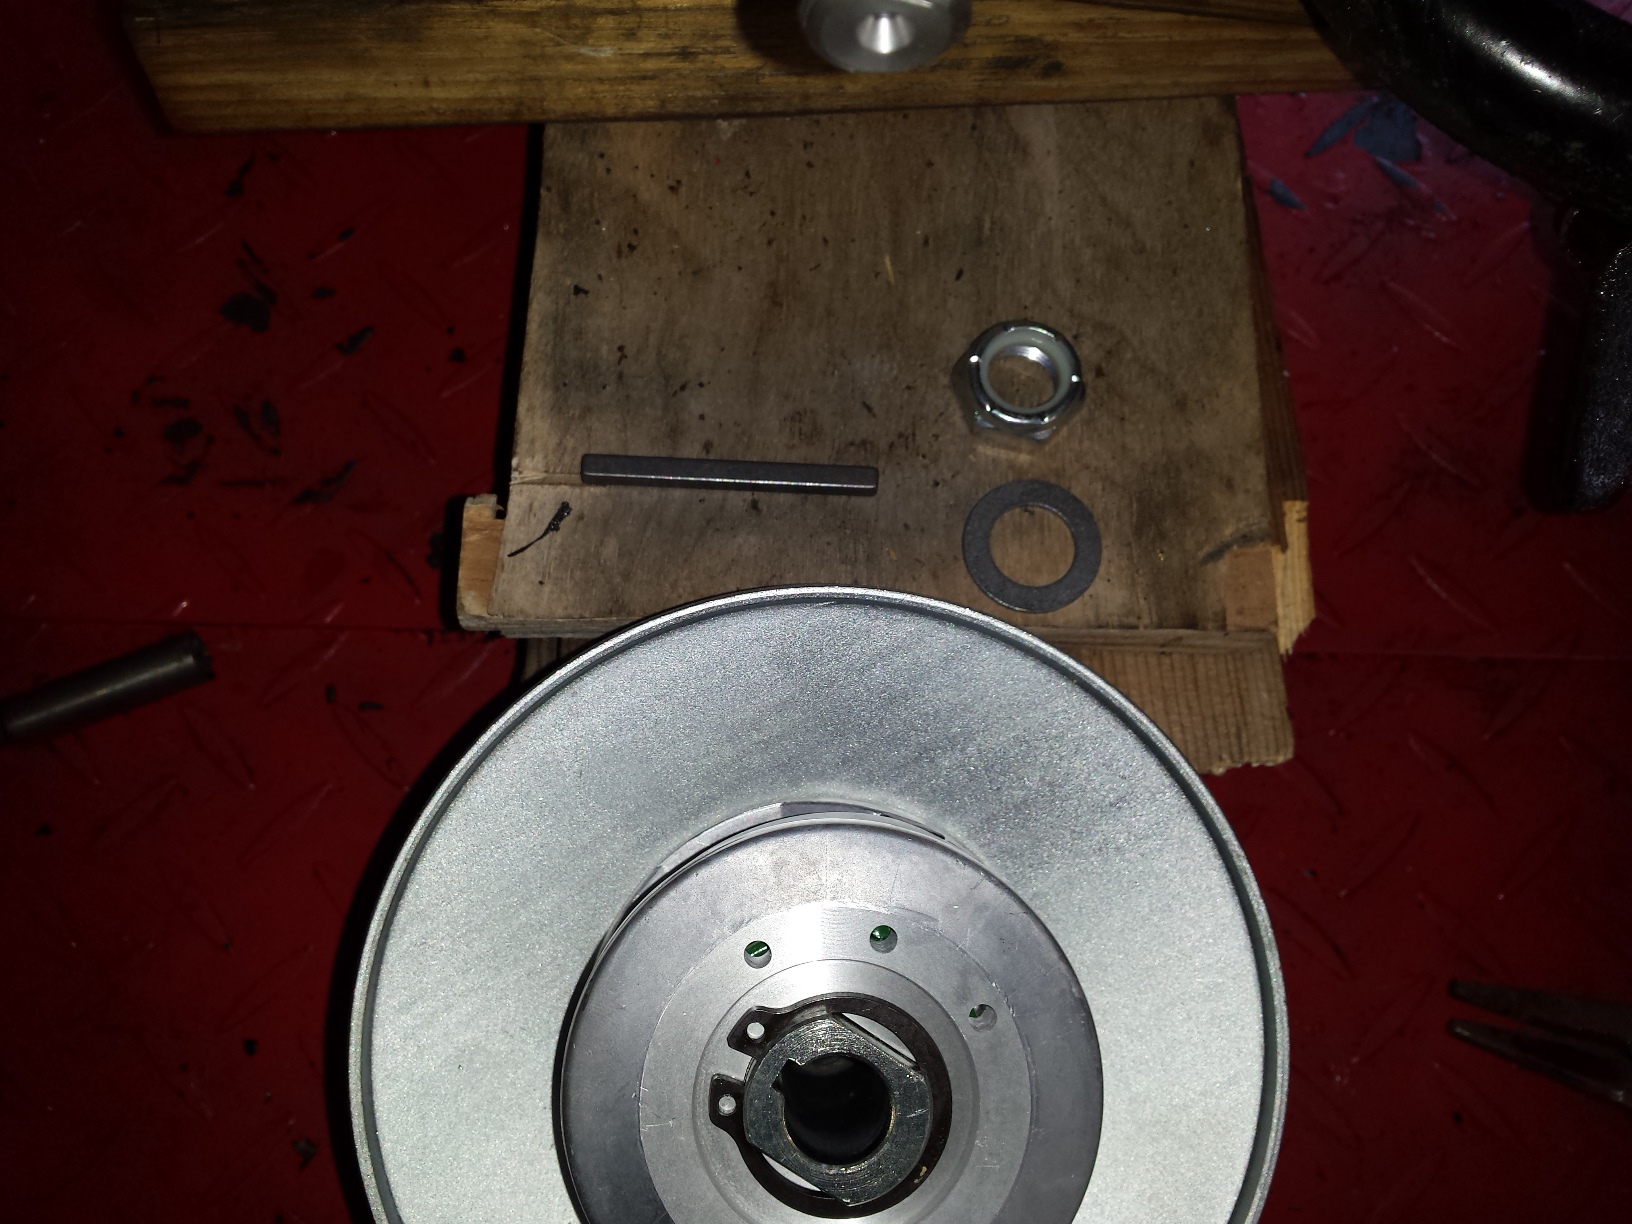
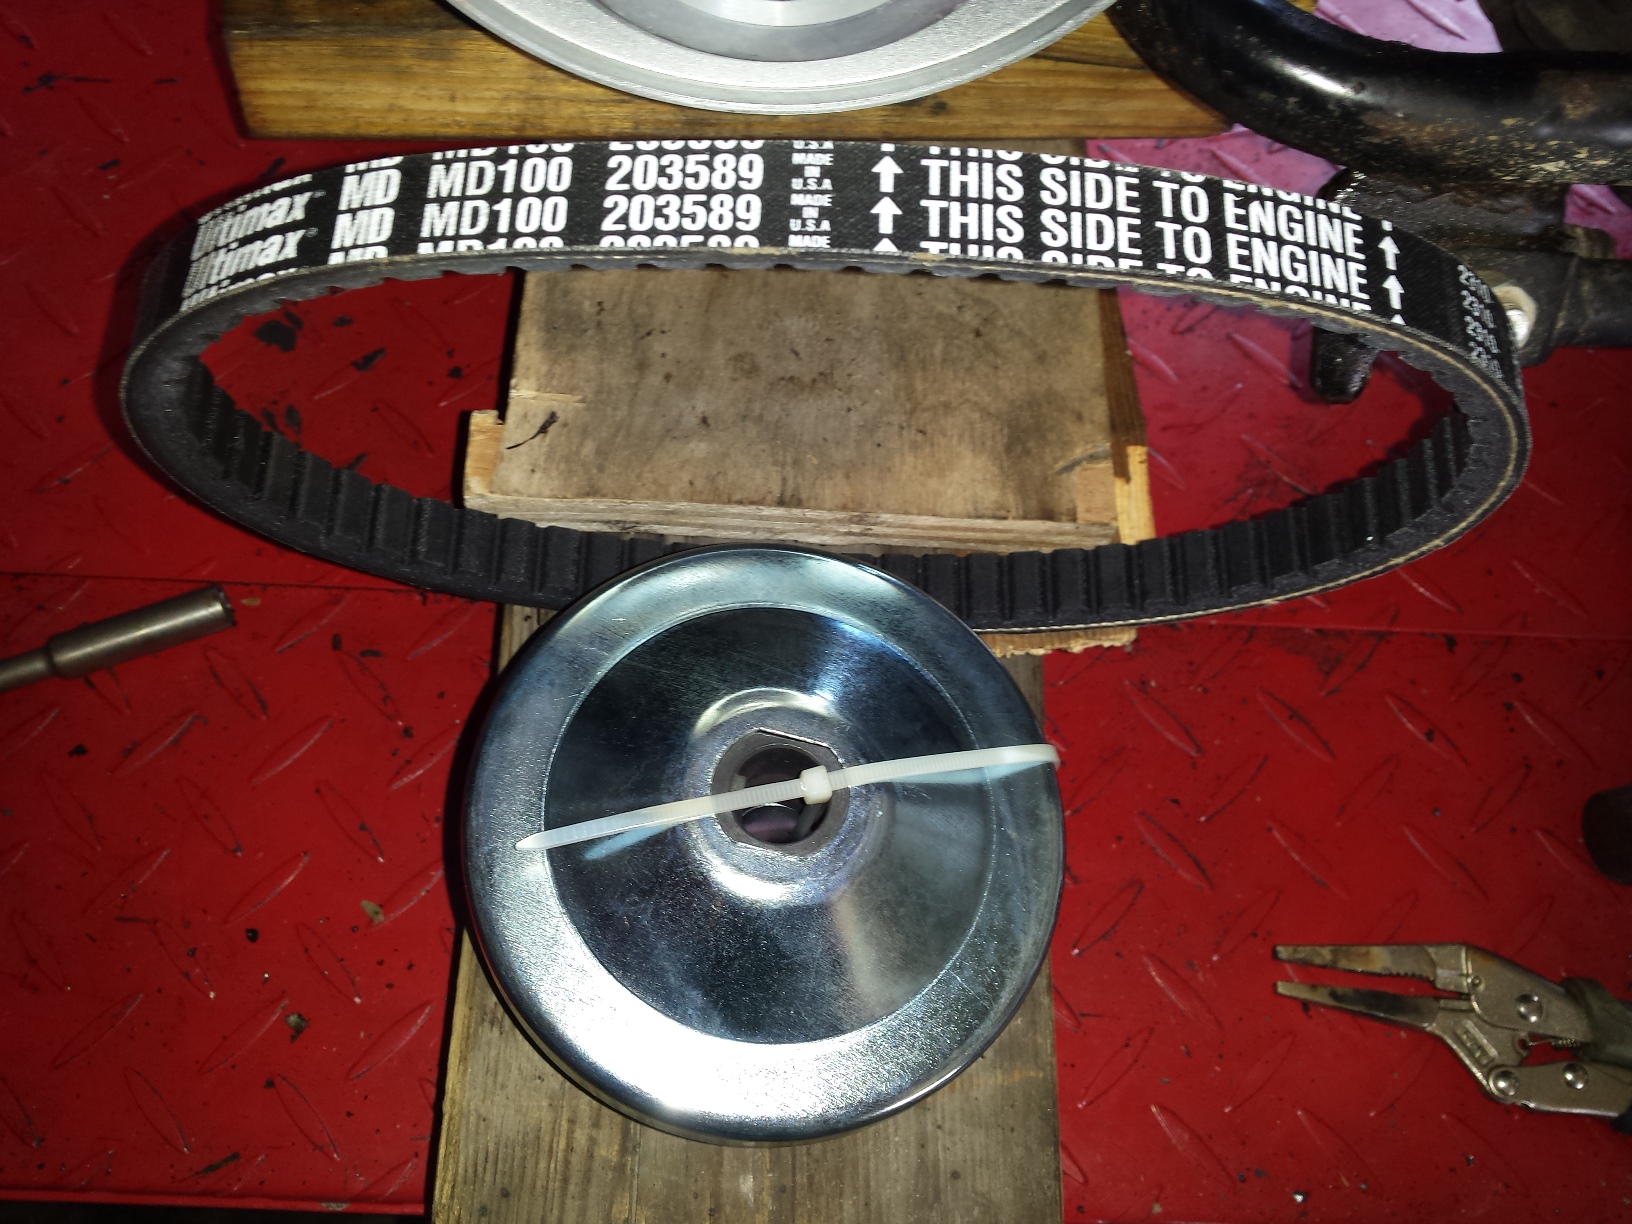
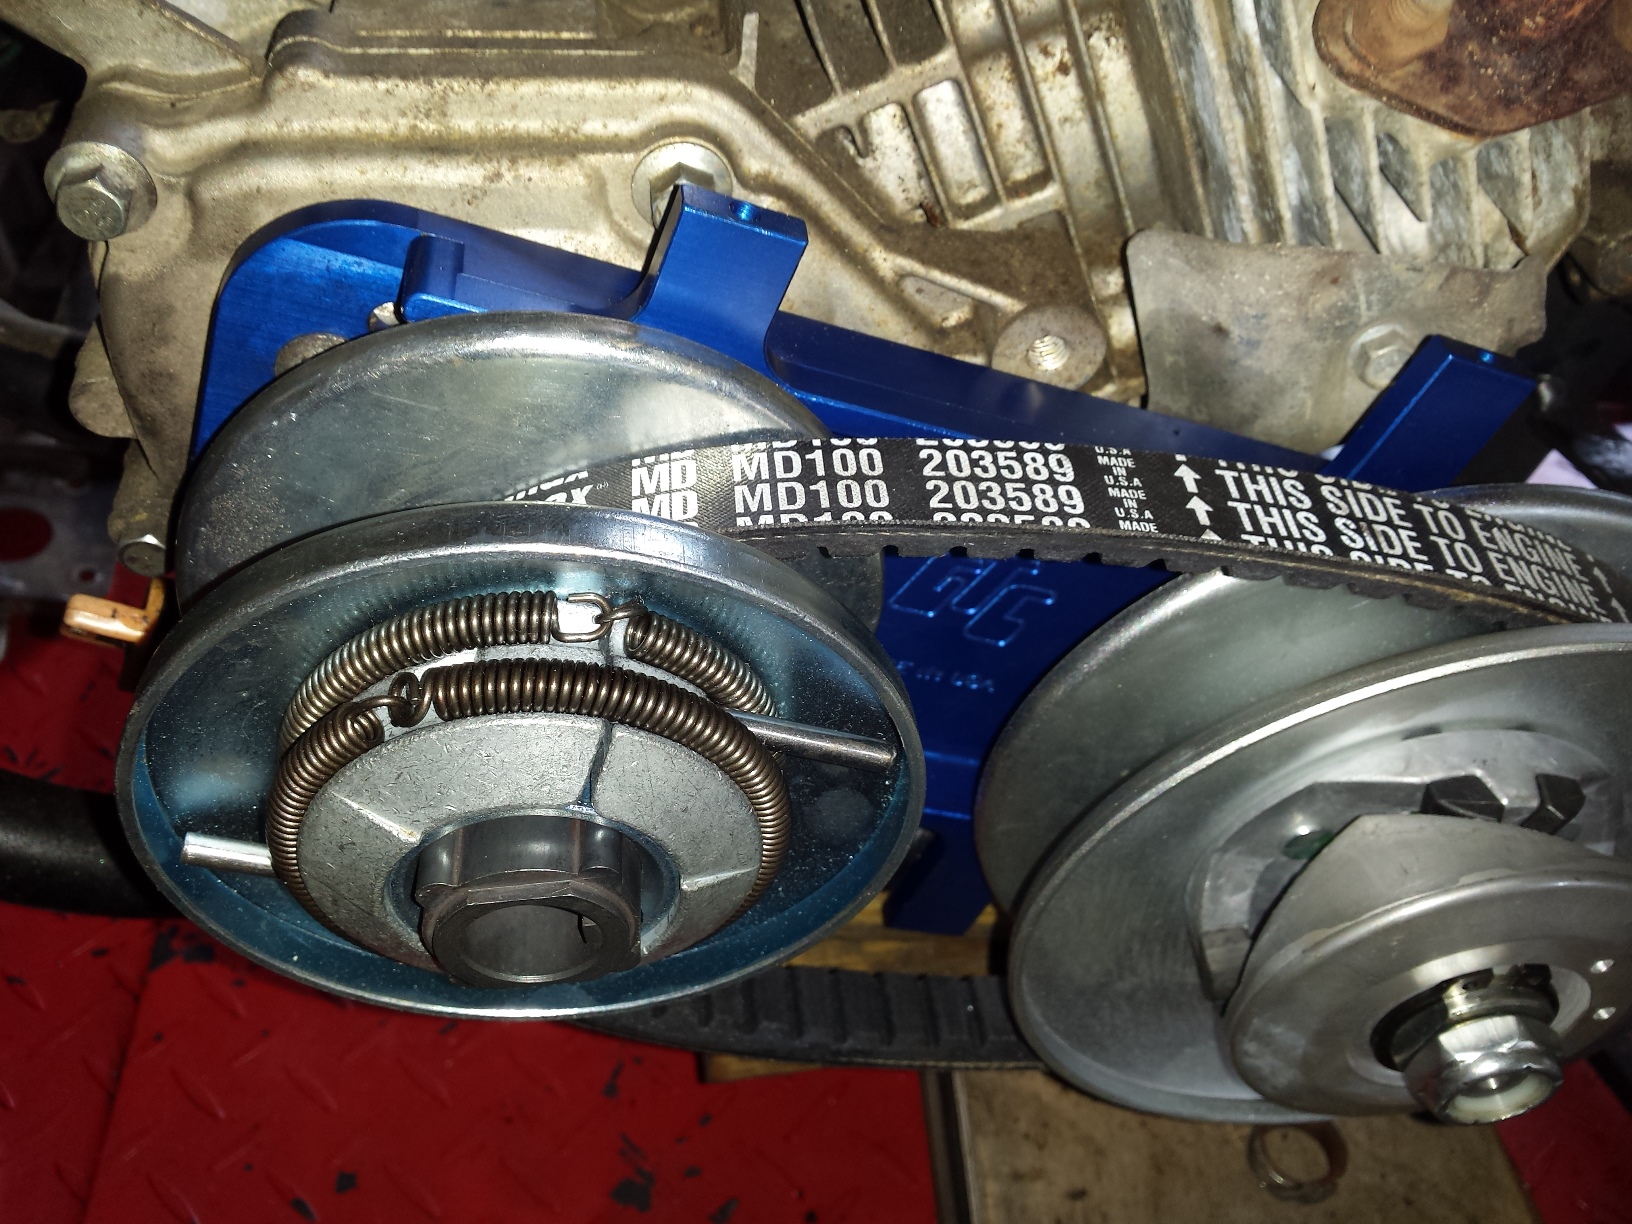
There is one really good performance enhancing mdification and that is the installation of a GTC Torque Converter. In my last post I did a quick installation overview & product review on this part. There is also a video of this mini running & being ridden on that page so that you can check it out. Click here to view it if you haven’t seen it yet.

<minibike in a box>

The front end is still a little bit tweaked from an accident that is was in prior to my owning it, and will stay that way. It’s such a little thing & it doesn’t bother me or anyone else who has ridden it. It’s just that the handlebar is cocked about a half a degree to the right when the bike is going straight, & not really worth trying to fix.

<custom Baja Warrior minibike>

Now that I have told you all about this custom Baja minibike, it is time to say that it is for sale. There’s a real running dirt bike sitting in the barn and I anticipate that this one will soon be sitting around more & more. So the first person to give me $350 bucks for it gets it. Although I would prefer to sell locally for cash, I am willing to crate it for shipping as long as 1. you make all the arrangements for the shipping. and 2. I get at least 3 working days notice to build the crate before pick up. and 3. I have been fully paid via verified USPS money order. NO online payment options available for this, as I have been the target of too many scams lately. If you do purchase this machine you acknowledge that it has been altered from its original factory condition using questionable & potentially unsafe modifications and that you the purchaser assume all risks associated with operating it including the possibility of severe injury or death. And for heavens sake if you’re gonna let a kid ride it, put a belt guard on it.

This minibike has been sold!

Peace Y’all


The GTC Torque Converter for Minibikes & Go Karts Installation and Review

Here’s what came in the box. I ordered it from GoKarts USA mainly because it was listed as being a direct bolt on fit to directly replace the cheesy jackshaft plate & tensioner that this minibike came with. Despite what is said on some of the forums around the internet, this is a good quality unit that is made right here in the good old U.S.A. Yeah sure it’s got a couple of imported components in it, but suck it up sunshine that’s just the way the world is, we’re all on one rapidly shrinking planet and the market place is making it smaller everyday despite the best attempts by idiot politicians and knuckle dragging nationalists to stop it. Still it’s nice to see something made here that is of good quality and is price competitive. The backing plate is especially well machined & finished to the point that it is almost a shame to cover it up with a belt guard.

<contents of the GTC kit box>

Now this is not going to be a full complete step by step set of installation instructions, just an overview with a few tips. If have lost your kit instructions or have purchased a second hand unit without instructions please click here to get a set from the GTC website.  As always you may click on any picture here for a larger view.

First you have to remove the original plate with the factory clutch & intermediate sprocket.

<Baja MB165 jackshaft chain tensioner>

Make sure you remove all of the spacers from the end of the crankshaft, if you are doing this to an older engine oxidation may cause the spacer to look like an integral part of the crankshaft. If you don’t remove it the drive pulley won’t line up and you’ll be scratching your head for a few minutes like I was.

<baja minibike crankshaft spacer>

This tab is no longer used and will have to be flattened or removed for the torque converter to fit.

<remove this tab>

The kit comes with longer bolts to mount the plate if needed.

<GTC kit bolt>

This particular installation just reused the stock bolts

<GTC mounting plate on Baja minibike>

A picture of the driven shaft with the snap ring and washer installed.

<driven pulley shaft GTC torque converter>

Here it has been started through back of the mounting plate.

<installing the driven shaft>

Next get the chain sprocket, key & spacer,

<sprocket,spacer,key>

sprocket,spacer, & key

and slide them onto the driven shaft as shown here.

<This is what drives the rear wheel>

The next shot shows the driven pulley with it’s associated hardware, slide it all into place and install the nut finger tight at this time.

<GTC driven pulley>

Here is the driving pulley & the belt. When you cut the tie wrap to install it take not of how the various parts & pieces fit together so you can re-install them correctly.

<torque converter drive pulley & belt>

I should have cleaned up the screw threads in this hole before I got this far, be sure to learn from my mistakes. BTW your engine must have an existing tapped hole in he end of the crankshaft or you cannot install a torque convertor. Be sure to check this before you spend your money as a few of the Honda clone engines are missing this feature.

<baja minibike tapped crankshaft>

The other drive pulley parts

<gtc drive pulley parts>

Stick the belt into place & begin assembling the drive pulley onto the end of the crankshaft.


<drive pulley parts on crankshaft>

Now that you’ve gotten everything assembled it is time to tighten it all down.

<GTC torque converter Baja minibike>

You really need to use a torque wrench and tighten the bolts & nuts to the torque specified in the instructions. Even a cheap one is more than good enough for everything the average home mechanic will ever do. If you over tighten the nut on the driven shaft it will pop the snap ring loose from the other side. Sure GTC could redesign the shaft to eliminate the snap ring but are you prepared to pay an additional 20 or 30 dollars for the kit to cover the cost of the additional machining and wasted material? Just use a torque wrench and you won’t have to worry about it.

<use a torque wrench dammit>

I did this install several months ago and have been driving this thing around the farm at least two or three times a week. While it did not transform my otherwise nearly stock MB165 into a 50 mph speed demon it did bump the top speed up enough to be much faster than a stock Baja minibike. Perhaps on a smooth surface with the governor removed it would but it is already able to outrun it’s own steering and stability out here in the deep soft sand & mud where I live.

<Baja heat warrior torque converter>

Four months ago when I installed this it was purely out of curiosity to see if it would really be an improvement, and it really is. The initial low speed engagement is much smoother than with a factory clutch allowing it to be driven at a lower speed than was possible with the clutch, while still increasing the top speed. The belt has proven durable and still looks fine after four months of hauling my big 200+ pound ass around the farm, down the dirt road, through the woods.  And when it does eventually wear out the belt is a little over half the price of a factory clutch. So is this worth spending the extra $200 buck on? If you are serious about actually riding your minibike, the answer is yes especially since the GTC TC2 is a direct bolt on that does not require engine mounting spacers to fit a stock Baja frame. Granted at this price it should come with the plastic belt guard but that really is my only complaint. At this time I’m running mine without the guard for a cool but possibly dangerous open primary look, but I don’t let kids ride it either.

Here’s a little video of the completed minibike so you can see how it works.

Peace Y’all


If you really enjoyed The GTC Torque Converter for Minibikes & Go Karts Installation and Review please visit our sponsor by clicking an ad below.