’97 Honda Shadow 1100 Carb Cleaning & Jetting ~ Part 2

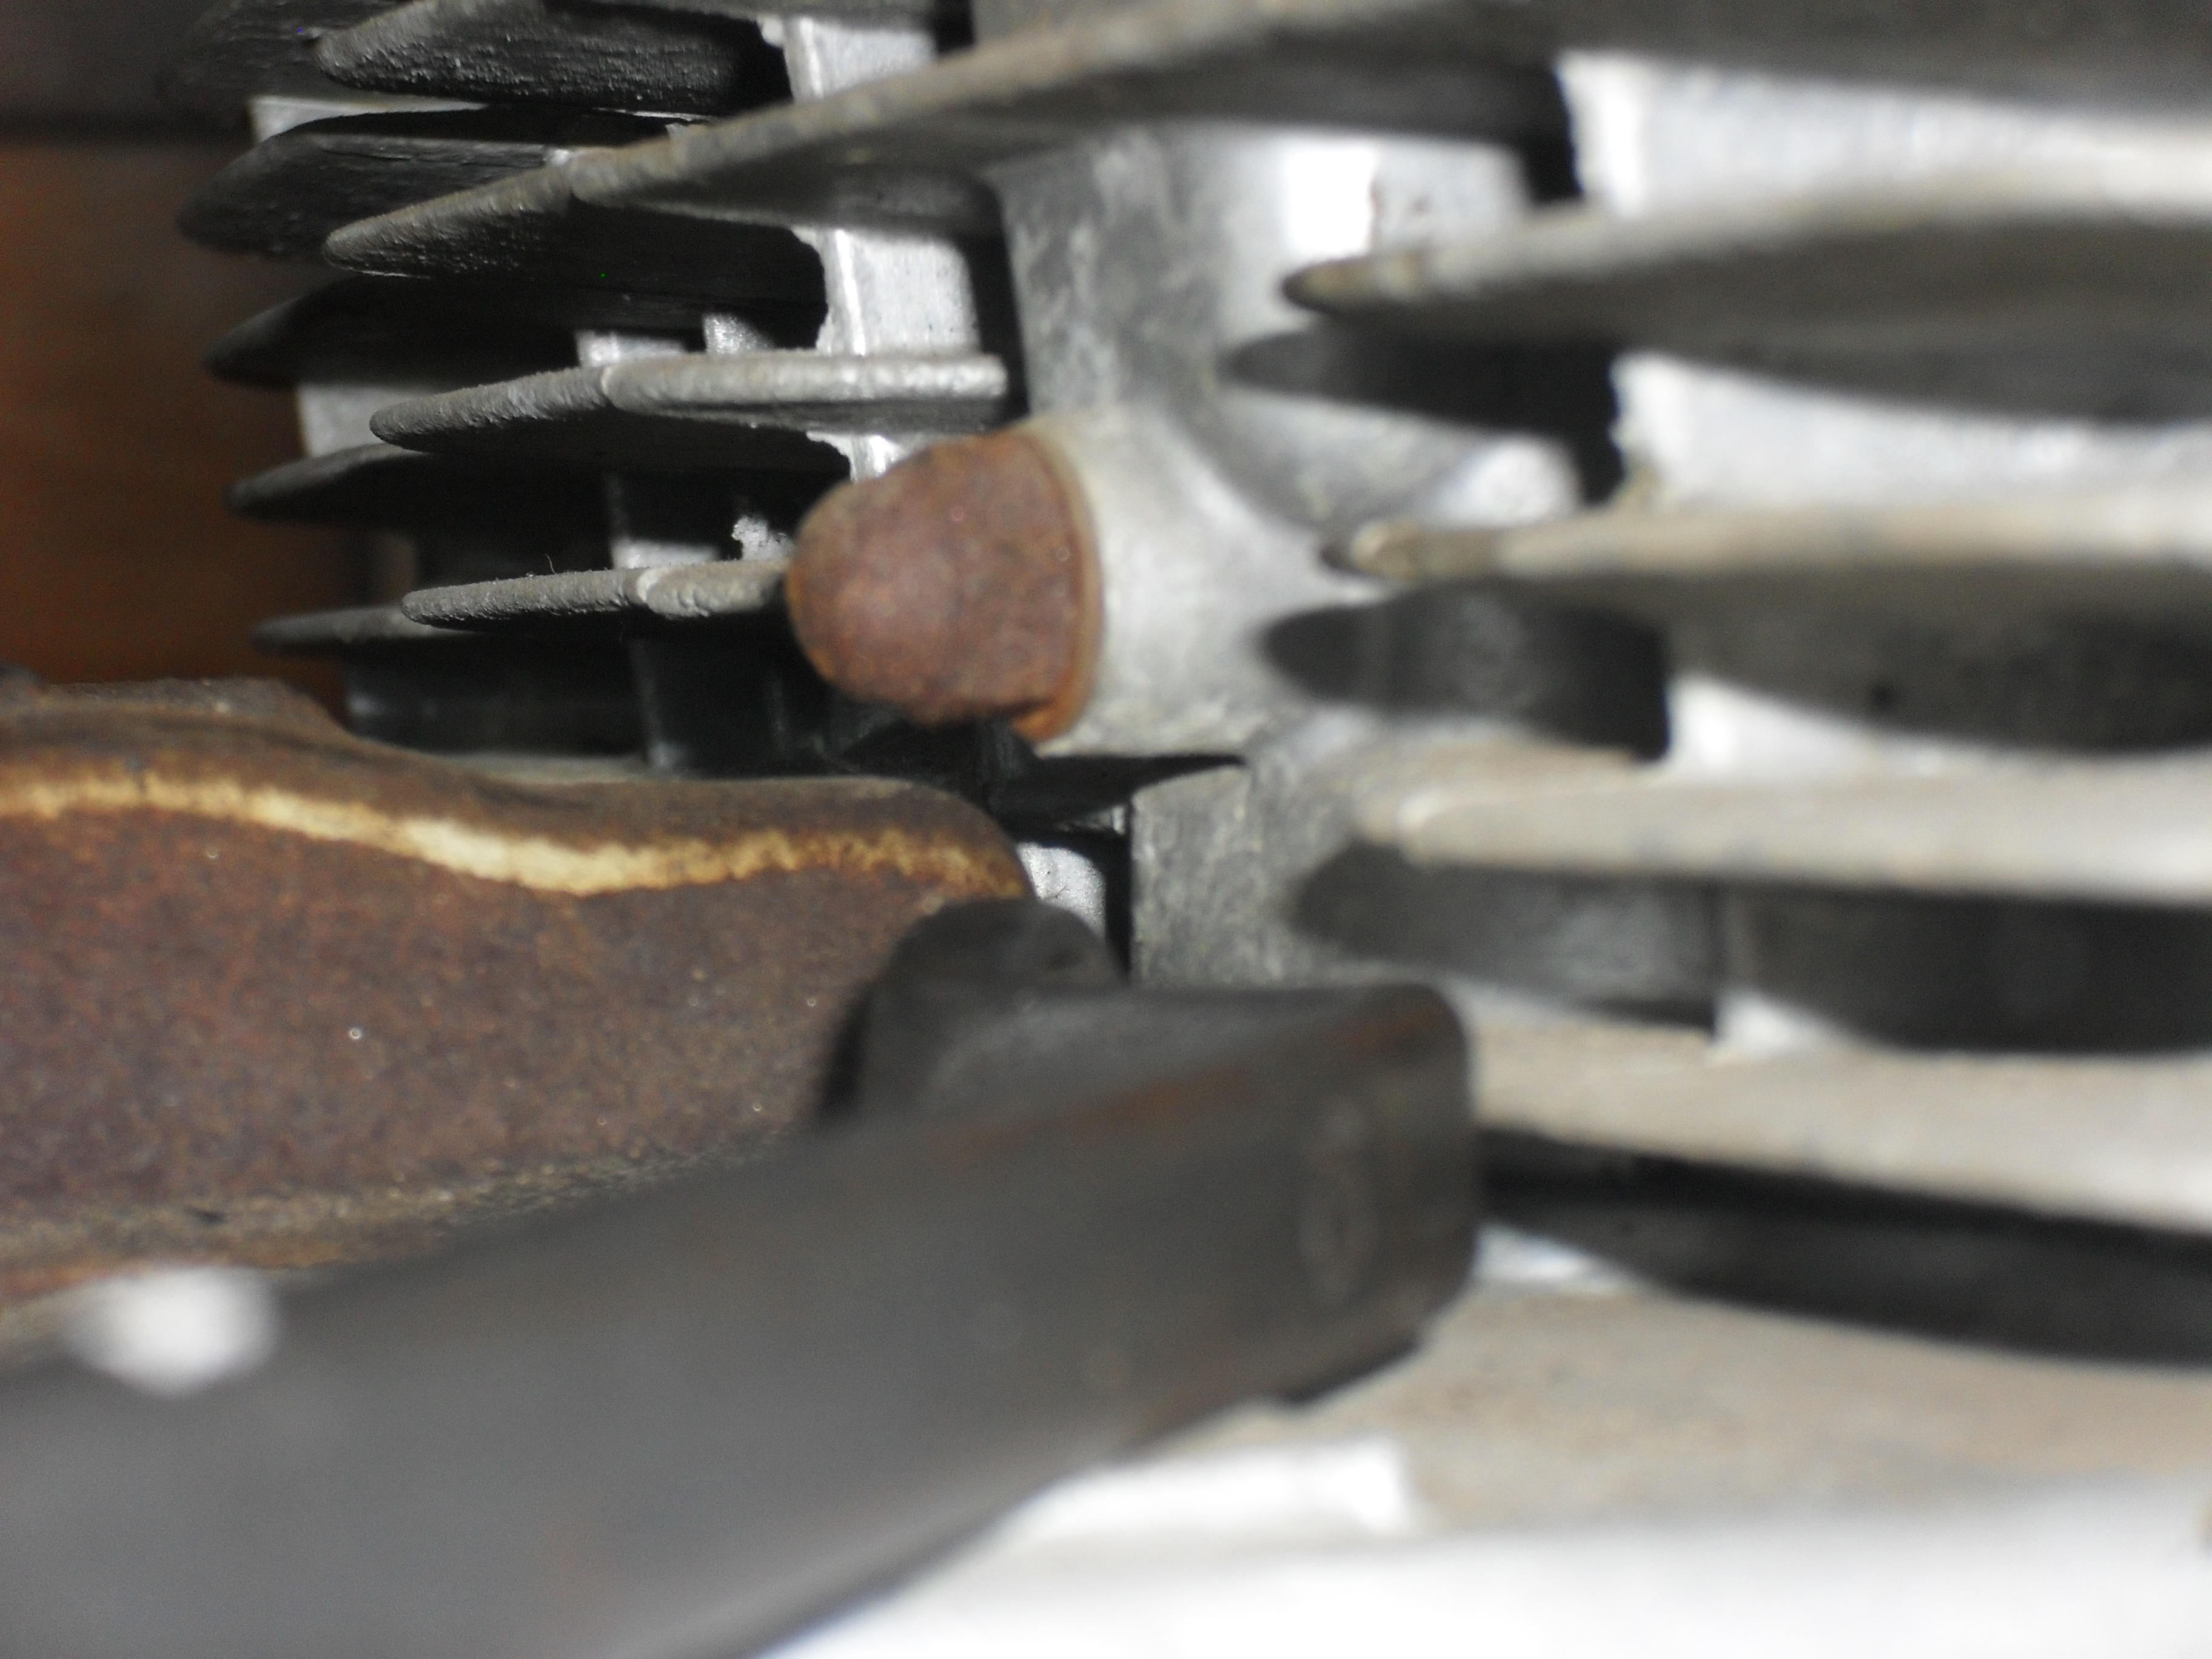
In the last installment, I had removed this set of carburetors from a 97 Honda Shadow 1100, after washing all of the loose crud from the exterior it was time to begin dis-assembly. This is not going to be a full on complete step by step tutorial, but we will cover all of the highlights that are specific to this job. Here you can see that the float bowl is off and although the interior of this carb does not look that bad there is a thin film of of fuel varnish on all the surfaces so I definitely going to clean that out.

Don’t forget, that if you need to you can enlarge any picture on this blog by clicking on it.

<001 dynojet honda shadow kit>

As always when working with multiple carburetors, it is best to dis-assemble one at the time and to lay the parts out in a reasonably orderly fashion so that you can reinstall the parts back into the carb body that you removed them from. Below you can see the float bowl, float, jets, etc. are lying on the table and I’ve removed the top and am about to pull out the spring and slide.

<002 97 shadow 1100 slide spring>

Since my ultrasonic cleaner is small to prevent part mix ups I only put one carbs parts at the time in it. One nice thing about dealing with the Shadow carburetors is that both of the air cut off diaphragms are on the outside of both carb bodies and can be reached without breaking the carbs apart, this makes it much easier to clean those critical passages.

<003 carb parts ultrasonic cleaner>

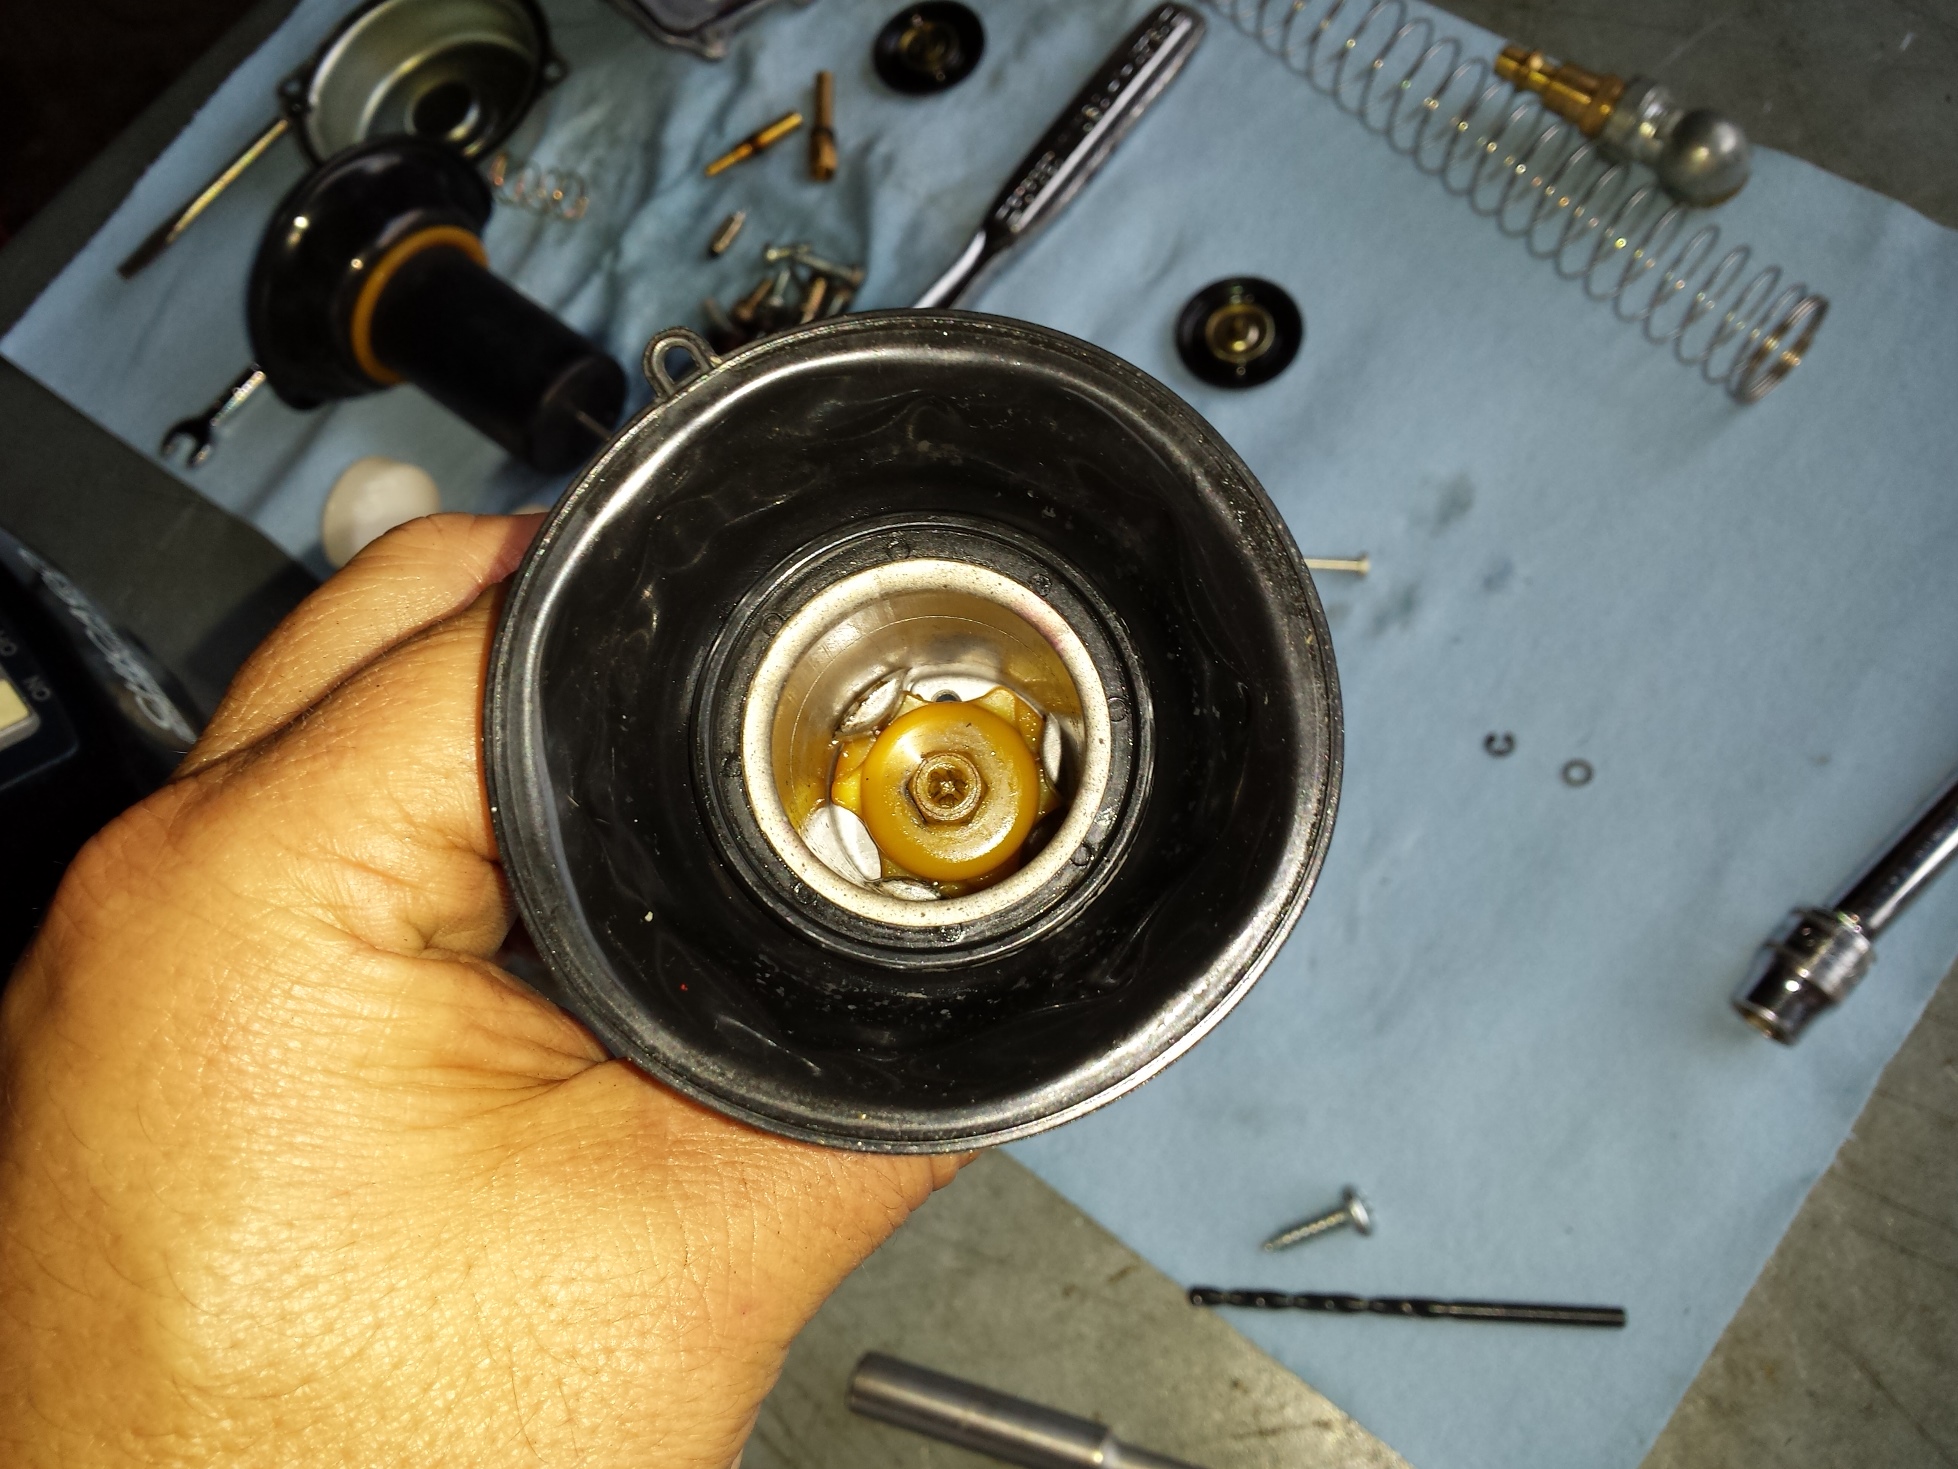
Now it’s time to begin the modifications that will really wake your old Honda up and make it sing a new song of power and glory! You should wash the slides off good and inspect the diaphragms for holes, or rips, if you find any problems you will need to replace the diaphragm before proceeding but if all is well, look insde at the retainer and using either a proper JIS screwdriver or an 8mm socket twist the retainer counter clockwise about 1/4 of a turn until it pops loose and will fall out, remove the needle (aka the metering rod) being sure to note if there damage to the retainer or it’s spring.

<004 shadow ace jet needle retainer>

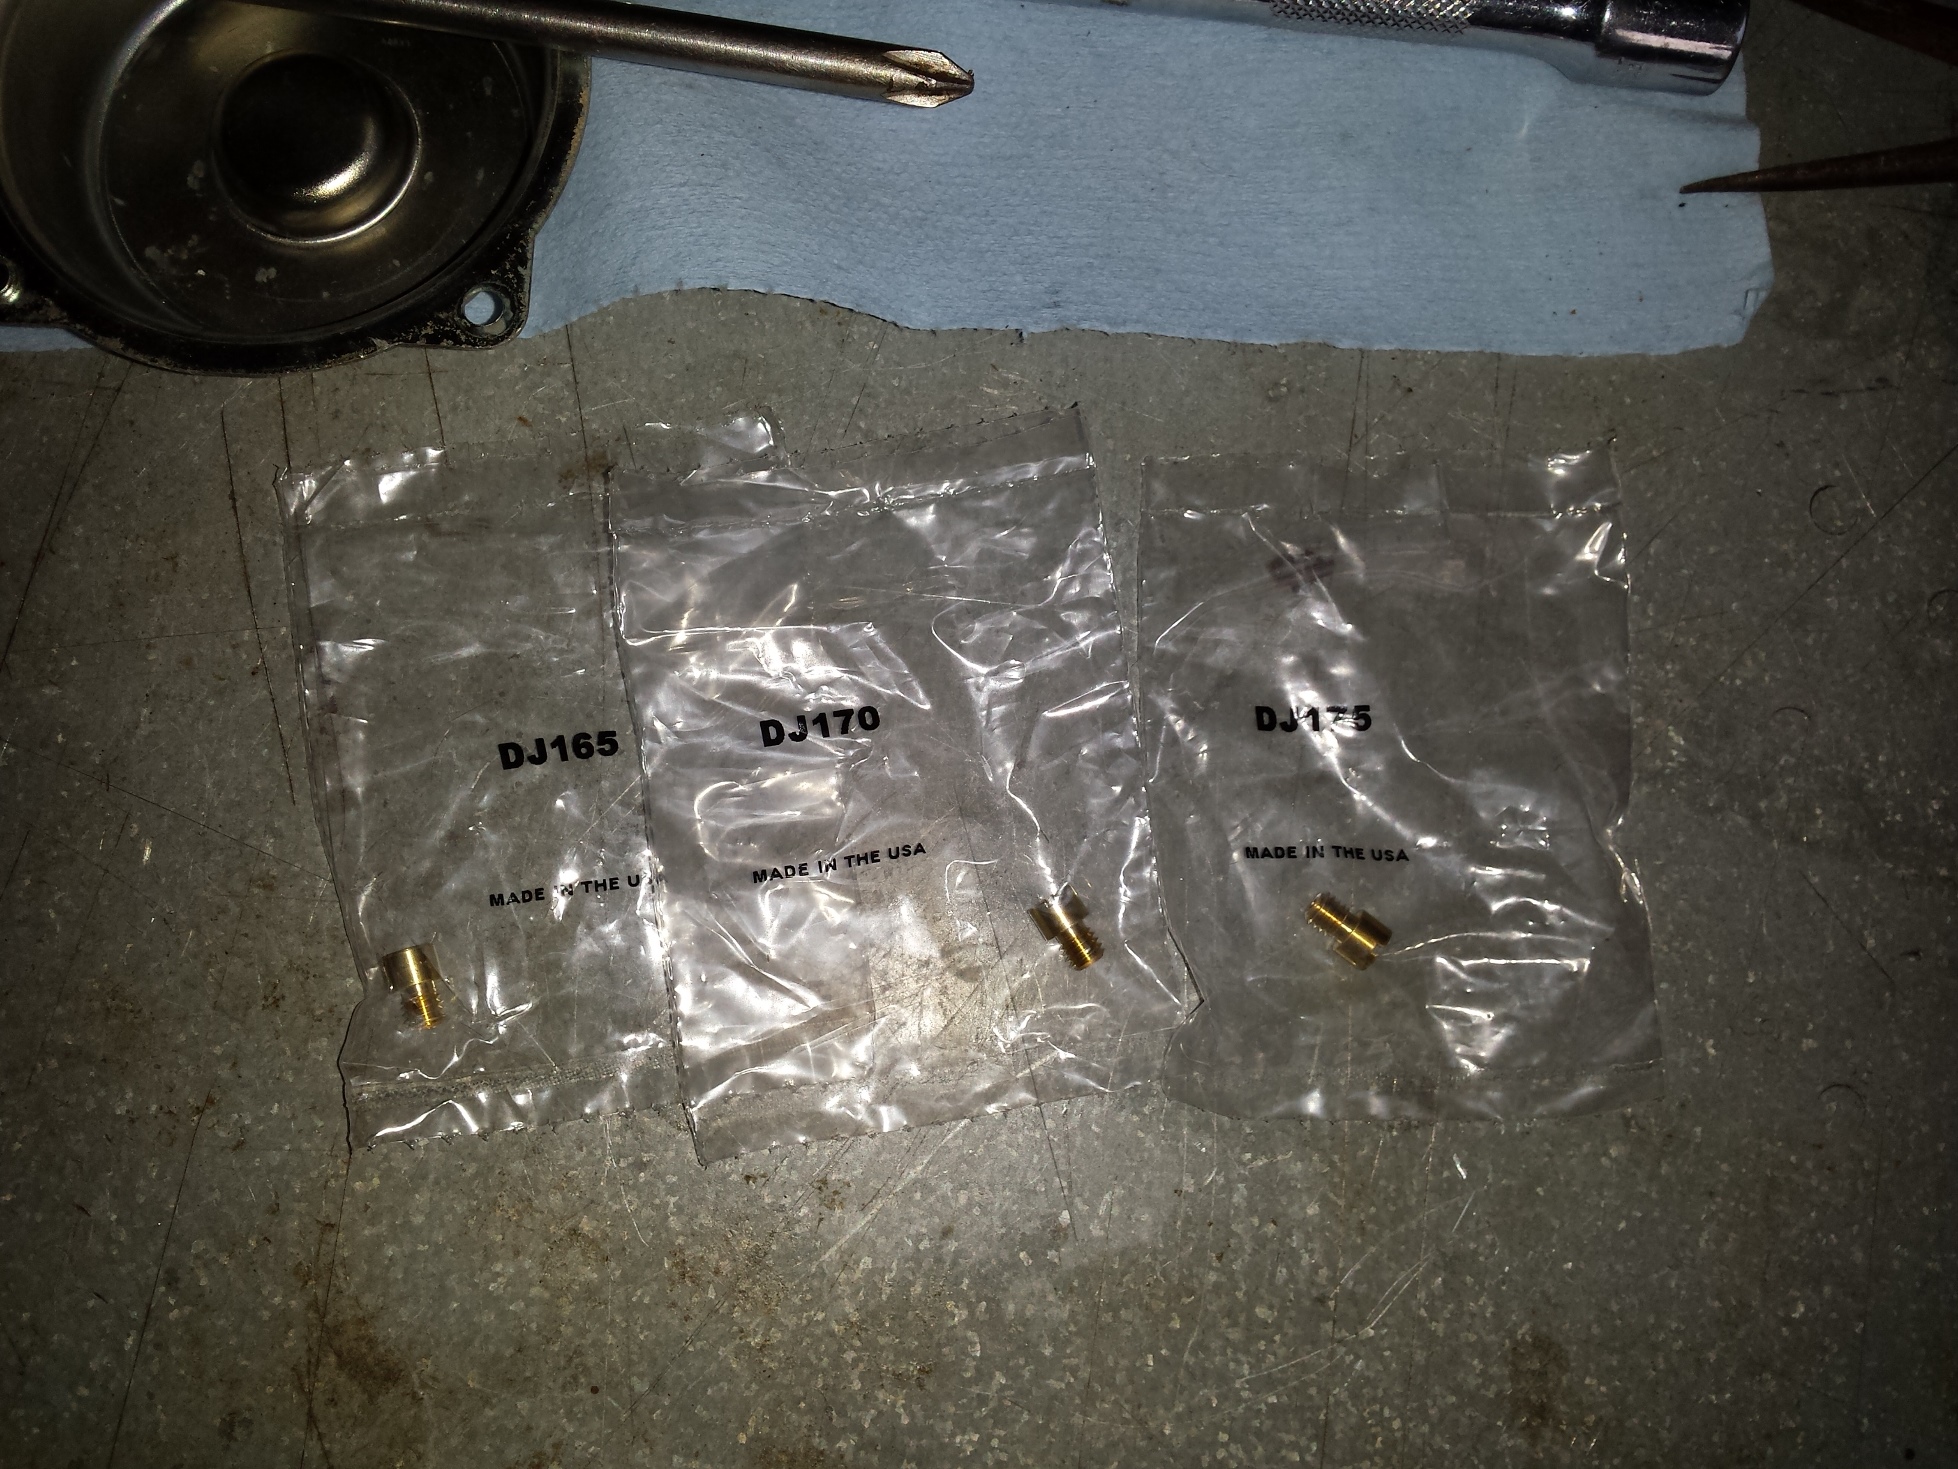
The Dynojet Research needles are packaged as shown, refer to the instructions in your jet kit for assembly instructions to match your particular application.

<005 dynojet research metering rod>

Here’s a quick shot of the slide, retainer & jet needle.

<006 metering rod removed honda 1100>

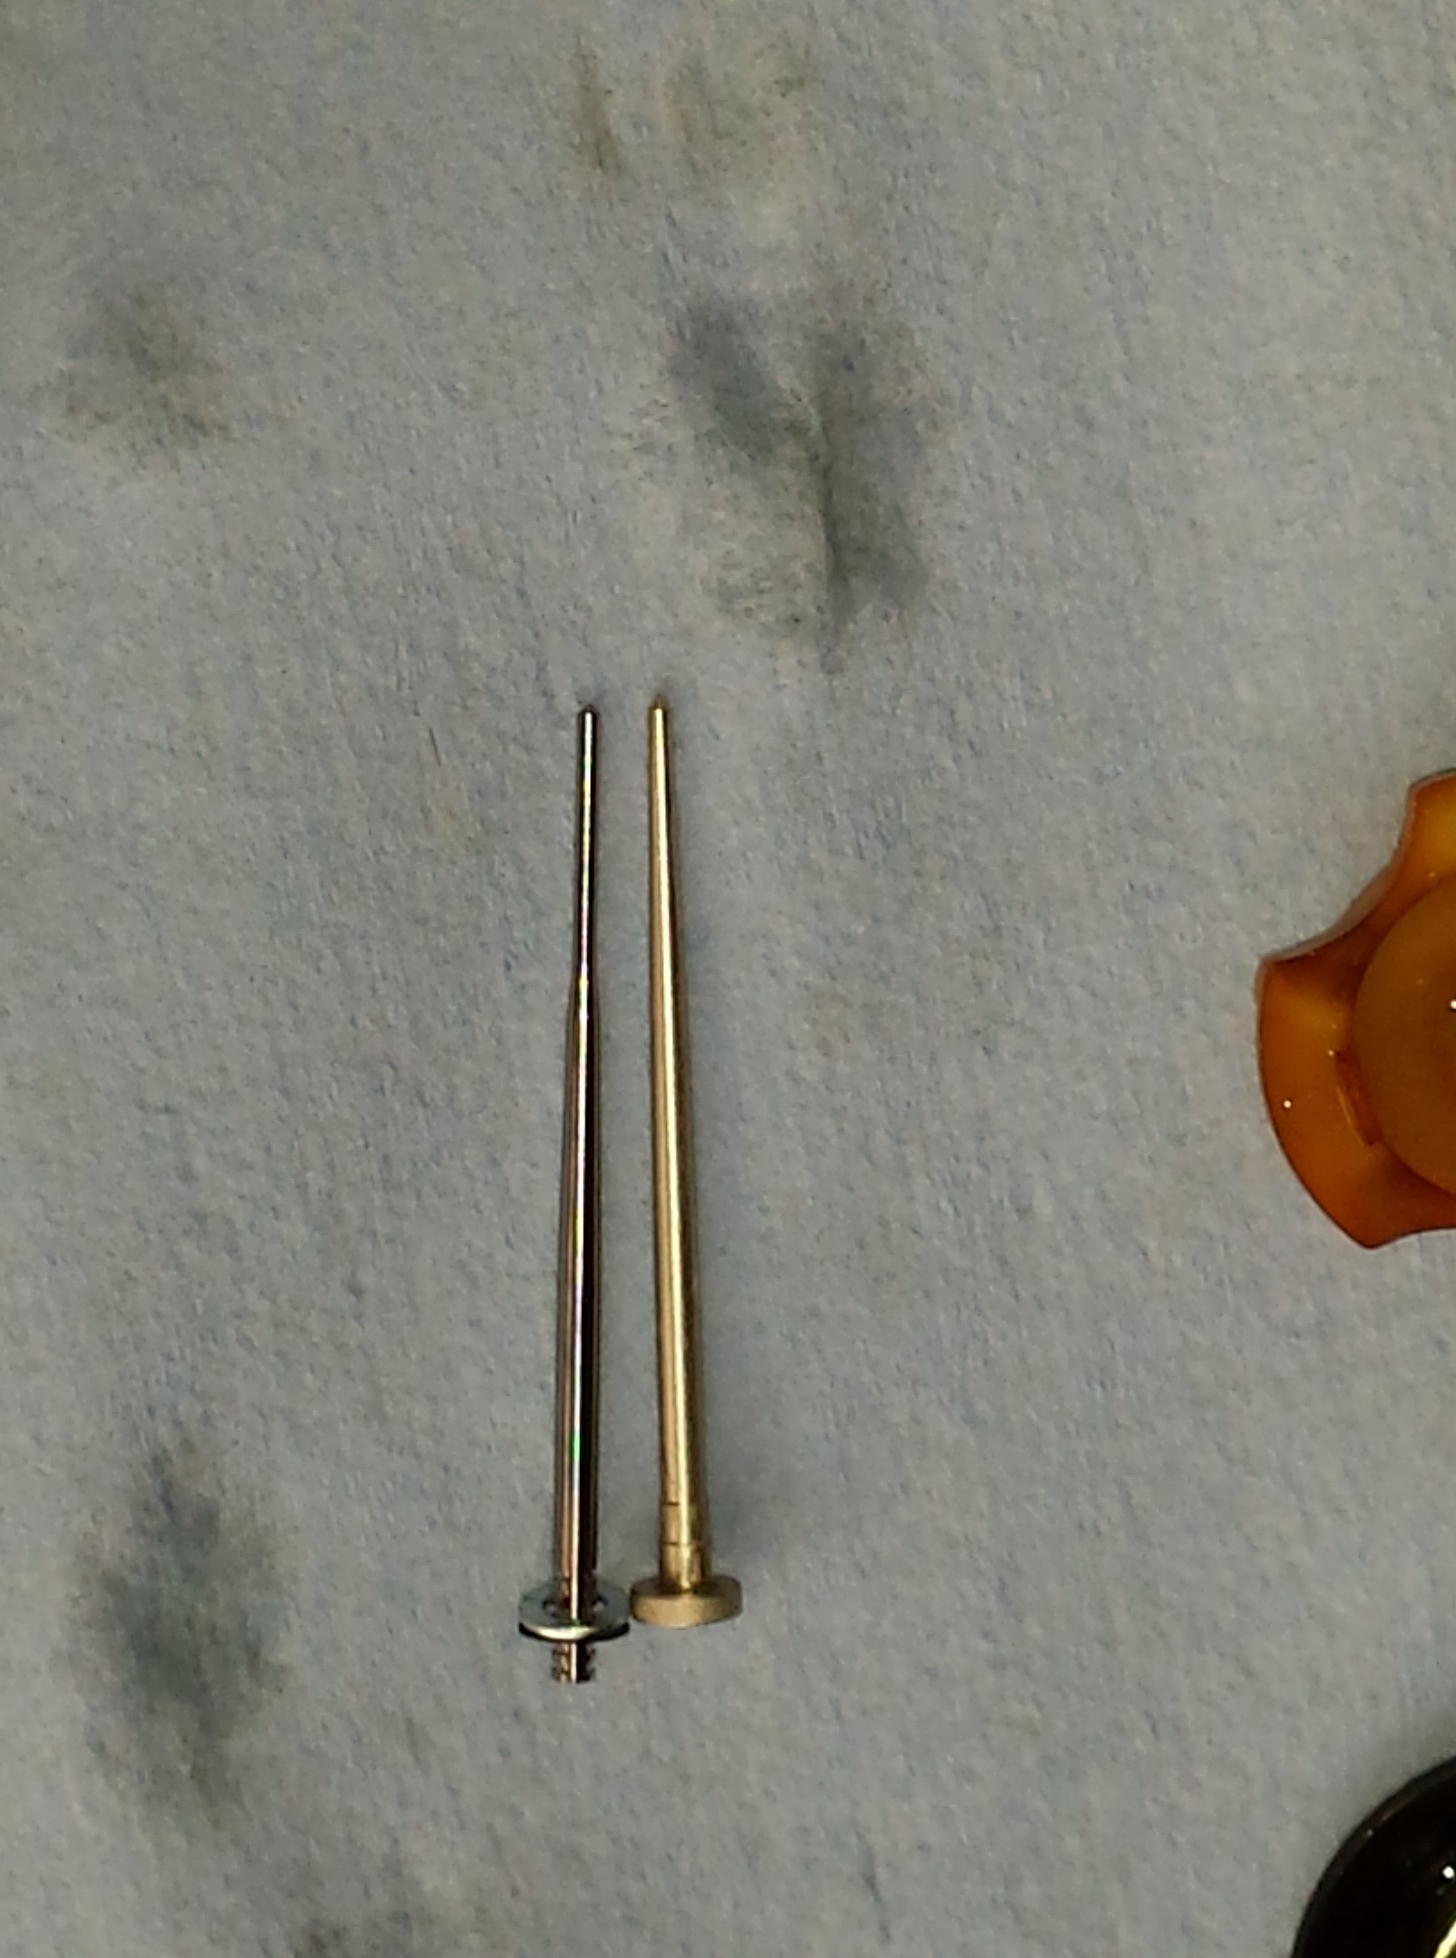
The next picture down is a comparison of the shape of the stock needle to a Dynojet needle. This difference in shape makes enough of a difference in flow that it should be used with the matching jets supplied in the kit. Likewise you can’t use your leftover kit jets in another bike without purchasing the correct needles.

The stock Honda needle is on top and the Dynojet needle is below it.

<007 needle jet comparison>

To simplify reinstalling the needle first insert it along with any spacers into the slide, then place the retainer into the end of an 8mm socket like this and then turn the slide upside down

<008 reinstall shadow ace jet needle>

while holding onto the needle as shown in the following picture andinsert the retainer into place and turning it to the locked position.

<009 metering rod install honda shadow>

Before I finish cleaning the bodies the idle mixture screws need to be removed. They are located under these caps on the sides of the carburetors. If you live in a state that requires visual emissions equipment inspection you should purchase new caps when you buy your carb kits or your bike will fail inspection if it does not have these caps on it.

<010 mixture screw cover>

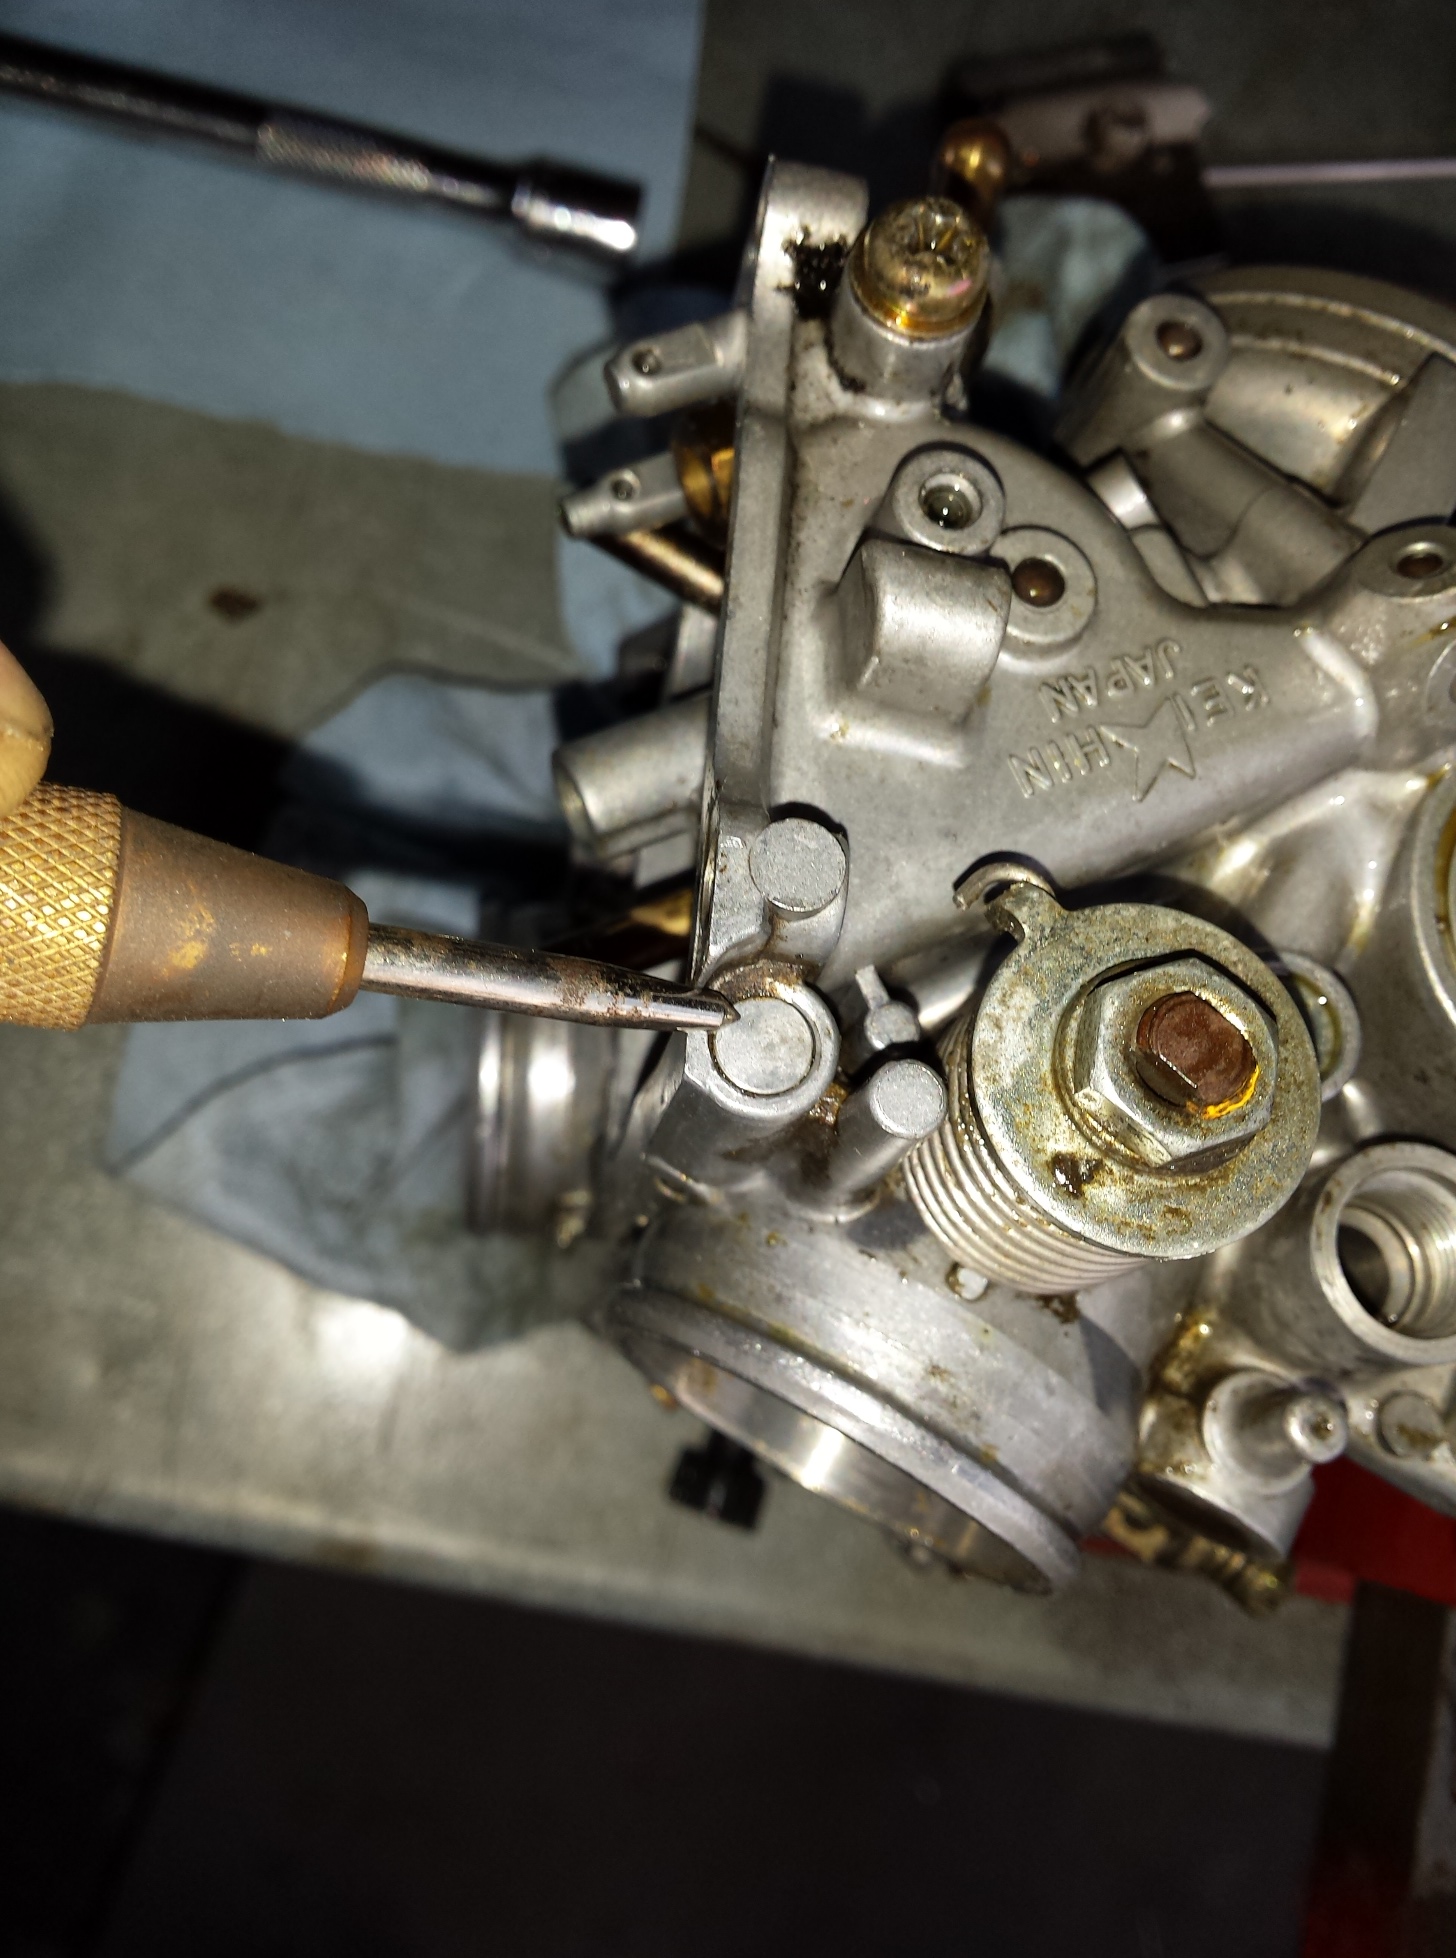
Centerpunch the holes and the very carefully drill through the caps stopping as soon as the drill bit breaks through the caps so you do not damage your carbs.

<011 drill it out>

Then you a sheet metal screw of the right size (supplied in the Dynojet kit as is the drill bit) and screw it into the hole far enough to get a good grip on it & then

<012 screw it in>

yank it out with a pair of pliers. If you are just installing the jet kit without cleaning the carburetor turn the screws all the way in until seated and then back out 3 turns for your initial setting. If your are cleaning the carbs as I am here carefully remove the mixture screws, their springs, washers and o-rings and then thoroughly clean the carb bodies.

<013 pull it out>

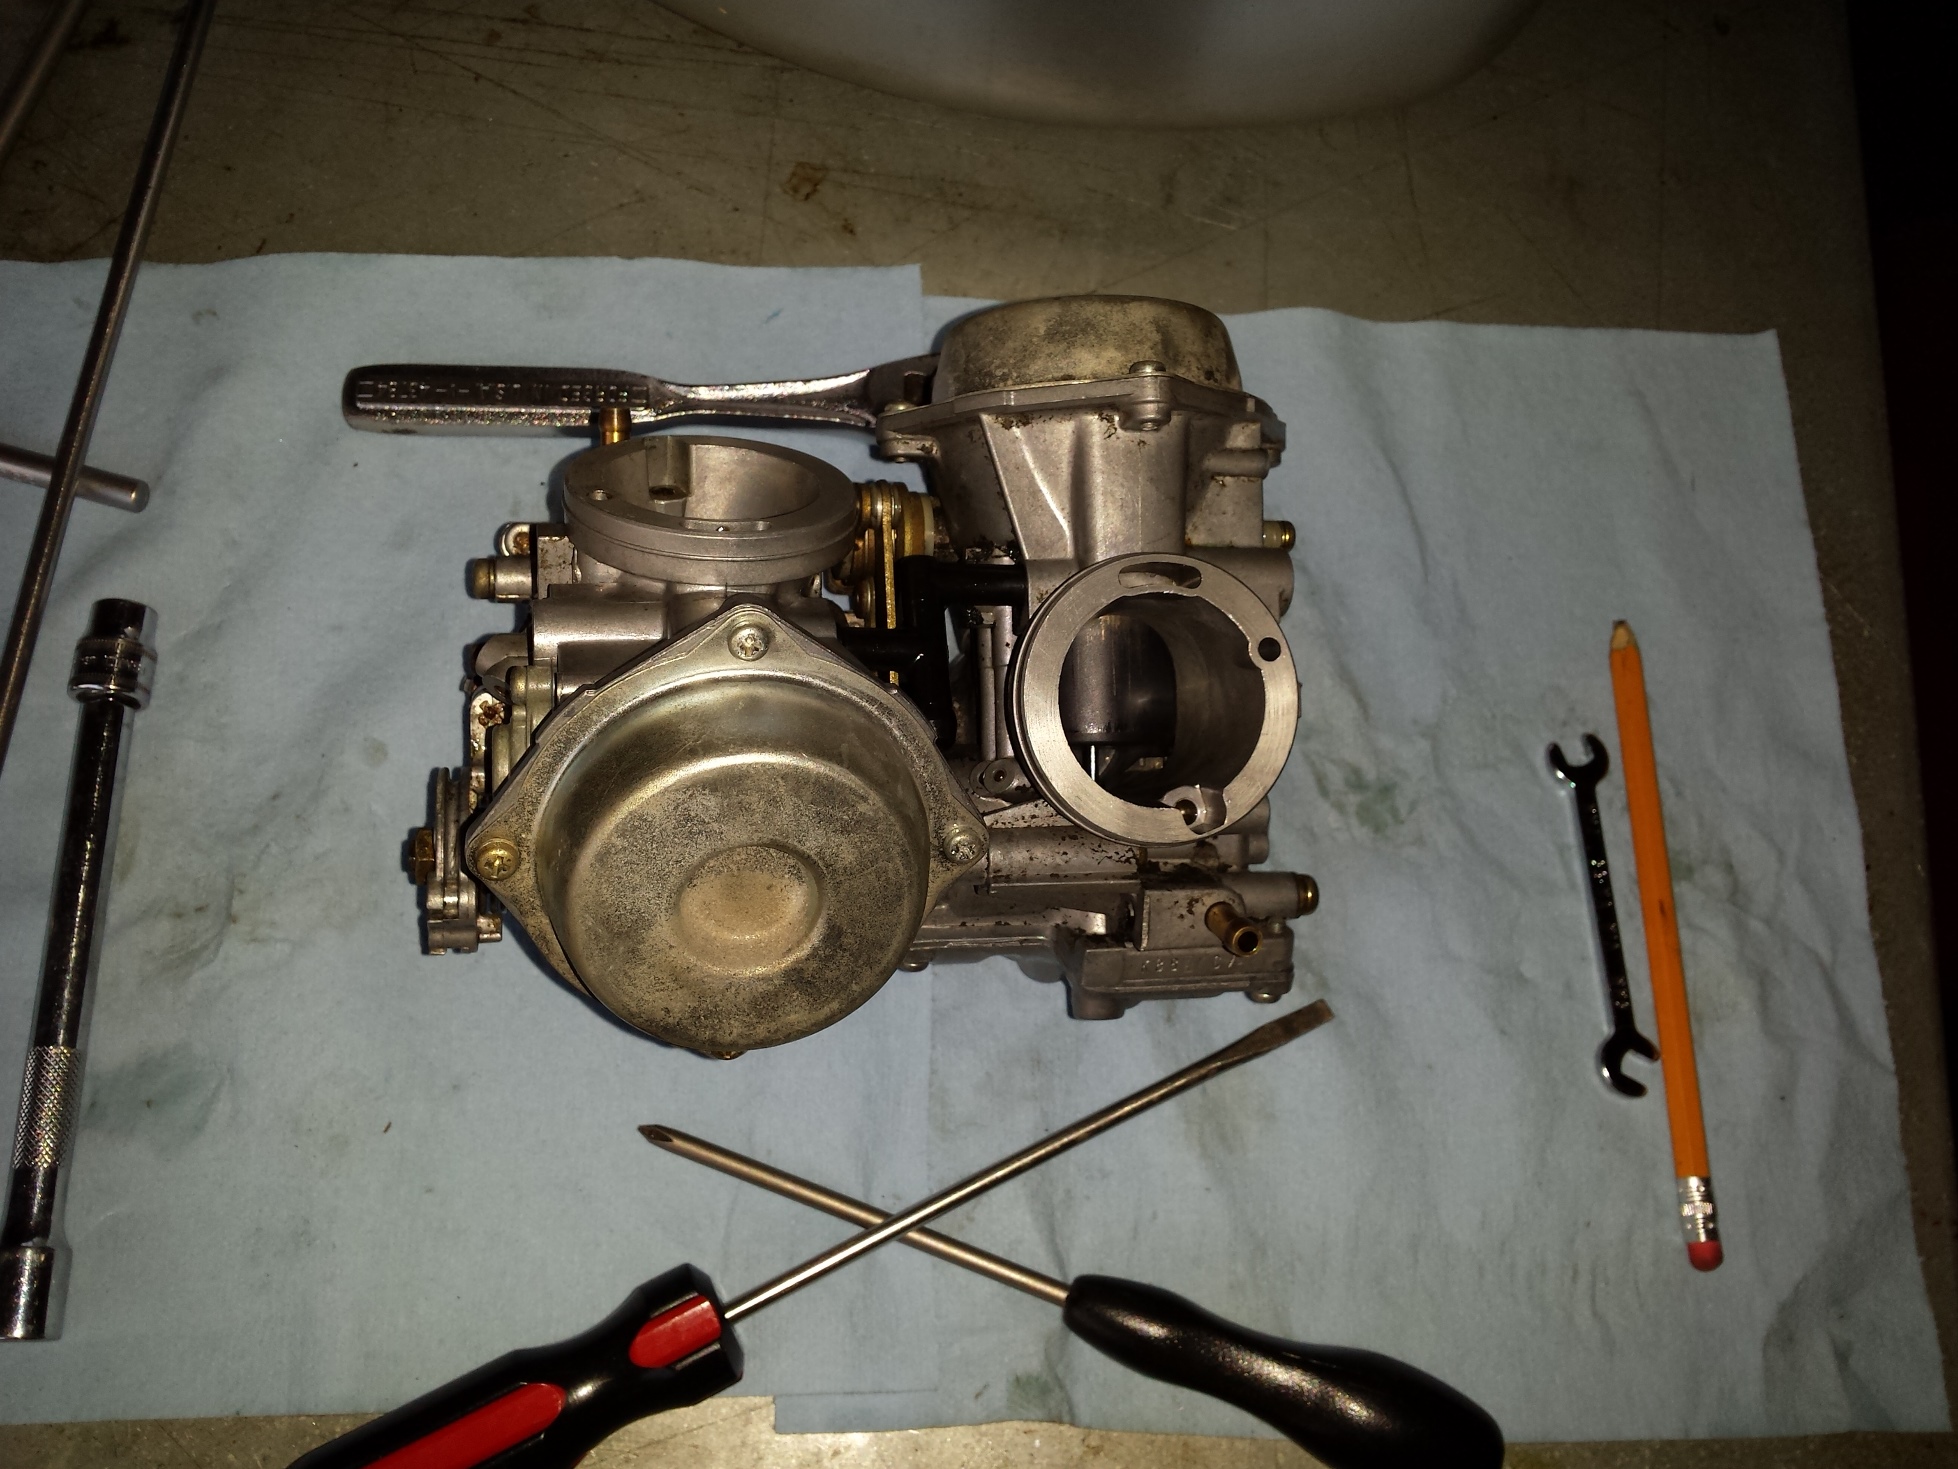
In this shot below things are going back together now, just reverse the diss-assembly process checking all of your parts,float height, gaskets etc. and correcting any problems you find.

<014 honda ace carburetors>


<015 dynojet research jets>

When it is time to put in the main jet you have a decision to make based upon the modification level of your motorcycle. Since this particular bike had a pair of large tube drag pipes on it, I went ahead & put the largest jets in the kit in it. Don’t just automatically put the biggest jets in especially if you are running stock or quite aftermarket pipes and the factory air filter setup.

<016 97 honda shadow 1100 carbs>

You should also be prepared to do a bit of tweaking especially to the idle mixture screws to get a good idle with a good throttle response as you come off idle. One must also be prepared if necessary to pull the carburetors completely back out if need be to try a different set of jets or alter the jet needle cir-clip position for the best running. If you pay attention to the instructions in the kit this is not likely but it is a possibility.


<017 Carburetors ready to reinstall>

There you have it, if you’re contemplating doing this to your bike at home first make sure that it is running well, and that it has new plugs, and that the ignition and charging systems are up to spec, and that there are no other problems such as cracked intake boots that would cause you to have drivability issues. If you put a jet kit in a motorcycle that is not running right to start with, you are very likely to have a motorcycle with a jet kit in it that still does not run right.

Just take your time, read the directions, and keep everything as clean as possible and you should be able to make your old Shadow run & sound even better than it does now.

Peace Y’all

<97 Honda Shadow Ace>


How To Adjust Valve Lash (1980 Honda CB650 SOHC)

<Honda 650 SOHC Valve adjusters>

Here I’ve already removed the tank and all of the necessary engine covers.

Since I have already put enough miles on this bike since I got it running to warrant an oil change I decided to re-check the valve adjustment for two reasons; one is that as long as the engine had been sitting without running I want to keep a close eye on it for a while & two so that I could show everyone how I do it. As you can see in the photo above I’ve already removed the gas tank, all four spark plugs  and all of the appropriate engine covers. The first thing to do before you adjust the valve lash is to adjust the cam chain tensioner. On a 1980 Honda CB650 this is done by loosening the nut on the rear of the cylinder just a little bit. Do not remove it just loosen it some

Honda CB650 Cam Chain Tensioner Nut

This is the nut you loosen to adjust the cam chain tensioner.

Then put the correct size wrench on the hex spacer behind the nut at the ignition unit on the right side of the engine. Then rotate the wrench clockwise slowly 4 to 5 turns as you simultaneously tighten the lock nut that you loosened at the beginning of this step. This is also the first thing you should try if you own a motorcycle and you can hear the cam chain rattling, but if after making the correct adjustments you still have a rattle then it will be time to start replacing parts. Keep the wrench that you used to turn the crankshaft handy, you are gonna need it a few more times.

1980 Honda Ignition Pulse Generators

The Clymer manual describes this as a 15/16″ nut. That is wrong this is a 24mm. OOPS

Here in this picture taken on the left side of the engine you can see 2 of the three openings in which we will be working to check & set the valve lash. The adjusters for the intake valves are on the back of the head in front of the carburetors and the exhaust valve adjusters are on the front of the head behind where the exhaust pipes stick out. The first step is to get the number 1 cylinder to top dead center. Take your large wrench and rotate the crankshaft clockwise and watch for the intake rocker arm on the first cylinder to drop down into the head and start to rise back up. Then look at the timing marks on the ignition advance unit (photo is further down the page) and continue to slowly turn the engine until the 1.4 T mark is aligned with the pointer that is cast into the crankcase.

Honda SOHC Cam & Rockers

The camshaft & rocker arms are in the left hole & one of the adjusters is in the right hole.

At this point both the intake & exhaust valve on cylinder number one should be loose enough both rocker arms to be wiggled. If not you either have a valve that is way too tight or you did not stop turning the crankshaft at the right mark, either way you should verify which problem you have before moving on. a simple way to see if the cylinder is at top dead center is to take a long small diameter wooden or plastic dowel and insert it into the spark plug hole. If the piston is at the top of the cylinder the dowel will not go in very far at all.

With the number one piston at TDC on a 1980 CB650 you should be able to adjust both valves on the number one cylinder, The exhaust valve on number two, & the intake valve on number three. Once you have those done you need to repeat the step above but this time watch the intake rocker of cylinder 4 on the right side of the motor cycle. With that one at TDC you can adjust both valves on number four, the exhaust valve on number three, and the intake valve of number two.

Lets talk about tools for a little bit. All of the shop manuals show a special tool for adjusting the valves, but the simple truth of the matter is that for a number of engines you don’t need them and this CB650 is one such example. For the lock nut, I just clamped a pair of Vise Grips around an old cheap 10mm socket that I have on hand and then just used the proper size of flat-head screwdriver to turn the adjustment screw with. Works great for me on this motorcycle, your mileage may vary, if you break something I’m not responsible, etc.

tools for valve adjustment

Macgyver was an amateur!

Speaking of tools let’s get the feeler gauges to set the valves with. The ones that I use are from Snapon and are about a foot long. The also came with a nifty holder that is very handy for working with the really thinner sizes in hard to reach places. The intake valve lash setting for this generation of Honda CB650 is .05mm (.002 inches) and the exhaust setting is .076mm (.003). So to do this job I will get out three feeler gauges in sizes .002,.003 & .004 (.1mm). Why three sizes? I’ll explain in a minute.

The next picture is of the .002 feeler gauge slipped in between the rocker arm & camshaft. This is where you measure the lash on this engine. Basically what I do is turn the adjustment screw until I can just slip the feeler gauge into place with just a little bit of wiggling. You should tighten the lock nut each time you do this as it may affect the final adjustment. If you tighten the lock nut and find that your lash setting has changed tighten the adjustment screw a bit to compensate, re-tighten the lock nut and check it again. Usually after I do all of this, and I am satisfied with my setting, I then take the next larger feeler gauge (.003) and try to insert it into the gap. If it doesn’t fit great I move on to the next one but if it slips in I readjust the lash until the correct sizes slips in fairly easy but the next size up wont go in. You may wonder why not just set it a little tight and not worry about it? I like to set these things exactly as needed for the best performance. The other reason is the way that motorcycle engine valves wear. Very rarely is there any wear at the top of the valve, most of the wear occurs where the valve closes at the valve seat in the head, this causes the valve lash to get tighter as the engine wears & not looser. This is especially problematic when you are running old motorcycles on the toxic, corrosive, & environmentally unsound corn juice that passes for gasoline in this day & time. If you must err on the side of caution it would be a little tiny bit better for your valve lash to be just a hair too loose than to be to tight.

<setting the 1980 CB650C intake valve lash>

For really thin feeler gauges like this .002 I recommend a holder like this one from Snapon tools.

Next take the .003 feeler gauge & set the exhaust valves as shown here. Then use the .004 gauge to make sure your adjustment is just right. It is especially critical not to over tighten the exhaust valve lash. If the valve wears down and is not able to close all the way due to a lack of clearance you may get a burned valve & a big repair bill.

<adjusting the 1980 CB650 exhaust valve lash>

If you have a late 70s or early 80s Honda with the factory electronic ignition you definitely want to perform this next step. First get yourself a set of nonmagnetic feeler gauges. DO NOT not use steel feeler gauges to set the magnetic pickups aka pulse generators on these bikes.

Brass non-magnetic feeler gauges

Non-magnetic feeler gauges are a necessity to set air gap on the pulse generator of most OEM electronic ignitions of this time period.

The range of settings for the air gap between the pulse generators (black boxes in the picture below) and the trigger mounted on the end of the crankshaft is .012-.016 inches (0.3-0.4mm) You can also see the pointer & the timing marks that I mentioned above in this picture.

<80 CB650 timing marks, pulsers & advance plate>

1980 CB650 timing marks, pulse generators & advance plate

Believe it or not I have never seen any motorcycles with this gap set correctly from the factory, but the system is still good enough so that most bikes run without any problems whatsoever. Still if you have one of these and it runs okay except for a little surging & hesitation the pulse generator air gap should be the first thing you check. To set mine I just rotate the engine until the trigger ( little square nib sticking out of the crankshaft ) is aligned with nib on the pickup, loosen up the adjustment screws, stick the feeler gauge in place, & hold it all together while tightening the screws back down. Then rotate & repeat to do the other one.

<Honda electronic Pulse generator Air Gap>

This makes a huge difference in engine performance if it is set correctly.

There you have it, put a little lube on the advance mechanism behind the plate, reinstall all of your covers, spark plugs & fuel tank. Now it’s time to fire it up & check it out. Once you are sure that you did everything correctly & your engine is sounding just the way it should take it out for a ride & enjoy the fruits of your labor!

Peace Y’all

EX 250 Ninja Basic Spark Plug & Oil Filter Change

Hello again everyone!

Welcome to another fun filled post on basic motorcycle maintenance. Today I am going to show you how I change the spark plugs and oil in my own personal motorcycle, a 1993 Kawasaki EX250 Ninja. While not exactly the same the procedure should be similar for other Kawasaki models such as the EX500 etc. To change the plugs requires removal of the seat & fuel tank at least. If your Ninja has the factory exhaust you can change the oil & filter without removing the exhaust system. Certain aftermarket pipes that run directly under the center of the engine will require you to remove the body work & the exhaust system just to change the oil. If you need a guide to removing the fairings & gas tank, please look here.

Before we get too far, let me go ahead and throw out a useful tech tip out for you. Most modern street bikes have the spark plugs buried down in deep holes in the center of the head(s). Combine this with compact frame design that often obstructs access to many parts of the engine and you can understand the need for long extensions to reach these parts with a socket & ratchet. The problem with this is that sometime the socket slips off of the end of the extension and remains trapped in the hole for you to fish out. Most of the time this is not a problem except with spark plug sockets that have the rubber grommet inside to hold the plug and the socket together. Those can be a royal pain in the ass if it gets stuck to the plug 6 to 8 inches deep in the head, when you pull the wrench away. Just to save some headaches any time I am working with a deeply recessed spark plug I use a locking extension such as the one shown in the picture below so that when I get ready to pull the socket out it doesn’t get left behind.

Snap On Socket on Locking Extension

spark plug socket on locking extension

Consult your manual for your particular motorcycle and pick up a fresh set of the proper plugs for your motorcycle. Please be aware that some manufacturers will list plugs as interchangeable for motorcycles and these plugs will screw right in, but are of absolutely the wrong heat range to work properly. The result of this is a very short plug life with possible engine damage. For the Japanese, British, & most European brands I try to stick with NGK & Nippondenso brands, but have also used Autolite successfully as well also. The important thing is to get both the correct size & heat range for your engine.

fresh new NGK spark plugs

fresh new NGK spark plugs

Once you get all of the body work off, pull the plug wires loose and either vacuum or blow out the holes with compressed air. Then using a long extension put the spark plug socket into the hole(s) and unscrew the plugs. If you are using a spark plug socket they should come out with the socket. If using a regular socket you may have to use a magnet to remove the plugs from the holes. Looking at the next couple of picture should show you why I am a fan of locking extensions for this job.

how a spark plug wrench fits a Ninja 250

how a spark plug wrench fits a Ninja 250

Next take your new plugs and inspect the gap between the electrodes. Spark plugs today come pre-gapped and protectively packaged but it is till a good idea to at least check the new plugs for damage such as electrodes pushed together, or cracks in the insulation. Place a plug securely into the socket so that it wont fall out and insert it into the plug hole taking care not to hit the end of  the plug on anything and close up the gap (this will keep it from working). You should be able to start the threads and screw the plugs 80% of the way into the heads by hand with no problems, and then finish them up with the ratchet.  Most of these heads are aluminum, so take great care not to cross thread them or strip the holes out, because the repairs for that are expensive & difficult. I never use more than one hand to tighten them and even then I don’t use full force. Now for the disclaimer part; You should always follow the manufacturers recommended torque settings. Unless you are an experienced wrench turner you should buy a torque wrench and use it. Even if you are an experienced wrench but are prone to screwing up every now & then you should use a torque wrench too. There is absolutely no way for me to teach you how tight is just tight enough. Not even if you were standing here next to me.

long extensions make life better

using a long extension to reach down into the plug recess

After you get the plugs in put the wires back on securely, put any parts back that you had to remove to get to them, then re-install the tank and seat. Start the engine and if everything sounds okay take it for a test ride. If you have any problems that you didn’t have before retrace your steps until you find what went wrong. If you were having a problem before changing the plugs and you have the same problem afterward something else is probably wrong.

Test Ride Time

go for a test ride before putting all the bodywork back on

Since I already had all of the bodywork off of this one I took it for a test drive just like this.

Time to change the oil

Locate the oil drain plug

ninja 250 drain plug location

ninja 250 drain plug location seen from above

Here’s a better shot of the oil drain plug & filter bolt. The 250 Ninja, like a lot of older motorcycles uses an internal cartridge oil filter instead of a spin on filter.

ninja oil filter & drain plug location

ninja oil filter & drain plug location

Place a container under the drain plug an remove it to let the oil drain out.

wrench on ninja oil filter bolt

wrench on ninja oil filter bolt

Then put your wrench on the oil filter bolt and unscrew it. When you get it loose a lot of oil may come out around it so stop a few seconds & let it finish draining and then completely remove it from the bike.

dirty oil filter ex250 ninja

Here’s how the filter looks when it comes out.

Pull the assembly apart taking note of how all of the parts fit together discard the old oil filter in an ecologically responsible fashion and thoroughly clean & inspect all of the other parts. If your new oil filter came with new o-rings then use the new ones. If it did not (& some brands don’t) carefully inspect your old ones & if there is any doubt about their condition get new ones before going any further. After all nothing will ruin your day as fast as a nice slippery rear tire coated with motor oil.

exploded view 250 Ninja oil filter assembly

exploded view of 250 Ninja oil filter assembly

Put all of the parts of the oil filter back together & re install it into the engine. Next check the aluminum sealing washer on the drain plug & replace it if needed, before re-installing the drain plug.

93 Ninja oil level sight glass

93 Ninja 250 oil level sight glass

Locate the sight glass on the lower right hand side of the engine.

the oil filler cap

the oil filler cap

Then remove the filler cap, place a clean funnel in the hole and with the motorcycle  straight up either on the center-stand or workbench or held up by a friend pour oil slowly into the engine until the oil reaches the top of the sight glass. Replace the filler cap.

always use a clean funnel

always use a clean funnel

Then start the engine for a few seconds, watch for leaks as you do and then shut it off. Now with the motorcycle still perpendicular to the ground check the oil again. You will probably not be able to see any oil in the sight glass at this point so remove the filler cap and add oil until it is at least halfway up the sight glass but not over the top of it. After doing this replace the filler cap & start the engine again and let it run a few minutes while you check for oil leaks.

proper oil level in motorcycle sight glass

proper oil level in Ninja 250 sight glass

After you stop the engine again check the oil level one more time just to be safe. After all a an EX250 only holds a couple of quarts so you really don’t want to be a half a quart low. Now get to riding!

Peace Y’all