Design & Building of the Cargo Camper
In my last post I spoke of the purchase & special order specifications of my new cheap toy hauler / cargo camper. My plans were simple, no fancy fold out beds or anything like that just a good place to throw an air mattress, with a way to brush my teeth, wash my face and fix coffee & breakfast in the morning. Part of my goal was to keep the modifications as light as possible since I’m pulling this with a four cylinder Tacoma that only has a 3500 pound tow rating. I deliberately got a v nose trailer so that I could have my storage space & sink in the nose without losing any of the 6 x 10 cargo space.

To keep it light I framed the counter in with 2″ x 2″ lumber and covered it with 1/4″ lauan plywood. Since all I am using for water is this Shelf Reliance water jug I built the top shelf out of heavier wood and the afterwards set my big water jug on it so that I could center the sink under the spigot. Although I wont show it here for my grey water tank there’s a 6 gallon bucket, under the counter that connects to the sink with a piece of flex hose connected to the trap on the sink. The sink was a cheap little RV lavatory sink I bought online.

I wanted to be able to put my camp stove at the window for ventilation purposes but didn’t want to give up any floor space for hauling bikes & gear so I came up with a nifty little folding extension for the counter. A short piece of 2″ x 2″ wood along the wall supports the back side. To save weight I used a 1′ x 2″ piece for the leg. to keep it rigid when folded down I added this block wit a locating pin at the bottom of the folding leg.

Then I marked the location where it would be straight & drilled a matching hole halfway through the floor.

Then I added this double ended snap hook and some screw in eyelets hols the folding counter in both the up and down positions. Although it’s very lightweight & inexpensive it can handle any of my camp stoves without any worries

“Shore power” is a nice thing to have even though I don’t need full on RV style electrical functionality it’s nice to be able to plug up at a campground or use a small generator occasionally so I added a couple of 20 amp 120 volt receptacles to the front of the counter. I decided against trying to install any type of breaker box in the trailer itself and simply used the appropriate size wiring and a matching electrical inlet box. Most campgrounds have a 20 amp receptacle with a 20 amp breaker for it anyway. I almost always have a volt meter in my truck in case I need to check the outlet before plugging my trailer into it.
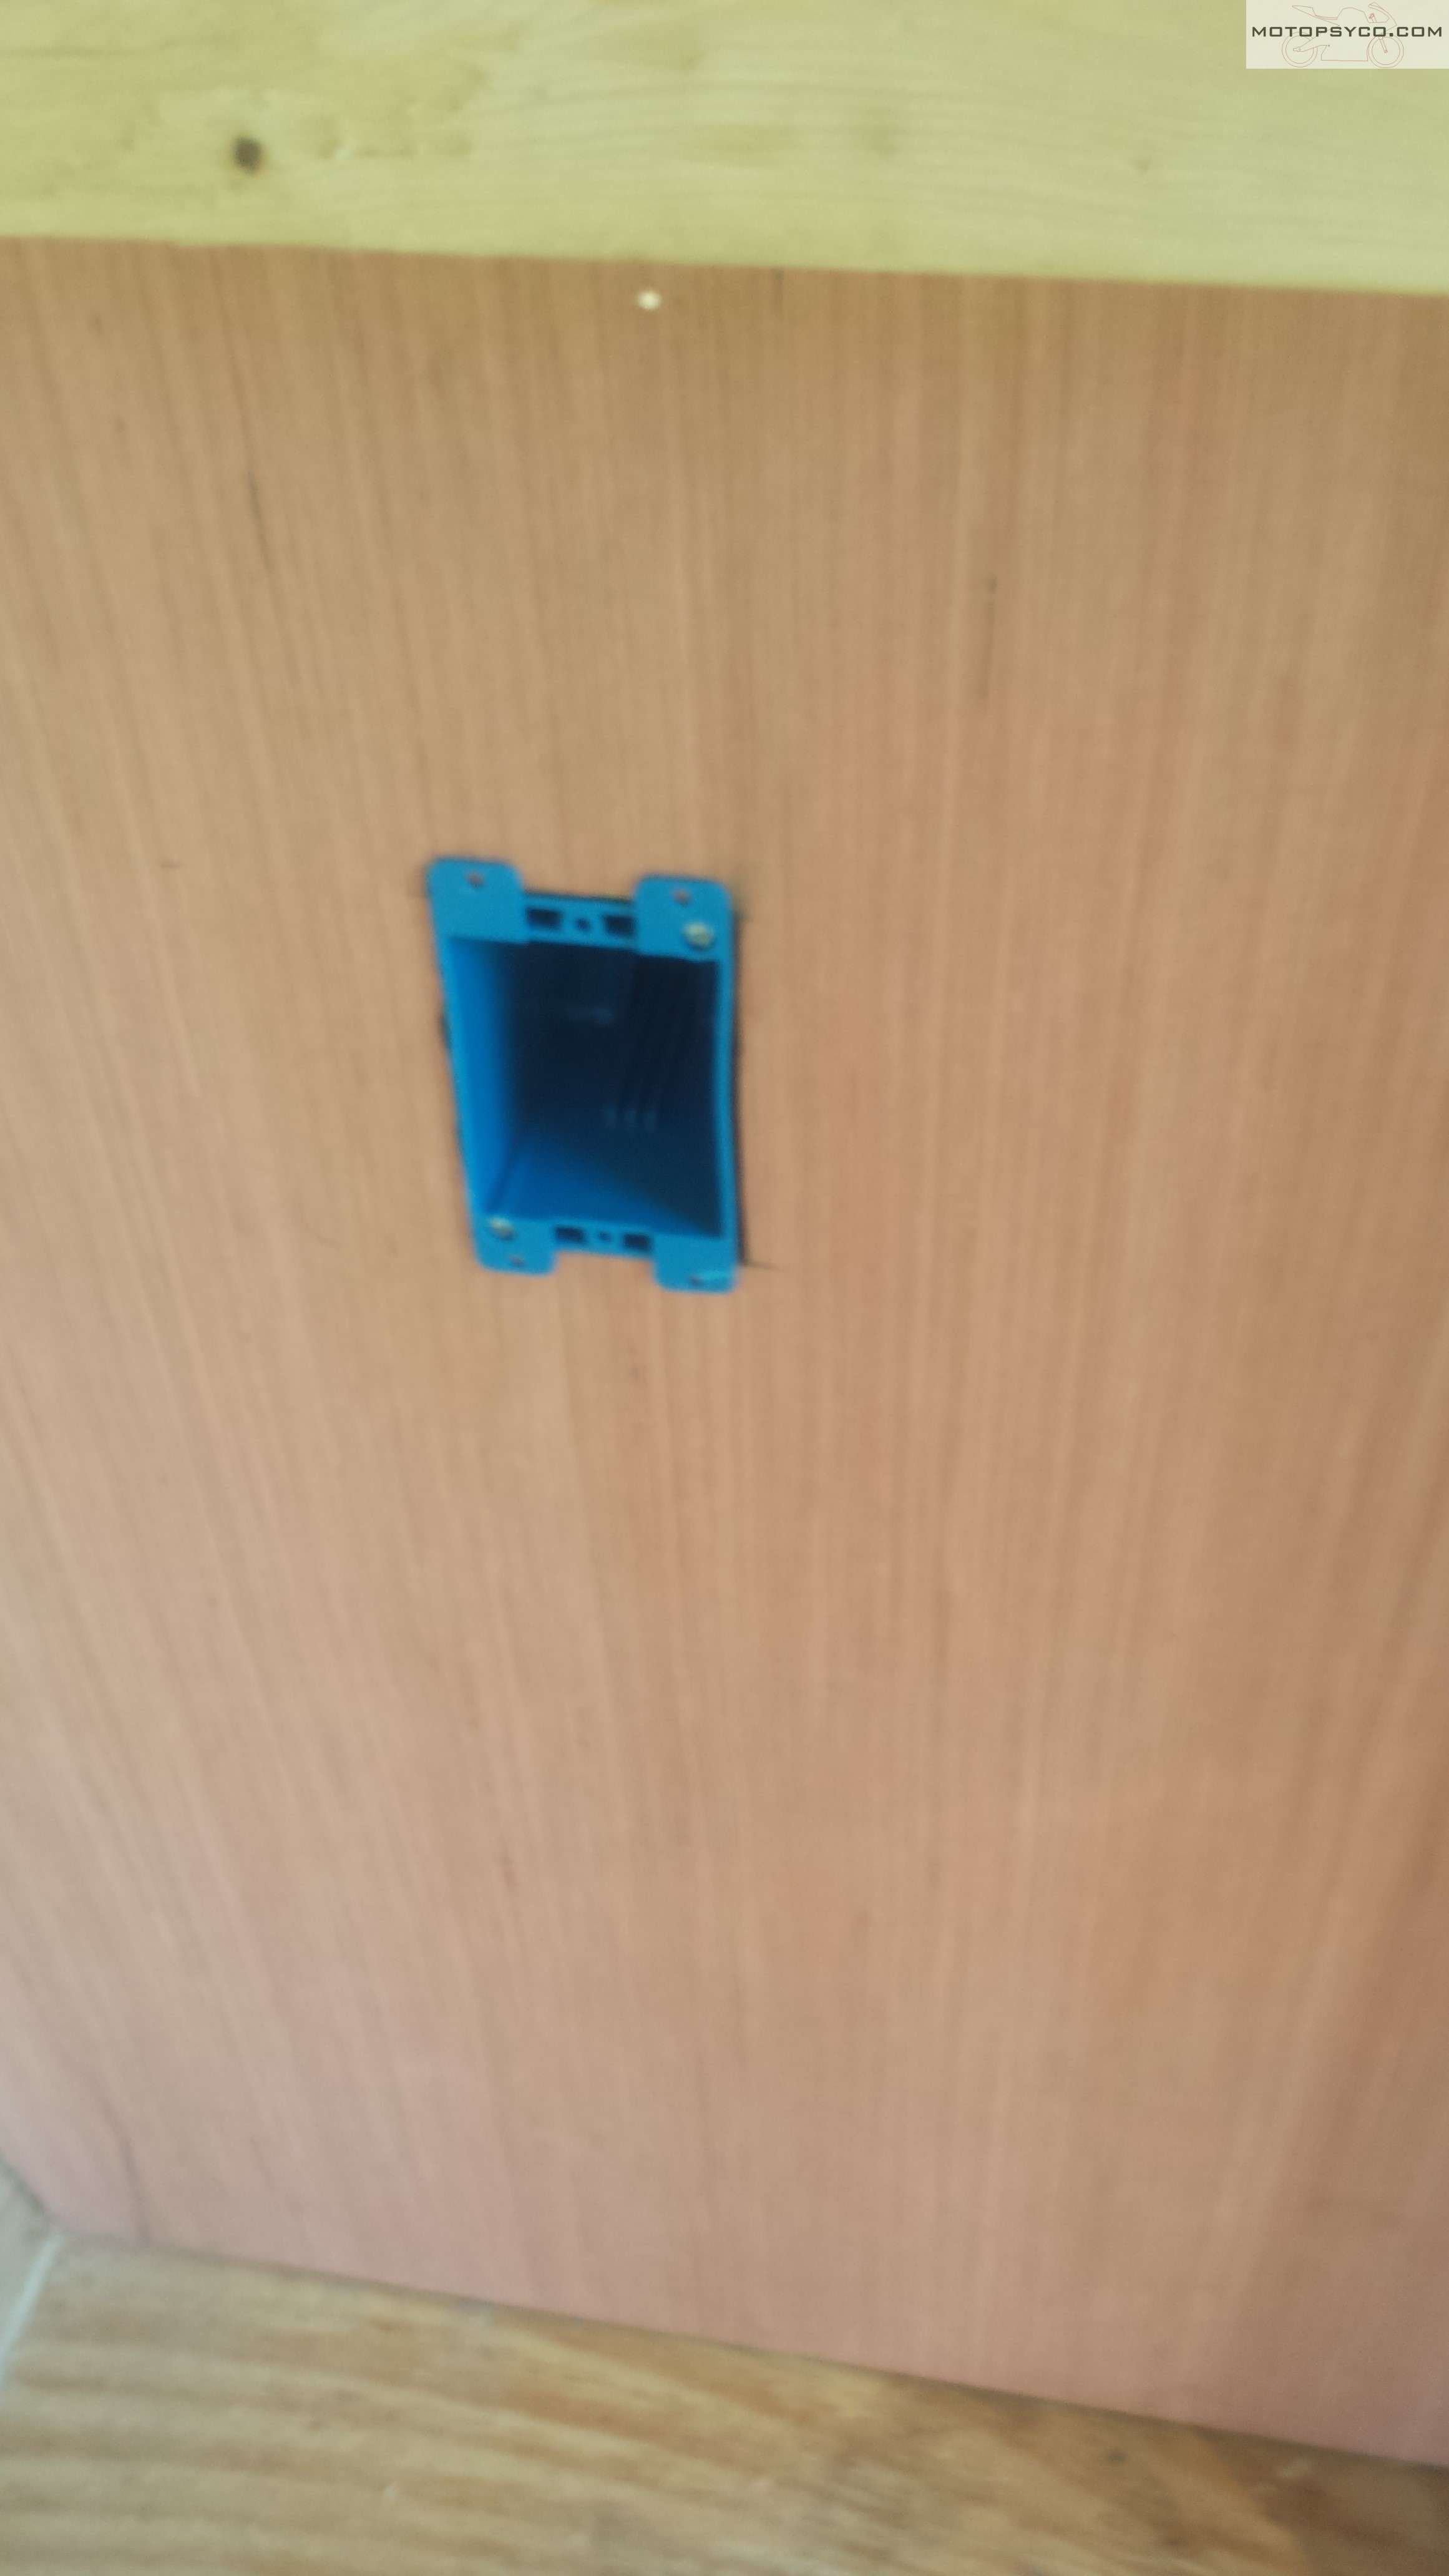

Installing the electrical inlet meant cutting into the exterior sheet metal of my trailer. This was actually done using a Dremel tool. After removing the insulation a drill and a reciprocating saw were used to finish the opening. Be sure to use a good high quality sealant around the hole any time you go through the wall of your trailer for any reason.

Here are a couple of pics of front of trailer with the wood work done but before staining & sealing. Any surfaces that may get wet need to be thoroughly sealed with a good waterproof polyurethane before use.


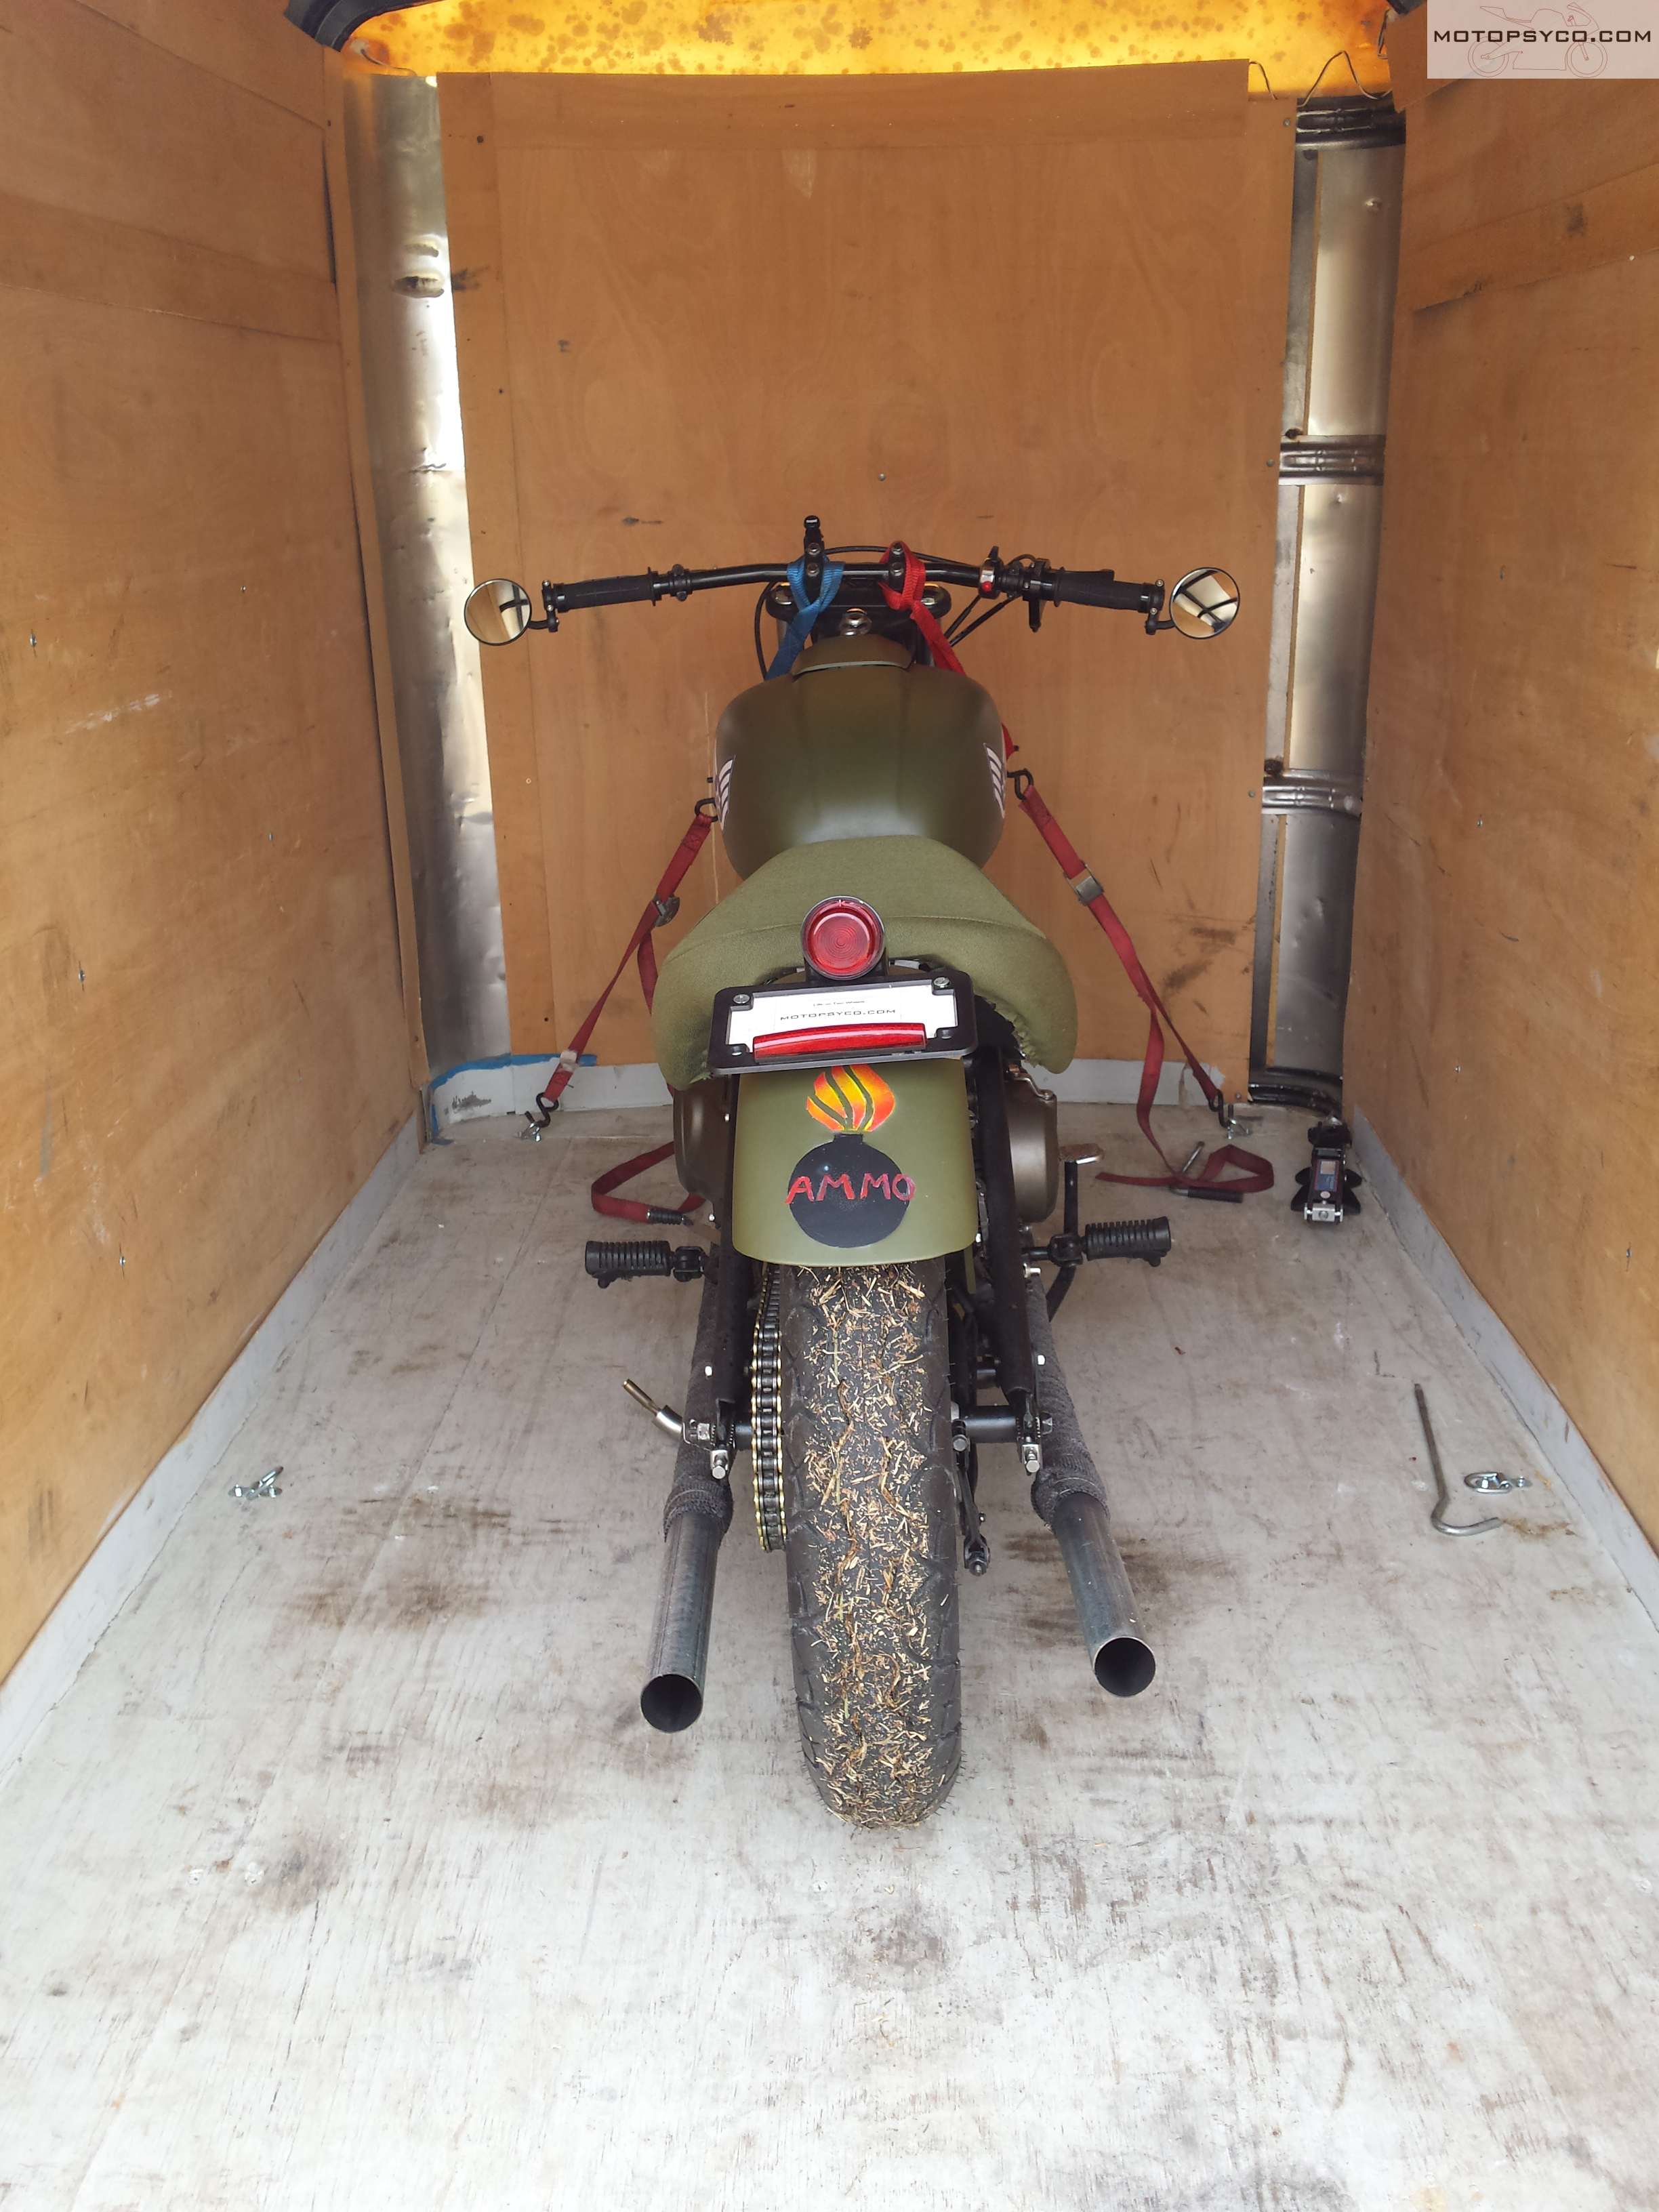
Now it’s time for wheel chocks! I used the Pit Posse recessed wheel chocks. These come in two sizes 16″ & 24″ I ordered one of each size just in case the smaller wheels on my scooter did not clear the longer (taller) chock. The 24″ chock fit perfectly between two of the steel cross members of the trailer

After laying out the location of the wheel chocks I cut a couple of great big holes in the bottom of my brand new trailer. As mentioned earlier the 24 inch chock fit perfectly between the floor cross members but for the 16 inch I had to compromise and only bolt 1 end through the steel of the trailer frame


Above you can see how the chocks and tie downs are located. I used 6 recessed heavy duty tie down ring with backing plates. These are stout pieces that are well worth the money. When your tie down rings are anchored to wood like this you really need the backing plates to spread the load & prevent them from pulling out
The next couple of pictures show you how the chocks & tie downs look from underneath the cargo camper. Before you ask yes I did consider using e-track for this trailer but decided against it just for the sheer ease of being able to fold everything into the floor and unfold my bed. No need to stow anything away or reassemble it to leave, just fold it down & then pull it back up to load bikes & go home.


The basic construction is done, I bought myself a cheap indoor outdoor carpet to put under my bed, with the recessed chocks & tie downs the floor is almost perfectly flat.


I still have a few finishing touches to show you in the next installment of Motopsyco’s Cheap Toy Hauling Cargo Camper!
YOU CAN READ THE NEXT INSTALLMENT BY CLICKING HERE!