
A couple of weeks ago I promised to do an article about motorcycles and fuel economy, since it does seem to be popular subject people are searching for more information about. There are many things to consider, but perhaps the biggest single key to getting the most fuel economy is to start with the right motorcycle. For the sake of this article we are not going to be considering anything not capable of running at least 60 mph thereby completely eliminating all of the “moped” class machines. Although if you live in a city and do a lot of driving in areas with low speed limits you may still wish to consider one.
This is by no means meant to be a complete listing. Your mileage may vary etc. There may be many similar or equal machines to the ones that I have named below so don’t beat me up if I left out your favorite. Please note figures given are gleaned from EPA ratings, personal experience, and/or reliable motorcycle data websites, and apply only to well maintained factory stock machines.
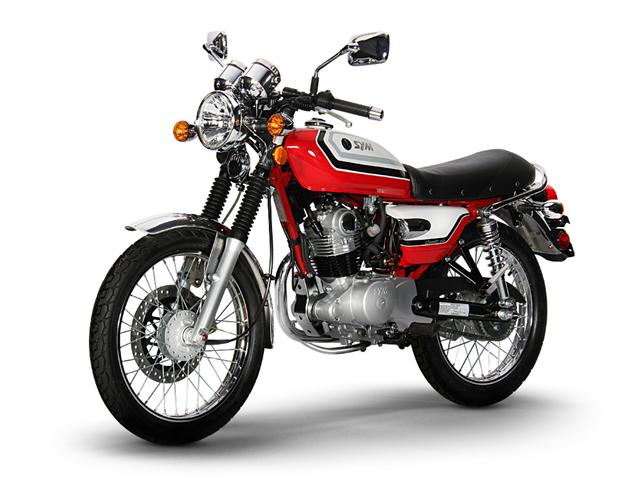
Sym Wolf Classic 85 mpg
The smallest machine that I looked at for this article was the Sym Wolf 150, a great looking little machine. Light & nimble it is the smallest motorcycle I would consider for street duty, other than the CB125 that the Wolf is a direct descendant of. Rated at 85 mpg it has great fuel economy, but has a top speed of around 65 mph, and being a very small light machine without much load capacity, I’d recommend you stay off the freeway with this one.
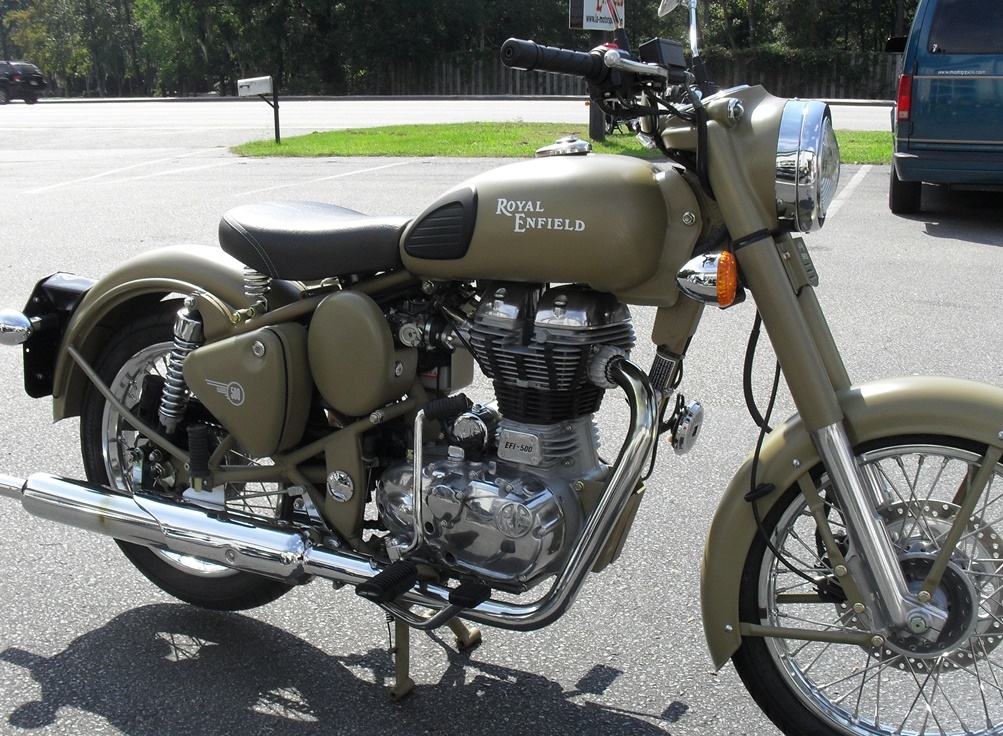
Royal Enfield Classic 500 85mpg
Surprisingly enough the next motorcycle up in the mpg sweepstakes is a heavy solid steel piece of spiritually British iron. Built in India for several decades, the Royal Enfield 500 has gradually evolved from a clunky unreliable relic, into a machine with a reasonably modern fuel injected engine slotted into a chassis that is still a relic, but in a good way. 27 hp combined with heavy construction isn’t going to win any drag races but the 85 mpg is astounding in a machine with enough torque for passenger hauling, and with an 80+ mph top speed you can still get on the freeway and go places. I probably wouldn’t keep it pegged WFO for hours on end but it is still capable of interstate travel at a relaxed pace.

CCW Tha Heist 80mpg
Next in the range are the 250 class retro & cruiser bikes such as the CCW’s Tha Misfit & Tha Heist, the evergreen Honda Rebel and Suzuki TU250 fit this group as well. These are decent little machines that are capable of up to 80 mpg. Extensive Freeway duty is a bit questionable on any of them but they are definitely a step up from the smaller Wolf. If you gotta travel the high speed roads you should probably look at the Japanese offerings first. The CCW bikes are great looking though and they do have a catalog of hop up parts to get more speed out of them but that will probably diminish fuel mileage.
A small step down in fuel economy but a huge step up in performance is the 250-300cc sport bikes such as the Kawasaki Ninja & Honda CBR. The baby Ninja can get just a tiny bit past the ton in bone stock condition even with a fat boy like me on it, and while I haven’t ridden the CBR250 yet, all the magazine testers put its top speed around 97 mph. The best part is that both of these bikes are as reliable as anvils, more than capable of traveling anywhere you want to go at any legal speed without ever breaking a sweat. Being fast enough to beat most cars at the stoplight drag races is also a very comforting safety feature as well. These bikes are capable of 70 mpg when ridden conservatively and still knock down over 55 mpg when you ride the snot out of them.

Honda NC700X 64mpg
I have consciously tried to avoid singling out any one machine for praise, especially one that I have not ridden yet, but the Honda NC 700 X is rated at a very good 64 mpg. This is a full size 700cc adventure touring type machine capable of cross country touring on any road of your choice. Compare that to a big scooter such as Honda’s own Forza with its streamlined bodywork and 300cc engine that only gets about 4 mpg more.
There is a huge range of motorcycles that slot into the 45-55 mpg range. Harley Sportsters, FXRs, etc., most cruisers, vintage bikes in the 350-850cc range. Practically every 600cc sportbike made by anyone can get 50 mpg+ and provide amazing performance. Even some of the 900-1000cc bikes can do 45 mpg. At this range the cars are starting to catch up mpg wise but these are incredibly slow & boring cars that get this kind of fuel mileage.

It only gets 33-39 mpg but does anyone really care?
You don’t really drop below 45 mpg until you get into either hyper sport machines such as the ZX14 Ninja or the Hayabusa, or full dress touring motorcycles like the Gold Wings, K1600 BMW, & Electra-Glides. Even so most of these machines are still capable of 35-45 mpg averages. While they are not economical sounding in motorcycle terms, in the economy of scale against other forms of transport with the same intended mission they are still very reasonable. The big touring machines are incredibly luxurious and loaded down with more amenities today than anyone ever thought possible. To get a performance automobile capable of matching the speed of a box stock big bore sport bike will cost you at least $100,000 and it won’t get anywhere near 30 mpg.

Yes the biggest Harley is rated at 42 mpg combined. Impressive.
As I said at the beginning if fuel mileage is what you are after in a motorcycle, the best way to get it is simply to buy the right motorcycle, maintain it well and ride it in a careful and conservative manner, keeping your speed down as much as safely possible. I’ll come back in a few weeks and touch on some maintenance items that you need to be sure to keep up with to maximize fuel economy, and at a later date will write a post about modifications & driving techniques, to help you wring every last mile out of your dollar.


