Here I’m just going to let you follow along as I remove the fairings, fuel tank, and exhaust system from my 93 Kawasaki 250 Ninja. Although the title of this blog is Life on Two Wheels, the truth of the matter is that for last year & over half of this year a true story of my life would have been called life in hotel rooms and rental cars. While I was away I still managed to squeeze in some bicycling time, and I did try on the occasional weekend to take my motorcycle out for a spin but unfortunately never far or often enough, and it has developed some problems related to long term storage anyway. A couple of months ago I started a new job, moved back home and now am ready to get back down to the business of serious recreational motorcycling again.

’93 Ninja 250 Fresh out of the shop after restoration 4 years ago!
This bike still starts right up and once warmed up will zip from idle to redline with just a flick of the wrist, riding it at low speed or for a short distance no symptoms are discernible. If driven at highway speed for more than 3 or 4 miles it begins to spit and sputter and stops like it has run out of gas. So far I have done all of the easy and obvious things such as verify the gas cap & other fuel tank vents, made sure the fuel petcock was working, and that both the in tank and external fuel filters were clean. So now its time to pull the carbs back off and check everything out. Since I am tired of having to pull the exhaust system off every time I want to change the oil filter (and it got some holes in it now also), I am going to pull the Yoshimura 2 into 1 header and replace it with a pair of Emgo Dunstall replicas using some custom fabricated adapters welded to the end of some factory head pipes.
As you are following along please be aware that my cycle is not stock. It has a few aftermarket, modified or bespoke parts on it so even if you have the same make and model of motorcycle you may notice many substantial differences between mine and yours. Just remember modifications to your motorcycle are made at your own risk, some may be dangerous or illegal in some places, I am not a motorcycle engineer, nor do I play one on t.v. Use your best judgement,consult your doctor, shrink, & attorney, then get a permission slip from your mom before imitating any mods you see on this site, because I am only responsible for my own stupidity, not yours. Now that the disclaimers are out of the way , let’s get to work!
First pull the mirrors.

Ninja 250 mirror removal
Unbolt the lower fairing I like to start with the front center bolt first.

Ninja 250 lower fairing remove bolt

Additional screws indicated by arrows.
Time to get the upper fairing loose You will notice some very blotchy spots in the next photo. It is not paint damage. I discovered the hard way that if you are shall we say a larger boy, you should not take pictures of shiny very reflective surfaces while wearing nothing but a pair of shorts. The resulting images were distorted,and bizarrely pornographic looking, so I blotched them out.
There is an arrow pointing to some damage to the tank that is a direct result of the hygroscopic nature of this damn corn syrup that the government is forcing into our gasoline. I’ll fix it, line the tank and paint it again.

Ninja 250 upper fairing screws
Then unplug the turn signals.

Ninja250 turn signal wires
You could have taken the seat off as the first step but I’m doing it now, just turn the key and pop it loose.

Ninja 250 seat lock
The side covers have one screw each at the bottom as shown here.

After removing this the side cover should snap off, pull it loose from the front first.
Here it is with the side covers off

Ready to remove the tank now!
Remove the bolts

Ninja EX250 fuel tank bolts
and then disconnect the fuel & vacuum lines from the petcock

Ninja EX250 fuel petcock
Hey look! it is a naked Ninja, enjoy the view.

Now you know what a sportbike looks like with no clothes
I still have to loosen the radiator to remove the head pipes. The hoses can stay attached but all of the bolts indicated by the arrows have to be removed from both sides.

NInja 250 radiator & fairing brace
This will allow me to pull it forward to remove the exhaust system. It’s hard to see in this picture but after unbolting the flanges from the head remove the bolts attaching the pipes to the frame. This particular system is suspended from the drivers foot peg.

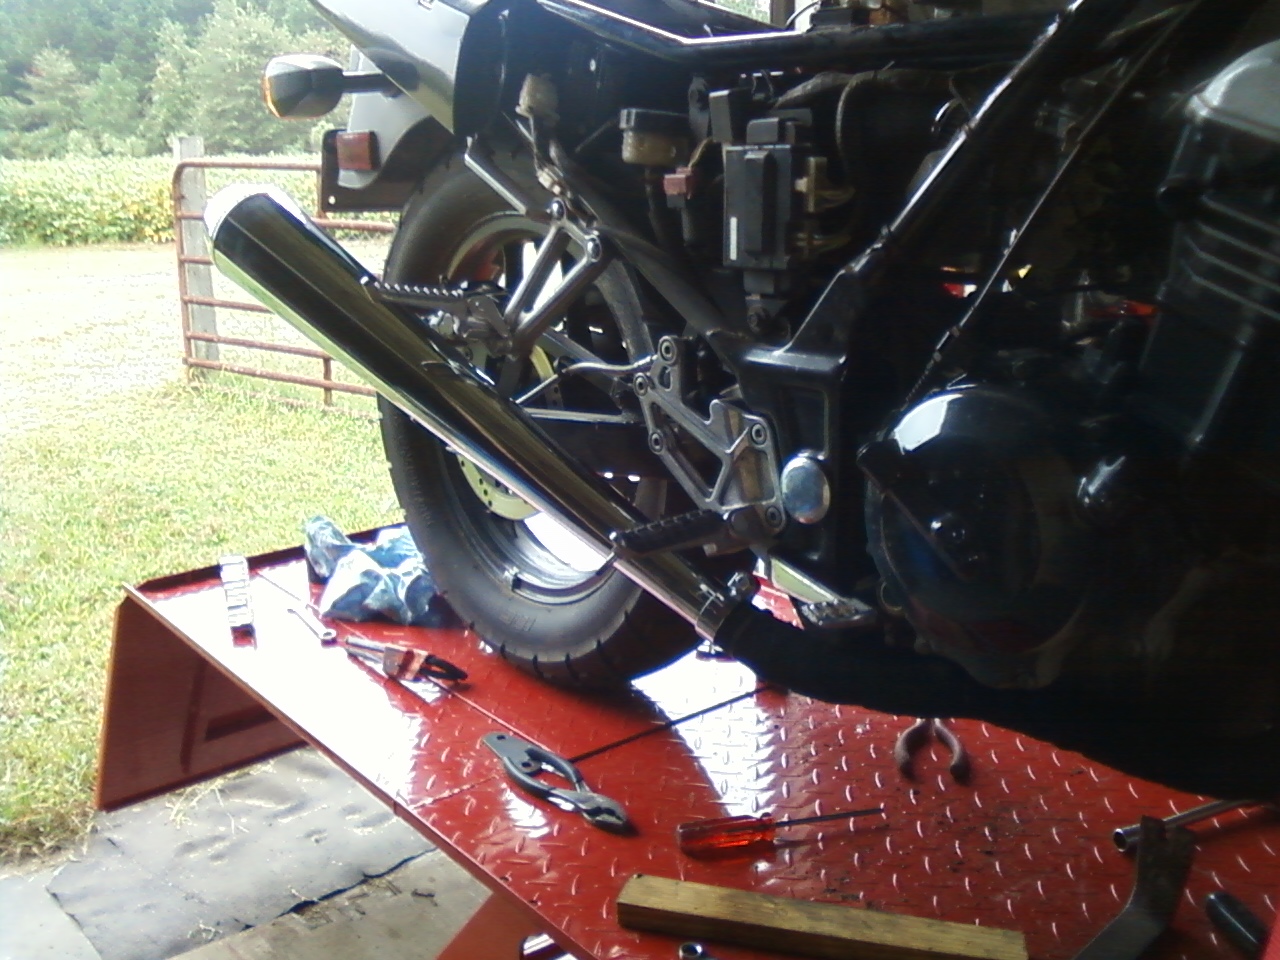
My soon to be former exhaust.
It is crazy but all of the preceding steps were necessary every time I wanted to change the oil filter, I loved the sound and performance of this system but due to the extra maintenance work and the damage it has suffered over the years (it was on the bike when my wife bought it for me) I decided to replace it.

Rusty pipe
Until next time,
Peace Y’all